
 |
|
|||||||
| Home | Rules & Guidelines | Register | Member Rides | FAQ | Members List | Social Groups | Calendar | Mark Forums Read |
| Builds (and builds only) Got a build thread? It goes here, build threads anywhere else on the forum will be locked and never moved. |
 |
|
|
Thread Tools | Display Modes |
|
|
#1 |
|
Zilvia Member
 Join Date: Oct 2010
Location: Vancouver B.C.
Age: 29
Posts: 216
Trader Rating: (2)
  Feedback Score: 2 reviews
|
Vancouver RB26 S13 build
Hey everyone, my car is a red 1992 S13 that ive had for about 5 years. It is currently reaching the final stages of an RB26 engine swap and car rebuild. I am obsessed with rare and period correct parts from Japan, I believe all these little things add to the car in a huge way (even if theyre items as small as an oil cap for example).
My goal is for this car to scream 1990s/early 2000s style and be a genuine Japanese build done in Canada. To start this off here is a current parts list of my car Drivetrain/Chassis: - S13 hatchback - Full stitch weld chassis - R33 RB26 engine - RB25 transmission - Custom trans crossmember with URAS mount - C's short stroke shifter - Custom length one piece driveshaft - BNR32 differential - Q45/Z32 6 bolt axles - Ogura racing Carbon twin plate clutch w/ lightweight flywheel Wheels/Suspension/Brakes: - Blitz 03 17x10 rear 17x9 front - BNR34 Brembo front brakes (PDM racing lines) - BNR32 rear brakes (PDM racing lines) - BM50 brake master cylinder - BNR32 Aluminum rear uprights - Adjustable rear arms - Powdercoated subframe - PoweredbyMAX subframe risers - BNR32 rear 5 lug hubs - Garage clear S14 knuckles for increased angle - Ikeya formula S14 roll center adjusters - Kazama tie rods - NISMO powerbrace - Tein Superdrift coilovers (Modified rear mount for aluminum knuckles) - Tein EDFC system Engine/Engine compartment: - R33 RB26 - Wring specialties PRO harness - ARP headstuds - Apexi metal headgasket - Tomei oil pan baffles - Oil pan modified for RWD only - Trust oil filter relocate and oil cooler - HKS downpipe (modified to clear steering shaft) - HKS/Custom intercooler pipe kit - HKS adjustable cam pulleys - Trust accessory pulley kit - Mines intakes/K&N filters - Greddy BNR32 radiator - Samco radiator hoses - GTR intercooler Interior: - Cusco 7pt with Cusco padding - Bride zeta I with bride rails (x2) - Takata 5pt harness - RYO 4pt harness - Personal 330mm steering wheel - D-max quick release - NISMO 260km/h cluster - BLITZ black light gauges (Boost, oil temp, oil pressure) - Yashio factory okachan water temp - Greddy turbo timer (pink crystal) - Greddy Profec boost controller (blue crystal) - Wideband meter (in cluster clock location) - Tein EDFC controller - Apexi multichecker - Tommykaira dead pedal - Suede wrapped headliner/glovebox door - C-pillar bar - Juran rear strut bar Exterior: - M-sport rear bumper - Vertex sideskirts - BN sports type I front bumper - M-sport (replica) hood - Eastbear aero side mirrors - Kouki 180sx taillights - B-wave wing ("small" version) - Dmax kouki position lights Picture of how the car currently sits 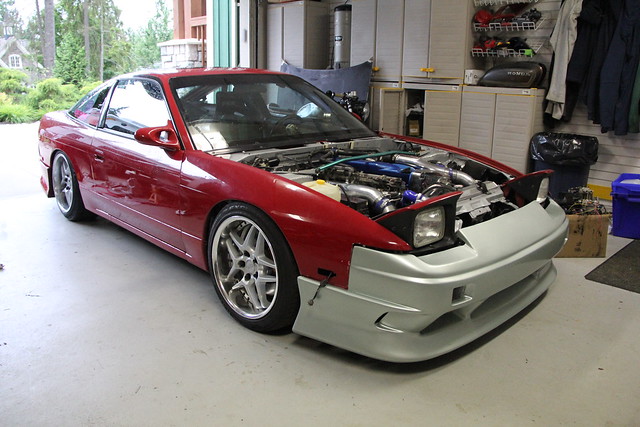 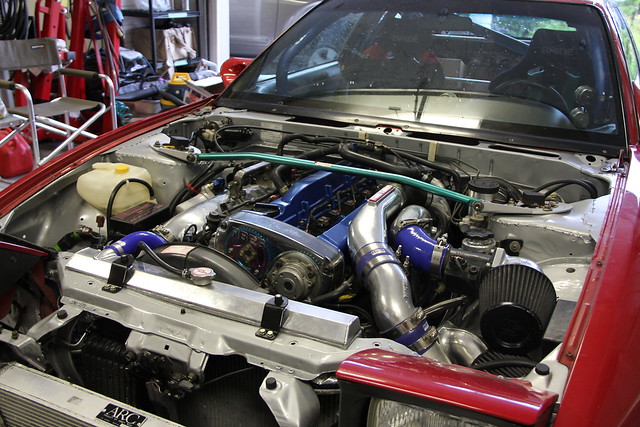 Heres some old photos of the car, im not going to go into much detail and just let the pictures do the talking 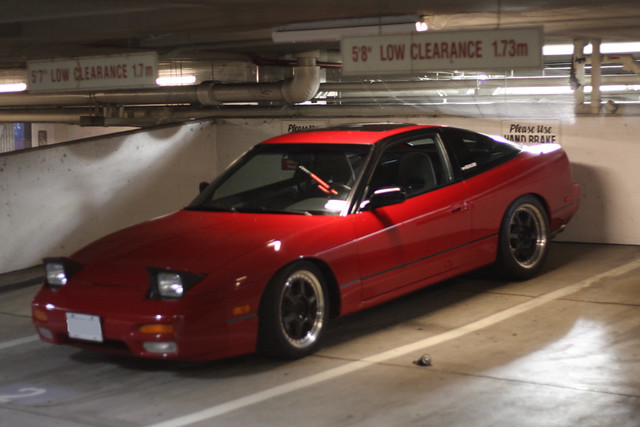 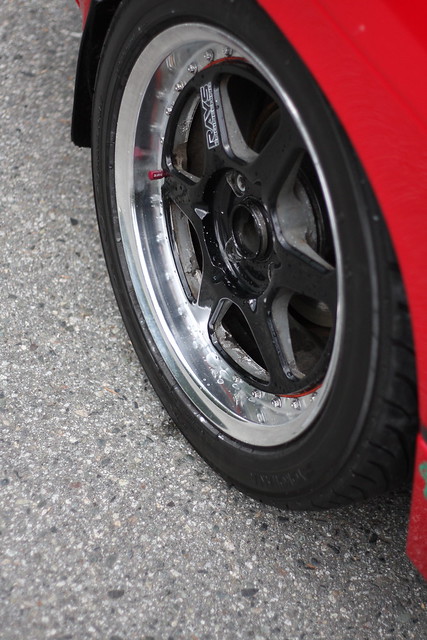 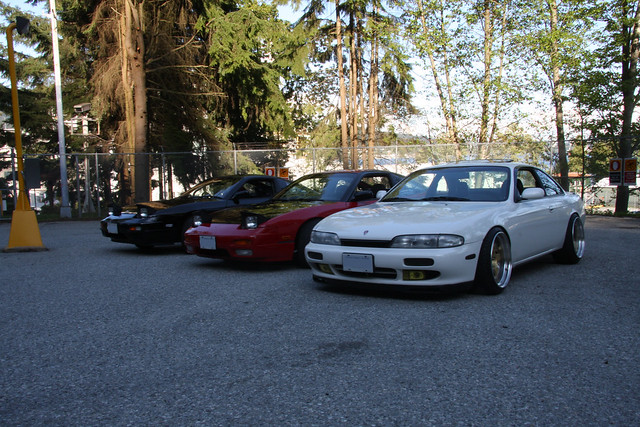 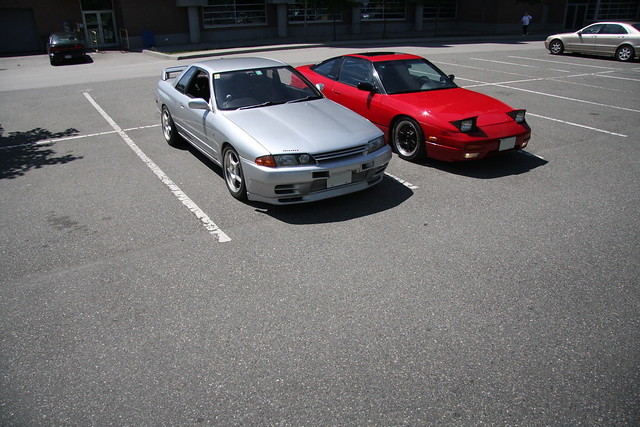 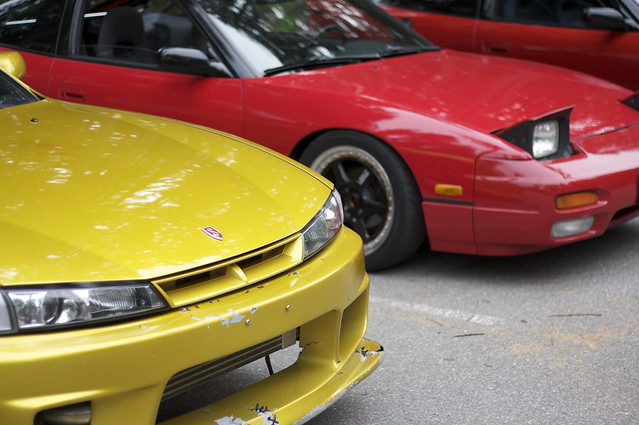 Heres another phase it went though 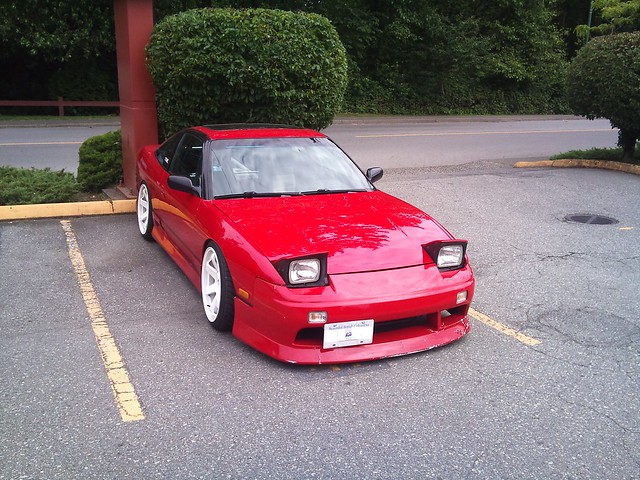 Did lots of hunting/buying and installing parts, once again, mostly going to let the pictures do the talking as theres a lot to go through. As i post updates they will be more in depth. Subframe build/hicas delete version 1 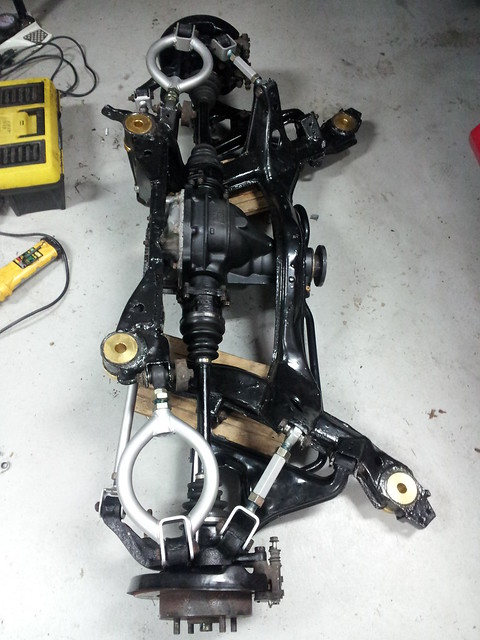 Lots of interior stuff 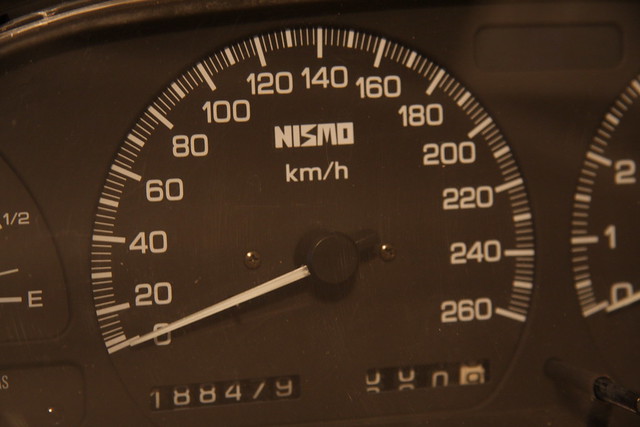 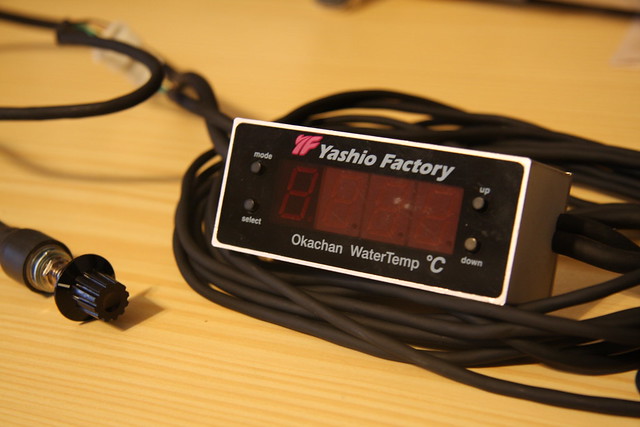 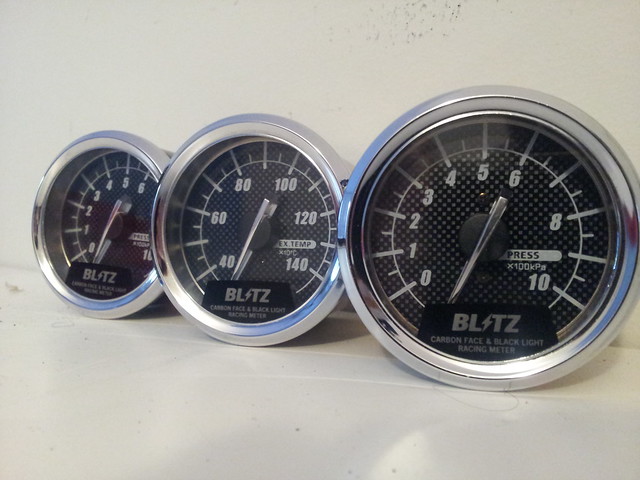 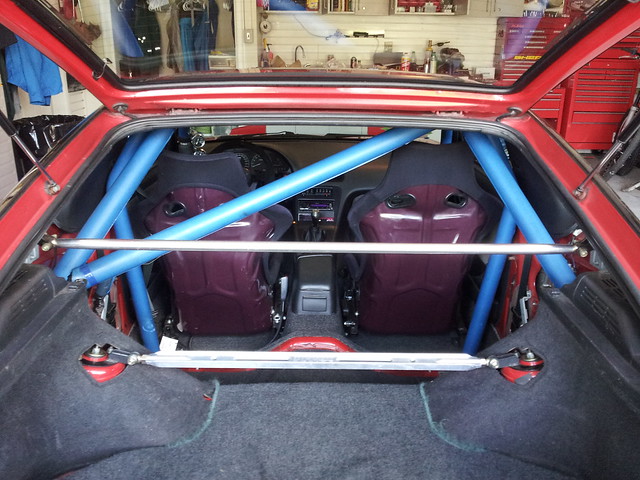 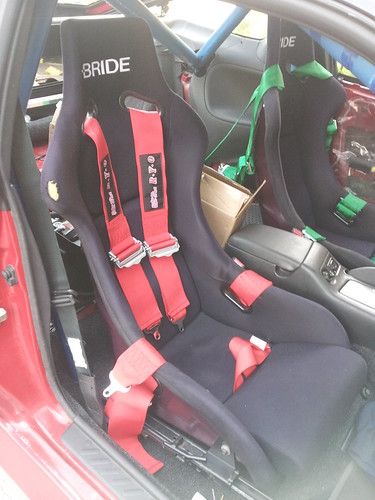 Brake upgrade Version 1 (R32 GTR brakes) 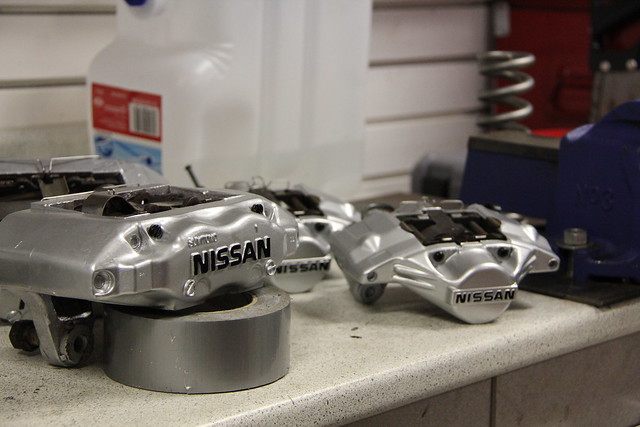 My first pair of Blitz 03s i acquired (17x10) 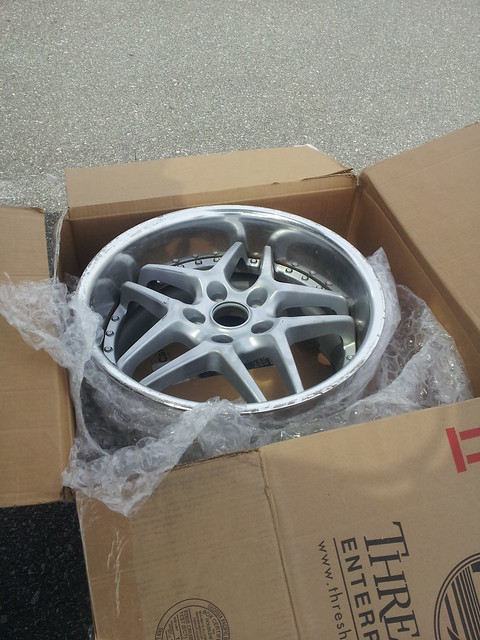 Once the other pair arrived shortly after 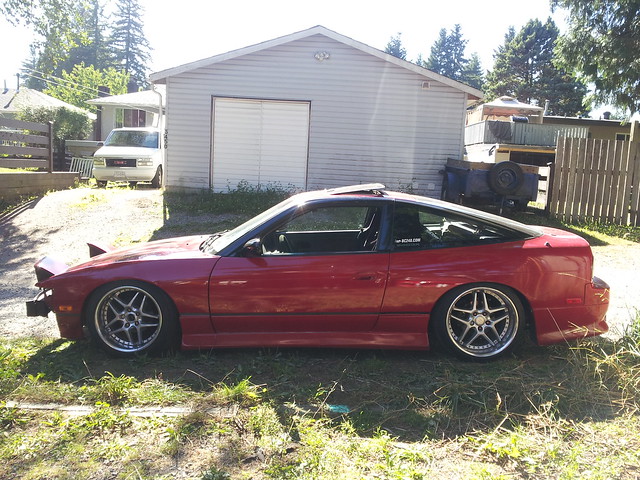 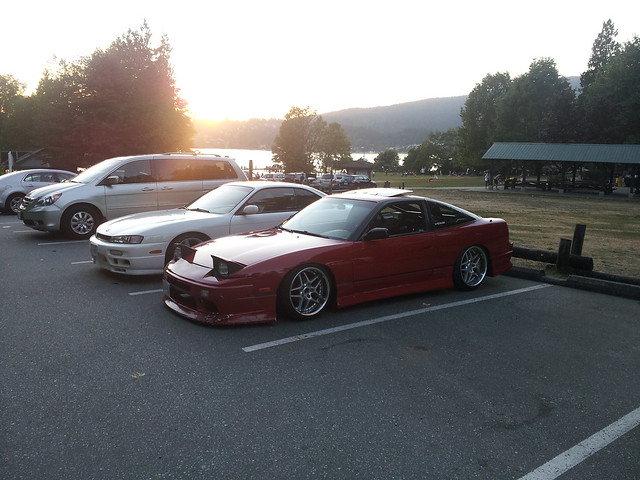 Kouki tail lights 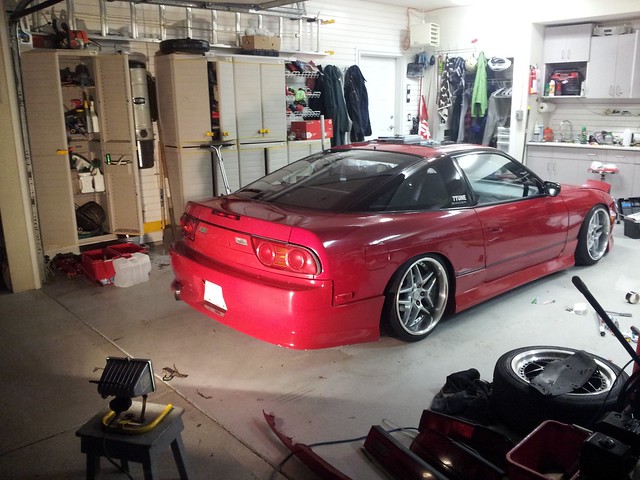 More 17" 03s 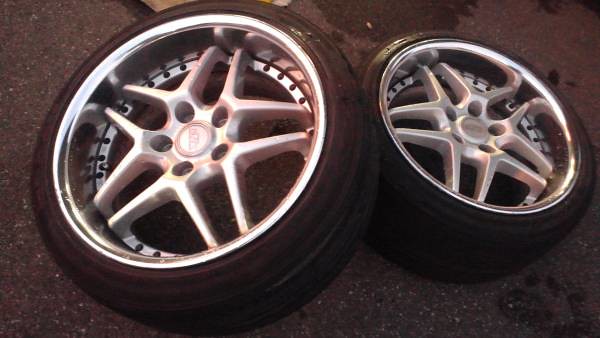 Test fitting bwave "smaller versions" wing 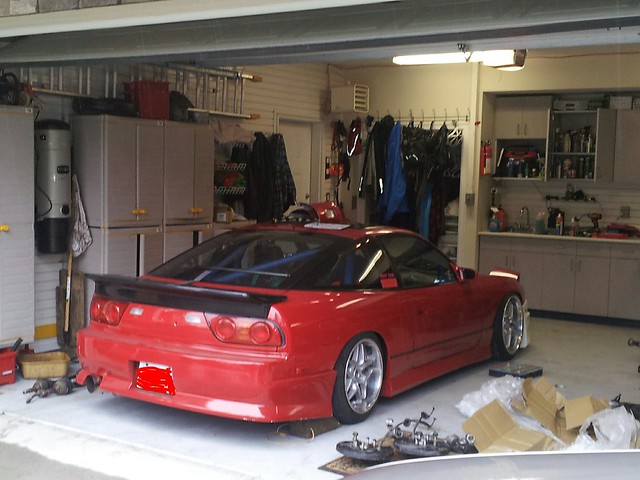 Bought a lot of SR stuff at one point with plans to build it with forged internals and do a GT2871r build. 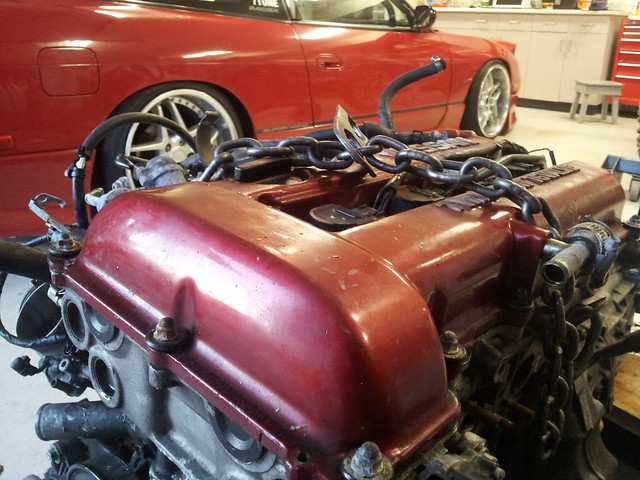 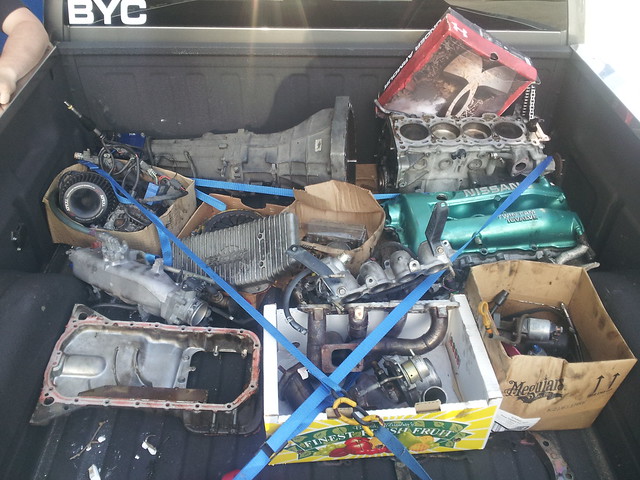 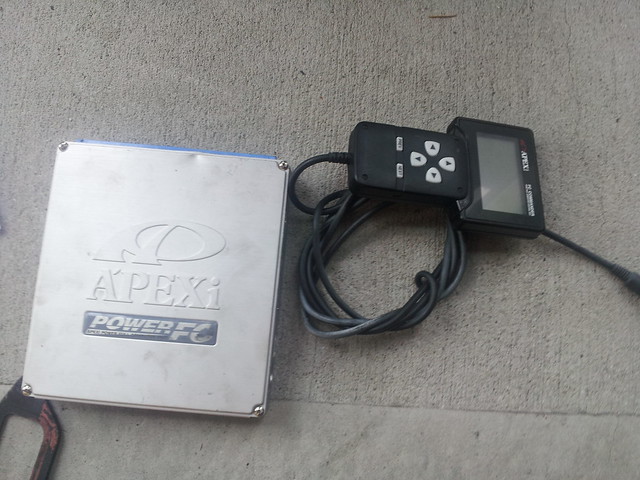 Would have been a great setup but plans basically fell through as i was spending more than i wanted on it all and would rather have put it towards the RB swap i always wanted to do from the beginning This is basically where things get interesting, sold most of my aftermarket SR parts and worked the rest of the parts into a deal for an RB26 Had a solid plan this time around so it was time to get to work Pulling the KA 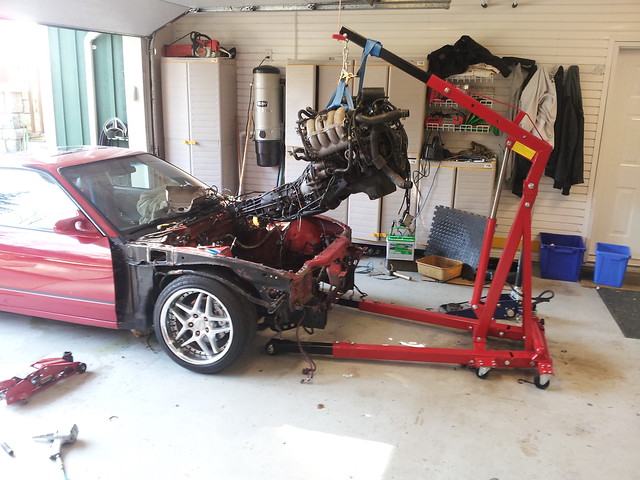 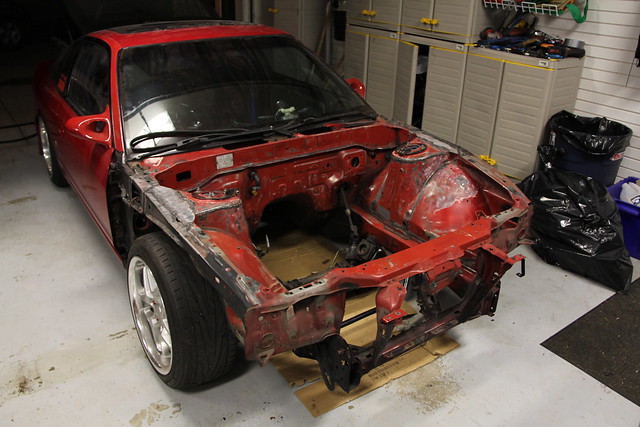 Removing the sound deadening 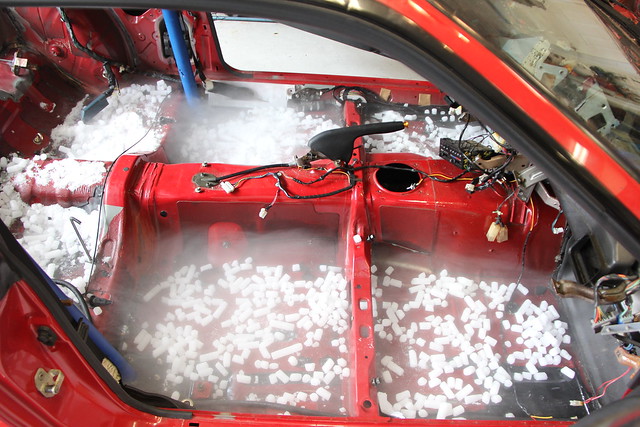 Did some witing stuff, prepped chassis for stitch welding, not the most fun of jobs... 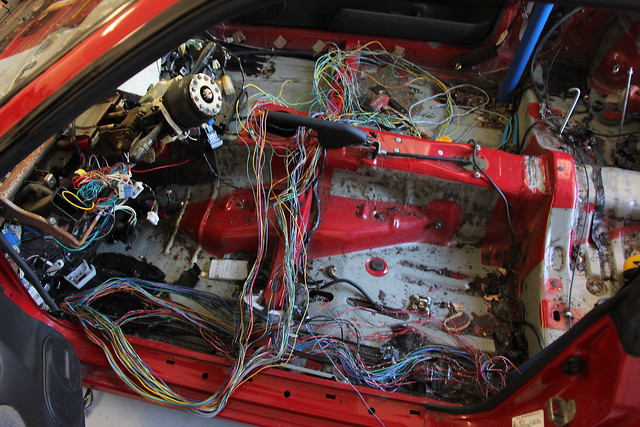 Carbon Ogura racing twin plate for the RB 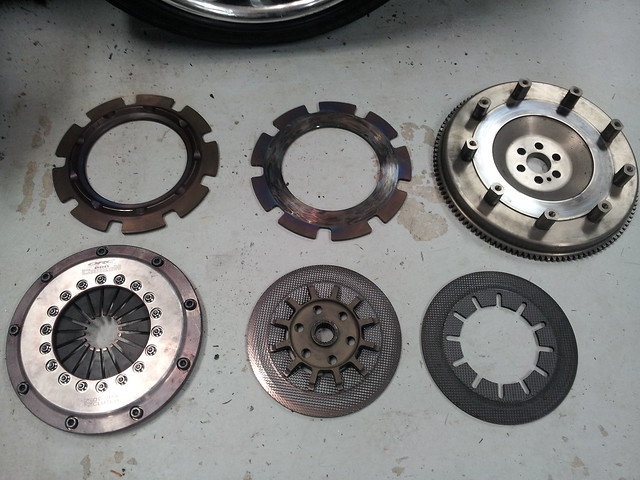 Finishing up the stitch welding 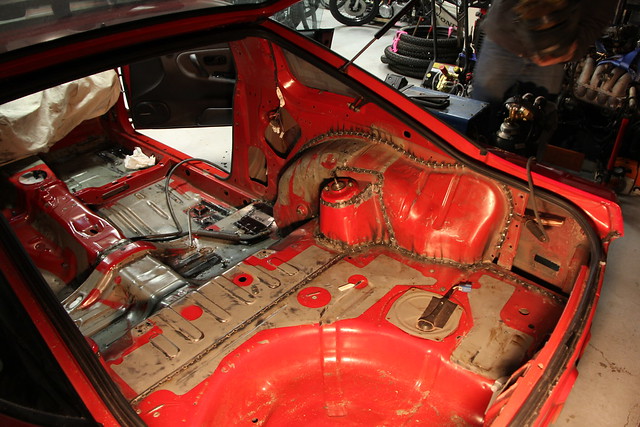 Swapped out to an R32 GTS front crossmember, it seemed there wasnt really an obvious way to mount the RB26 so i just figured things out as i went 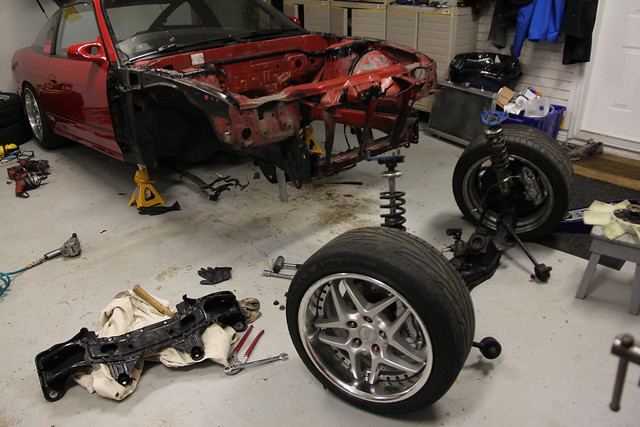 My RB25 box with C's short stroke shifter, very nice shifter, they are getting hard to find and i was lucky enough to get one bnib 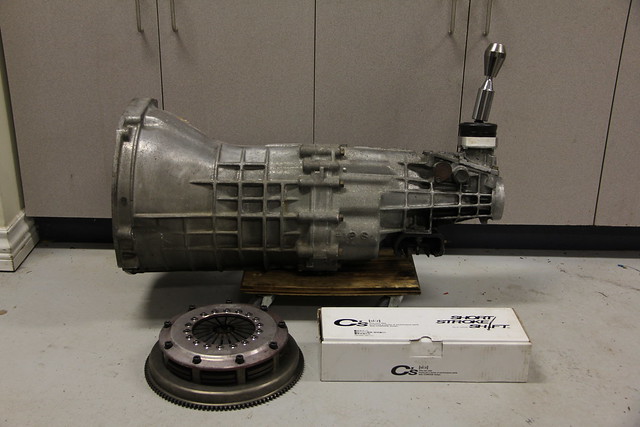 Greddy R32 GTR radiator 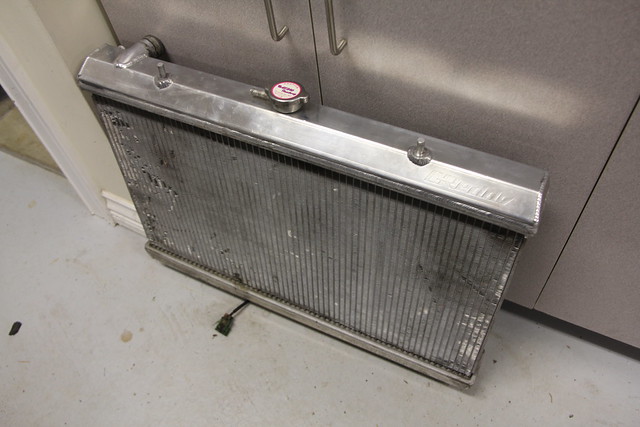 AFR meter i fitted into the clock section of the gauge cluster 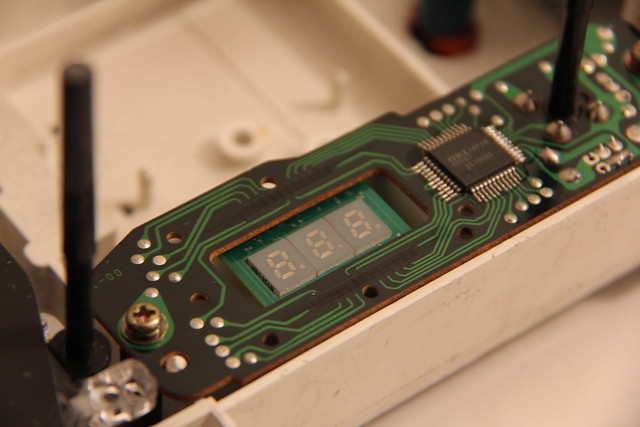 Greddy GREX oil cooler setup 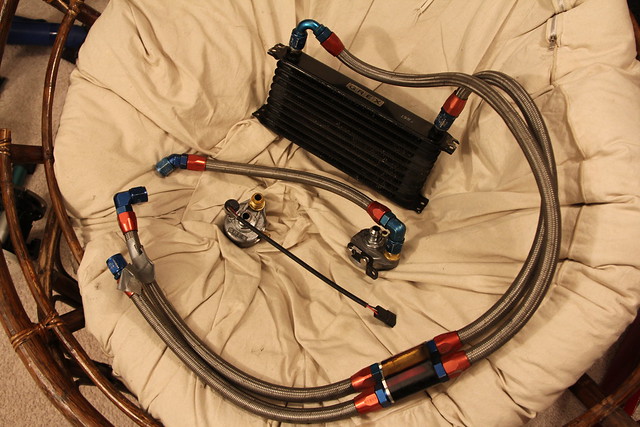 Profec B boost controller. I love the crystal, gameboy-look of the older greddy units 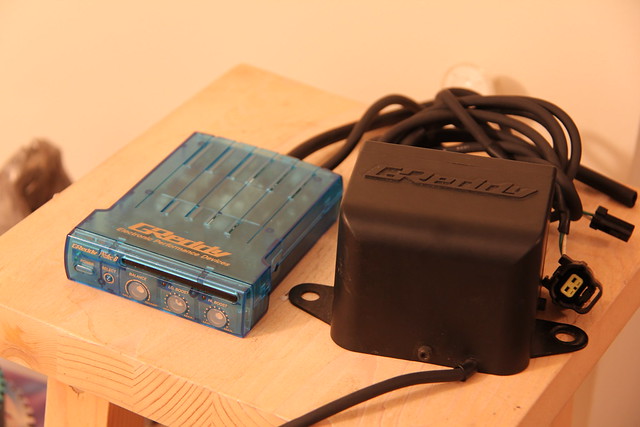 Picked up paint for my engine bay and interior. This was my first time painting so it was a bit of a learning experience but i am happy with the results 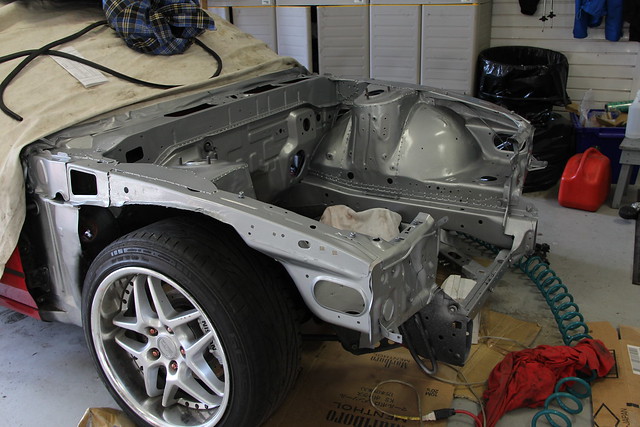 Some R34 brakes came available to me at a good price and i couldnt resist so i picked them up 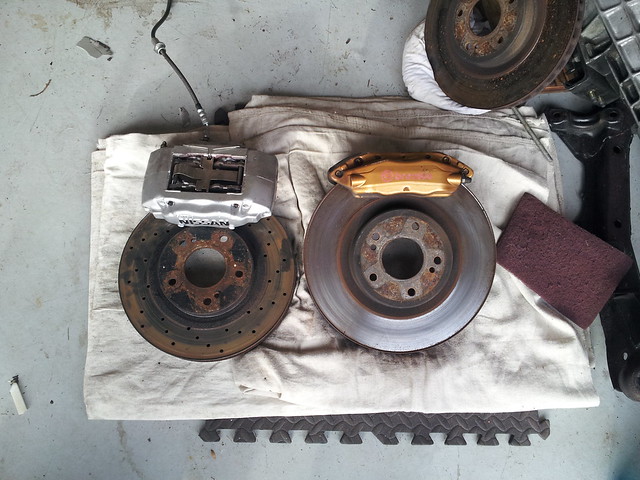 Lots of putting things back together 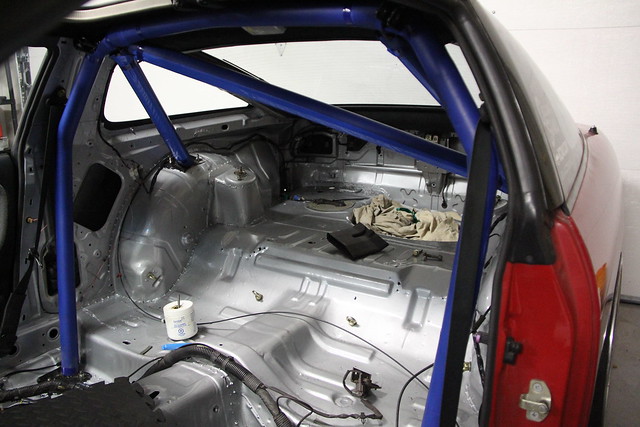 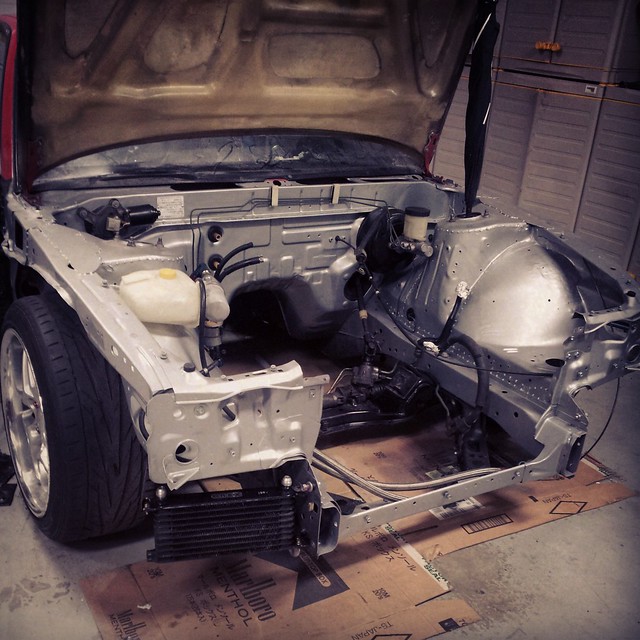 Pulled the subframe out of an R32 GTR for some more parts 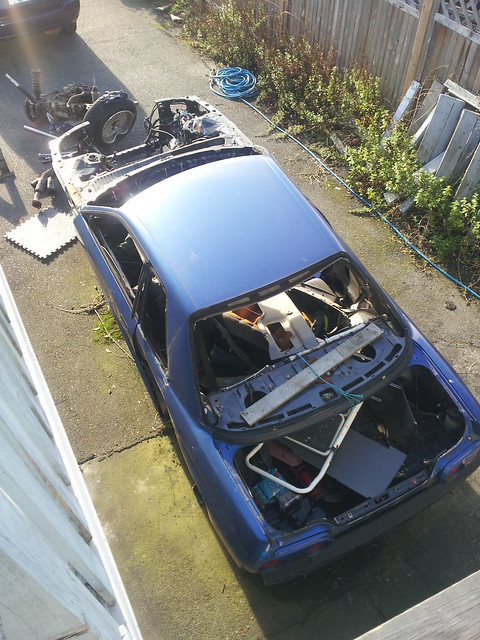 This was the beginning of my subframe build version 2 Had another S13 subframe powdercoated, swapped my PBM risers over, installed GTR diff with S13 rear cover and made some spacers to solid mount the front portion. Installed the GTR aluminum knuckles, Q45 and Z32 axles, GTR sway bar etc. 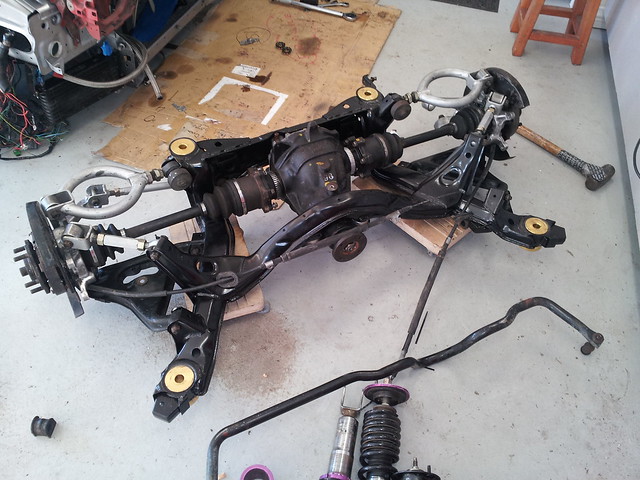 Got my bottom end back from the machine shop so it was time to start assembling 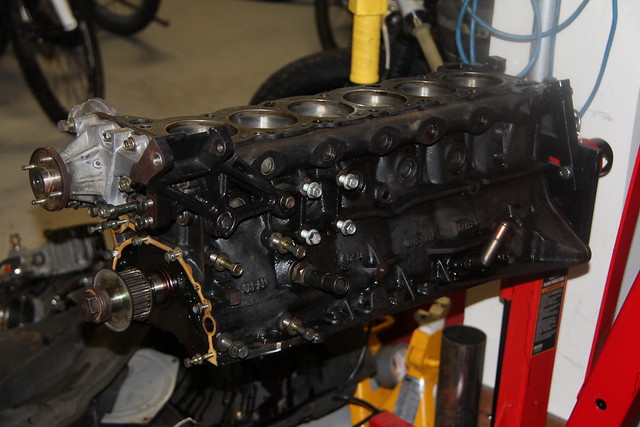 New oil pump, since this is an R33 there is no problem with the oil pump drive on the crank being to short 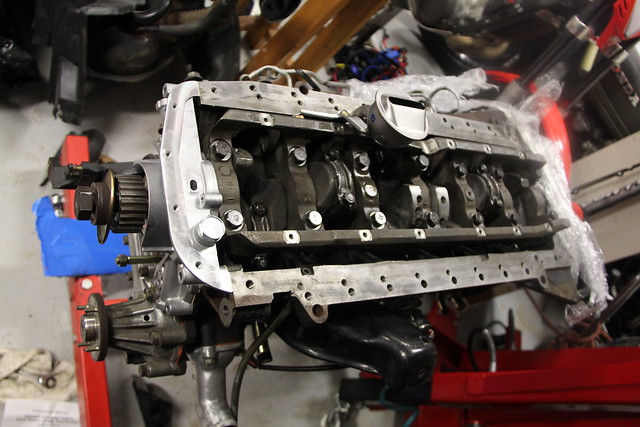 Installing new valve seals in the head 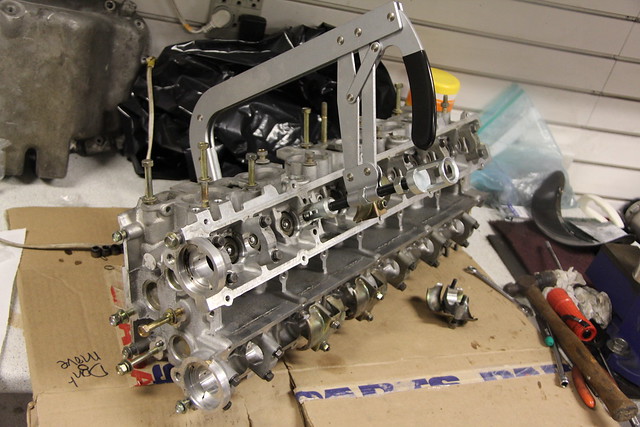 Gasket matching these water ports 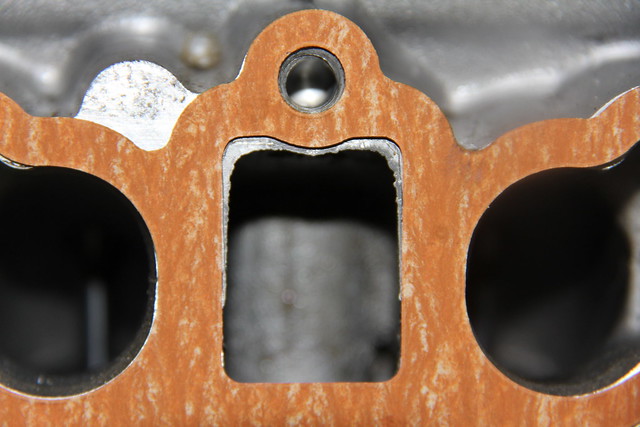 Head bolted on with the ARP headstuds and Apexi headgasket. Timing belt also installed 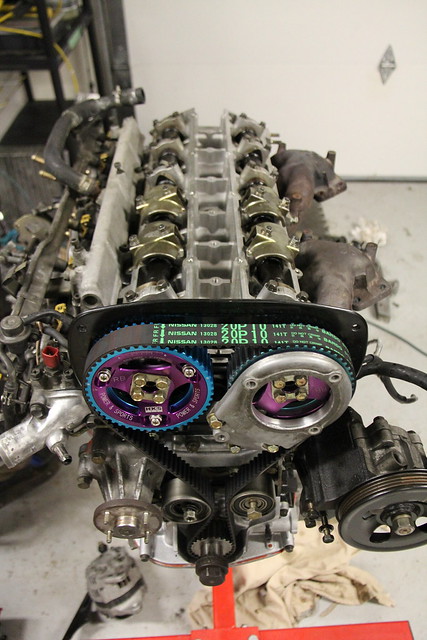 ARP stud for timing belt tensioner 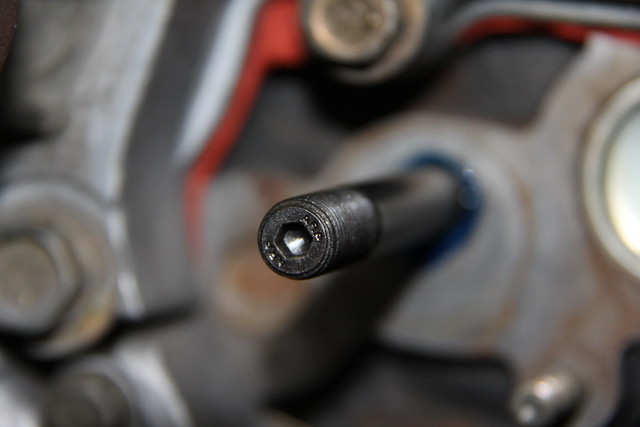 Got some parts polished which came out amazing 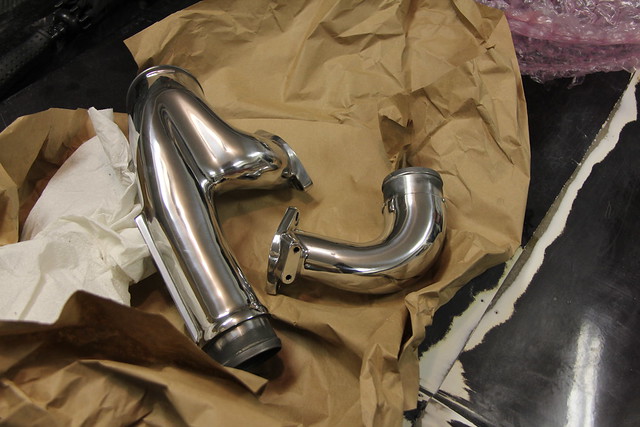 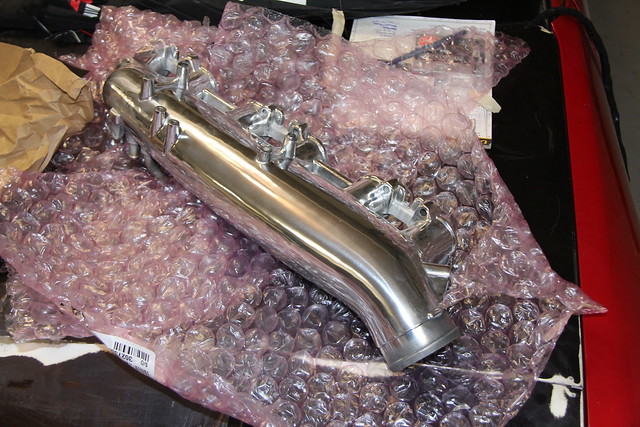 Max amount of images has been reached, still lots more to come before this thread is up to date to where i am now. |
|
|

|
| Sponsored Links |
|
|
#2 |
|
Zilvia Member
 Join Date: Oct 2010
Location: Vancouver B.C.
Age: 29
Posts: 216
Trader Rating: (2)
  Feedback Score: 2 reviews
|
Began cutting up the oil pan to convert it to RWD only. The oil pan was a mini project in itself but was kinda fun!
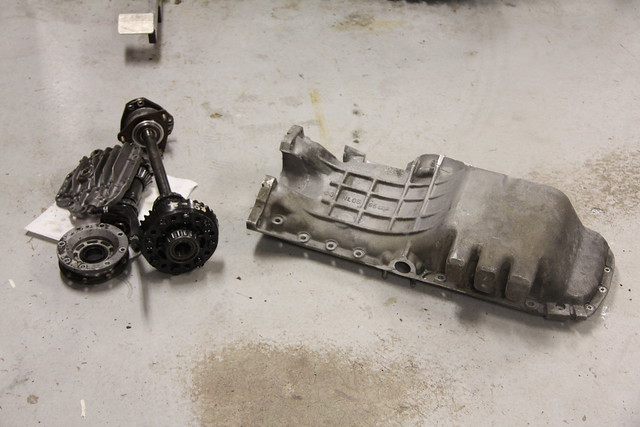 Sooo much cutting, forget how many cut off discs i went through but it was a lot. Heres all the bits that came off 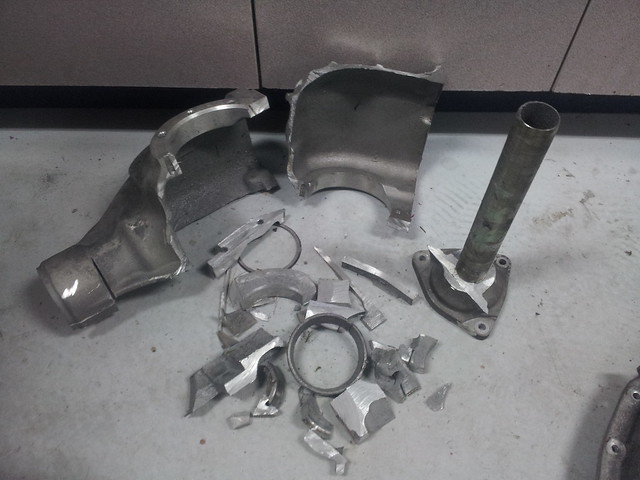 My friend Ben was able to get some aluminum round stock plugs for me that fit perfect! 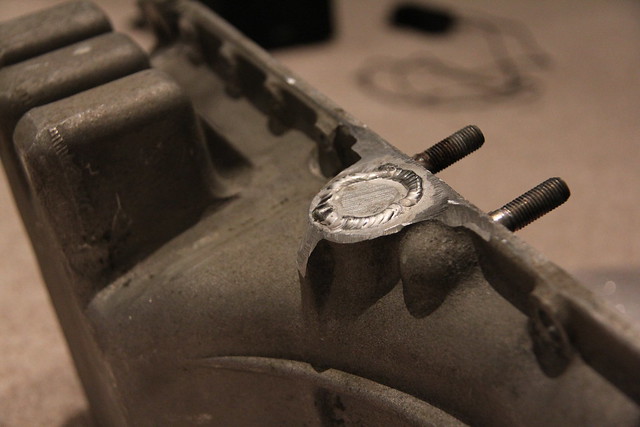 Drilled out oil returns to 5mm for better flow After and before 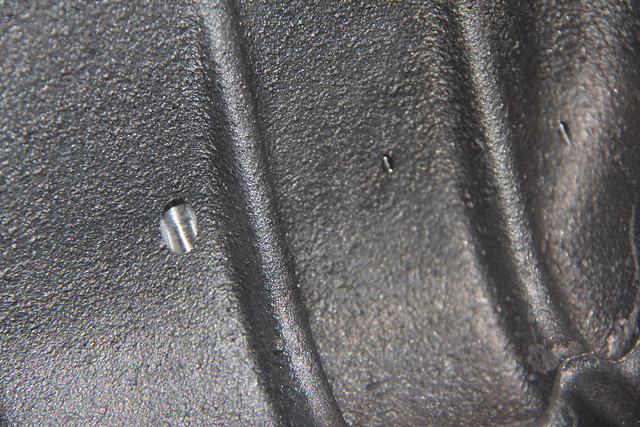 Tomei baffles installed! 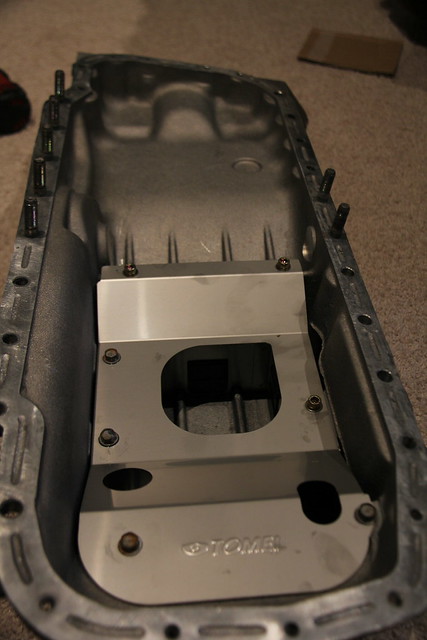 I didnt really want to mess around with turbo elbows, manifolds etc coming loose so i decided i would replace all the hardware and find a good way to keep things tight. So i made a trip to PDM Racing and got these neat lock washers and hardware. The lock washers are used in pairs (2 per bolt) and have ramps that face each other to prevent the bolt from backing out.  While i was assembling things for whatever reason i had to back off one of the nuts, i hadnt even torqued it yet and it was twice as hard to undo. So hopefully these will do the trick 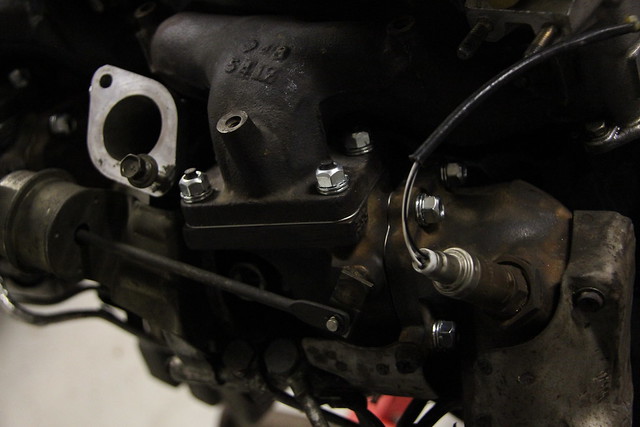 Engine pretty much assembled! 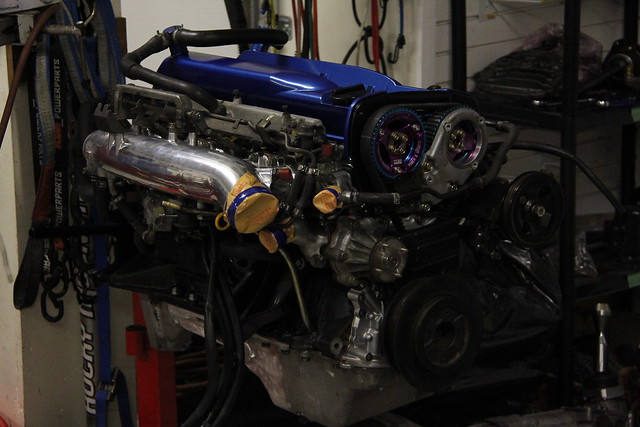 First test fit in the engine bay. As expected i didnt bash the firewall enough in the starter area as well as the top of the transmission. Couple other small issues with brake lines etc 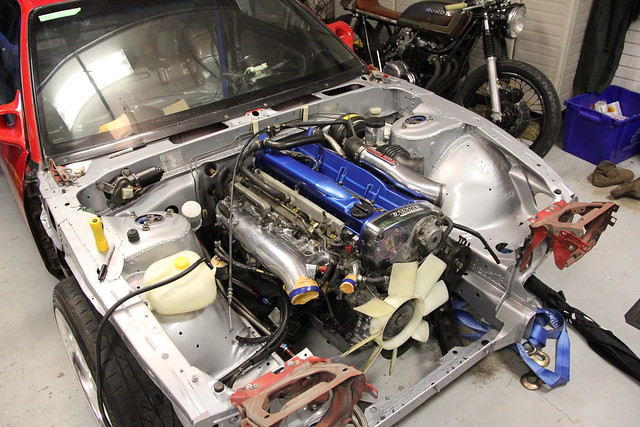 The real issues are with the steering shaft and the downpipes (as expected). The front turbo basically comes out dead center to the steering shaft. I have begun work on modifying and oldschool HKS downpipe i picked up. I will post more on this in the next update since ive only just started. I am very happy with how it sits though, not to high or low, and not to far forward or far back. 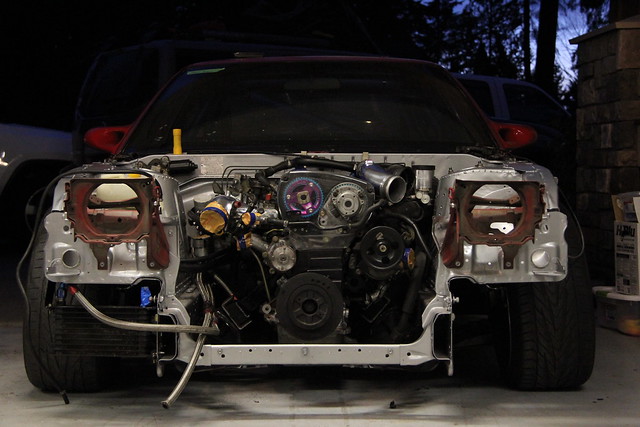 Also my wheels decided to come out for some sun that day! (*^▽^)/ 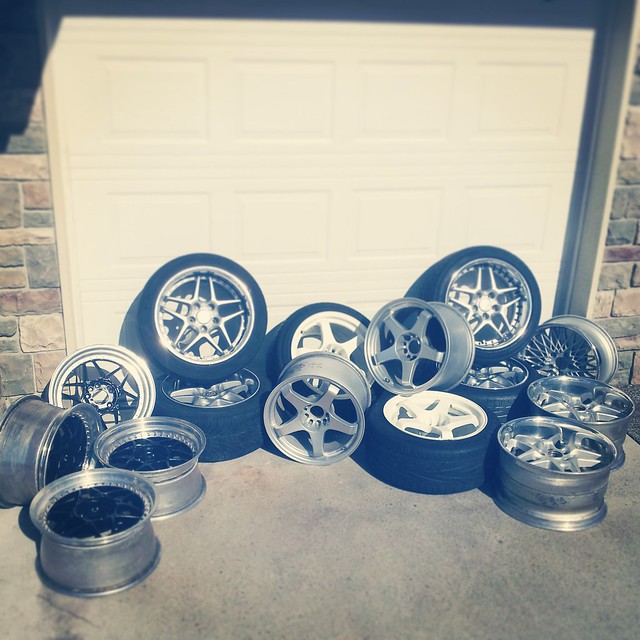 Decided to pick up some new coilovers. Owned my Tein HAs for waaay to long and they were on their way out. These are TEIN drift master which are high up on the list of dream coilovers for me. They also have the EDFC which allows you to electronically change the dampening for front/rear from inside the car, pretty unnecessary but at the same time kind of cool haha 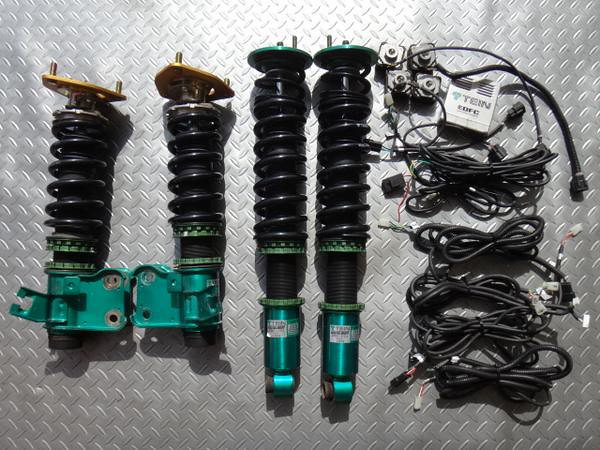 More motor pictures as well as my modded HKS downpipe to clear steering shaft 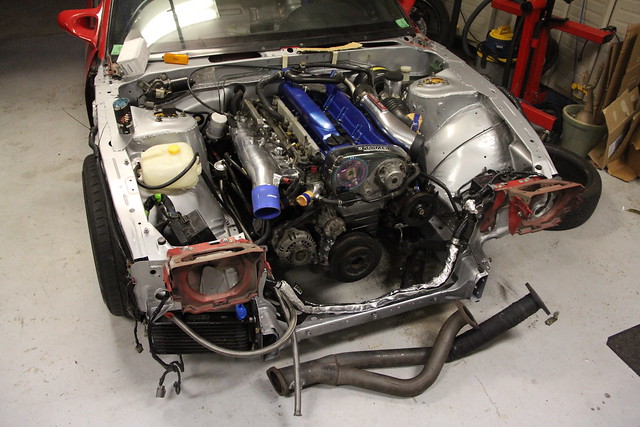 My superdrifts are now installed all around as well. Still need to fine tune the height etc once the body panels are on. Also ran all the wires for the EDFC. Since im running the GTR rear knuckles i had to swap to the fork style lower mount so i cut the mount of some beat up HKS hipermax i had laying around and got them welded on 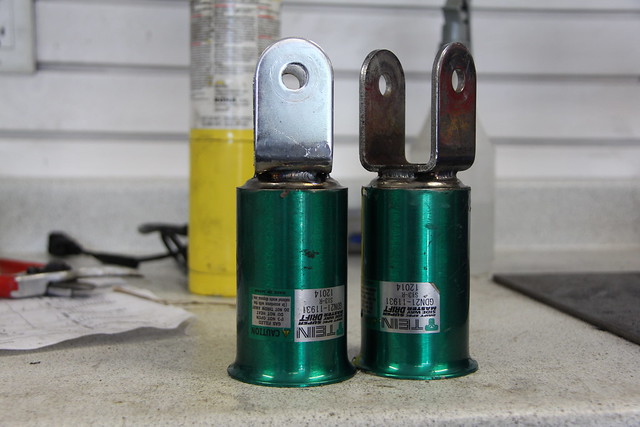 New trans mount! 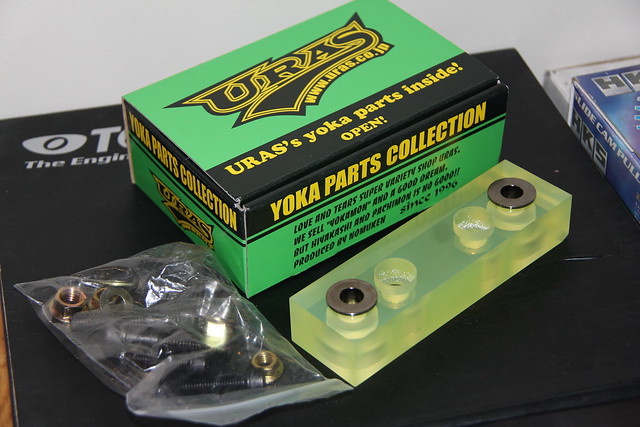 Ended up making some solid motor mounts. Many different opinions on these.. hoping with the smoother inline 6 its not too violent. We'll see, may end up changing them. Theyre basically just 3" round stock cut to 45mm (By Ben Osborne, thank you sir). Then drilled a hole through the center, drilled and tapped a hole for that allen head screw to keep the mount from spinning in the crossmember and put a bolt through it. Was going to tap threads and do studs but this installed on the motor easier because i could just slide them in from the side. 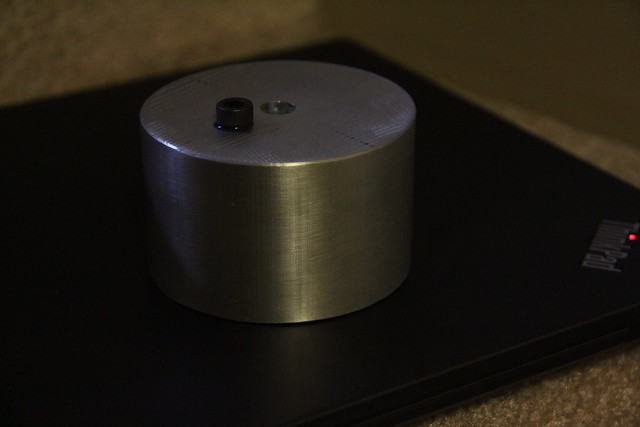 Made these up as well so i can run my Z32 2+2 cables 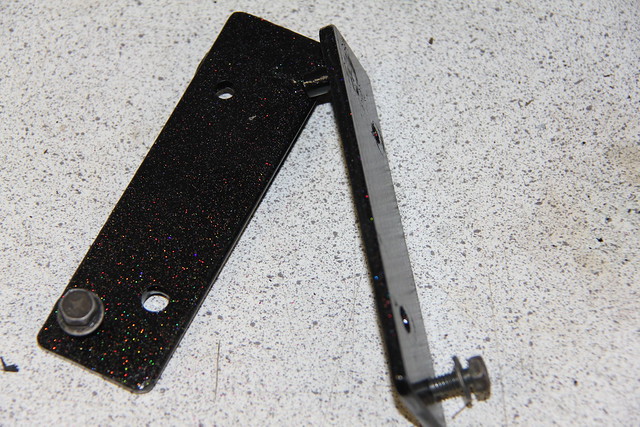 Modded this GTST trans crossmember 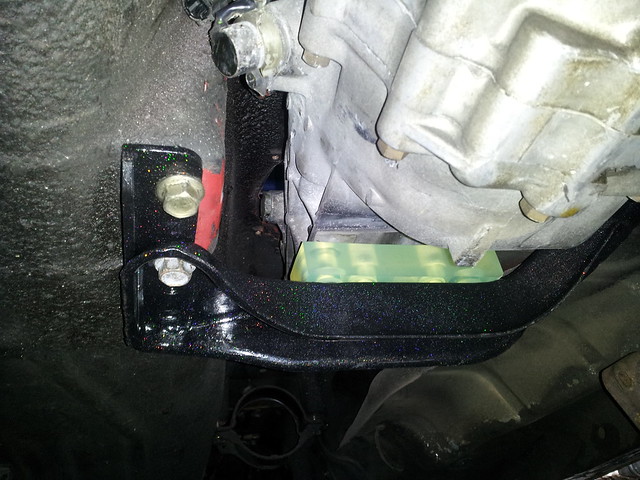 Random cool parts picture!! 〜( ̄▽ ̄〜) 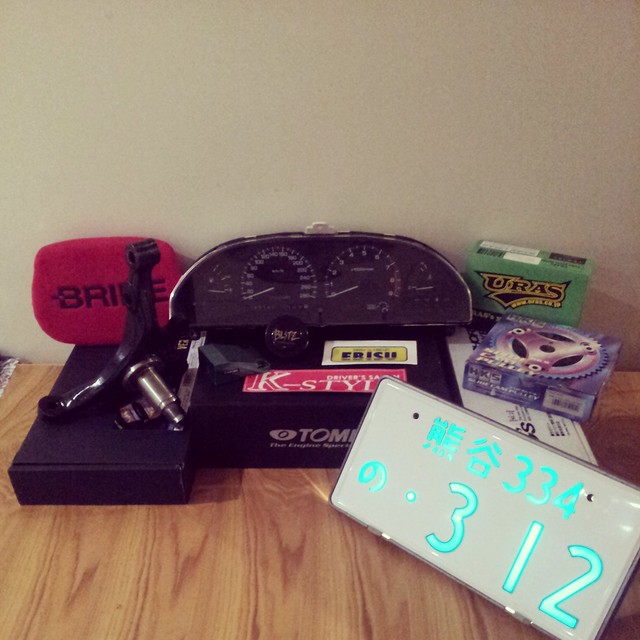 I had these knuckles made by a shop in Japan called Garage Clear. I told them a bunch of specs for my car and they made them accordingly, the sheets say what the specs are. They normally just deal with processing knuckles (you send your knuckles, they modify then send back) but since shipping would suck for me they were able to source the knuckles in Japan for me which was really cool. 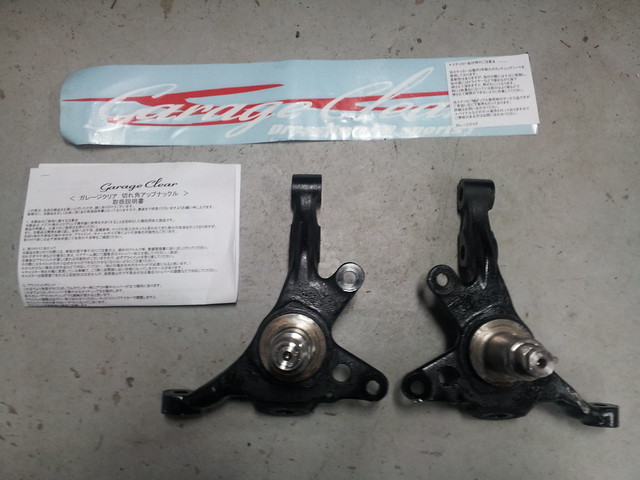 You may have also noticed they are S14 knuckles, I will be switching to S14 front suspension (mostly for 5 lug hub availability). They mostly deal with AE86 and have done over 150 pairs of knuckles on them! 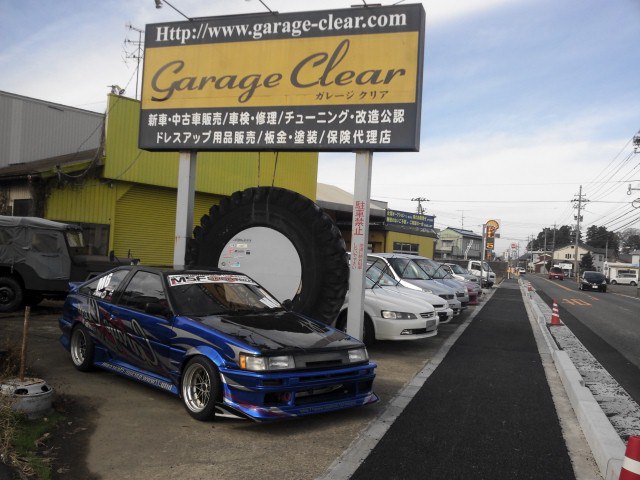 Got this plate/light box sent over with some parts haha. Maybe throw it on if im running a day permit.. or just wire it and hang it on the wall hahah. These things look super cool in person 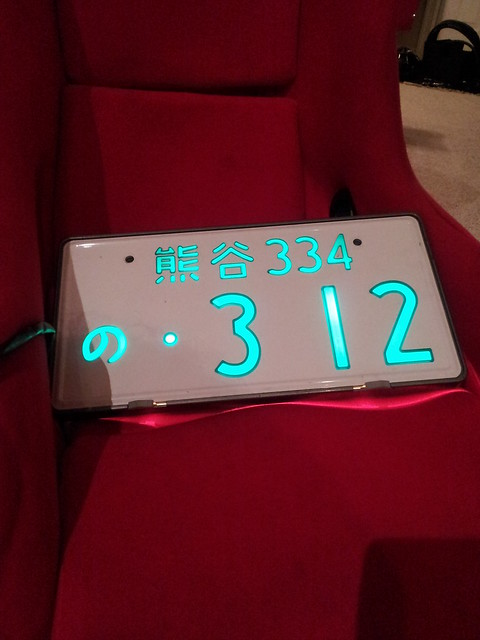 Couldnt pass up the opportunity to own this TOMEI cluster. I really enjoy collecting rare part 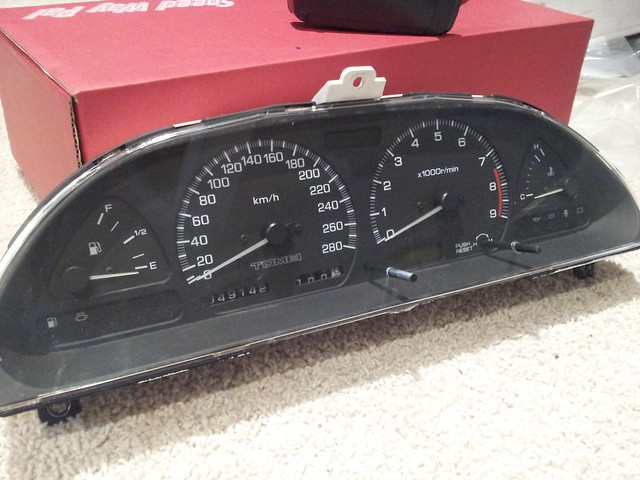 TOMEI strut bar as well. Couldnt fit a 3 point with the RB26 covers but this will do! 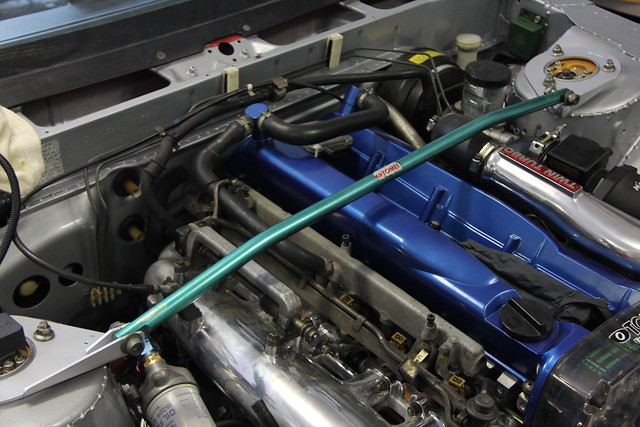 Got a new clutch slave cylinder as well as a braided clutch line. 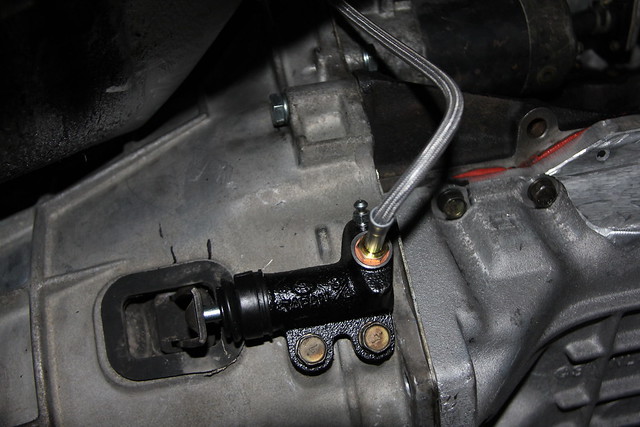 Got my new driveshaft made with RB25 yoke and larger U-joints. 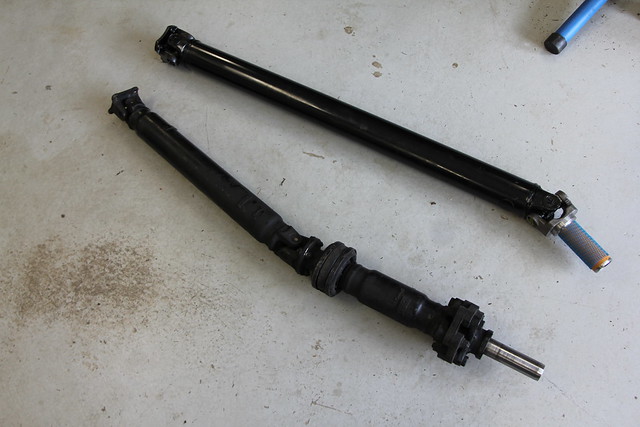 Here you can see how much beefier this thing is! 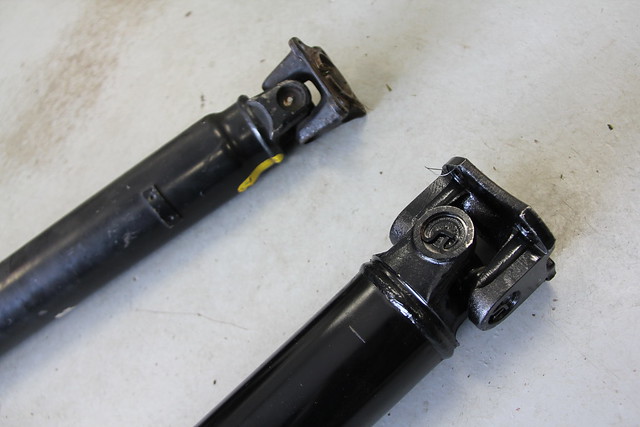 Made this power steering fluid return line and mounted this reservoir ive had laying around forever 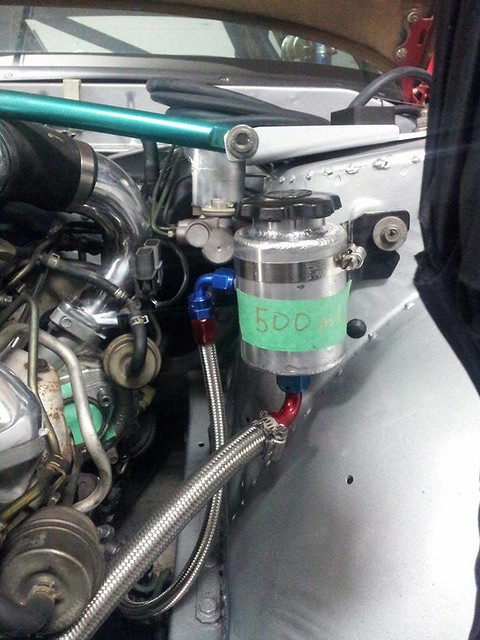 I picked up this pipe kit a while back, its from a C35 laurel that had an RB26 swap. Its a combination of HKS and custom piping and seems to fit quite well on the turbo side at least, the intake side may need some modification but i bought it expecting to have to modify it more so im super happy 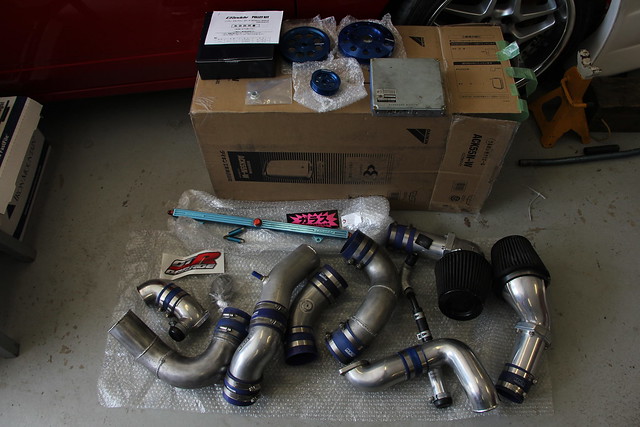 Box also included OEM R33 GT-R computer and a Greddy fuel fuel deliver pipe. Its just for standard 10.5mm injectors, i just find the OEM one to be a bit of a eyesore in the engine bay Finding a water pump pulley (i was missing mine) locally wasnt happening so i also grabbed the TRUST pulley set for R33/R34. Stoked on these as well even though you dont even really see them in the engine bay 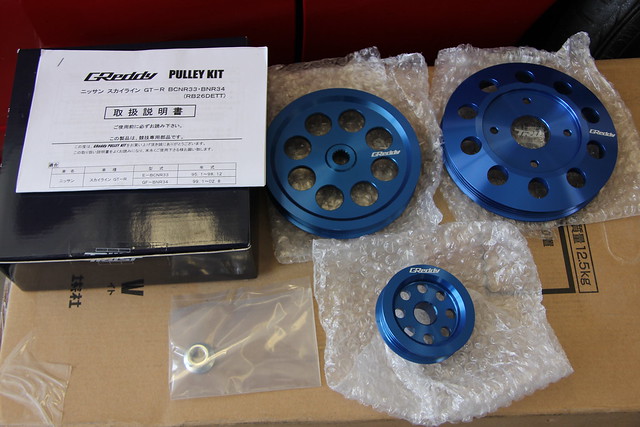 The piping all fit up really well and looks very cool  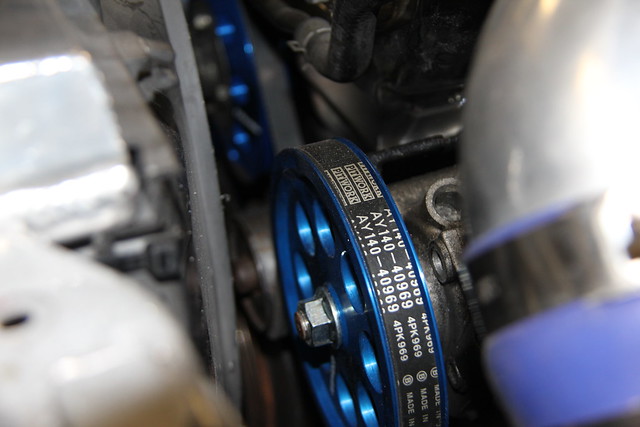 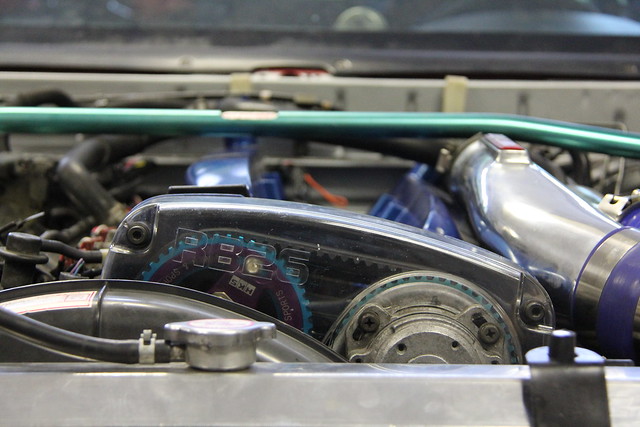 My wiring harness showed up the other day. The harness is super nice and was really easy to install. All the looms are wrapped in braided sleeving, everything tucks under the intake manifold, ignitor chip and injector resistor pack relocated into the cabin next to the ECU etc etc. Was too excited to take pictures so i dont have any uninstalled photos (▰˘︹˘▰) 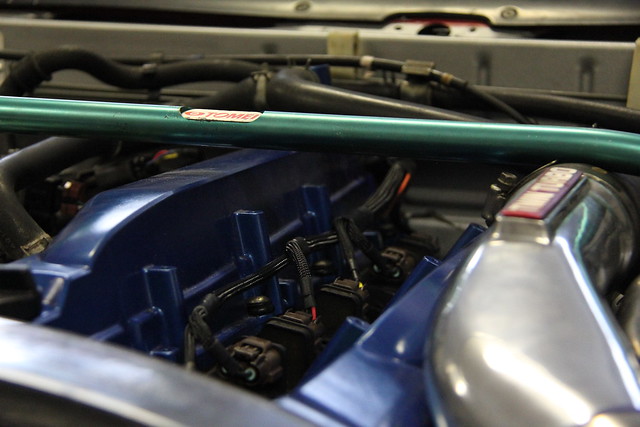 New bumper! BN sports type I  Was able to make my Mines intakes fit and still be able to close the hood  Annnnnnnnnnnnnnd started the engine!! https://www.youtube.com/watch?v=4KMx9W00vu8 NISMO power brace 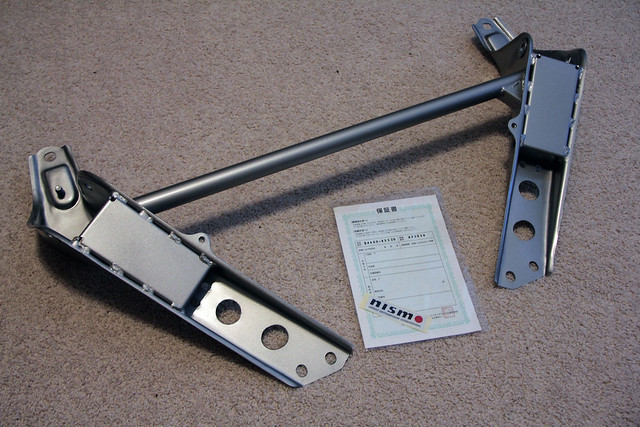 HKS limited edition oil cap 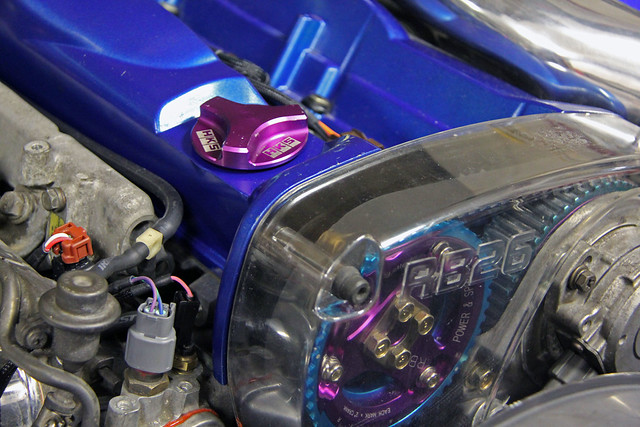 For some real proper photos of my car check out constant revolution for another progress update!!! http://www.constantrevolution.ca/201...-rb26-s13.html 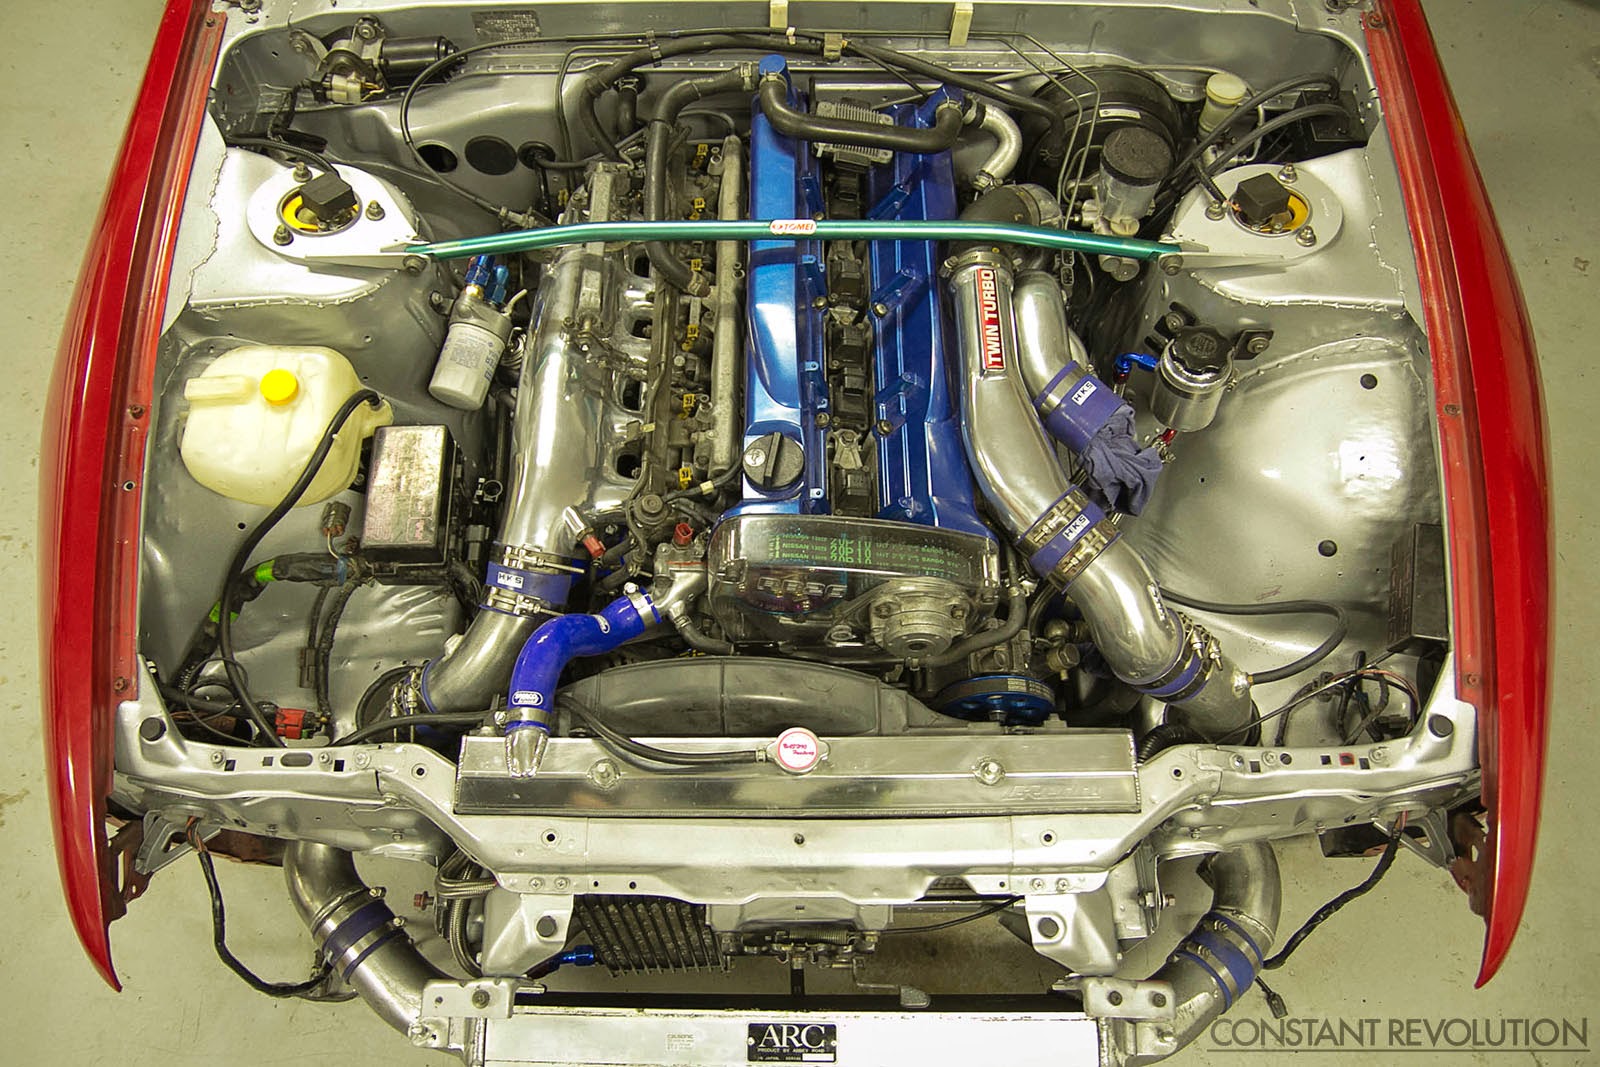 |
|
|

|
|
|
#7 | |
|
Zilvia Member
 Join Date: Oct 2010
Location: Vancouver B.C.
Age: 29
Posts: 216
Trader Rating: (2)
  Feedback Score: 2 reviews
|
Thanks everyone!! I'll post some interior shots at the end of this post, its still a work in progress tho.
Quote:
Today i started installing my new front suspension/steering setup 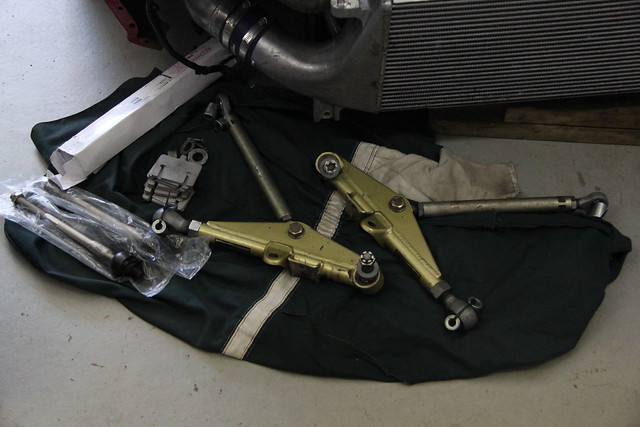 Ikeya formula roll center adjusters NISMO power brace Kazama inner tie rods Garage clear S14 knuckles 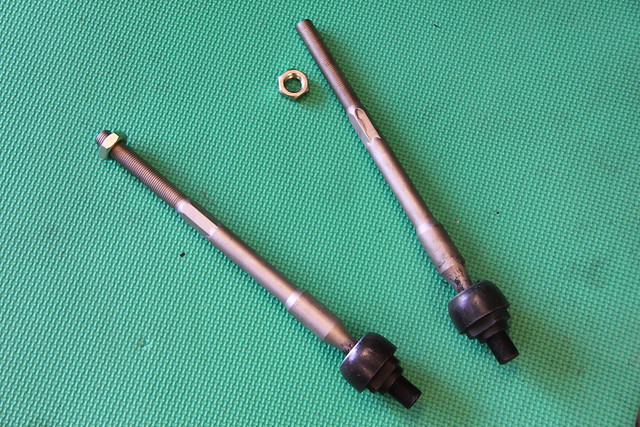 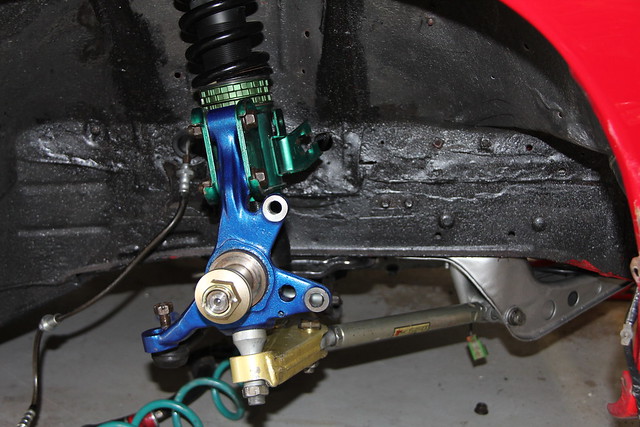 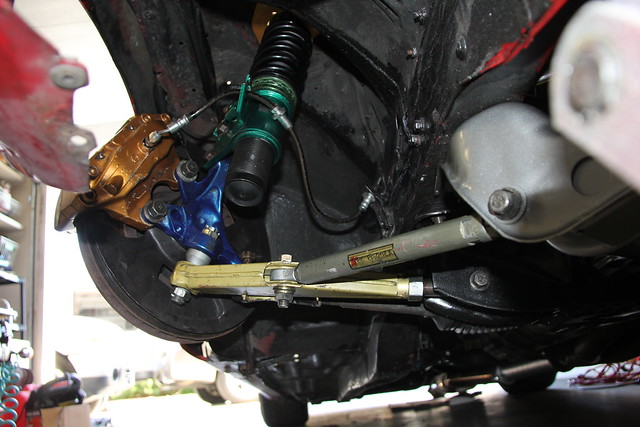 I still need some S14 outer tie rods before i can finish. I cant wait to drive with this setup, should be able to get some better steering angle and have a huge improvement in roll center As promised heres some interior pics: 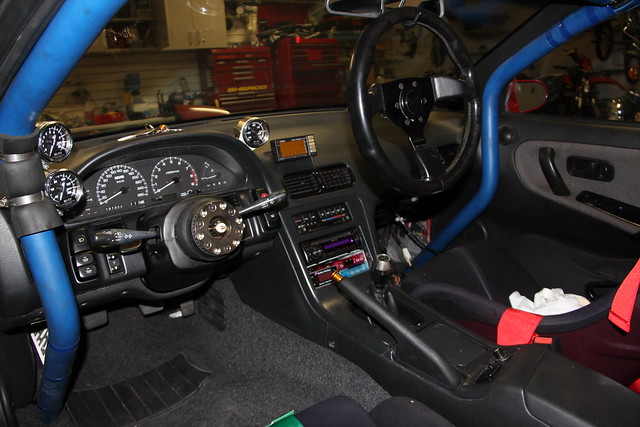 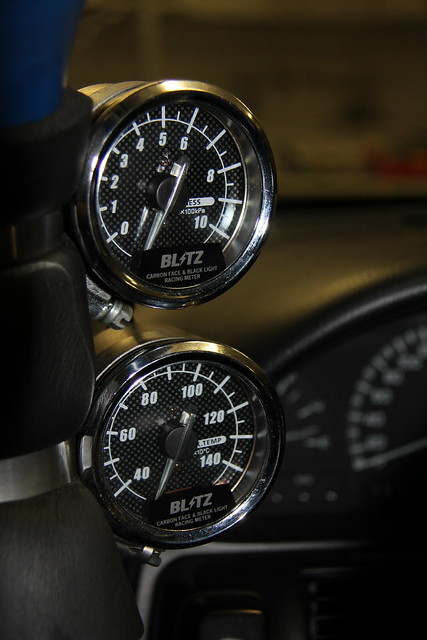 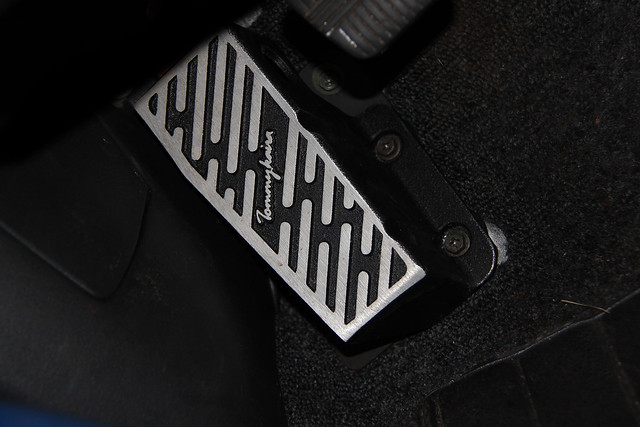 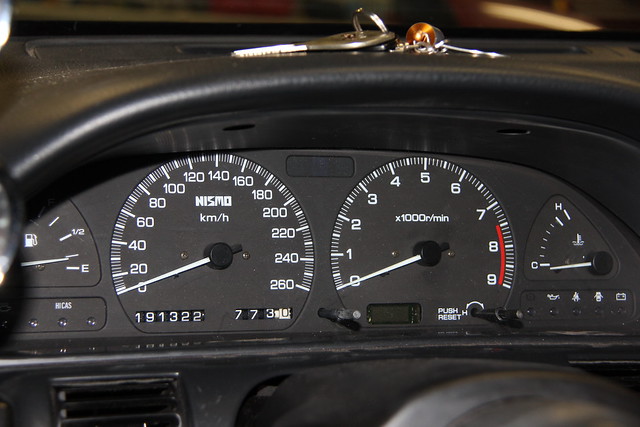 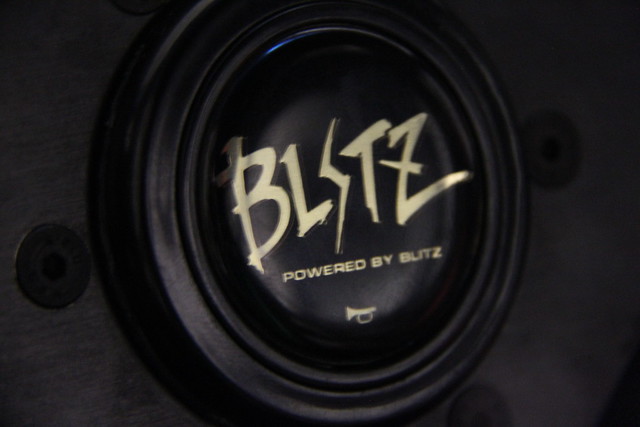 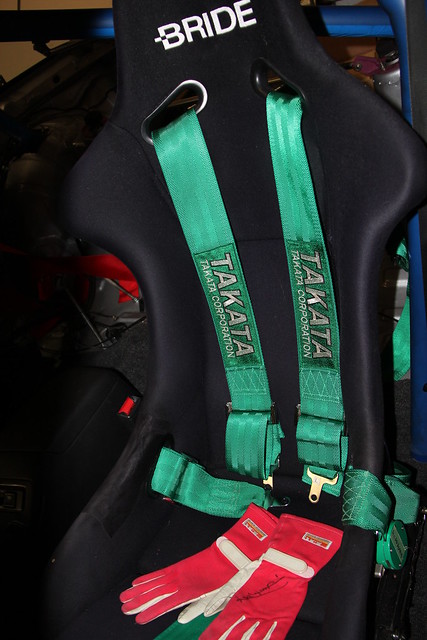 These old school Keiichi Tsuchiya driving gloves also recently arrived, according to the seller on YAJ they were signed ~20 years ago 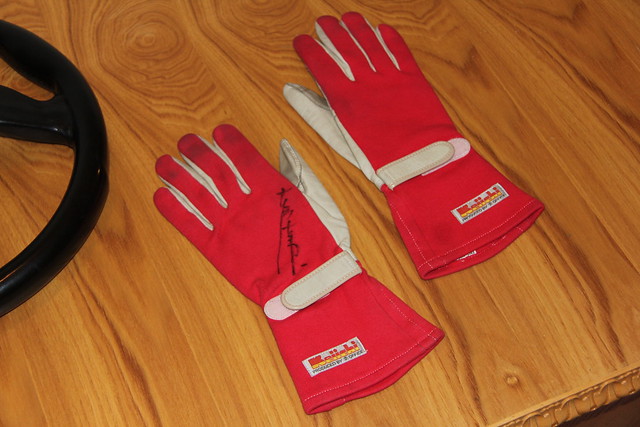 |
|
|
|

|
|
|
#10 |
|
Zilvia Member
 Join Date: Oct 2010
Location: Vancouver B.C.
Age: 29
Posts: 216
Trader Rating: (2)
  Feedback Score: 2 reviews
|
Not really too much to update, been working on setting up my front suspension/steering and ran into some problems
Had to order some tie rod extensions, love URAS parts, i couldnt find anyone else who made these (quality ones at least). Their parts always come in cool boxes as well 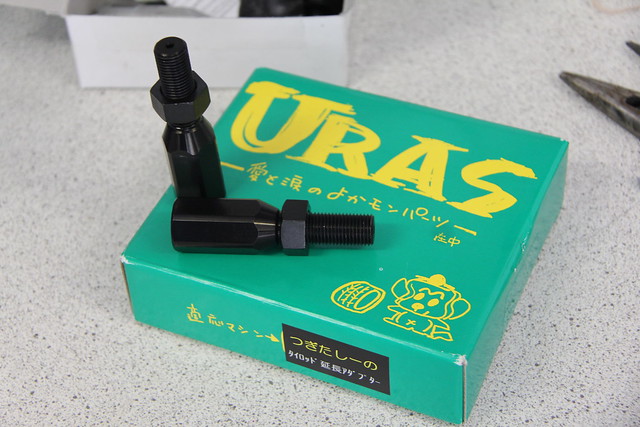 Mated these to my TEIN outers... 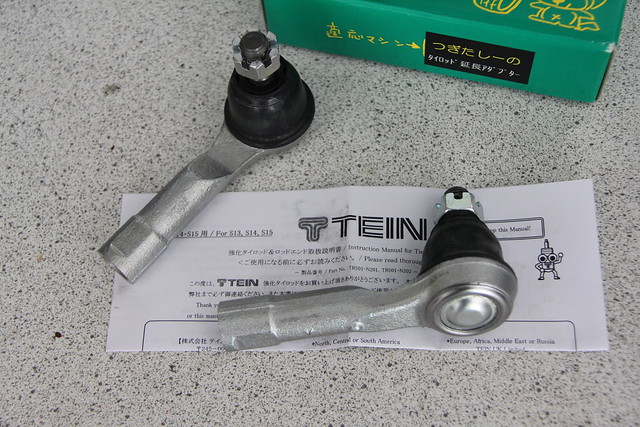 then to my Kazama inners 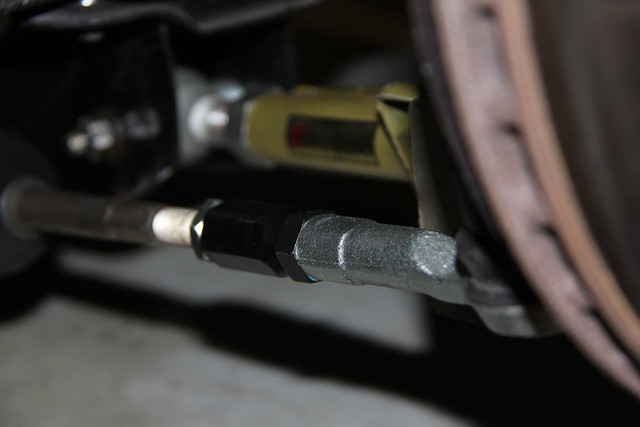 Next were the Ikeya Formula offset tension rod collars to allow for more clearance of the wheels with the increased steering angle 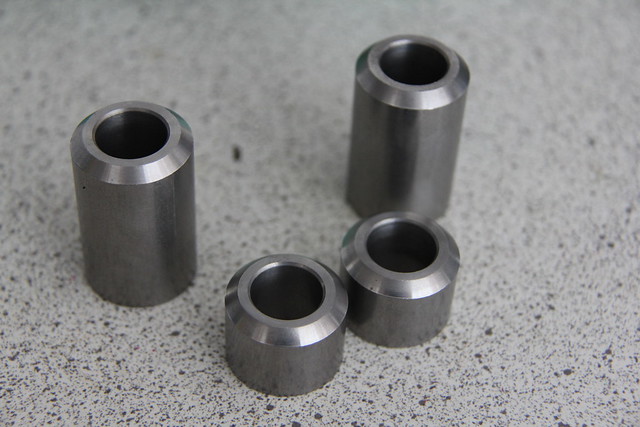 However due to my wheels being higher offset the tension rod clearance is still what is limiting my steering angle. I may try running larger spacers (currently 15mm) then shortening the lower control arm which will get the wheel further away from the tension rods 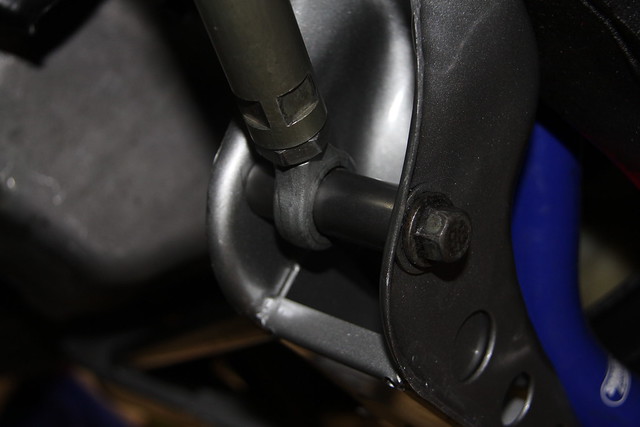 Grabbed this Arai GP-2K helmet which is custom painted with the Keiichi Tsuchiya design (non-chrome) 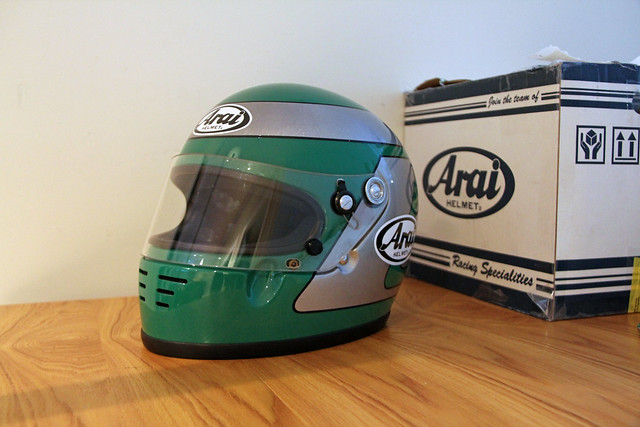 To solve the front steering angle problem i ended up buying some new wheels, original plan was to just buy another pair of 03s but theyre not super common in the size i need and i need something to use in meantime. Plus i just always wanted a set of these 。゚(TヮT)゚。 Panasport G7 C5C2 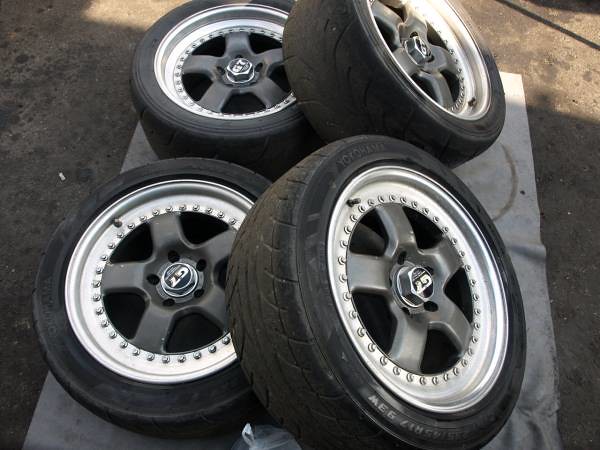 The fronts are 8.5J and will give me more inner clearance than my 9J 03s do even with a large spacer. The rears are 9.5J +28 which is basically as aggressive as i can fit with my current suspension settings I still plan to either find a pair or 03s that are 8.5j or change the inner barrels on mine (if i can find a reputable place that sells lips) so i can have both full sets |
|
|

|
|
|
#12 |
|
Zilvia Member
 Join Date: Oct 2010
Location: Vancouver B.C.
Age: 29
Posts: 216
Trader Rating: (2)
  Feedback Score: 2 reviews
|
Thanks for the comment! I actually got Lordco to order it in for me believe it or not.. The ARP part number for the stud is AM33501LB I meant to post that in my original post
|
|
|

|
|
|
#14 |
|
Zilvia Addict
 Join Date: Jul 2008
Location: Canada
Age: 34
Posts: 686
Trader Rating: (0)
           Feedback Score: 0 reviews
|
Love the build and love the parts list even more. Glad to see all the rarities im getting out bid on are going to a good home :P haha keep it up
__________________
-Jordie Lewis '93 Skyline Type M |
|
|

|
|
|
#17 |
|
Zilvia Junkie
 |
wow your car is looking great! keep up the good work
-Juan
__________________
Juan Vargas - Motorsports Specialist Fontana Nissan/Nissanraceshop.com
email: [email protected] Scott's Personal Website/Blog: http://www.scottandkerryann.com |
|
|

|
|
|
#18 |
|
Leaky Injector
 Join Date: Feb 2012
Location: Dallas, Texas
Age: 28
Posts: 140
Trader Rating: (0)
 Feedback Score: 0 reviews
|
I thought I was doing good with "rare" parts... Wow just wow.. Good work man. Really digging all the OG parts, keep it up.
__________________
"I have no cupholder" |
|
|

|
|
|
#20 |
|
Leaky Injector
Join Date: Nov 2012
Location: eureka, california
Age: 29
Posts: 61
Trader Rating: (0)
 Feedback Score: 0 reviews
|
Oh man, this is prime. Im almost done with my rb26 in my coupe right now. Was wondering if i was gonna have to hammer the tunnel. Guess that answers that lol.
|
|
|

|
 |
| Bookmarks |
| Thread Tools | |
| Display Modes | |
|
|