
 |
|
|||||||
| Home | Rules & Guidelines | Register | Member Rides | FAQ | Members List | Social Groups | Calendar | Mark Forums Read |
| Builds (and builds only) Got a build thread? It goes here, build threads anywhere else on the forum will be locked and never moved. |
 |
|
|
Thread Tools | Display Modes |
|
|
#1 |
|
Leaky Injector
 Join Date: Sep 2009
Location: Jacksonville, FL
Age: 33
Posts: 141
Trader Rating: (0)
 Feedback Score: 0 reviews
|
S13 -> FC Fun in the Sun ~Street Style~
Hey everyone, I'm far from new here but its my first time throwing a build thread on the site. I figured there are a lot of people in drifting and clean simple cars so why not share what I've been up to. If this isn't aloud please feel free to send me a message or leave a comment and I will be sure to remove the thread.
I've been into drifting for a few years now and have built a couple different cars including this S13 that I sold a couple years ago and I am now building my most recent FC RX7. The RX7 is a car that I can't get enough of and the one below is actually my 5th one and will be my most modified one to date. Drivetrain SR20DET Swap Greddy FMIC Koyo Radiator HKS BOV Megan Racing 3" Exhaust S14 Welded Rear Diff Suspension Tein Super Drift Coilovers PBM Solid Rack Bushings Isis solid subframe bushings Isis adjustable arm kit Circuit sports rucas Interior Bucket Seats with Harnesses Momo Steering wheel with hub Greddy Boost Controller HKS Turbo Timer Greddy Boost Gauge AEM Air Fuel Gauge Oil Pressure Gauge Volt Gauge Exterior 17" XXR 962's I bought this car August 17th, 2012 looking like this. The car ran like poo, had massive 18" rims and "lowering" springs. This thing was a monster truck. Well I got the car home that night put it in the garage and immediatly left for Daytona to purchase a used set of Tein SuperDrift coilovers for a good price. I waited a few days to install the coilovers since I was still looking for wheels and a welded differential. Three days layer August 20th, I drove to Georgia to get them. 17" XXR 962. Yes I know not baller wheels but alot better then those 18's that were previously on the car. The Differential is out of a S14 which I didnt realize till I got home. The next day I had to go order the longer diff bolts and a set of bushings from Nissan. Not a bad deal since they overnighted them for me. The install of the parts happened a couple days later and the outcome was this. Alignments way off and I still want to adjust the height a bit. Brought the front end down a little more but I still want it lower. It handles really well and slides very easy but still doesnt look right yet. Sorry I dont have any photos of it going sideways. Soon though The last picture shows no cage in the car or harness bar. That is the plan but havnt had time or money to order one so its going to have to wait. I do realize the dangers of not having one during a accident when using harnesses and I am doing this at my own risk. At some point i picked up a used Momo steering wheel and hub since the stock one was disgusting and beat to shit. Sorry for the iphone photo At this point I had been driving the car around for a few weeks and was tired of the horrible alignment so I decided it was time to order more suspension pieces. I went with the Isis arm kit from Enjuku along with solid rear subframe bushings and PoweredByMax solid rack bushings. This should stiffen it up alot and give me a good alignment. Taking out the rear subframe for the first time by yourself is a pain. I will never attempt this again its deff alot easier with two people. September sometime is when all the suspension went in, I finally get the subframe back into the car and go to bolt my coilovers in and I cant get them to fit. They dont fit with the RUCAs that I ordered. Luckly Enjuku is a good company and allowed me to return them and get Circuit sports. Thanks Enjuku. The car was off the road for atleast a week but with all the new suspension pieces it was a blast to drive. Next came more interior. I dont have any great photos of it installed yet but I will get some soon. I got tired of the stock 90's grey cloth and wanted something nicer/cleaner. I found this material at Joanns fabric and it worked awesome Here are those shots from today unedited cause im no photographer although I do want to learn.. Well the headgasket blew in the KA and its been sitting for a few weeks but I picked my self up a killer Black friday deal... SR20DET swap We are pulling the ka and cleaning my bay this week and then saturday we should be pulling the sr and putting it in my hatch... December 15th is my first legitimate drift event so I will have some sideways photos/videos then For the second part of this update the SR swap is complete and running amazing. My buddy Brandon and I pulled the KA in the middle of the week and then saturday we decided to pull everything from the black car and put it into my red hatch. Pulling: Out: Although we did run into a issue with it running properly. It would start but barely idle and when you stepped on the gas it wouldnt go at all. Anything past 1/8th throttle would kill it. After trouble shooting for a couple hours I gave up and came back to it sunday. Im not sure what it was but I ended up checking the fuel pump in my car and the black car. Mine was stock and the black car has a walbro 255 in it. Swapped them quick and bam it ran like a beast. Although I dont have any photos of the initial swap I do have these. This past weekend I started a wire tuck so that I could prepare to tub my front end. The last photo shows one reason that I want to tub this car lol. Bought these wheels as drift spares.. Cant wait for the 16th Last edited by LaMaR-; 08-20-2016 at 11:16 AM.. |
|
|

|
| Sponsored Links |
|
|
#2 |
|
Leaky Injector
 Join Date: Sep 2009
Location: Jacksonville, FL
Age: 33
Posts: 141
Trader Rating: (0)
 Feedback Score: 0 reviews
|
Not long after that last photo I ended up separating from my wife. A girl I had been dating since high school and whom I had married when I joined the military. Im not sure what it was that ended our relationship but she left and I sold the car. Selling that car is the one thing that I wish I never would have done. Something in my mind told me that if I sold the car, she would stay. I was wrong. She left and drained my bank accounts at the same time... A true fresh start?
Nearly a year after her leaving I saved up enough money to buy another project. I ended up driving to North Carolina and back and picking up another RX7. Why North Carolina? Reason being is for the price I paid, I got a heck of a deal. Its a 88 FC3S RX-7 with Tein Super Drift coilovers, the same coils I had in my s13, it also has a ford 5.0 swap with T-5 trans and the full grannys swap kit. The motor has some work done to it most of which I have no idea what lol. As far as I currently know it has after market heads, cams, its chipped, headers, arp headstuds, and a whole bunch more internally probably. Here it is when I picked it up. Upon getting her home I immediately decided I needed to figure out why it was running so poorly and that I needed to put my touch on the car for sure. In the garage doing what I always do lol take the front end off and have a look at everything else The engine bay was and is still a mess, I can't wait to pull the motor after the september drift event and start cleaning up the wiring harness and the engine bay itself. The interior wiring on the car is even more of a mess, heres what it looked like under the dash :evil: At this point I started ordering parts to make it a better platform to drive around Grip Royal Royal Knight NRG Hub and Quick Release Crow Harnesses Bride LowMax Replica seats After this it was time for its first street legal drive.. Everyone loves gas station pictures right? It was running a little better still has vacuum leaks and whatever else going on but overall I am super happy with the way it runs and drives. Interior was together and I could drive it legally so I went to my first drift event as a driver. I learned a bunch and enjoyed the car, I just wish that I had swapped my rear tires earlier and not missed my competition run. During the event I noticed that my rear differential was still leaking even though I had just replaced the pinion seal, and also Brandon noticed some smoke from my engine bay when I met him at the gas station to head to the event. My slave cylinder was leaking right on my exhaust and would burst into flames for just a second so we had a extinguisher ready the whole day just in case. After this event I decided I had to do something to fix the rear suspension, the FC doesnt have a real camber adjustment stock and at the time there were very few options to fix the camber. Not a week later Drew decided to take me in a PBM thread stating that the camber links, toe arms, and Camber arm would be coming out. I ordered them as soon as they were put up for sale along with the solid Differential mount and bushings, and the solid subframe bushings. Heres some pictures of the rebuild of the rear suspension, As I was rebuilding I took my differential to a shop here on the westside to have them fix the leak and check over the internals. Toe Arms Left, Camber Arm center, Camber links right Diff bushings top, subframe bushings bottom in my freezer It was now time to pull the rear suspension, you might want to scroll slowly because its really ugly.. First things first start to dismantle it all Broken forward Diff mount, and rear bushings are cracked to shit Pretty sure the factory camber link shouldnt be bent lol Scrub the subframe clean with a red scuff pad and burn the bushings out Then I started spraying things Diff with installed solid mount and bushings Subframe mounts in with diff Complete rear end minus axles and brakes Rear end is now reinstalled and ive been driving the car around heres a few final shots. Drivers view picking up food is what it mostly does lol |
|
|

|
|
|
#3 |
|
Leaky Injector
 Join Date: Sep 2009
Location: Jacksonville, FL
Age: 33
Posts: 141
Trader Rating: (0)
 Feedback Score: 0 reviews
|
Around December 2013 I deployed yet again. Not anywhere bad, just Okinawa Japan. 8 months in a country where I would love to drive so many cars that are a norm for the locals. I had a blast and really was looking forward to buying parts while I was there and shipping them back. No luck on that, all I bought was a set of mirrors. Ill get to that later though.
While in Japan I met quite a few people, mostly air force, that were into cars. I love photography and really want to better myself so I decided to try and get them to let me shoot their cars. Heres the outcome... |
|
|

|
|
|
#4 |
|
Leaky Injector
 Join Date: Sep 2009
Location: Jacksonville, FL
Age: 33
Posts: 141
Trader Rating: (0)
 Feedback Score: 0 reviews
|
Back to my car now... I got back and drove around the RX7 for a little bit, it had no plates or insurance so it was mostly just starting it up, letting it idle for 5-10 minutes then driving it around the block and then parking it again. Nothing too exciting.
While I was deployed I started to order a few parts. Nothing major. ASD Hydraulic Ebrake RaceFab dual caliper bracket PBM suspension pieces - I currently own everything made for the rear end of the RX7 The car had a sketchy cage in it ever since I bought the car and I really wanted to go ahead and get a FD legal cage put in so I started cutting out the cage and the old cage mounts. What a pain in the A** that was. I had torn the car completely down so I could do bodywork and have the car finally become the car I had always dreamed of it becoming. At some point during the cage cutout I decided it was going to be way to much work and I really needed to find a new shell instead of wasting my time. A couple months later I sold my 2013 GSXR-1000 and ended up finding a Black shell that was "pretty clean" other then the 6 coats of paint that would need to be stripped off of it. I actually don't have any photos at this time of when I first bought it, but just imagine a completely stock FC RX7. This one was my 4th FC and actually the worst one I've ever purchased. I looked at the car at night and for some reason trusted the seller about it being rust free... With the money from selling my bike I decided I wanted to order some more parts. Shine Autosports 30mm rear overfenders Shine Autosports 30mm ventless front fenders Shine Autosports Roof spoiler S13 Coupe Rocketbunny rear spoiler Replica BN Sports Type 1 kit Varrstoen ES2 18x9.5/10.5 wheels After all these parts arrived it was time to pull my motor out of the blue car and get it sold. This was the first time I've actually pulled the motor and since I was going to keep the subframe from the blue car I decided it might be easiest to just drop it through the bottom and pull the car up and over it when it was out. Again What a pain in the A**. After finally selling the blue car I started to work on cleaning up the bay.. Heres a couple photos of that work going down. Now remember there was probably 6 coats of paint on the whole car and it had to be stripped in order to apply new paint and to make sure it doesn't have any chipping or peeling issues. Finished bay for now, still to come is tubs and welding up all the unused holes. Then I will paint it and add gold heat reflective tape to the firewall Lastly here you can see the "finished" bay and my motor patiently waiting to be rebuilt and cleaned up |
|
|

|
|
|
#5 |
|
Leaky Injector
 Join Date: Sep 2009
Location: Jacksonville, FL
Age: 33
Posts: 141
Trader Rating: (0)
 Feedback Score: 0 reviews
|
I guess I can't leave anyone hanging on what its gonna look like roughly lol
Heres a rough look at the rear of the car. The tire size and height is going to change quite a bit still. and heres the money shot.. The front end  and in the end i would love for it to be a similar color to this S13. I've was slowly working on getting the front suspension and subframe cleaned up and put back in so I could have a rolling chassis again. One of the biggest things I wanted to change this time around was the add power steering to the car since it never had it, now I know why it didn't lol. The motor mounts made it so that I had to bend custom lines to fit, and while doing so I came to find out that its hard to find the fittings for these racks anywhere local. I might end up ordering some later on and go ahead and bend custom lines if the ones I have on there now don't work. I ended up taking the stock lines and adding a couple bends to them and removing a little out of a couple bends. Heres where I am at with the power steering setup. From there I had to put back in the A arms and coilovers so i could throw the wheels back on and for the first time see it on all four wheels. |
|
|

|
|
|
#6 |
|
Leaky Injector
 Join Date: Sep 2009
Location: Jacksonville, FL
Age: 33
Posts: 141
Trader Rating: (0)
 Feedback Score: 0 reviews
|
I go through cars too fast, The last car I posted ended up having a lot of rust that I didn't see originally, I guess I should have looked at it better. Also while working on it I noticed that the drivers floor was buckled a bit and came to a conclusion that it was probably hit in the door which is why the door doesn't fit 100% and the rocker was rusted. I begin my hunt for another shell and ended up calling about a car that was posted on craigslist. It ended up being about 10 minutes from my house and the guy just wanted it out of his yard so I went and looked at it really quick.
Heres the photos of how it sat when I went to look at it. I didn't jump on it right away because it was a automatic and I knew the transmission mount was different from manual trans cars to automatic. IDK why mazda would do this but whatever thats life lol. I come home and call up Grannys speedshop and get a price for a new mount, it was way cheaper then I expected so I ordered and it drove back down to look at the car more thoroughly. It was really clean and had everything I needed for my current car. Needs a windshield but that will come later on I suppose. Well I picked the car up Tuesday 24FEB15 and had it towed to my house. Then wednesday 25FEB15, less then 24 hours later I had my suspension and wheels on the car just so I could get an idea of how they would look. In my opinion the tires are way too stretched for my taste so they will be changed out but overall I'm really happy with it. I can't wait to get my motor in this car and finally be able to drive it again. Then today when I got home I wanted to get an idea of how low it would be with the skirts on. so I threw the drivers side on.. I really can't wait now. Thats all for now, but as soon as I can get the bay painted I will be putting the motor in and sending it off to have an exhaust made for it. After a very long hiatus from this project and spending much of my time working on my house, I finally decided it was time to start working on it again. I got the motor bolted back in for a test fit and went to put in the new transmission cross member and realized that I was sent the wrong one. So I couldn't finish that goal. On the plus side though, I did get ahold of Grannys Speed Shop and talked to them about the issue, they are sending me the correct mount this week at no charge. Couldn't be happier. Well with that part on hold yet again I decided why not actually go ahead and test fit all of my panels, besides the rocket bunny wing but that'll come later lol. Everything fits really well except the front bumper, I need to figure out what to do in order to relieve some pressure off of the fenders. Sorry in advance for the horrible photos but the car is too low to get out of the garage. I think that a taller sidewall on the rear tires will help since I don't really want to raise it up any. Onto the photos. In this photo you can see that the rear tire is actually low on air plus its super stretched, not really my style. Bigger rear tires will be going on for sure. Last but not least I figured I would throw in a photo of my house with the car. Love how both of them look and can't wait to have the car streetable again. |
|
|

|
|
|
#7 |
|
Leaky Injector
 Join Date: Sep 2009
Location: Jacksonville, FL
Age: 33
Posts: 141
Trader Rating: (0)
 Feedback Score: 0 reviews
|
FEB2016
So I haven't gotten a lot of work done lately, mainly due do a lot of knee pain after having knee surgery. Today I finally got around to doing a few things that Ive been wanting to do. First thing was to start glassing my rear spoiler back together as one piece. This was my first time working with fiberglass in years and figured it would be the easiest thing to do. the second thing I've been wanting to do was figure out why my front bumper pulled my fenders in so hard. I bolted back on my factory fenders and threw the bumper back on and realized that it was roughly an inch too narrow. Time to cut it in half and begin the process of widening it...No fun thats for sure, but it will fit much better and give me some practice with bodywork again. Its been too long. First side before cutting other side Fit the first side then the other side Heres the gap I'm going to need to fill, not bad at all. Obviously I need to do a little final fitment on the hood gap but I'm not worried about making it exact since this isn't going to be a show car, i plan to drive the hell out of it and enjoy it. |
|
|

|
|
|
#8 |
|
Leaky Injector
 Join Date: Sep 2009
Location: Jacksonville, FL
Age: 33
Posts: 141
Trader Rating: (0)
 Feedback Score: 0 reviews
|
Not long after fiberglassing that front bumper back together I lost all interest in the car. It seems to happen once in awhile and it actually took me until about June or July this year to get started again. But here it is finally getting worked on again.
So its been awhile and I finally have had the time and motivation to start working on her again. So I finally put the motor back in the car to see if I could figure out a way to get it to fit under a stock hood. So far thats a no go but I am still trying to figure out a way. 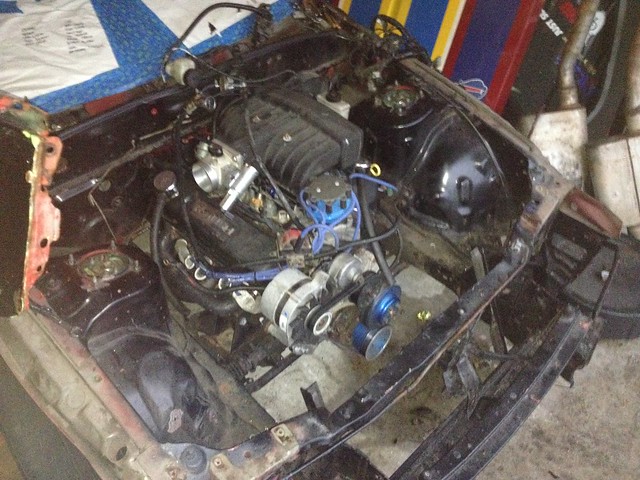 Rx7 project by J Manderville, on Flickr Rx7 project by J Manderville, on Flickr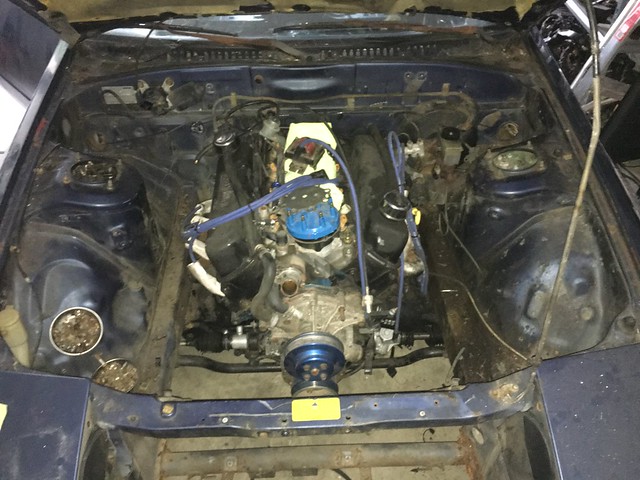 Rx7 project by J Manderville, on Flickr Rx7 project by J Manderville, on FlickrAfter deciding that I needed to move forward and concentrate on something new, I pulled the motor and started to clean her up. 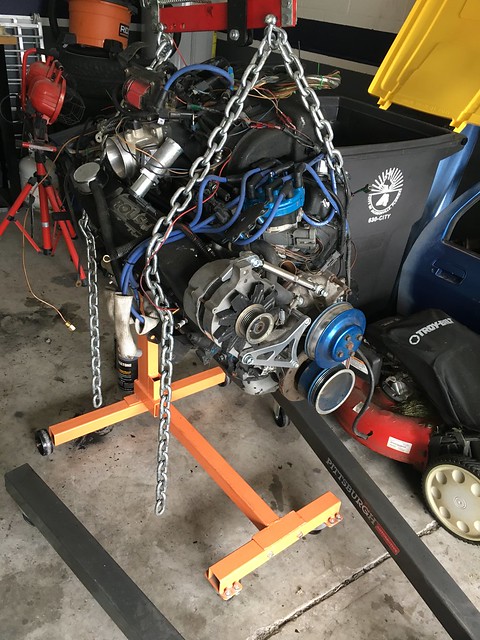 Rx7 project by J Manderville, on Flickr Rx7 project by J Manderville, on Flickrafter scrubbing the trans for awhile it looked like this and then the primer and paint went on. 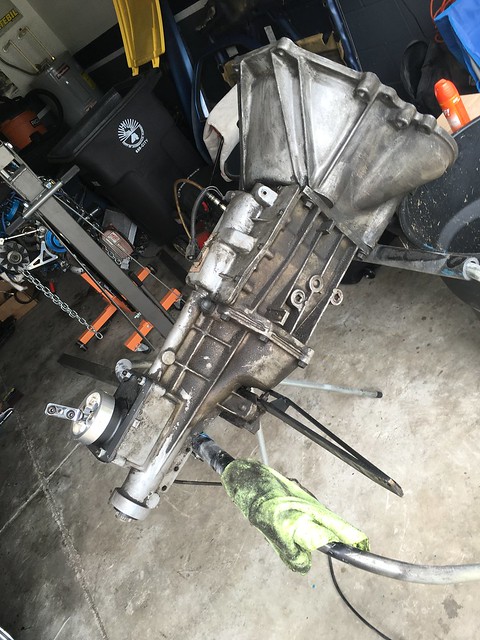 Rx7 project by J Manderville, on Flickr Rx7 project by J Manderville, on Flickr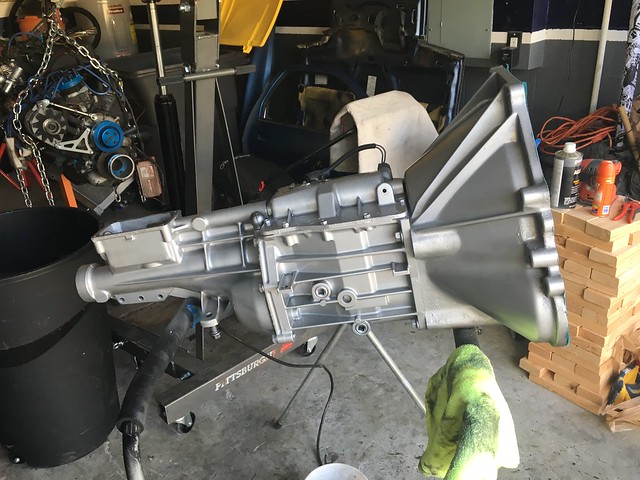 Rx7 project by J Manderville, on Flickr Rx7 project by J Manderville, on FlickrAfter completing the easy part, it was time to move onto the motor. I didn't want to tear it all the way down, I just wanted to replace all the gaskets and really clean it up quite a bit. So out came the scrub brush again and after some hard work I finally got it to this point. Initial Tear down 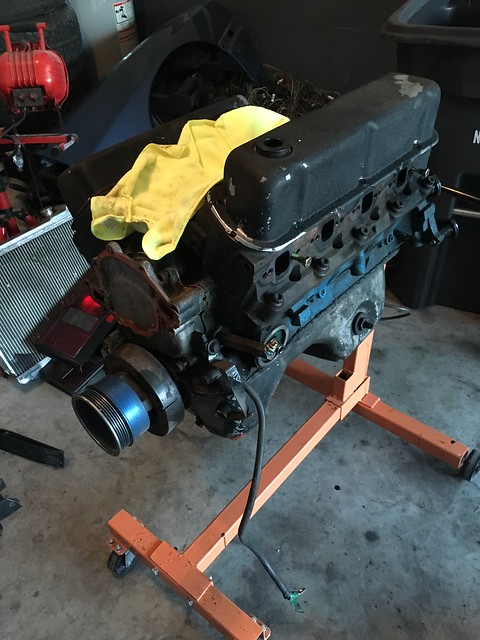 Rx7 project by J Manderville, on Flickr Rx7 project by J Manderville, on Flickrclean and prime 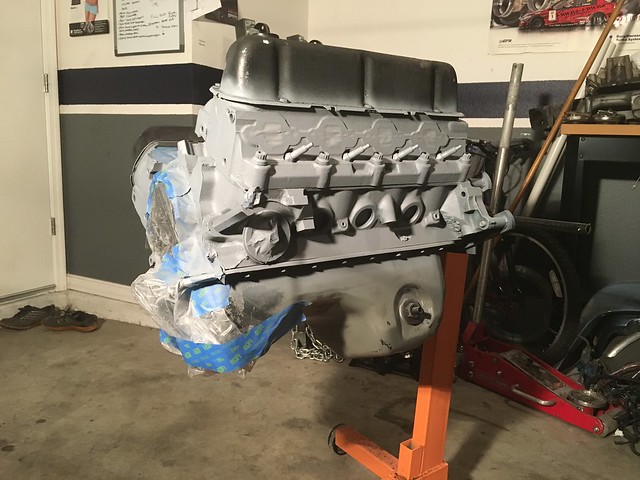 Rx7 project by J Manderville, on Flickr Rx7 project by J Manderville, on Flickrand some silver paint to really make it pop. The valve covers and some pulleys will be sent out for powder coating here soon, so I'm not too worried about the overspray. 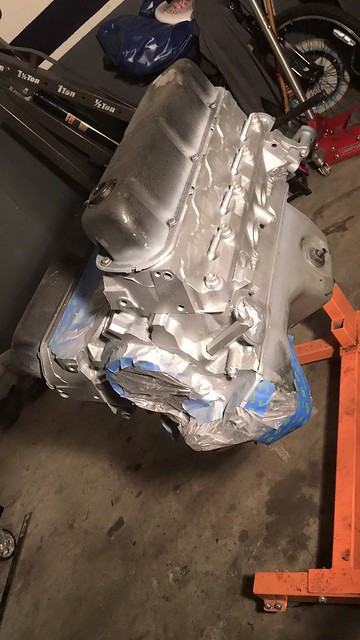 Rx7 project by J Manderville, on Flickr Rx7 project by J Manderville, on FlickrAfter finishing up cleaning the motor I decided it was time to get the rest of the car in order. I was waiting on a ton of parts to come in anyway to finish rebuilding the motor. First things first, cut and weld up the rear quarters for the wide body. I didn't want the normal cutout that people do because I will be driving the car on the street as well as the track so it needed to be closed off to the elements. First thing I did was cut the outer panel off and then sliced the inner panel so that it would be easier to work with. 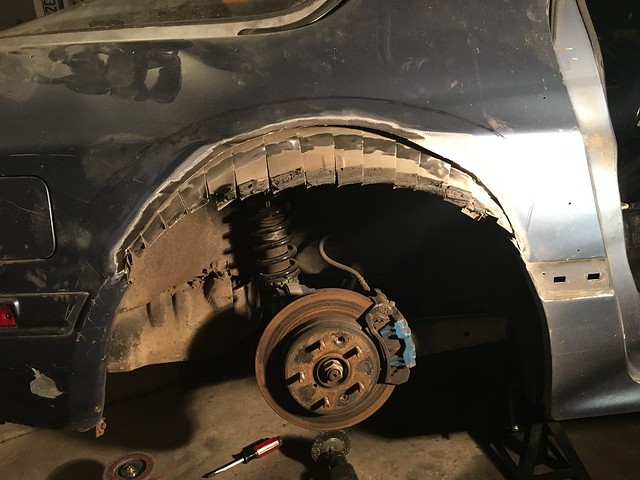 Rx7 project by J Manderville, on Flickr Rx7 project by J Manderville, on FlickrThen I bent all the metal outward and welded the seam and sealed it. 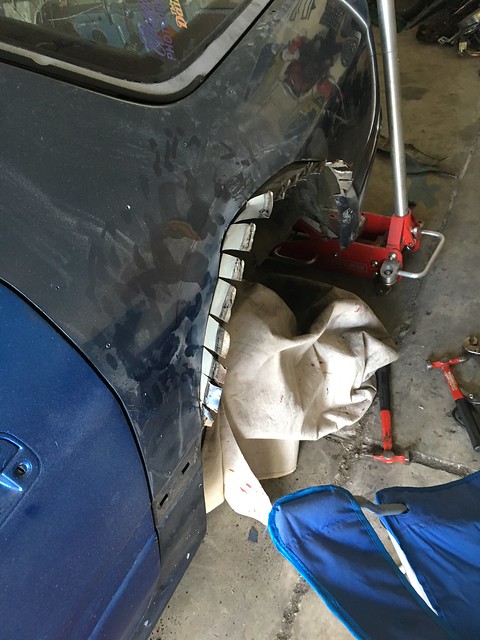 Rx7 project by J Manderville, on Flickr Rx7 project by J Manderville, on FlickrDrivers 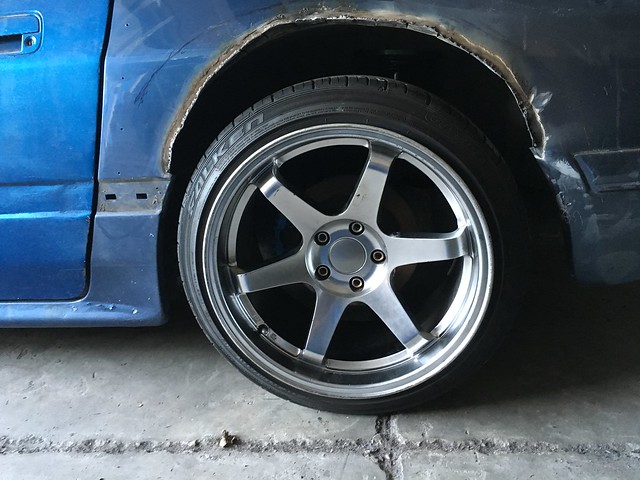 Rx7 project by J Manderville, on Flickr Rx7 project by J Manderville, on FlickrPassengers 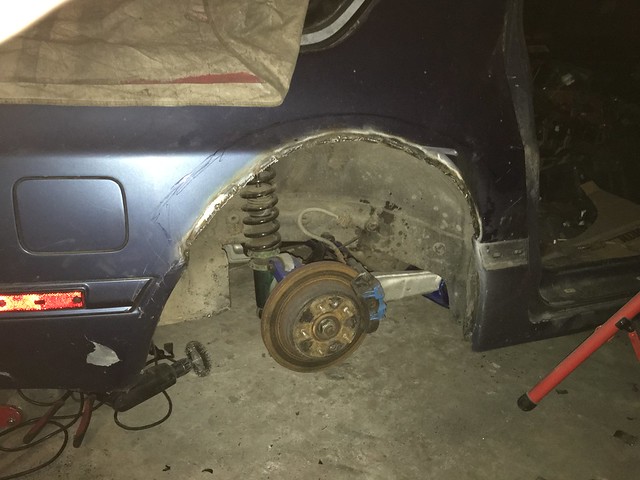 Rx7 project by J Manderville, on Flickr Rx7 project by J Manderville, on FlickrRear panels put back on just to show that nothing can be seen. 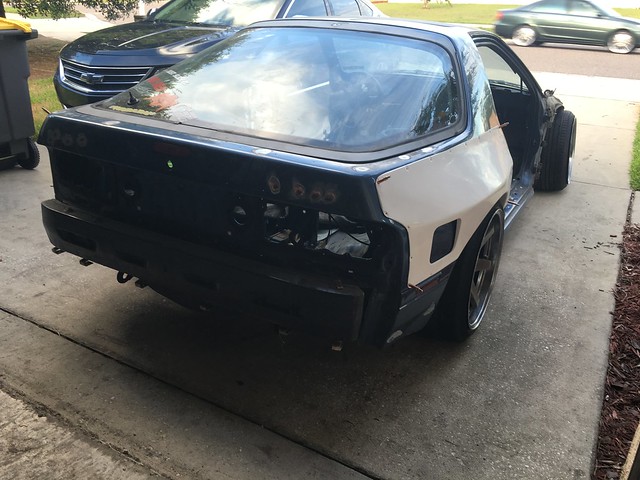 Rx7 project by J Manderville, on Flickr Rx7 project by J Manderville, on Flickr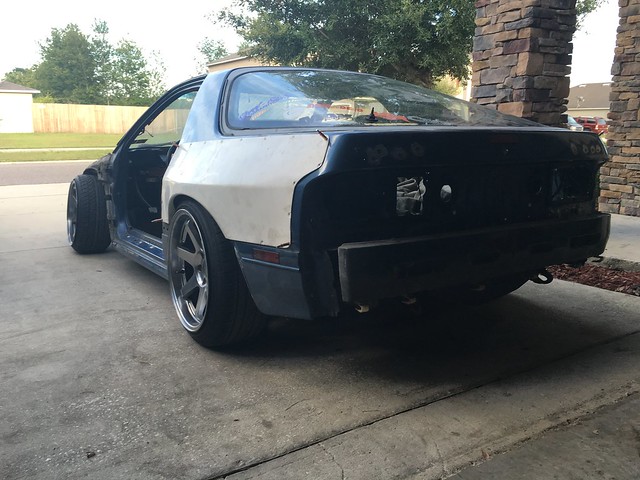 Rx7 project by J Manderville, on Flickr Rx7 project by J Manderville, on FlickrAlso not shown, I ended up ordering an angle kit from the Villains drift team out in Washington state. Really is a simple design but it works great. I can't wait to test it out and drive this thing. |
|
|

|
|
|
#9 |
|
Leaky Injector
 Join Date: Sep 2009
Location: Jacksonville, FL
Age: 33
Posts: 141
Trader Rating: (0)
 Feedback Score: 0 reviews
|
Two week ago I started slowly working on the engine bay, stripping it down and getting ready to weld in a set of tubs. Im taking my time and making sure that everything is perfect side to side. I want the bay to be very clean since most of the time it will be out in the open until I figure out what to do for a hood.
The mandatory "Before" 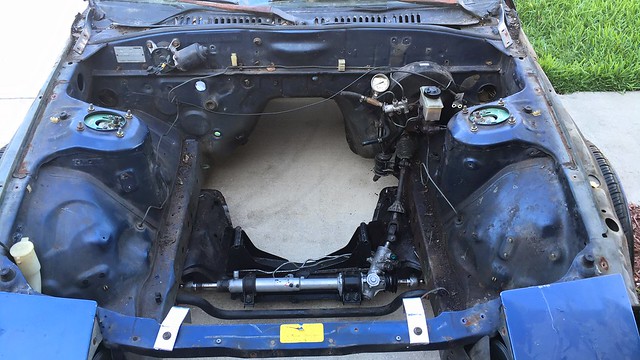 Rx7 project by J Manderville, on Flickr Rx7 project by J Manderville, on Flickrbeginning to cut out the original tubs and realizing that the metal is a bit sharper then my thumb could handle lol. Not a bad cut but just enough to sit there and bleed constantly. Nothing a little tape can't fix right? 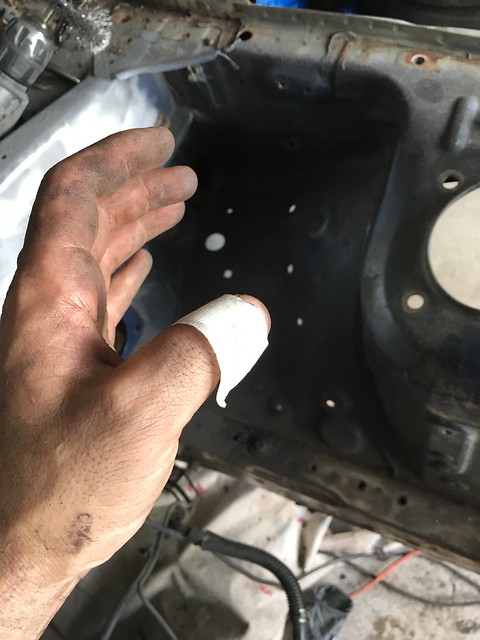 Rx7 project by J Manderville, on Flickr Rx7 project by J Manderville, on FlickrTest fitting the first side, just a note, those "welds" up top are from another shell that I previously sold. The welds were from a flux core welder and looked like absolute garbage. I learned my lesson and they have now been ground off to prepare for the install. 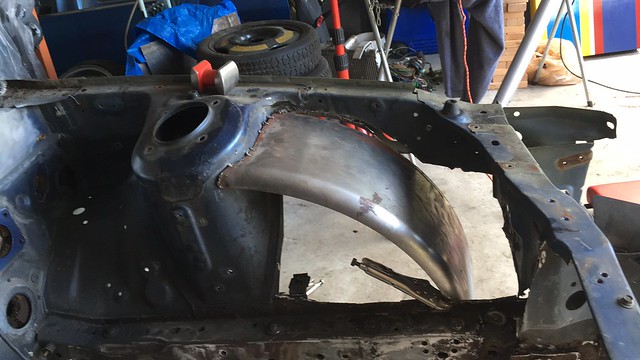 Rx7 project by J Manderville, on Flickr Rx7 project by J Manderville, on FlickrHow I left her two nights ago 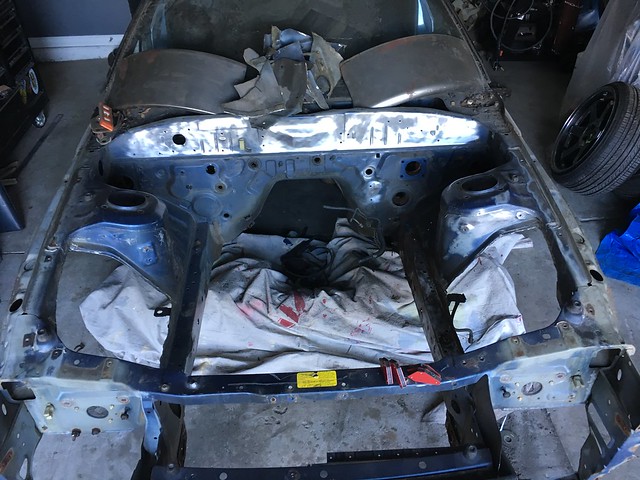 Rx7 project by J Manderville, on Flickr Rx7 project by J Manderville, on FlickrYesterday after work I got home and began working again. First things first, I wanted to verify that I had enough of the factory tubs removed and placed but of the new tubs in place and made sure they were even side to side. As I stated before, I want this thing to look identical side to side since it'll be shown off quite frequently. 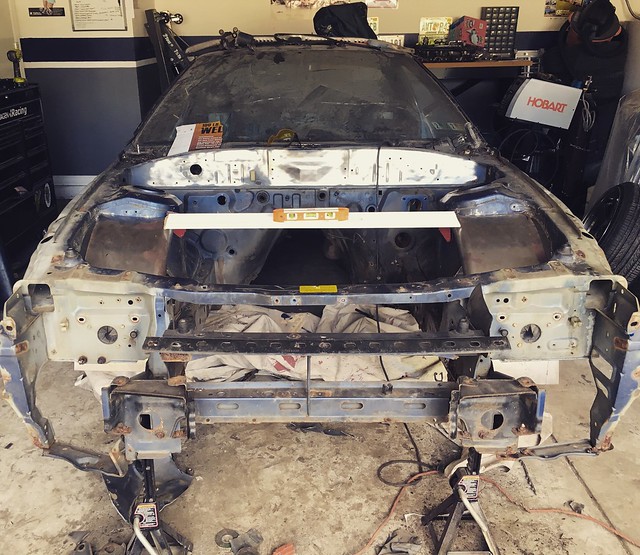 Rx7 project by J Manderville, on Flickr Rx7 project by J Manderville, on FlickrEverything looking pretty good so now its time to strip it all the way down. 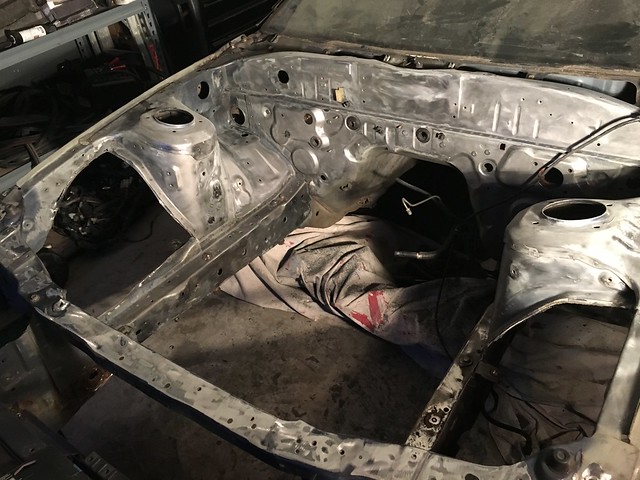 Rx7 project by J Manderville, on Flickr Rx7 project by J Manderville, on FlickrFinally getting close but sick of sanding everything down I decided to tackle another job since the materials finally came in. Instead of running long tube BBK headers this time around I opted for a set of shorties. Going this route will change the amount of torque I end up having but it will allow me to lower the car quite a bit more which in my opinion is a better option. Just a quick before and after. Not too bad for my first time wrapping headers. 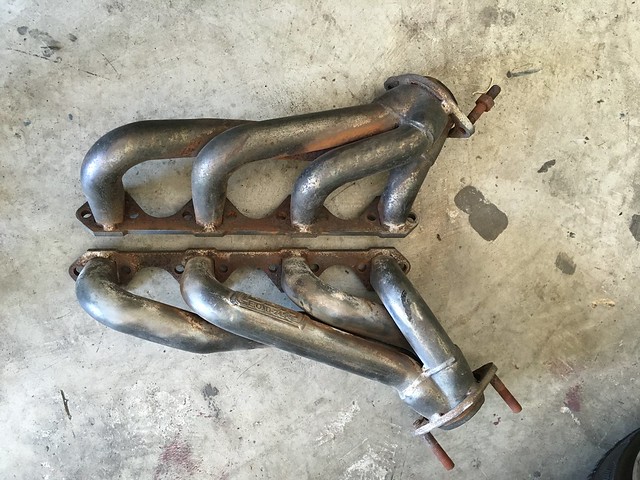 Rx7 project by J Manderville, on Flickr Rx7 project by J Manderville, on Flickr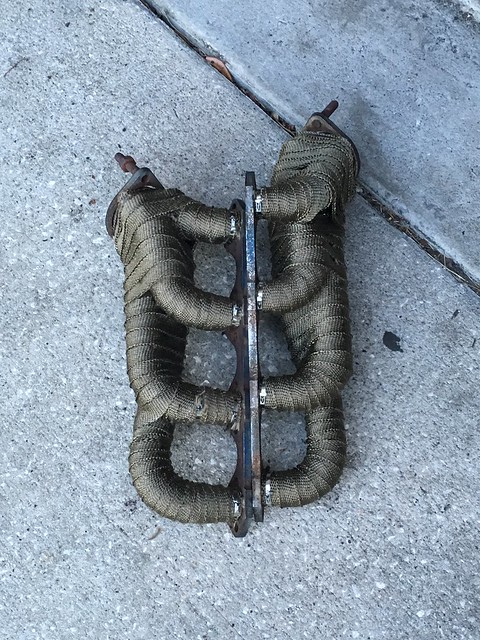 Rx7 project by J Manderville, on Flickr Rx7 project by J Manderville, on Flickr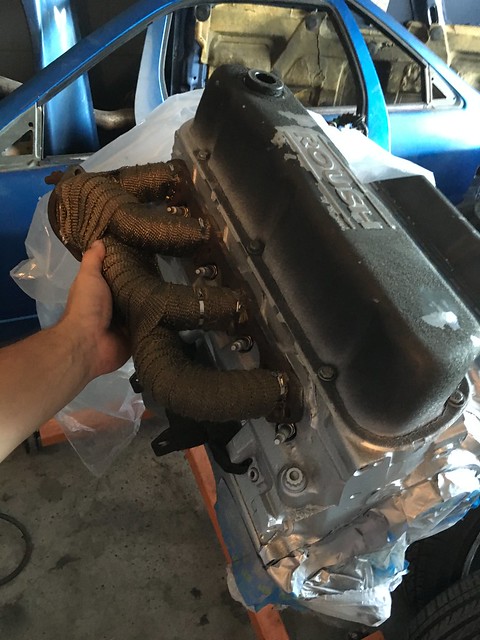 Rx7 project by J Manderville, on Flickr Rx7 project by J Manderville, on FlickrThats all for now but I am working on the car daily so expect more updates to come. If anyone has any comments or suggestions I would love to hear them. |
|
|

|
|
|
#10 |
|
Leaky Injector
 Join Date: Sep 2009
Location: Jacksonville, FL
Age: 33
Posts: 141
Trader Rating: (0)
 Feedback Score: 0 reviews
|
16AUG - The nice thing about Jacksonville Florida is that we actually have a shop dedicated to drifting.. The bad thing is, they can't do any fab work lol, what kind of shop is that??
Ive been working on doing tubs and after a busy weekend I got back to work. Started out making sure everything was nice and level side to side. 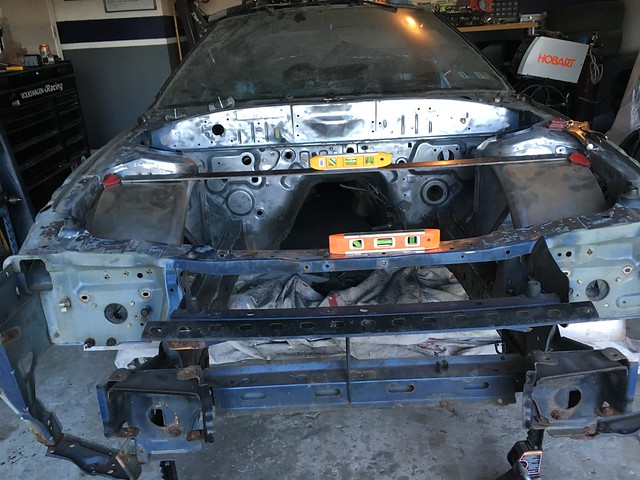 Untitled by J Manderville, on Flickr Untitled by J Manderville, on FlickrFrom there I just started slowly tacking everything into place. Nice and slow and trying to keep everything as clean as possible. Far from perfect but for someone who hasn't done any sort of welding class I would say its not bad at all. 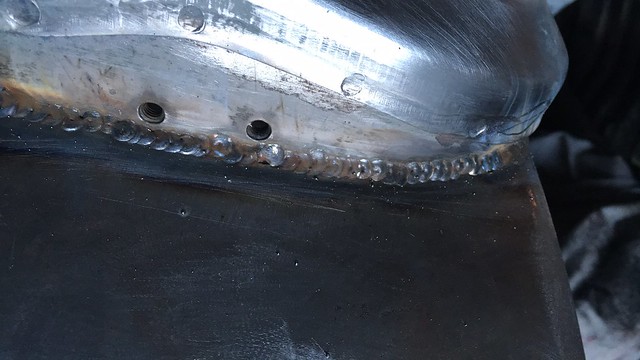 Untitled by J Manderville, on Flickr Untitled by J Manderville, on Flickrboth sides in. 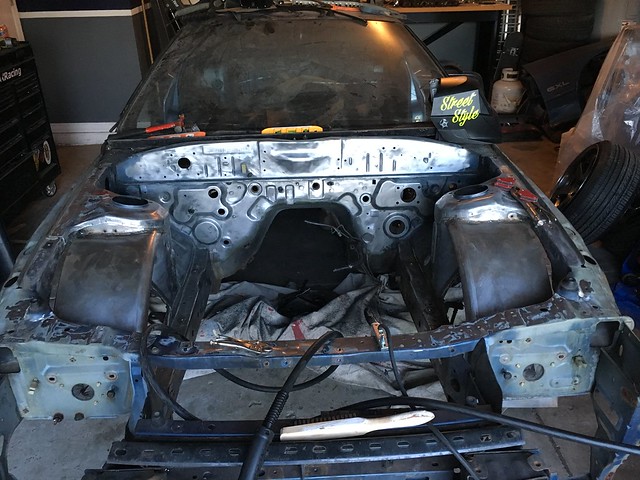 Untitled by J Manderville, on Flickr Untitled by J Manderville, on FlickrBecause I want it to look good I am going nice and slow so heres where I stopped tonight. I started to make templates out of cardboard but I think tomorrow on my way home from work I am going to stop and grab some poster board since its easier to work with. 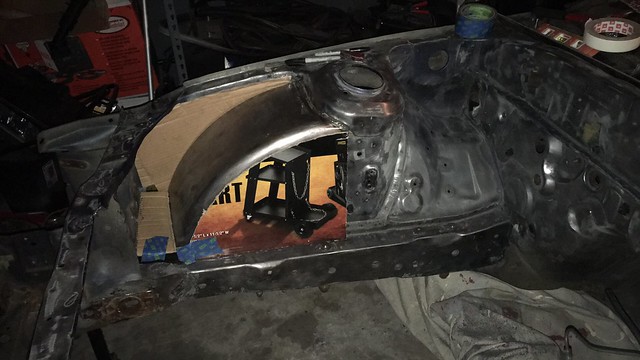 Untitled by J Manderville, on Flickr Untitled by J Manderville, on Flickr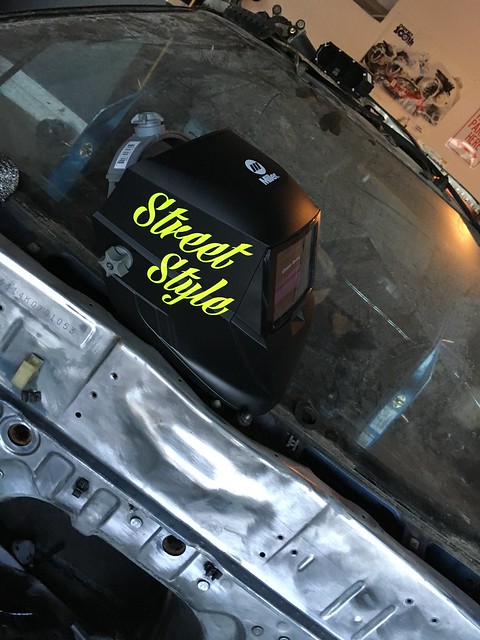 Untitled by J Manderville, on Flickr Untitled by J Manderville, on Flickr |
|
|

|
|
|
#11 |
|
Leaky Injector
 Join Date: Sep 2009
Location: Jacksonville, FL
Age: 33
Posts: 141
Trader Rating: (0)
 Feedback Score: 0 reviews
|
Finally here is the last photos being dumped and the most up to date. Im in Charleston for the weekend for my moms birthday so I will get back to work early next week.
18AUG16 Started on the drivers side and got almost everything Tacked into place. Ill finish it up monday or tuesday this week and move onto cleaning everything up and priming it and painting the bay. 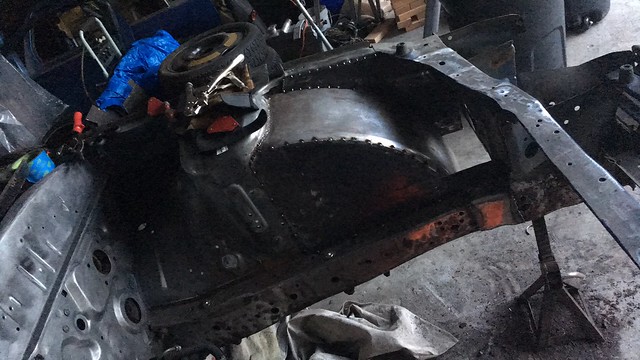 Untitled by J Manderville, on Flickr Untitled by J Manderville, on FlickrSide to side its pretty darn close I must say. 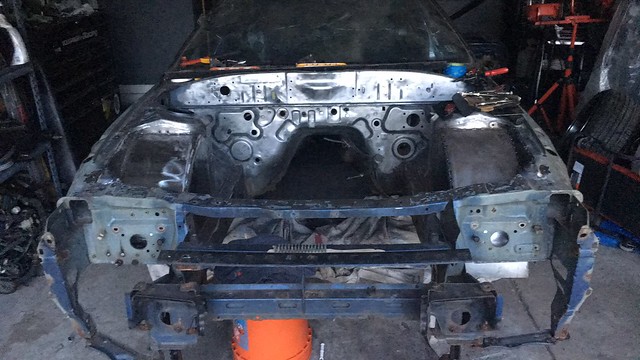 Untitled by J Manderville, on Flickr Untitled by J Manderville, on Flickr |
|
|

|
|
|
#13 |
|
Leaky Injector
 Join Date: Sep 2009
Location: Jacksonville, FL
Age: 33
Posts: 141
Trader Rating: (0)
 Feedback Score: 0 reviews
|
Thanks man, I am being put to shame by Jared and his Le RB-7 but its all in good fun. Maybe for my next one ill build something crazy like his. Or a jz powered Fd if all goes well with this one...
|
|
|

|
|
|
#15 |
|
Leaky Injector
 Join Date: Sep 2009
Location: Jacksonville, FL
Age: 33
Posts: 141
Trader Rating: (0)
 Feedback Score: 0 reviews
|
by far my favorite car ever, if you missed it lol this is my 5th one... On a side note though, Jareds car is making me want to RB swap something so maybe I will do that later on to this car or maybe my BRZ lol goals...
|
|
|

|
|
|
#16 |
|
Leaky Injector
 Join Date: Sep 2009
Location: Jacksonville, FL
Age: 33
Posts: 141
Trader Rating: (0)
 Feedback Score: 0 reviews
|
A little bit of filler and some seam sealer and these tubs will be ready for paint.
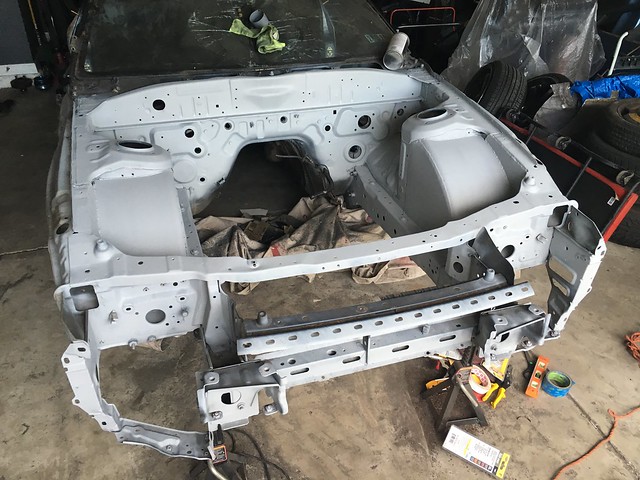 Untitled by J Manderville, on Flickr Untitled by J Manderville, on Flickrcan't wait to get it done and put the motor back in one last time. |
|
|

|
|
|
#20 |
|
Leaky Injector
 Join Date: Sep 2009
Location: Jacksonville, FL
Age: 33
Posts: 141
Trader Rating: (0)
 Feedback Score: 0 reviews
|
I appreciate it man. Slowly getting it to where I want. This was my first time ever doing tubs or any sort of fab work so I am very happy with the results. I have a few ideas of how I will do the next set differently though.
|
|
|

|
|
|
#21 |
|
Leaky Injector
 Join Date: Sep 2009
Location: Jacksonville, FL
Age: 33
Posts: 141
Trader Rating: (0)
 Feedback Score: 0 reviews
|
Haven't had too much time this week and I will be working this weekend so I decided to take advantage of a free night and get my radiator support welded into place. Nothing special but it does allow me to slant the radiator forward and keep it in place. Nice and simple nothing over the top.
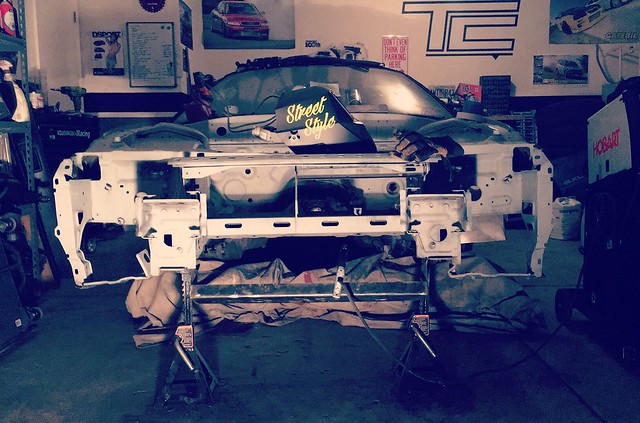 Untitled by J Manderville, on Flickr Untitled by J Manderville, on Flickrand how it looks installed. 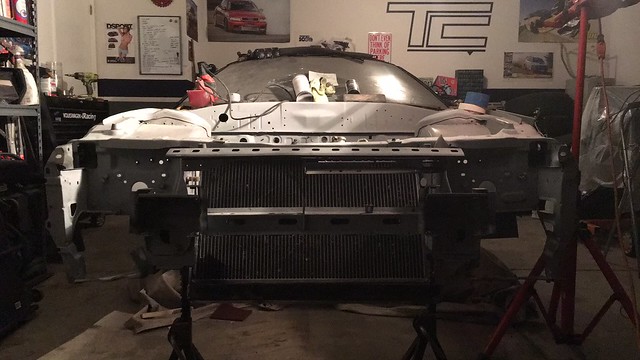 Untitled by J Manderville, on Flickr Untitled by J Manderville, on Flickr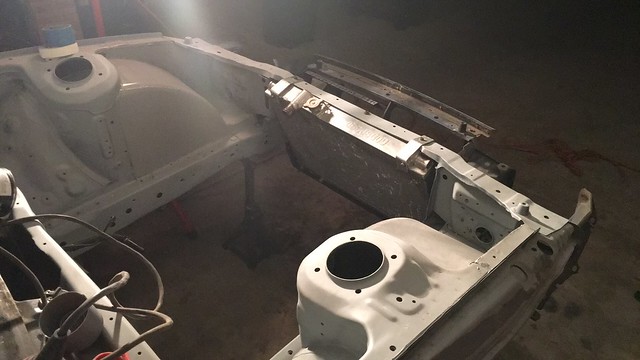 Untitled by J Manderville, on Flickr Untitled by J Manderville, on FlickrThe last thing that I need to do prior to paint is to build a mounting bracket for my oil cooler setup. I need to throw the front bumper into place and make sure that I place it properly into one of the openings. |
|
|

|
|
|
#23 | |
|
Leaky Injector
 Join Date: Sep 2009
Location: Jacksonville, FL
Age: 33
Posts: 141
Trader Rating: (0)
 Feedback Score: 0 reviews
|
Quote:
Stay tuned  |
|
|
|

|
|
|
#24 |
|
Leaky Injector
Join Date: Jun 2016
Location: adelaide australia
Age: 33
Posts: 61
Trader Rating: (0)
 Feedback Score: 0 reviews
|
rad build dude!
having done a LS FC drift car a while back (before my current s14s) i played around with a heap of different lock kits/cut and shut knuckles. do yourself a favour and just order PBMs drop knuckle/LCA combo. by far the best i drove with. |
|
|

|
|
|
#25 | |
|
Leaky Injector
 Join Date: Sep 2009
Location: Jacksonville, FL
Age: 33
Posts: 141
Trader Rating: (0)
 Feedback Score: 0 reviews
|
Quote:
lock kits? as it angle kits? Also do you have any info on how to either weld up a T2 diff or how to put bigger shims in it in order to lock it up better? |
|
|
|

|
|
|
#26 | |
|
Leaky Injector
Join Date: Jun 2016
Location: adelaide australia
Age: 33
Posts: 61
Trader Rating: (0)
 Feedback Score: 0 reviews
|
Quote:
yeah sorry angle kits (im aussie so different terminology haha) i only ever ran a 2 way in mine so cant help with the welding/shimming thing. fairly certain theres a few guides on RX7 club/ausrotary etc to do it. now that i think about it shimming a FC diff shouldnt be any different to a S chassis r200 (could be wrong there however) |
|
|
|

|
|
|
#27 | |
|
Leaky Injector
 Join Date: Sep 2009
Location: Jacksonville, FL
Age: 33
Posts: 141
Trader Rating: (0)
 Feedback Score: 0 reviews
|
Quote:
Thanks again for the kind words and I will be sure to keep this updated. |
|
|
|

|
|
|
#29 | |
|
Leaky Injector
 Join Date: Sep 2009
Location: Jacksonville, FL
Age: 33
Posts: 141
Trader Rating: (0)
 Feedback Score: 0 reviews
|
Quote:
On a side note, with all of the suspension upgrades since the last time I drove the car you really shouldn't notice too much of a weight difference. We shall see though. |
|
|
|

|
|
|
#30 |
|
Leaky Injector
 Join Date: Sep 2009
Location: Jacksonville, FL
Age: 33
Posts: 141
Trader Rating: (0)
 Feedback Score: 0 reviews
|
I ordered these spacers from Xcessive Manufacturing. They are one inch spacers for the subframe and I am really hoping they will give me enough clearance to run the factory hood.
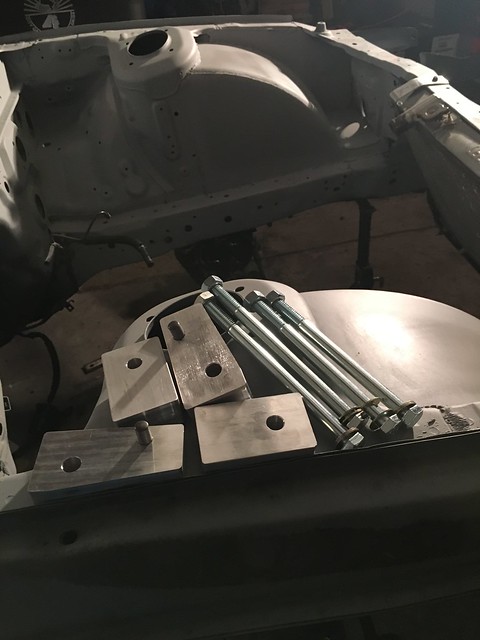 by J Manderville, on Flickr by J Manderville, on FlickrThen threw the wheels back on to see how everything fit and see the new angle now that the tubs were completed. 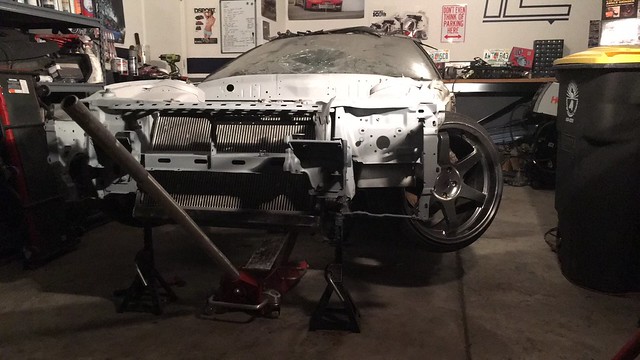 by J Manderville, on Flickr by J Manderville, on Flickr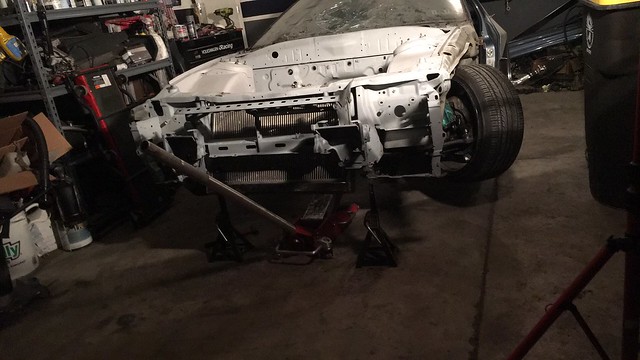 by J Manderville, on Flickr by J Manderville, on FlickrLast but not least since I am now waiting to throw some real primer on the bay so that I can wet sand and paint it, I decided that I might as well throw on the bumper and fenders just to see who my clearance is. Before anyone says it, I know that I need to bring the rear end down some more. 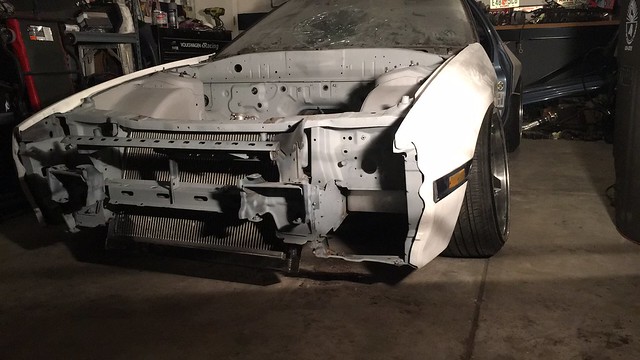 Untitled by J Manderville, on Flickr Untitled by J Manderville, on FlickrPassenger fender fitment 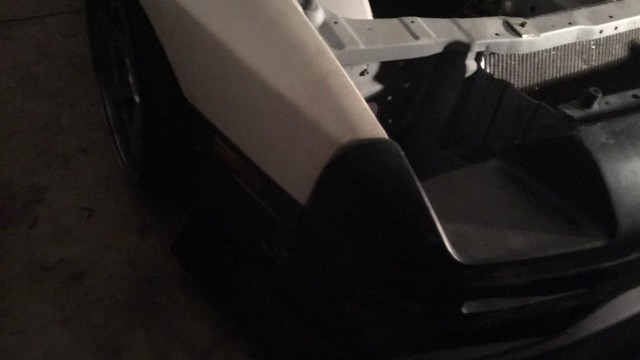 Untitled by J Manderville, on Flickr Untitled by J Manderville, on FlickrDrivers 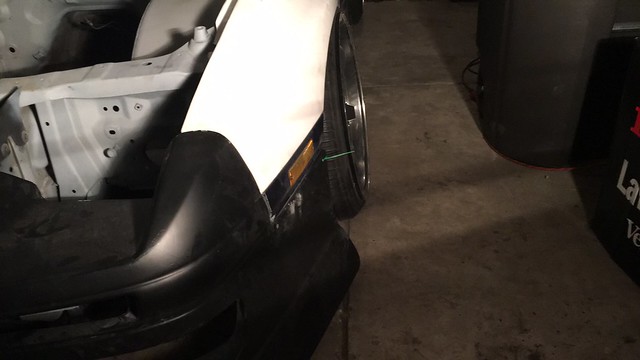 Untitled by J Manderville, on Flickr Untitled by J Manderville, on FlickrHere you can see how much I had to widen the front bumper in order to make it fit decent.. Some of these replica kits are absolutely ridiculous. 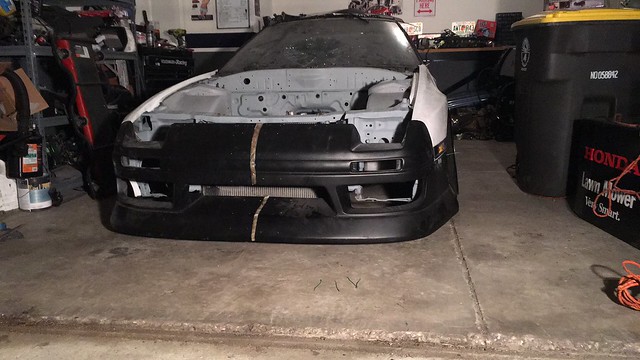 Untitled by J Manderville, on Flickr Untitled by J Manderville, on Flickr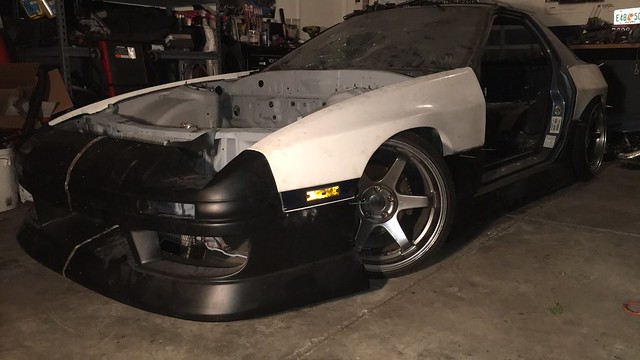 Untitled by J Manderville, on Flickr Untitled by J Manderville, on Flickr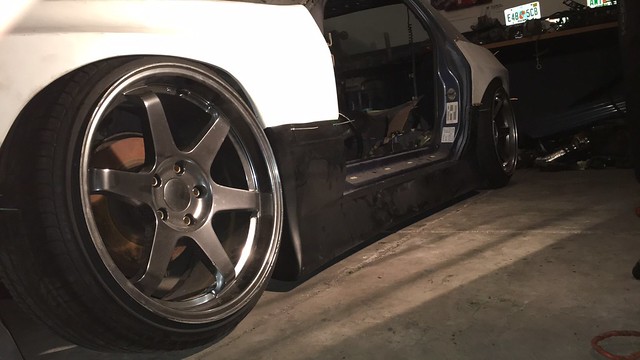 Untitled by J Manderville, on Flickr Untitled by J Manderville, on Flickr |
|
|

|
 |
| Bookmarks |
| Thread Tools | |
| Display Modes | |
|
|