
 |
|
|||||||
| Home | Rules & Guidelines | Register | Member Rides | FAQ | Members List | Social Groups | Calendar | Mark Forums Read |
| Builds (and builds only) Got a build thread? It goes here, build threads anywhere else on the forum will be locked and never moved. |
 |
|
|
Thread Tools | Display Modes |
|
|
#1 |
|
Leaky Injector
Join Date: Feb 2009
Location: Arnhem, the Netherlands
Age: 31
Posts: 92
Trader Rating: (0)
      Feedback Score: 0 reviews
|
S14 kouki + project from the Netherlands
Hi everybody!
Normally i only read the topics here on Zilvia. I'm also having a project so i thought I also share it with you guys. This is my 1997 Nissan 200sx S14a (i'm from Europe, the Netherlands) so with the SR20DET. I bought this car in 2008, so I already got the car a few years. Last year I decided to do a big makeover, because there was also a bit rust and other things. I bought the car with 124.000km, I used the car as my daily driver the last 7 years, when I started my project the km-counter was at 300.000km. The engine still runs great!  Currently only the basic engine mods like, more boost, fmic, exhaust etc. Currently only the basic engine mods like, more boost, fmic, exhaust etc.My plan is to have the car up and running in the beginning of next year. The bodywork has to be done. Somewhere next year i'm rebuilding the engine with more engine modifications. 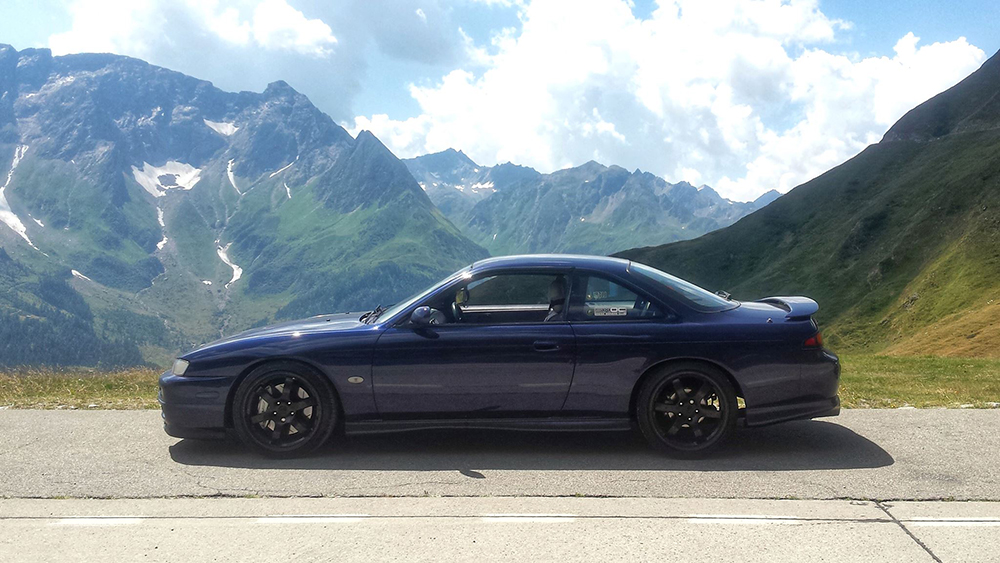    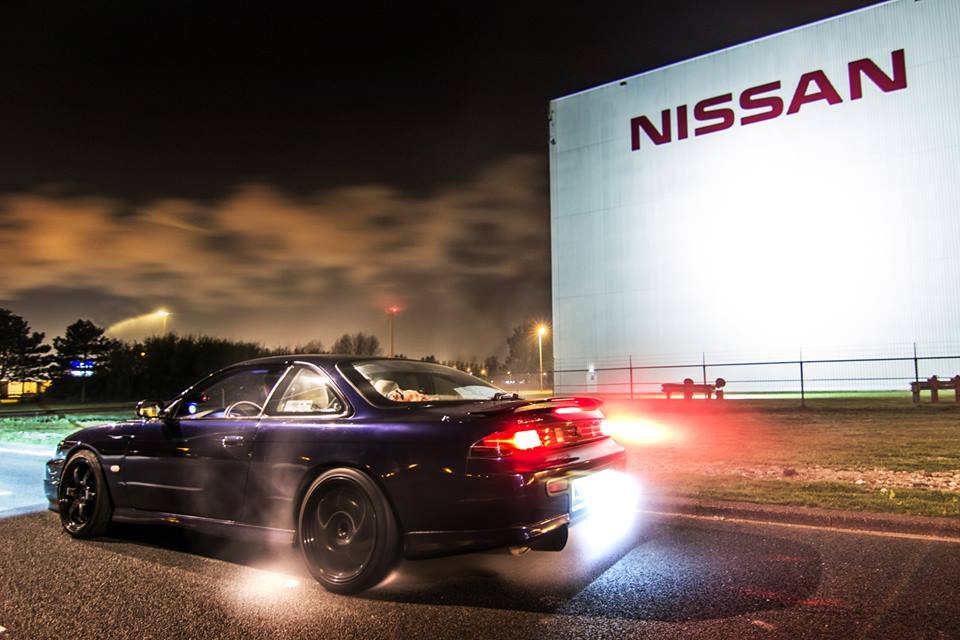 My plans for the outside are a jdm kouki front/end with wide fenders and enkei rpf1 wheels. After the build it will be a streetcar again so it has to be functional again so I will keep the same ride height. Here I made a photoshop impression before I started. 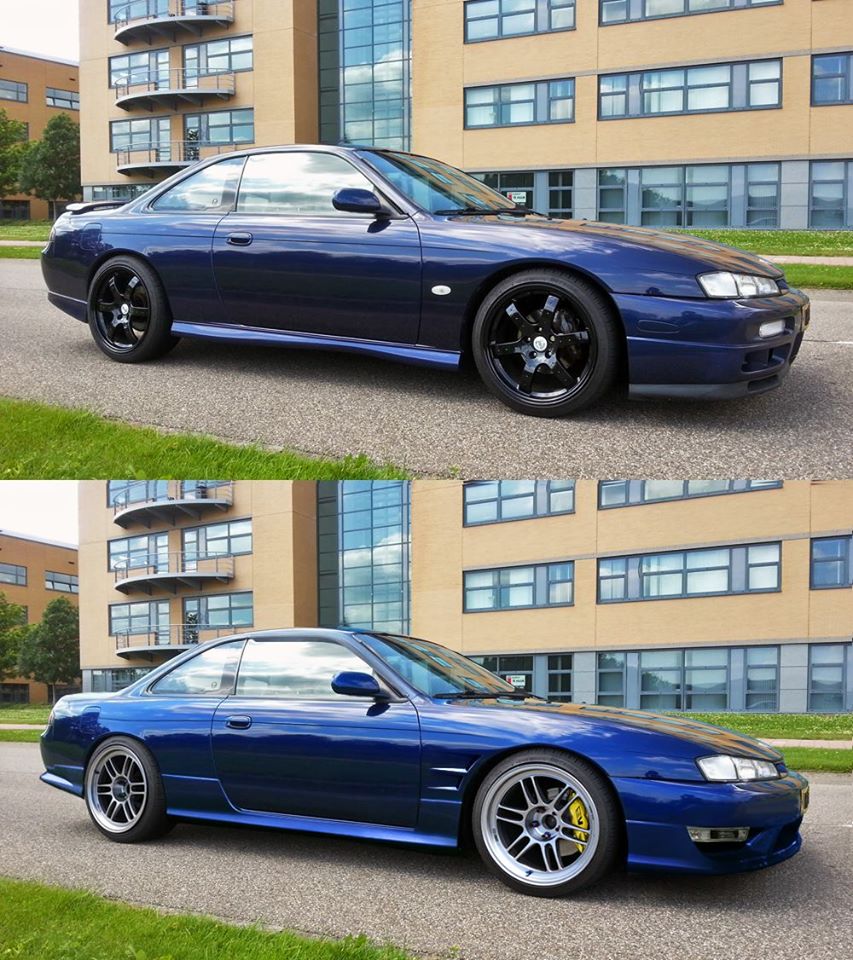 The day I started 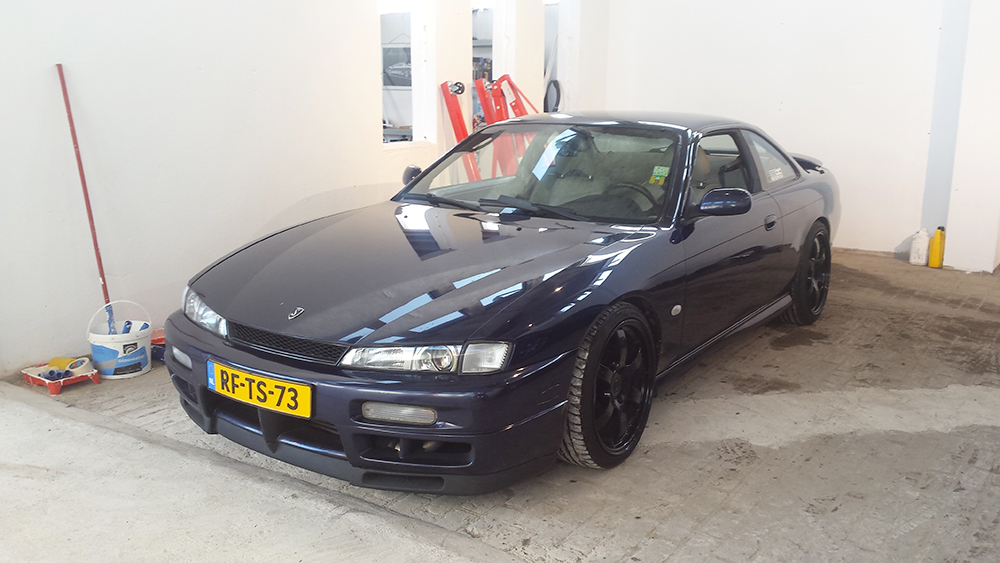 Alof of rusted bolts/nuts, hate it  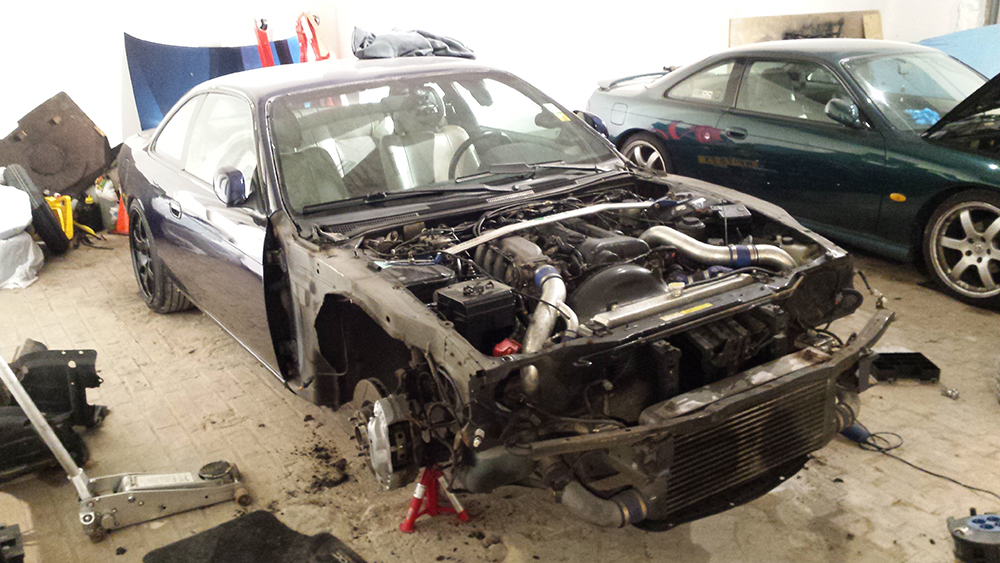 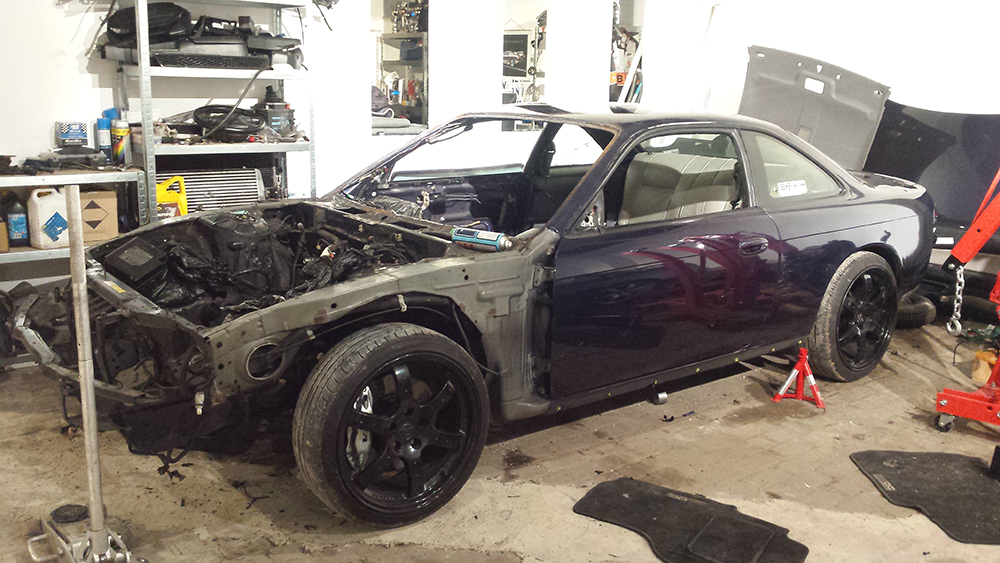 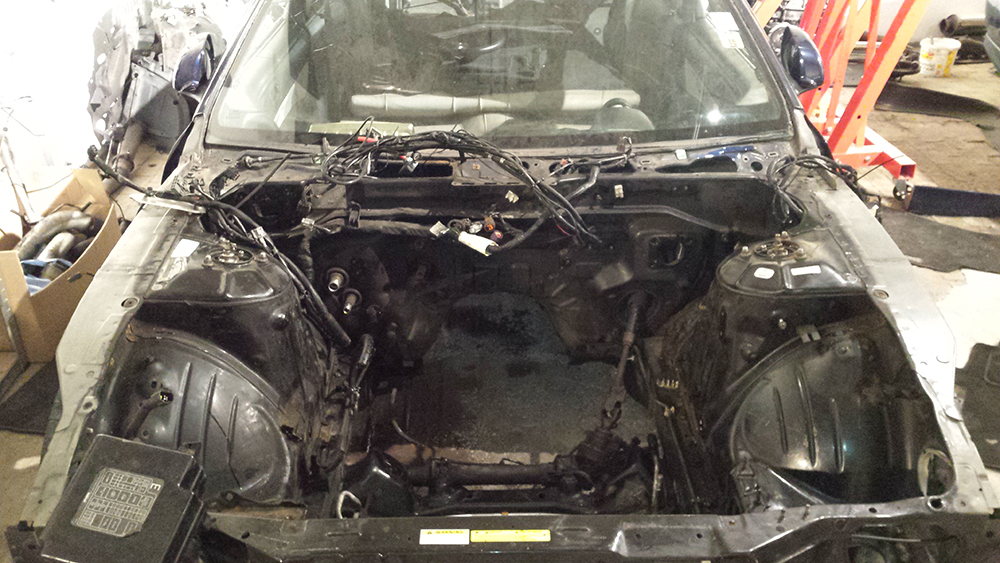 Recieved the frp parts, front +25mm, rear +50mm, frp navan style skirts 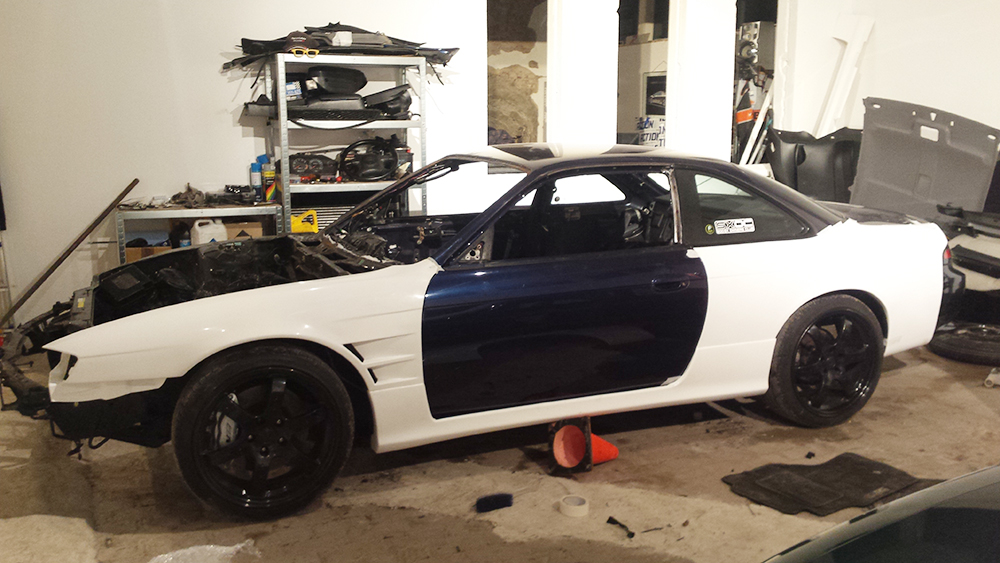  jdm folding mirrors, i'm gonna convert these to LHD and combine them with the europe mirrors so then I got heated mirrors + electric folding option 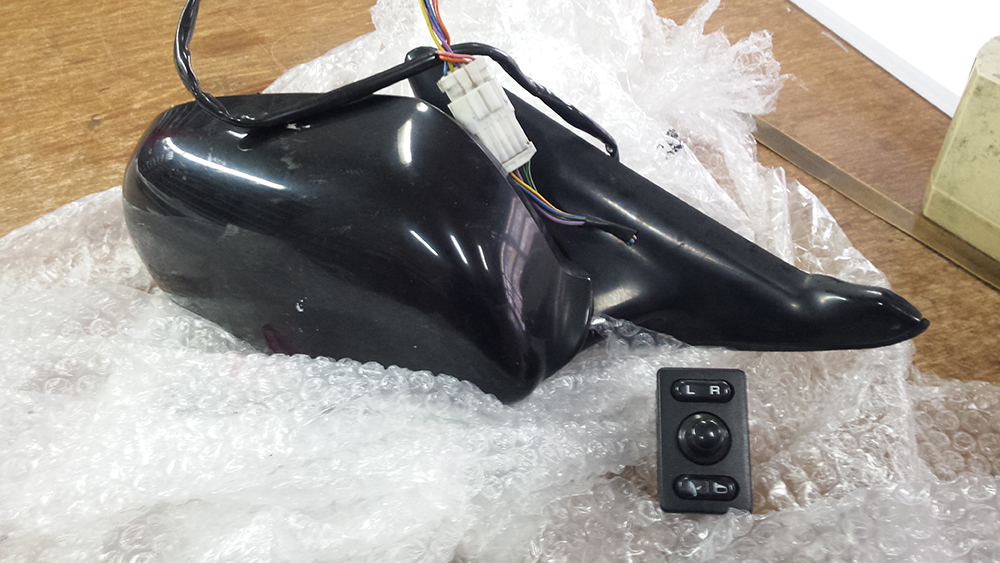 Going to the welder for some work 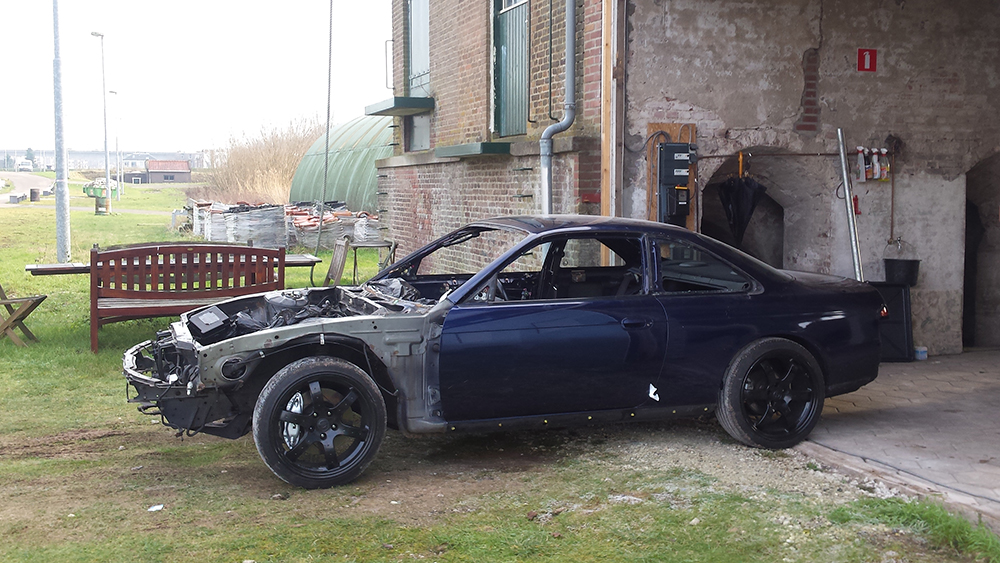 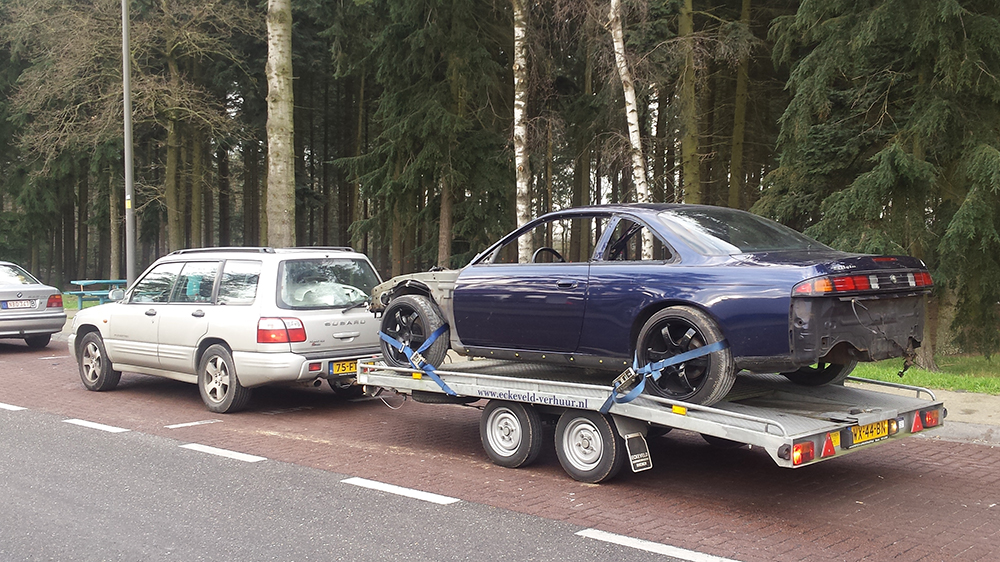 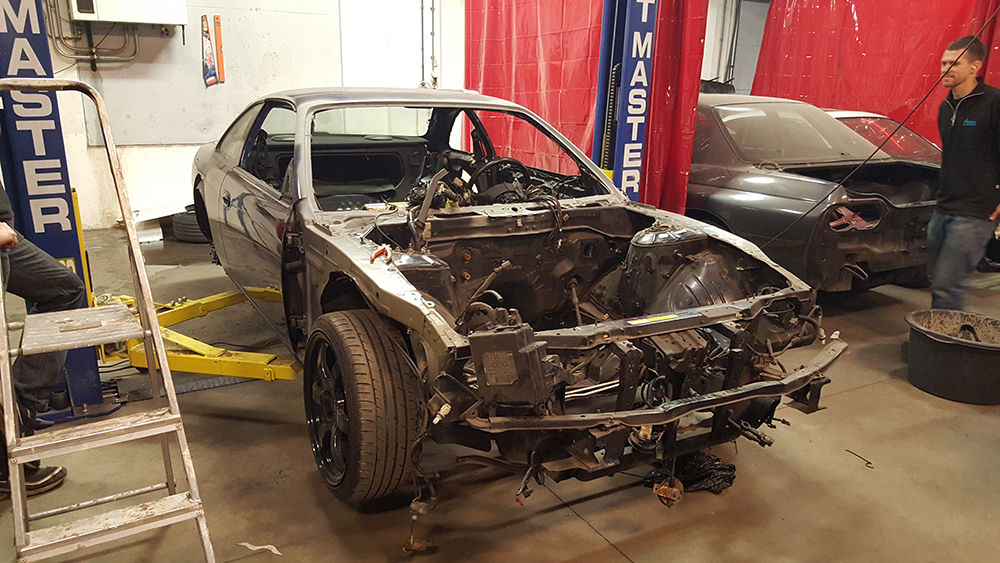 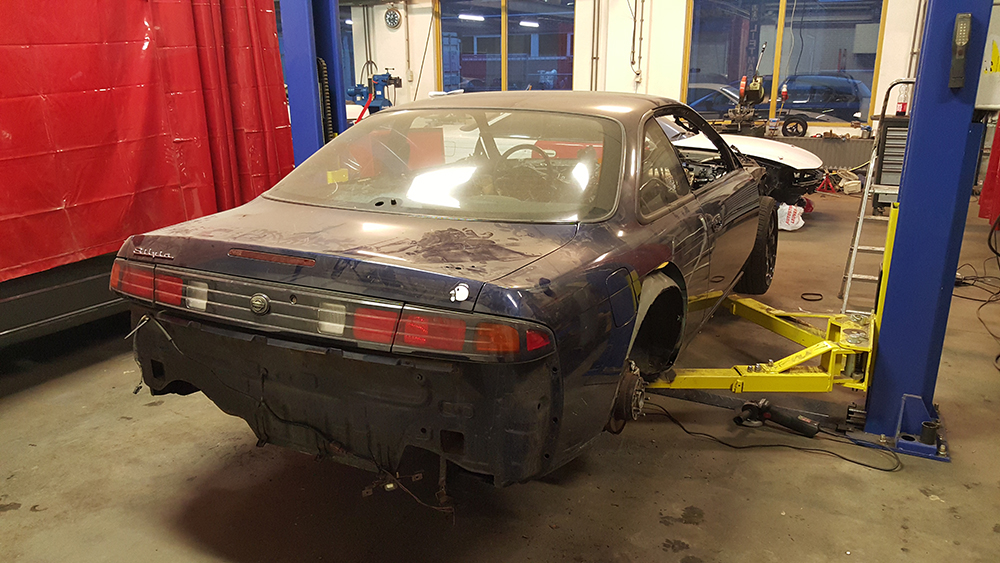 As there was also alot of rust in the engine bay, we decided to make tubs. Also new door sills, modified rear arches and welded some other places with rust.   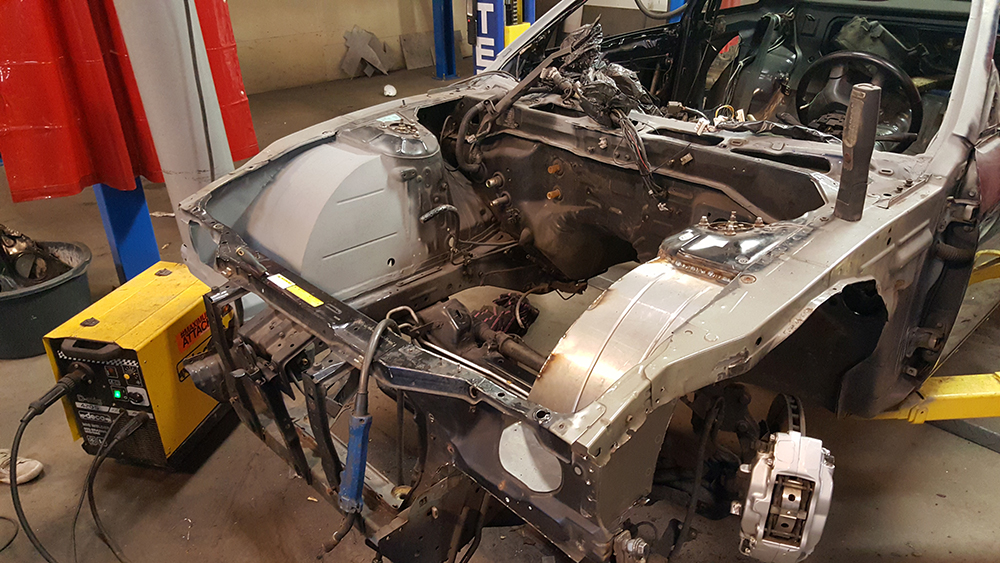 New doorsils   Creating new rear wheel tubes  Cleaned and sealed the bottom 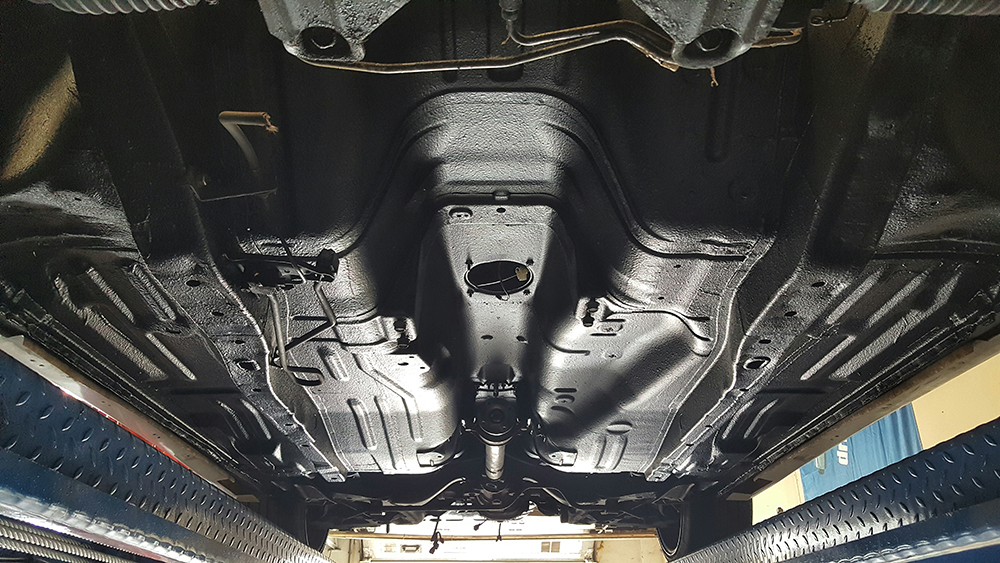 Going back home! 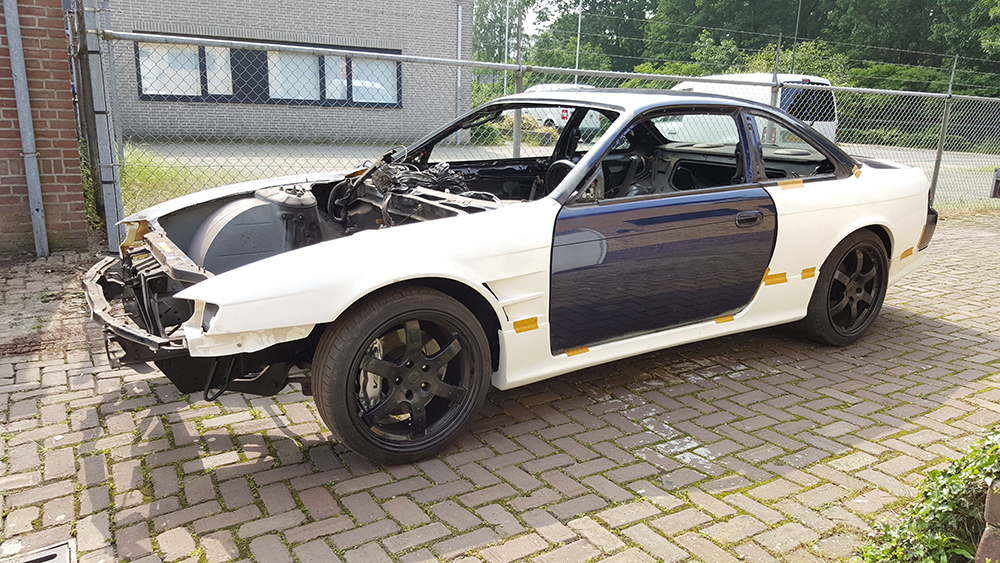 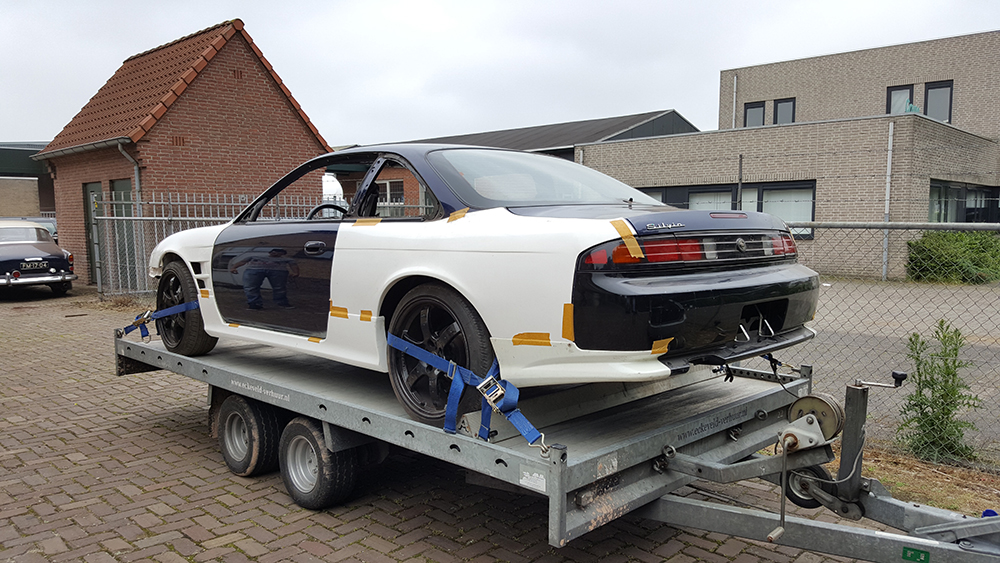 Last edited by CHiNo4ReaL; 12-15-2016 at 02:33 AM.. |
|
|

|
| Sponsored Links |
|
|
#3 |
|
Leaky Injector
Join Date: Feb 2009
Location: Arnhem, the Netherlands
Age: 31
Posts: 92
Trader Rating: (0)
      Feedback Score: 0 reviews
|
Thanks!
Back from the welder, trying out the frp wide/overfenders and navan style skirts. The fitment is quite good, but not as perfect as I want so it needs modifications. 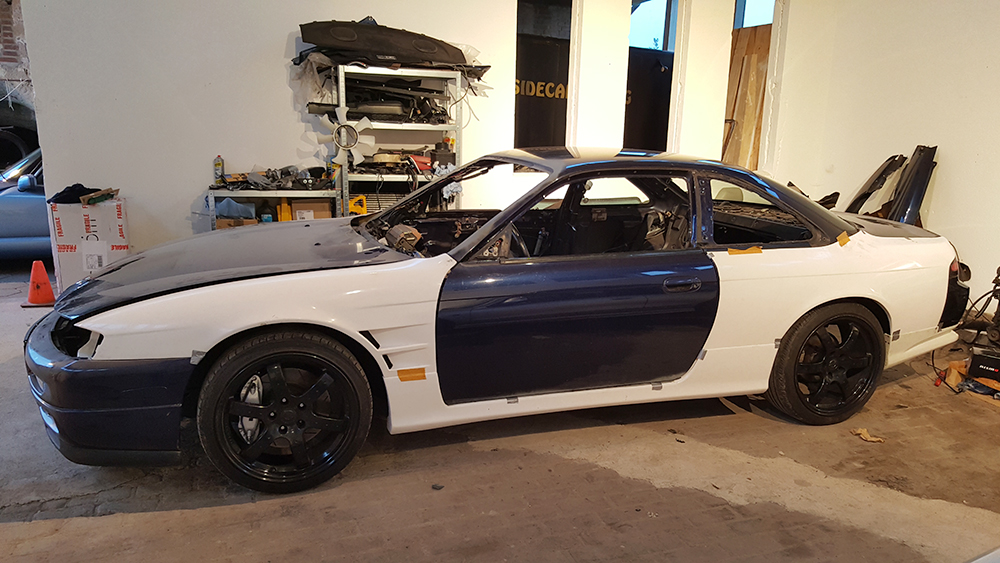 Started with the front fenders 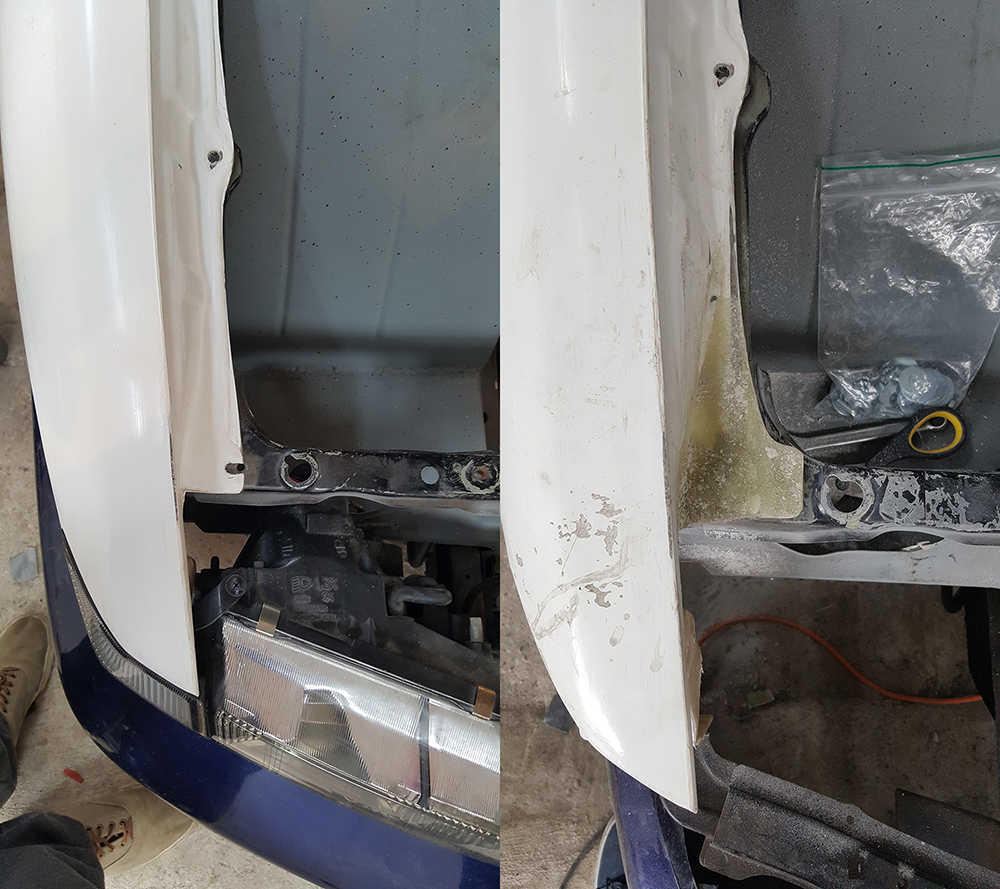 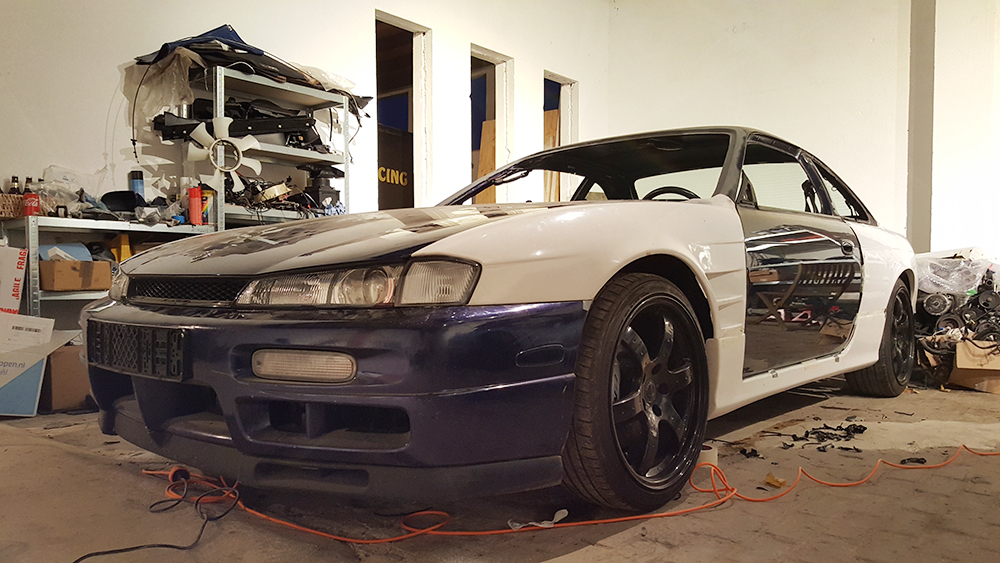 I don't like fenders that doesn't cover the whole fender, so I also modified the overfenders for full fitment 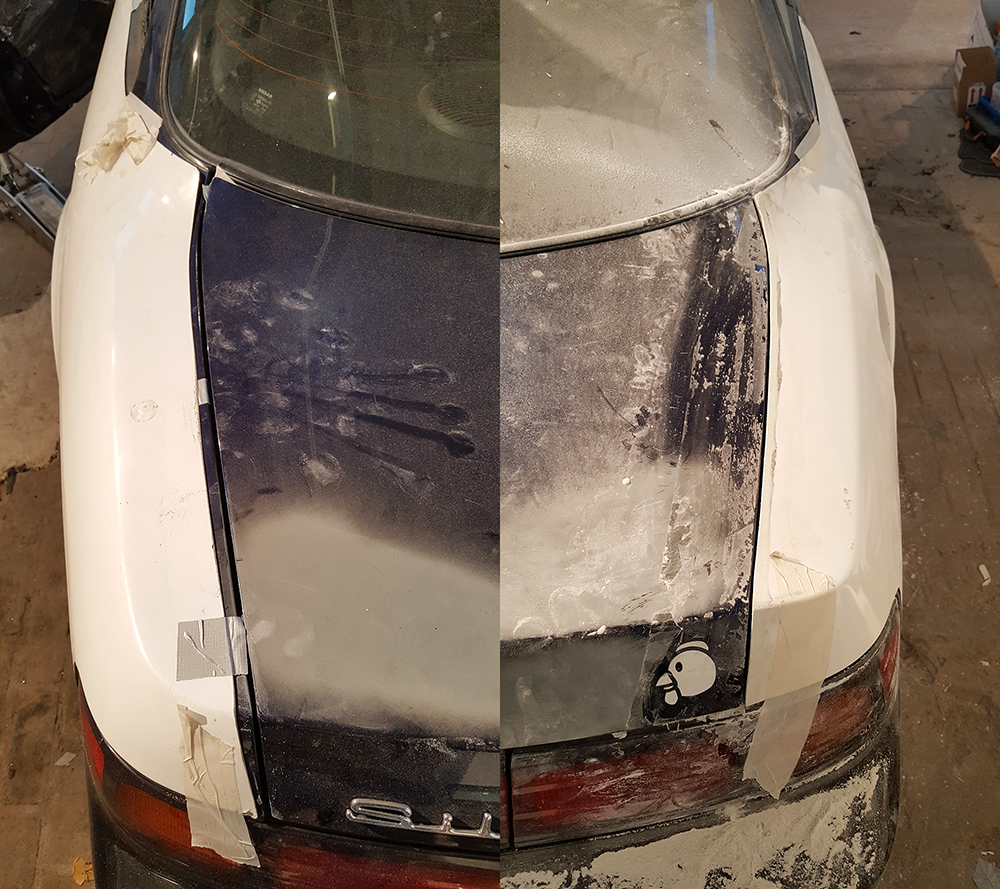 I searched a long time, but I found a jdm k's bumper with lip in Japan. It took a while but I was very happy when I got it hehe. It was in great condition! 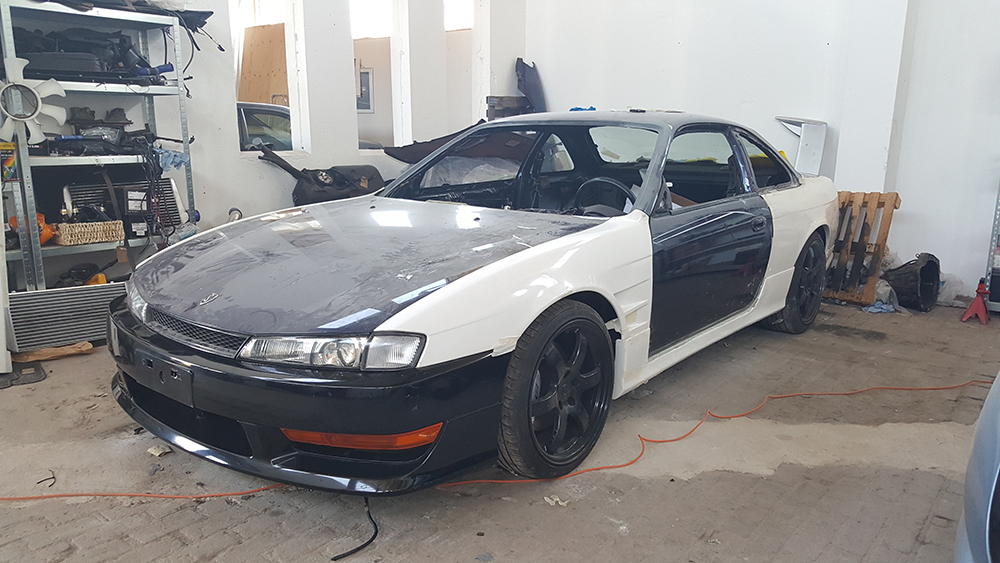 Dyed the original carpet black, also made a suede roofliner. I want everything black in the interior except the seats.  Nismo stuff 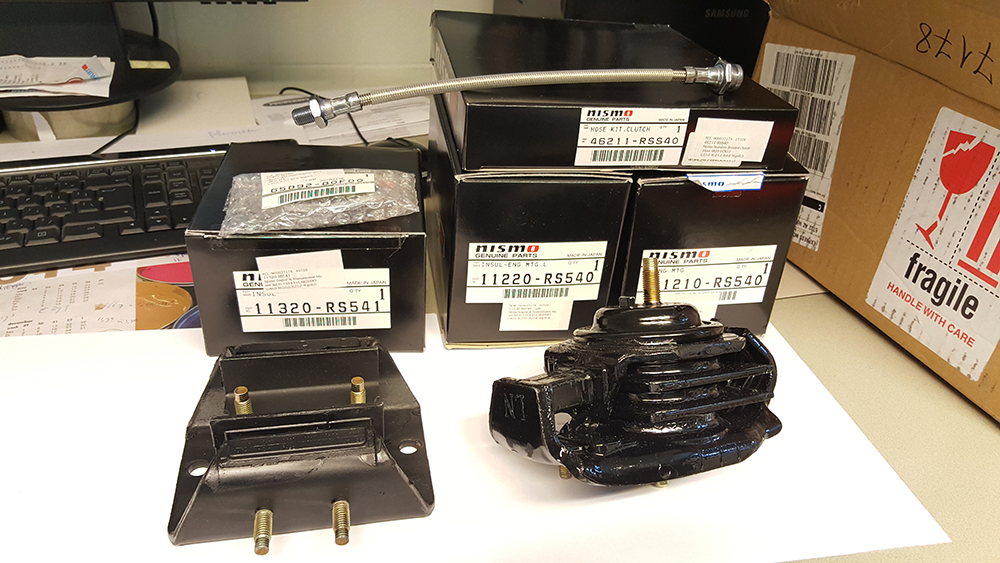 After the bumper I also recieved my new Enkei rpf1 wheels, 18x9.5 and 18x10.5. It took 4 months  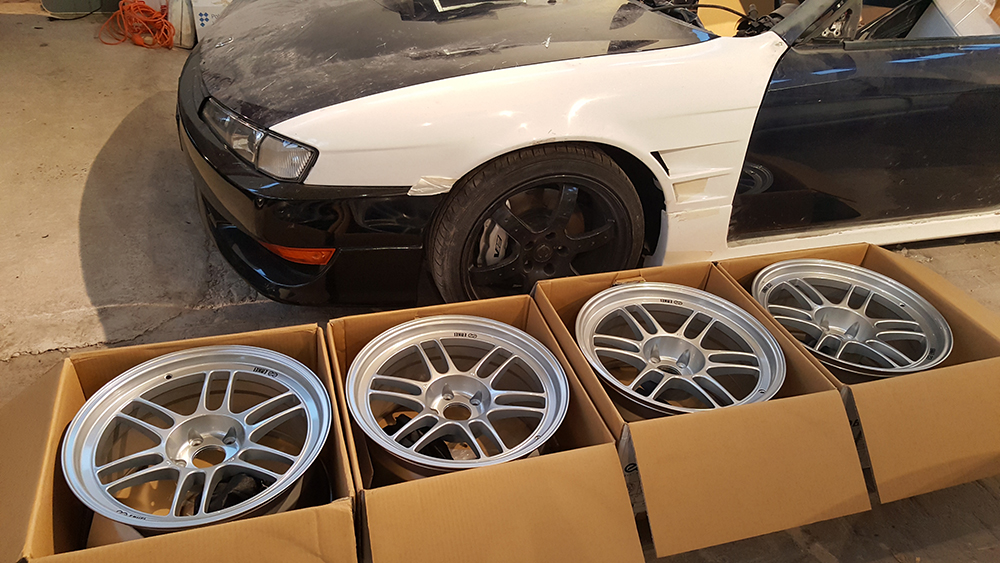 The enkei's will be wrapped in federal semi's 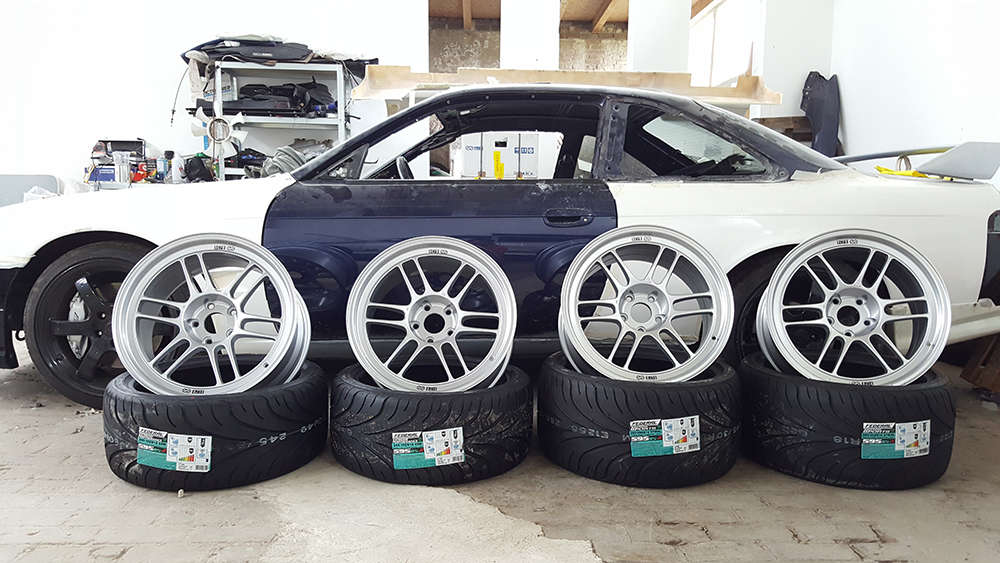 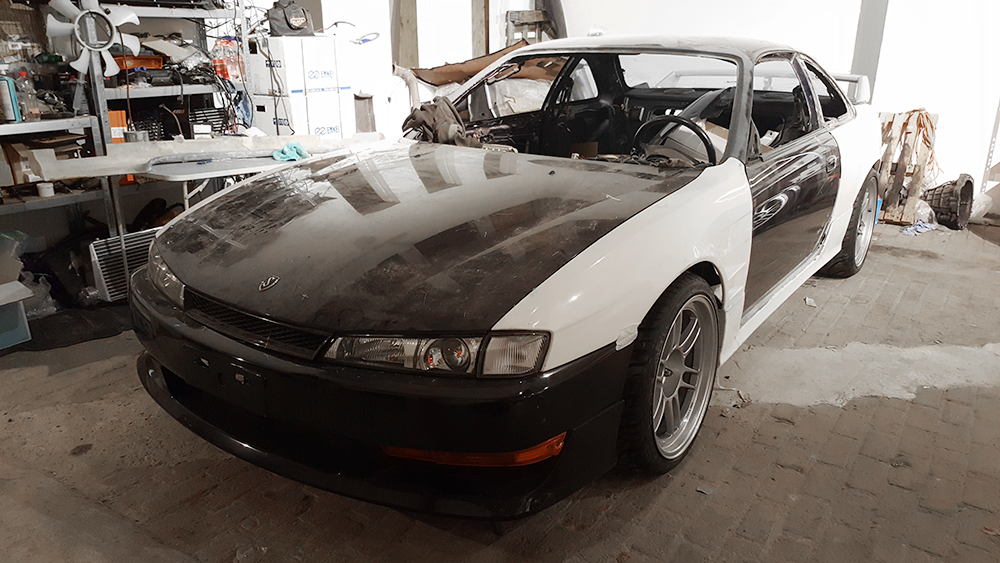 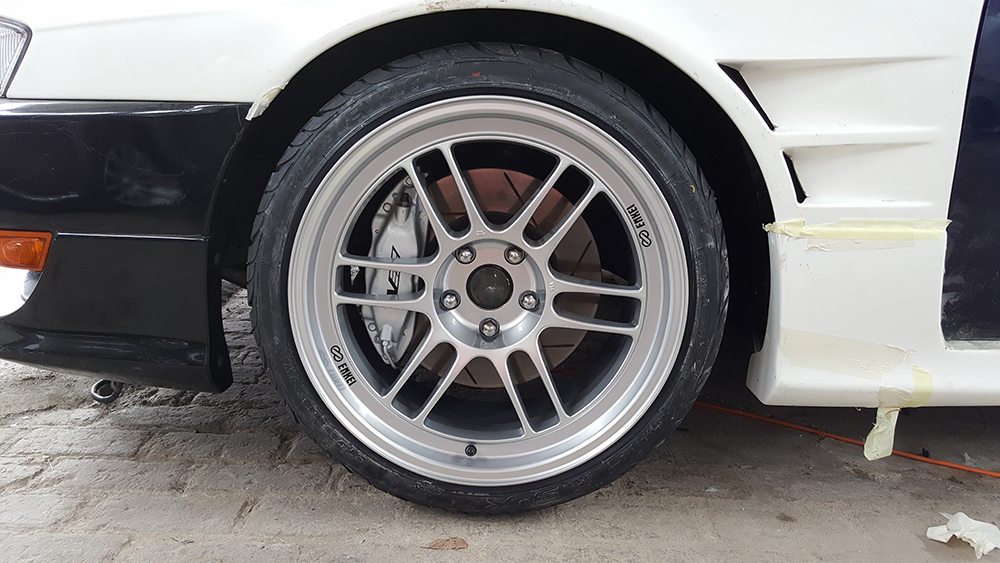 After that it was time for more FRP work for the perfect fitment. I don't want to use rivits for the rear fenders, they will be attached with kit. 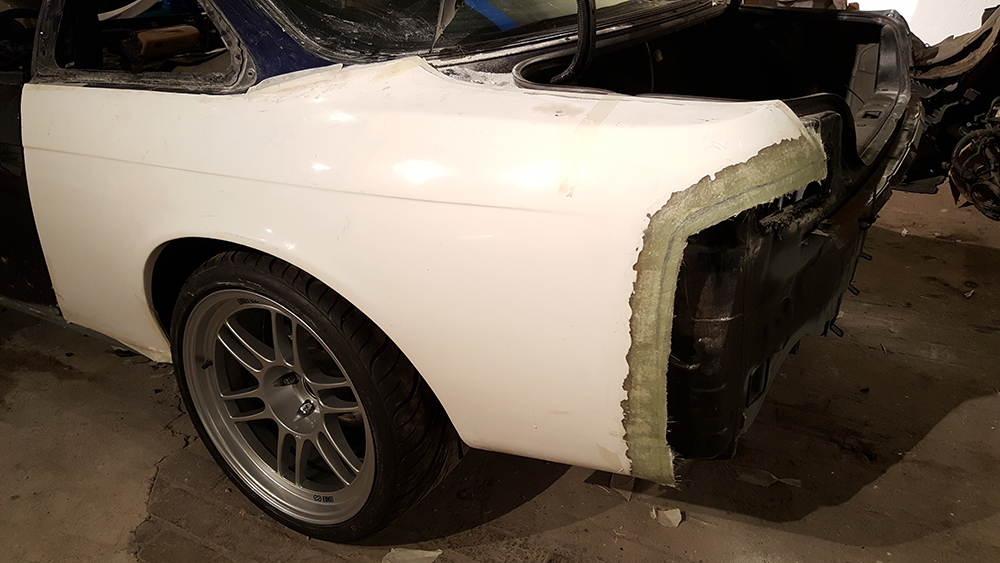 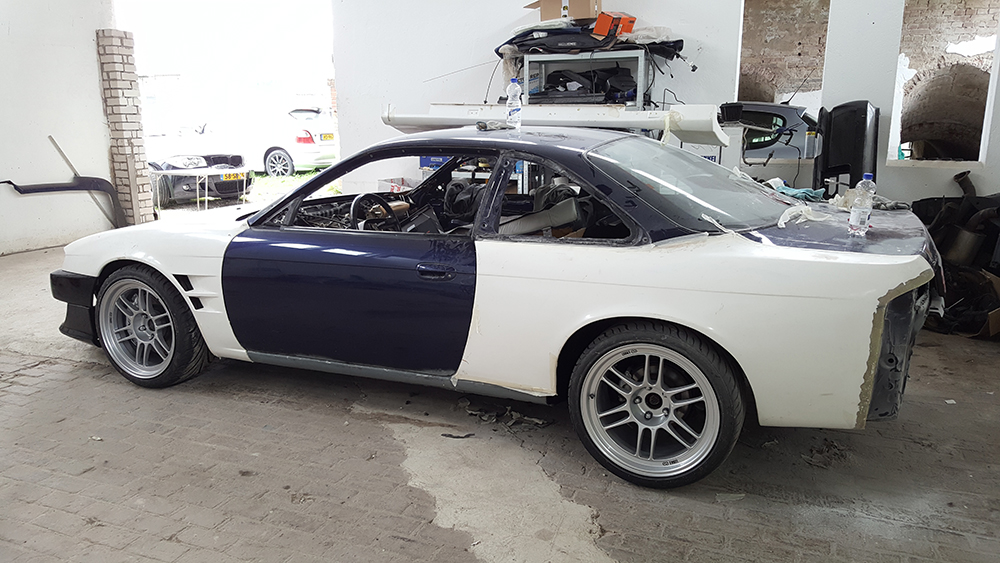 More new parts 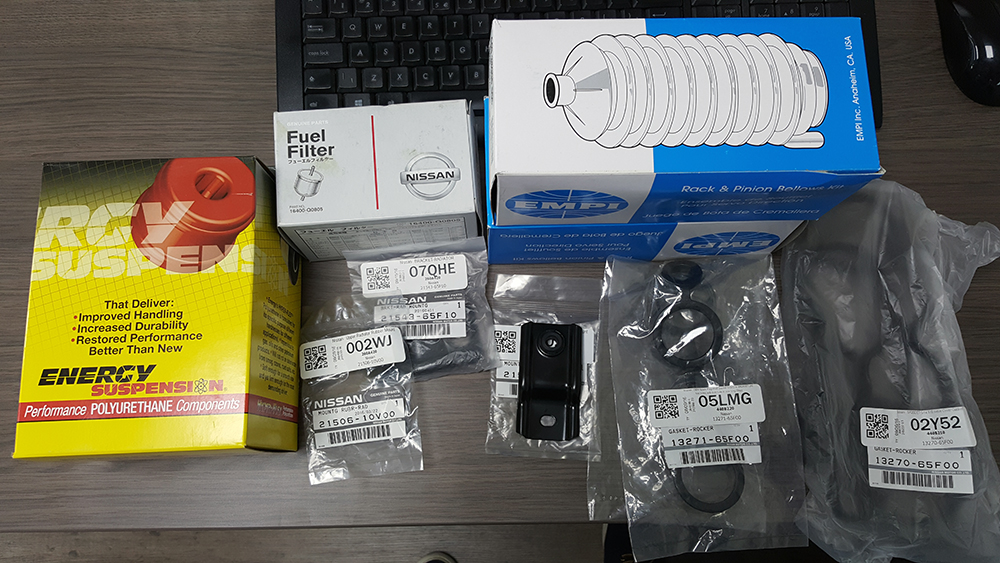 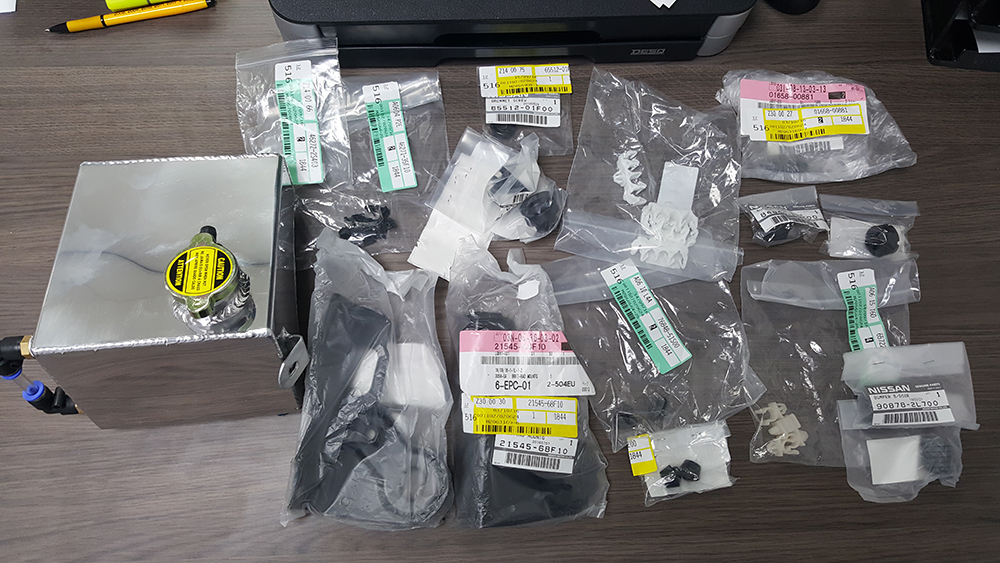 I already had a fmic kit, but as i'm renewing everything I also bought a new fmic kit. Needed to do some modifications because of the tubs 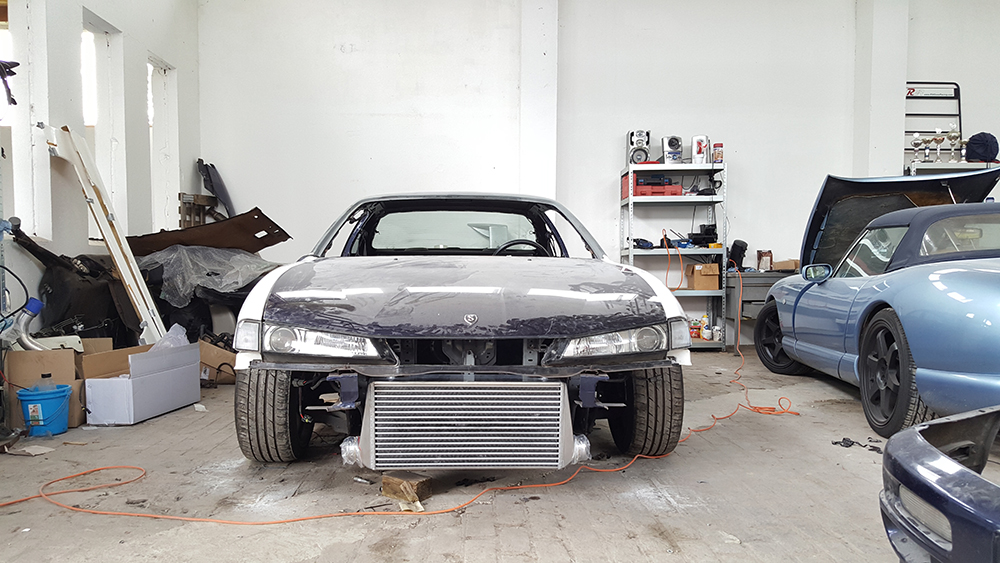 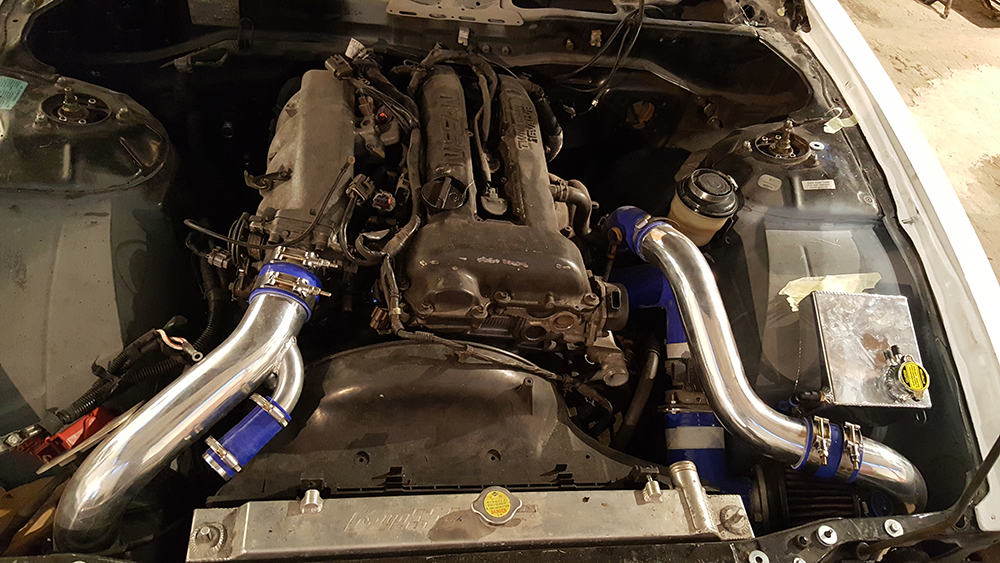 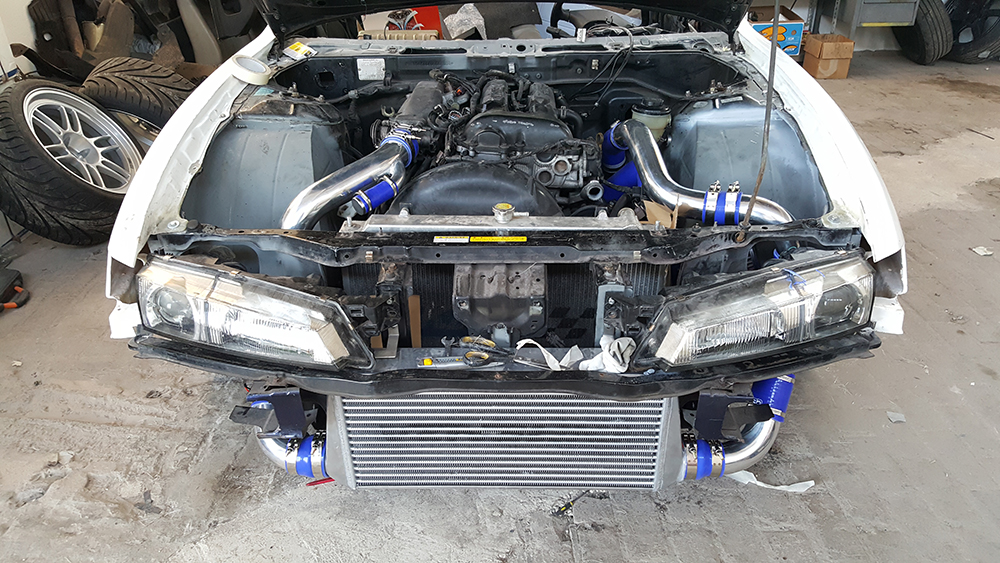 The right sideskirt also need some frp work as the fitment wasn't 100% 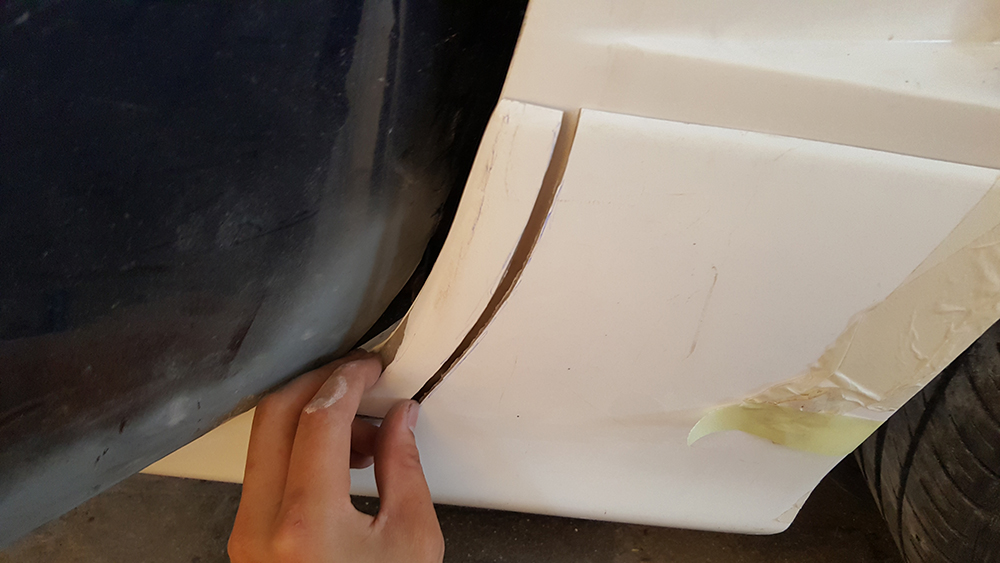 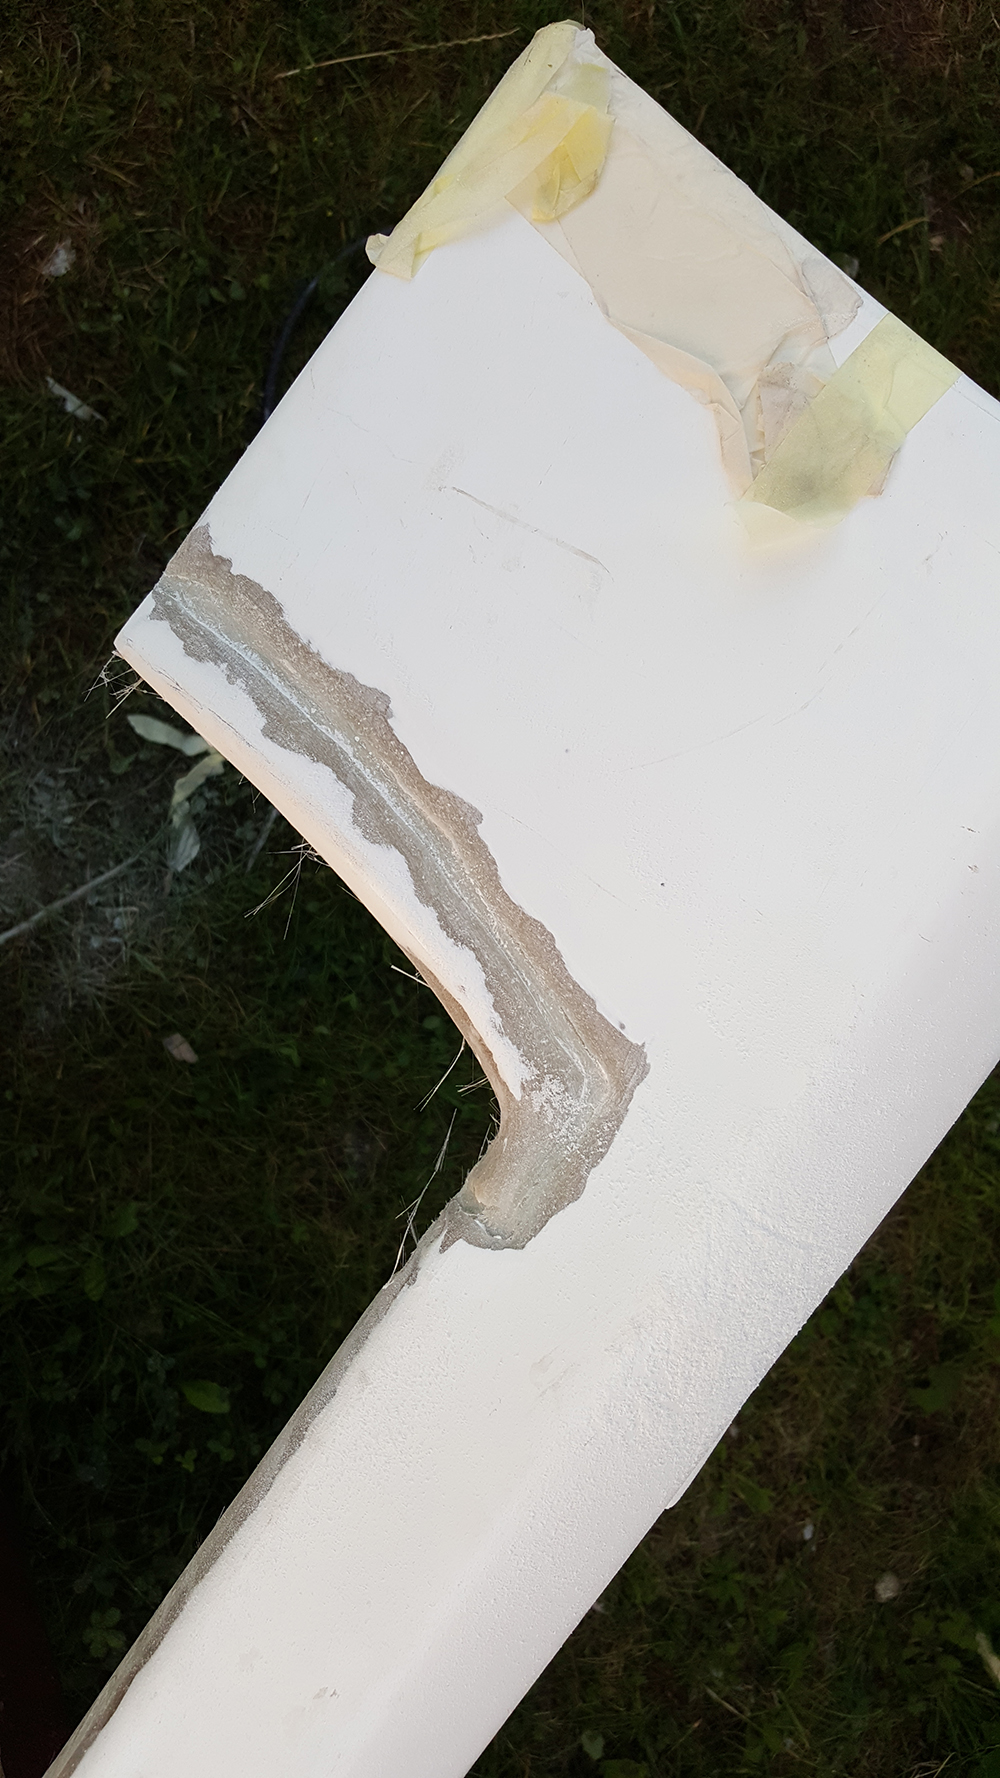 Also bought a kouki wing and rear spats to complete the package 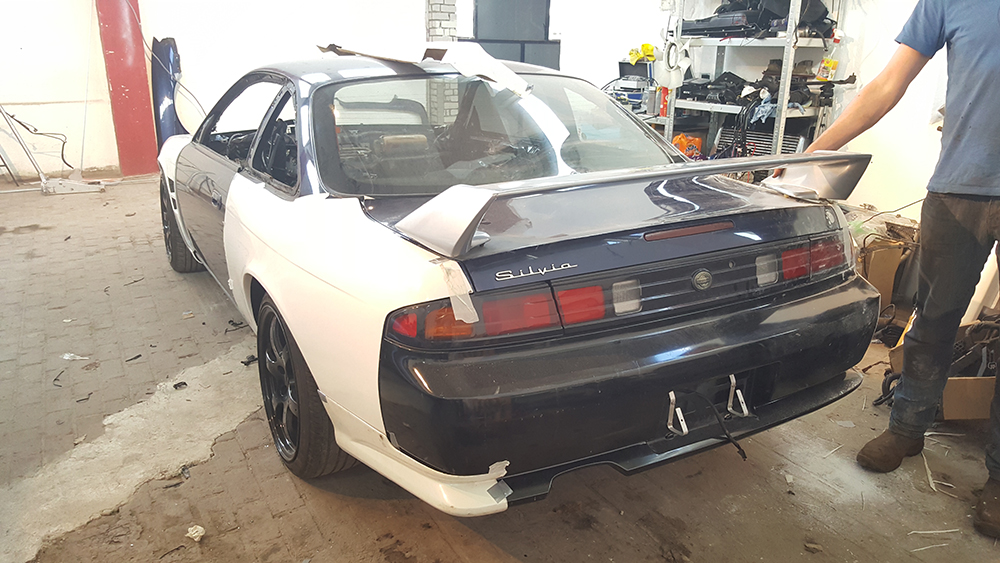 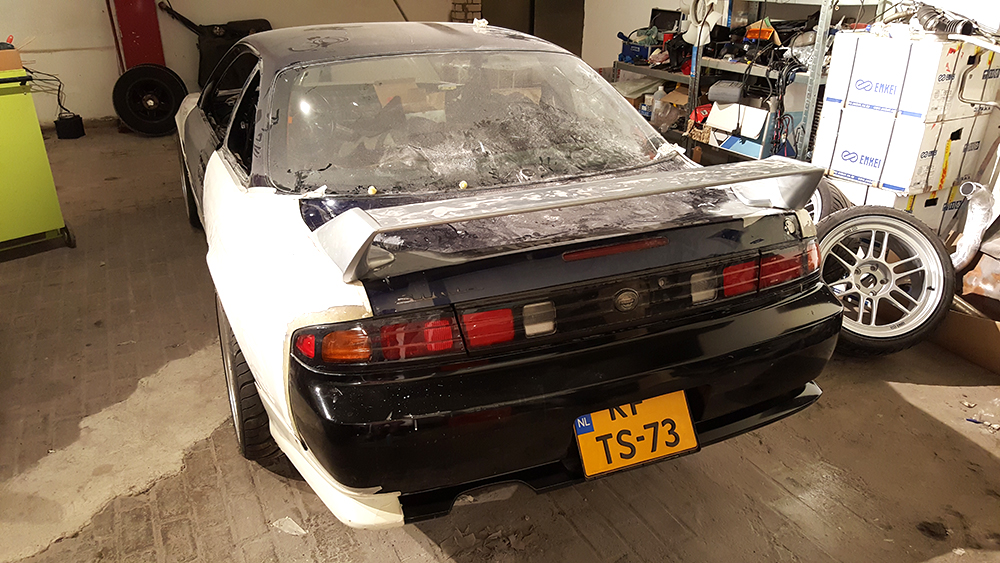 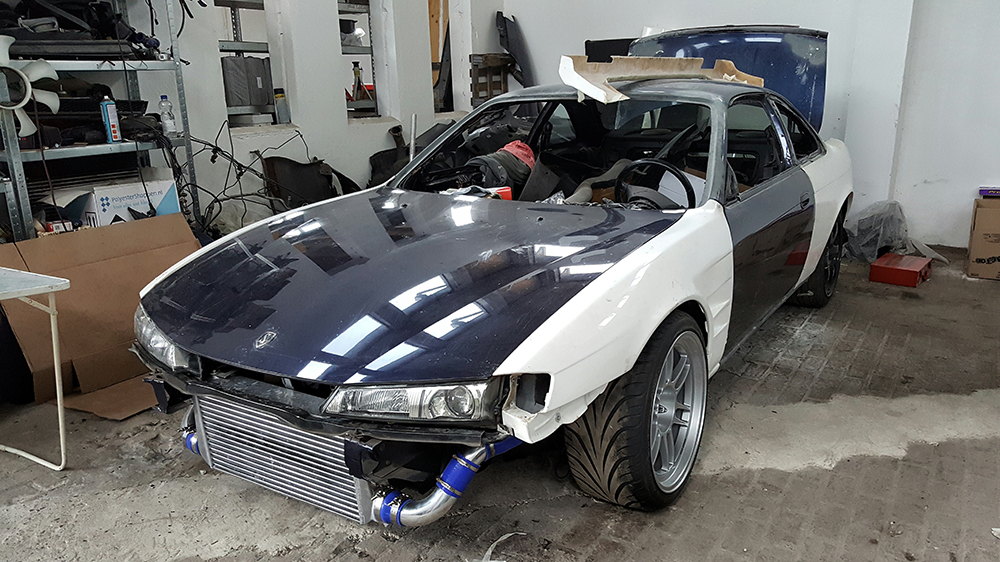 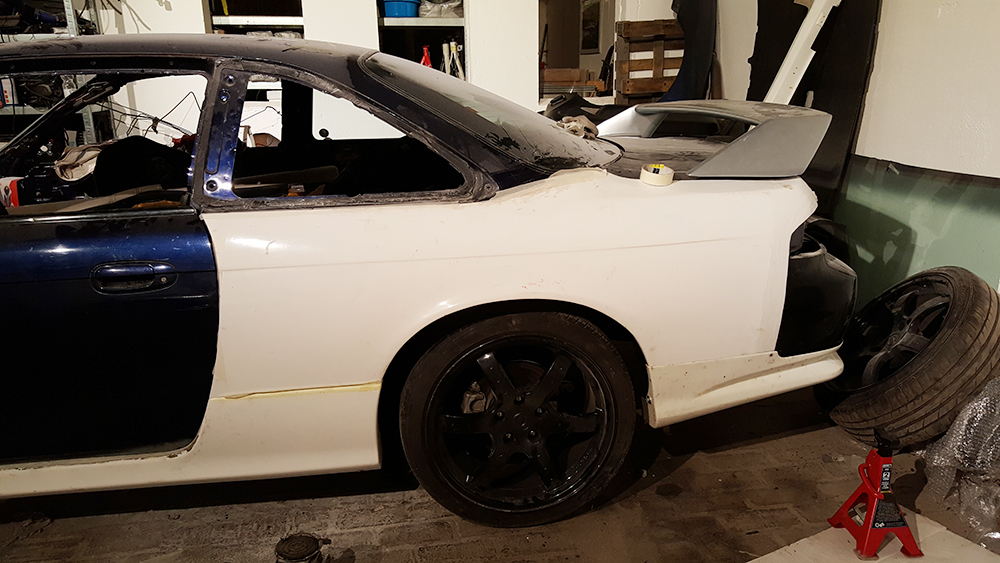 Next it was some to do some work in the rear subframe. I knew that the rear bearings and the subframe were a bit worn so I needed to change them. 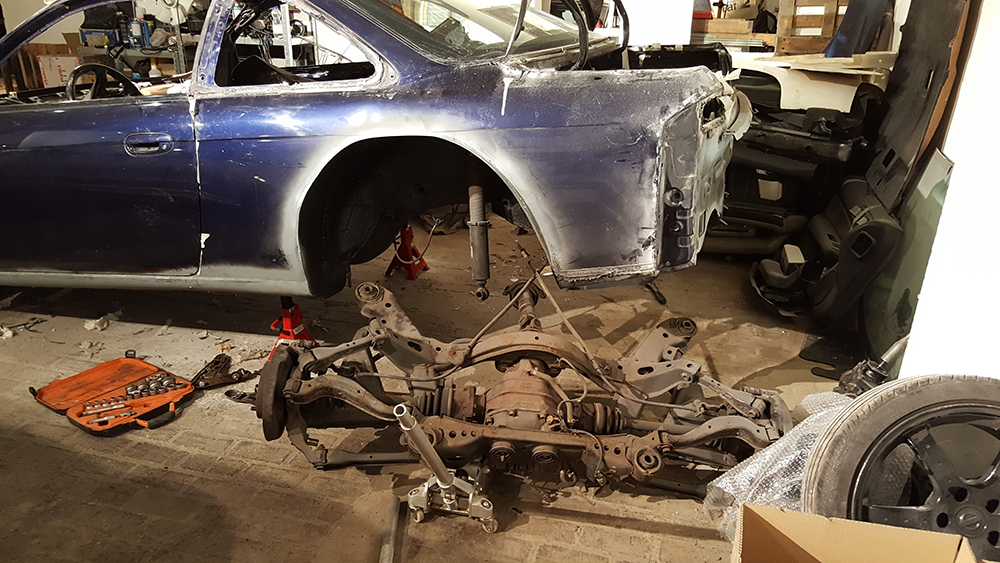 Everything was all rusty, so decided to change everything, sandblast and powercoat it 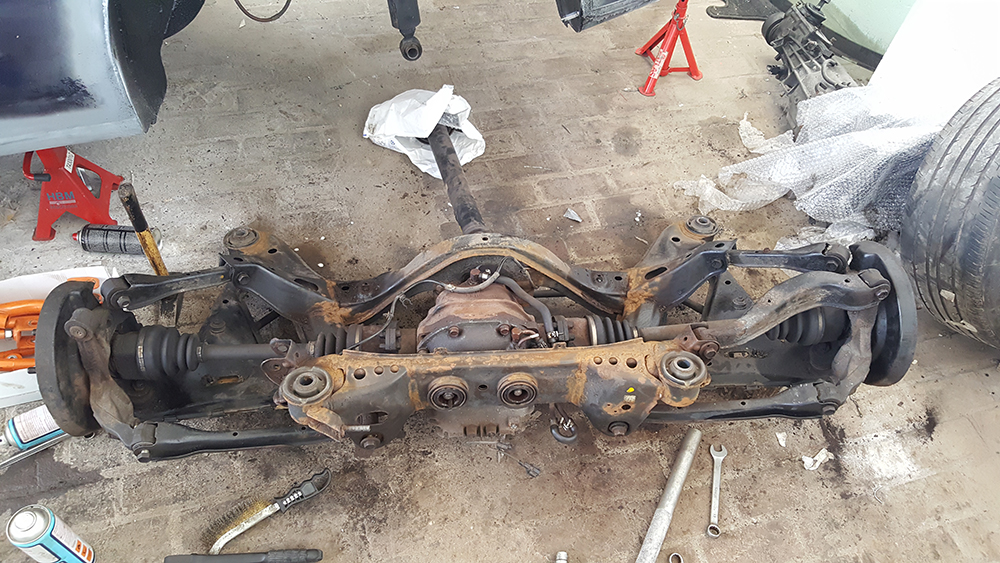 This was fun to do  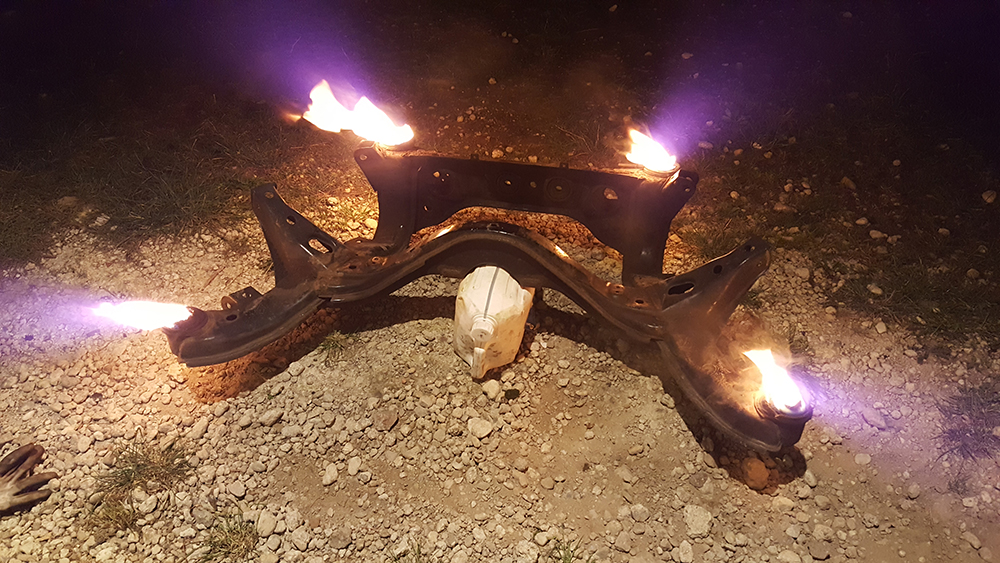 Back from the sandblaster/powercoater 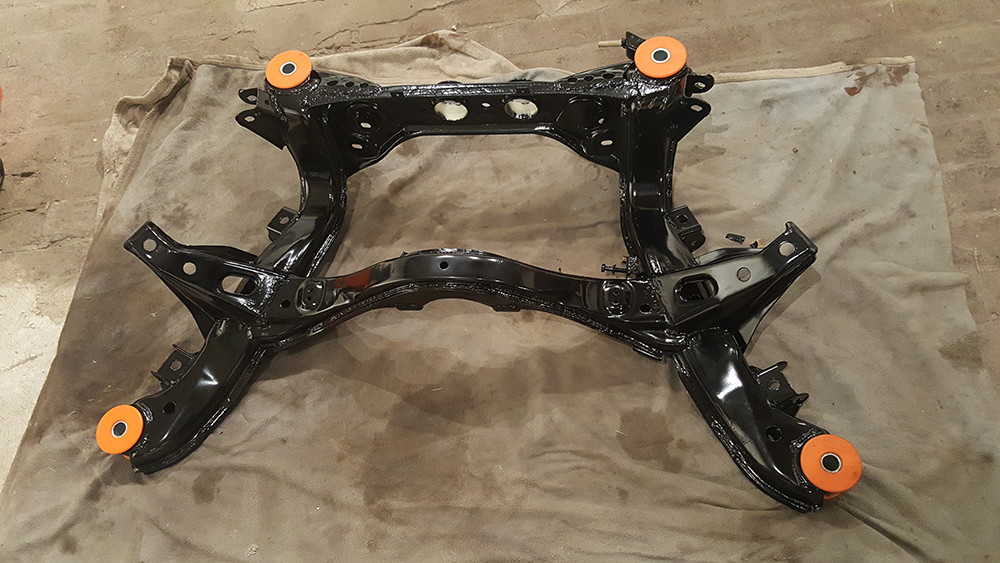 New wheel bearings 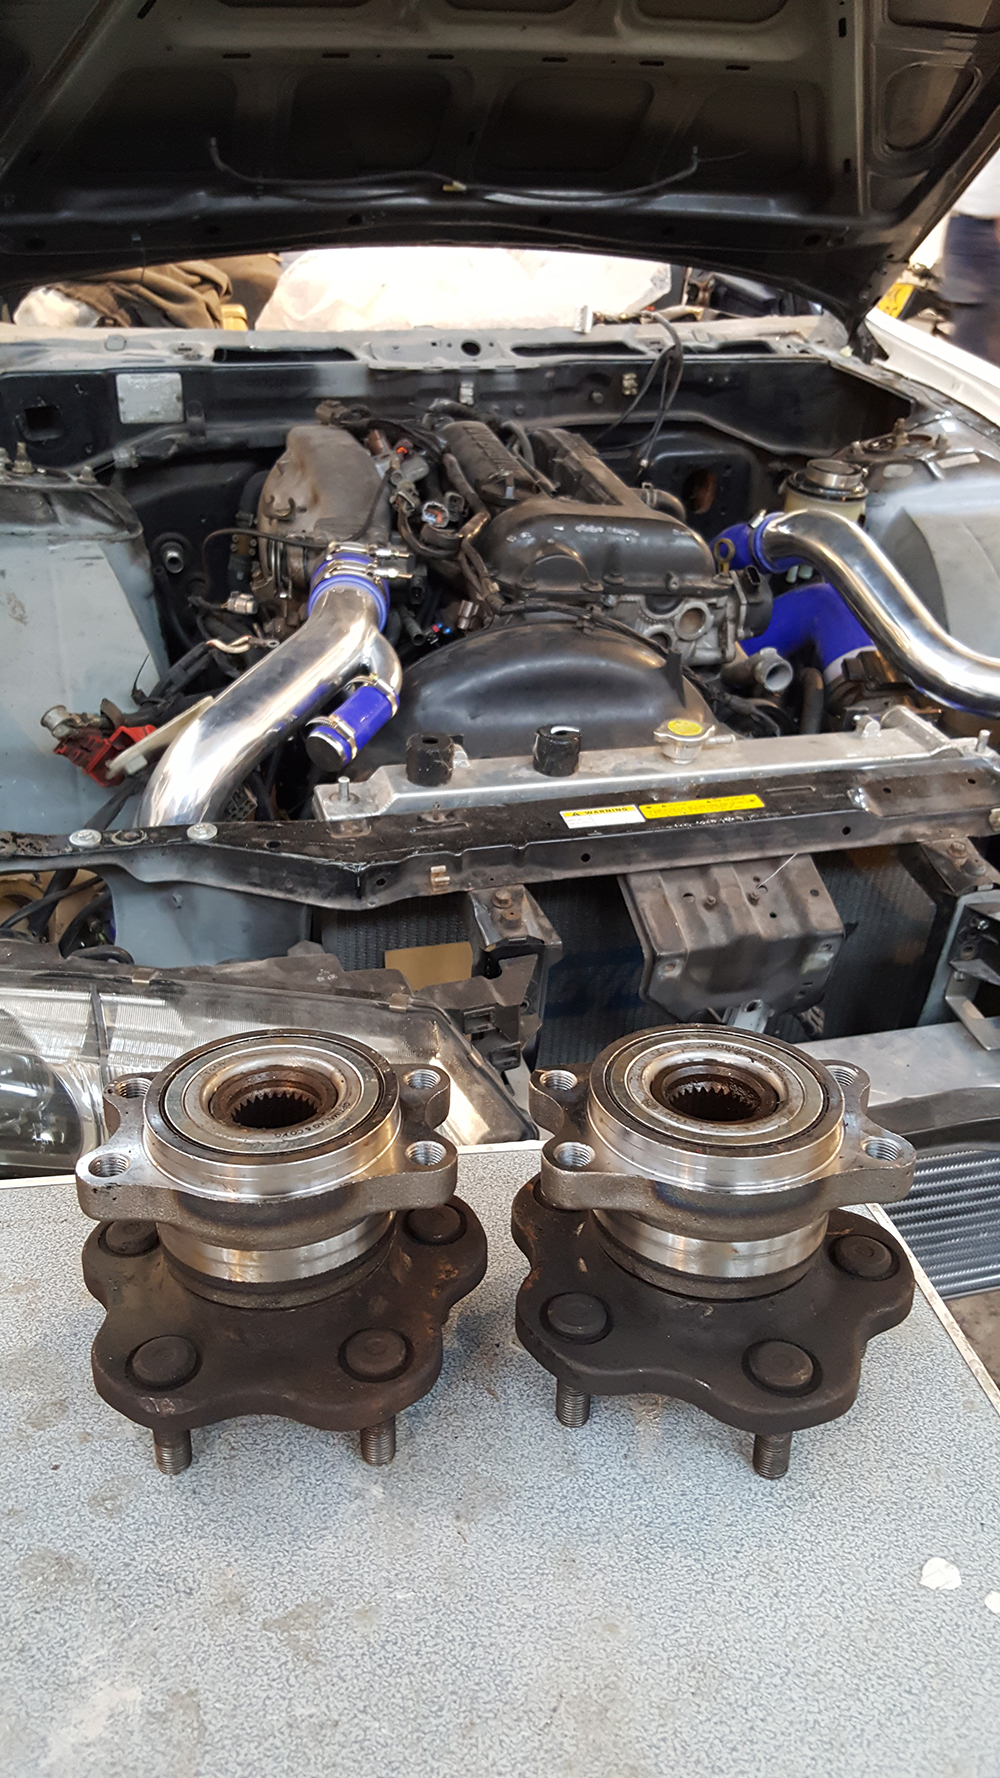 Because everything was apart, I also decided to upgrade the rear brakes to a r33 setup. Got it in 3 days from Japan! 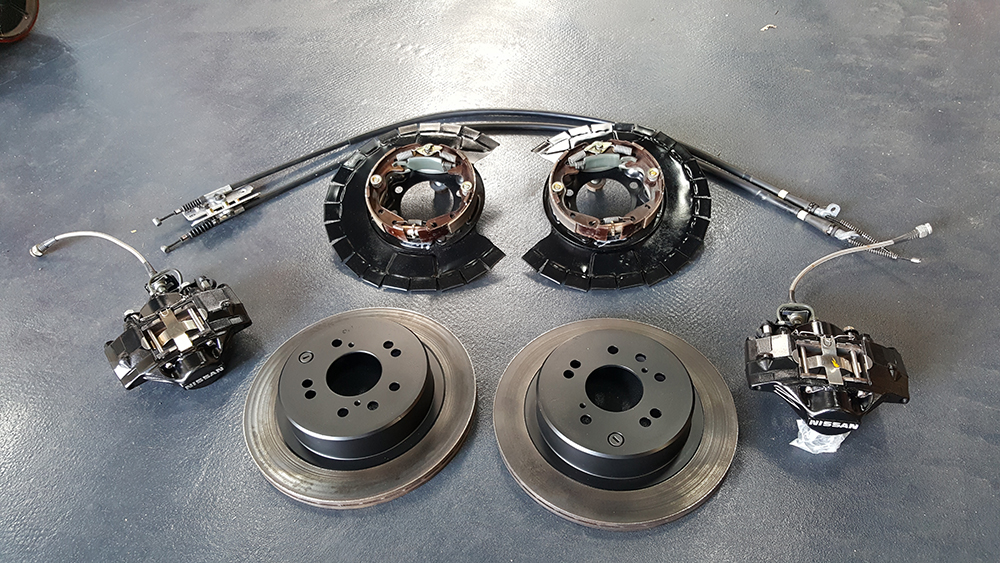 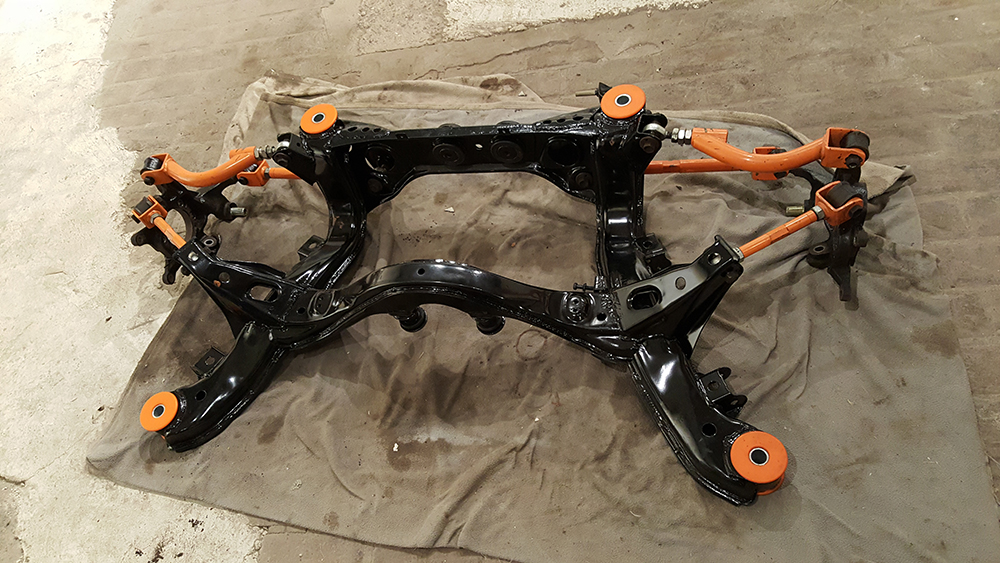 Everything back together 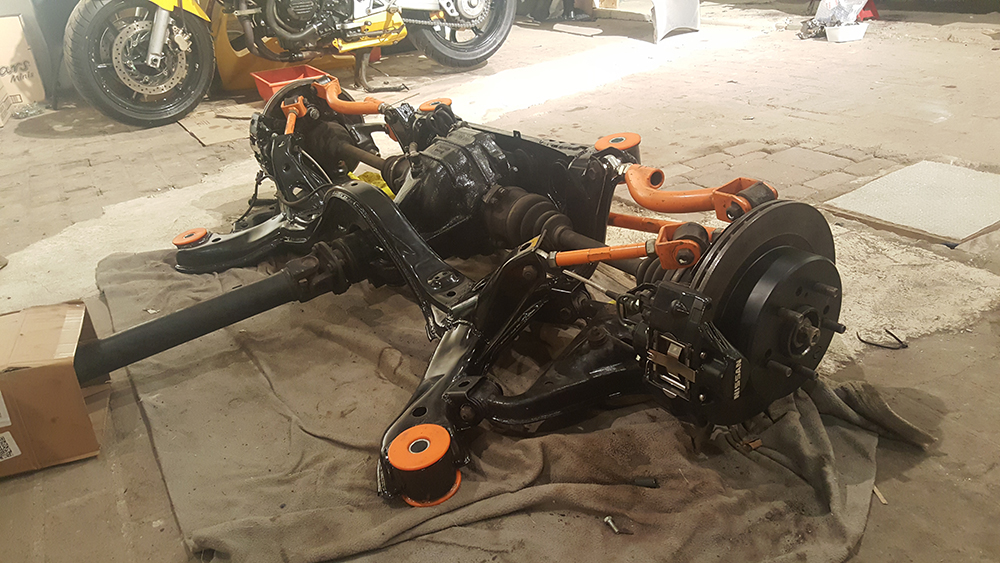 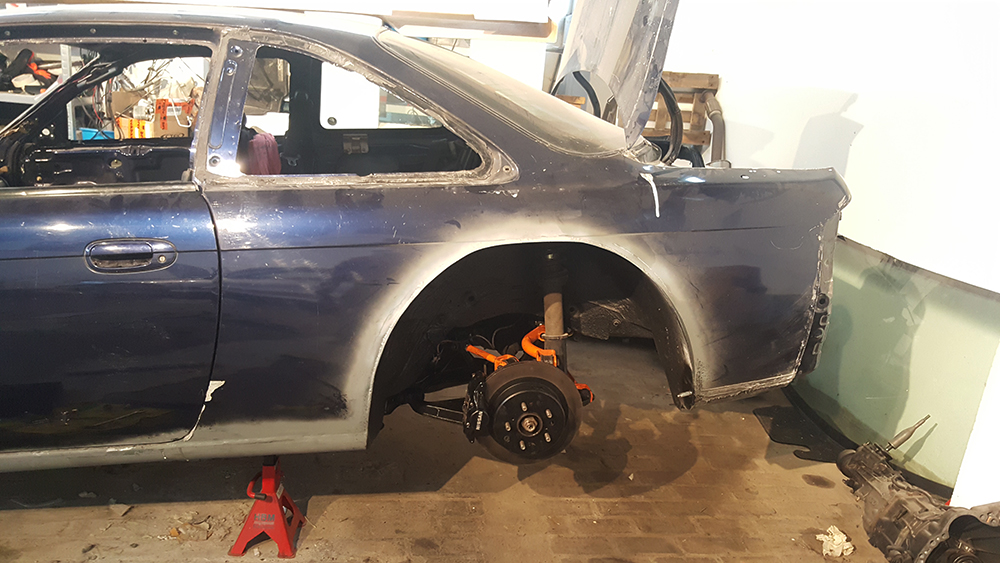 My old tank straps were also rusted, so the welder made some new ones for me, these will be added also with new fuel/brake lines from front to back. 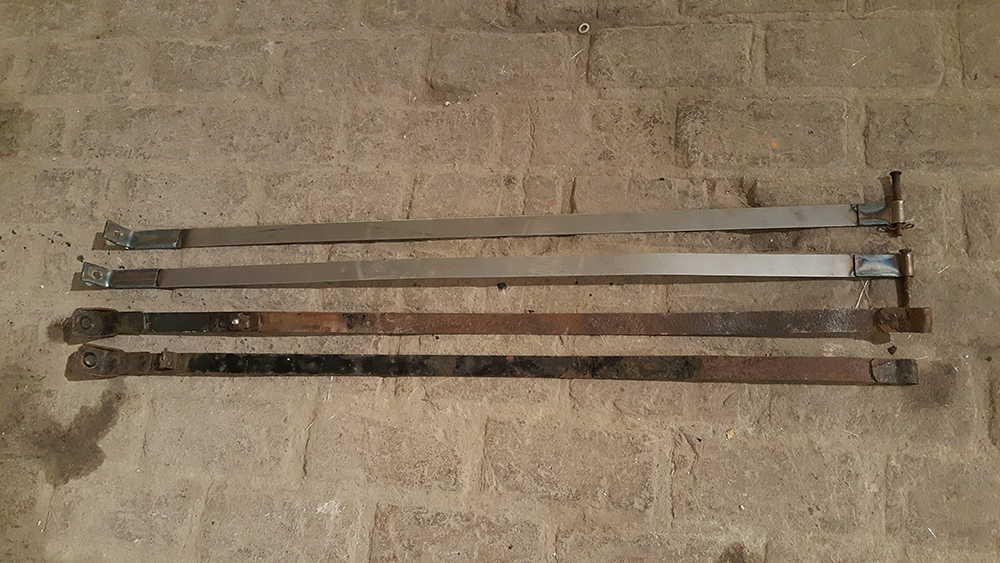 Next it was some for some more frp work on the front fenders. As I wanted to keep the splash guards like oem. I also didn't like where the way the openings in the front fenders, so more modifications needed: 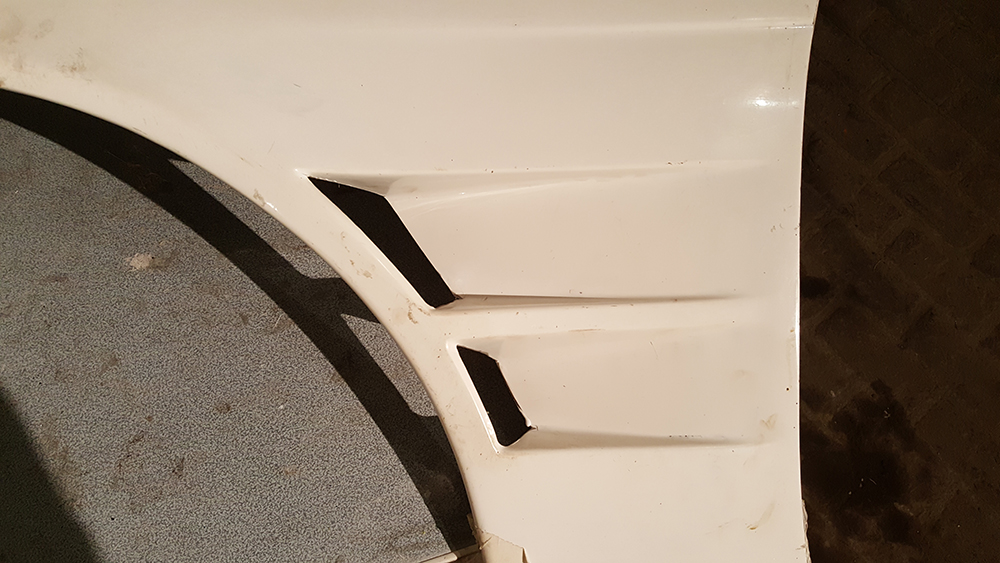 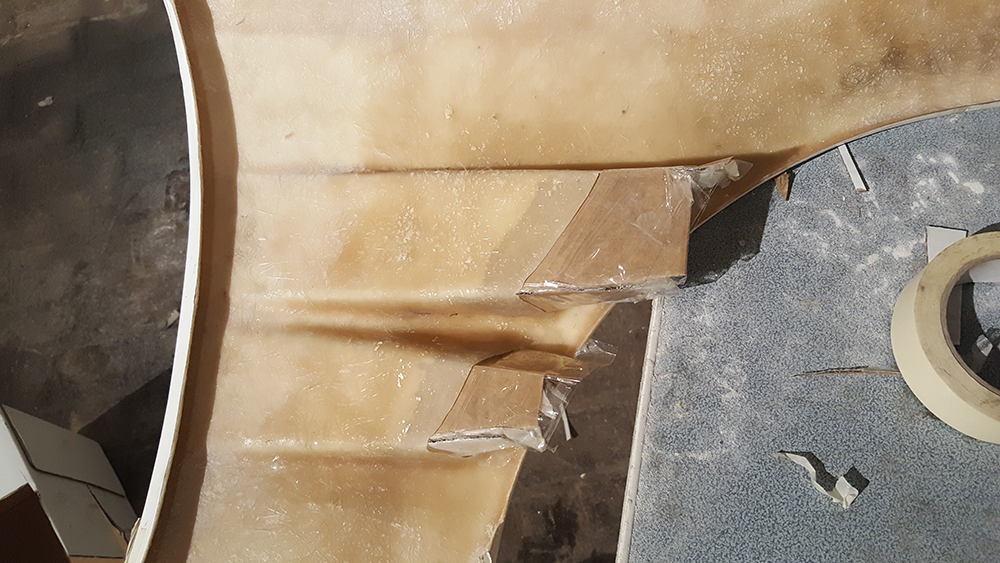 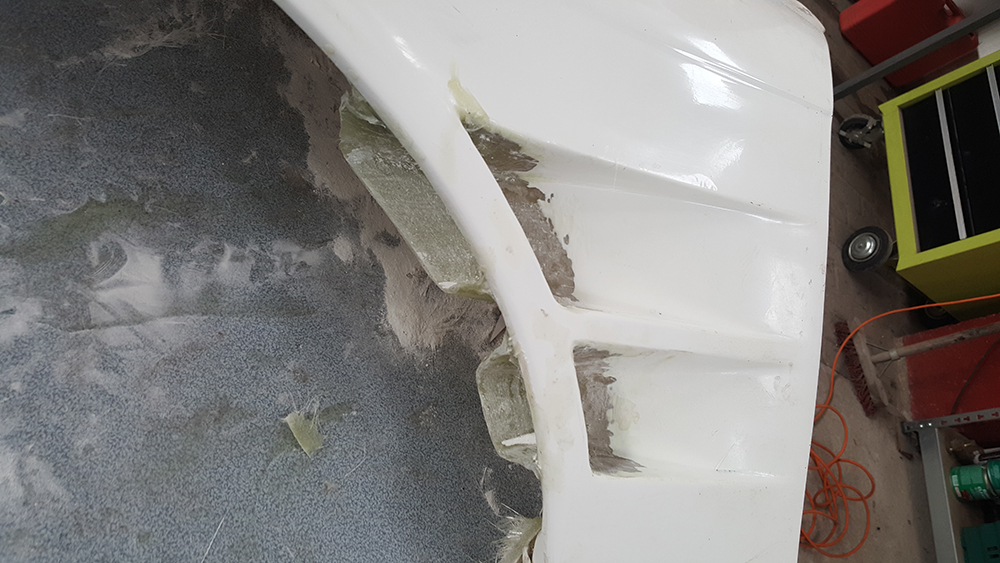 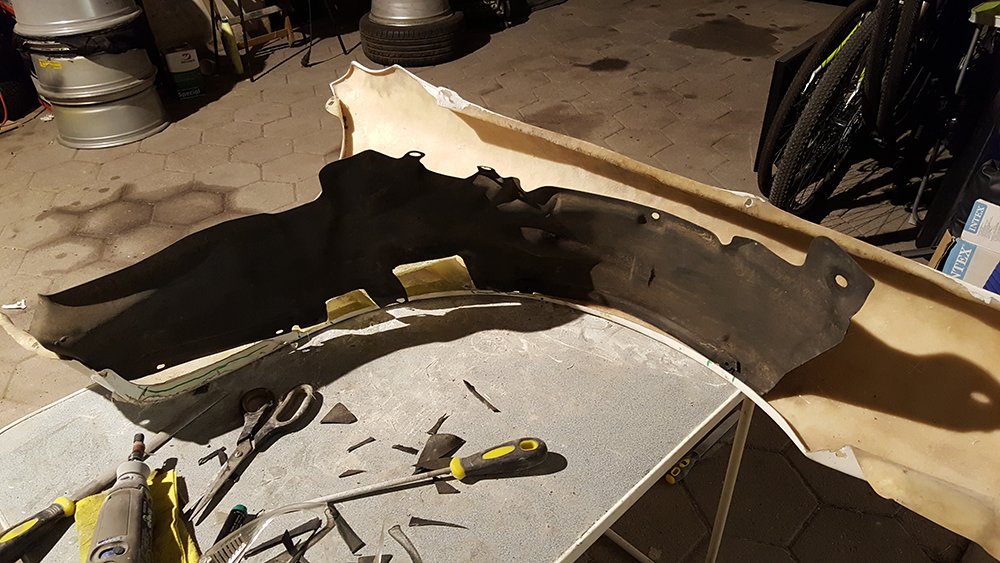 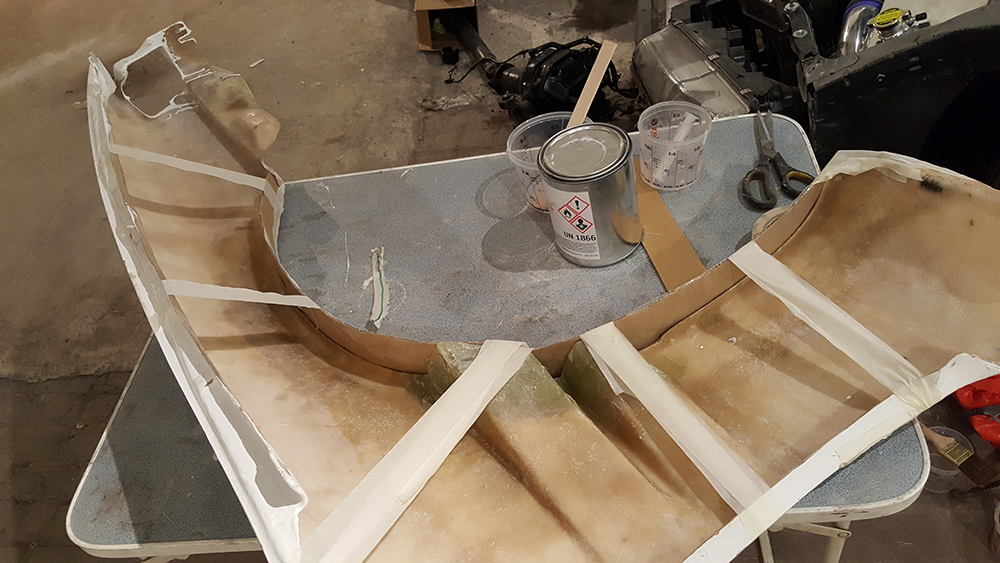 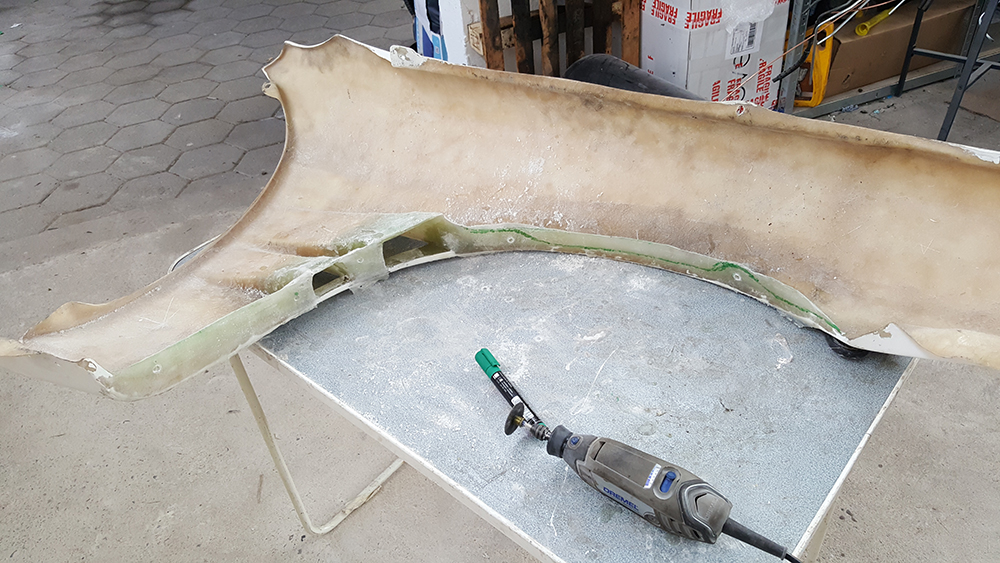 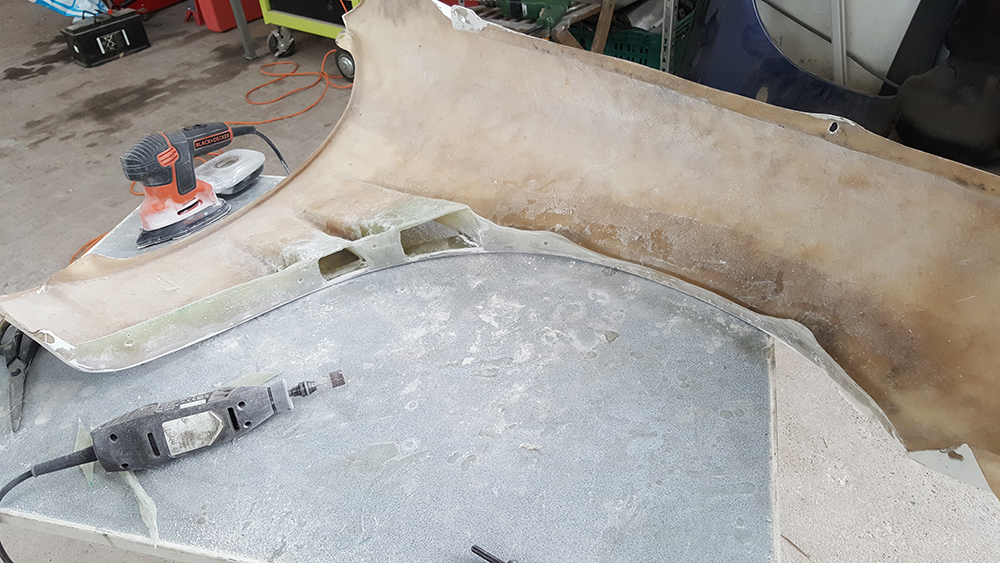 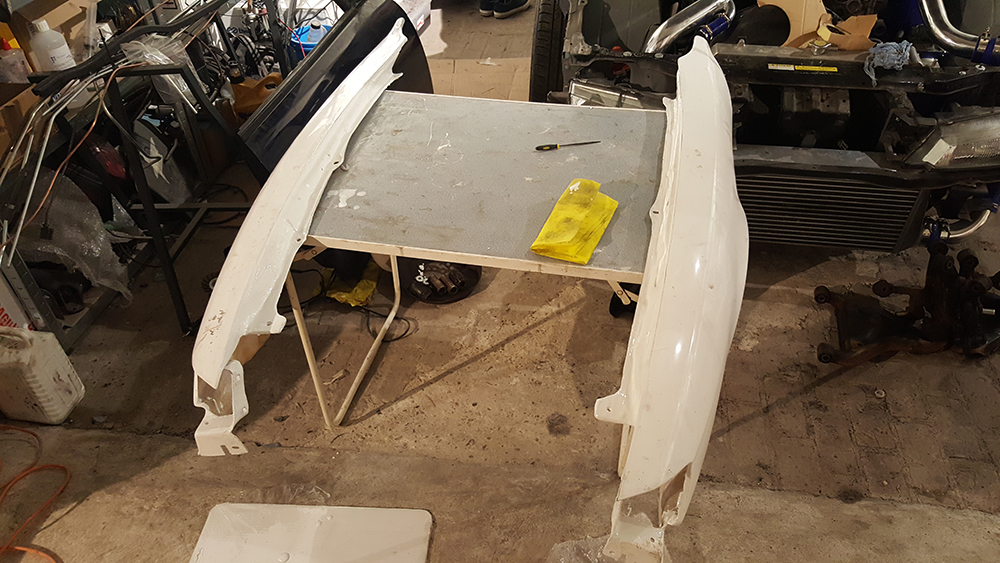 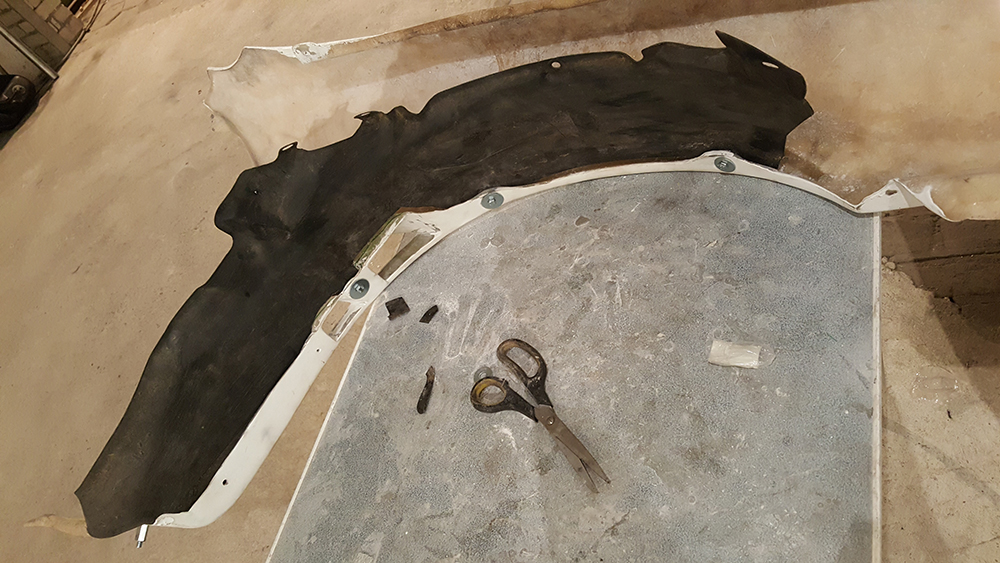 Finished with the skirts and front fenders 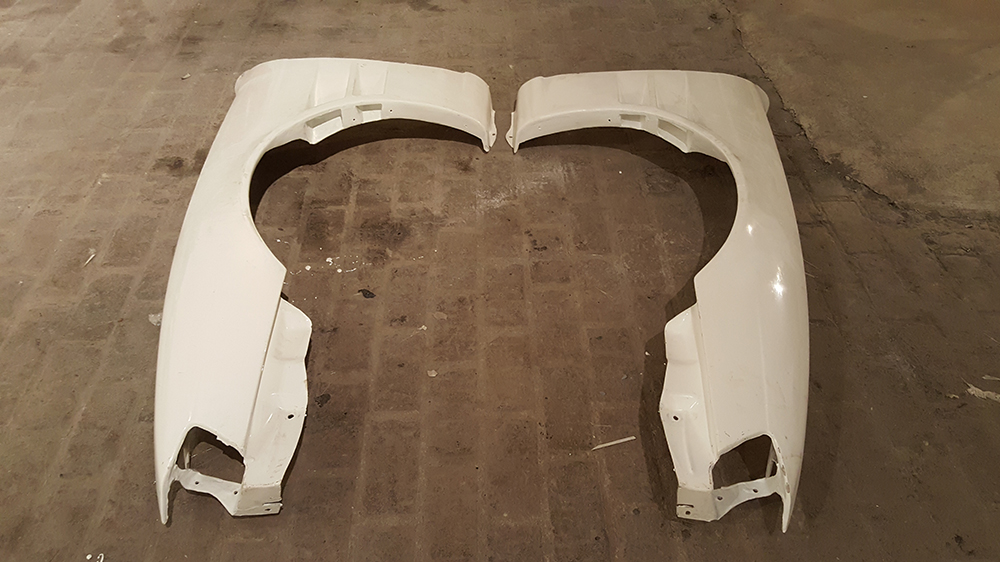 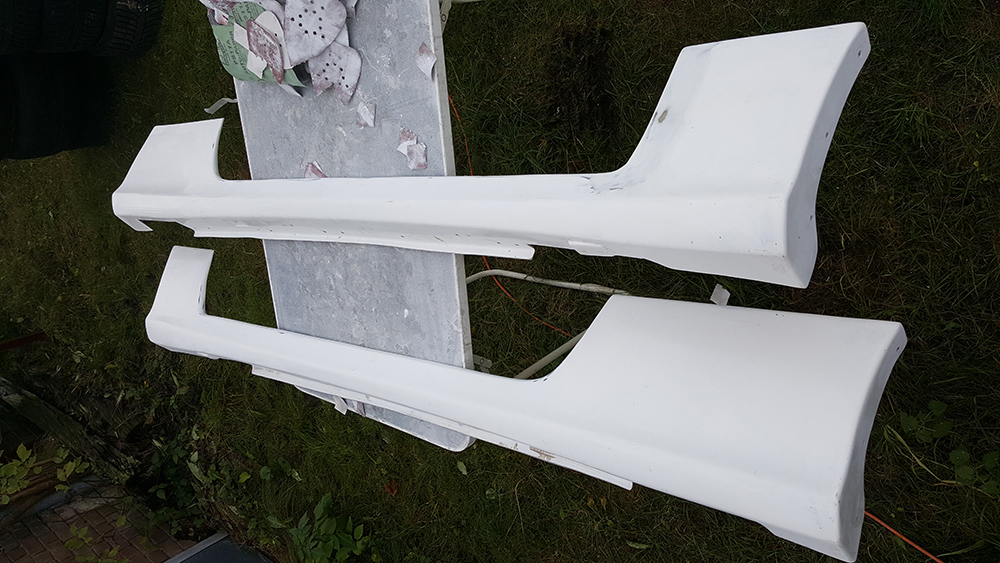 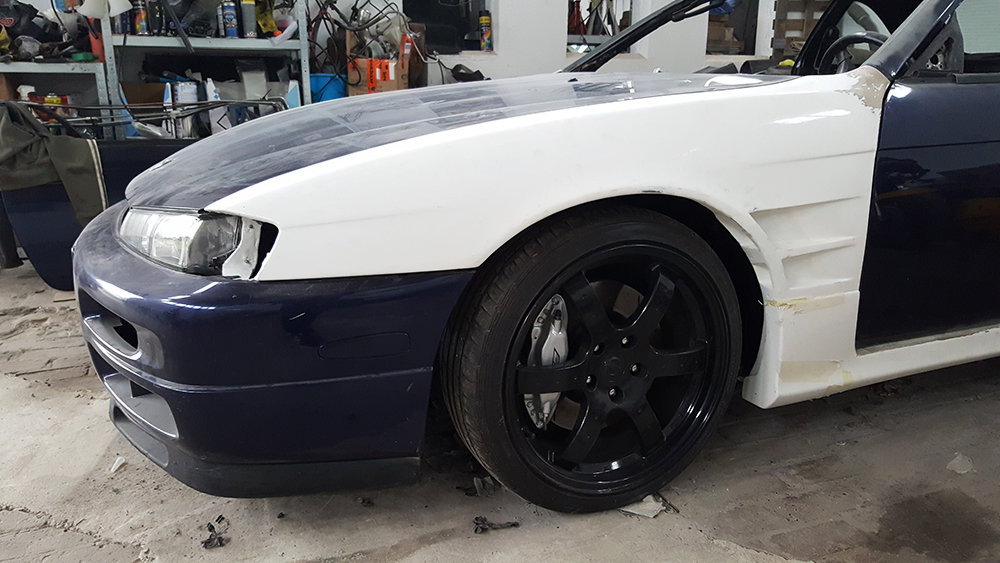 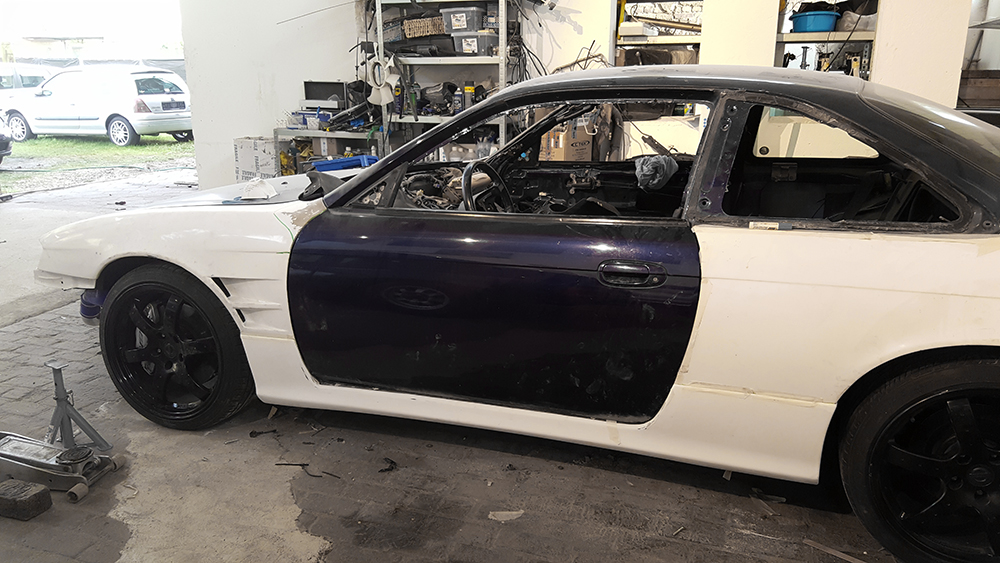 Another impression, can't wait to see stage 3 in real life hehe 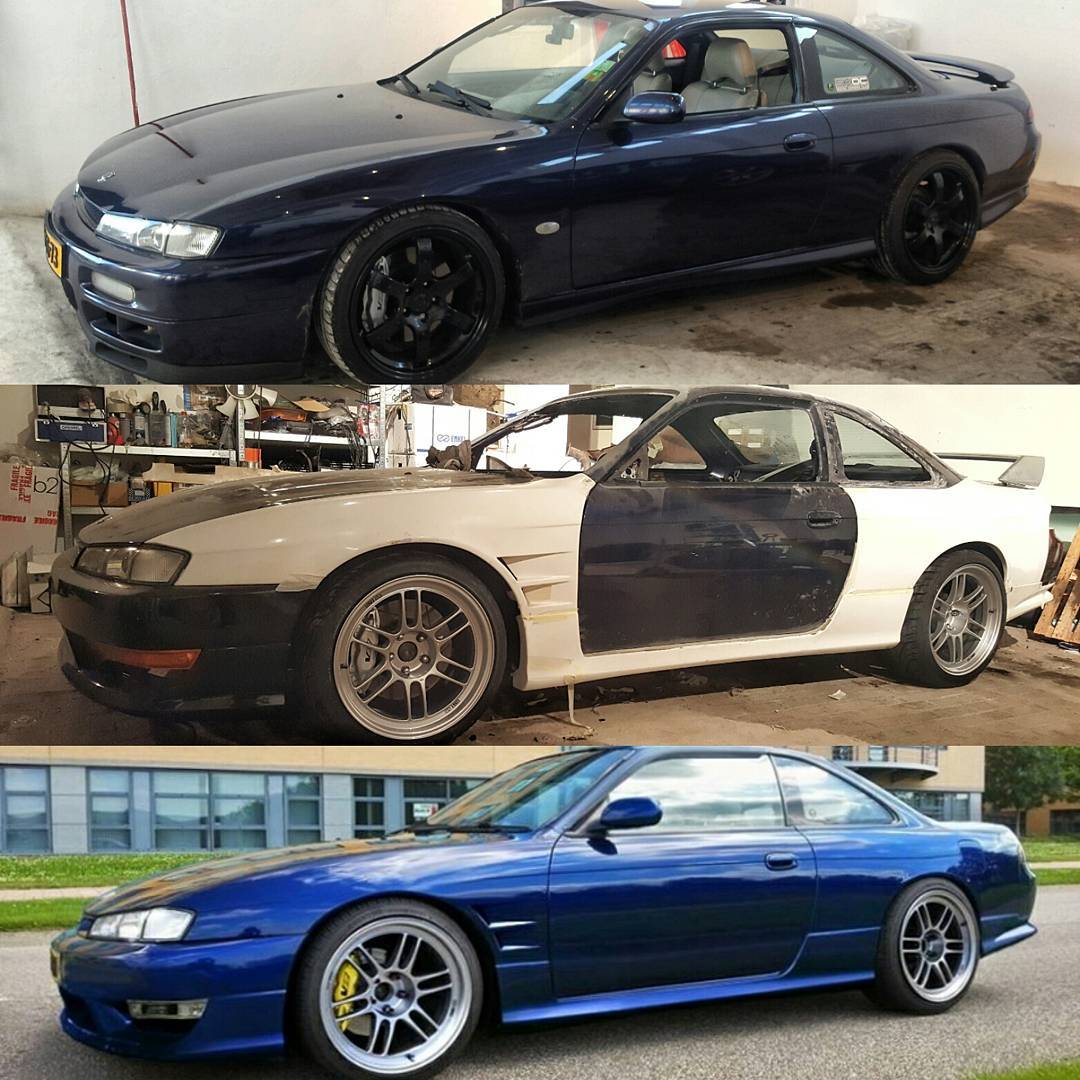 Last edited by CHiNo4ReaL; 12-14-2016 at 03:47 PM.. |
|
|

|
|
|
#5 |
|
Leaky Injector
Join Date: Feb 2009
Location: Arnhem, the Netherlands
Age: 31
Posts: 92
Trader Rating: (0)
      Feedback Score: 0 reviews
|
Thanks!
This is my first time working with fibreglass, you have to be very patience for it and it takes alot of time haha Yeah in Europe we got the SR20DET blacktop stock with the T28 turbo, also stock 5 lug wheels, heated leather front seats, heated mirror glass and other stuff. |
|
|

|
|
|
#7 |
|
Post Whore!
 Join Date: Mar 2008
Location: San Diego, CA
Posts: 4,140
Trader Rating: (27)
           Feedback Score: 27 reviews
|
That first picture is awesome.
Great build so far. I like how you're trying to make the aftermarket aero function or at least look like it came from the factory. |
|
|

|
|
|
#9 |
|
Premium Member
 Join Date: Sep 2003
Location: Lake Stevens, WA
Age: 38
Posts: 2,585
Trader Rating: (20)
           Feedback Score: 20 reviews
|
Great looking build thus far. Love the attention to detail.
Let me know if you have any spare S14 center consoles that have the spaces for the heated leather seats switches.  |
|
|

|
|
|
#10 |
|
Post Whore!
 |
Forget the skirts , sell me the z rear valance if it real !!!! Really pm price shipped to 92358 USA
__________________
Www.PowerAutosports.com |
|
|

|
|
|
#11 | ||
|
Leaky Injector
Join Date: Feb 2009
Location: Arnhem, the Netherlands
Age: 31
Posts: 92
Trader Rating: (0)
      Feedback Score: 0 reviews
|
Quote:
I'm indeed trying to make everything what I change as close as oem, or at least make it function as it should be. Sorry the skirts are already sold. Are these rare in the US? If you want I can search for them over here, but I think that the shipping costs will be high because of the length. Quote:
It looks like this, I think that that piece with switches is demountable. I can look for you if you want. 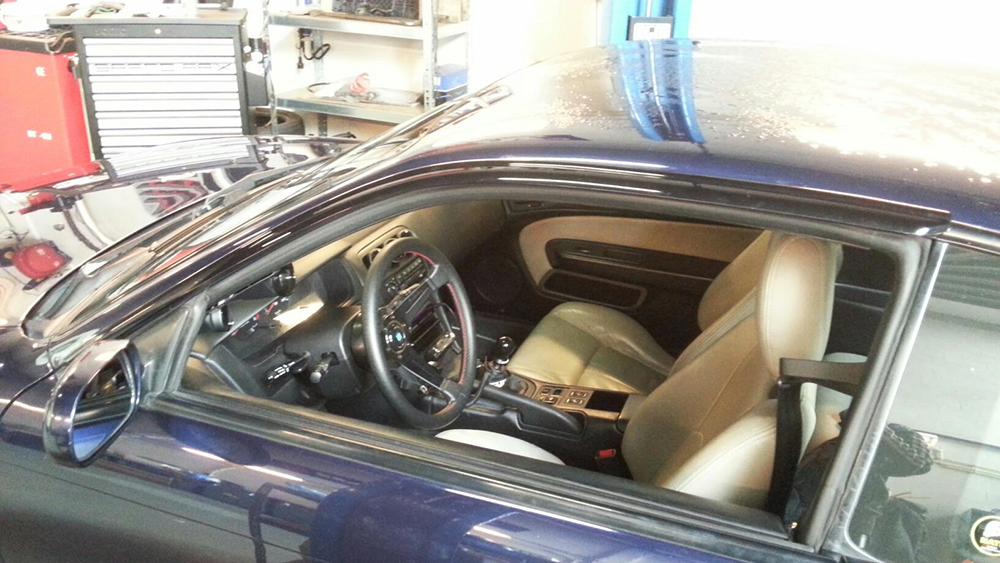 Sorry already sold! It was a perfect FRP replica, as the original of the Z and Racing-editions are very rare. |
||
|
|

|
|
|
#15 | ||
|
Leaky Injector
Join Date: Feb 2009
Location: Arnhem, the Netherlands
Age: 31
Posts: 92
Trader Rating: (0)
      Feedback Score: 0 reviews
|
Quote:
I hope that I can keep the standard and don't disappoint you haha Please send me your contact details or facebook by PM for easier contact, I will look for you in our community! Quote:
The seatbelt holders are stock, don't you guys got that in the S14? I know that the S13 got automatic seatbelts, but how is that in the S14 then? |
||
|
|

|
|
|
#18 |
|
Zilvia Addict
 |
Nope, we don't have them. You just have to reach back and grab the belt. Are the holders attached to the belt or are they removable?
|
|
|

|
|
|
#21 | |
|
Leaky Injector
Join Date: Feb 2009
Location: Arnhem, the Netherlands
Age: 31
Posts: 92
Trader Rating: (0)
      Feedback Score: 0 reviews
|
Thanks for your comments guys, very happy to read it!
Soon more updates! Quote:
When i'm finished with the fibreglass bodywork, i'm gonna make my own cooling panel. Maybe cover it with carbon fibre, not sure yet. I've just spoken Rik on the phone, I heard that you are also looking for the heated mirror glass. I think that I got a spare set! Will look for you tomorrow. |
|
|
|

|
|
|
#22 |
|
Zilvia Addict
 |
That would be awesome if you had a set! Thank you! I need to go over there. It looks like a beautiful country with cool cars.
|
|
|

|
|
|
#23 |
|
Leaky Injector
Join Date: Feb 2009
Location: Arnhem, the Netherlands
Age: 31
Posts: 92
Trader Rating: (0)
      Feedback Score: 0 reviews
|
Today I started working on my new brake/fuel lines, as the old fuel lines were a bit rusted.
Just need to paint them with bodyshoots so it wouldn't rust and then I can finally mount the fueltank + lines back and put the rear subframe back for the last time. 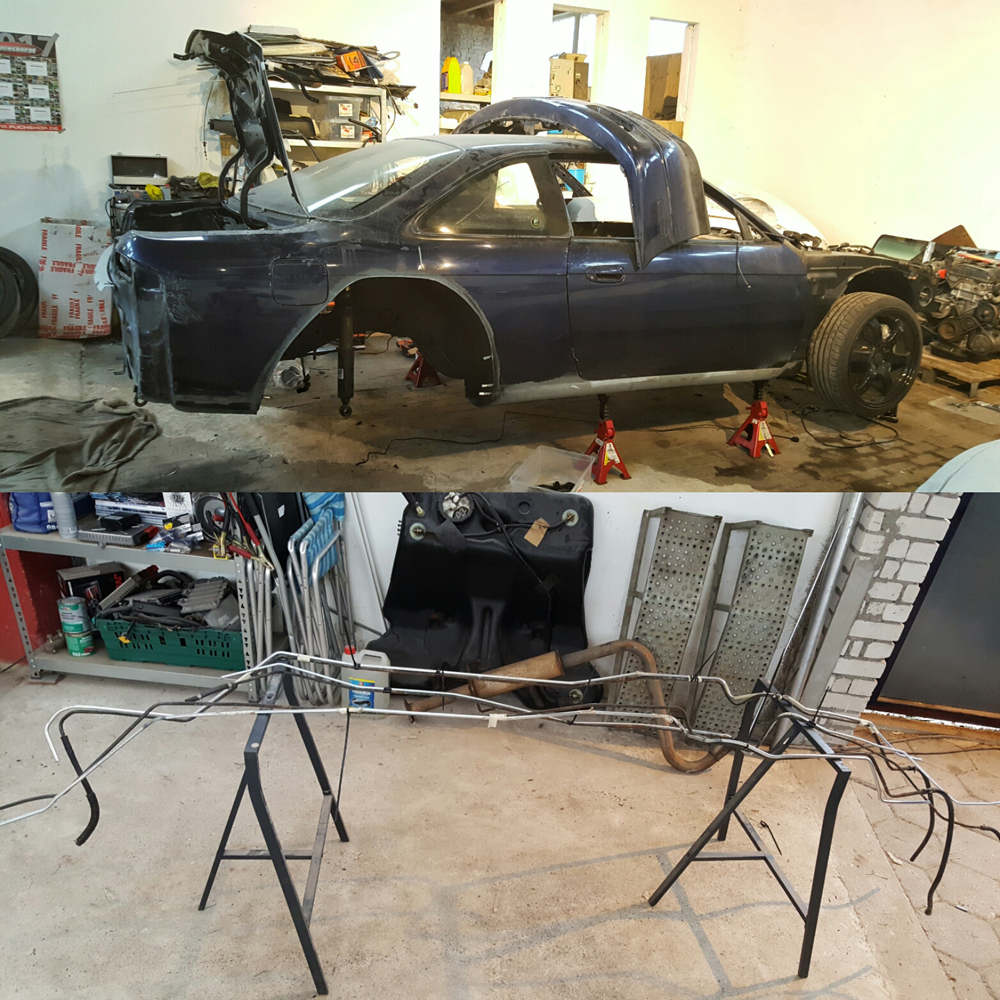 Also did some more frp work. One corner of the left front fender wasn't even with the door, so added a few layers of frp, sanded it down. Just need to add some white topcoat and then it is perfect  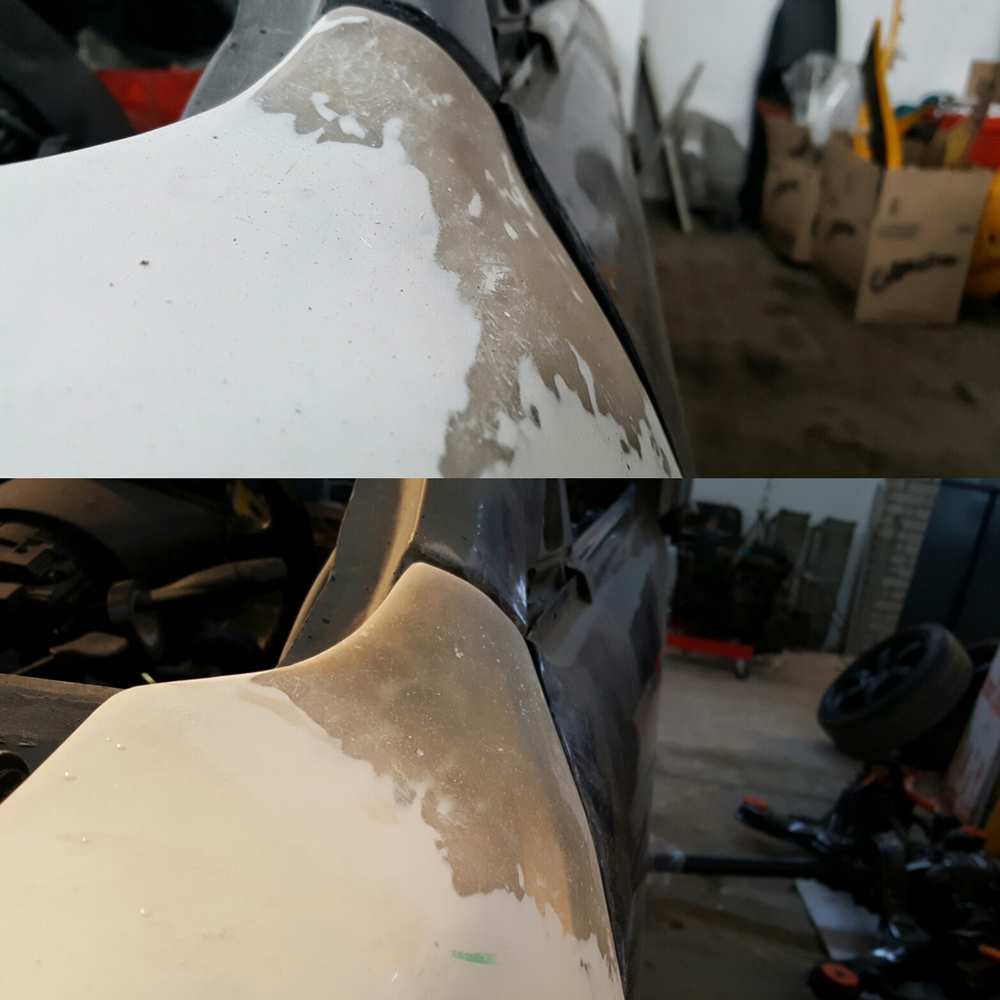 Also started with my rear trunk, sealing all the seams again with 3m sealer, repaint it so it will be nice and clean again. Also place the battery box and relocate the windscreenwasher bottle to the trunk. Last edited by CHiNo4ReaL; 03-29-2017 at 02:37 AM.. |
|
|

|
|
|
#24 |
|
Leaky Injector
Join Date: Feb 2009
Location: Arnhem, the Netherlands
Age: 31
Posts: 92
Trader Rating: (0)
      Feedback Score: 0 reviews
|
Just an small update, as I didn't had very much time last weeks
Recieved my BM57 BMC, as the CTS-V Brembo's + R33 rear don't work too tell with the stock BM50 I think 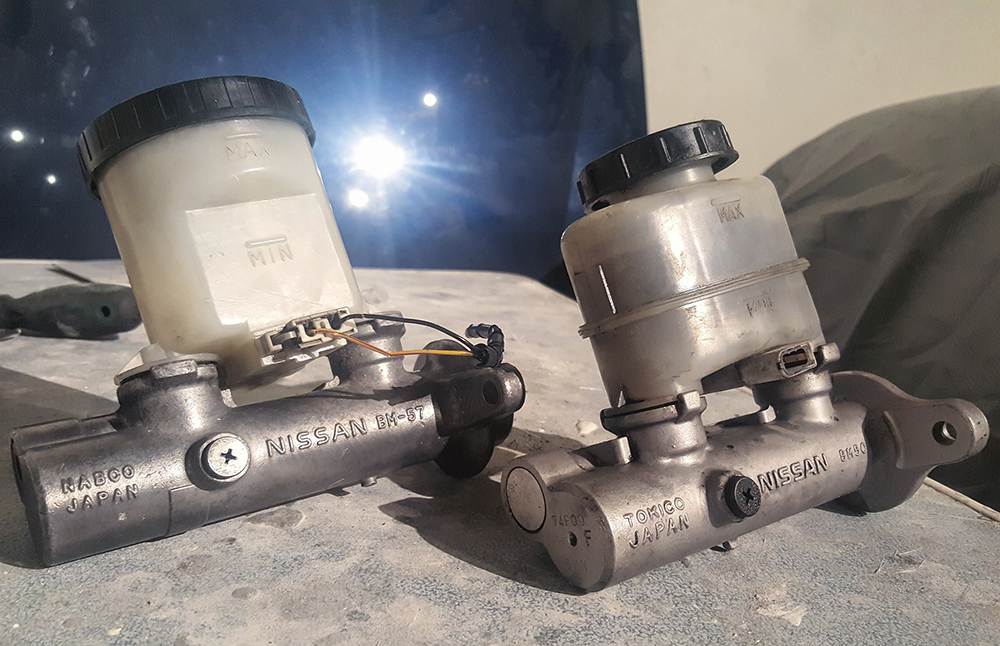 Finished with the rear booth, removed the original paint as there was a little flyrust. New paint, 3m seam sealer so it is as new. Only need to find a good set of booth carpet. 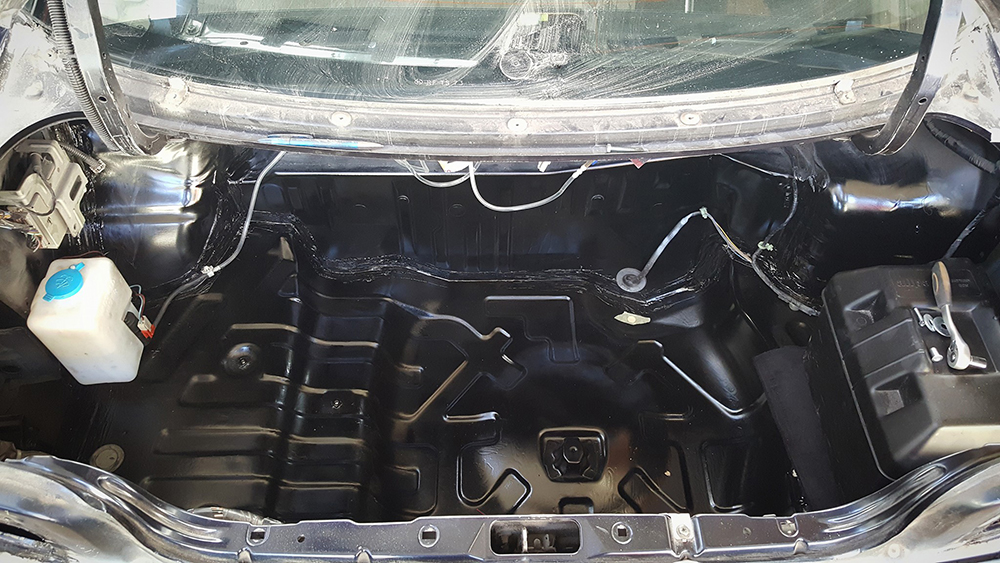 Also started making my own cooling panel from fibreglass, I can also buy one but making my own is more fun to do! I hope that I got more time this week, as now it is just a raw shape. 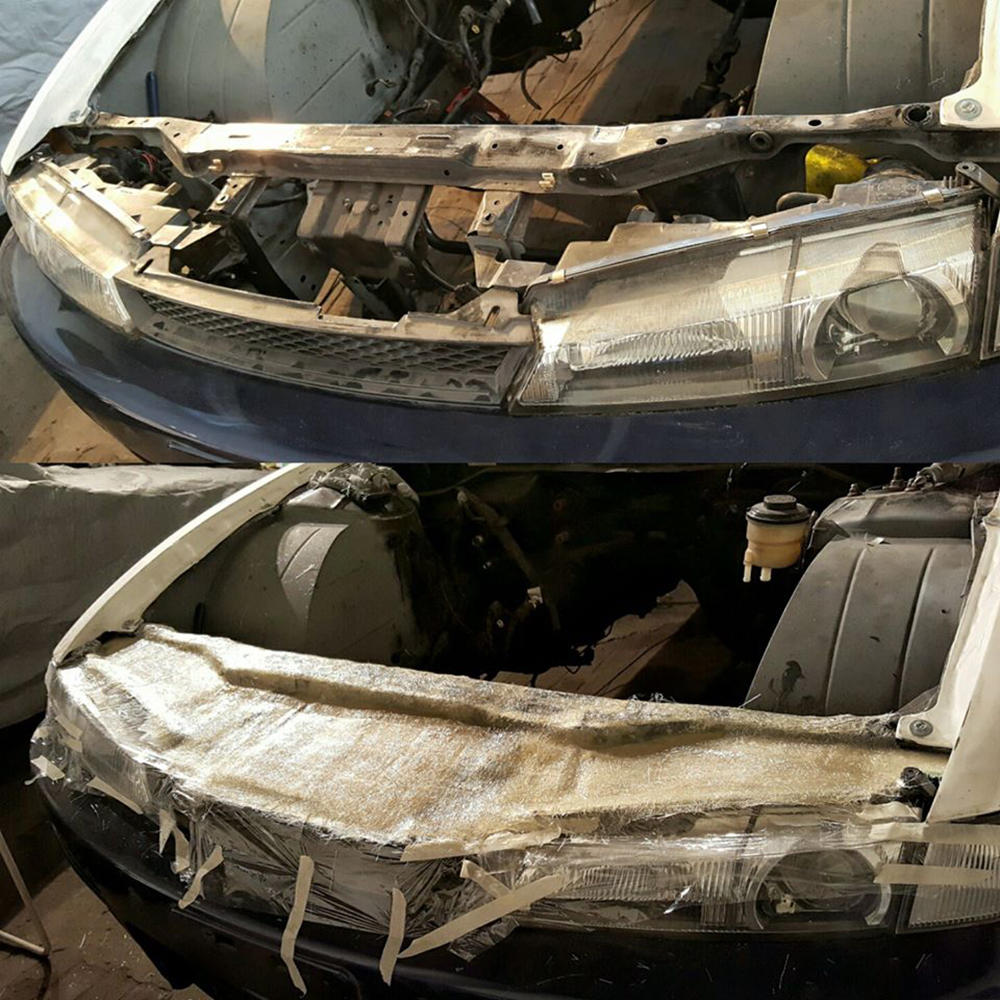 |
|
|

|
|
|
#25 | |
|
Quote:
|
||
|
|

|
|
|
#27 |
|
Leaky Injector
Join Date: Feb 2009
Location: Arnhem, the Netherlands
Age: 31
Posts: 92
Trader Rating: (0)
      Feedback Score: 0 reviews
|
I moved the front windscreen bottle to the rear indeed! It is an aftermarket bottle, not oem.
There was a rear wiper+nozzle, but I deleted it as I don't use it. I used the existing line from the front to the back nozzle for the new windscreen bottle, just reconnected the lines. Now only need to hookup the wiring and it is done. When you are doing the same, just make sure that you got a one-way-valve in it, otherwise the nozzles will leak as there is no vacuum on the line I think? The lines originally got a one-way-valve so I just had to turn it. The current place of the bottle is just temporary, i'm gonna place it where the original jack sits. The cooling panel is getting in shape. Next, add some more fibreglass for the final shape and sand it down to make a smooth surface 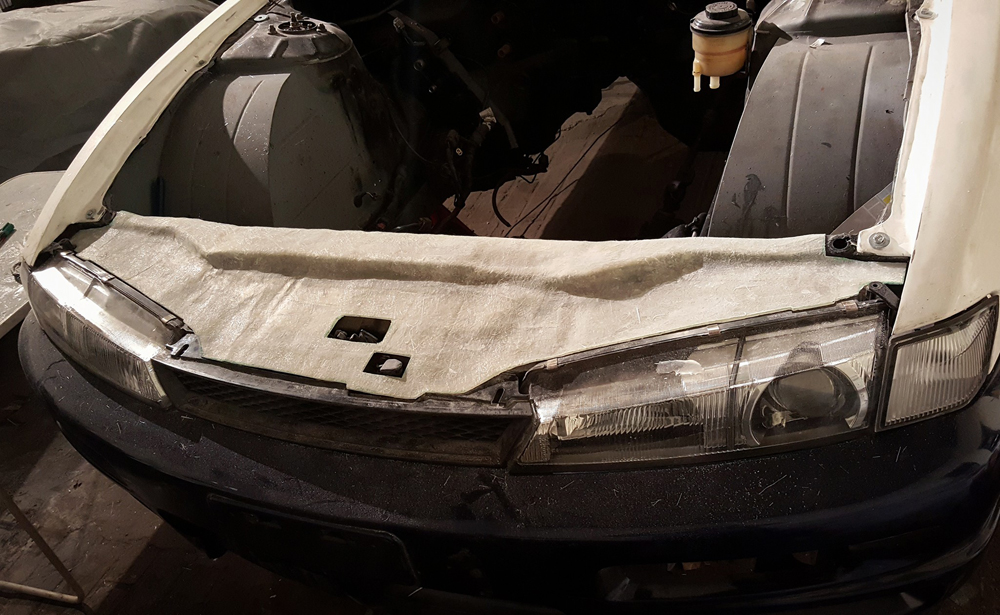 Last edited by CHiNo4ReaL; 12-28-2016 at 02:55 PM.. |
|
|

|
|
|
#28 |
|
Zilvia Addict
 Join Date: Jul 2008
Location: Canada
Age: 34
Posts: 686
Trader Rating: (0)
           Feedback Score: 0 reviews
|
I love the way this is taking shape.
When you started your cooling panel, did you just put some plastic wrap or thin cardboard down first to get the initial form?
__________________
-Jordie Lewis '93 Skyline Type M |
|
|

|
|
|
#29 |
|
Leaky Injector
Join Date: Feb 2009
Location: Arnhem, the Netherlands
Age: 31
Posts: 92
Trader Rating: (0)
      Feedback Score: 0 reviews
|
Yes, plastic wrap around the headlights / grill as you don't want any residue stick on there.
Also add some tape around the radiator support bar so when it is hardened it wouldn't stick and make it easier to get it off. Then make a mould with cardboard and more tape and start with laminating the fibreglass 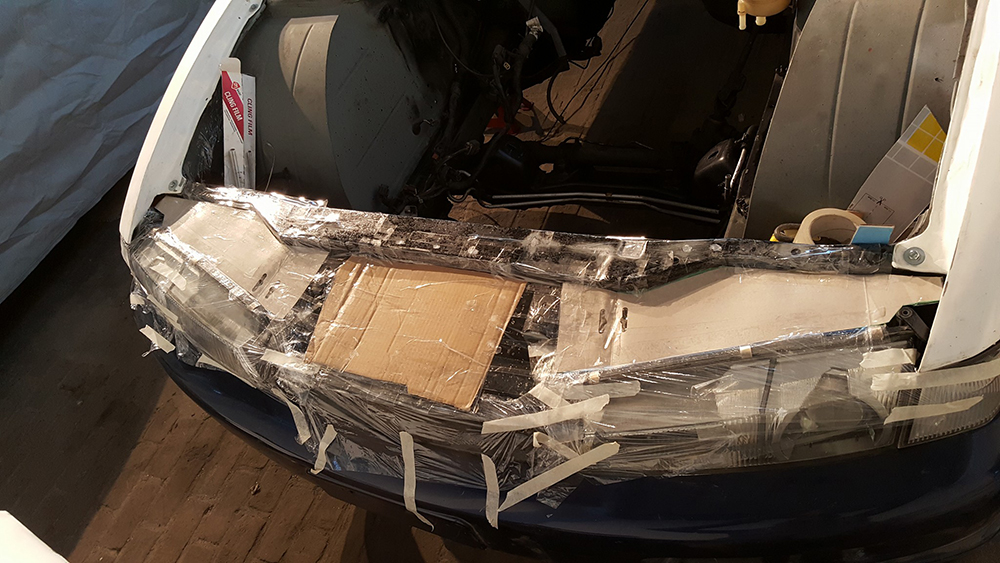 |
|
|

|
 |
| Bookmarks |
| Thread Tools | |
| Display Modes | |
|
|