
 |
|
|||||||
| Home | Rules & Guidelines | Register | Member Rides | FAQ | Members List | Social Groups | Calendar | Mark Forums Read |
| Tech Talk Technical Discussion About The Nissan 240SX and Nissan Z Cars |
 |
|
|
Thread Tools | Display Modes |
|
|
#1 |
|
Nissanaholic!
 Join Date: Feb 2012
Location: Oxnard, CA
Age: 28
Posts: 1,876
Trader Rating: (31)
           Feedback Score: 31 reviews
|
Nismo Clutch Bracket Install - S13
I've never seen an install article (only promises of one), so here is one for the community (the way I tackled this) - with pictures!!
Install: hour to hour and a half. If you're installing a nismo bracket you probably are pretty familiar how to pull the bracket out. If not, then two hours max. You'll need an M6 bolt, two washers, and nylon lock nut. For tools, basic hand tools, and a vise preferably. 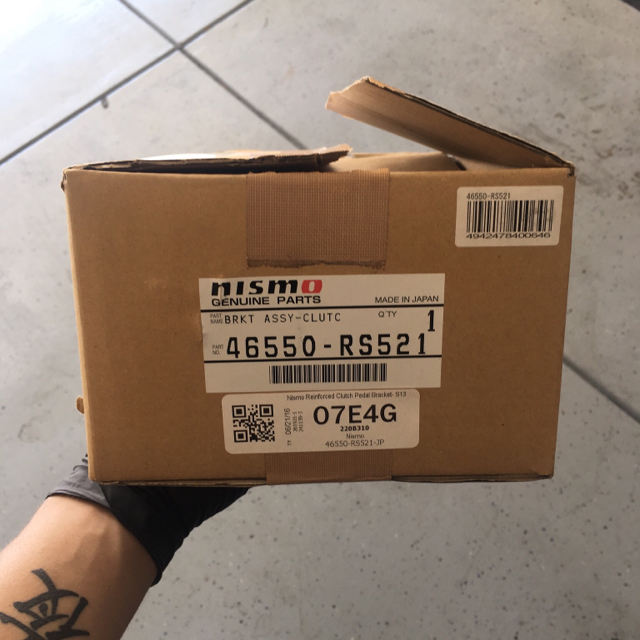 Why the nismo bracket? It has an upper support, more welds, and my personal favorite... It's straight! The problem with welding your clutch bracket you just broke is you probably mangled it after it snapped. It's hard to get it perfectly straight and keep pedal placement (space between clutch pedal and brake pedal) proportional. On top of that, a new regular bracket cost more than the nismo. You can go to the junk yard but not everyone has a welding friend. This install DOES NOT require ANY drilling, cutting, etc of the nismo bracket nor the arm itself. You can do this at home with hand tools . The arm has full movement in the nismo bracket and does not hit anywhere. You will be able to retain a spring function, and the stopper/ASCD switch (basically you will be able to have your normal clutch pedal adjust and your free play adjust). You WILL lose the NSS. I bypassed mine a long time ago (I'm surprised you haven't either). You could make another bracket to retain it, but it is not covered in this article. Put the brackets side by side and you'll notice the differences. The return spring mounting is different and NSS arm is not there. Onto the install!!! Part One - Nismo bracket prep 1. Take your 14mm socket wrench and unbolt the arm from the old bracket, and tap the bolt out. Clean off the old grease and put some new stuff on there. 2. Take the arm and line it up on the Nismo bracket. Put the bolt in and tap it in with a hammer LIGHTLY. It's a TIGHT fit. 3. If you're using the USDM return spring, you will need to modify it. It will NOT fit where the Nismo bracket's is. The shape is offset versus center, and is way too short. To use the oem spring, you'll be using the two holes just above the pivot point for the pedal. If you have a RHD clutch pedal spring, then lucky you. Throw it in, and re-install everything. If you are using the USDM spring, keep going. 4. For your protection on this part, PUT ON SOME SAFETY GLASSES. If you fuck your eye up not wearing them, it's on you. 5. You'll need to bend the spring in a few places to seat properly. Reason being is that the holes are not the same distance from the pedal arm. Looking from the front of the bracket, the hole on the right is farther back. You need to spread open the middle off the spring, so there's a greater distance (more tension). Then put a bend in the arm for the right coil side. The last one is on the right side coil. The right side hook needs to be able to reach farther back. To do this, collapse the last coil so its reach is extended (this is where the vise comes in). 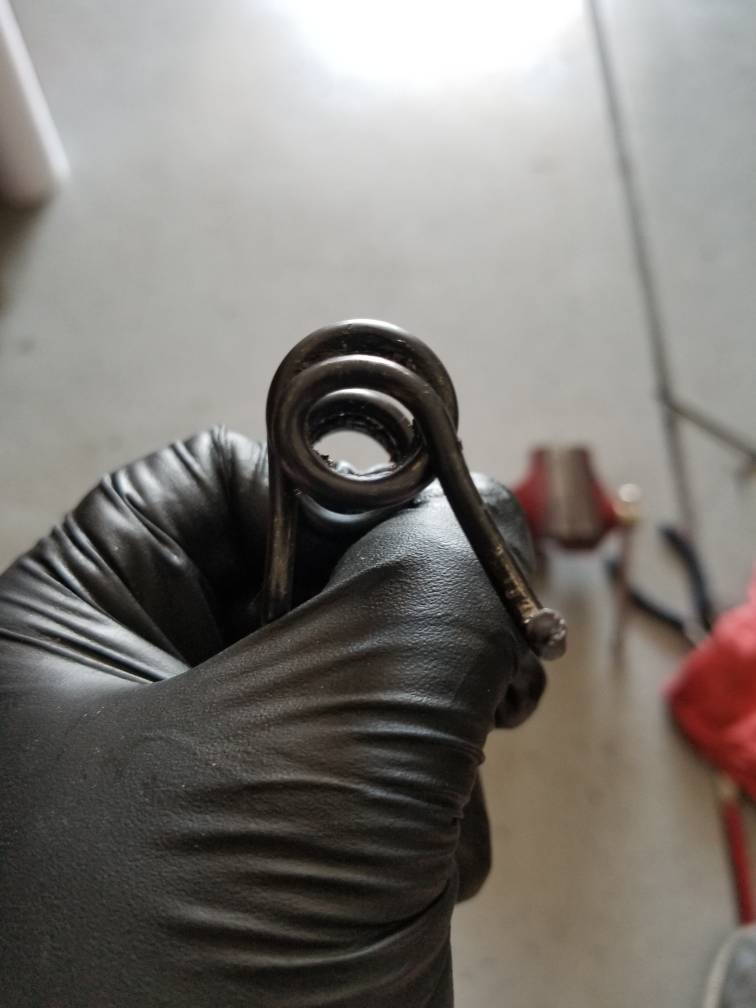 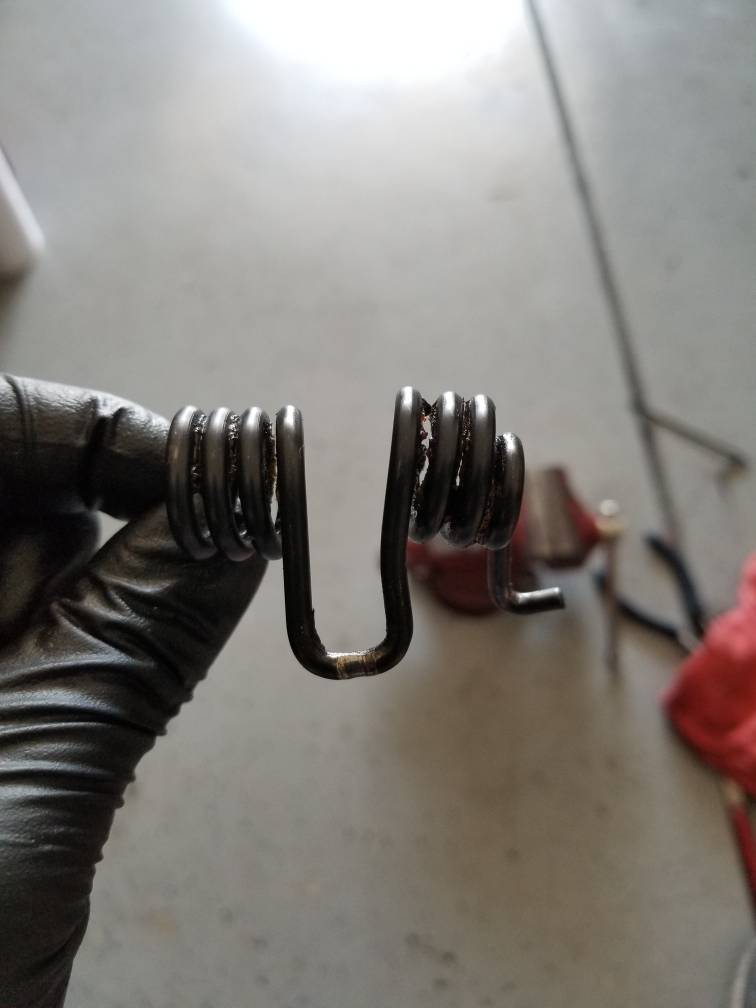 6. To install the spring, use a zip tie to hold the ends together, it will make life much easier. I found it was easier to slip the left side hook, then cut the zip tie and install the right side hook. Have the expectation of possibly scratching the paint inside the bracket. 7. Apply new grease to the spring, and sides of the bracket where the spring coils may rub against. 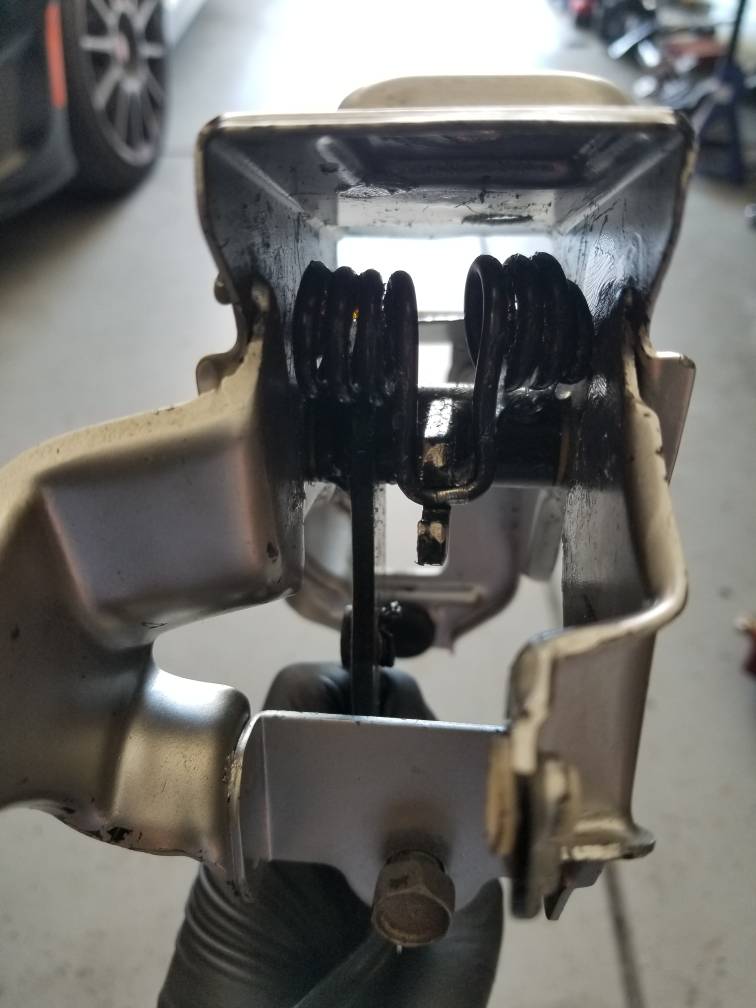 8.Take your m6 bolt and slide two washers and then the nut on. Make sure the nut is snug. Slide through the lower hole (bolt head facing inwards of the assembly) and put your washer and nylon lock nut on. Now you have your free play adjustment. 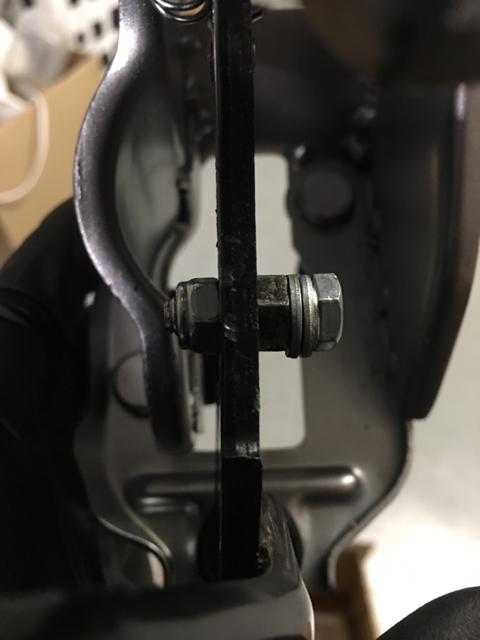 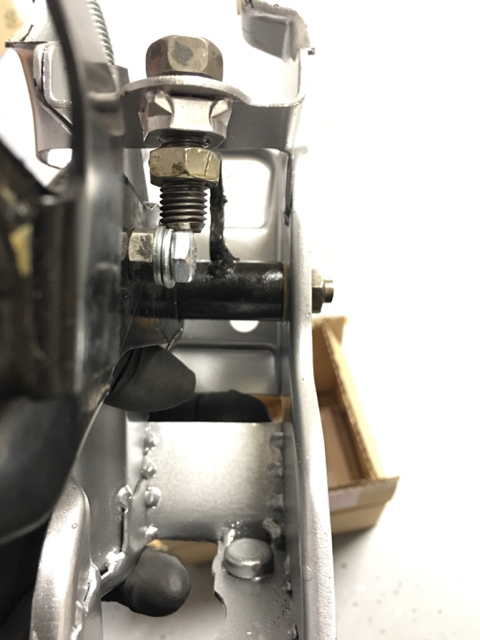 9. Transfer your ASCD switch/stopper over. 10. Make sure you test pedal movement and watch the spring hooks to see how they move. If the right side hook pops out, check to see if the hook is extended enough or the coil bend is angled enough. If it moves and returns as normal, then prep is done! Part two - Install 1. Get under the dash remove the dash under cover. The nismo bracket is shaped differently and it will be a TIGHT fit to get it in. You will need to manipulate it around your HVAC ducting. 2. Pull the clip to the pin the holds the CMC bracket to your clutch arm. Pull the pin and set them somewhere you won't lose them. 3. Take your 12mm deep socket and unbolt the CMC from the firewall (the bracket's studs). 4. If you still have a hardline then you'll have to take off the line from the clips to be able to move the cmc forward. If you changed to a braided line, then just pull the CMC out and set it to the side, make sure it doesn't go sideways/upside-down! It WILL drain out! 5. Go back under the dash and look up, and unbolt the 12mm bolt holding the bracket on, and slide out the old bracket. 6. Take your nismo bracket and slide it wedged around the HVAC ducting, and slide in the bracket. Easier said than done. It will take some time and manipulation of the duct, take your time and don't push too hard. 7. Bolt the bracket up and reinstall the CMC, do your adjustments and enjoy your nismo bracket! 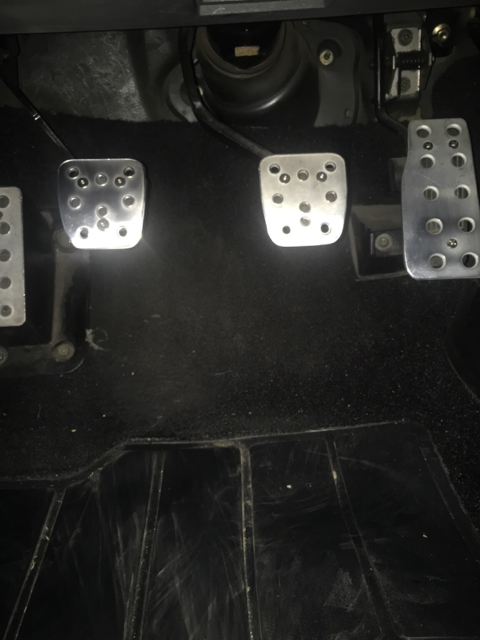 One last thing... After installing the Nismo bracket, the upper bracket that's welded to the firewall (holds captured nut for upper bracket bolt) will be next in line to fail. Mine has actually separated at the welds. Just something to keep in mind. Last edited by mr.nismo.; 06-19-2019 at 11:46 AM.. |
|
|

|
| Sponsored Links |
|
|
#2 |
|
Zilvia FREAK!
 Join Date: Apr 2006
Location: East Coast
Posts: 1,083
Trader Rating: (27)
           Feedback Score: 27 reviews
|
Why would you remove the stock coil spring? I installed a nismo bracket and looked nothing like this writeup with a home depot door spring, i'd be very cautious of having that on my clutch pedal box.
__________________

|
|
|

|
 |
| Bookmarks |
| Thread Tools | |
| Display Modes | |
|
|