
 |
|
|||||||
| Home | Rules & Guidelines | Register | Member Rides | FAQ | Members List | Social Groups | Calendar | Mark Forums Read |
| Tech Talk Technical Discussion About The Nissan 240SX and Nissan Z Cars |
 |
|
|
Thread Tools | Display Modes |
|
|
#1 |
|
Zilvia FREAK!
 |
HOW TO: WORKING cluster with RB in s13
Since I recently swapped my RB25 in my S13, I’ve been searching and searching for how to get a working cluster for cheap. With no definitive answers, I’ve decided to share how I made mine work.
You’ll need your stock S13 cluster, a z32 cluster (or any Nissan V6 cluster), a dremel, a soldering iron, and a sheet of thin plastic (optional) I started out with removing my OEM S13 cluster. Dual cam, single cam, doesn’t matter. Everything will be replaced. Next you’ll need to disassemble it. Pop out the clear plastic pins, then the black plastic pins, and both covers will come right off. You’ll be keeping the temp and gas gauges, and the warning lights on both sides, so be careful with those. Flip the cluster over, and remove the 4 screws for the speedometer, 2 screws for the clock, and the remaining ones for the odometer. Then, remove the 3 screws for the tachometer. After that, the tach, speed, odo, and clock should all come out. Set this aside somewhere safe. You’ll then do the same thing for the z32 cluster. Remove the covers, then the gauges. The only thing that mattered to me was the tach and speed, so those were the only ones I needed. If you want the oil pressure or OEM boost gauge, that won’t be covered here. Remove the rest of the S13 gauges and lights, then remove the blue circuit tape on the back. Then take your bare s13 cluster and hack the shit out of it with your dremel. Actually. Remove every single plastic mounting point, screw hole, etc besides the slots for the plugs. Take your z32 speedometer and tachometer, and size them up. I found speed on the right and tach on the left works best. Then you’ll need to cut a slot out of the top of the cluster for the speedometer motherboard to sit nicely. Here’s how mine looks. 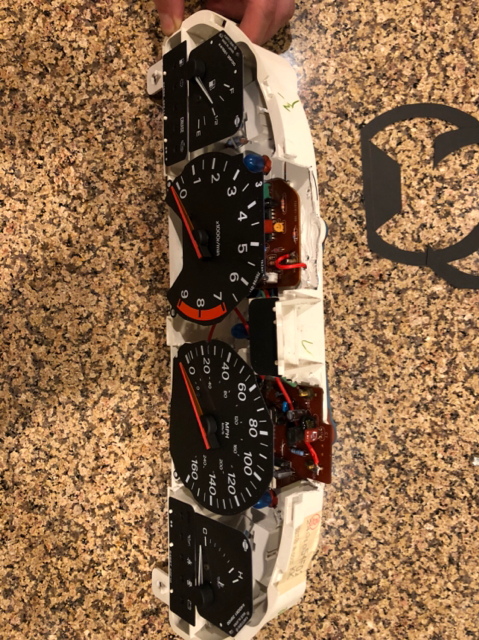 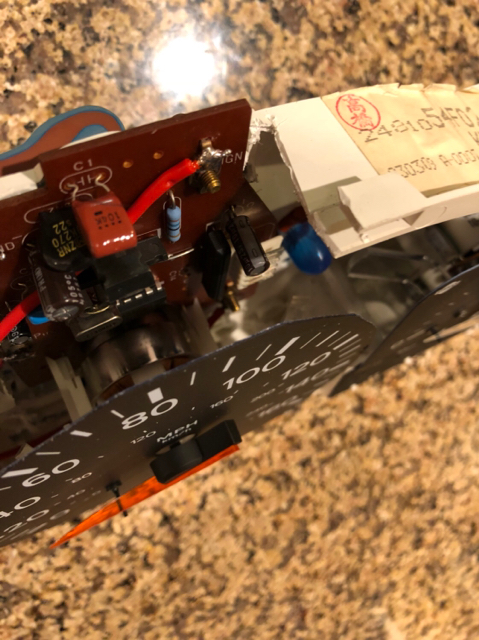 Once everything is lined up how you like, mark where the screws on the back of the gauges sit on the cluster. Drill those holes with a small drill bit just big enough for the OEM screws. Screw them into the cluster and make sure it sits nicely. Some adjustment may be needed. Next, look on the back of the z32 cluster and see which pin slot on each gauge has what function. If you can’t read the Japanese or don’t understand the acronym, don’t worry! The s13 and z32 have the same writing so each pin is straight forward, just match each one. You’ll need to run a wire from each exposed copper part on the blue circuit tape to the corresponding pin on the gauge. If done correctly, it should look something like this: 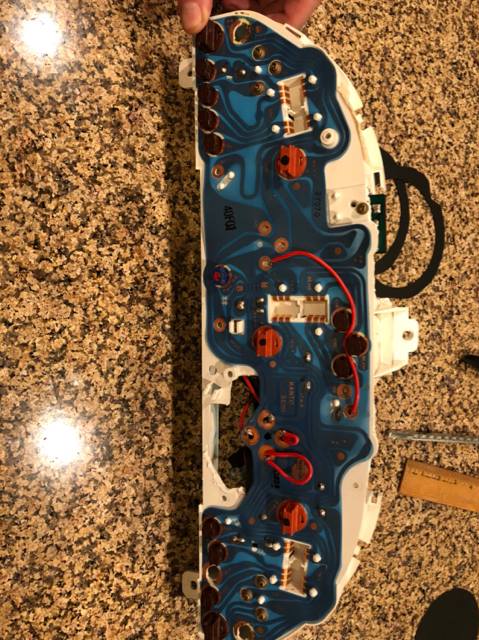 The next step is optional, depends how nice you want the product to look. Since the z32 gauges are rounder than the s13 gauges, they don’t fill up the black cover completely. Measure the gauge face and draw a circle with a 1/2 cm bigger radius on any plastic sheet surface. I chose a 5 star notebook cover. Cut it out, then measure 1 CM inwards from the circle, then cut that out. It should look like this. 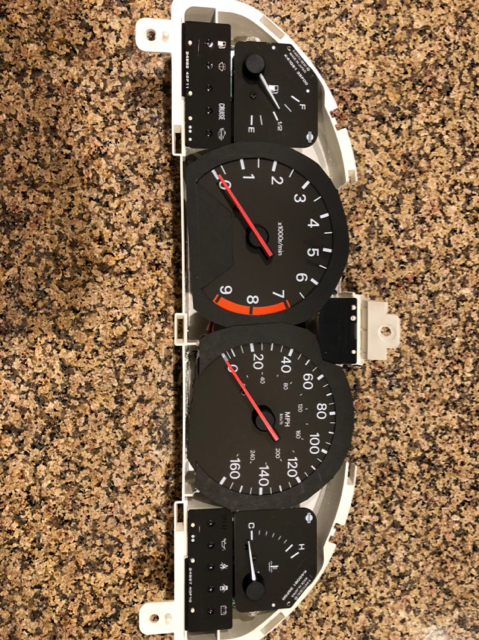 Trim accordingly to make it fit, look how you want, etc. Then figure out a way to mount them permanently. I chose superglue. Put the other OEM gauges in the cluster, reattach the circuit tape (you should’ve already since you had to wire it), and pop the faces back on. It should be complete for the most part now. Tape up the hole(s) you had to cut. 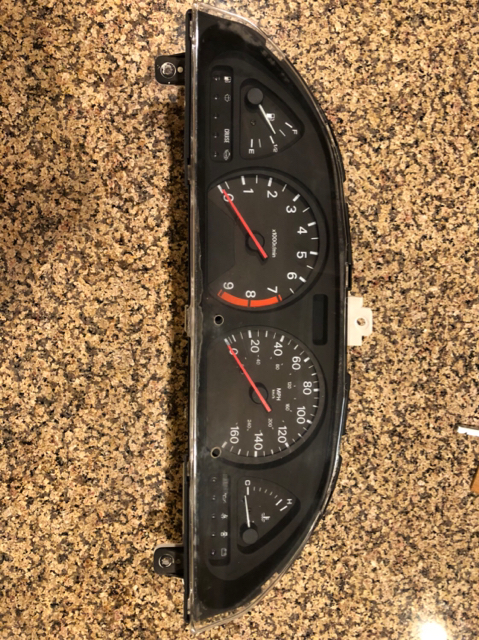 Plug it in, and see if you’ve done it correctly! It won’t read correctly at first, you’ll need to adjust the potentiometer on the back of the tach. I found this is a better alternative to aftermarket tachs, tach converters, etc. Hopefully this helps anyone with any sort of 6 cylinder swap in their s13. It works and it’s very accurate and responsive compared to the alternatives. 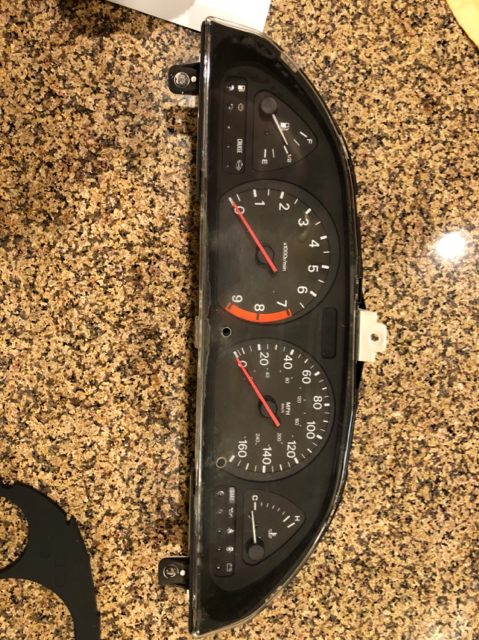 I take no responsibility if you royally fuck up your cluster, car, or self in any shape or form. Sent from my iPhone using Tapatalk |
|
|

|
| Sponsored Links |
|
|
#2 |
|
Premium Member
 Join Date: Mar 2009
Location: Maricopa, AZ
Age: 30
Posts: 7,679
Trader Rating: (10)
           Feedback Score: 10 reviews
|
That was a pretty decent writeup actually. Thanks for contributing to the forum and setting an example. Reminds me of the old days when people did write-ups all the time instead of just wanting to be spoon fed.
|
|
|

|
 |
| Bookmarks |
| Thread Tools | |
| Display Modes | |
|
|