
 |
|
|||||||
| Home | Rules & Guidelines | Register | Member Rides | FAQ | Members List | Social Groups | Calendar | Mark Forums Read |
| Builds (and builds only) Got a build thread? It goes here, build threads anywhere else on the forum will be locked and never moved. |
 |
|
|
Thread Tools | Display Modes |
|
|
#31 |
|
Leaky Injector
Join Date: Feb 2009
Location: Arnhem, the Netherlands
Age: 31
Posts: 92
Trader Rating: (0)
      Feedback Score: 0 reviews
|
Thanks!
Here another update, because I was very busy last weeks. Finally managed to mount the fuel tank, fuel/brake hoses, e-brake lines and the subframe etc for the last time. 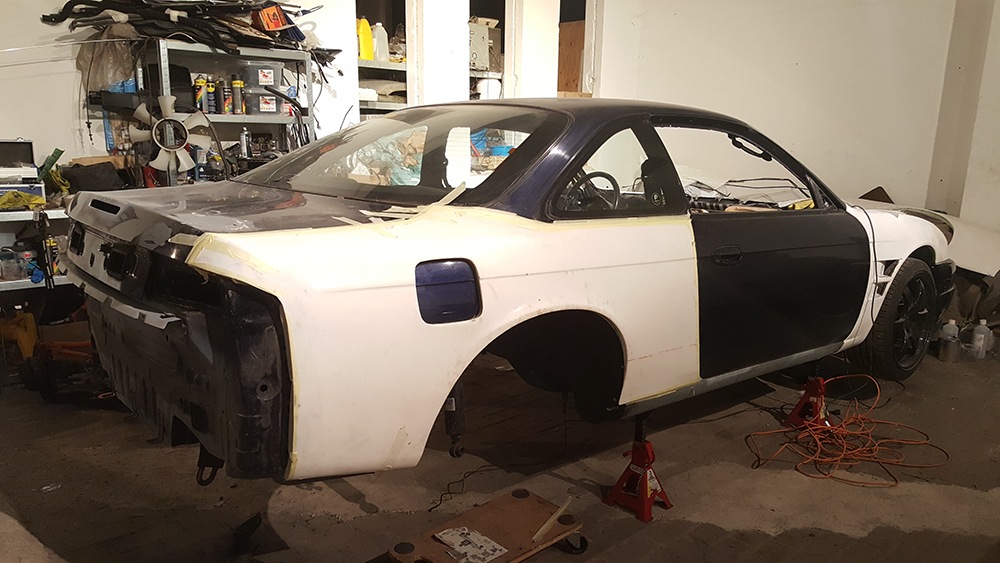 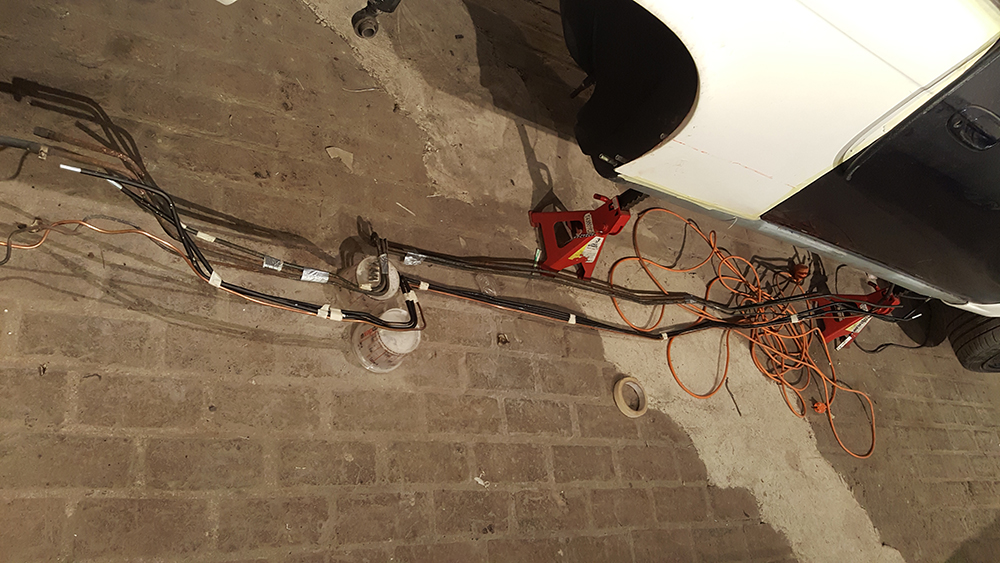 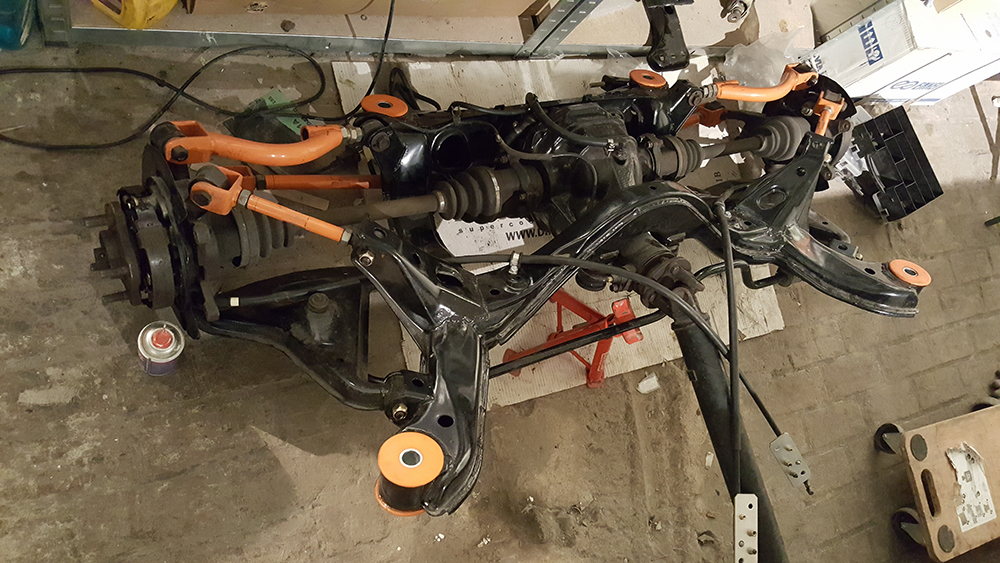 Another step further  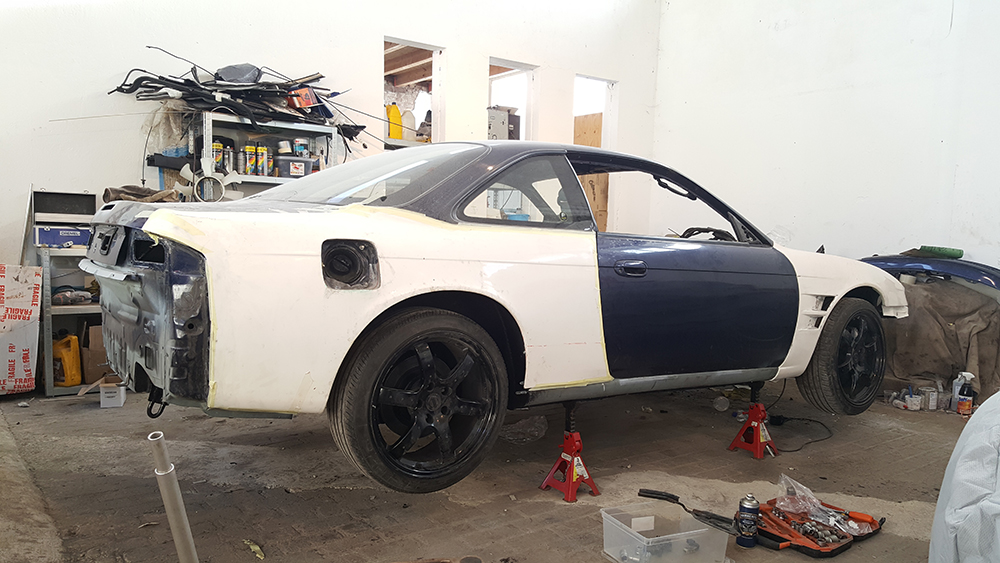 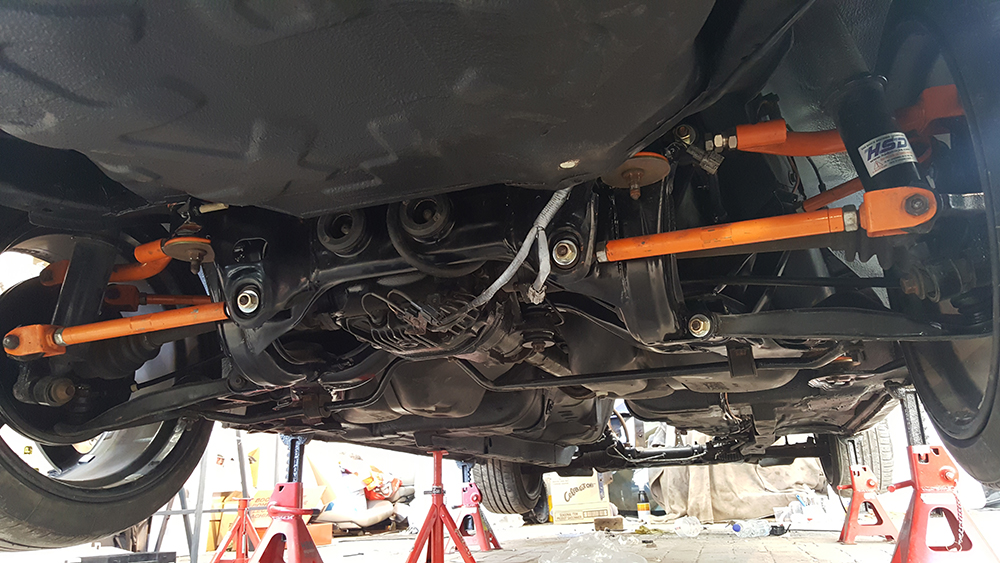 Also made some steps with the cooling panel. Now I only need to make some mods to the piece where the hood lock sits, that needs to be lower for the hood. 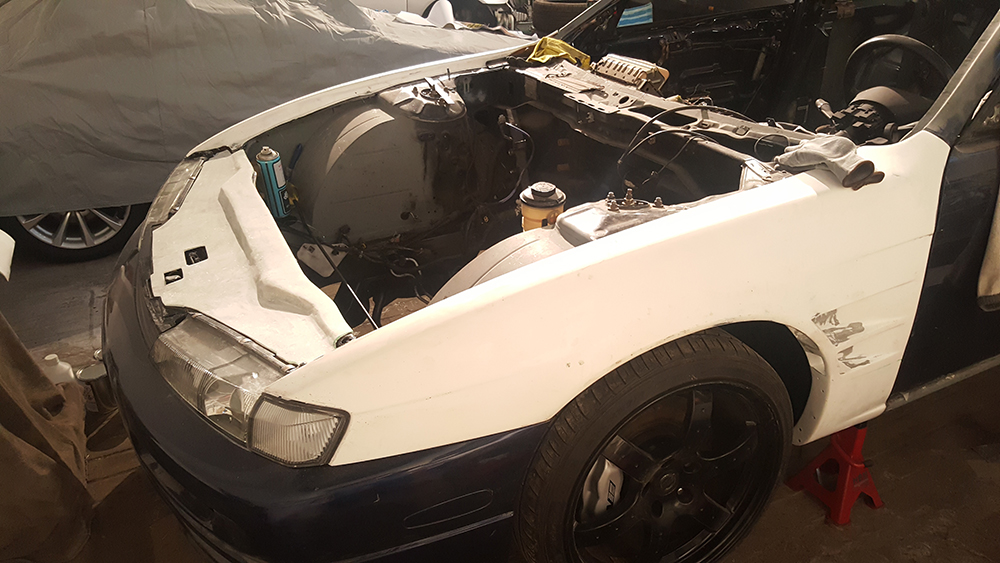 Everything on the front is aligned, headlights, bumper etc., but the corner lights didn't fit very well on top, there was a gap. on the right side it was even worse. 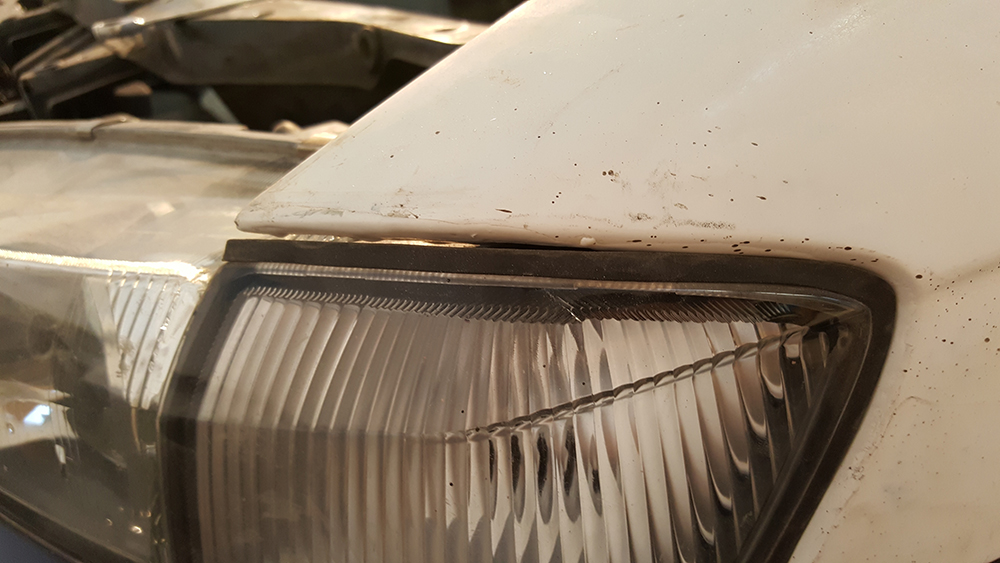 So I added some fibreglass, strengthed it from the in and outside. 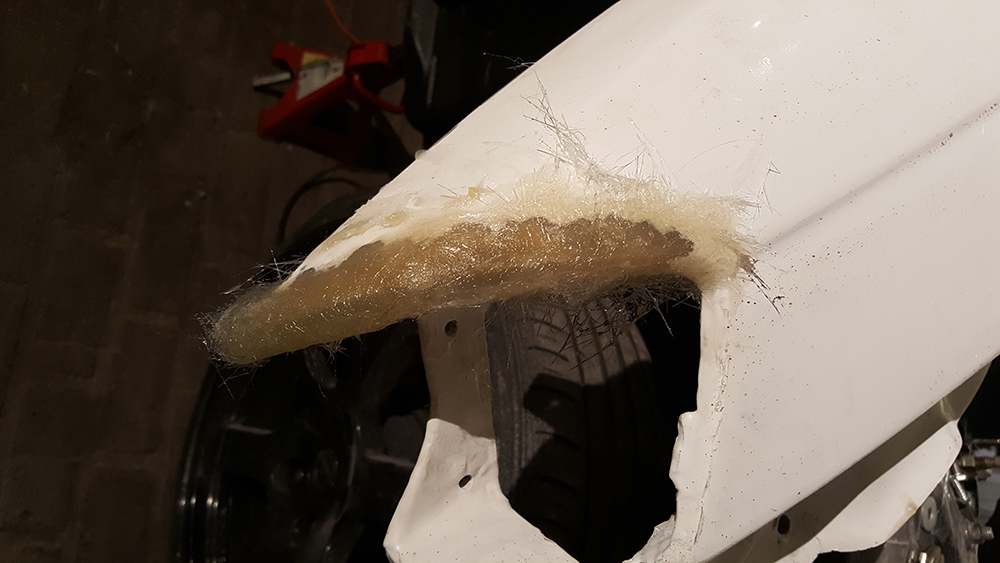 Then grind it off and more measurement 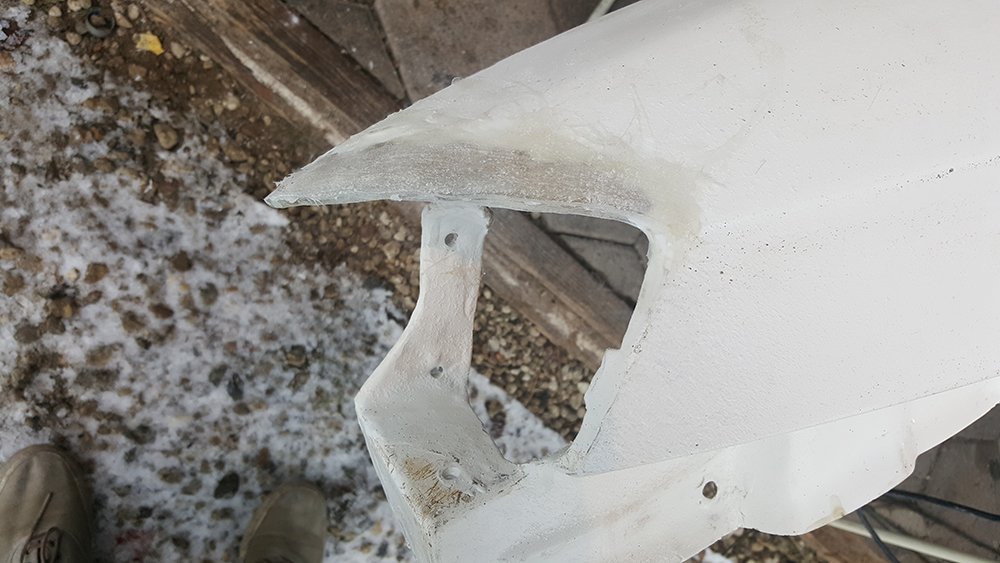 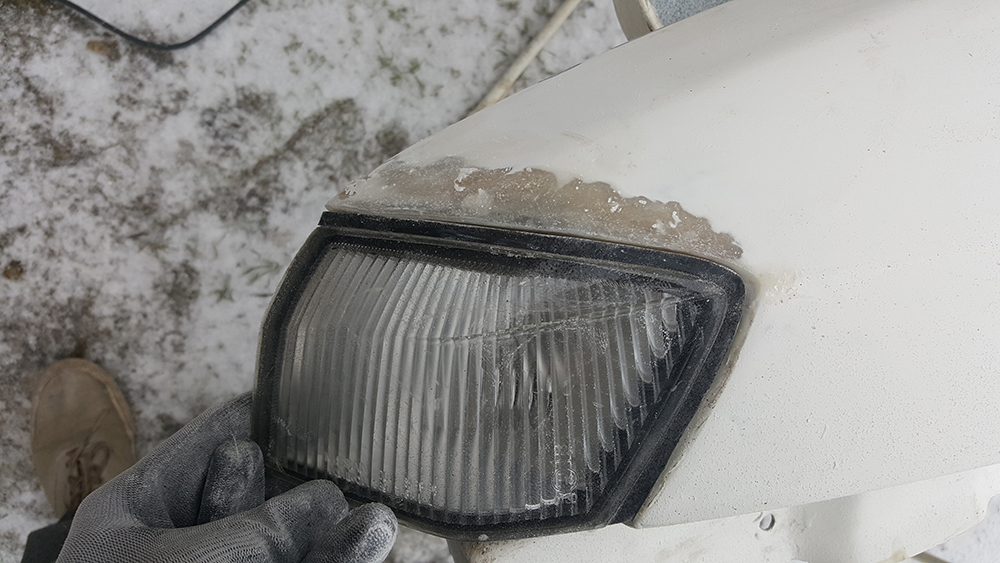 Alot of work later, it fits perfect  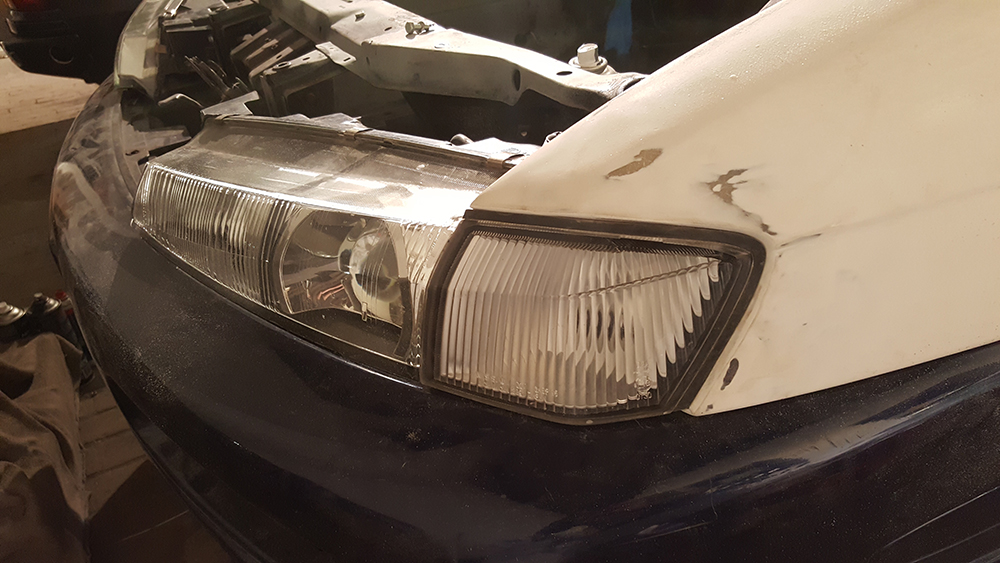 Also did some more work in the inner arches. Made some mounting holes/brackets extra 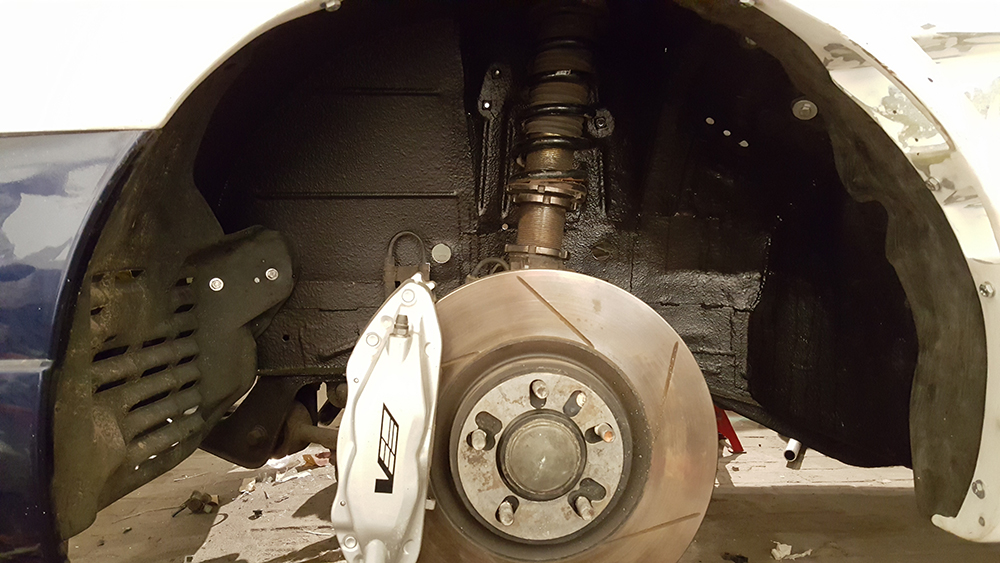 Last pic for now, I just need to do a couple small things and then I can bring her away for paint! 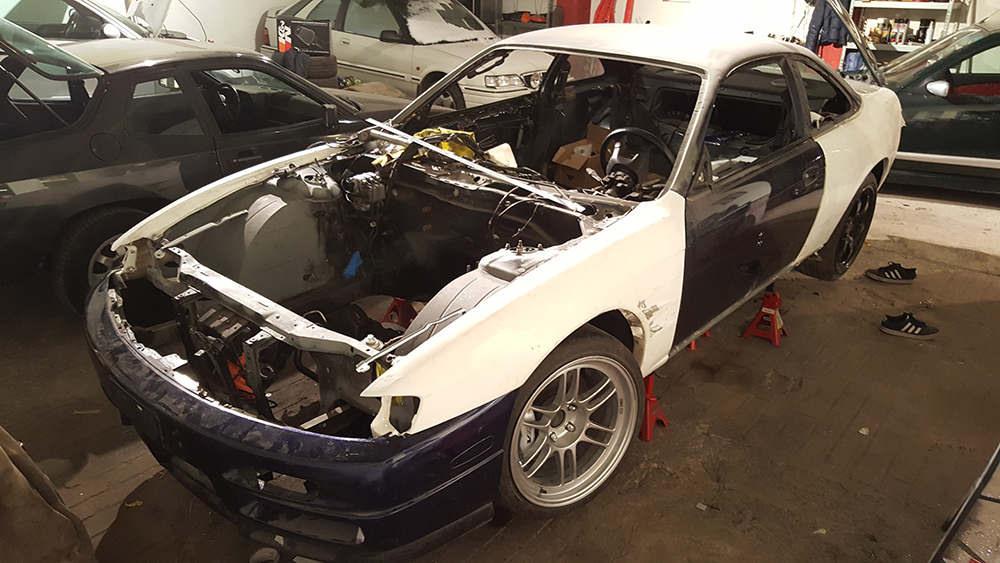 Sneak preview for the color, it will be painted in Aurora Blue pearl of the R35 GT-R. As I love blue, also I want to keep it in a OEM Nissan color. The calipers will be painted in Porsche speedgelb, I think that this combination will look good! 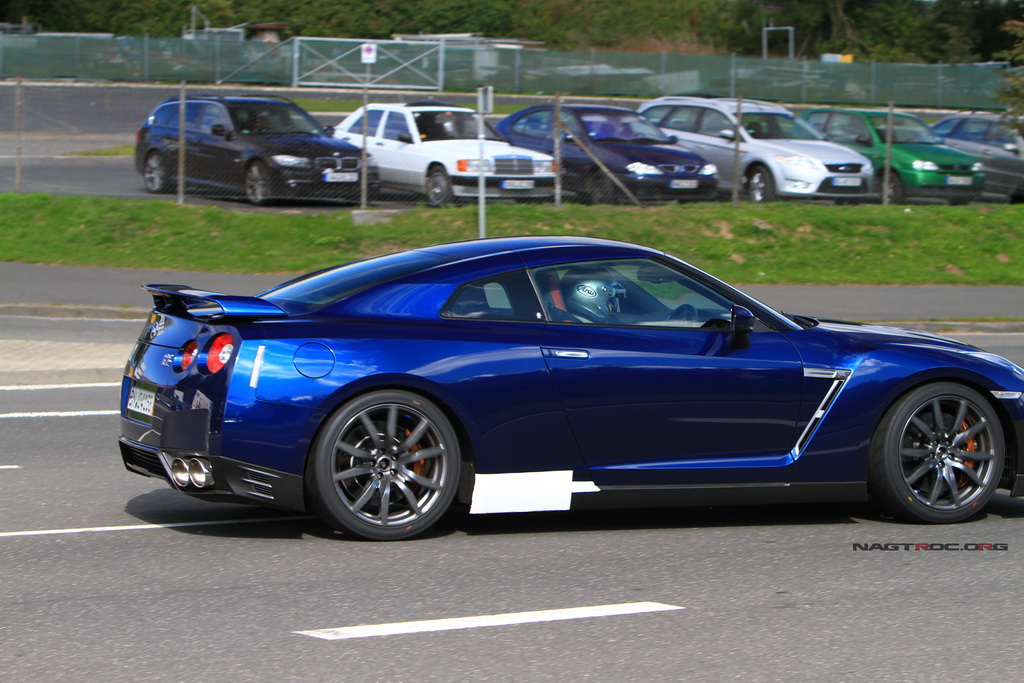 Last edited by CHiNo4ReaL; 01-24-2017 at 08:01 AM.. |
|
|

|
| Sponsored Links |
|
|
#36 |
|
Leaky Injector
Join Date: Feb 2009
Location: Arnhem, the Netherlands
Age: 31
Posts: 92
Trader Rating: (0)
      Feedback Score: 0 reviews
|
Thanks! I'm happy that I fixed it otherwise I think that it would annoy me when the car is build up
Another update: The last couple of days I did alot of work to finish all the fiberglass work. First, started with the rear overfender where the fuel cap sits. I've choosen to let the fuel cap cover to sit on the original position, so you can see that the car is wider then original. Originally the overfenders had a piece for in the opening, but because I want to keep the cover on the original position I had to modify thatm First, fill the outside with Fiberglass so I can use that as a mold for later. Then add fiberglass to the inside to fill it up, so I can make it fit perfect. 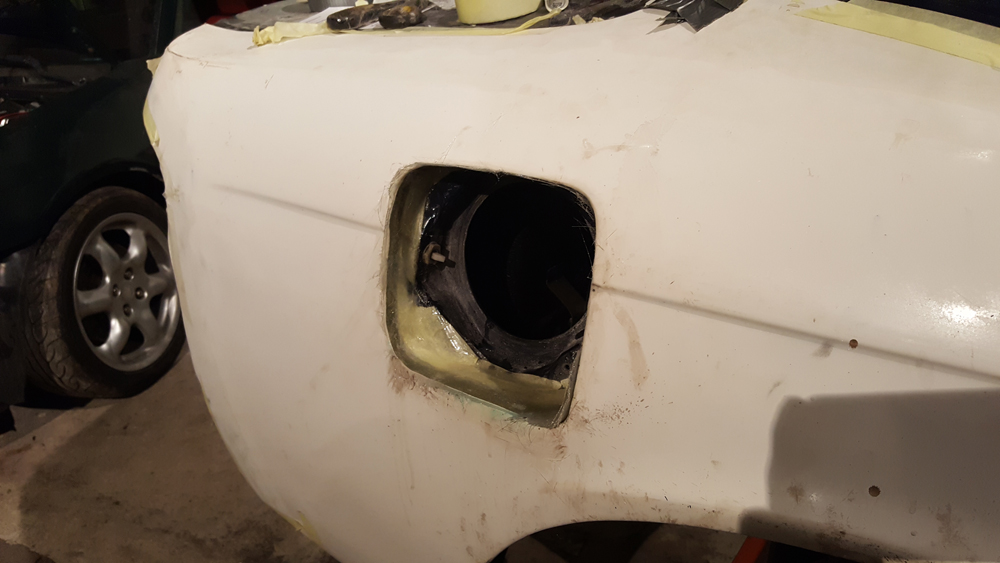 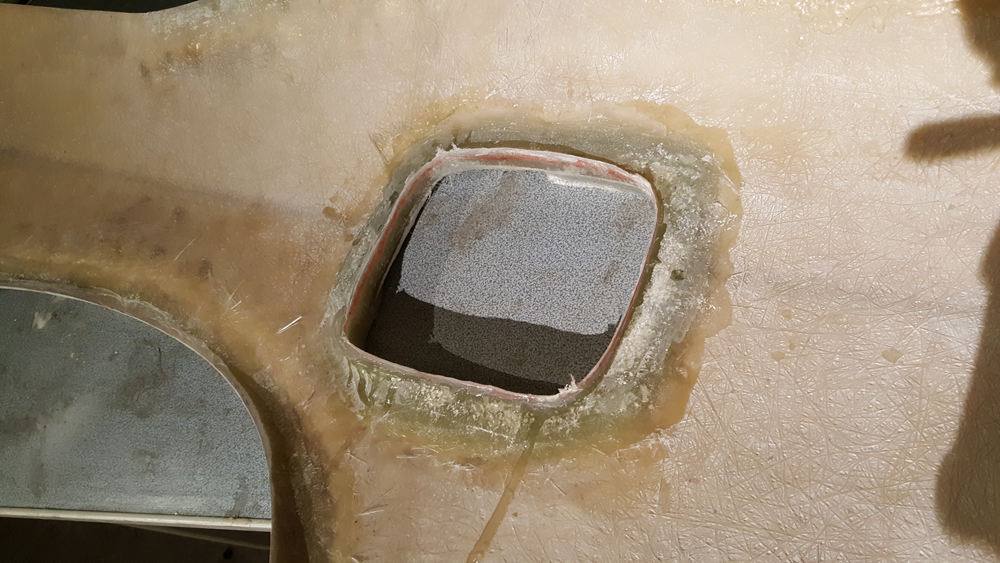 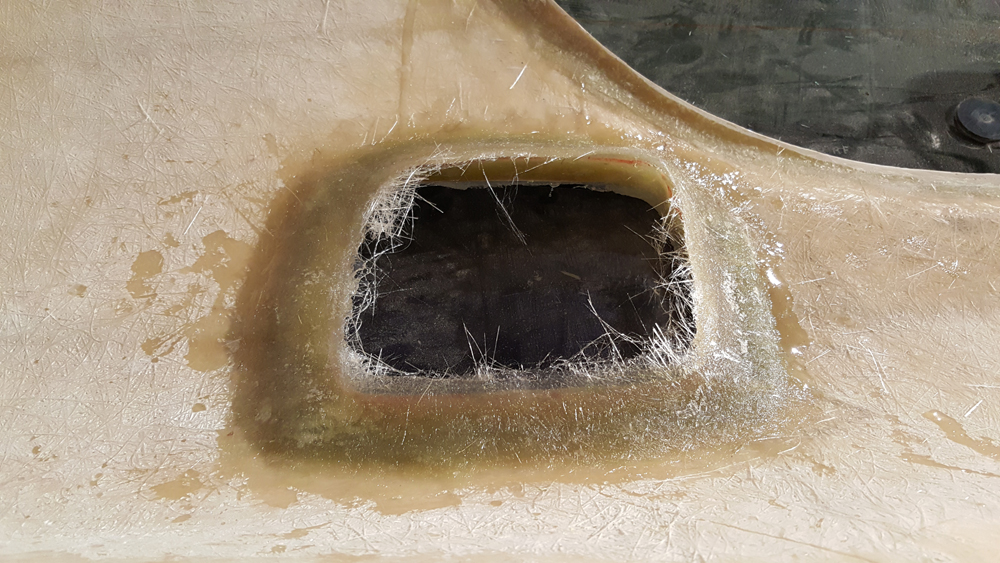 Then sand the outside down to the right size 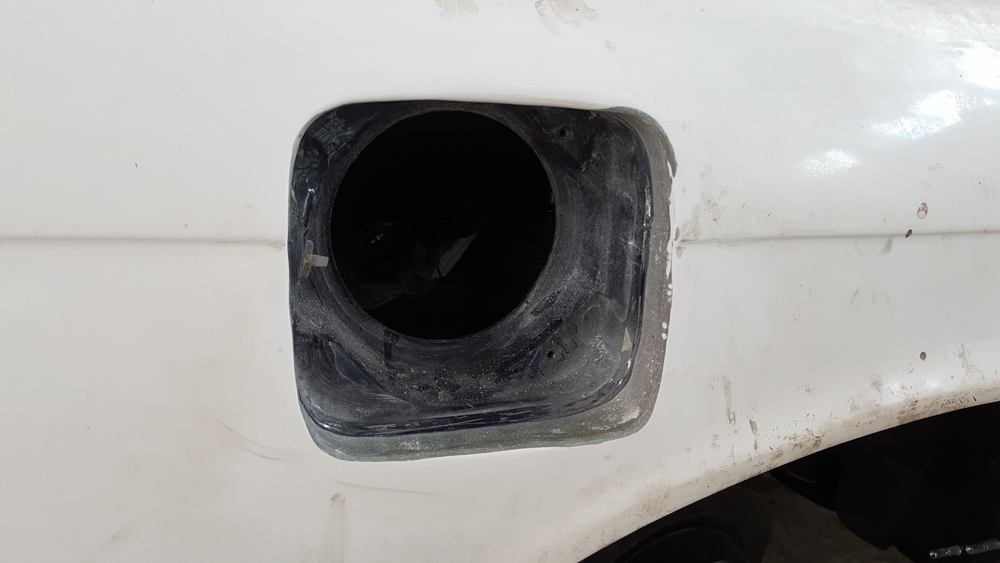 Finished it off with topcoat and then more sanding for the final result. The overfenders will be attached with kit. There is a minimal gap between the overfender and original fender, so I think that it will fit perfect. 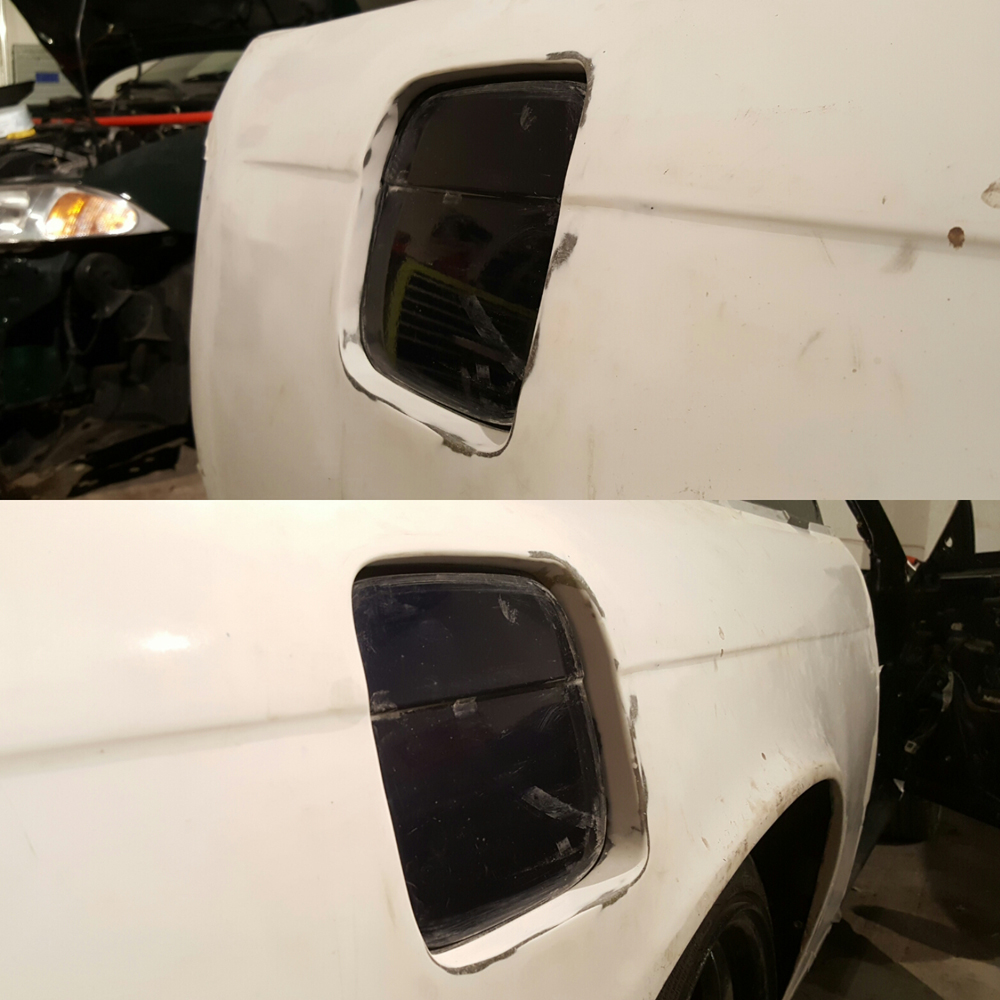 Such a mess haha 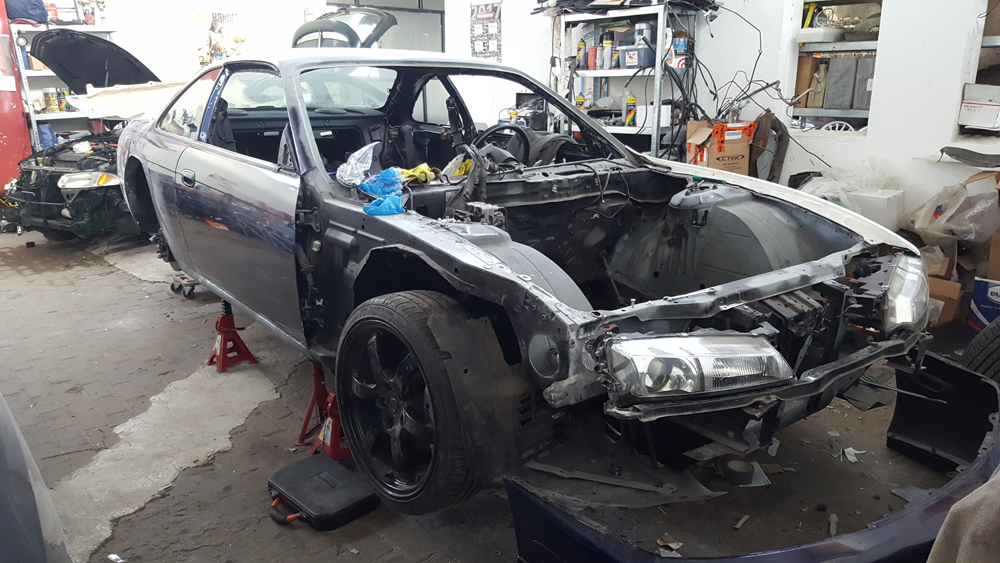 Also found a new place for the coolant expansion bottle, I'm gonna use the original bottle. First I wanted to mount a alloy bottle on top of the wheel tub but this will be a bit cleaner. 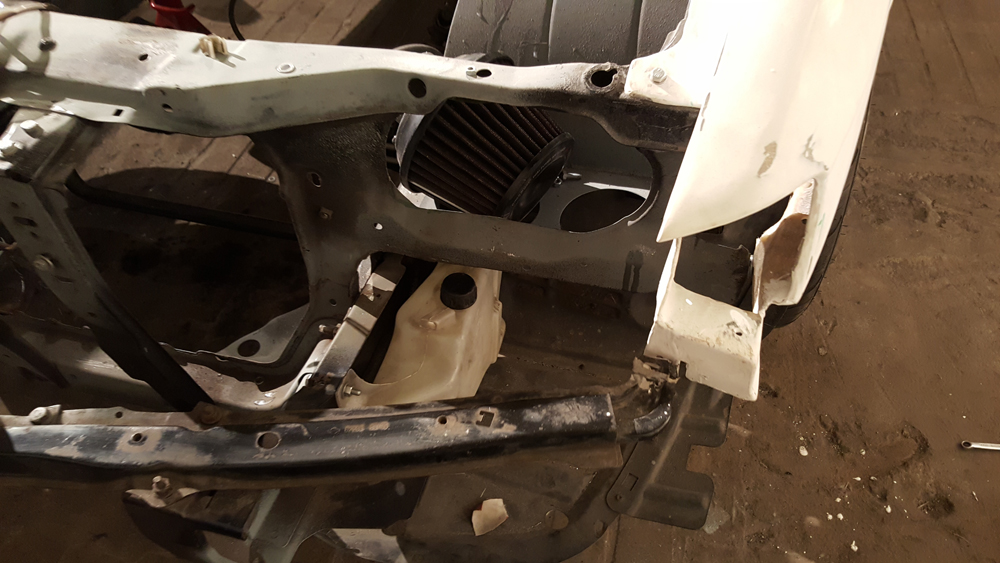 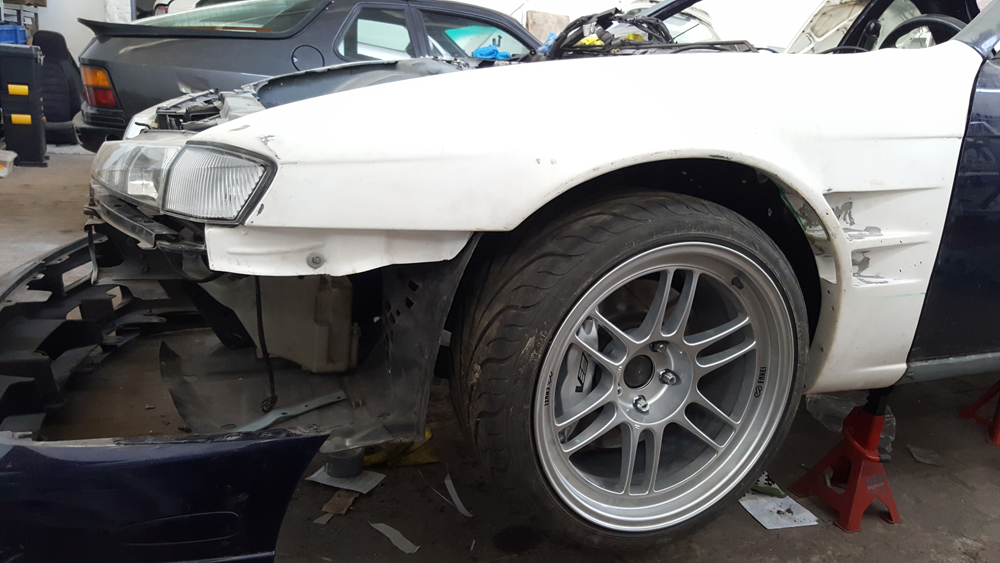 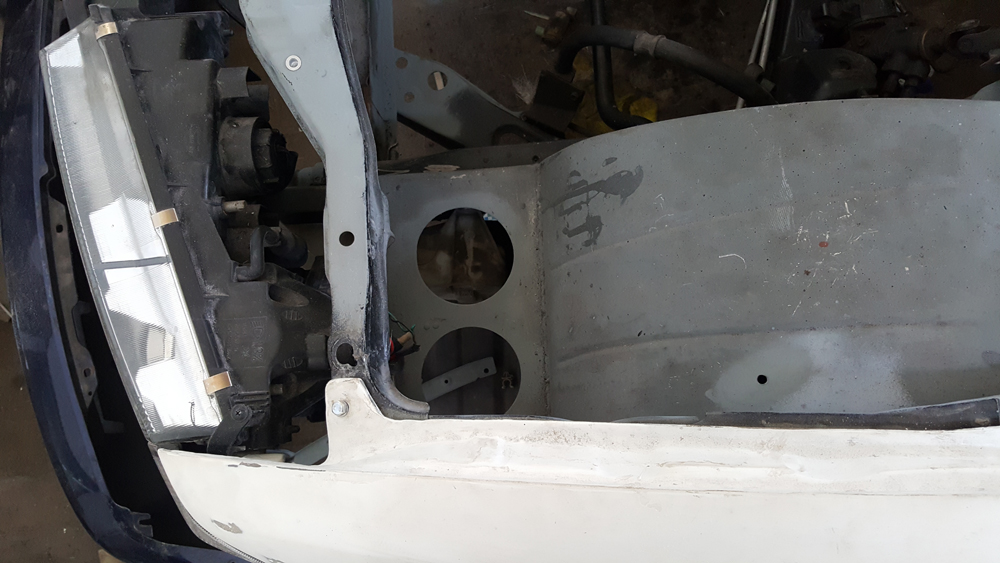 Also started with working on the cooling panel. First, I had to cut the middle part, because that has to sit lower because of the hood. 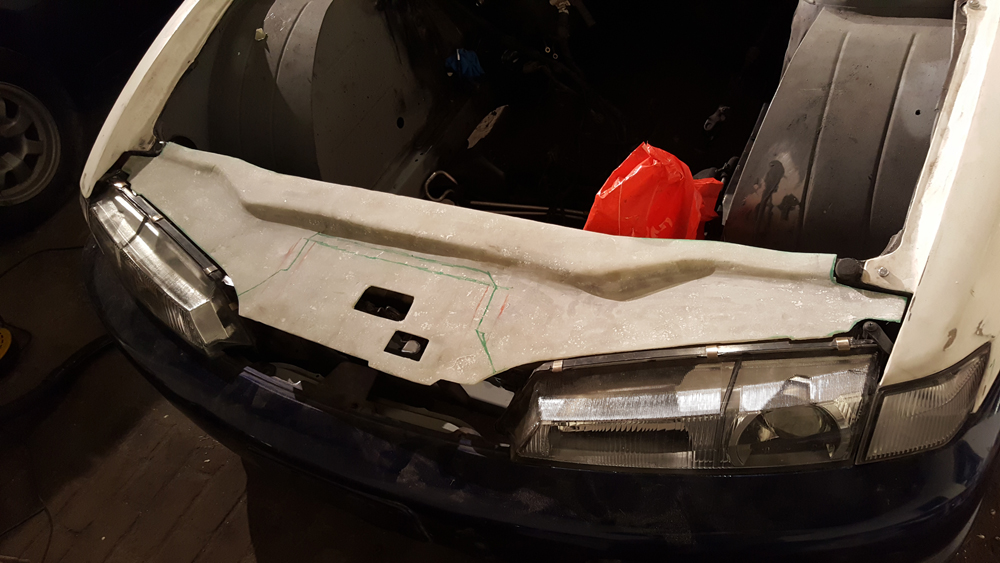 Like a puzzle haha 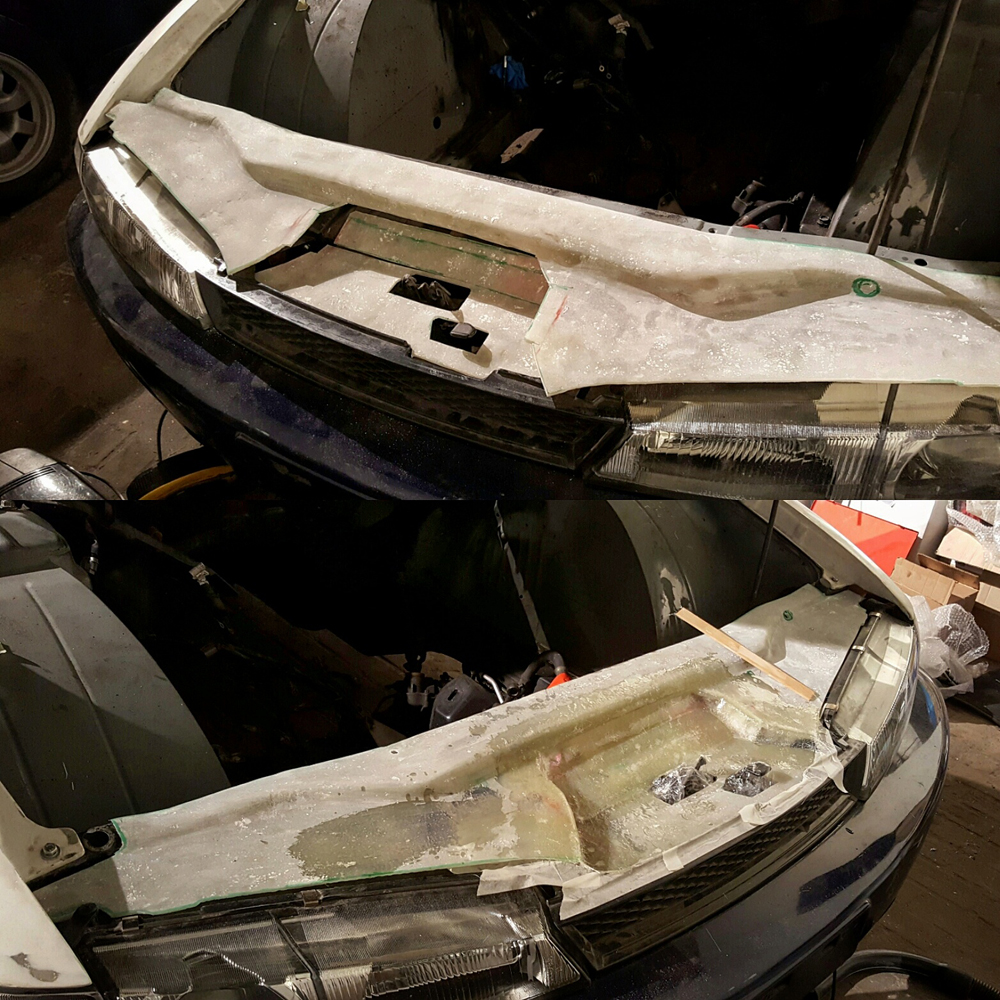 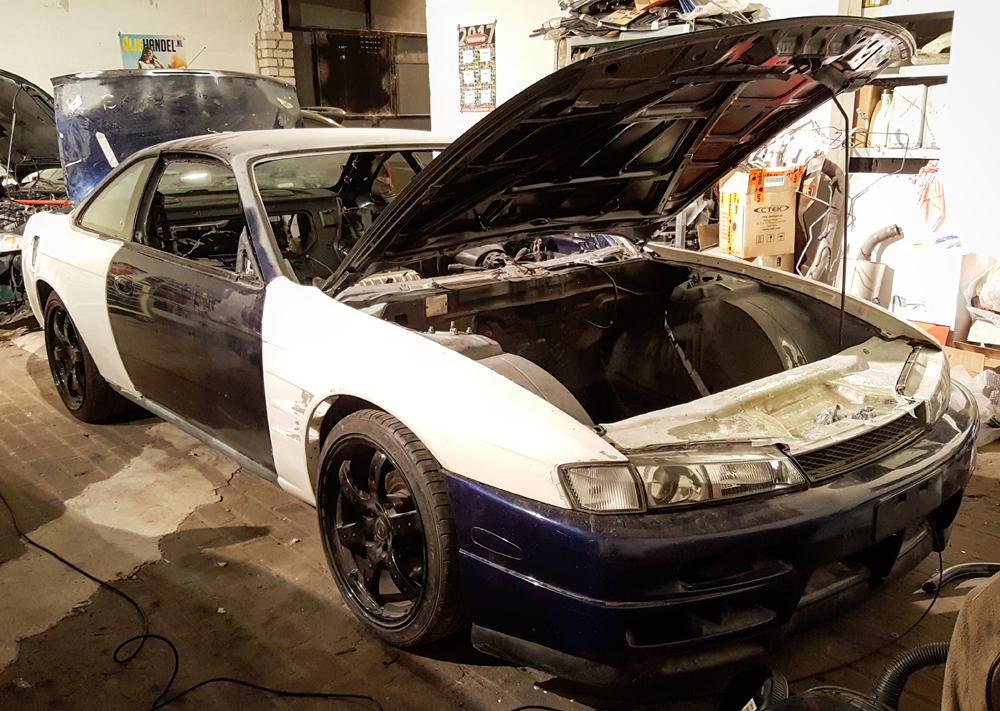 Then started to fill-up the gaps with more fiberglass. When it is hardened I'm gonna sand it more down to create a smooth and thin surface. 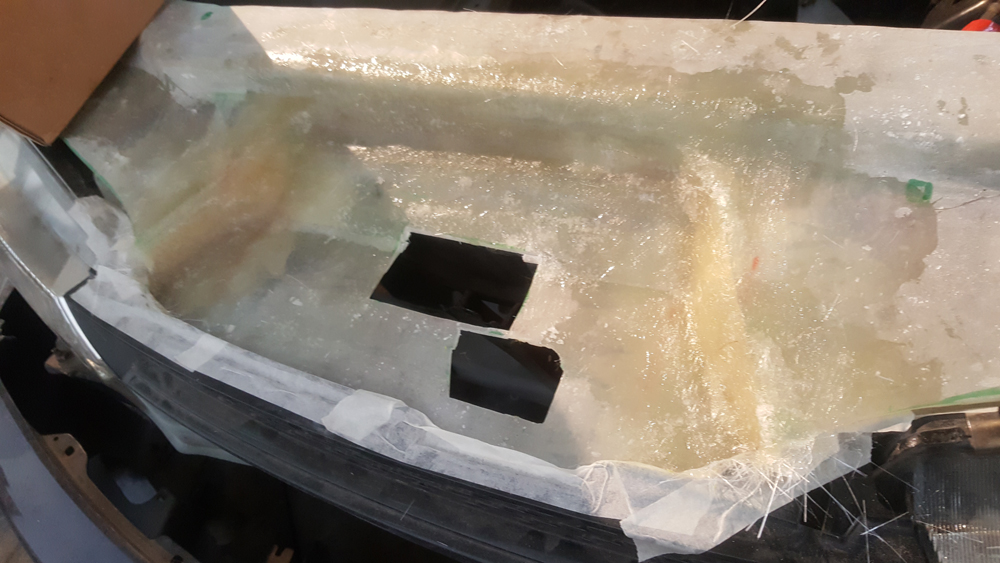 Also recieved a few pictures from the painter. He already sprayed the bumpers, spoiler and small parts. The color is Aurora flare blue pearl of the Nissan R35 GT-R. 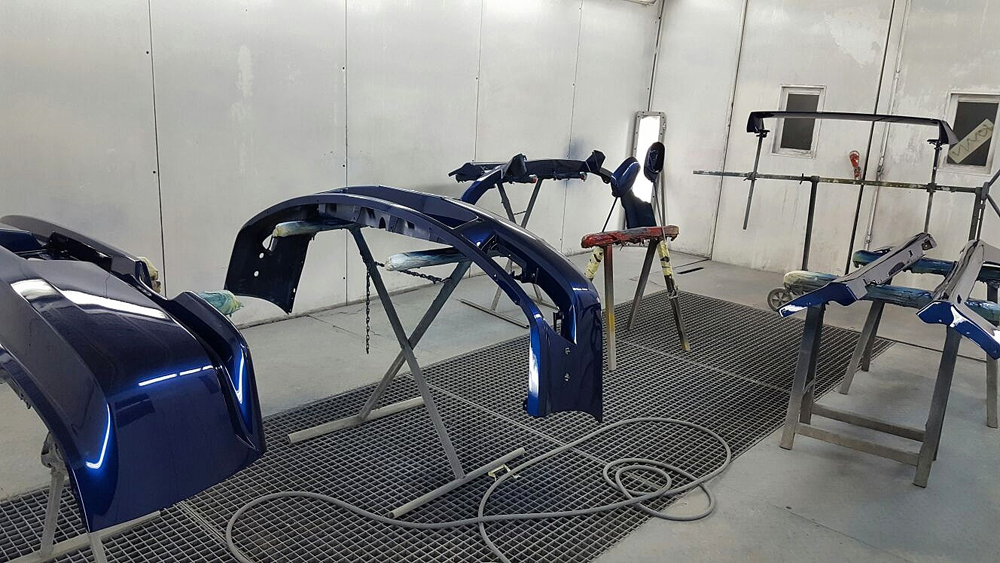 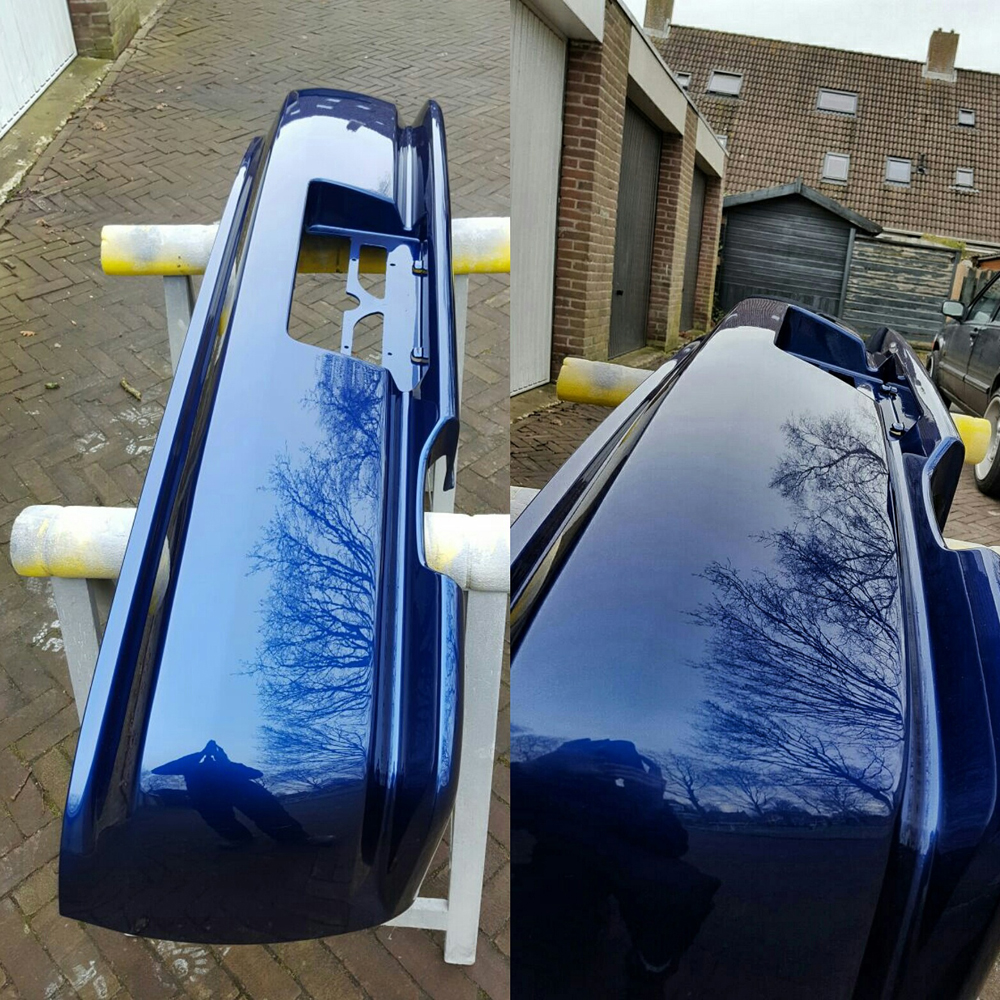 Somewhere next week I'm gonna bring the whole car for paint. Can't wait to start re-building! Last edited by CHiNo4ReaL; 02-06-2017 at 10:44 AM.. |
|
|

|
|
|
#38 |
|
Leaky Injector
Join Date: Feb 2009
Location: Arnhem, the Netherlands
Age: 31
Posts: 92
Trader Rating: (0)
      Feedback Score: 0 reviews
|
Thanks! Can't wait to see everything in one color
On Wednesday i'm gonna bring the body to the paintshop. Finally done with everything. 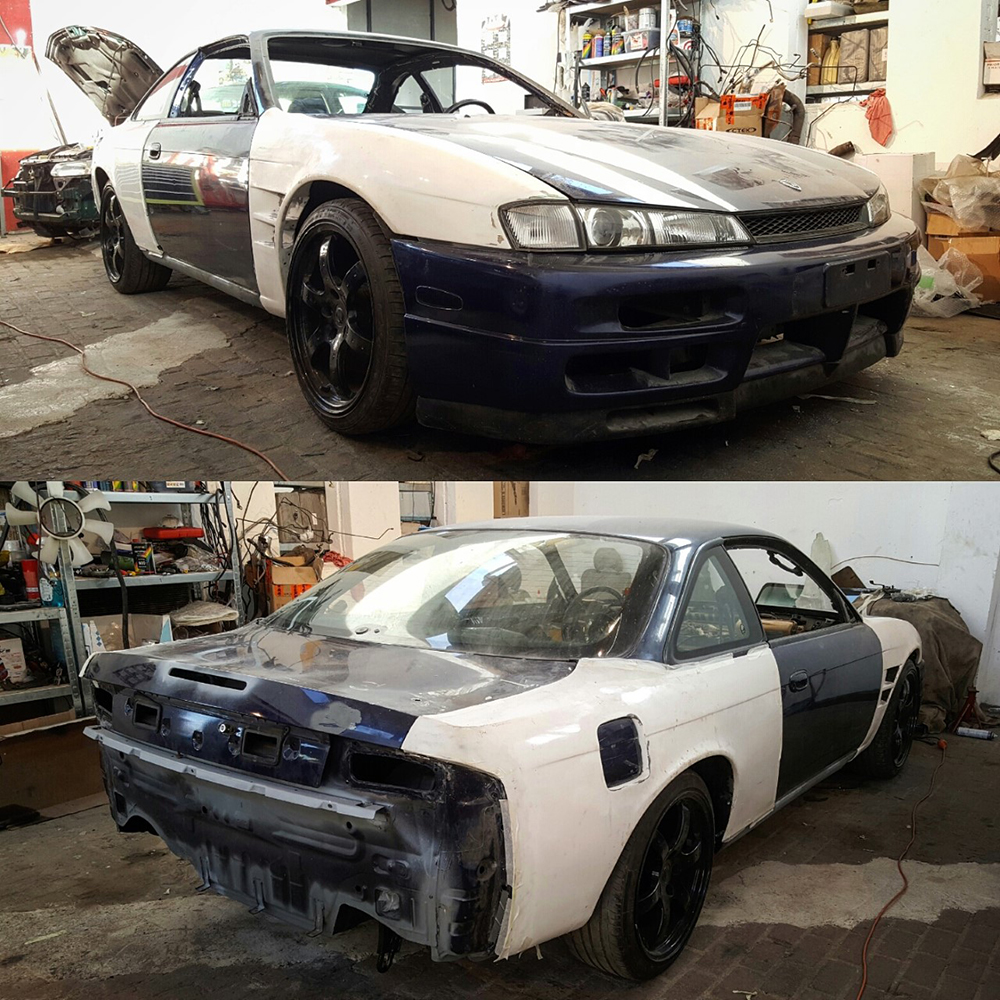 Also some progress of the cooling panel. 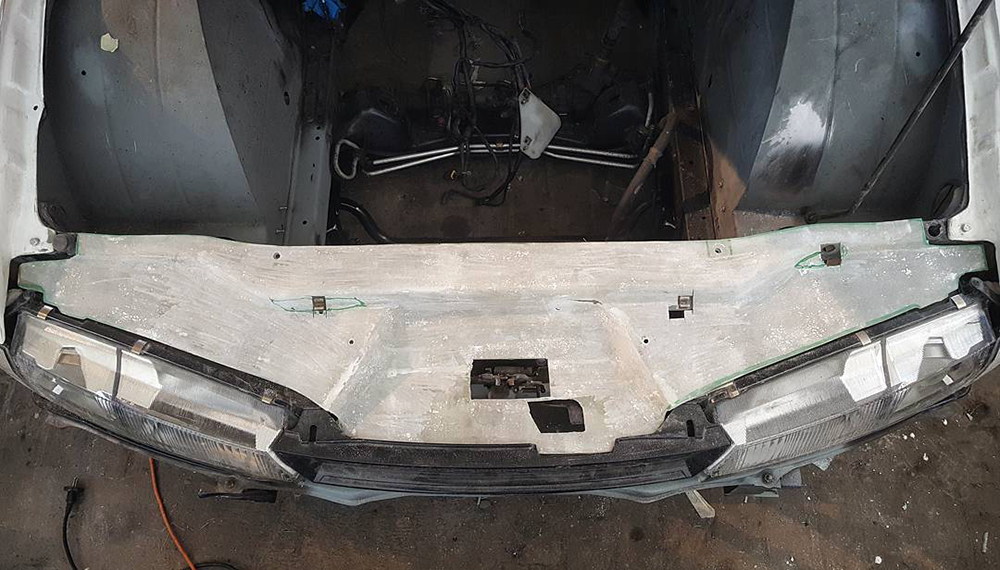 |
|
|

|
|
|
#40 |
|
Leaky Injector
Join Date: Feb 2009
Location: Arnhem, the Netherlands
Age: 31
Posts: 92
Trader Rating: (0)
      Feedback Score: 0 reviews
|
Here a close up video of the color, I love it
 Also assembled the mirrors, I combined the JDM mirror inside with the LHD mirror holder and heated glass, so now I got electric folding mirror + heated glass 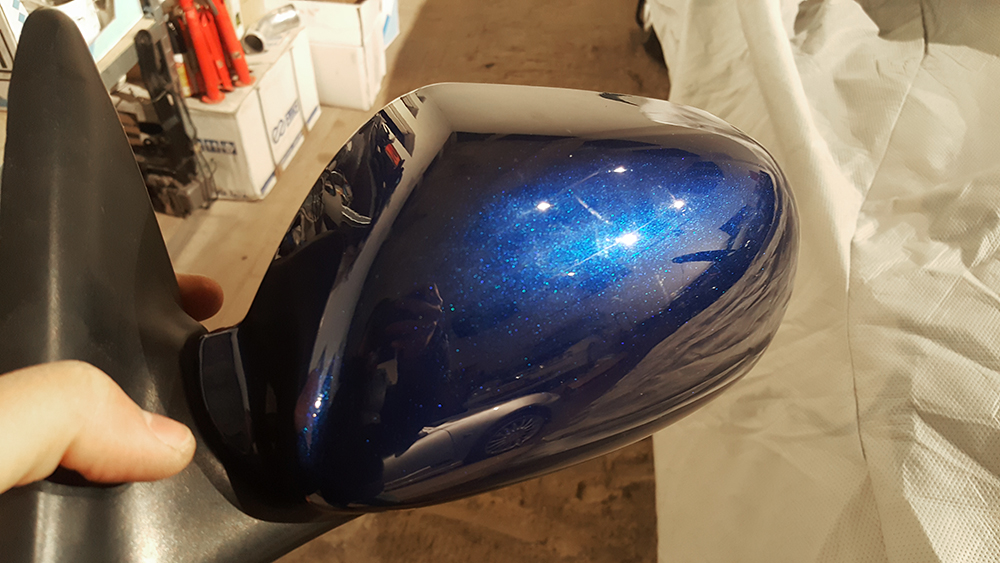 Also prepared the calipers for paint 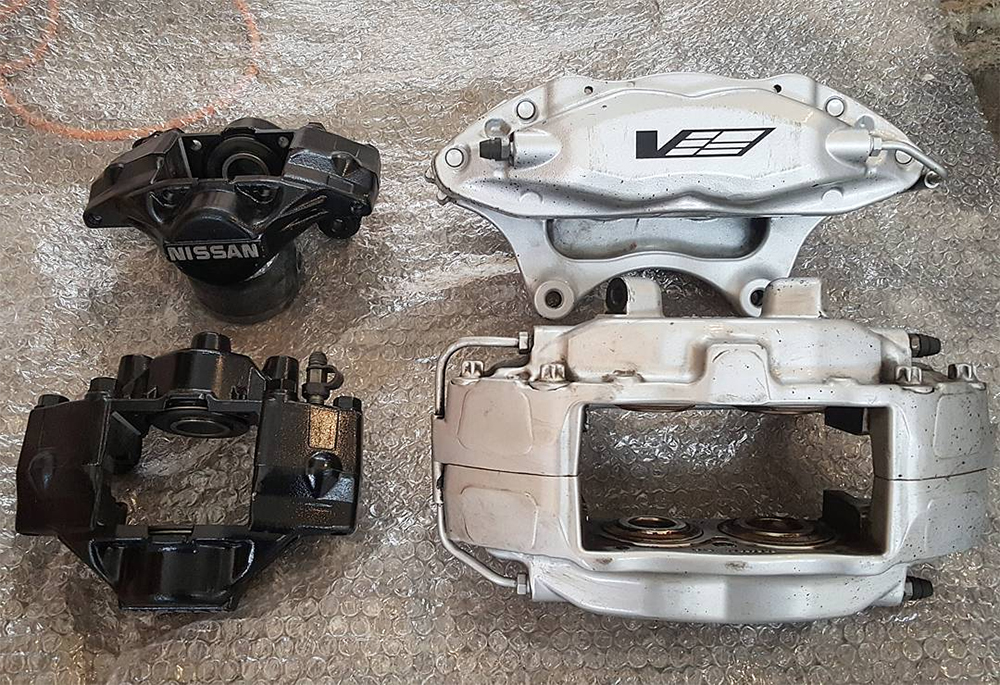 |
|
|

|
|
|
#44 | |
|
Leaky Injector
Join Date: Feb 2009
Location: Arnhem, the Netherlands
Age: 31
Posts: 92
Trader Rating: (0)
      Feedback Score: 0 reviews
|
Quote:
But from the US I heard alot of people who want the eudm/jdm look haha When you got the plateholder/fog light part and when you make some cutouts in your usdm bumper, then you can mount it straight into your existing bumper. If you want I can look for here for you 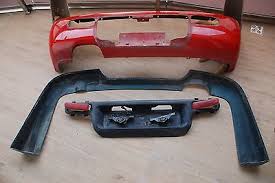 Here another pic: 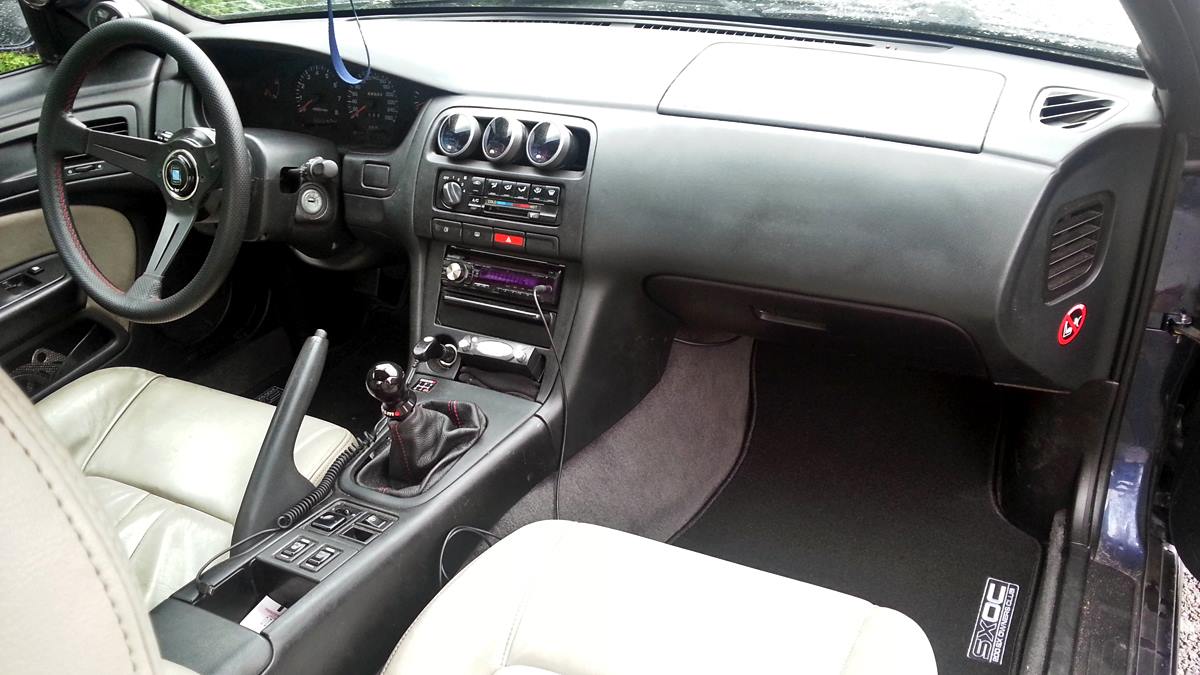 The interior will be full-black except for the seats. Already dyed the carpet black and made a black suede roof liner, think that it will look good! Last edited by CHiNo4ReaL; 02-15-2017 at 03:54 AM.. |
|
|
|

|
|
|
#46 | |
|
Premium Member
 |
Quote:
I kind of figured that's how it worked but I never really saw any definitive info on the euro plate holder. I might have to take you up on that offer tho! xD Your interior is going to be looking mint with the black out and those seats and door card contrast. I blacked out my carpet and headliner with the fabric dye and OMG it makes a hell of a difference on the look of the interior. Are you going to be molding the gauges in the vent area? |
|
|
|

|
|
|
#47 |
|
Leaky Injector
Join Date: Feb 2009
Location: Arnhem, the Netherlands
Age: 31
Posts: 92
Trader Rating: (0)
      Feedback Score: 0 reviews
|
Haha indeed!
By the time that you want it, just send me an message and I will look for you in our community! I already got my car since 2008 with the original eudm look, so it time for a complete new look. I'm not sure yet, I liked it how it was before because I could still use the central vents. When it is moulded I can't use them anymore. Last edited by CHiNo4ReaL; 02-15-2017 at 12:29 PM.. |
|
|

|
|
|
#48 | |
|
Premium Member
 |
Quote:
You could go for something like: 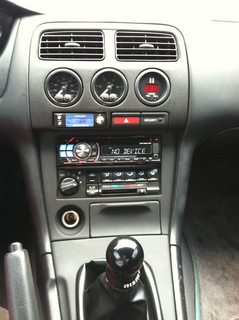 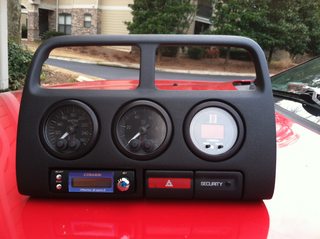 (pics from a post in HIDplanet/interior thread) But then you would need to move your ac controls somewhere else. No matter what you do tho, I am sure it will turn out beautifully. |
|
|
|

|
|
|
#49 |
|
Leaky Injector
Join Date: Feb 2009
Location: Arnhem, the Netherlands
Age: 31
Posts: 92
Trader Rating: (0)
      Feedback Score: 0 reviews
|
Finally some updates
 A fellow SX-ownersclub member is painting the car, so brought the car to him 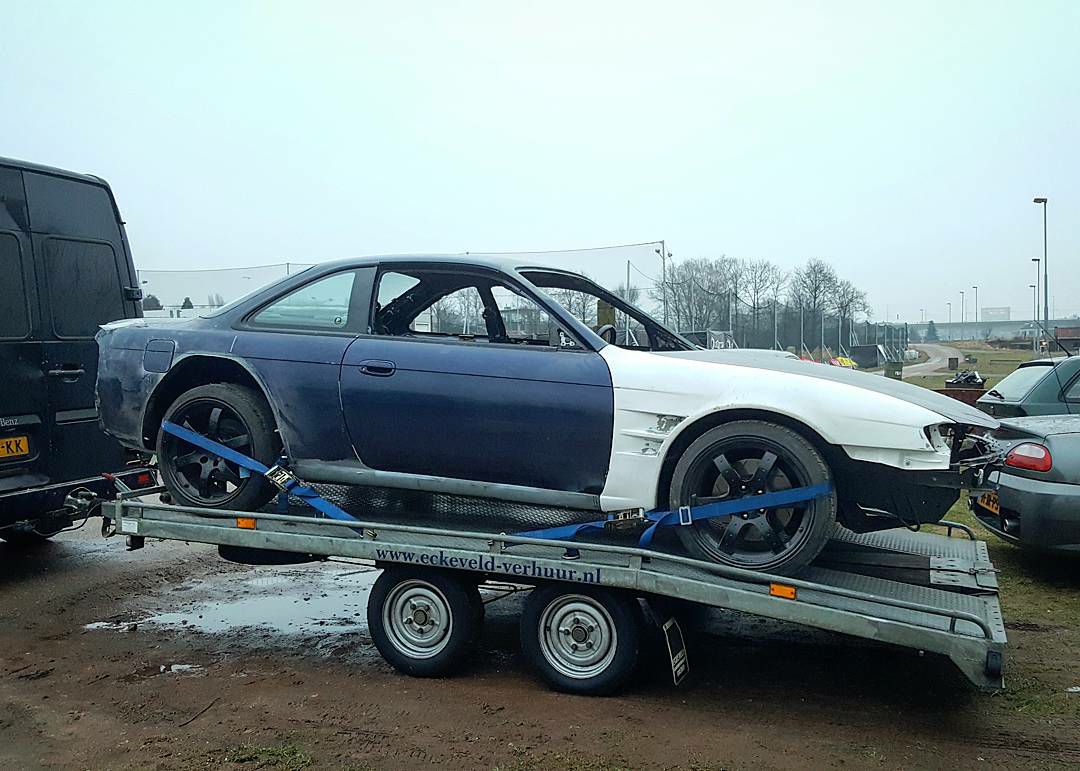 Started with paint prep and primer, after this the car will be painted in a normal paint booth. Everything will be be painted in 1 color 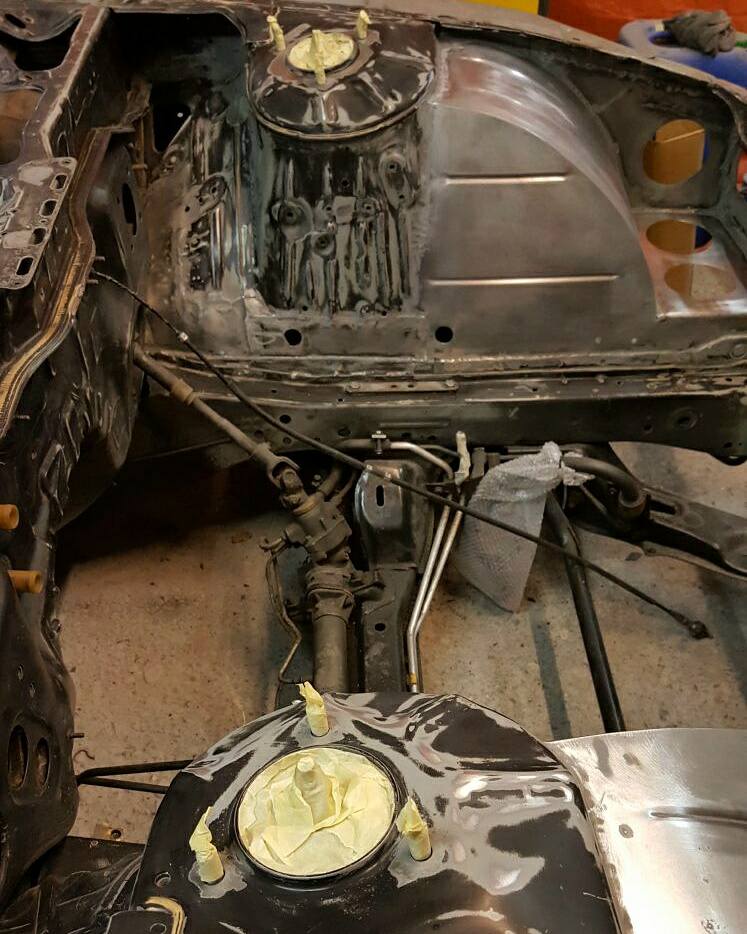 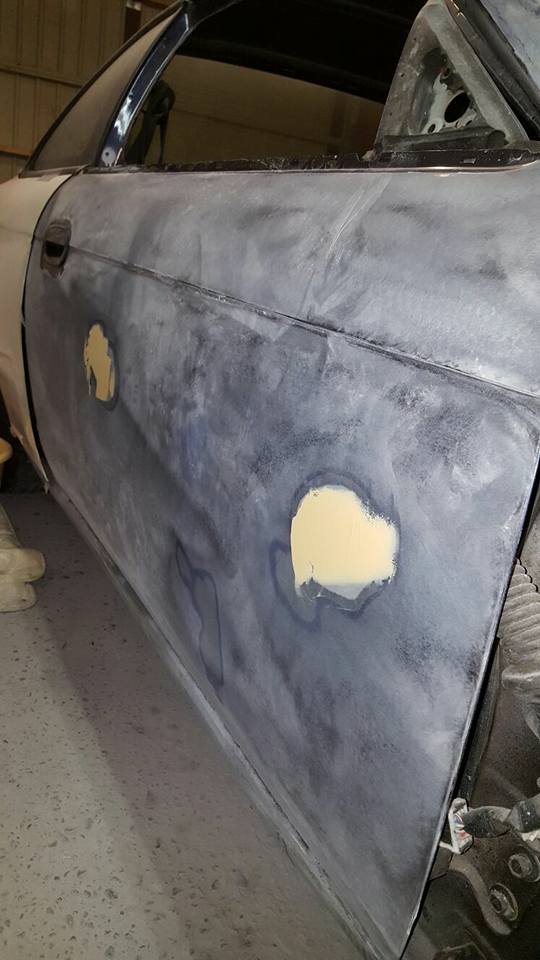 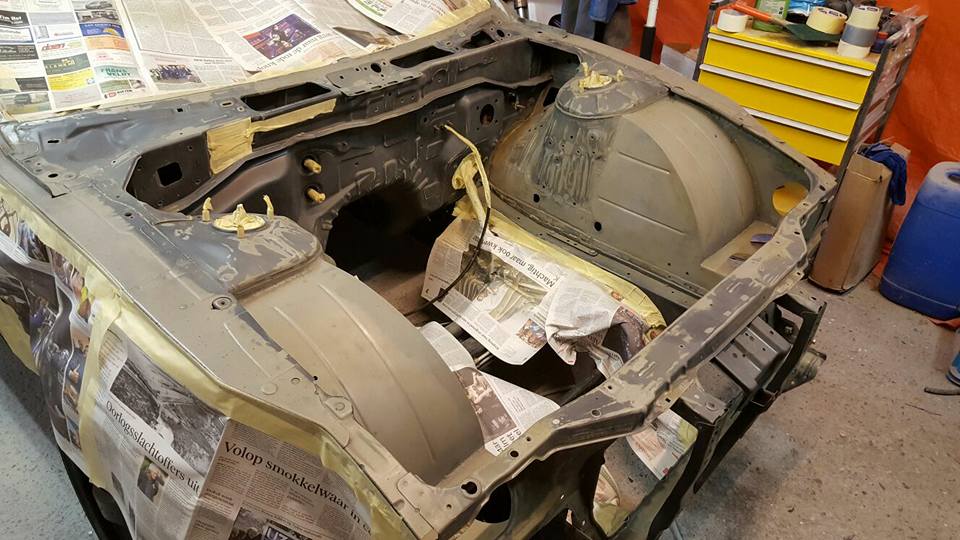 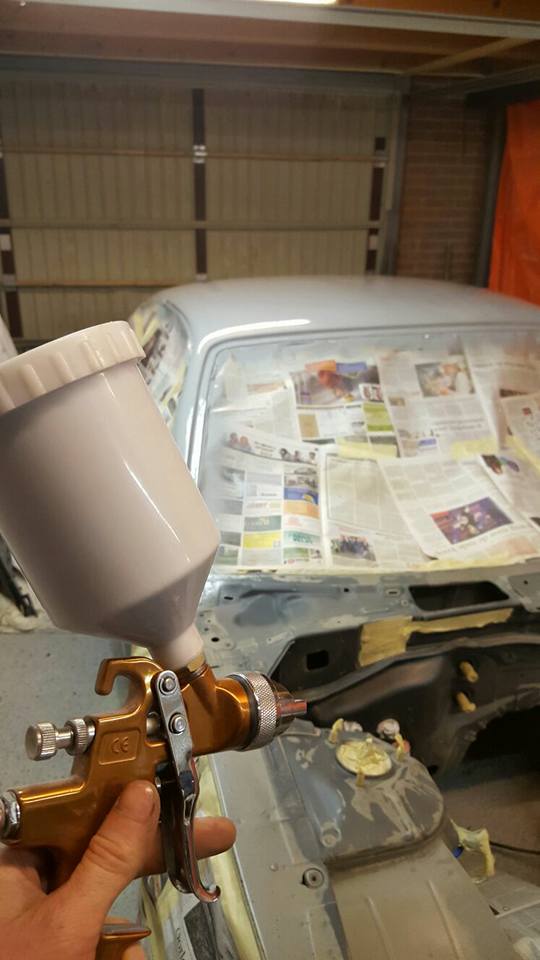 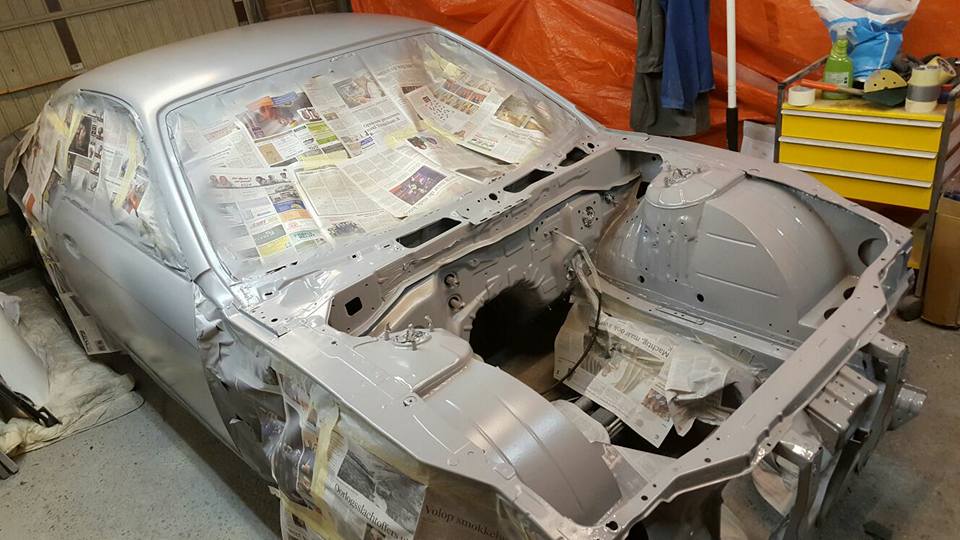 The screws are only for holding the overfenders on the right place, they will be removed when the fenders are kitted to get the best result as possible. 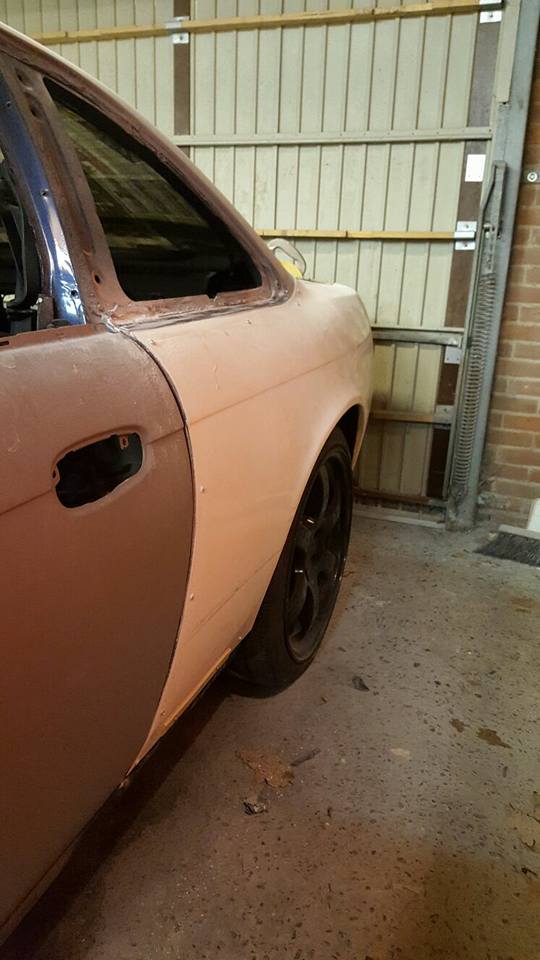 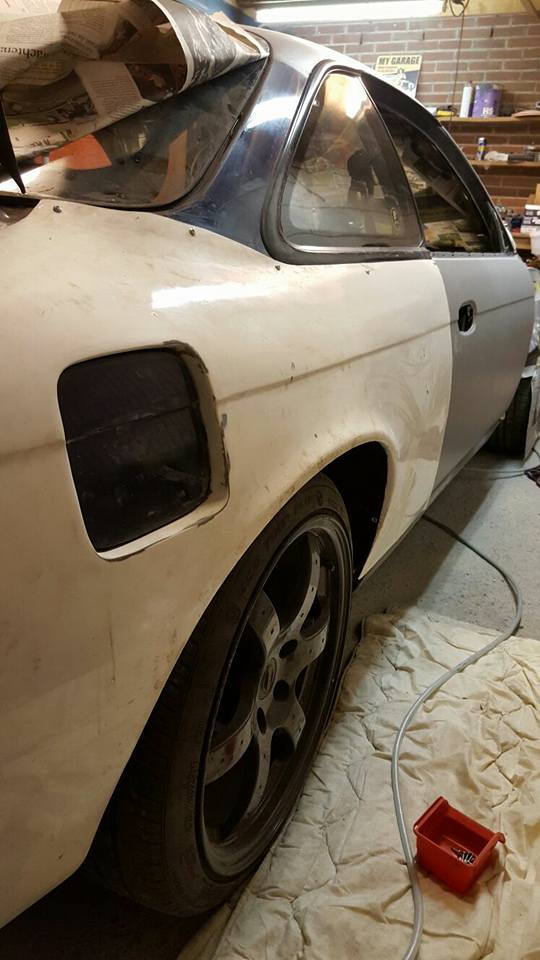 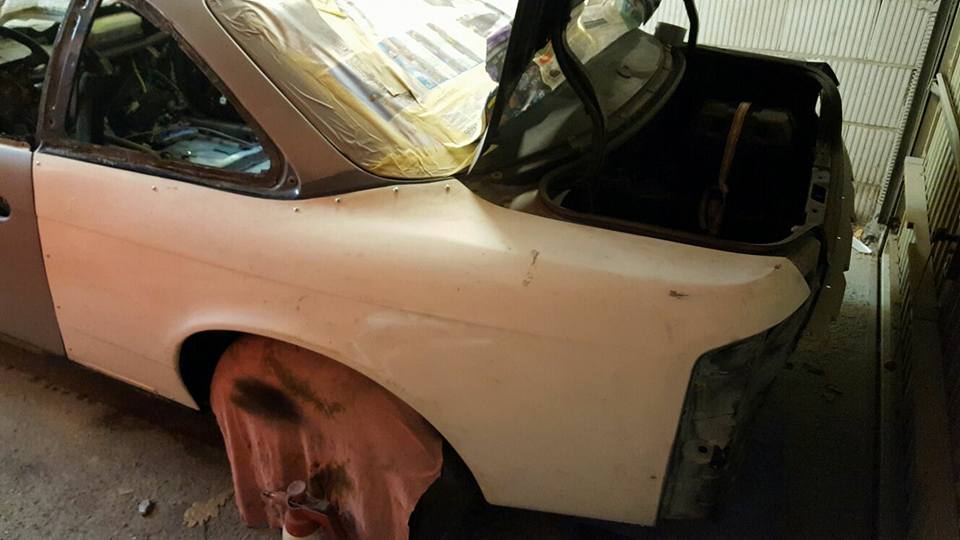 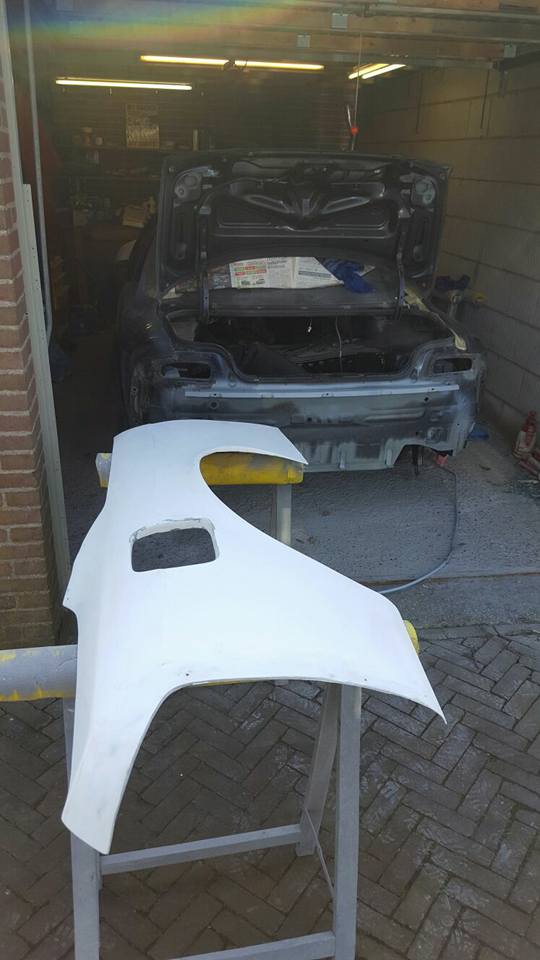 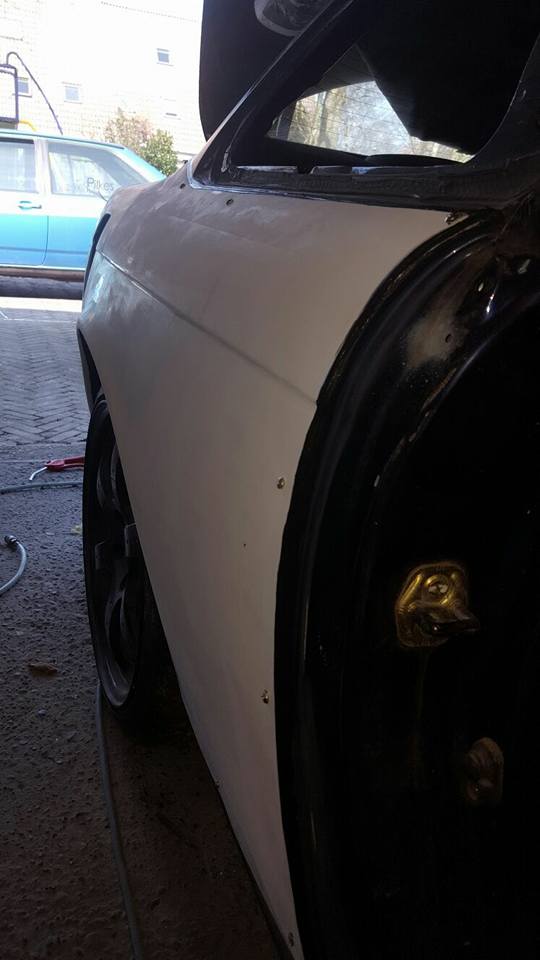 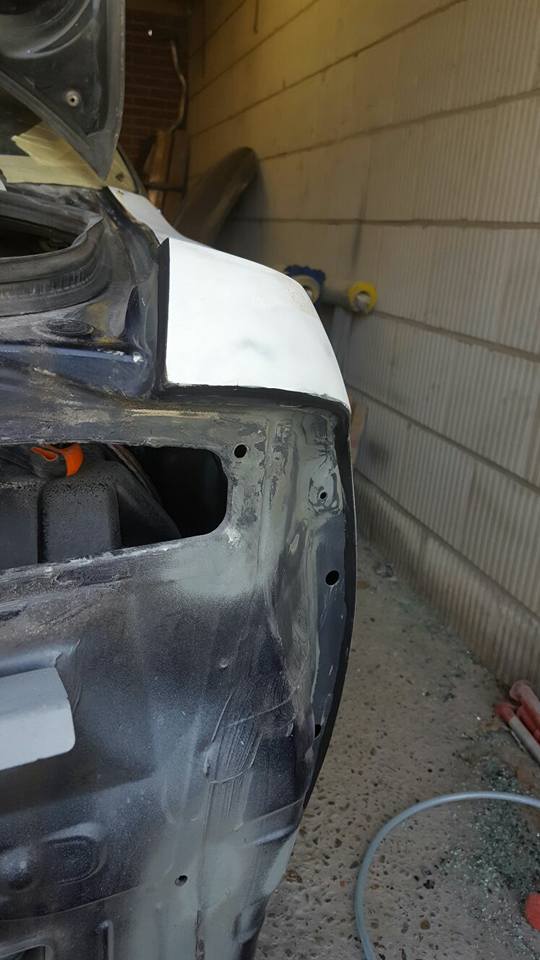 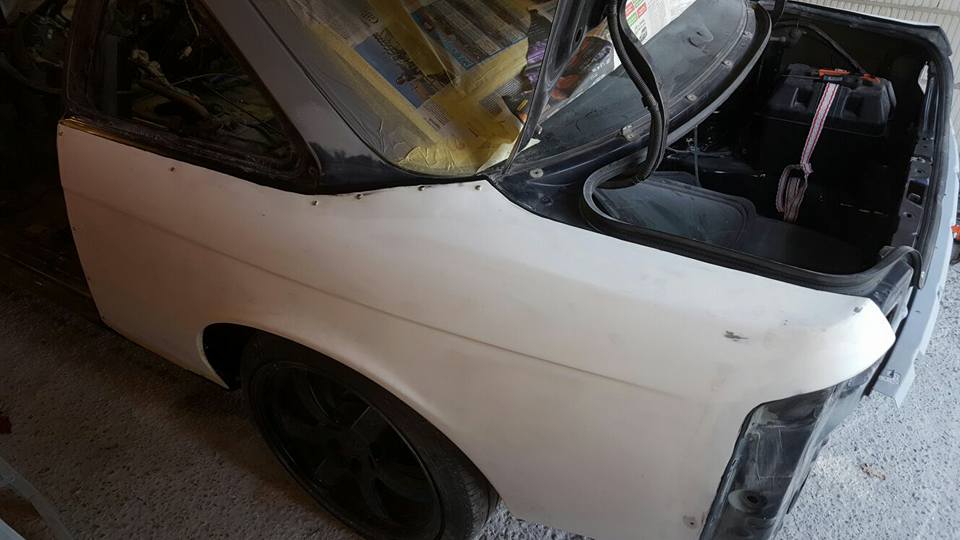 Also recieved my flatoutgfx RPF-1 center covers from the states. I like these much more then the original RPF-1 center caps. 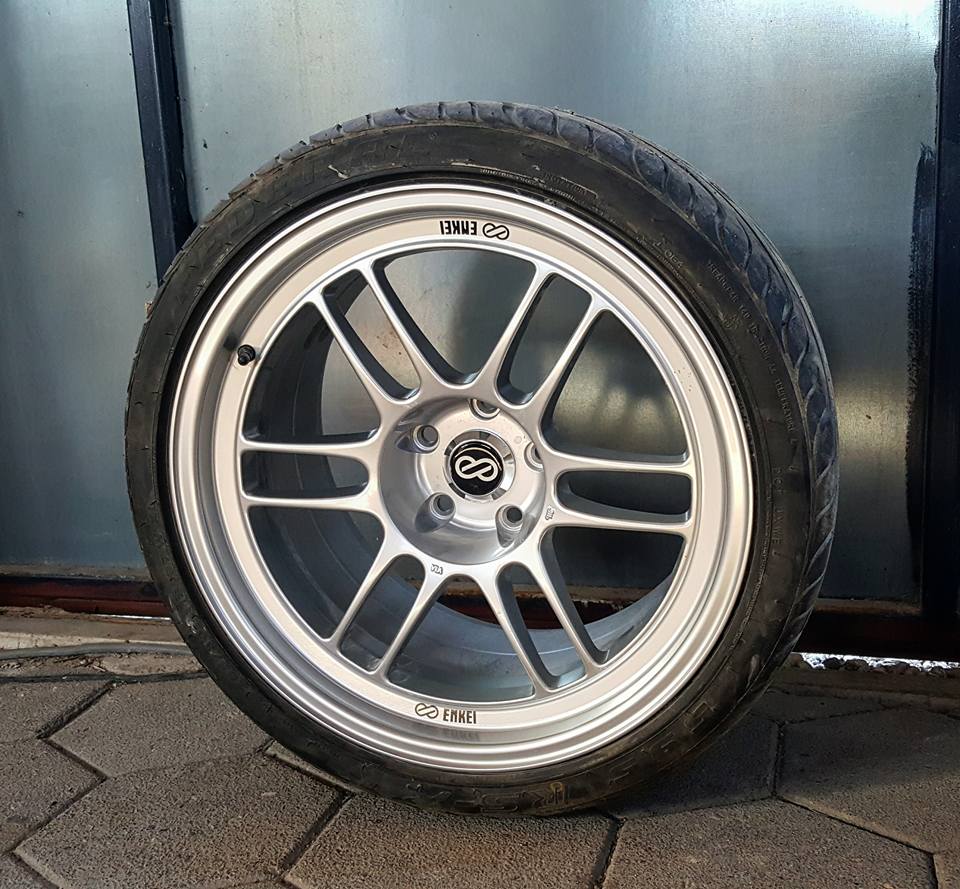 Calipers also almost done. On the front calipers there will be a black Brembo sticker added and then it will be sprayed with clearcoat. 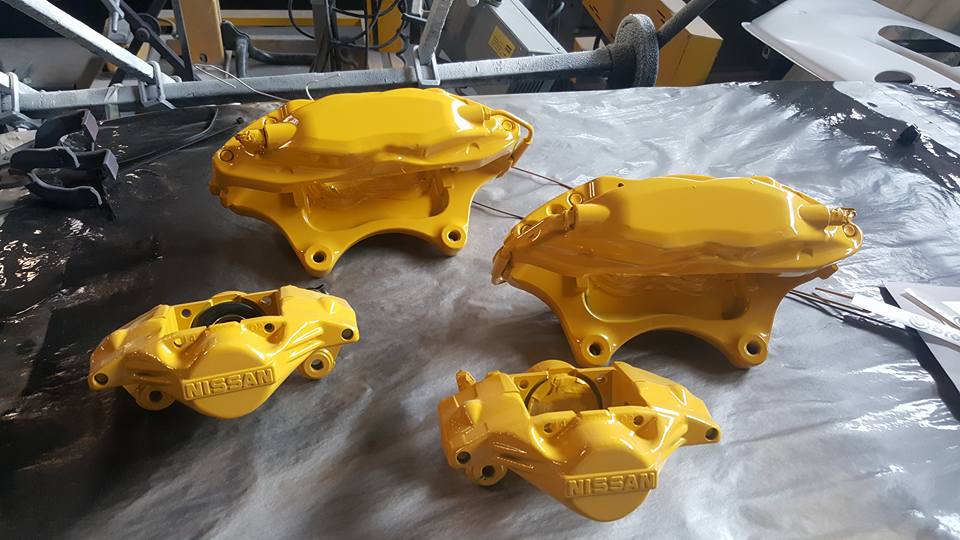 |
|
|

|
|
|
#52 |
|
Leaky Injector
Join Date: Feb 2009
Location: Arnhem, the Netherlands
Age: 31
Posts: 92
Trader Rating: (0)
      Feedback Score: 0 reviews
|
Bodywork is alsmost done, hopefully that he can spray the car in the spraybooth this weekend or next week
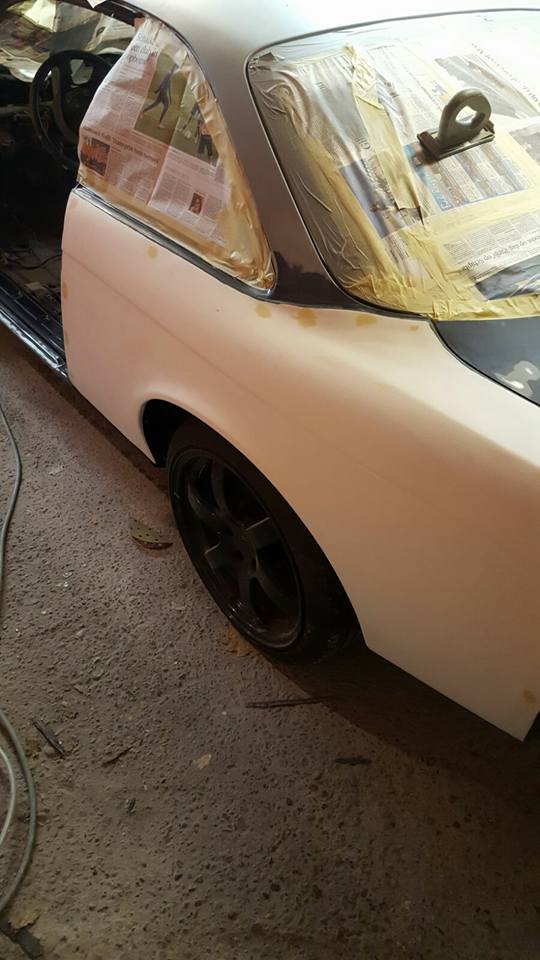 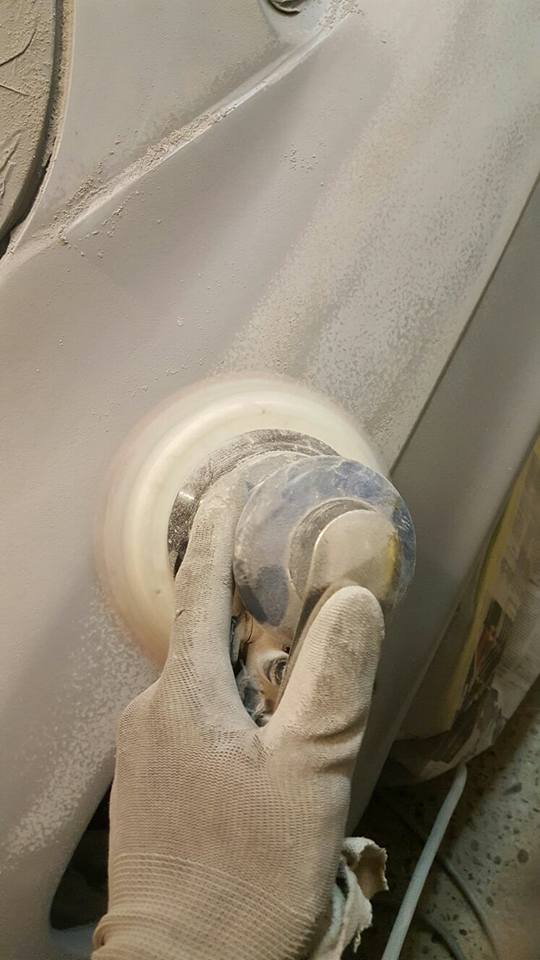 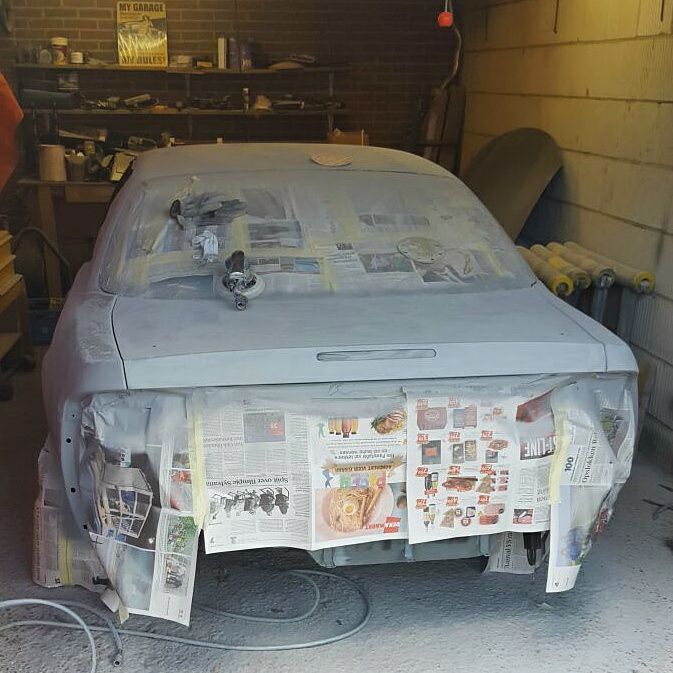 Also recieved the most parts for my engine rebuild. 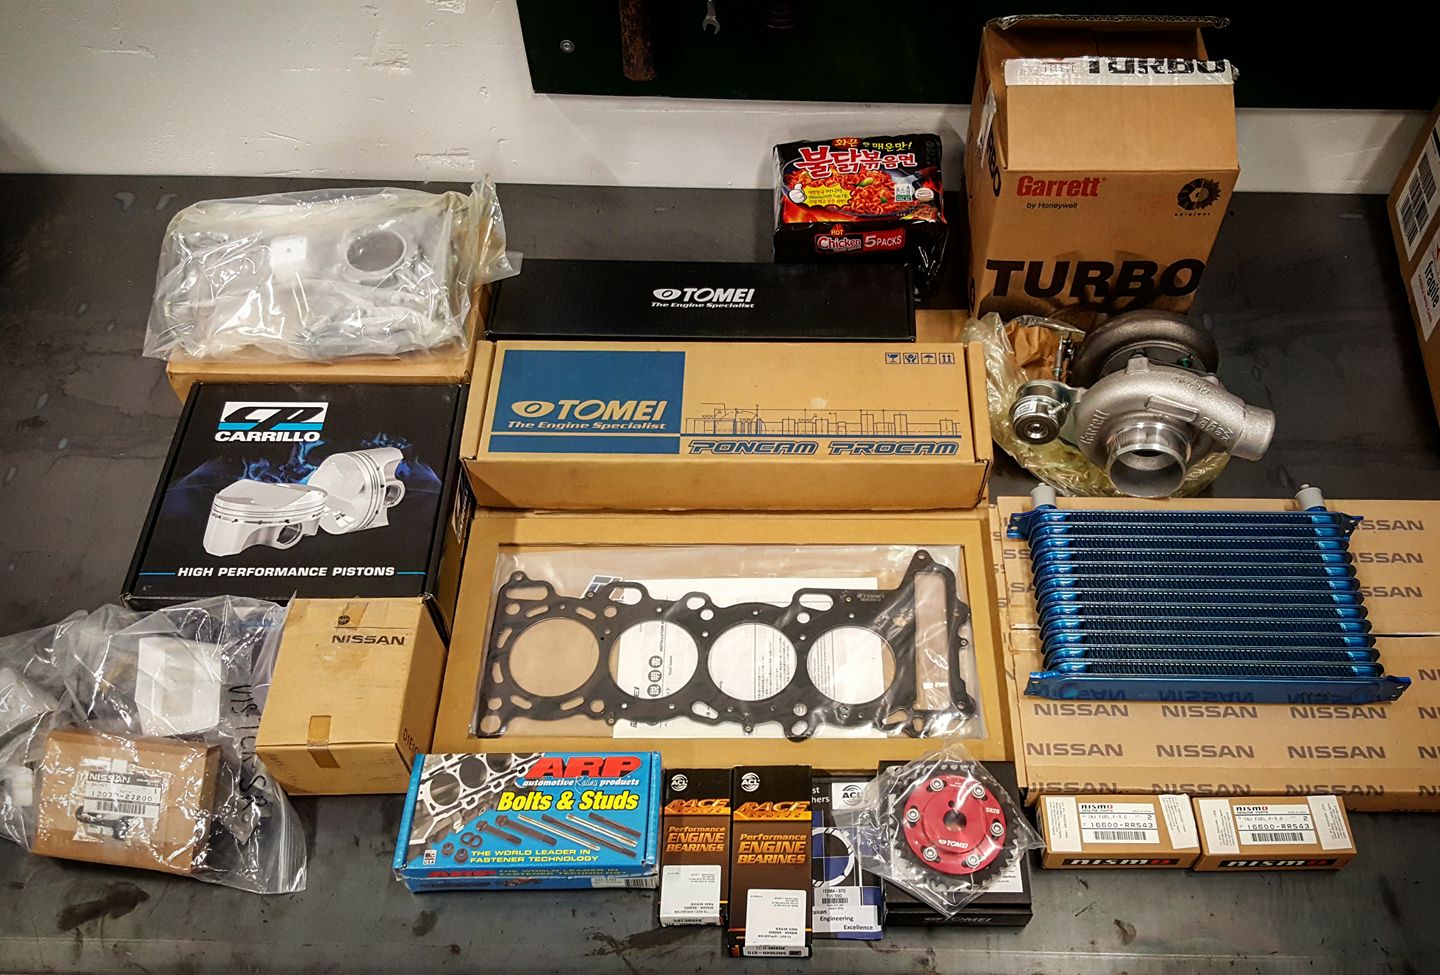 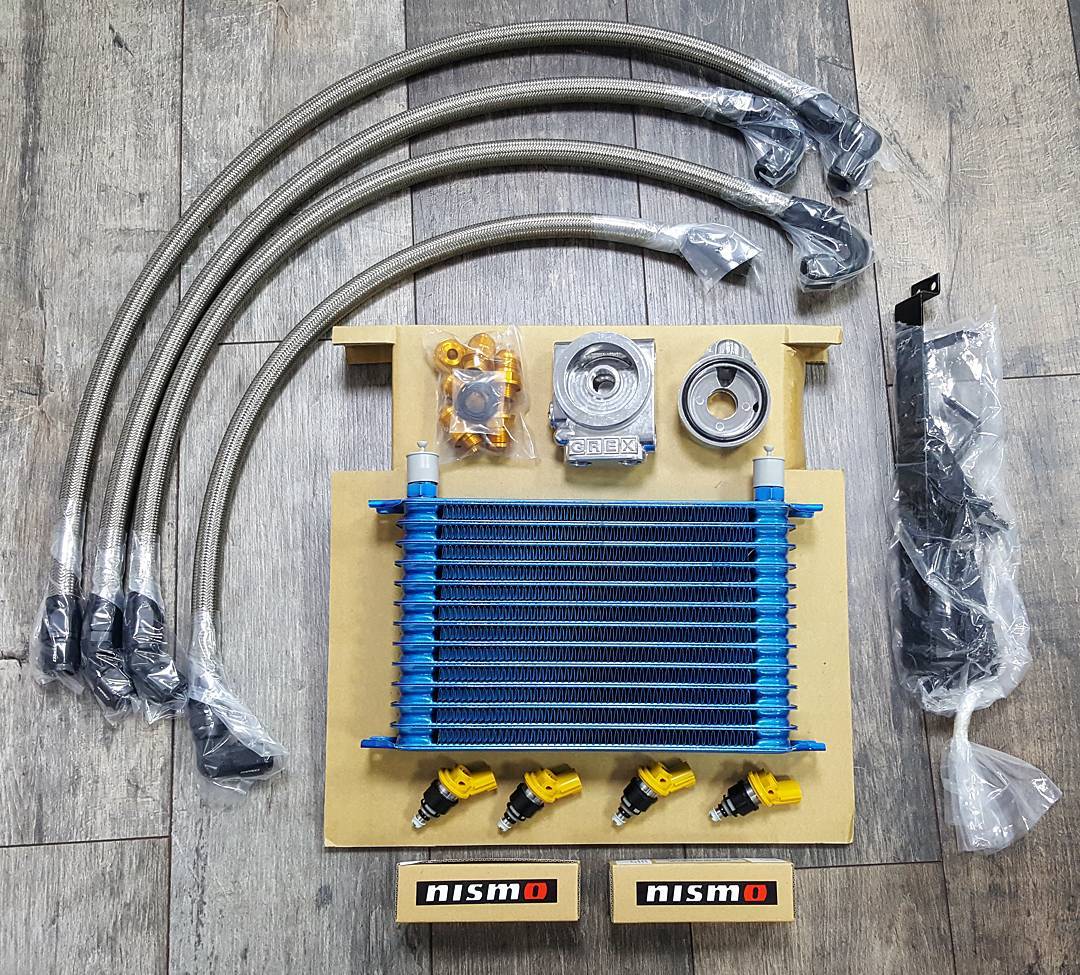 Last edited by CHiNo4ReaL; 04-25-2017 at 08:22 AM.. |
|
|

|
|
|
#53 |
|
Leaky Injector
Join Date: Feb 2009
Location: Arnhem, the Netherlands
Age: 31
Posts: 92
Trader Rating: (0)
      Feedback Score: 0 reviews
|
Finally an update with alot of progression!
The car fully wetsanded smooth 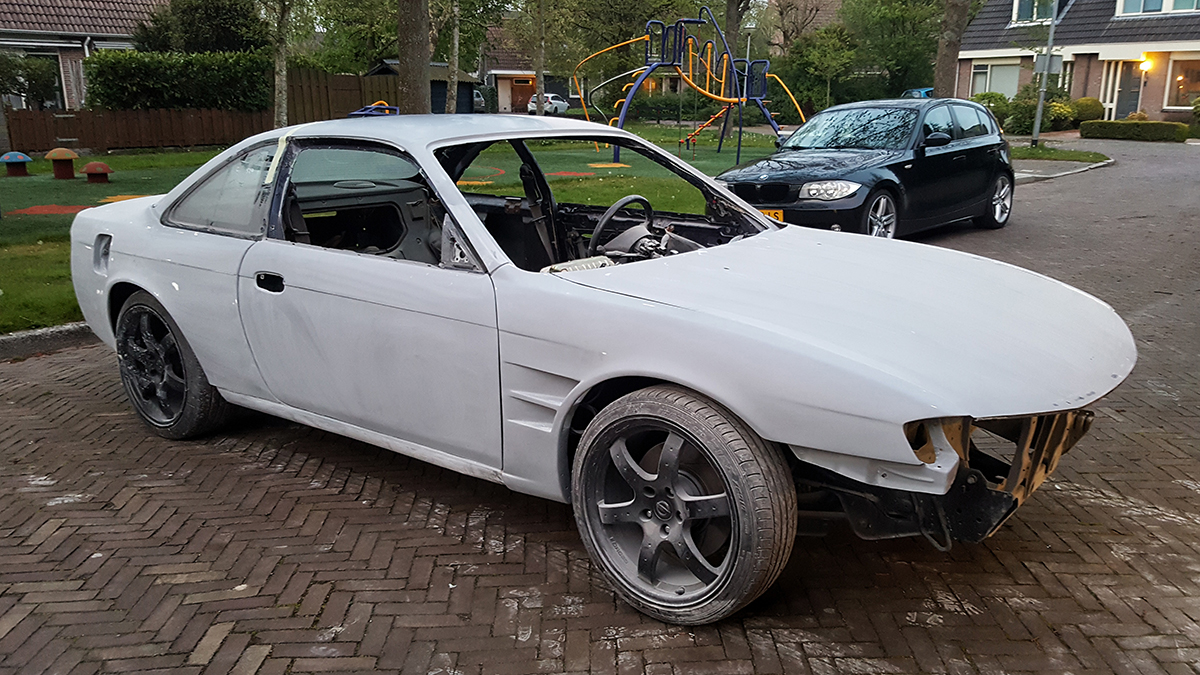 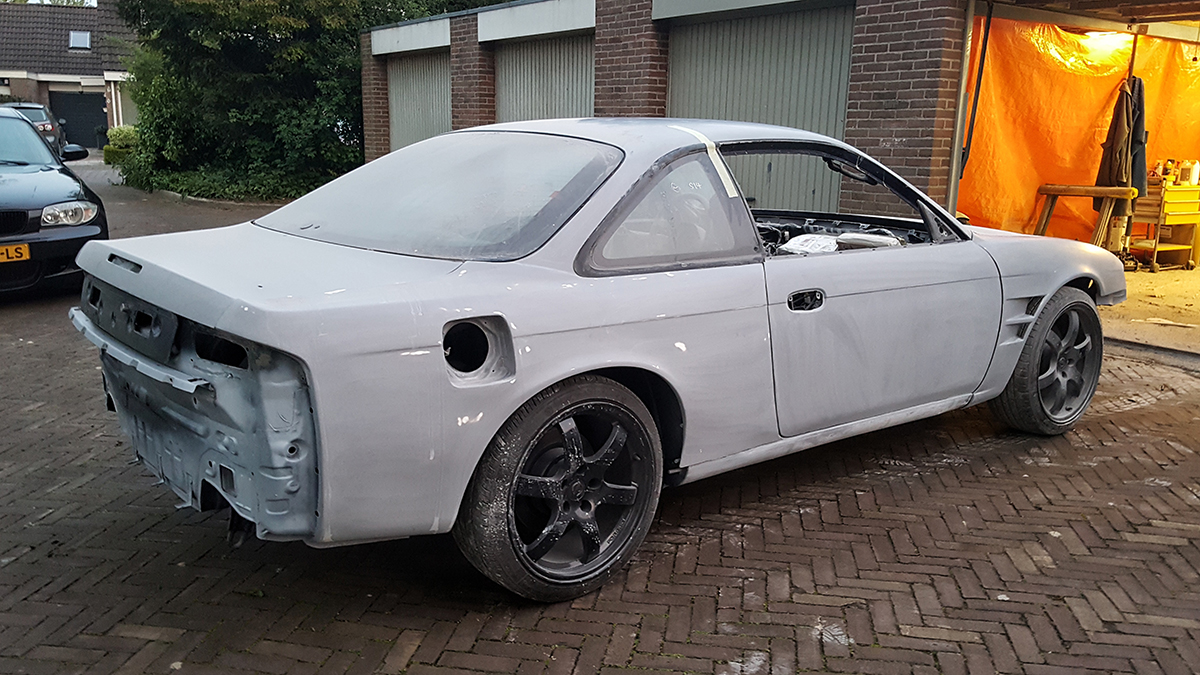 In the mean time sprayed some small bits so they would be as new. i had to wait so did these things 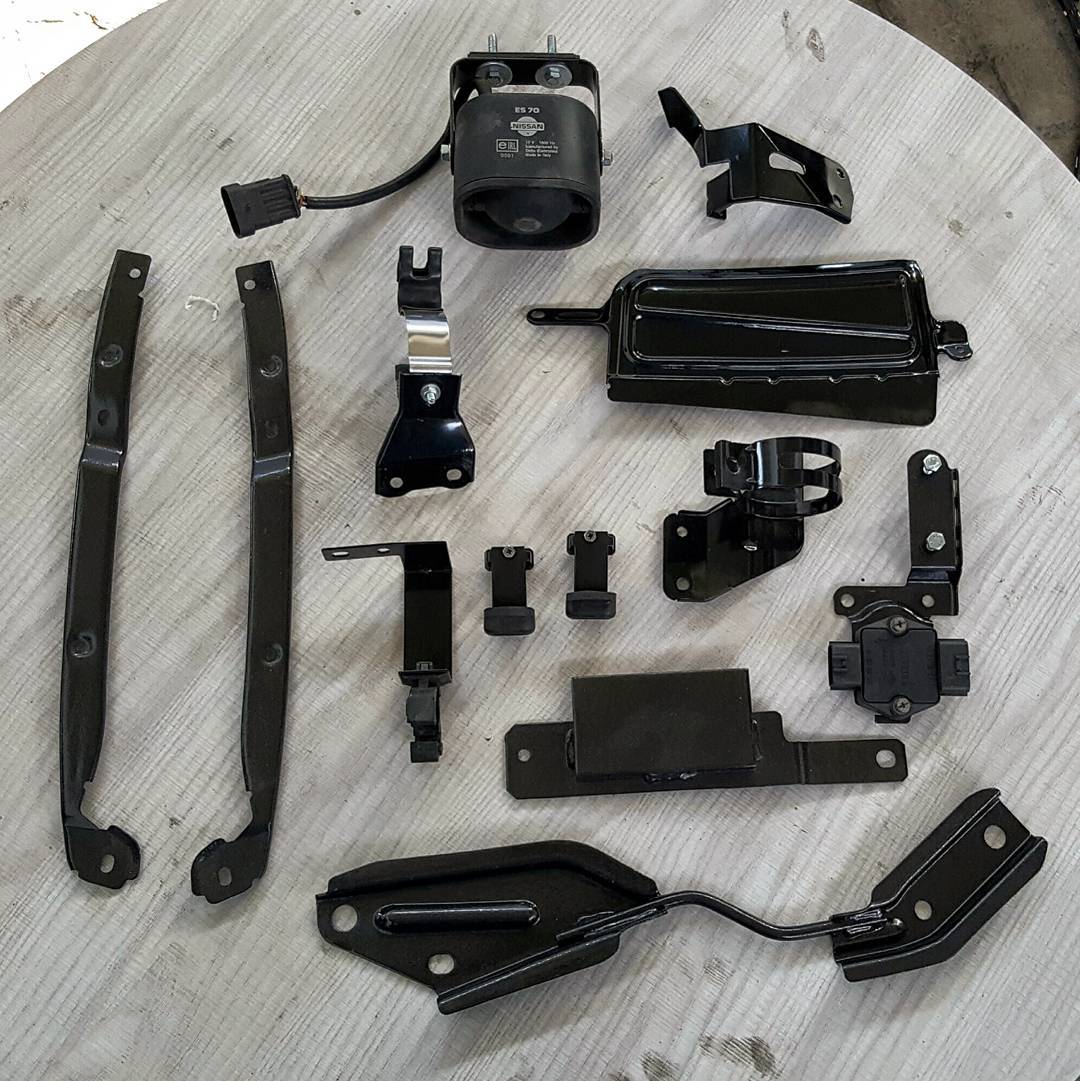 Also recieved my new ACT clutch, to replace the Exedy stage 1 as it only can hold 390Nm of torque. I think that I'm gonna go over that with the new setup. 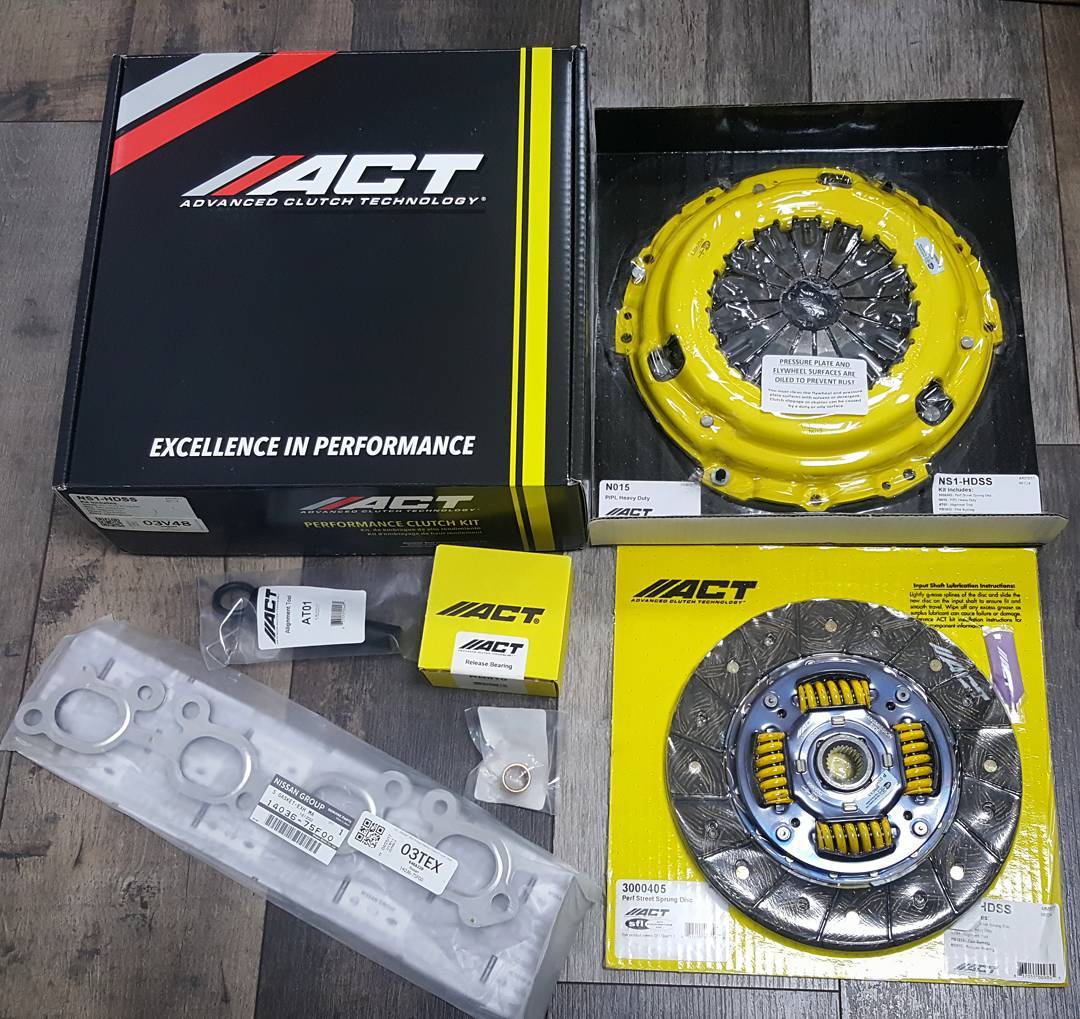 Last weekend the painter finally sprayed the car! Today I picked her up. Cool to see the difference between color and with clear coat. 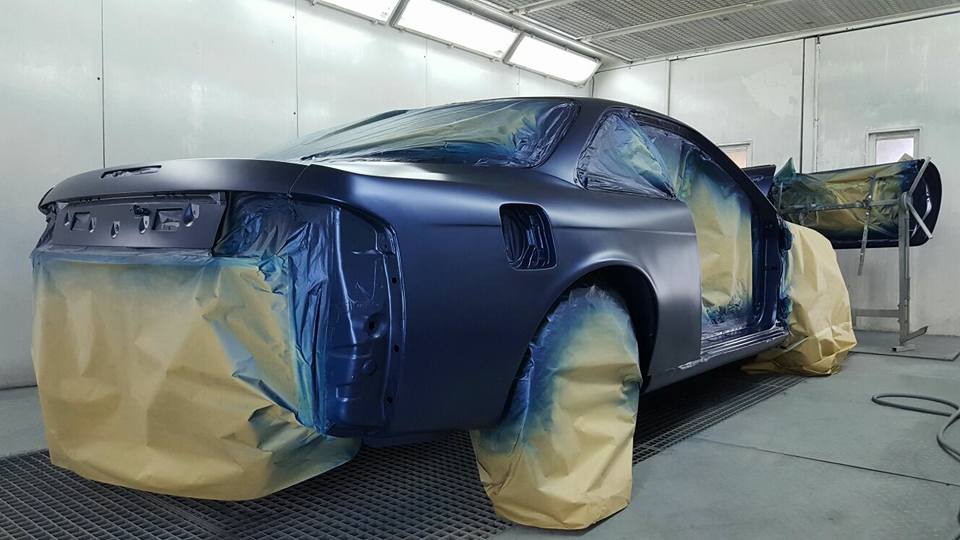 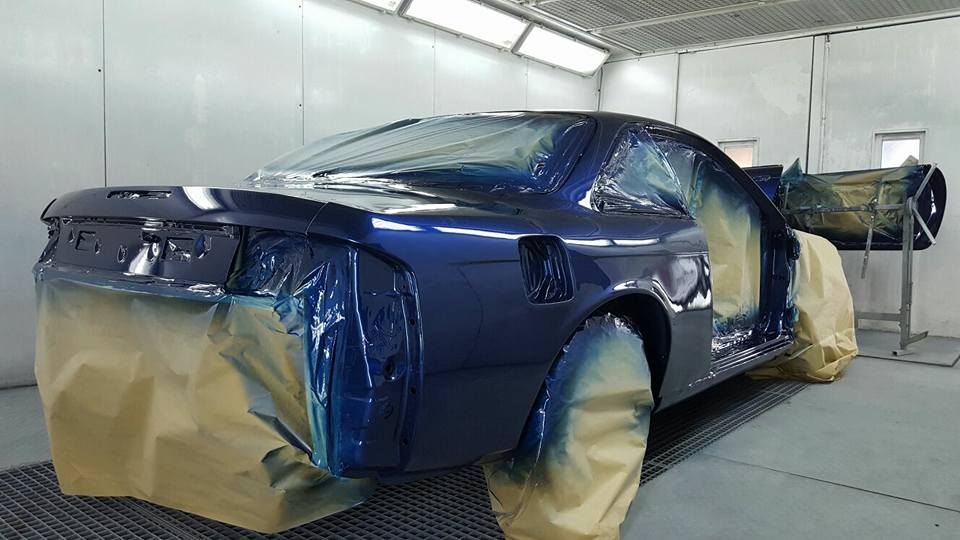 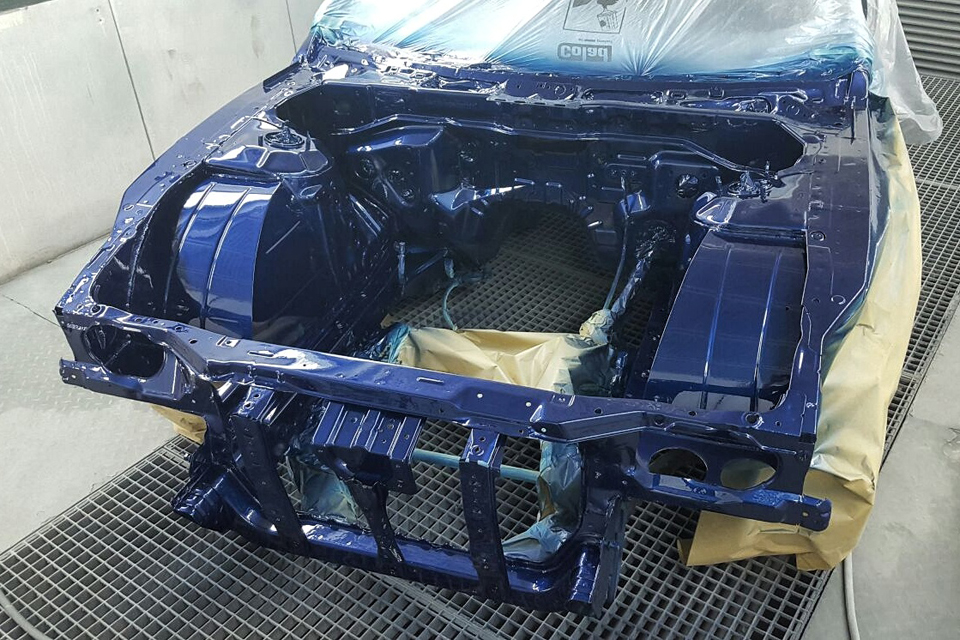 The color looks really awesome in the sun, I like it alot! In the shadow it almost looks like the original color but when there is alot of light/sun it really sparkles 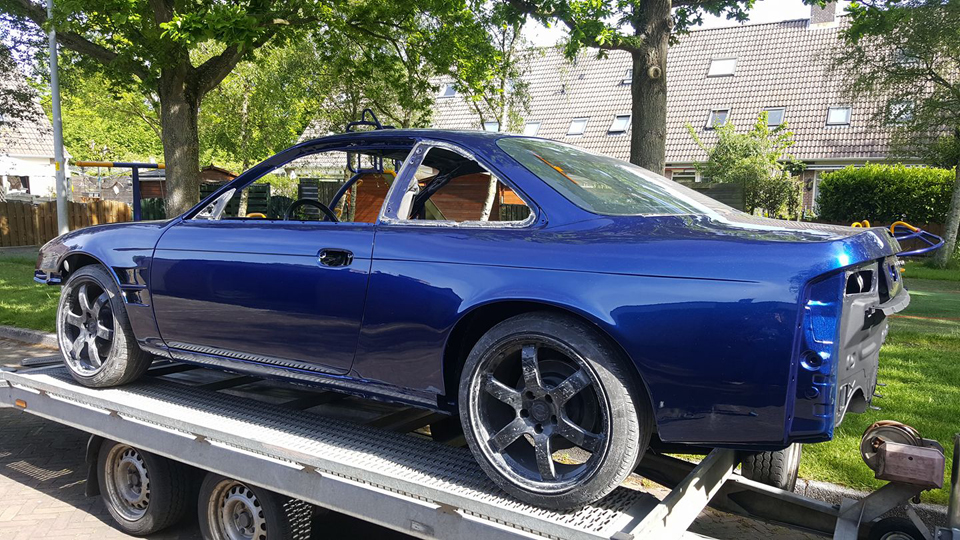 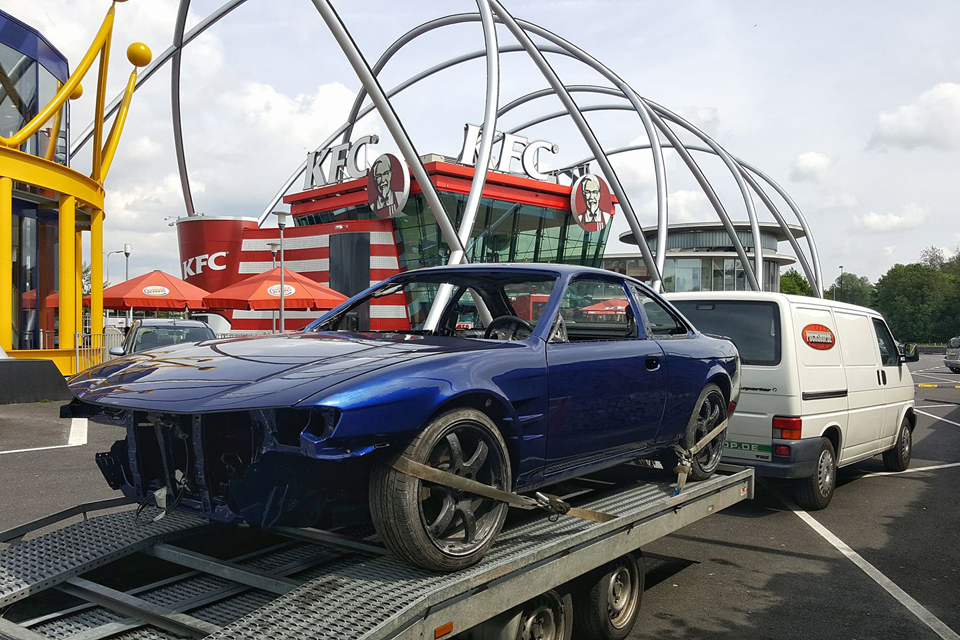 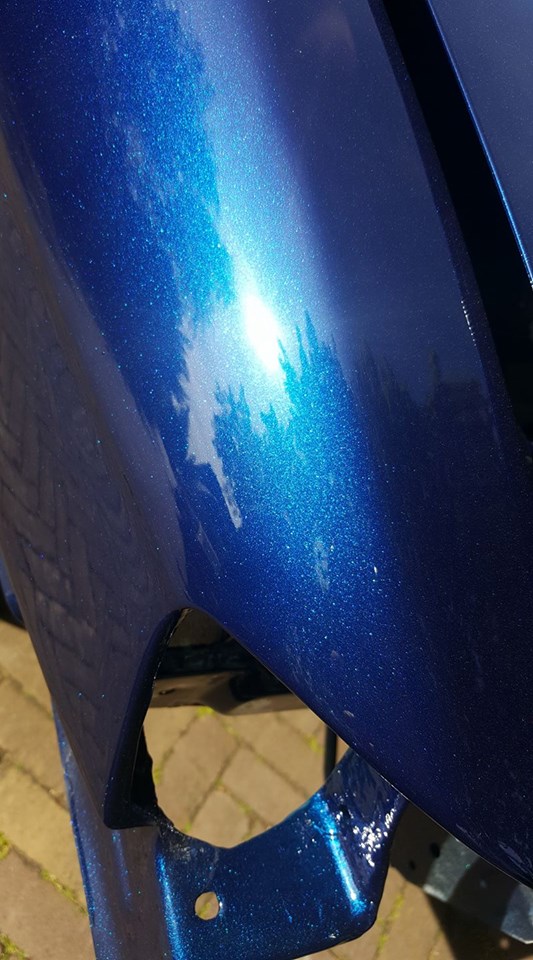 Finally back home and started immediately 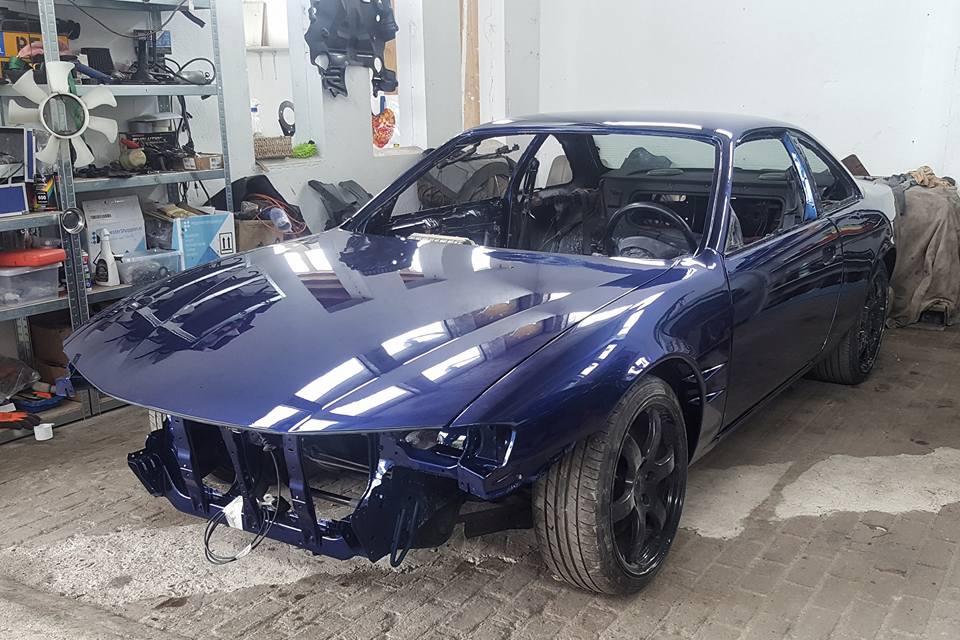 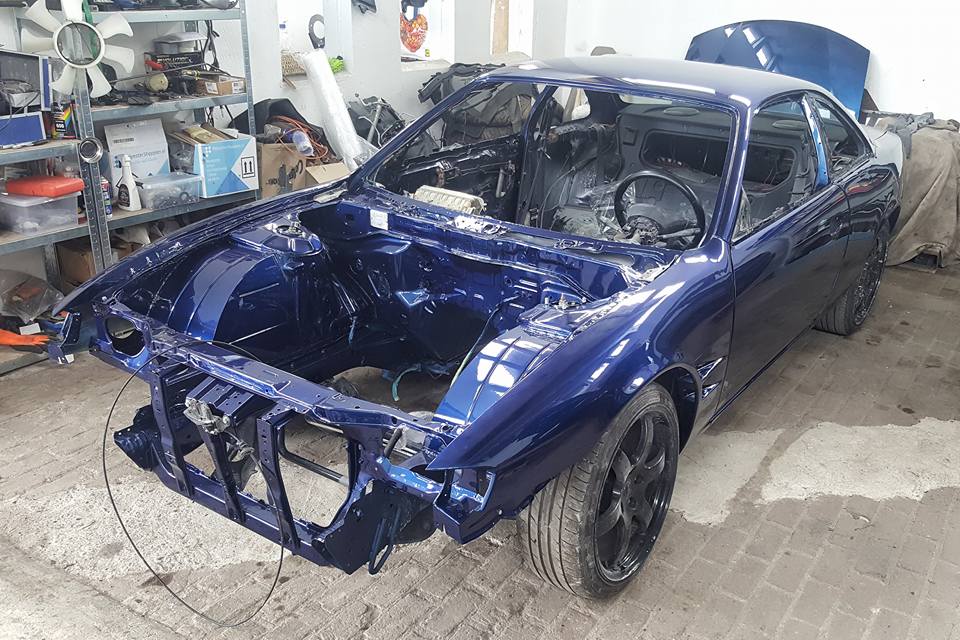 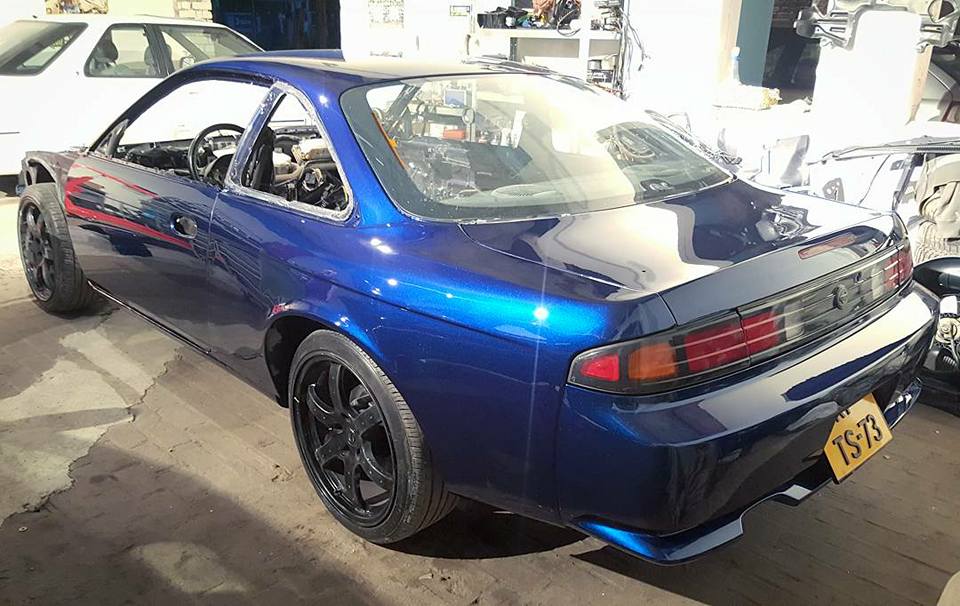 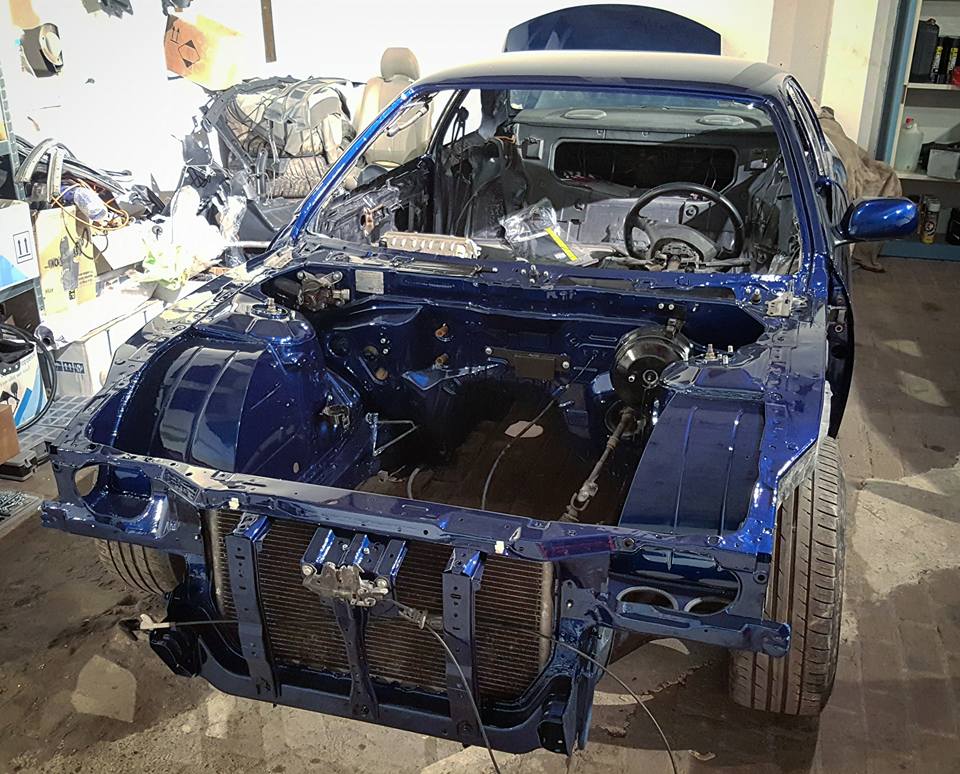 |
|
|

|
|
|
#57 |
|
Leaky Injector
Join Date: Feb 2009
Location: Arnhem, the Netherlands
Age: 31
Posts: 92
Trader Rating: (0)
      Feedback Score: 0 reviews
|
Thanks for the kind words
 I'm in a hurry because I want to have the car build up asap to get MOT (it is a every year test of the car to see if everything is safe). After that I will take out the engine again for the rebuild, then break it in and then map it on the dyno. I got a roadtrip planned in the beginning of August with a few friends to Italy, I want to drive it with the S14 so I got alot to do! 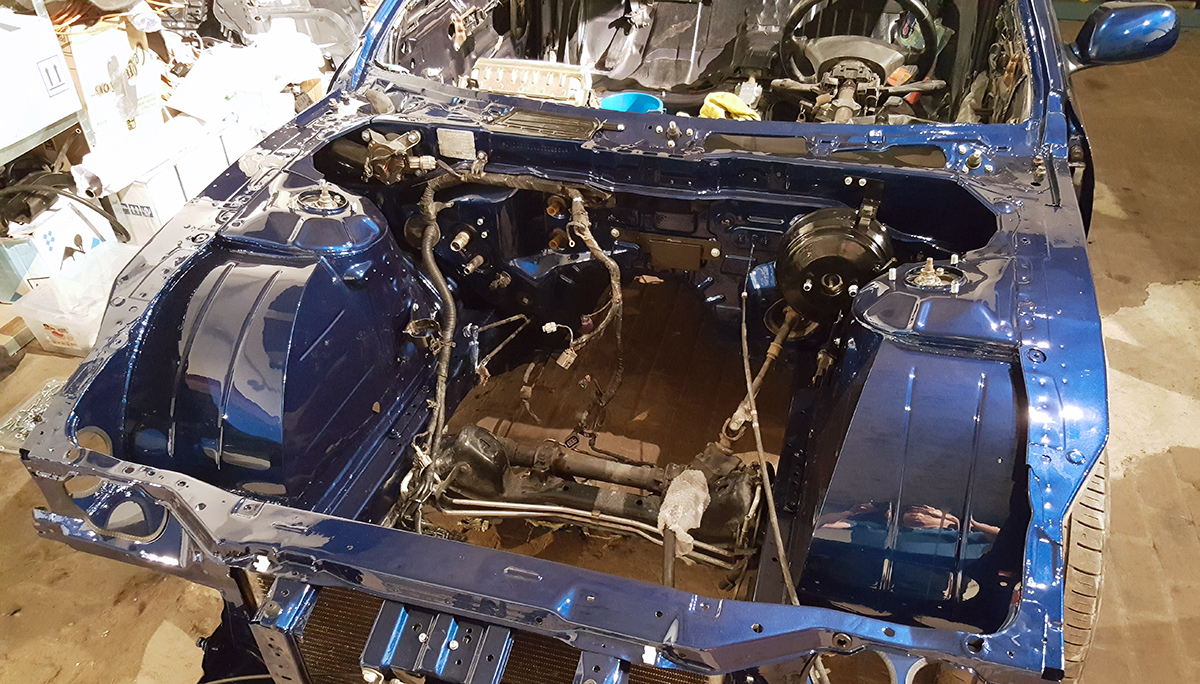 |
|
|

|
|
|
#58 |
|
Leaky Injector
Join Date: Feb 2009
Location: Arnhem, the Netherlands
Age: 31
Posts: 92
Trader Rating: (0)
      Feedback Score: 0 reviews
|
Yesterday did some work on the interior.
Doors almost complete, only need to mount the side window. Also put the blacked out carpet back in together with the rear seat and panels. I'm relocating the battery to the back 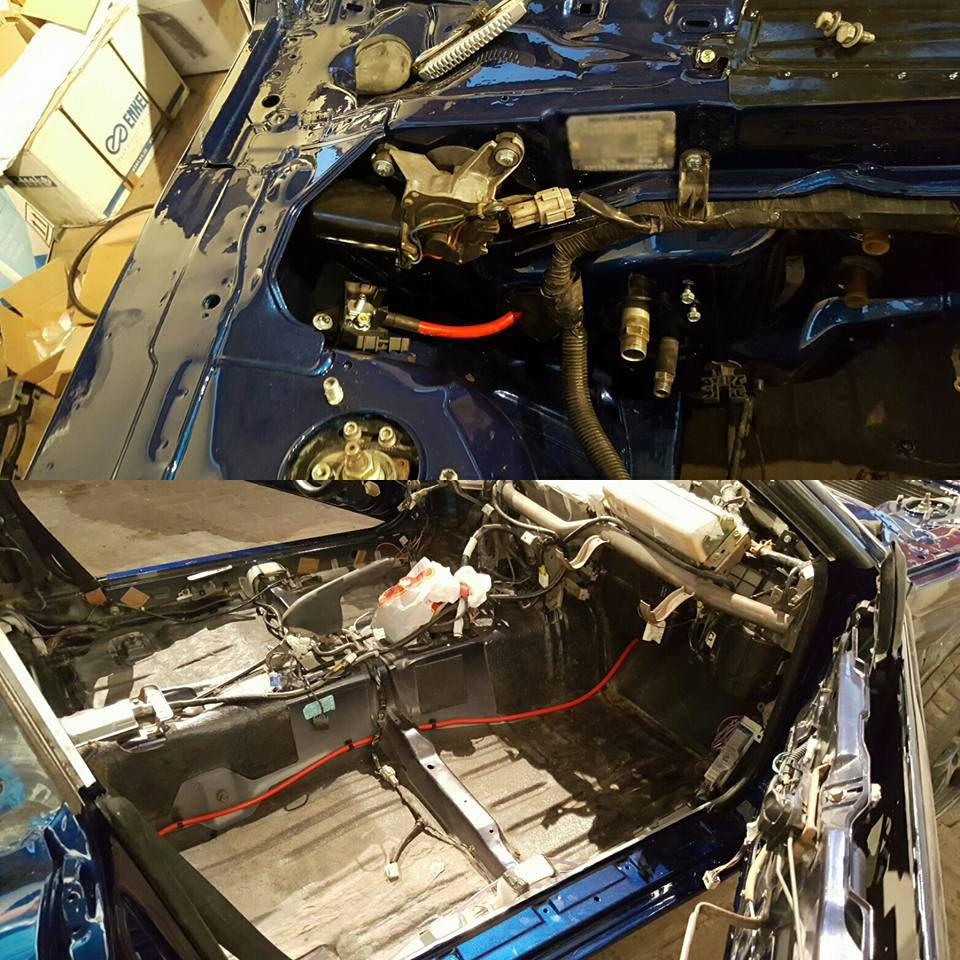 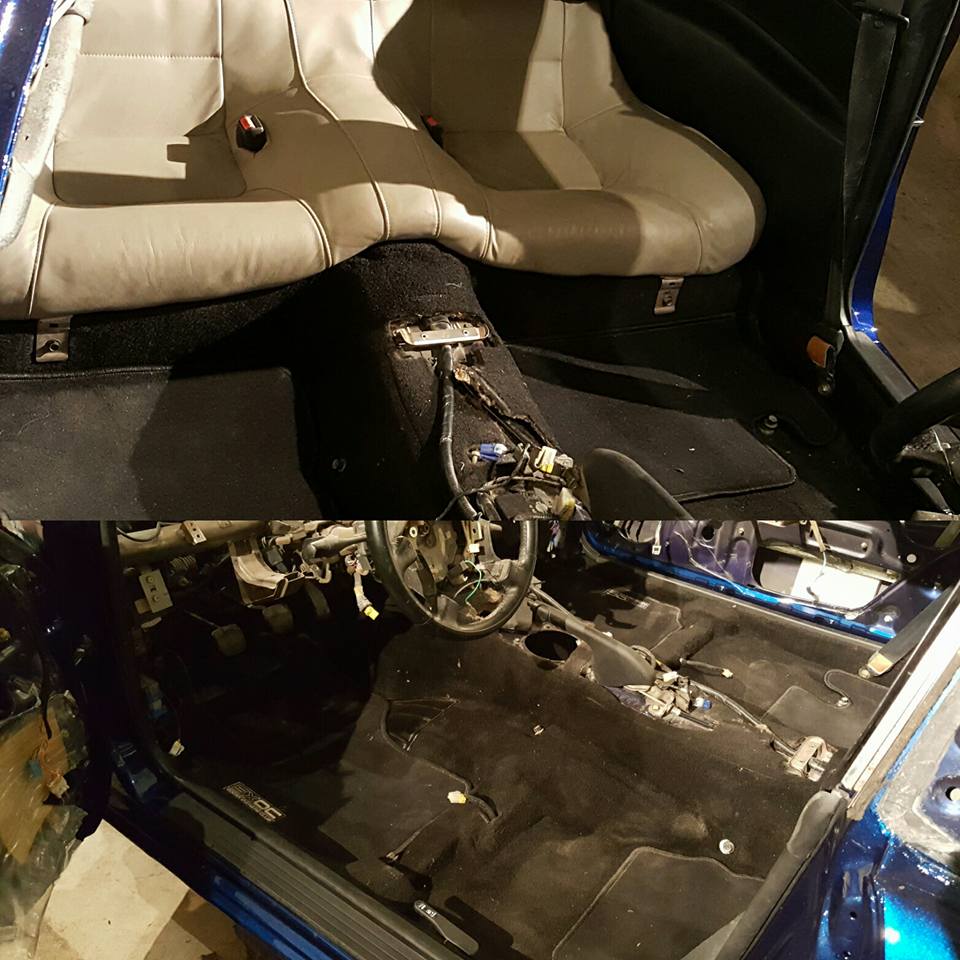 Next is to mount the abs pump, brake/clutch lines back and then to the wire loom. Then I can finally but the engine back in! |
|
|

|
 |
| Bookmarks |
| Thread Tools | |
| Display Modes | |
|
|