
 |
|
|||||||
| Home | Rules & Guidelines | Register | Member Rides | FAQ | Members List | Social Groups | Calendar | Mark Forums Read |
| Builds (and builds only) Got a build thread? It goes here, build threads anywhere else on the forum will be locked and never moved. |
 |
|
|
Thread Tools | Display Modes |
|
|
#91 |
|
Zilvia Member
 Join Date: Nov 2012
Location: Massachusetts
Age: 27
Posts: 276
Trader Rating: (0)
 Feedback Score: 0 reviews
|
awesome thread pretty good fab work too for learning all on your own, i did the same thing just learned as i went on im 17 now. keep it up in for the update too!!
|
|
|

|
| Sponsored Links |
|
|
#93 |
|
Zilvia Member
 |
Hey man, just wanted to say that I really like this build. It's nothing crazy or over the top but I see a lot of myself right now with what you guys are doing. I'm virtually in the same boat as you guys (minus tubs) but I'm almost done with my first complete build.
I'm seeing almost all of the issues that I ran into with my bay in yours and it makes me nervous just re-living it again! As you've learned, the best lesson I learned while I was building my hatch was to do everything correctly the first time. If you got better at a skill, re-do past mistakes to avoid problems in the future. You guys look like you're having fun, keep working hard and I'll be checking in on your progress! |
|
|

|
|
|
#94 | ||
|
Leaky Injector
 |
Quote:
Quote:
We are wrapping up work for the summer at this point, with fall semester approaching way faster than we'd like, so our progress will be posted shortly! Its not finished as we would have hoped, but we made some changes that both myself and my brother agree were worth the extra time to go back and redo properly. In the mean time, we attended Friday Nigh Drift Party in Englishtown, NJ back in June and I finally got around to making an edit, so check out some sweet tire slaying. 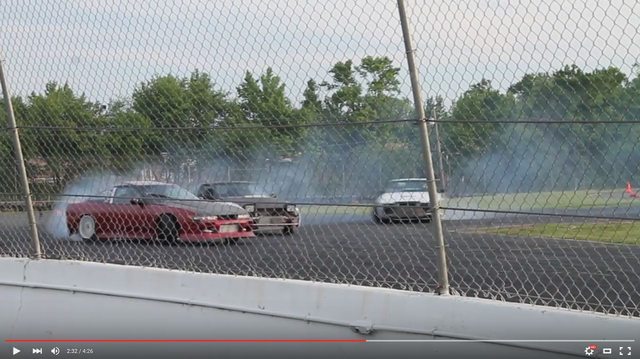 -Jordan |
||
|
|

|
|
|
#95 |
|
Leaky Injector
 |
I haven't updated this in a while. Mostly because not a whole lot of progress has been made. Just a lot of grinding and redoing things over again, but it's getting there. It will be worth it in the end. I also started school at the end of August, so not a whole will be happening over winter. We're hoping to finally get this thing painted next spring and get it on the road!
Here is the progress made since the last post on here. Took the tail lights out and cleaned up all the goo. We got some shiny new half and half tails but I don't have a picture of them at the moment. 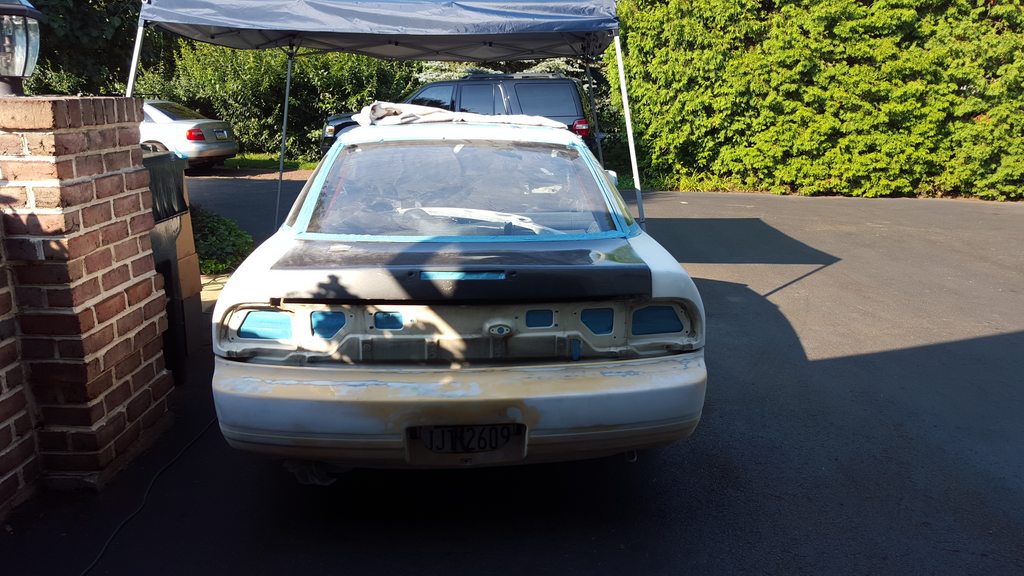 Started on the roof. Ground down all the rust spots and started laying filler. I'm really contemplating just getting a new windshield put in because there was a bunch of rust in the seams. But I'll see how I feel about doing it in the spring. 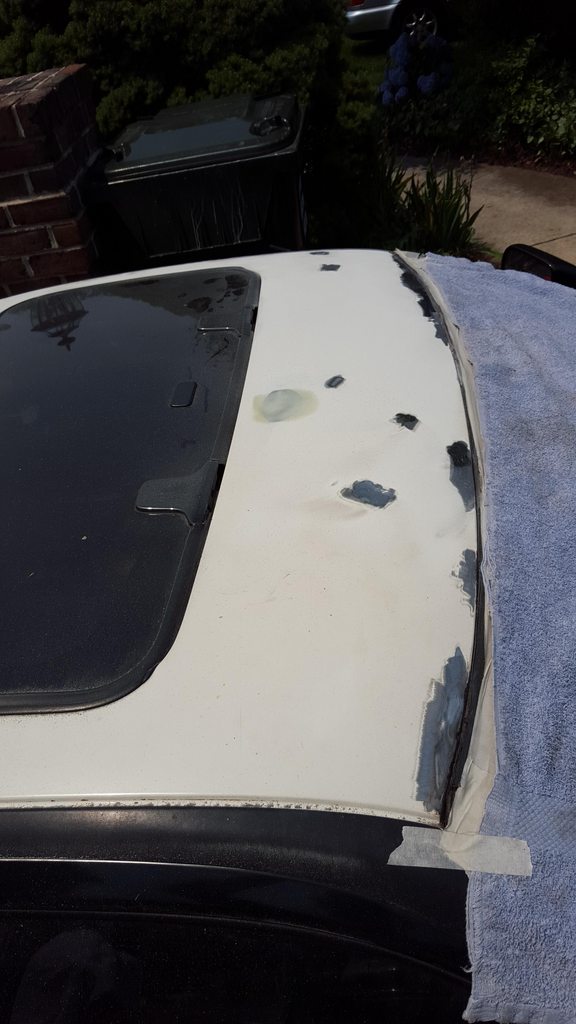 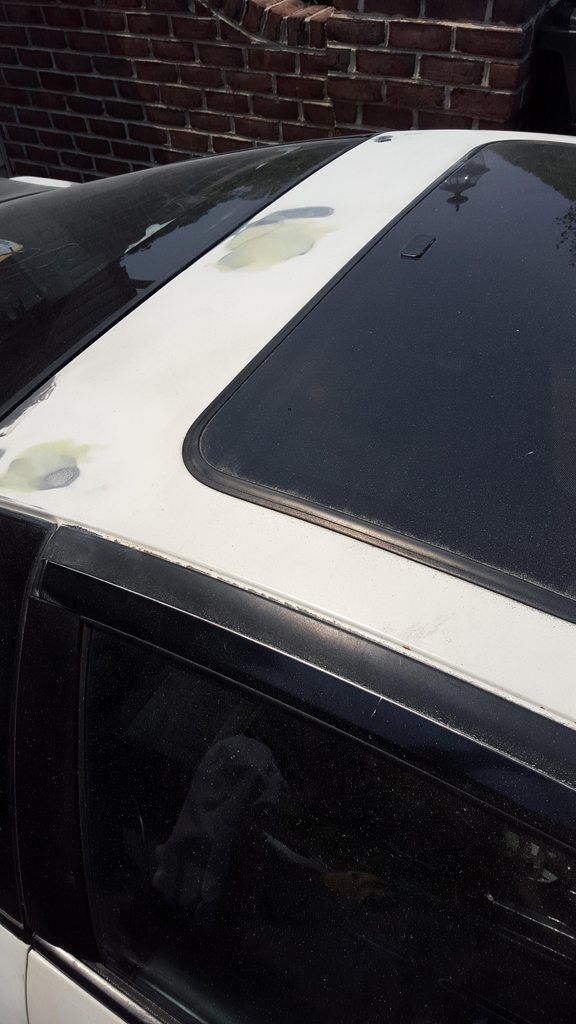 Last edited by homegrowngarage; 10-22-2015 at 09:44 PM.. |
|
|

|
|
|
#96 |
|
Leaky Injector
 |
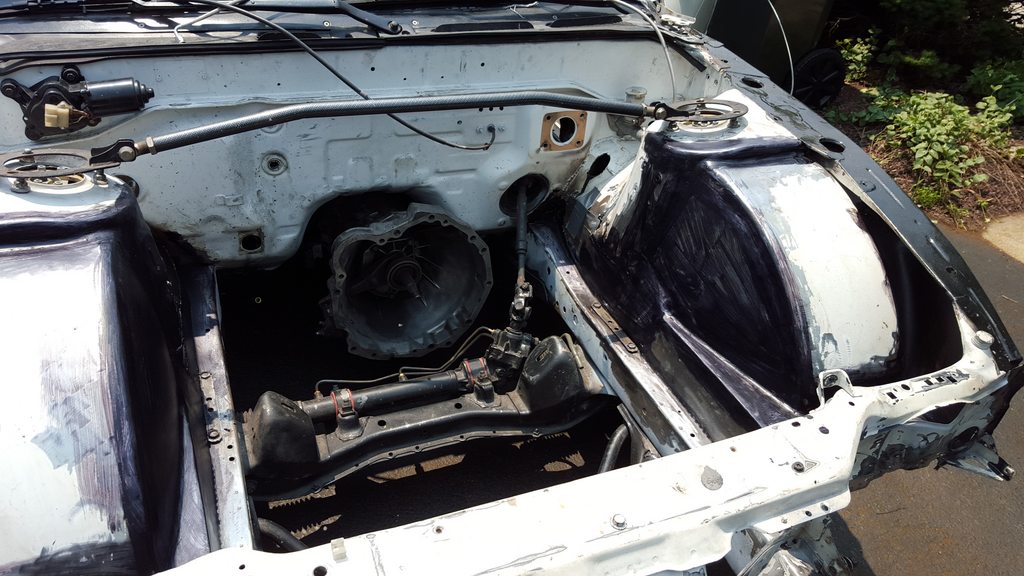
Put some rust neutralizer on the bay. It sort of works, but if you let it sit for more than a day it starts to show some surface rust. I ended up just not using it anymore and ground down the whole bay to bare metal put some primer on it.
 Started laying down some filler on the rest of the body. 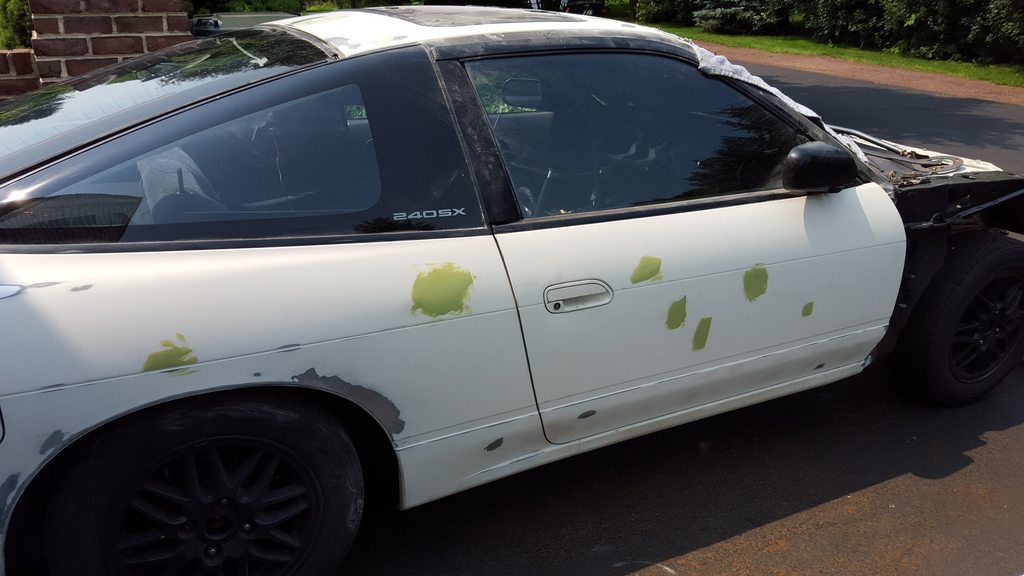 Primed the roof. 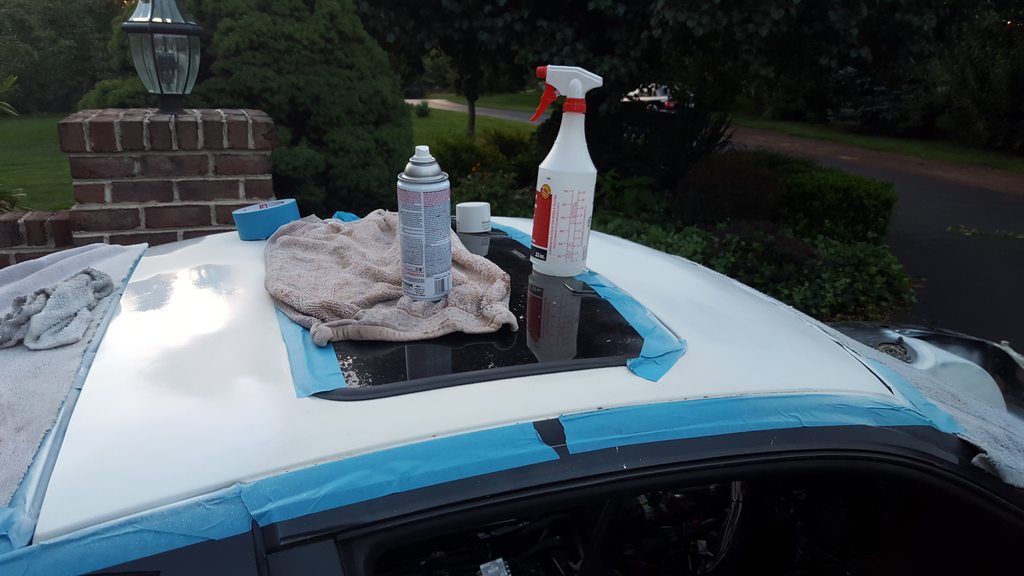 Last edited by homegrowngarage; 10-22-2015 at 09:44 PM.. |
|
|

|
|
|
#98 |
|
Leaky Injector
 |
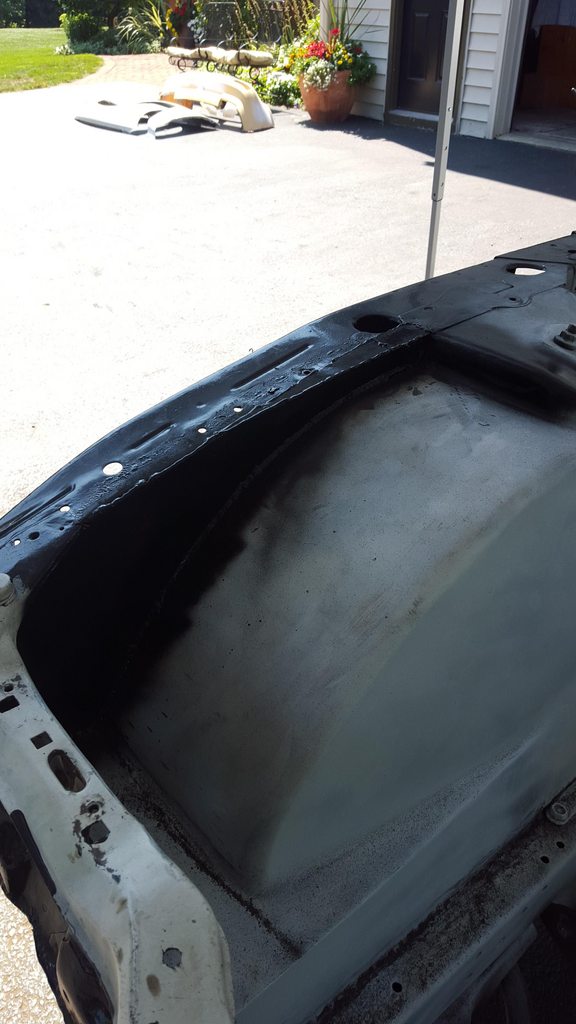
Primed the tubs. We also put down por-15 on rad support. I love using that stuff, it looks awesome and is super durable.
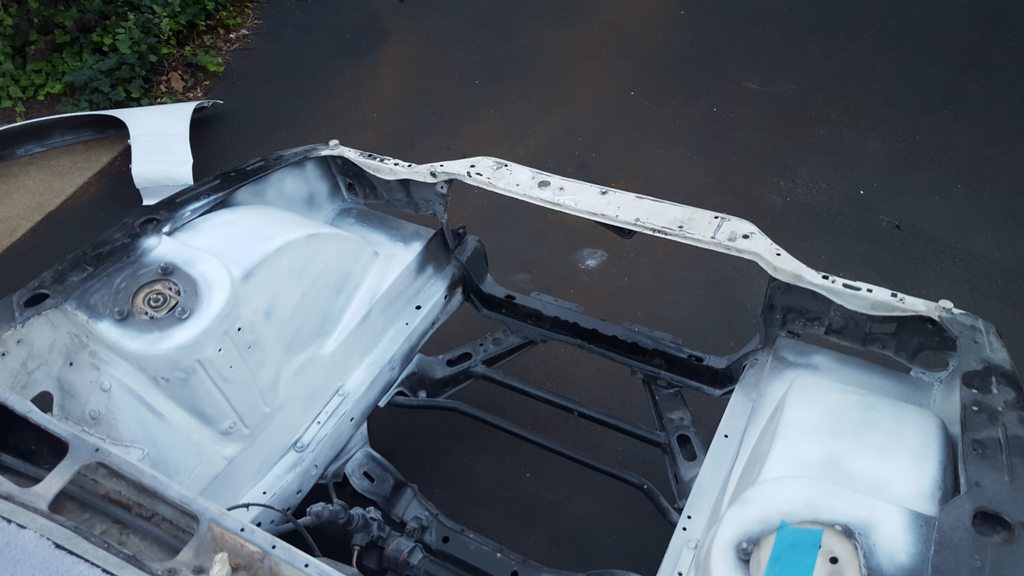 I also re-did the sides of the tubs. The thing I made before was just dumb and looked really bad. Now it's just a flat piece that goes right up to the frame. 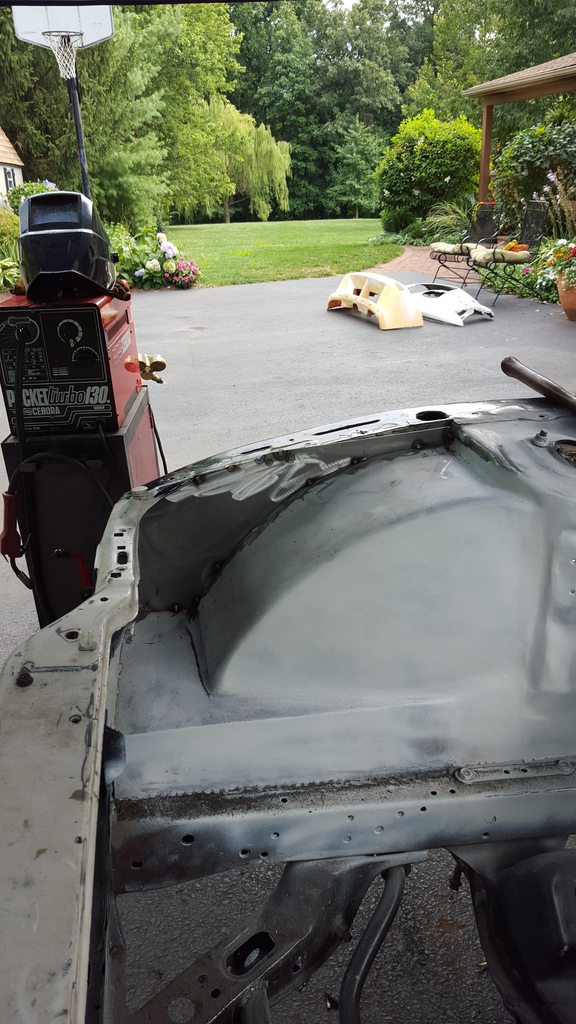 When it was all cut out. 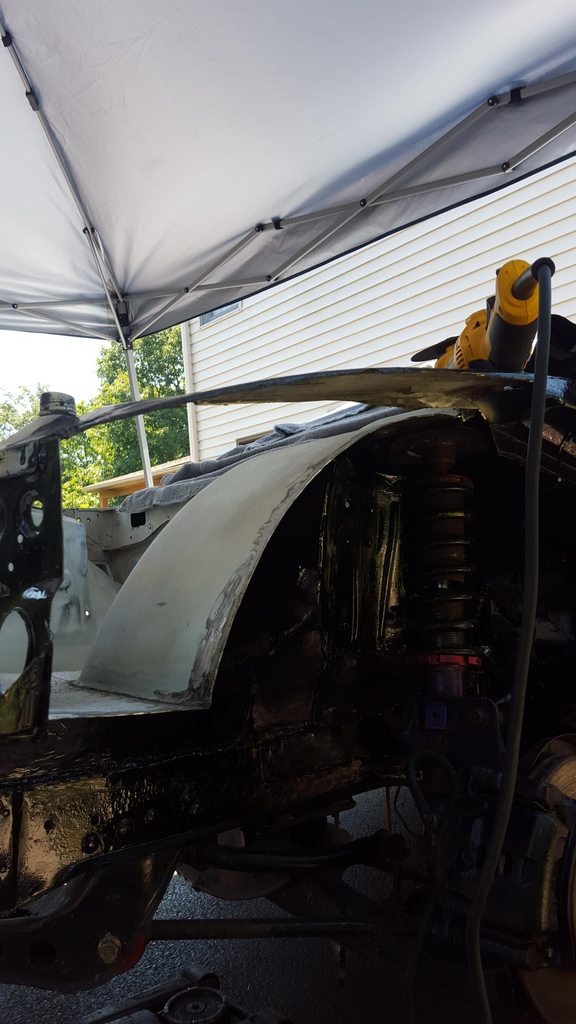 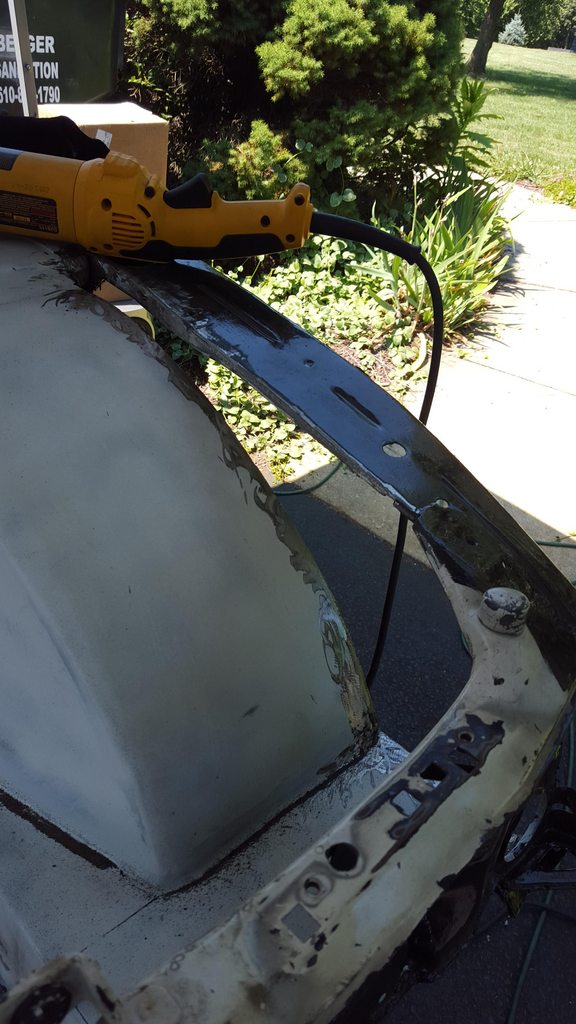 Close up shot. The welds turned out pretty decent for this section. 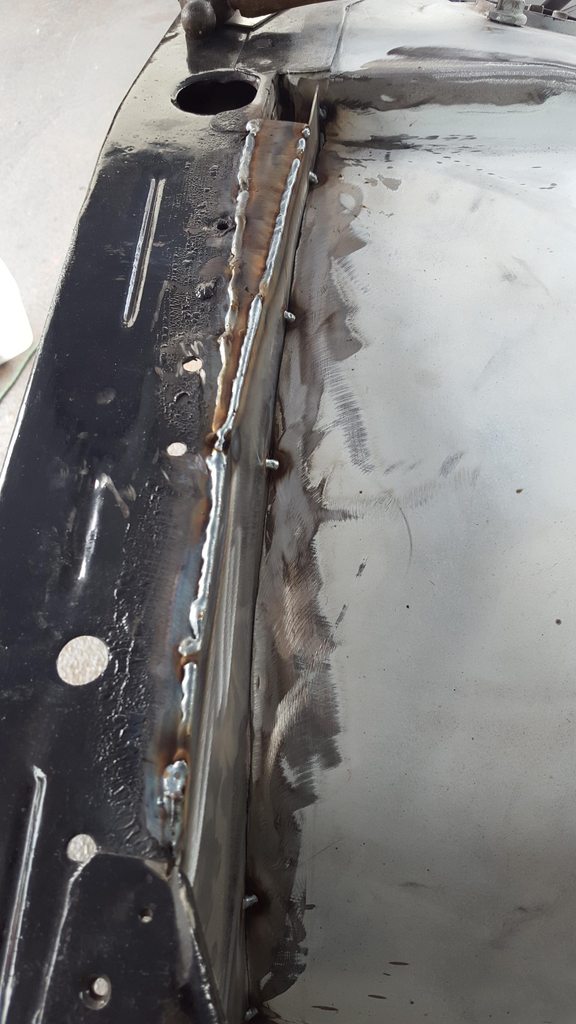 Last edited by homegrowngarage; 10-22-2015 at 09:45 PM.. |
|
|

|
|
|
#99 |
|
Leaky Injector
 |
Painted it immediately to prevent it from rusting. I've learned my lesson.
 On a side note I finally picked up a decent angle grinder. We've been using a harbor freight angle grinder up until about 2 months ago. After having about 5 break in a week I got fed up with it and got this dewalt one. It may not be a snap on but it's 100x better than that harbor freight shit. 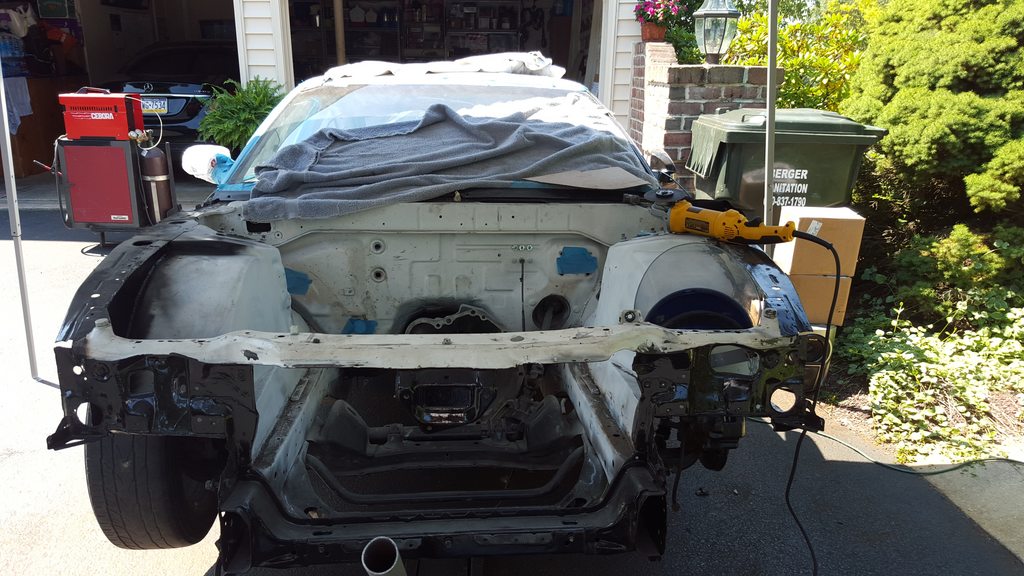 Tubs are finally done! 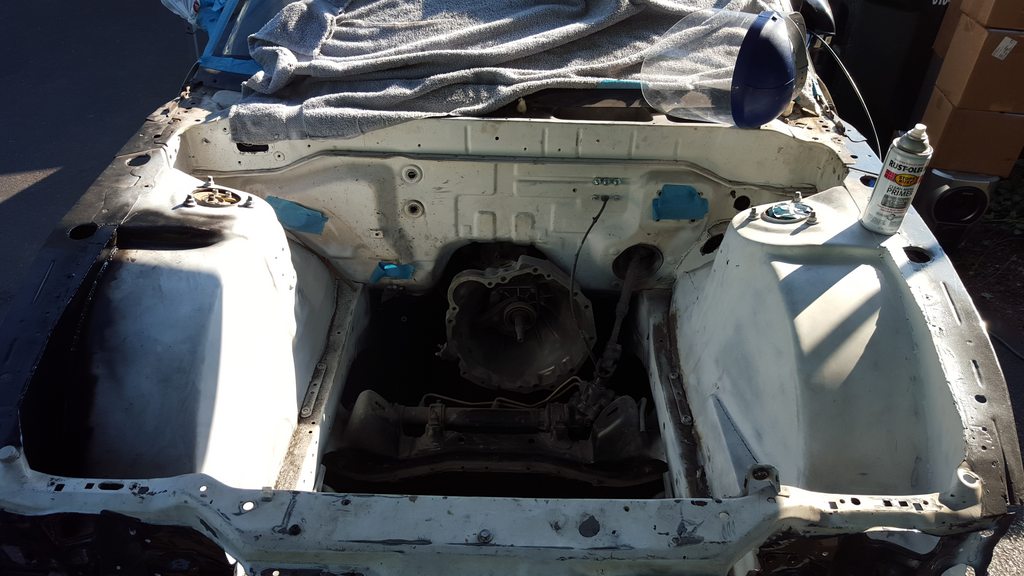 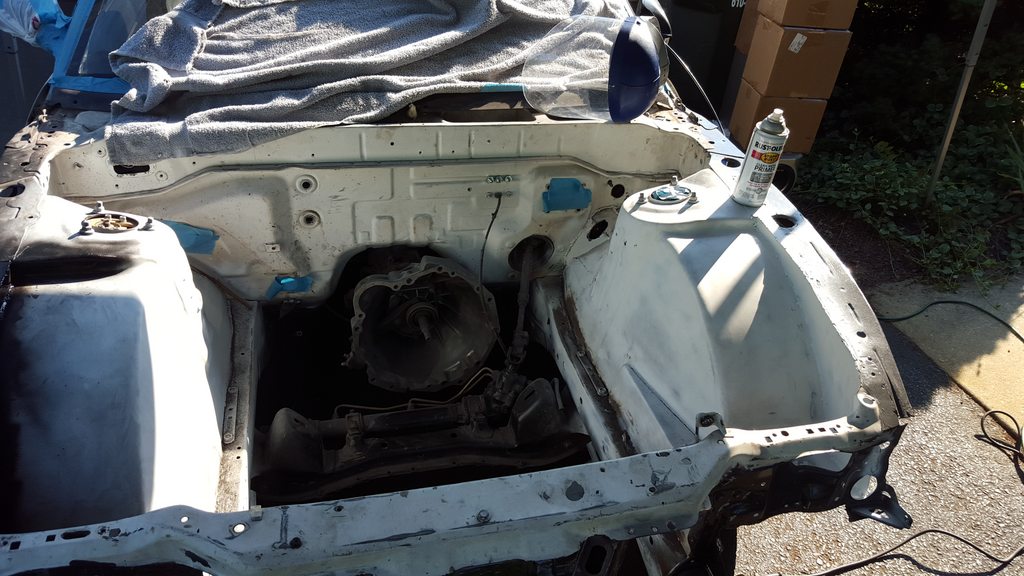 I have been considering and redoing that section that I had to cut to fit the brake booster. I think it just looks stupid and haggard. I guess this winter I'll be having some fun haha. But after that the bay should be 100% done. I've learned so much from doing this bay and even though it can be extremely frustrating, it feels good once it's (almost) done. I just can't wait put it all back together and finally drive it. Last edited by homegrowngarage; 10-22-2015 at 09:45 PM.. |
|
|

|
|
|
#100 |
|
Leaky Injector
 |
The body work is shaping up pretty good. I can't wait for paint!
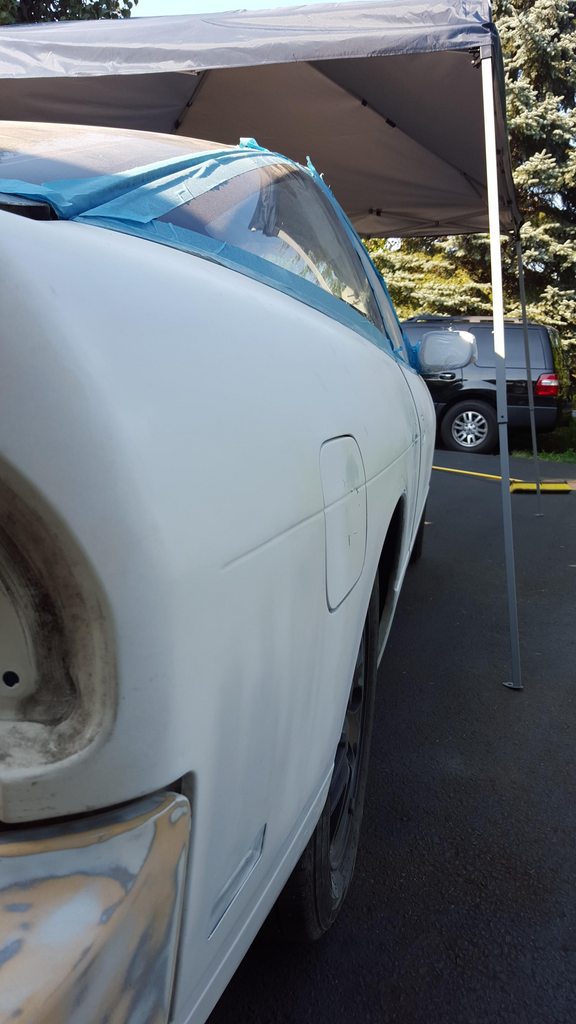 And that's it for now. This winter break we'll probably be back working on this turd and hopefully this spring we'll be able to get to painting right away! Then actually drive it!  Last edited by homegrowngarage; 10-22-2015 at 09:46 PM.. |
|
|

|
|
|
#101 |
|
Leaky Injector
 |
Itching to keep working on the 240 while I'm away at school, but soon enough will be winter break and there will be real updates.
This picture sums up the feels. 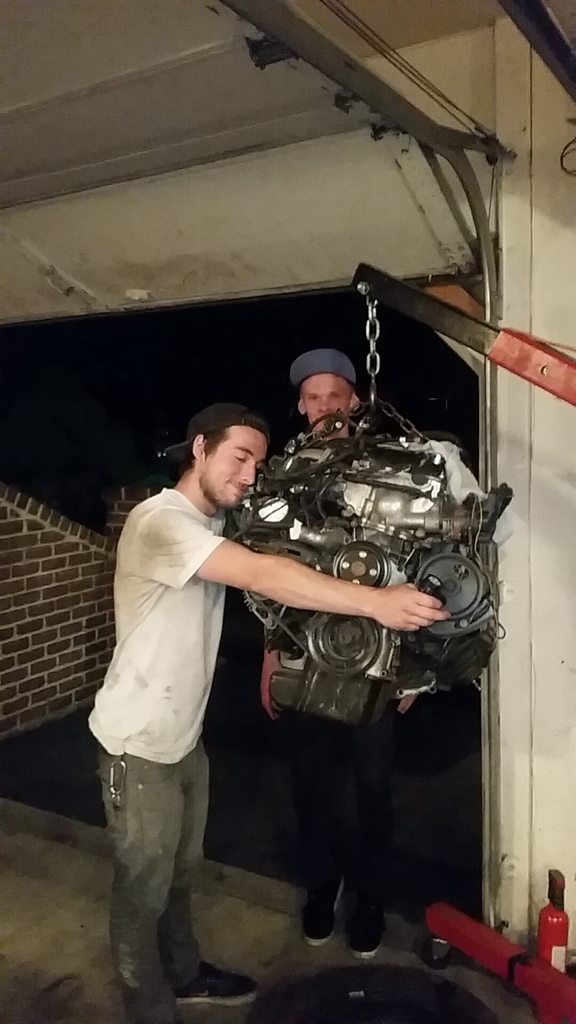 Also never got around to actually taking pictures, but the wiring in the car and engine bay has been wrapped in braided nylon and heatshrink  Looks great, will get some pictures of it asap, but here is an example of the quality. 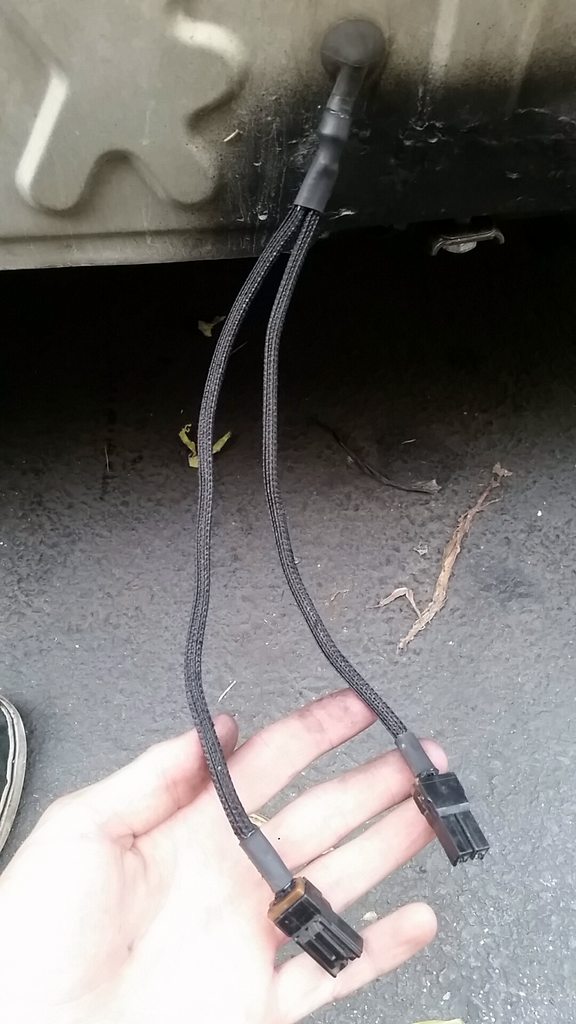 Also hopped on some Facebook pages and eBay and snagged both a working HUD cluster with subharness as well as the projector and trim for a very good price. Cant wait to get this installed. 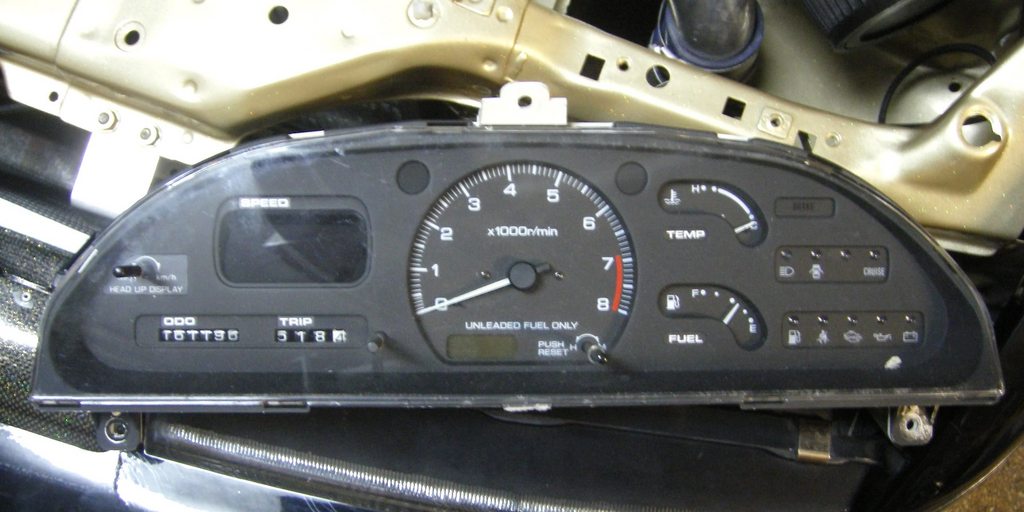 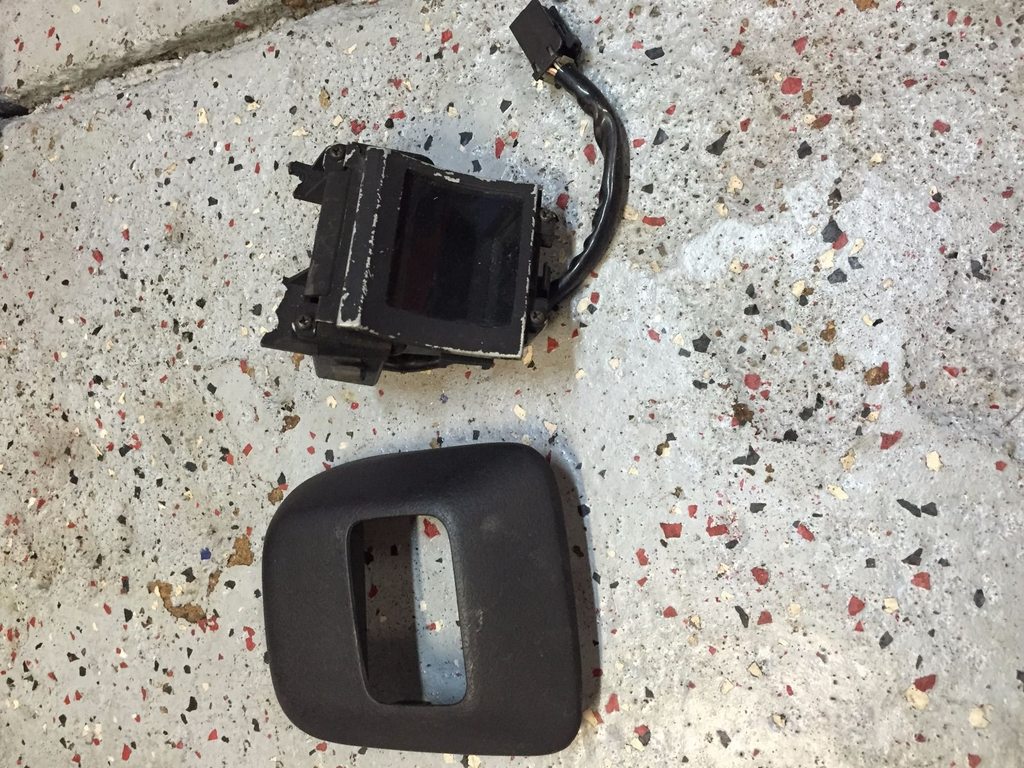 More to come. - Jordan |
|
|

|
|
|
#102 |
|
Zilvia Addict
 Join Date: Jan 2011
Location: In my house
Age: 29
Posts: 755
Trader Rating: (3)
        Feedback Score: 3 reviews
|
Do any one of you guys go to Temple? I see alot of those blue subies around, was always wondering if any of them belonged to you guys.
I ran into another forum buddy last week lol so its not far out there |
|
|

|
|
|
#103 | |
|
Leaky Injector
 |
Quote:
-Brennan |
|
|
|

|
|
|
#106 |
|
Leaky Injector
 |
Yes definitely when we get it painted and rolling we need to meet up, possibly photo shoot haha. Your build has been a major inspiration for us, plus knowing there is someone local with the same taste in 240s is pretty neat too. Hopefully we can get our s13 as clean as yours!
-Jordan |
|
|

|
|
|
#107 |
|
Leaky Injector
 |
Long Overdue Update!
So we've been back home from college for over a month now, and have been hard at work to get the car done. Our initial goal was to have it done for East Coast Bash, but it just didn't happen soon enough.
We unwrapped the car, and found that the "rust neutralizer" paste we applied to the bare metal actually accelerated the formation of rust! And totally fucked up everything we grinded down last year. This meant we needed to once again grind the entire bay back down to bare metal! 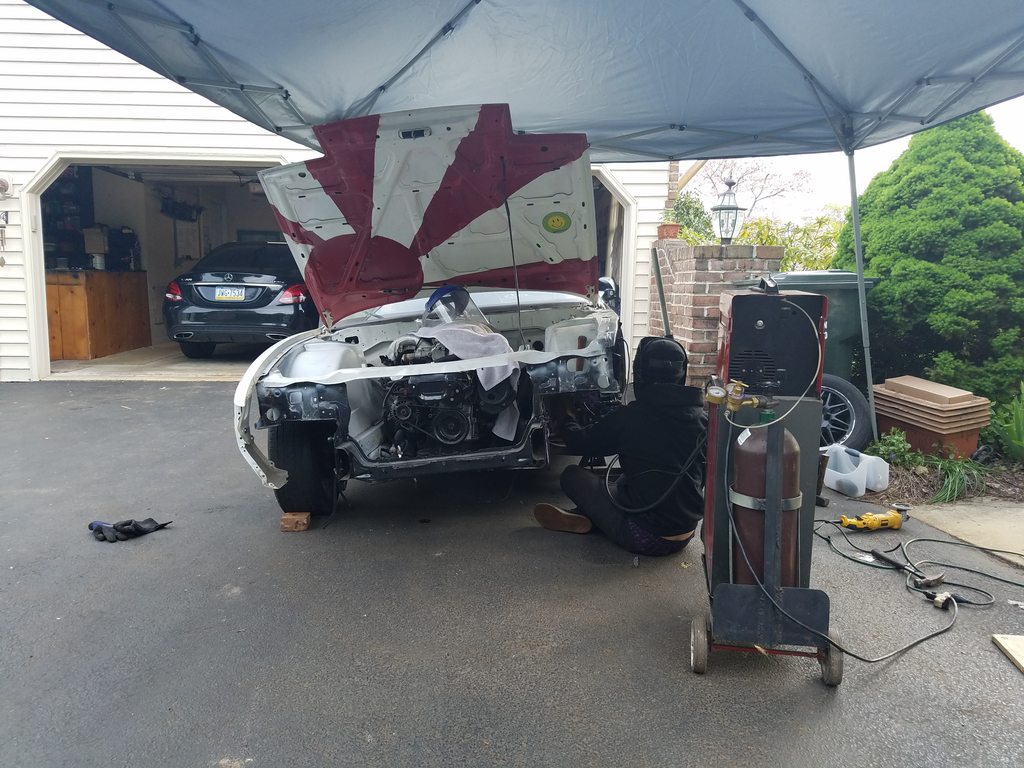 In addition to this, you may have seen previously that we've made repairs that were honestly pretty shitty, but we tried our best. We keep trying to correct those as our skills improve, and one of those fixes was redoing the rear corner of the bay where we made a crap patch that looked awful. Now you see it 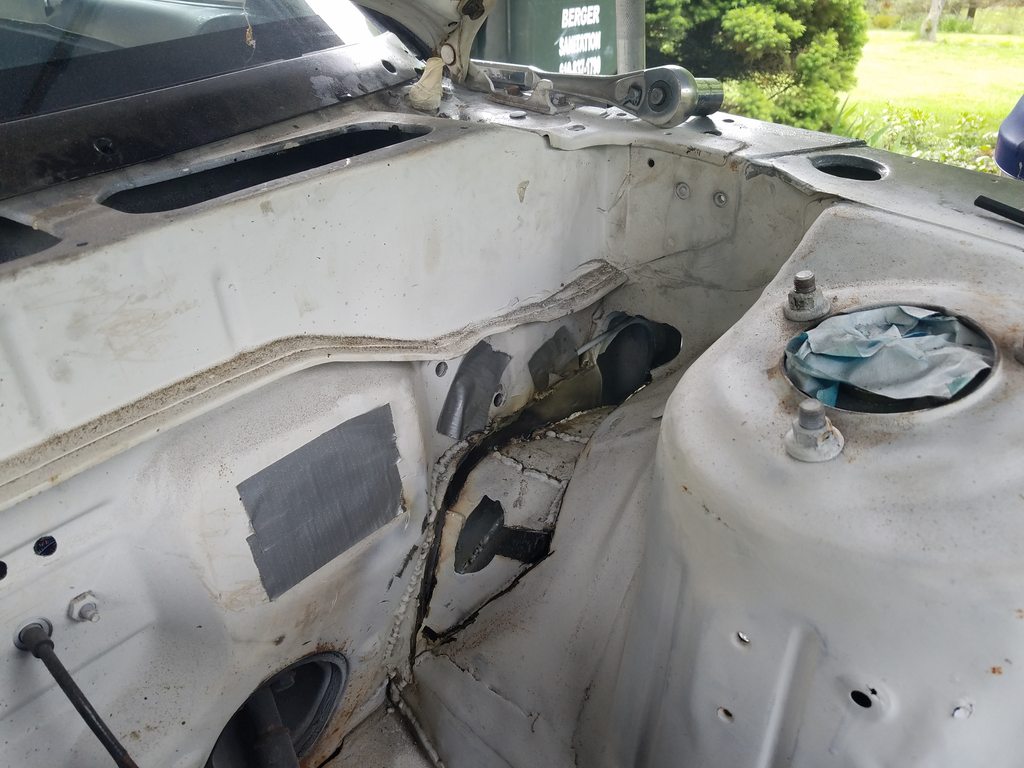 Now you don't! 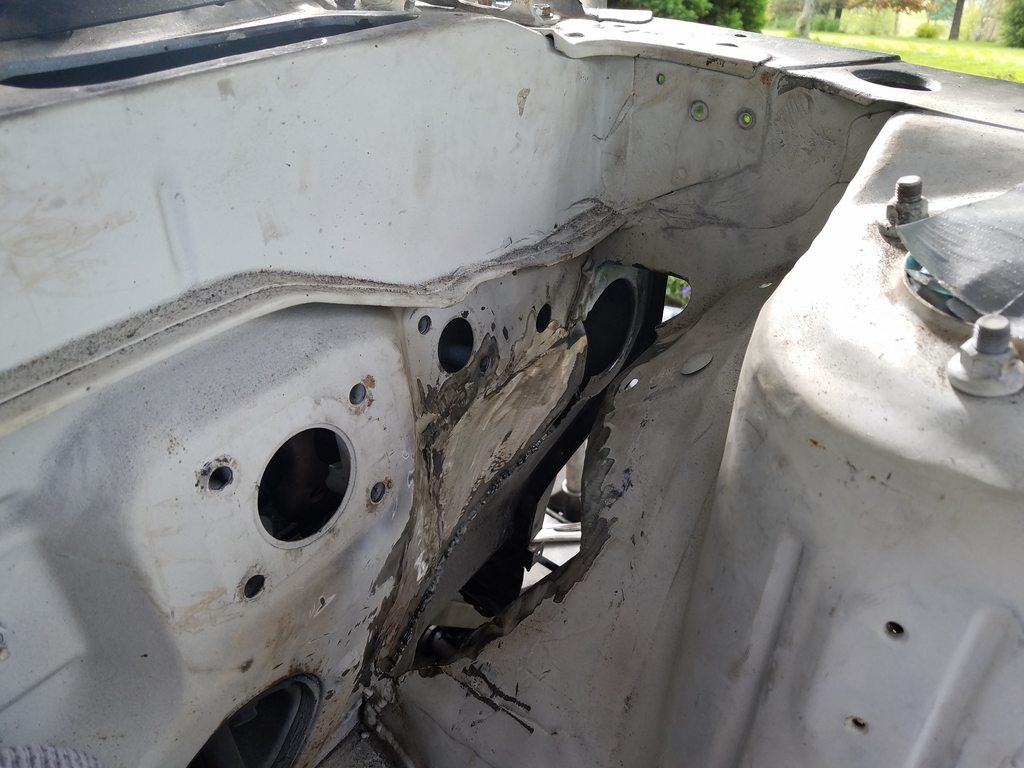 New patch going in, trying to make it match the oem curve of the wheel well. 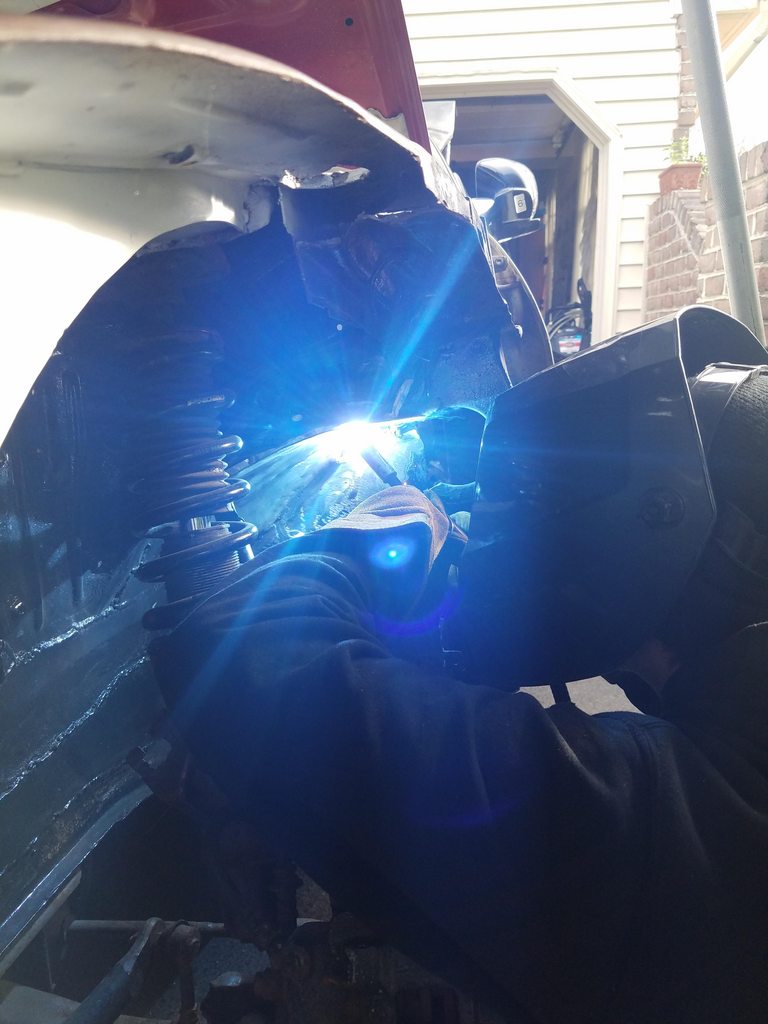 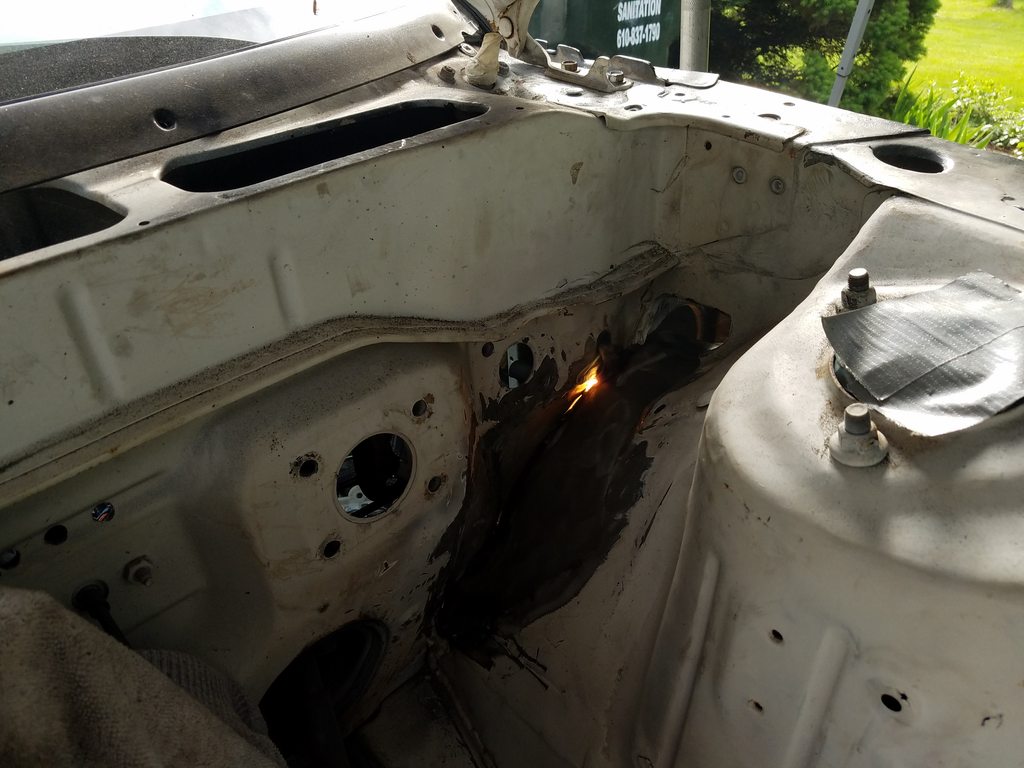 Grinding down the bay and prepping for body filler. Our goal was to use as little filler as possible, so it reduces the chances of cracking. This makes the bay look less perfect, but it's worth it over cracked paint. 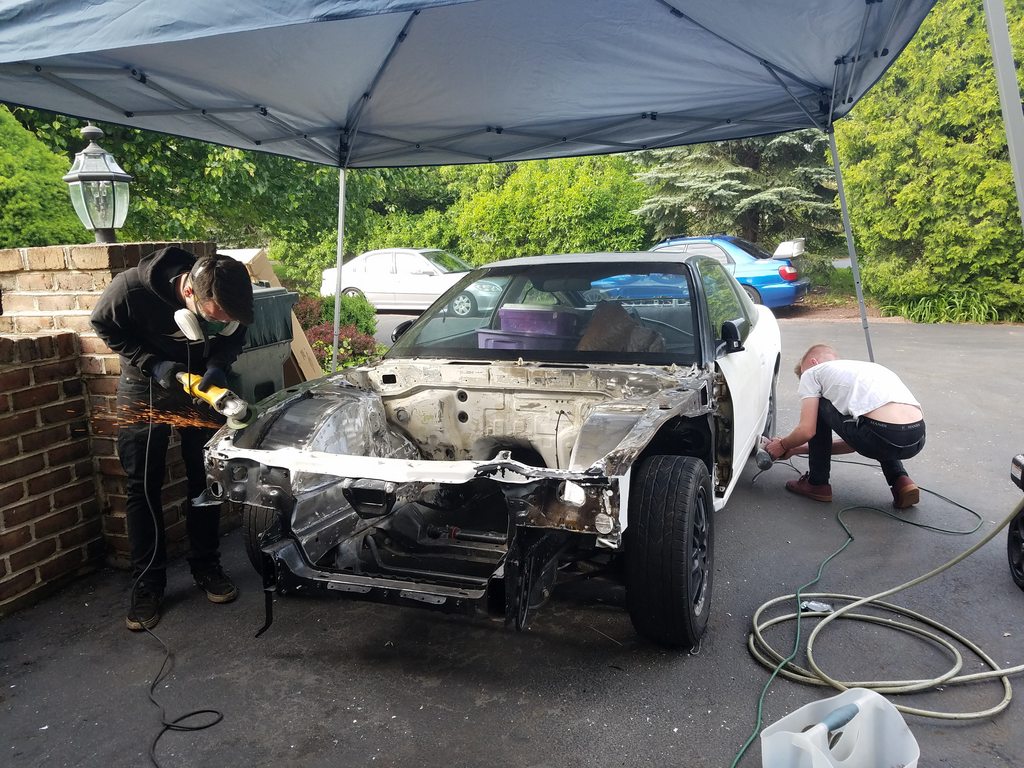 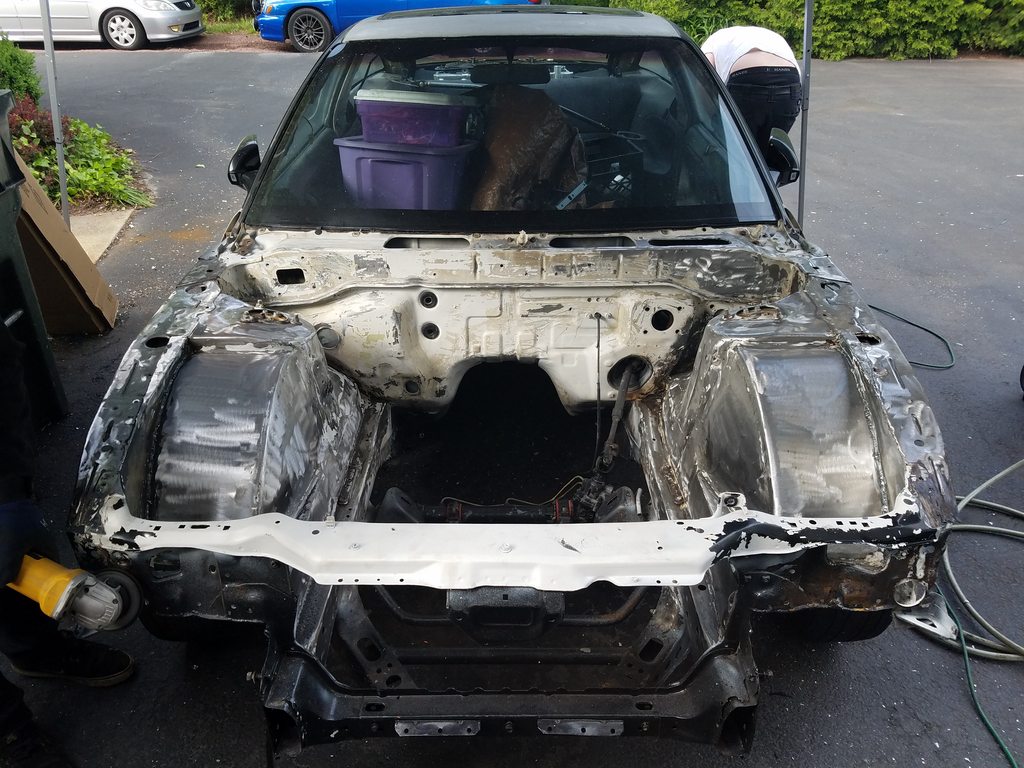 More grinding. 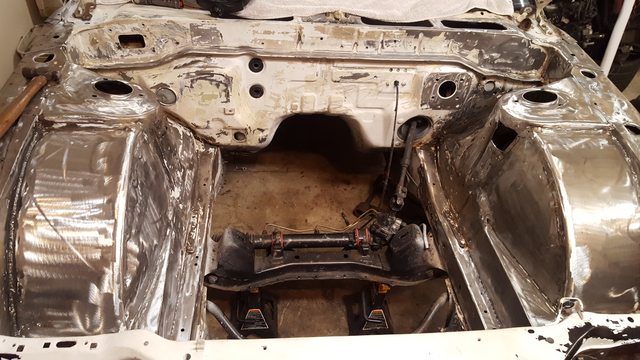 Had to fix a few more places. At this point I wish I just cut all of the stock metal out and made the tubs extend all the way to the firewall. Maybe next time (; 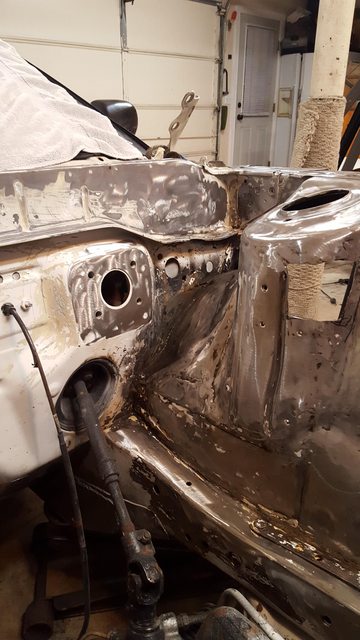 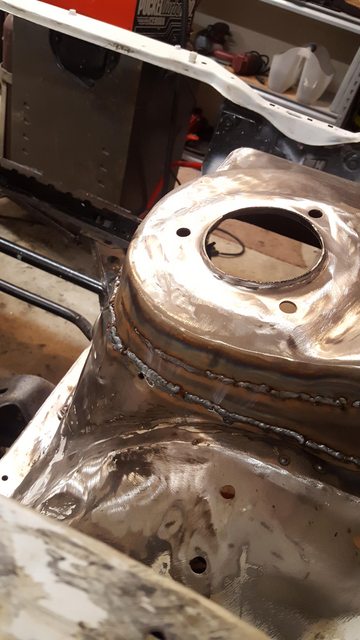 Much better than the first time! 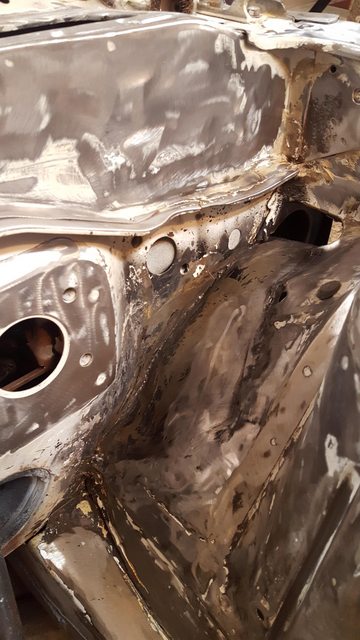 Last edited by homegrowngarage; 07-06-2016 at 08:52 PM.. |
|
|

|
|
|
#108 |
|
Leaky Injector
 |
New parts have arrived!! This is everyone's favorite part of building a car, aside from having a lighter wallet.
First up was something we've been eyeing from the beginning. After we realized that ebay bucket seats we a poor idea, we decided to skip right to a FIA certified fixed-back seat by Corbeau. We lucked out on free shipping from Enjuku Racing over memorial day, thanks guys! 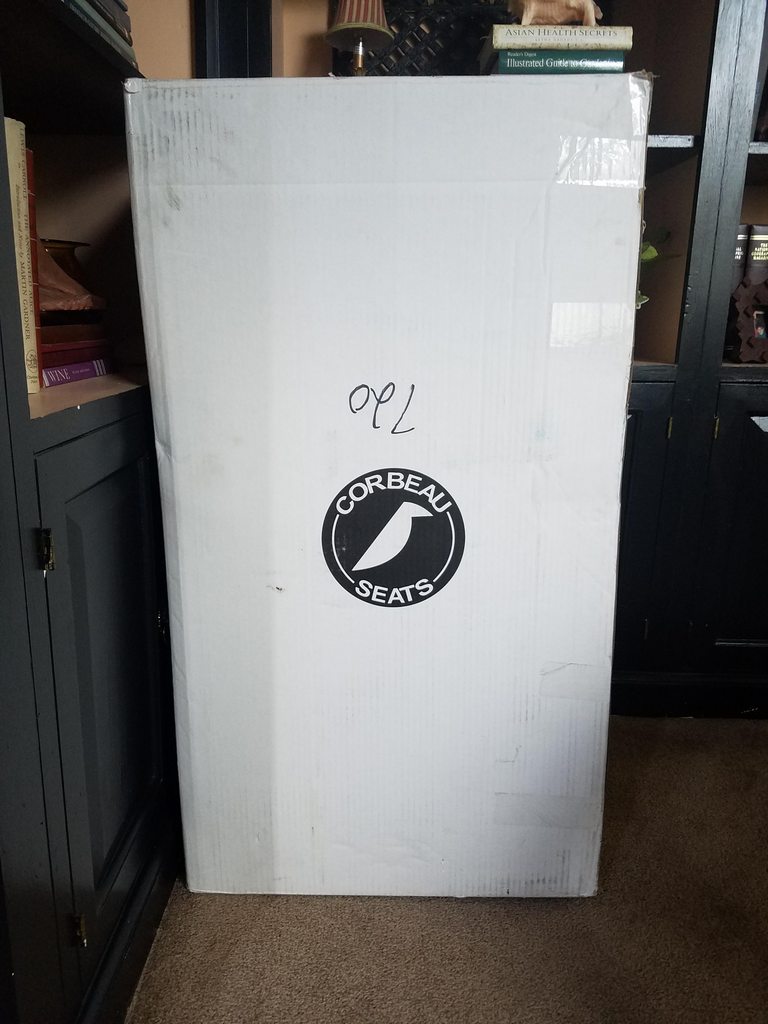 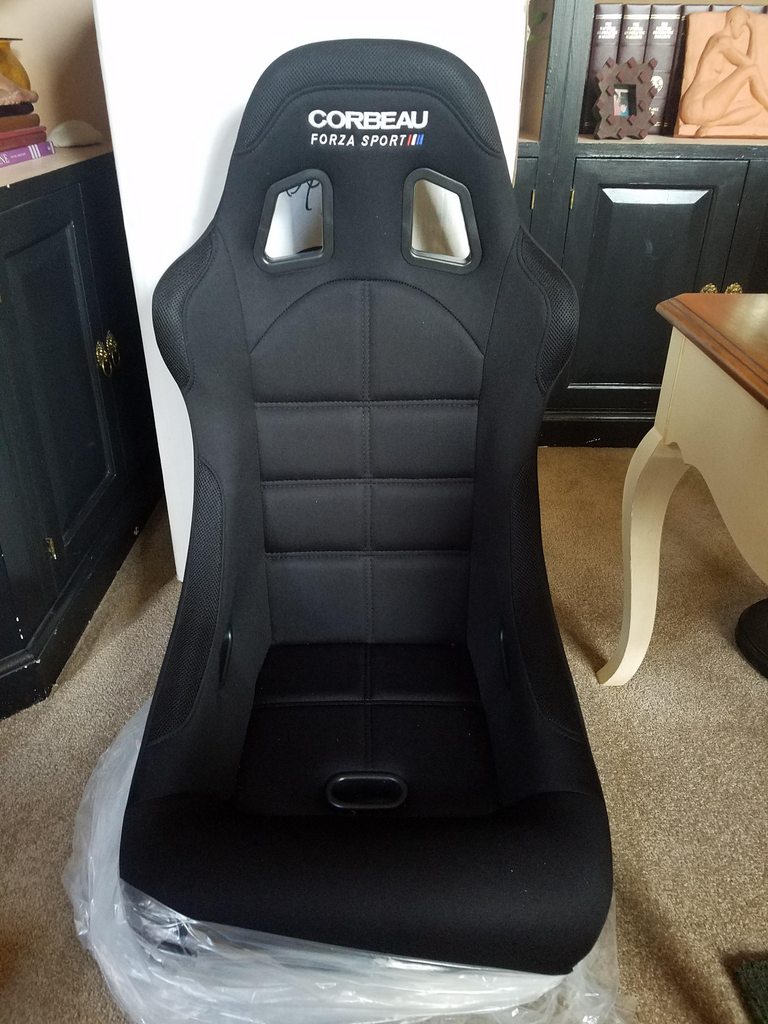 What better to pair the seat up to than handmade seat rails by Street Faction Engineering. Seriously these things are awesome, look great and can be easily adjusted for our side-mounted seat. 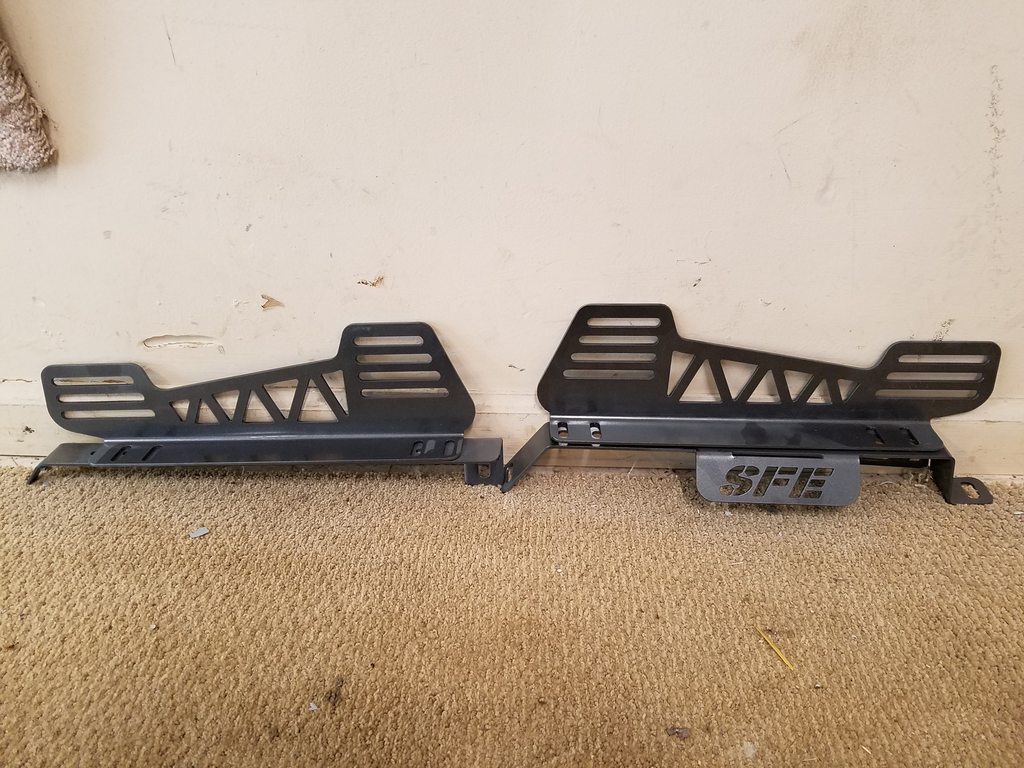 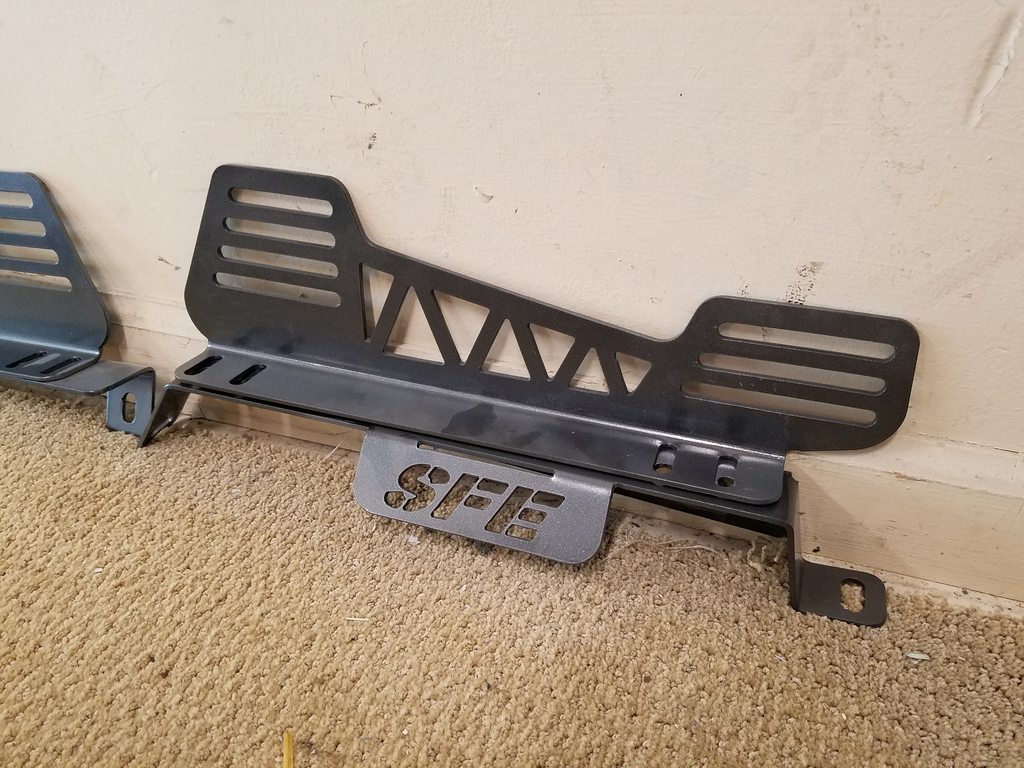 Now the passenger is equally as important, so no way another s13 seat is going back in the car. We managed to grab a MINT S14 seat from a local guy for only $30! It really looks like it was never sat it, super stoked to have it in the car. 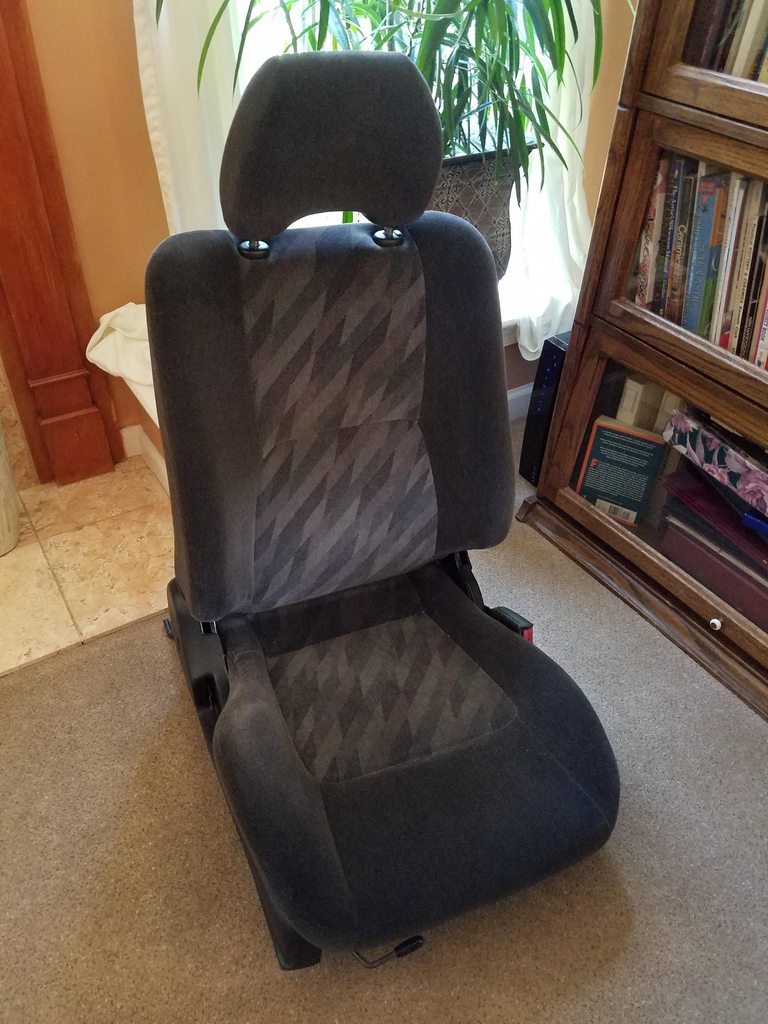 Now another issue has been what to do with seat belts. 4 point harnesses would be neat, but without a roll cage they aren't practical or safe, so we grabbed a pair of S14 Black 3-Point seat belts. 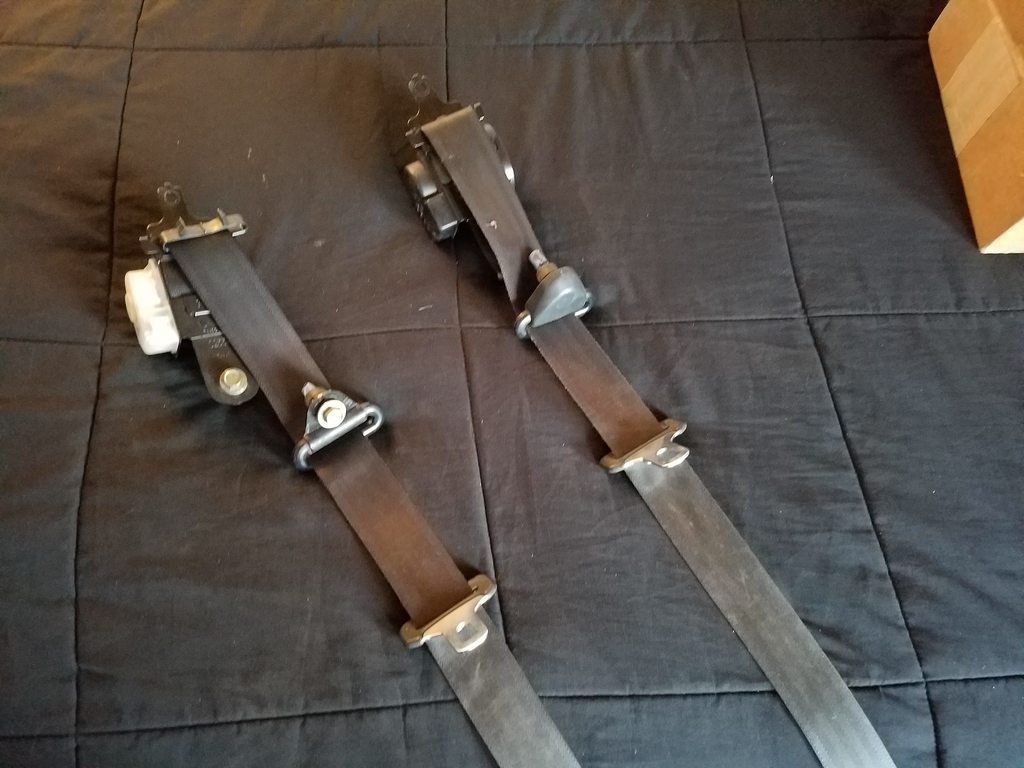 Another idea we had for the car was to tuck the brake lines inside the firewall and use bulkhead AN fittings to clean it all up. Well it just wasnt working out as planned, and to save the hassle we just went with Chase Bays brake line relocation kit. It looks like good quality so we'll put it to the test when the cars done. 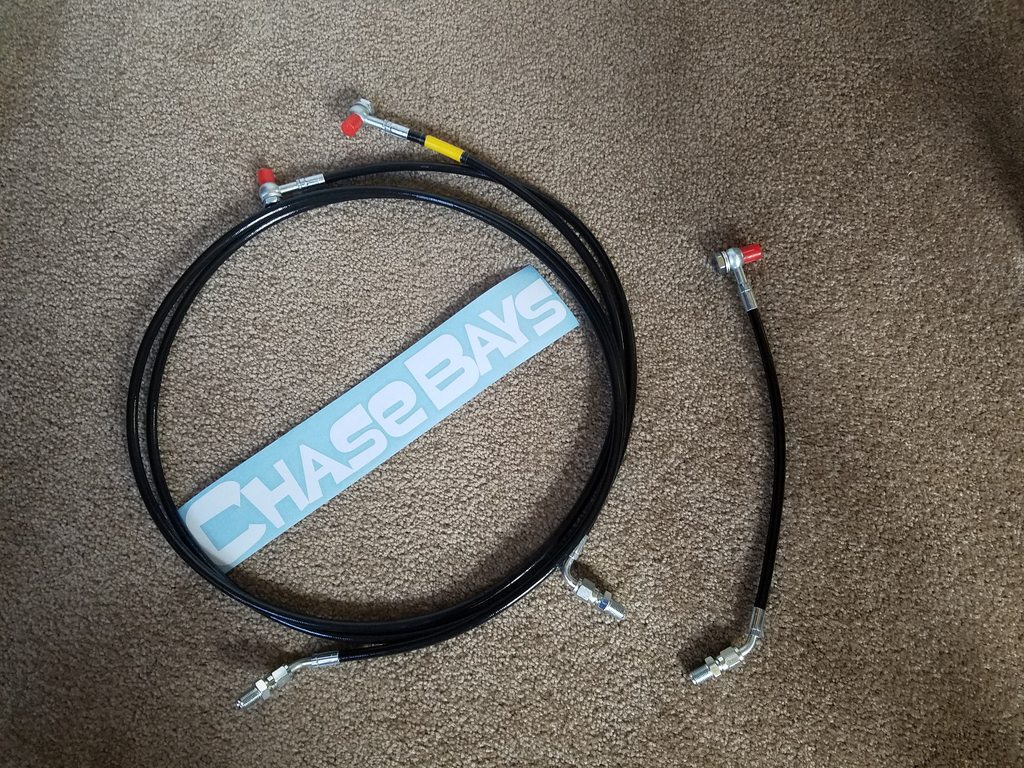 Finally after we laid a coat of primer with a Harbor Freight HVLP gun, we knew it definitely wouldn't give us the results we wanted when we painted the car. So I bought a decent 3-gun setup from Areopro which worked flawlessly. 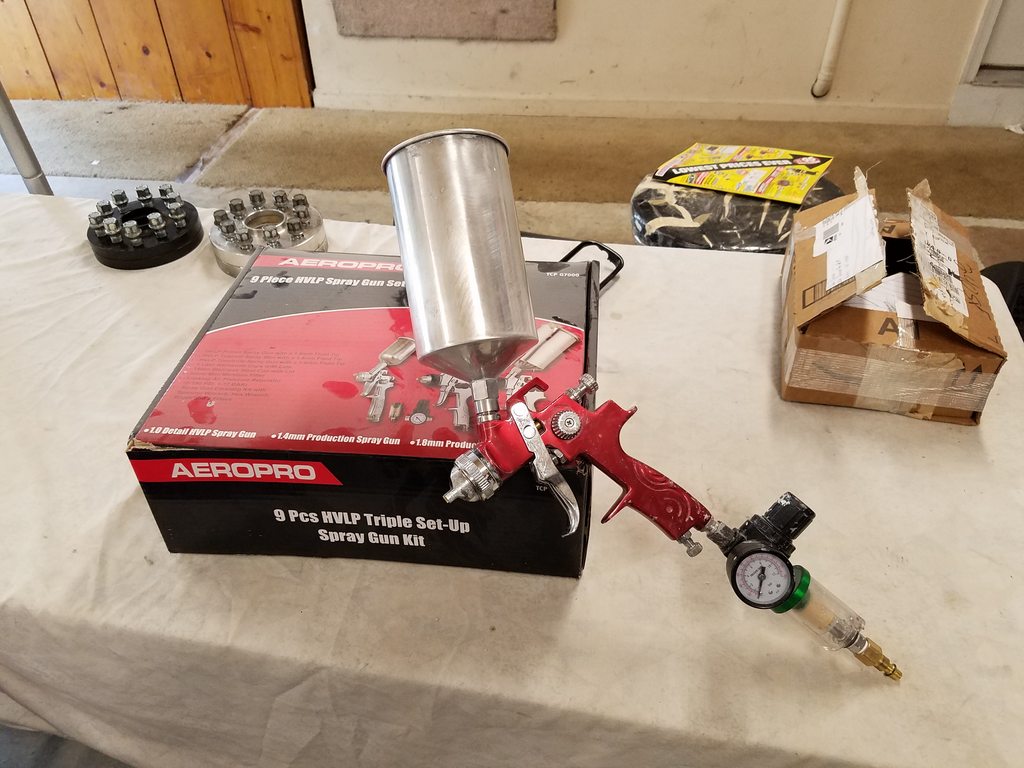 More to come. -Jordan |
|
|

|
|
|
#109 |
|
Leaky Injector
 |
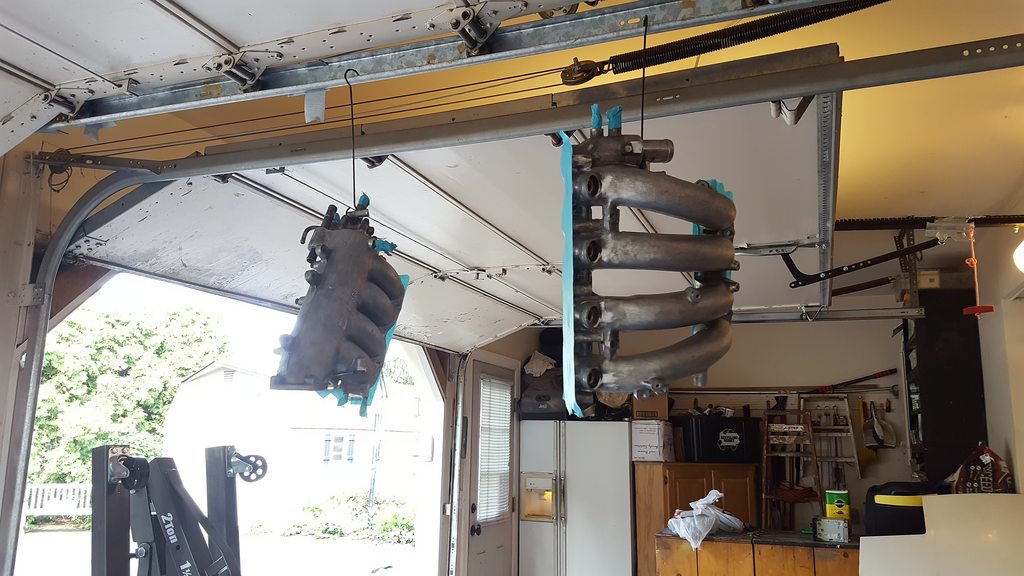
Got the intake manifold all ready for a coat of silver engine paint .
 All the covers were taken off for a fresh coat of paint and new gaskets were put in. We painted the engine block with black engine enamel. 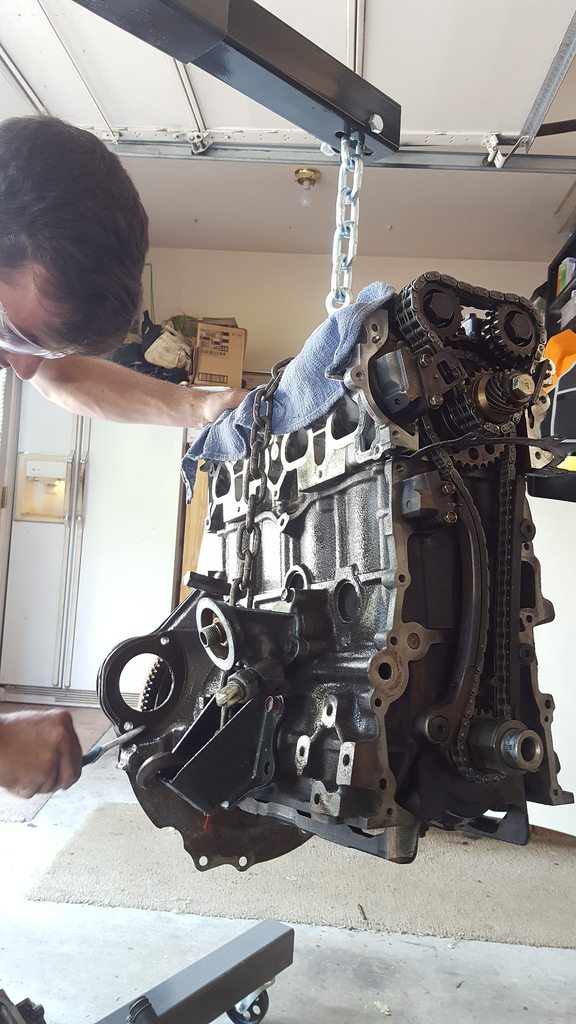 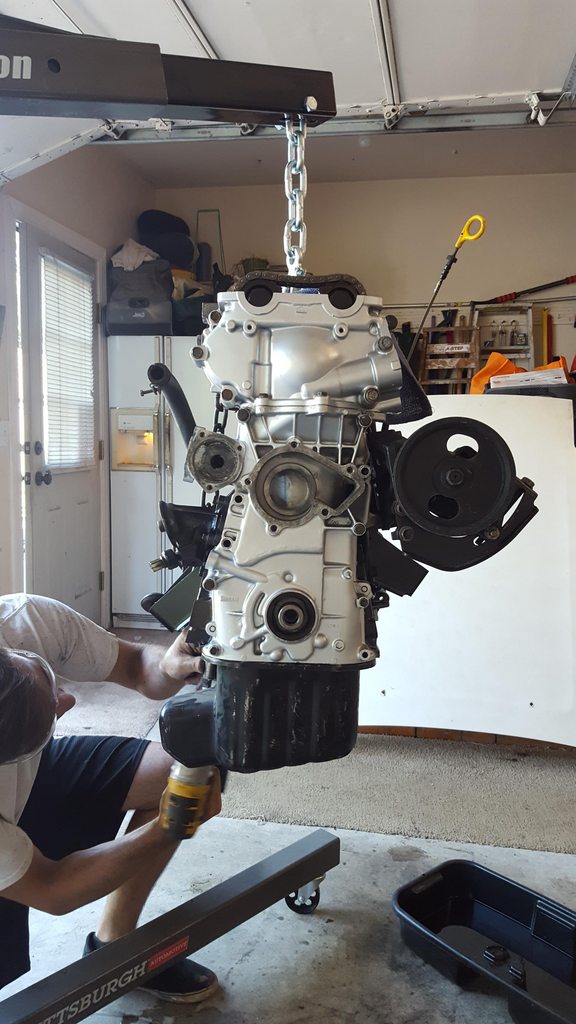 Everything on and painted! 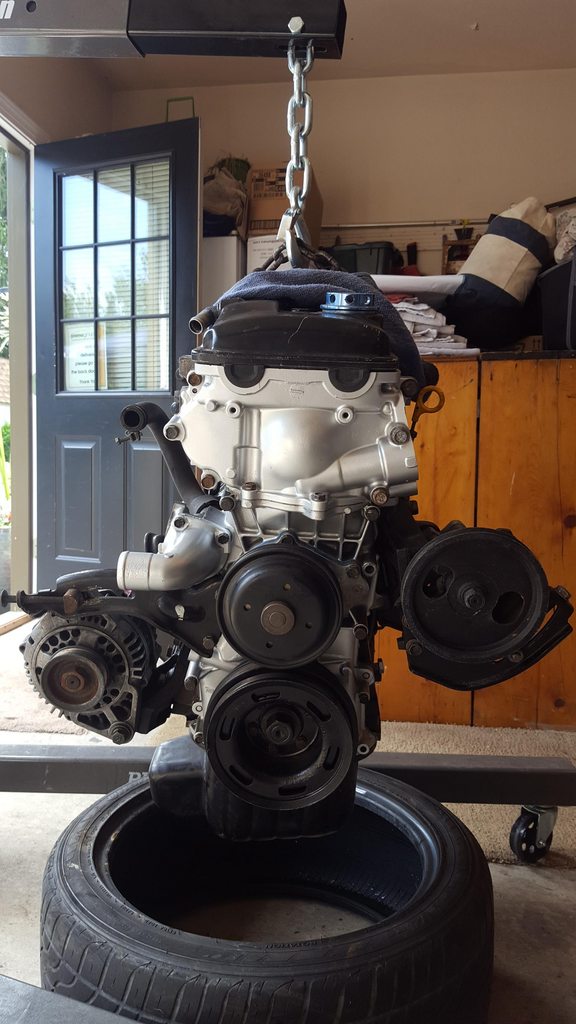 Brand new gaskets for the intake manifold, water pump, thermostat housing and other bolt on pieces. 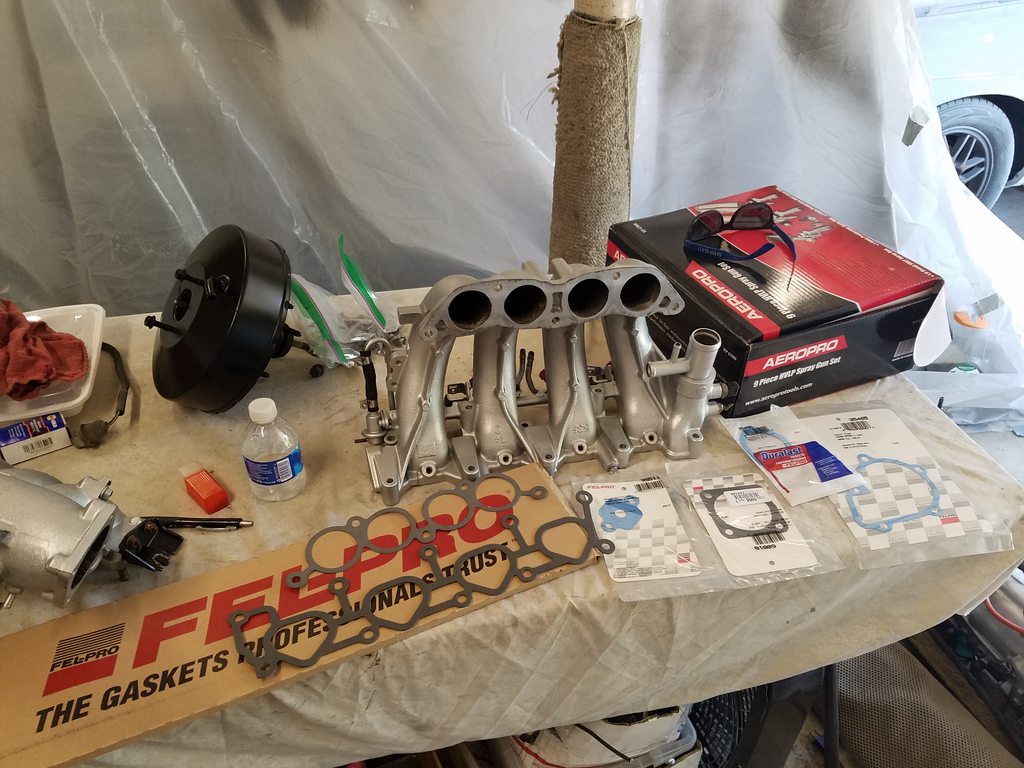 While the motor was torn apart for new gaskets, I decided to delete the pcv hoses on the back of the manifold as they were cracked and aren't really necessary if the block is venting from the valve cover.. I used a great write up from ka-t.org about removing them, which can be found here: http://www.ka-t.org/forums/viewtopic.php?f=2&t=27437 After removing the nipples from the manifold with a punch, you then tap the holes with 3/8" tap to thread some hex plugs into. 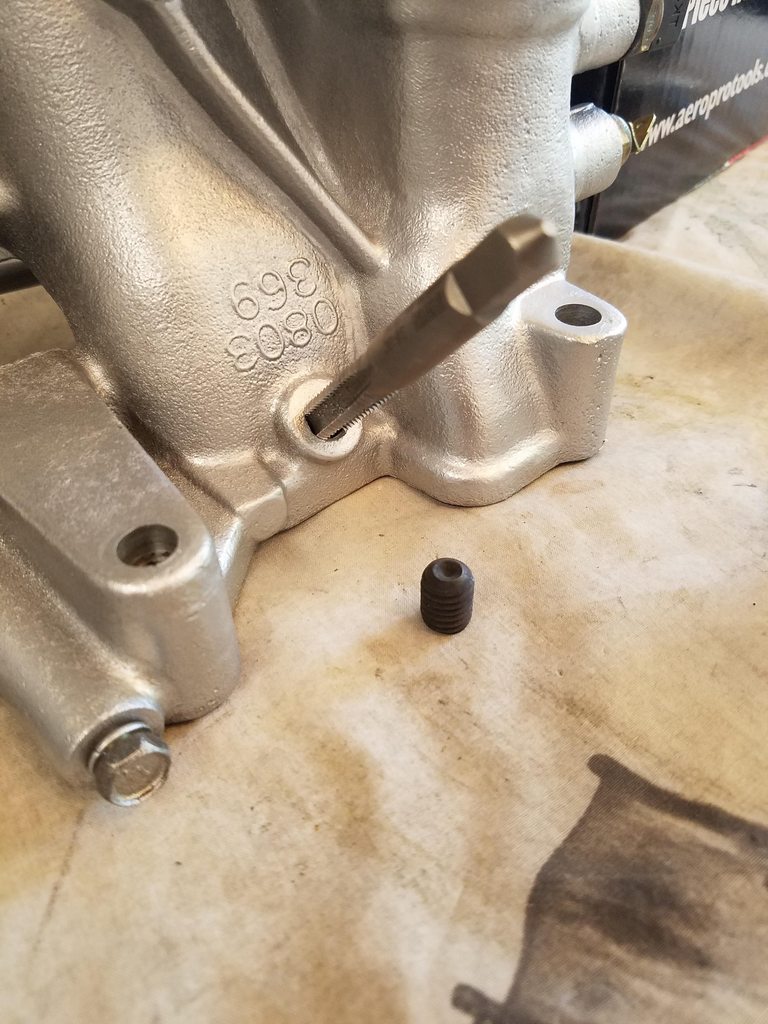 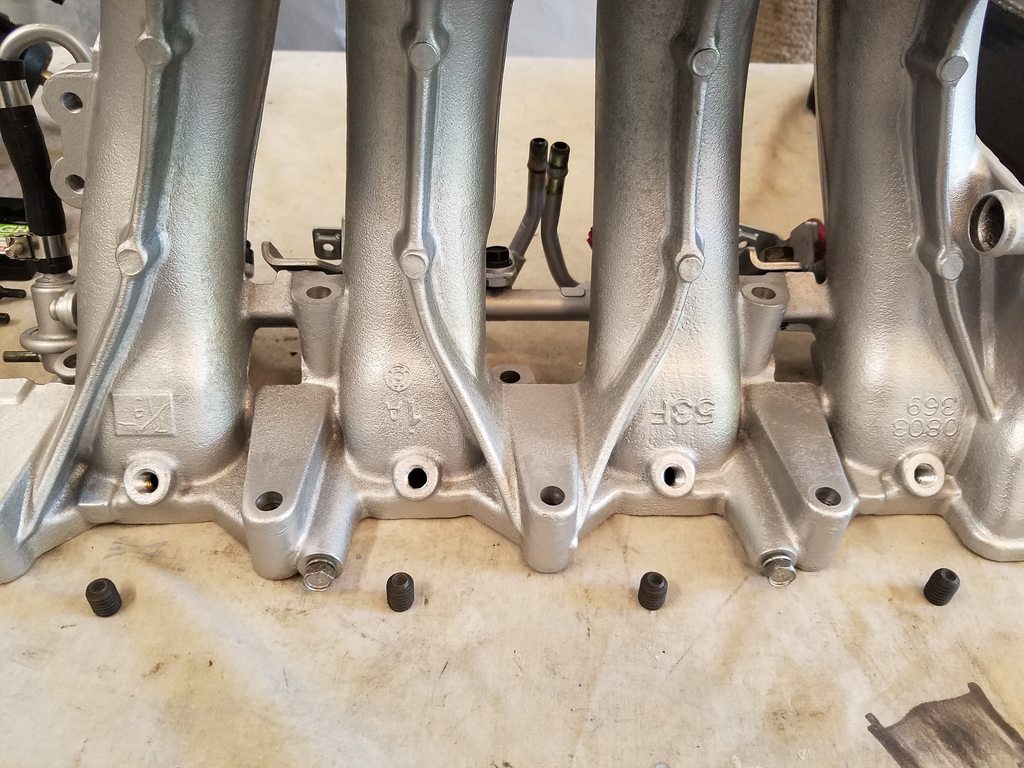 Total cost was $2 and the underside is alot cleaner. Last edited by homegrowngarage; 07-06-2016 at 09:02 PM.. |
|
|

|
|
|
#110 |
|
Leaky Injector
 |
Another small project i've been meaning to get around to is installing the HUD display into our dash. This feature came on the higher trims than our SE so the dash needed to be cut out for it. I used a template and instructions found over on NICOclub: http://forums.nicoclub.com/convertin...d-t562470.html I have the template if anyone wants me to upload it.
Mask off the area and trace the template. 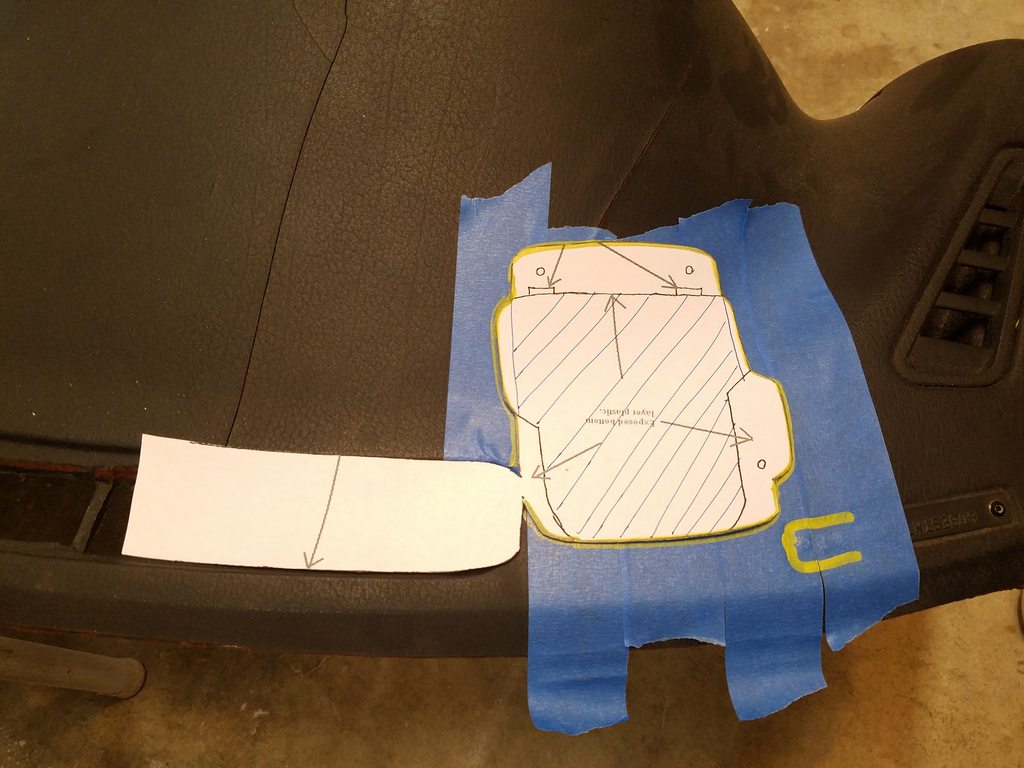 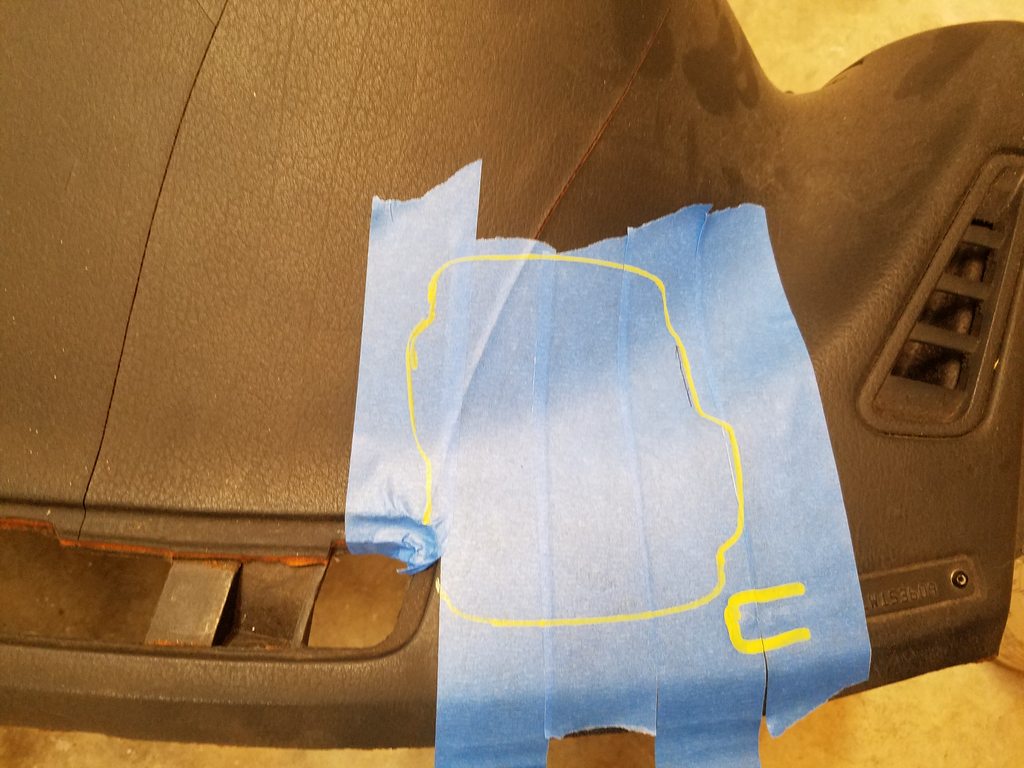 Cut into the foam/vinyl dash with a razor blade and remove the top layer.  Use a dremel to cut the inner section of the hole. This part goes all the way through. 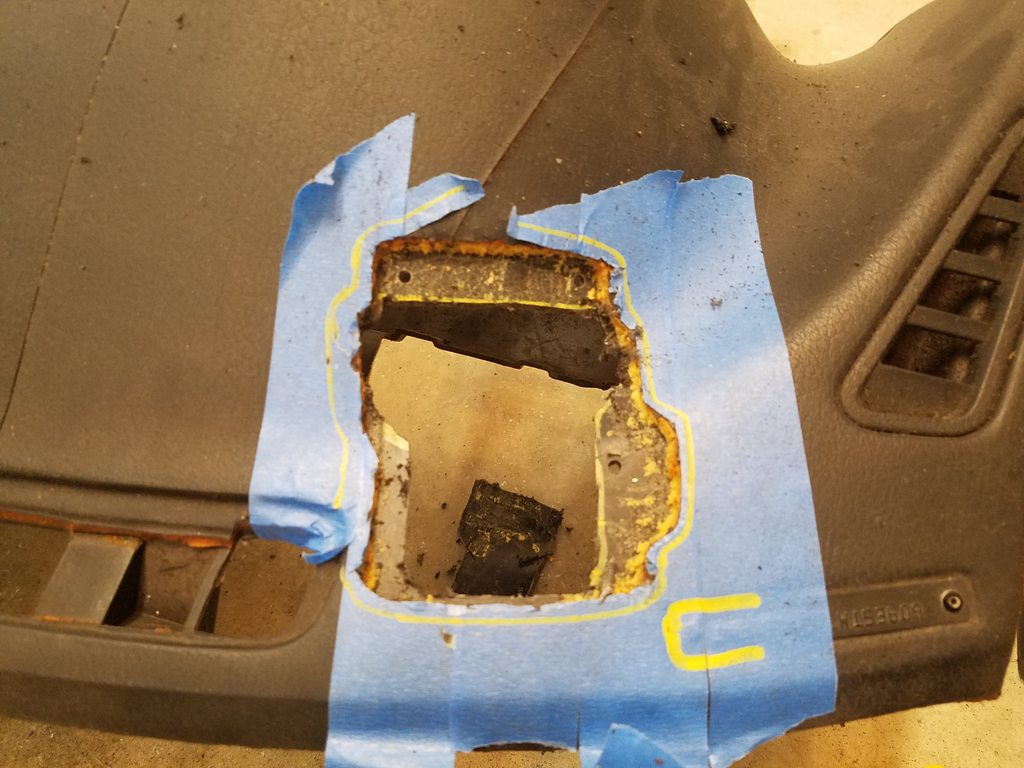 HUD in. 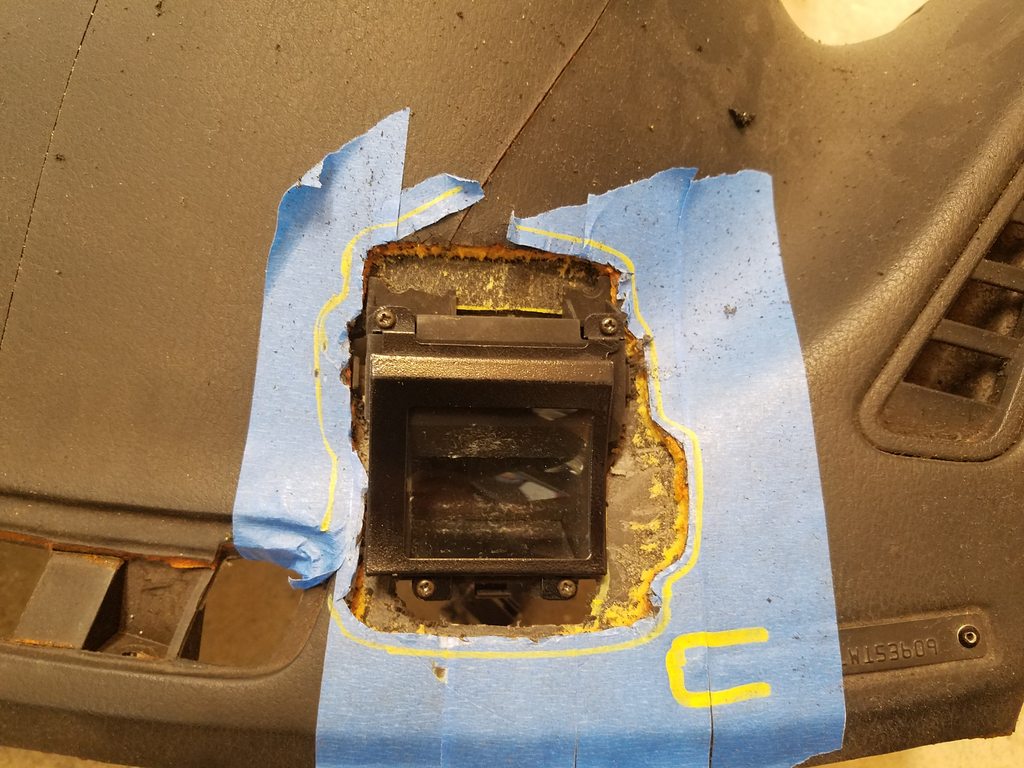 Cover on. 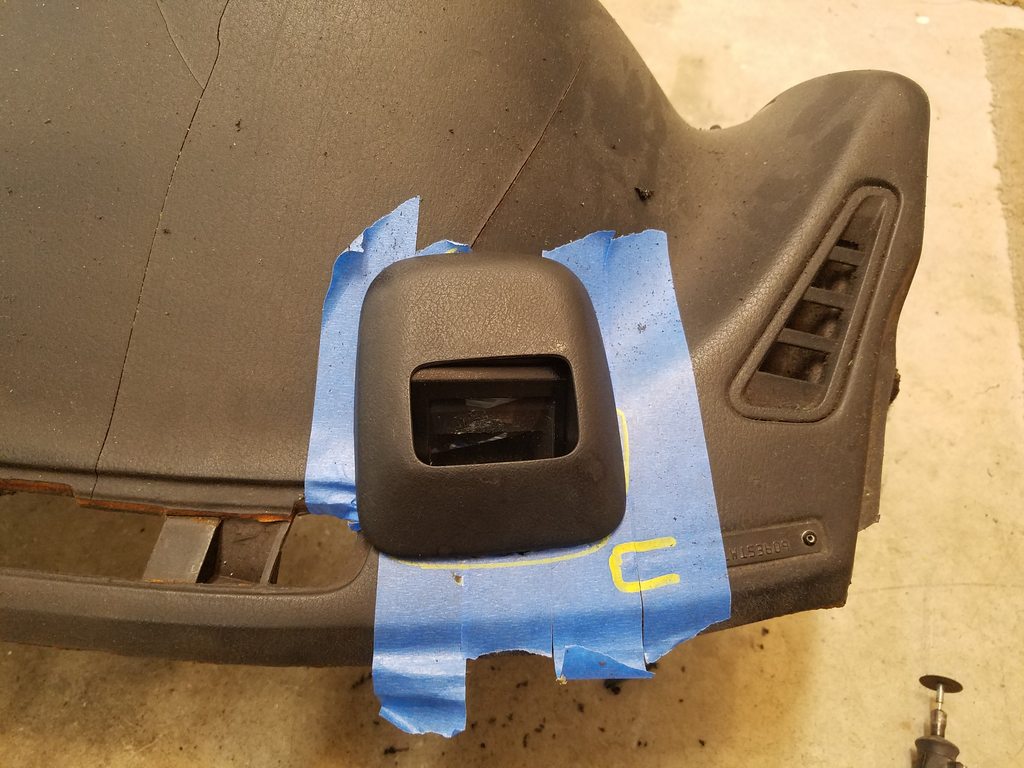 Dope. 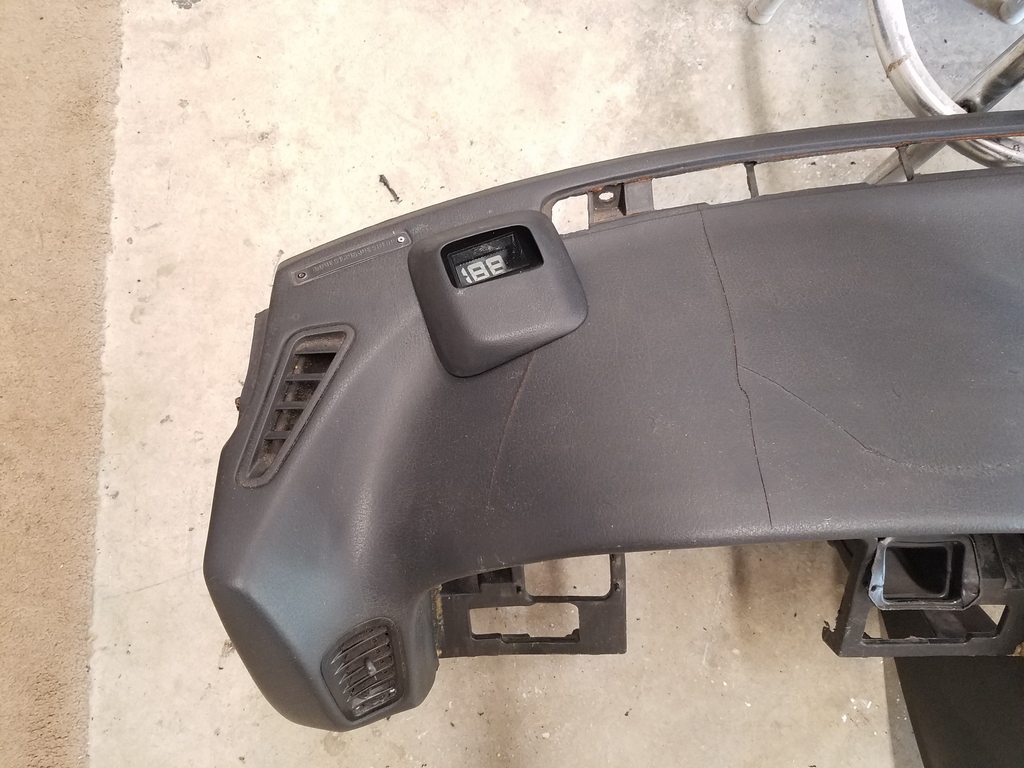 |
|
|

|
|
|
#113 |
|
Leaky Injector
 |
Everything all primed up. It was such a good feeling finally seeing everything one color. Now it's time to block everything down.
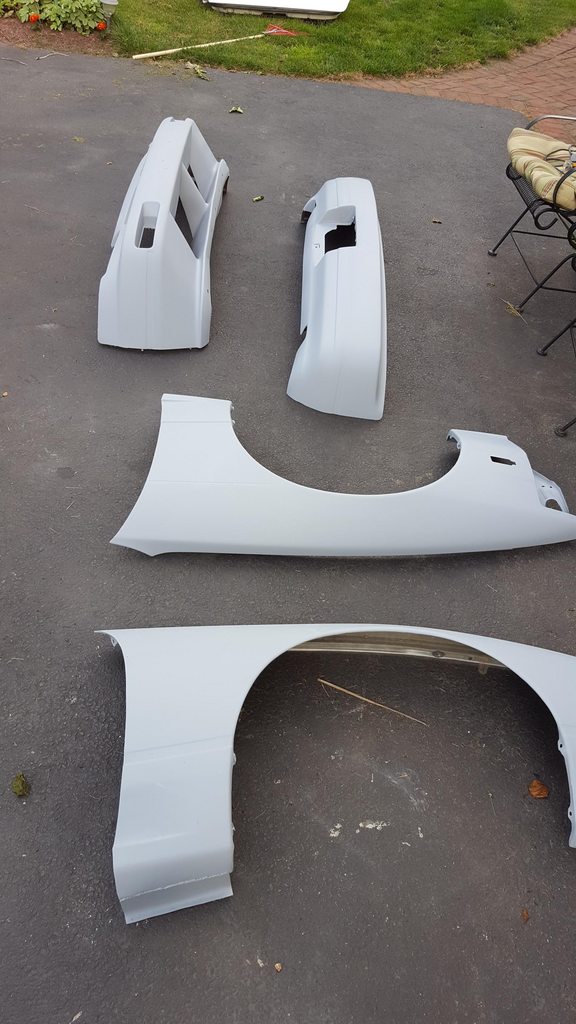 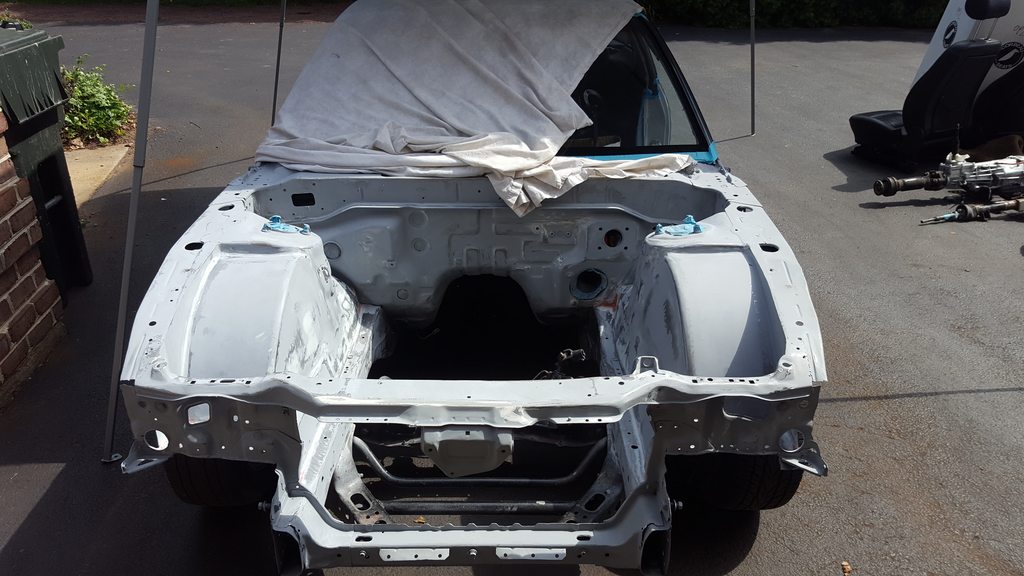 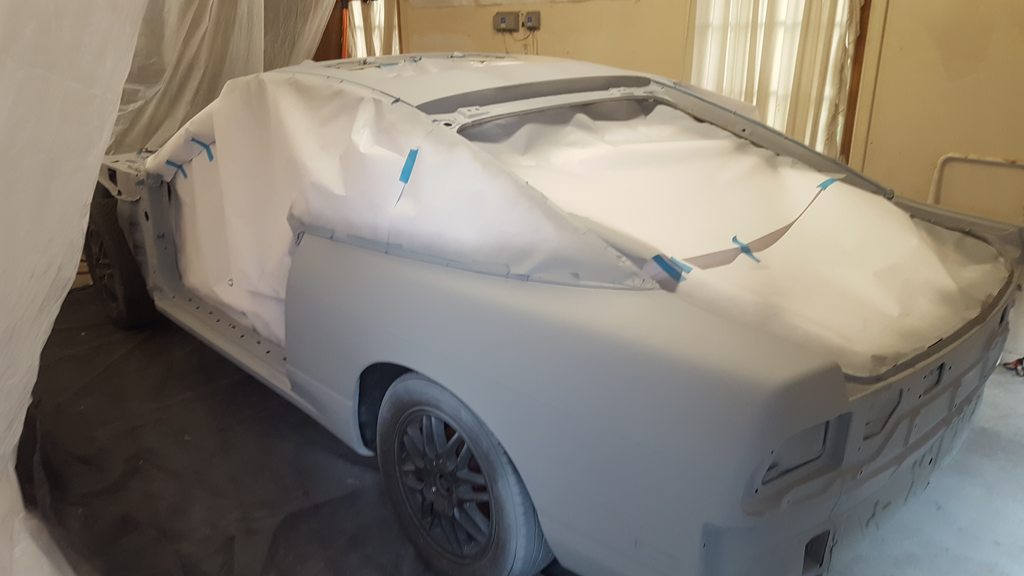 We set up big plastic sheets that we got from harbor freight, it worked as well as you would expect hah. 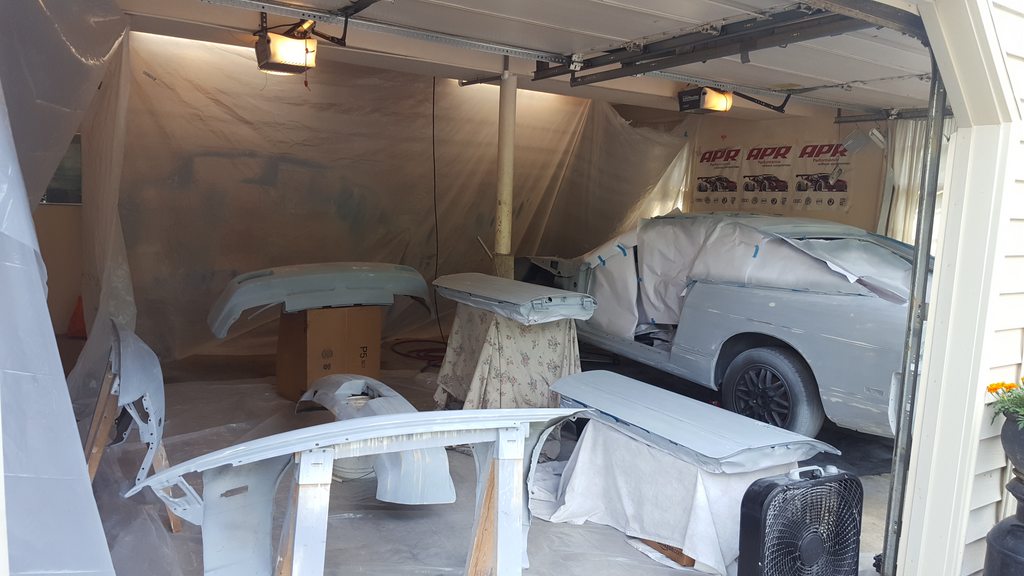 |
|
|

|
|
|
#114 |
|
Leaky Injector
 |
It's been awhile. Things have been busy, especially with both of us being away at college and all that. I realized I didn't even finish updating the thread to where the project sits right now. So lets get down to business.
Everything was primed and ready to go. Here is a shot of the firewall section. I'm so glad that I went back and fixed it. 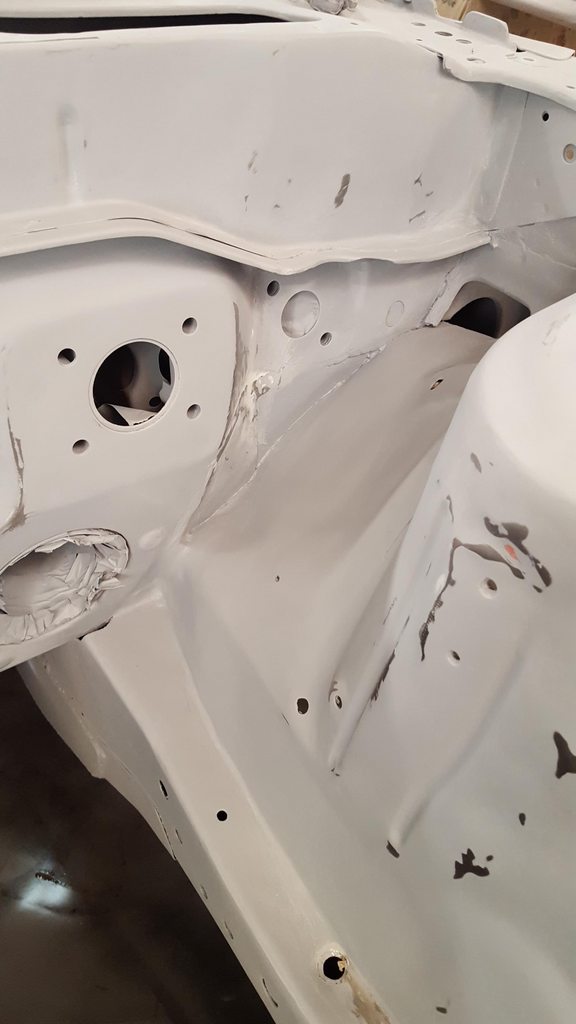 Then it was time for base coat! Fenders and bumpers were all painted. 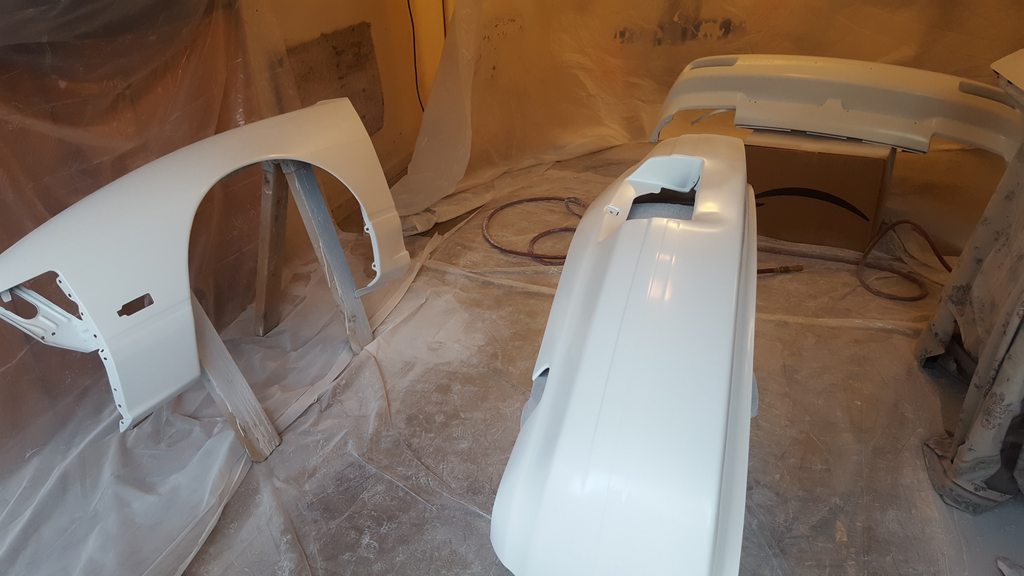 And the full car. 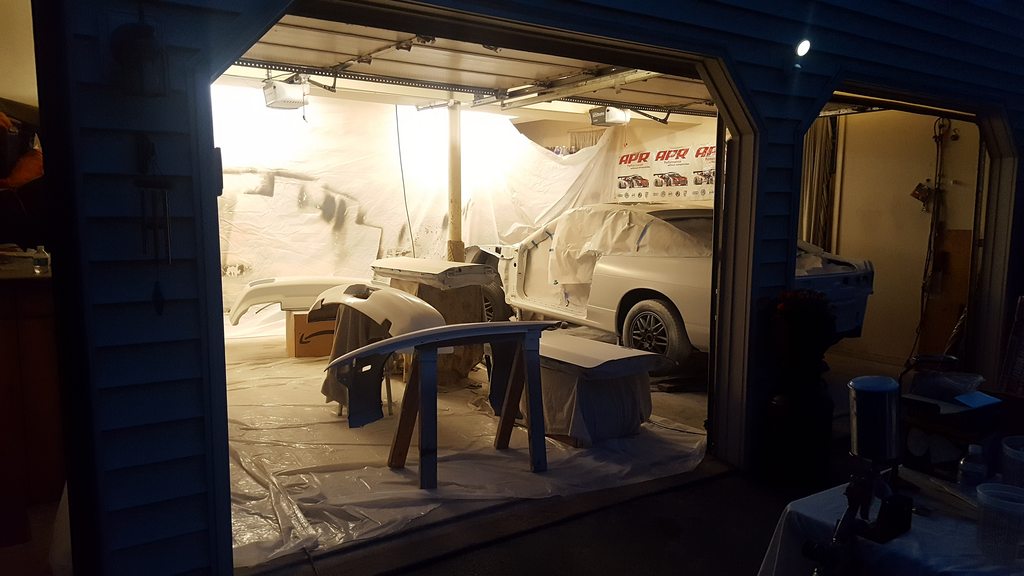 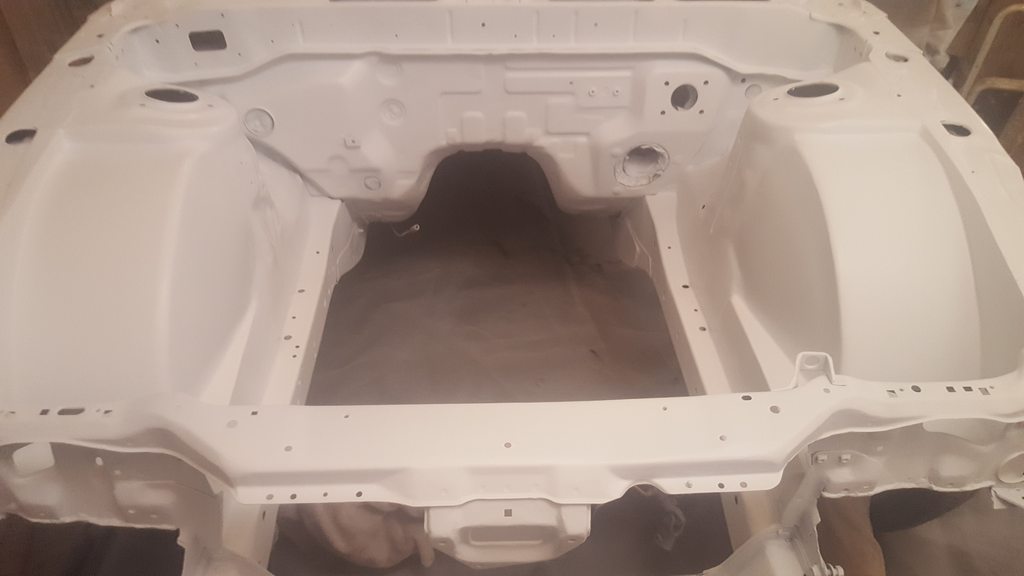 |
|
|

|
|
|
#115 |
|
Leaky Injector
 |
Then we finally laid some clear. We were learning as we went but over all it went pretty well for the first time. There were some bugs that landed in the clear that had to be wet sanded out. Some things did have to be recleared but it's all part of the process.
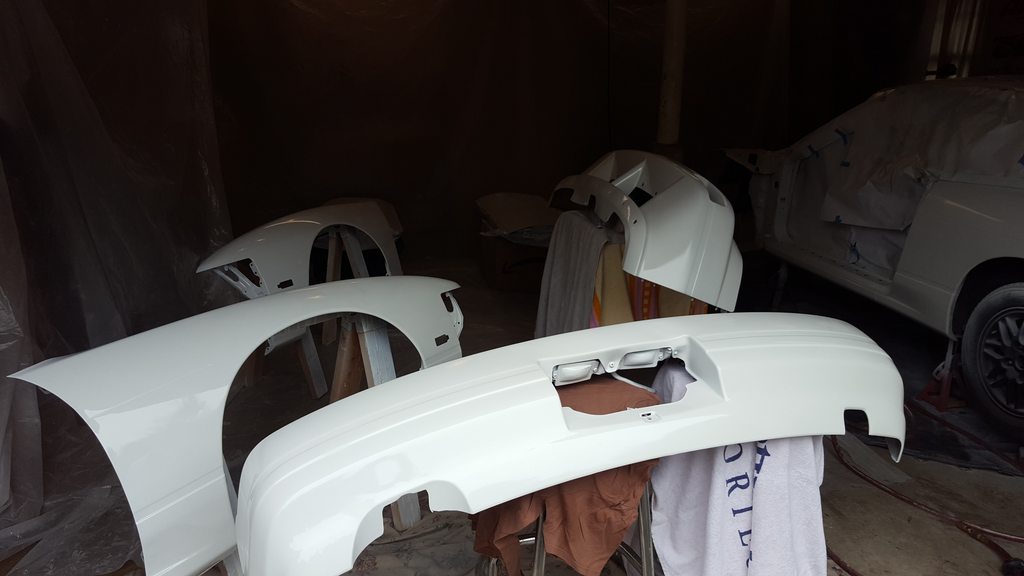 You can see some of the dirt nibs that were in the clear. The plan is to wet sand and cut and polish the entire car in the spring. That should take care of most of the imperfections. 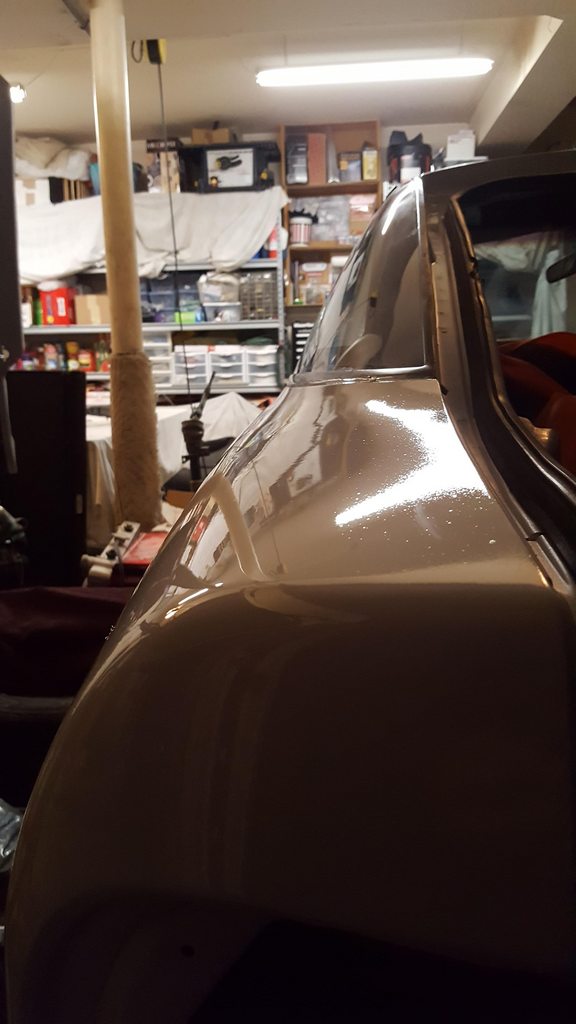 Amazing what a change of angle can do haha. 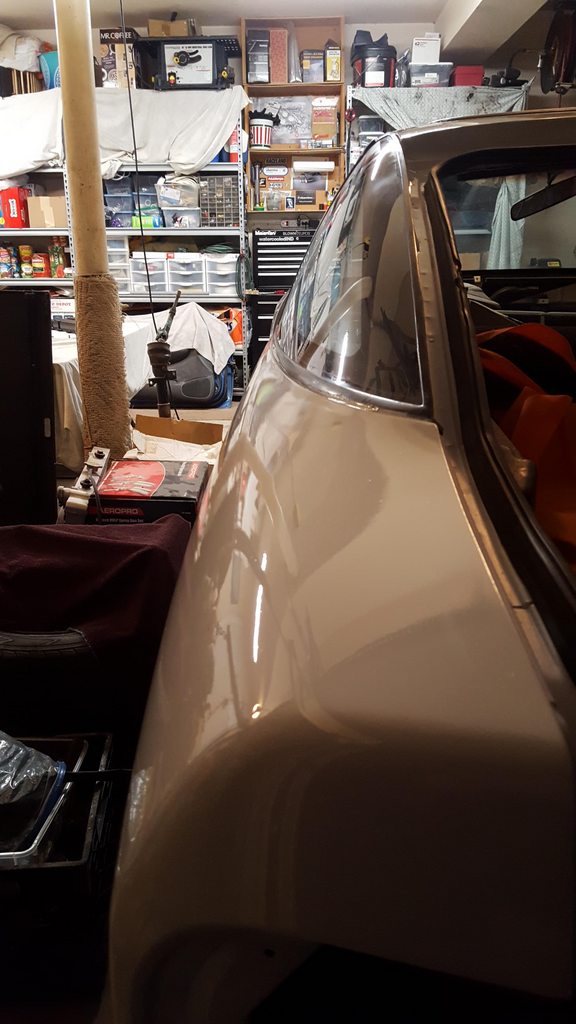 |
|
|

|
|
|
#116 |
|
Leaky Injector
 |
The bay turned out really nice as well. There was no better feeling than having it completely painted after all that time of struggling and and grinding and sanding.
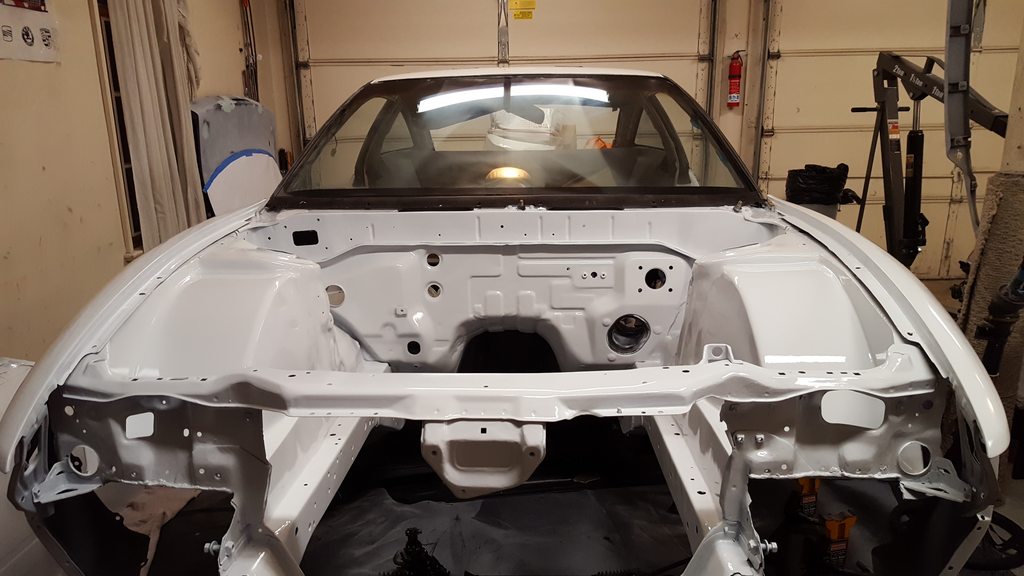 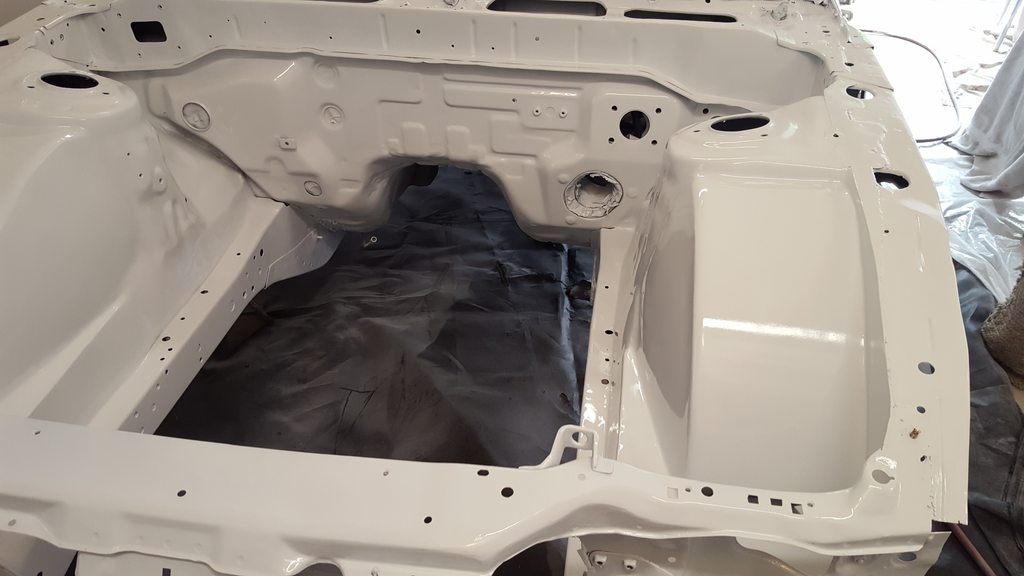 Did a little mock up of the bumper and fenders. 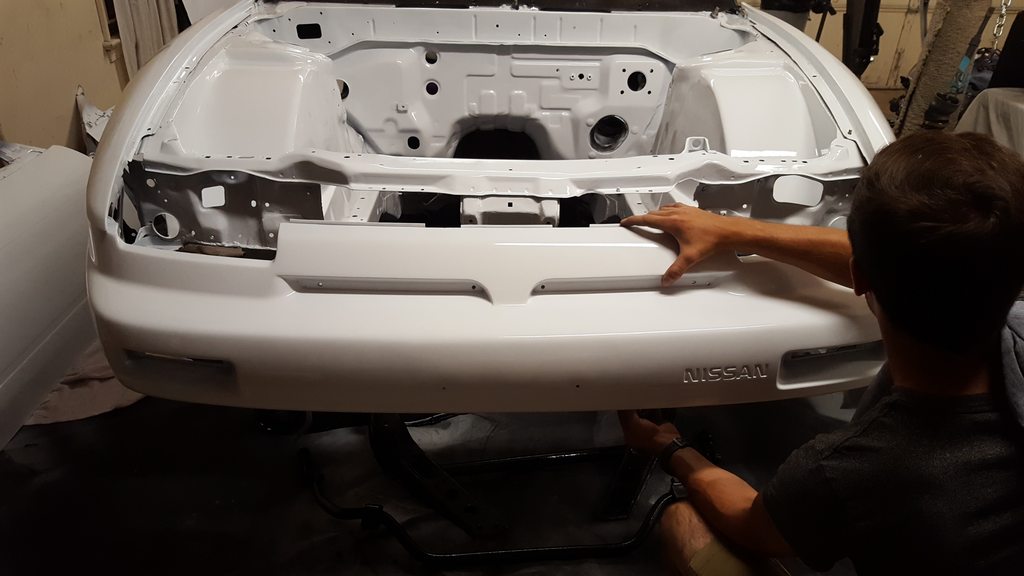 More pictures of painting. 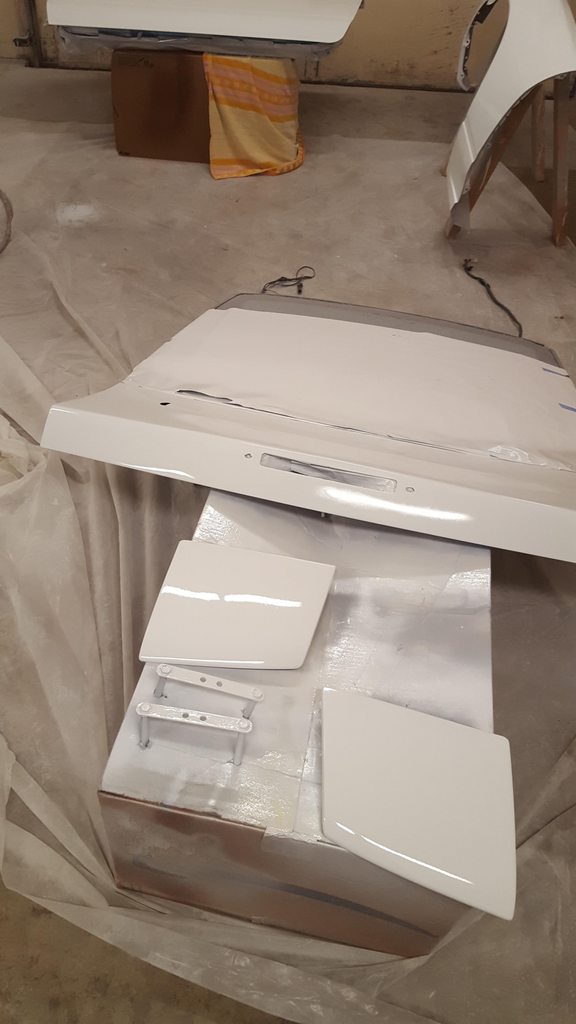 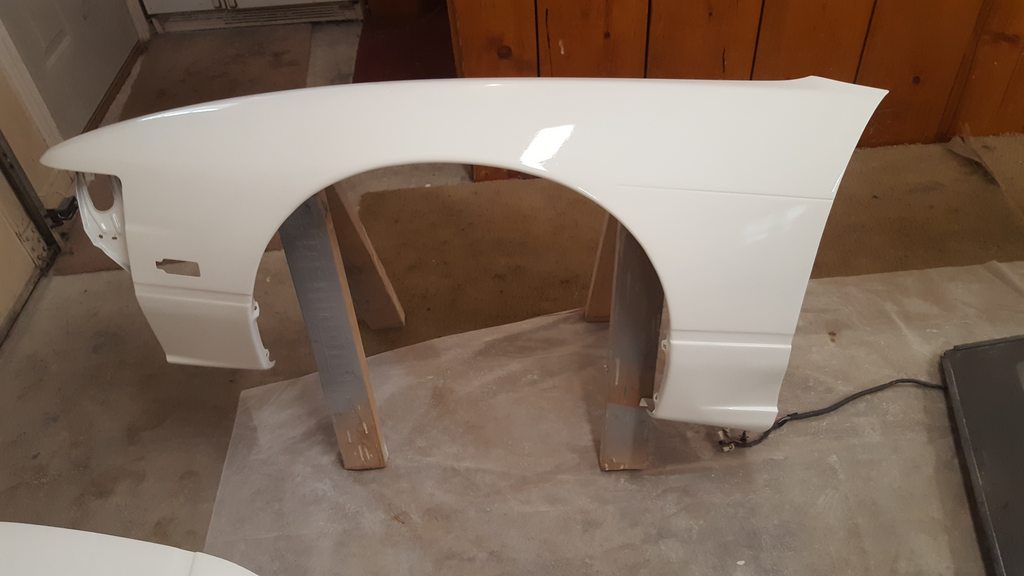 Got rid of the tacky rising sun. 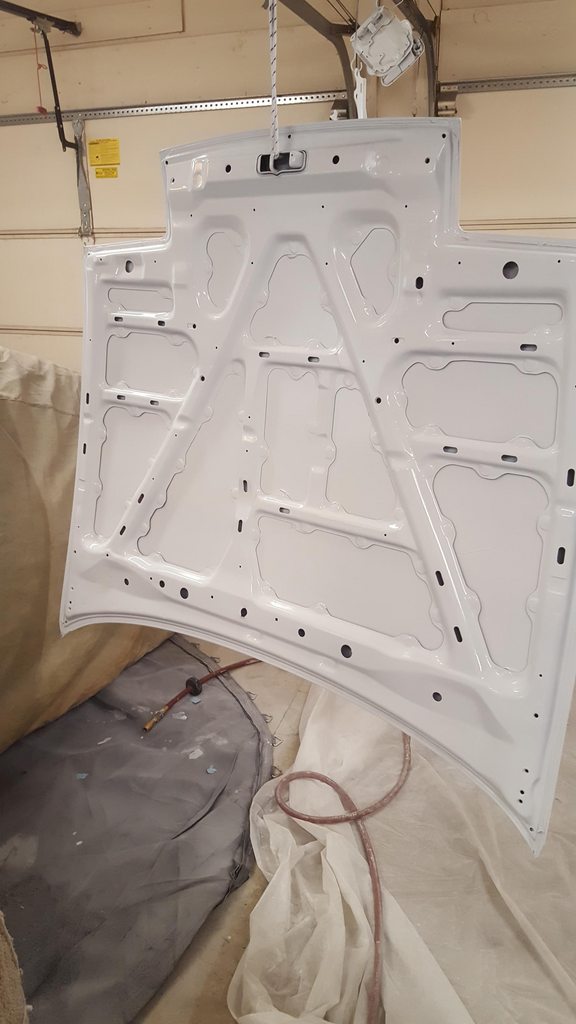 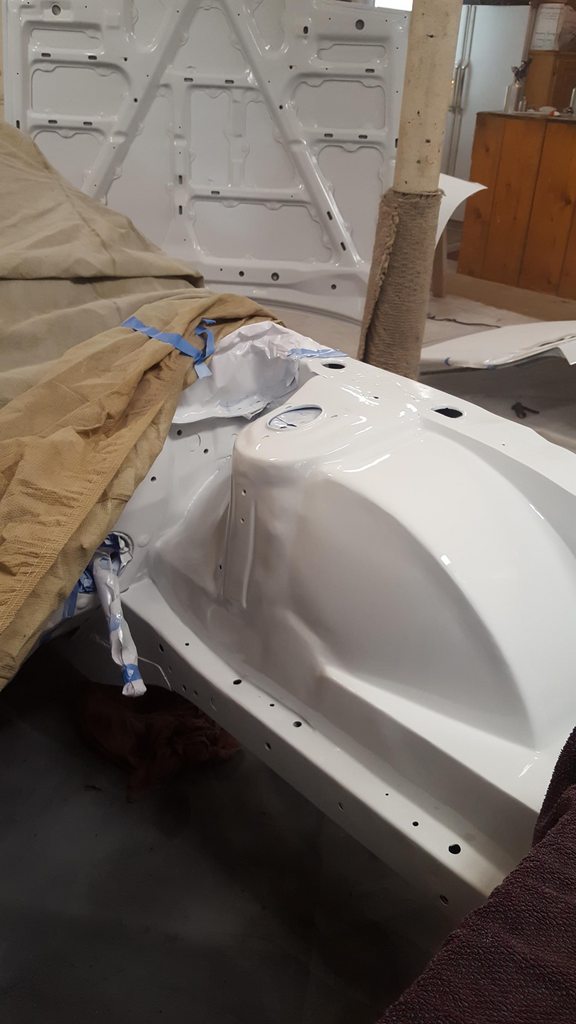 |
|
|

|
|
|
#119 |
|
Leaky Injector
 |
Front subframe assembled and ready to go in with the addition of circuit sports polyurethane motor mounts.
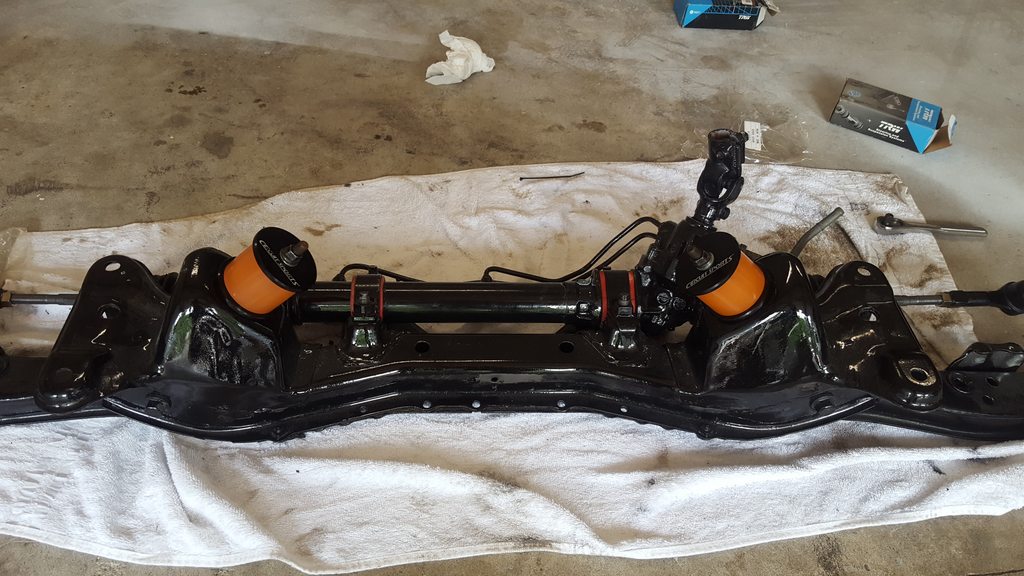 Power brace getting a coat of por15. 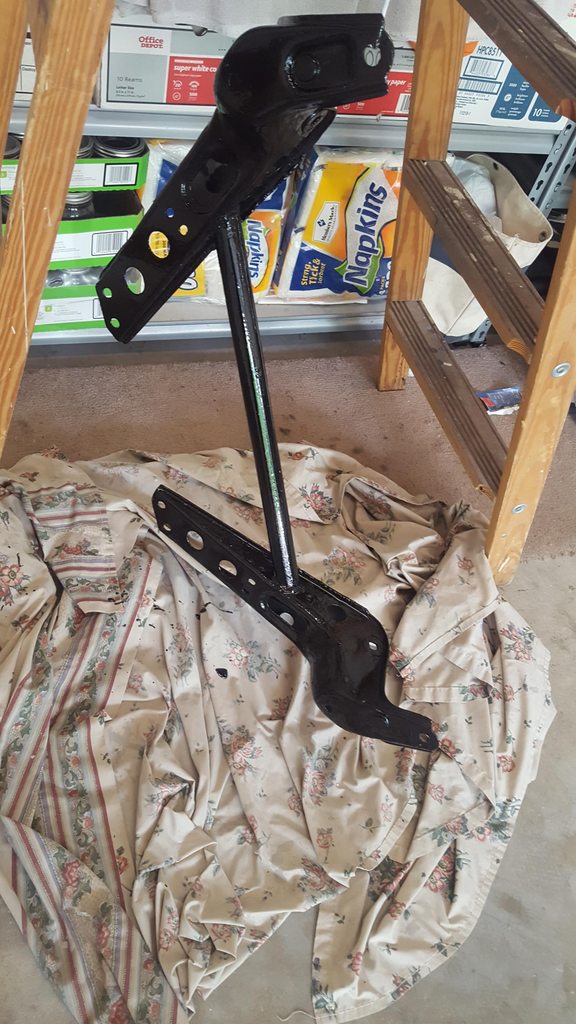 All bolted in, along with the custom power brace.  |
|
|

|
 |
| Bookmarks |
| Thread Tools | |
| Display Modes | |
|
|