|
|||||||
| Home | Rules & Guidelines | Register | Member Rides | FAQ | Members List | Social Groups | Calendar | Mark Forums Read |
| Builds (and builds only) Got a build thread? It goes here, build threads anywhere else on the forum will be locked and never moved. |
 |
|
|
Thread Tools | Display Modes |
 08-01-2017, 08:45 AM
|
#1 |
|
Zilvia Addict
 Join Date: Nov 2006
Location: Southeast Division
Age: 35
Posts: 818
Trader Rating: (6)
 Feedback Score: 6 reviews
 |
My kouki s14 rebuild
Most of you already know my car so I won't go through the previous stages it's been in.
Here's how it looked in March of 2016.  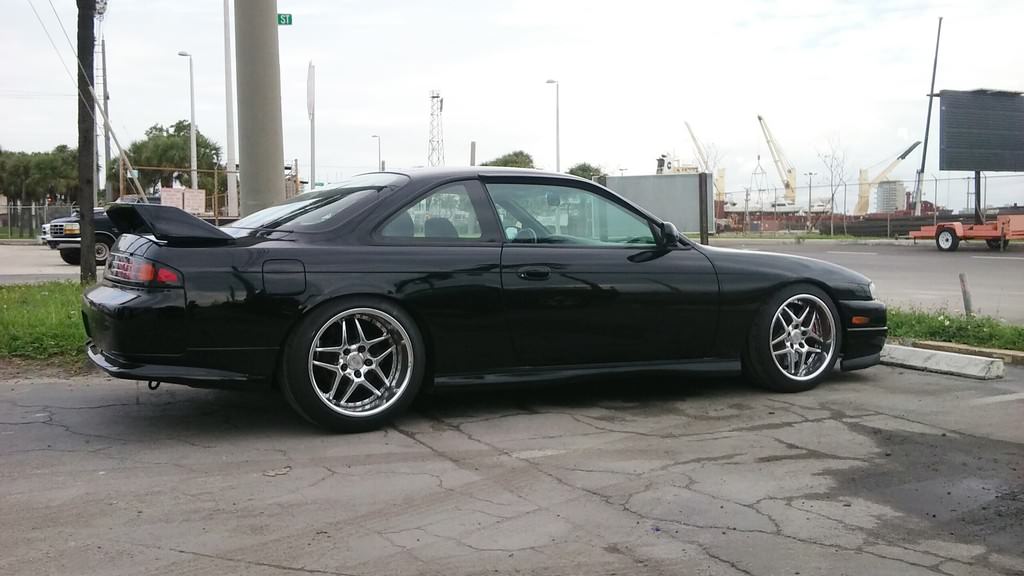 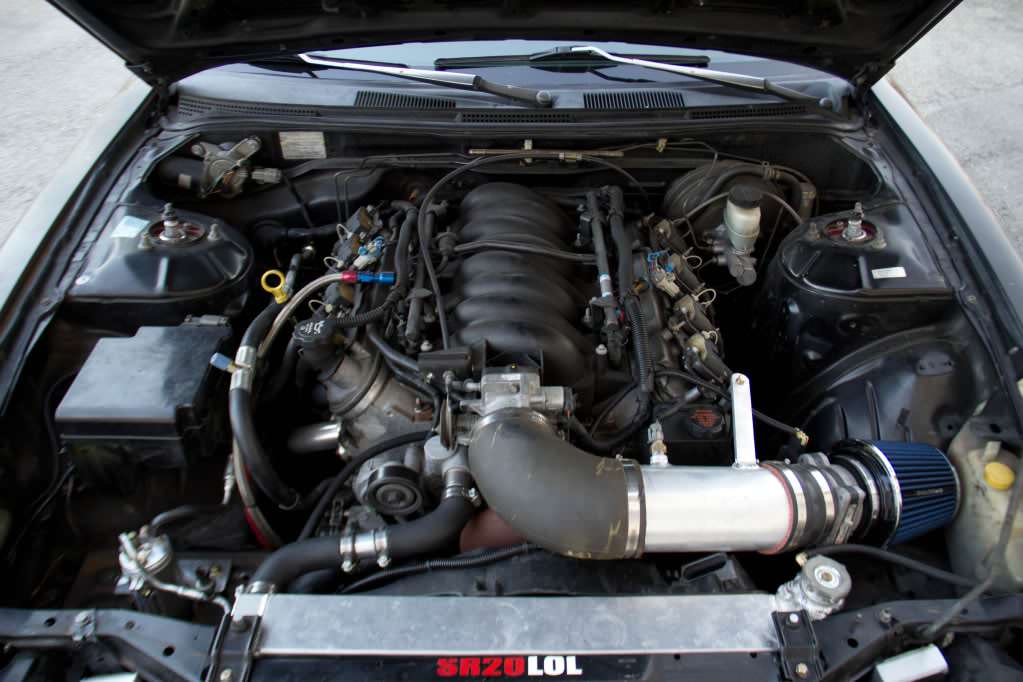 Leaving a Nissan get together my timing chain decided to break (it was an LS2 chain, not stock LS1). Not sure why but, that was the last time I drove the car. Timing chain broke, bent a ton of valves, hit the pistons & to top it off a lifter turned in the bore, broke & got stuck which ruined the cam.  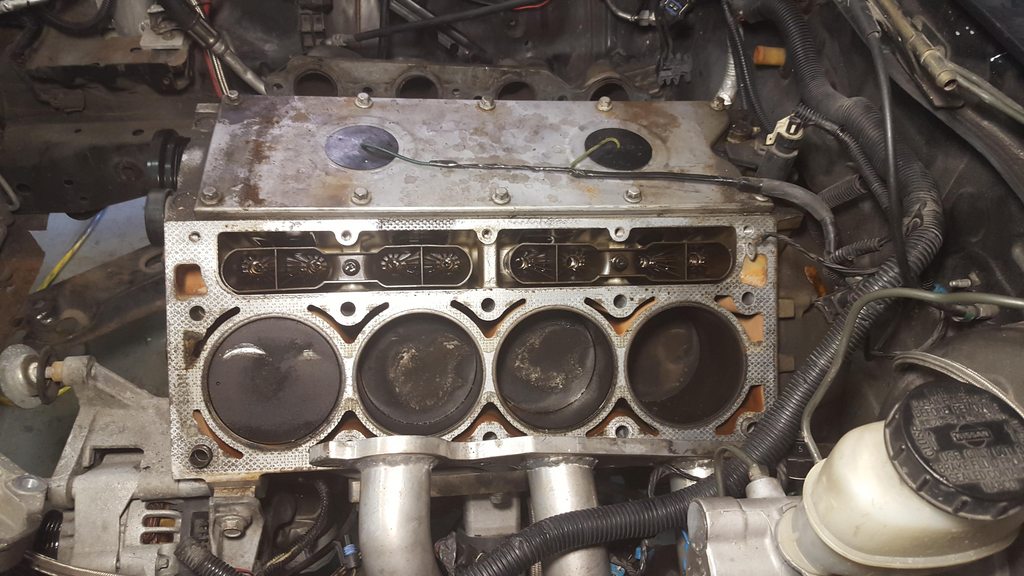 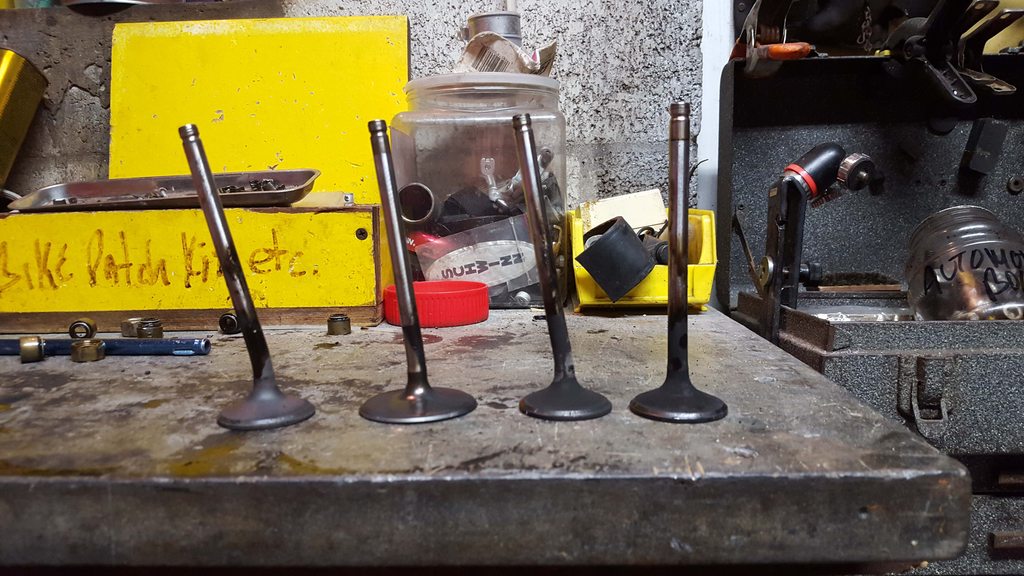 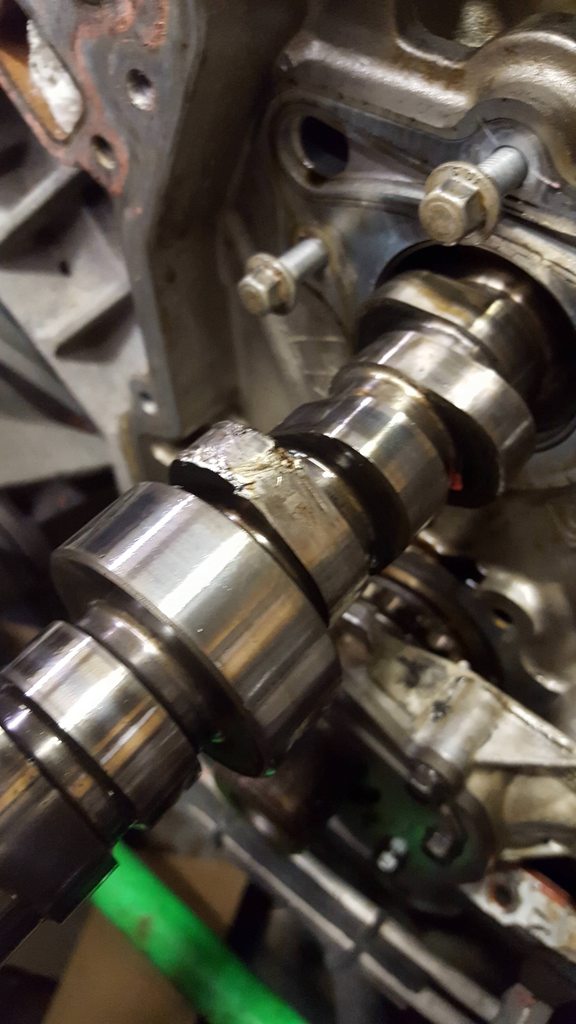 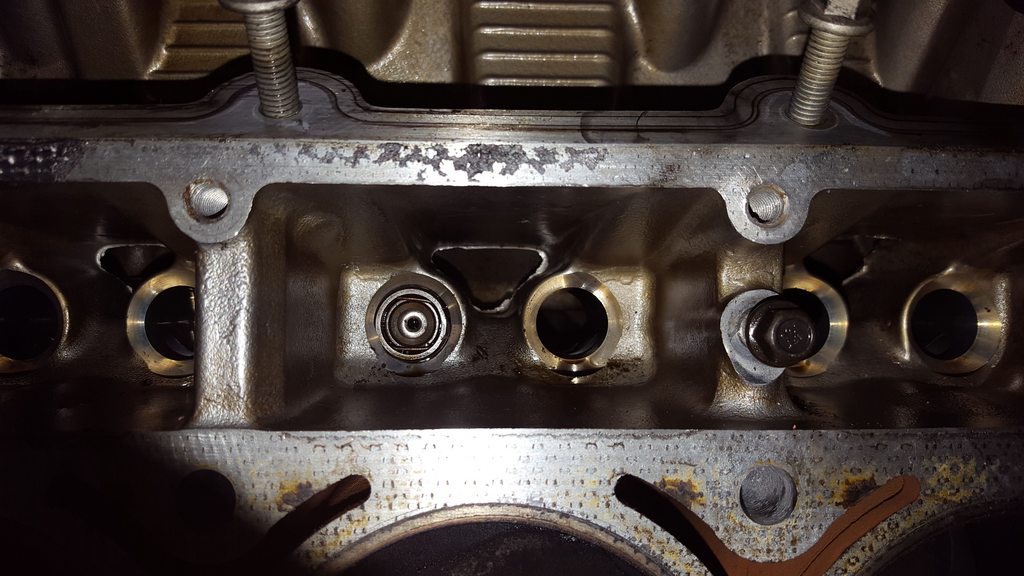 I was upset & didn't know what I wanted to do.....until I did, go bigger & badder haha. I decided that another LS1 with just a set of ported heads wouldn't be enough, after 6 years of a bolt on, cammed LS1 I wanted a lot more power. It was time to turbo the car. A friend found me a used 5.3 iron short block for what was almost highway robbery ($130). New setup is gong to be. gen 3 5.3 iron block gen 4 5.3 pistons & rods new rings, bearings etc for the short block arp head bolts PRC stage 2.5 ported truck heads LJMS stage 1 TT cam Mcleod twin disc Tial 44mm wastegate 80lb injectors Walbro 450lph fuel pump etc etc PRC stage 2.5 truck heads  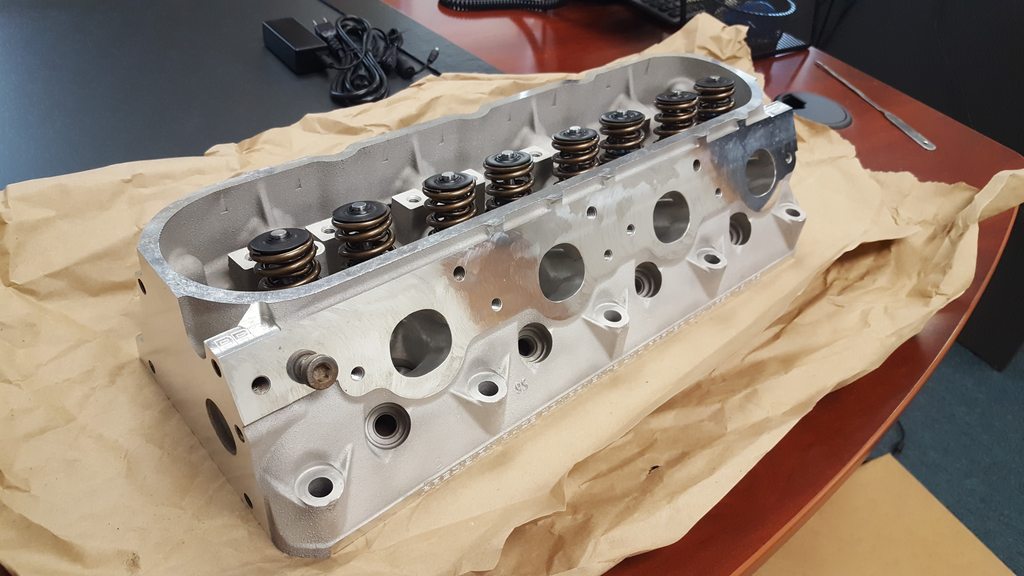 Mcleod twin disc 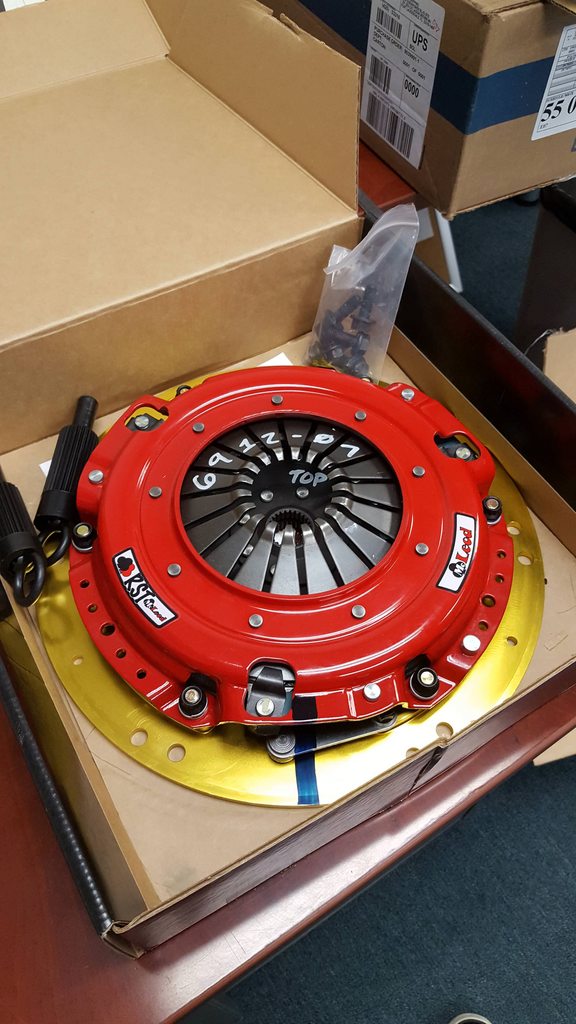 Before I pulled out the old 5.7, I dropped the car off with my fab guy to build the turbo kit while the 5.3 stuff is at the engine shop being rebuilt. Turbo kit is a forward facing truck manifold on the driver side & an LS2 C6 Corvette manifold on the passenger side in order for the crossover pipe to clear the oem GM a/c compressor in its stock location. I was not going to give up a/c in Florida. Frame had to be notced for downpipe clearance. Turbo is a 7875 ball bearing turbonetics piece. 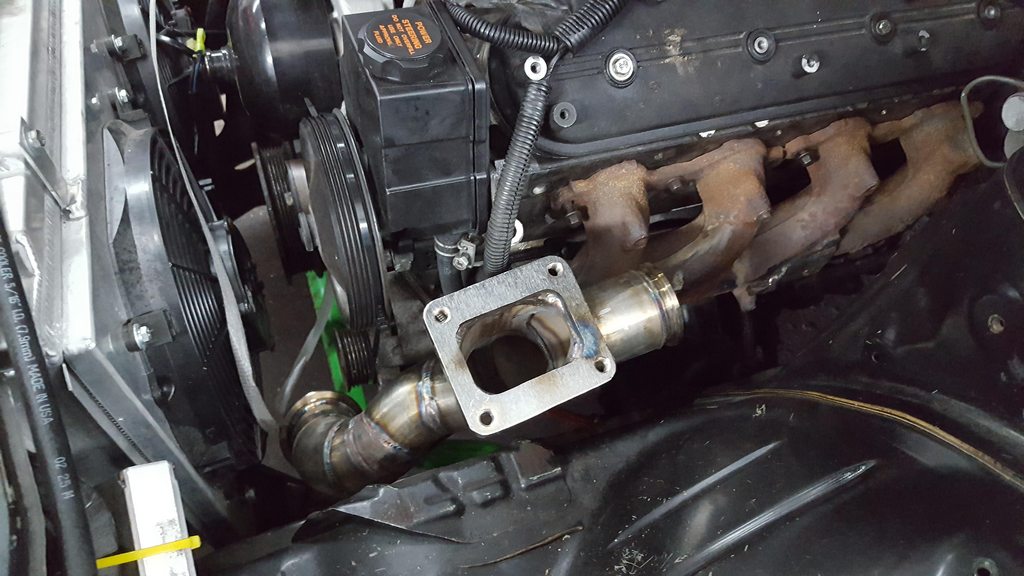 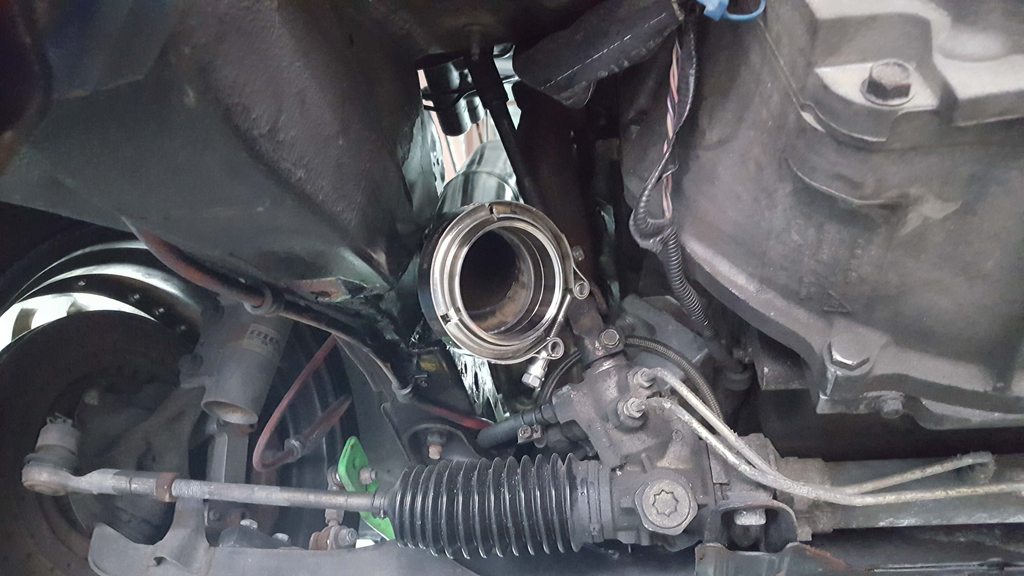  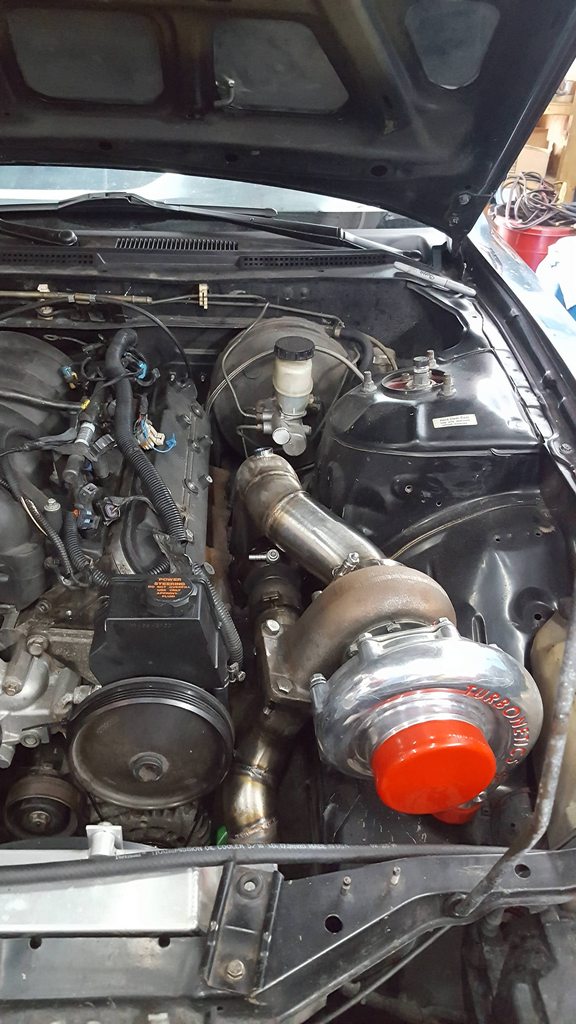 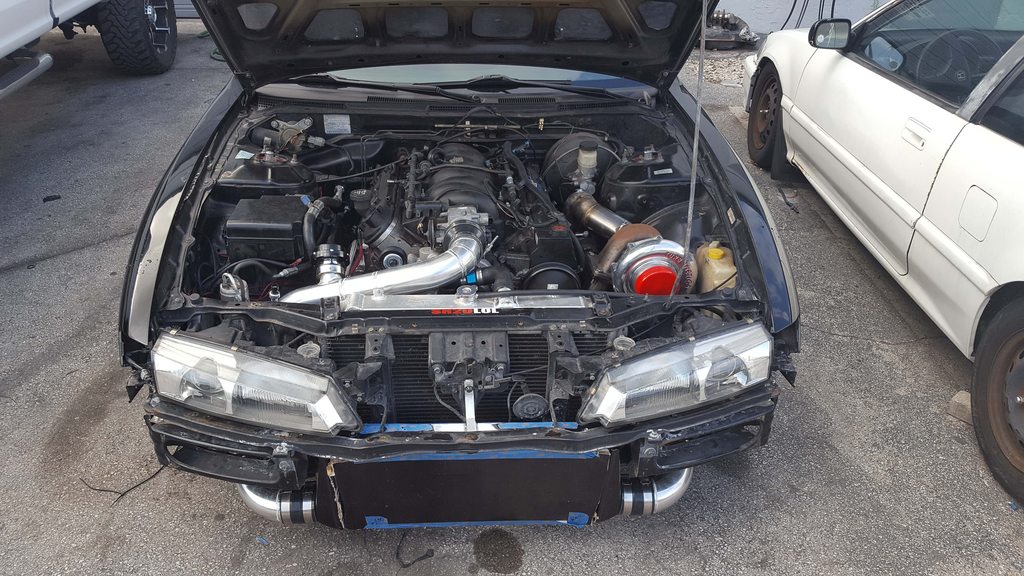 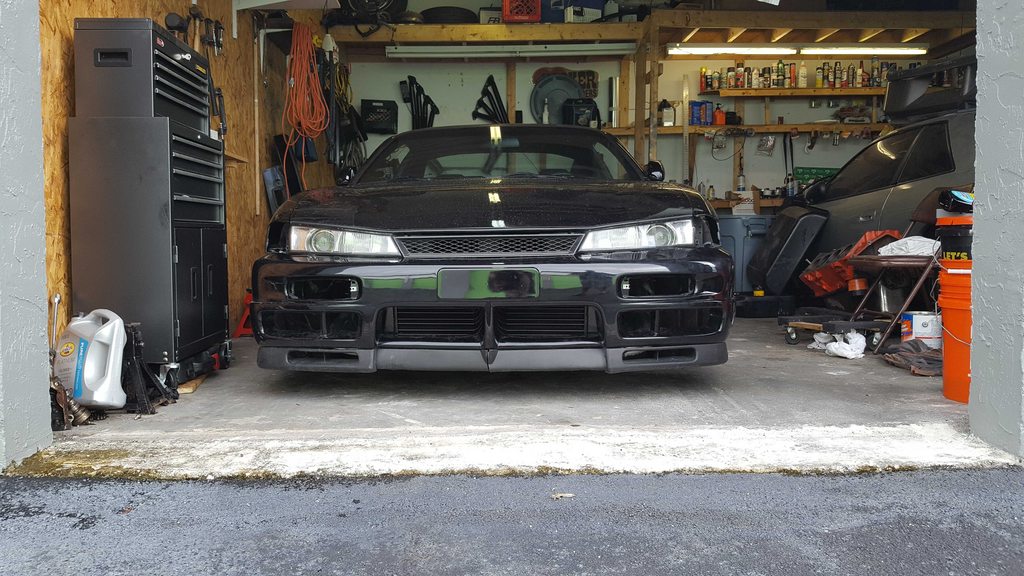 The shortblock is still at the machine shop which is upsetting, hes taking forever but i guess it gives me time to save money, ha. I pulled the old motor out & threw it on the engine stand & then bolted on the turbo kit. I still need to throw on the p/s pump & alternator. I want to make a heat shield for the alternator & measure thermal sleeving for the power lines so I don't cook it instantly. Also I've got to measure length for oil feed & return lines. 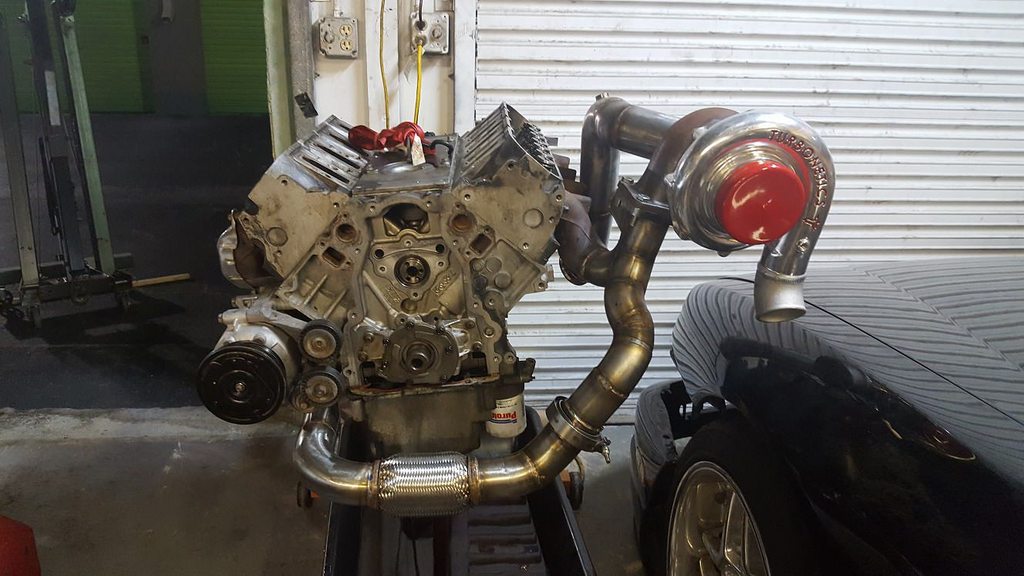 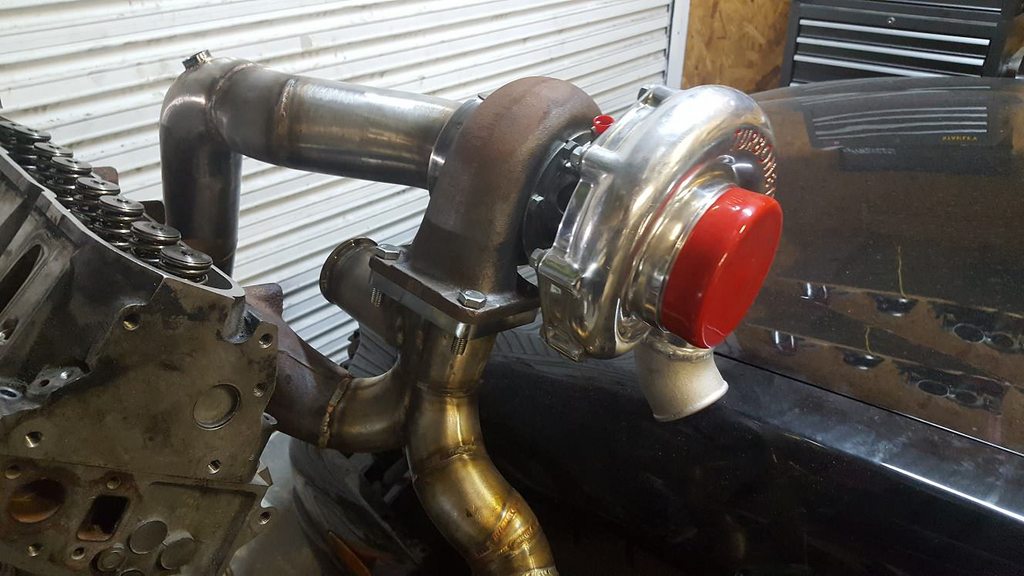 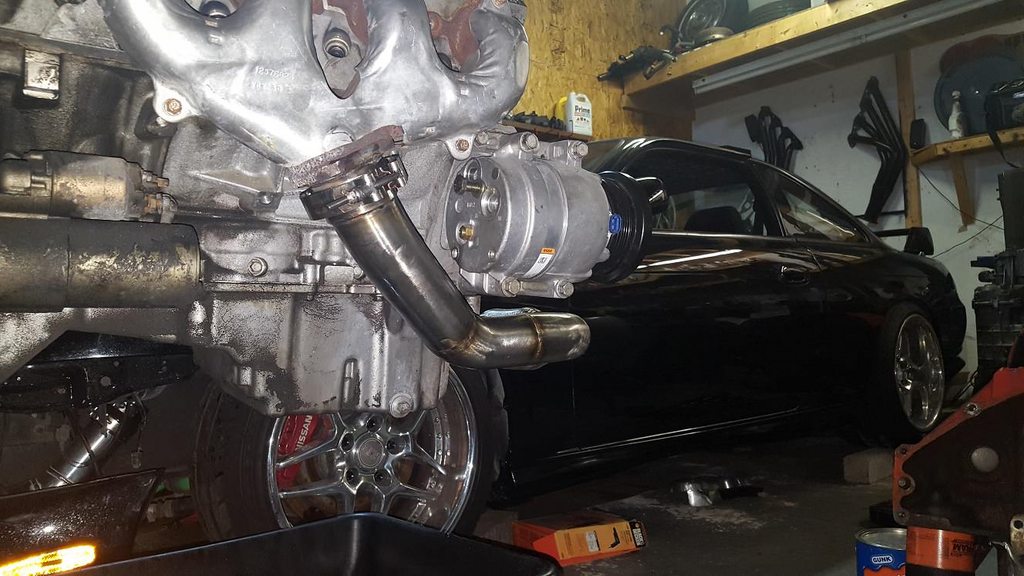 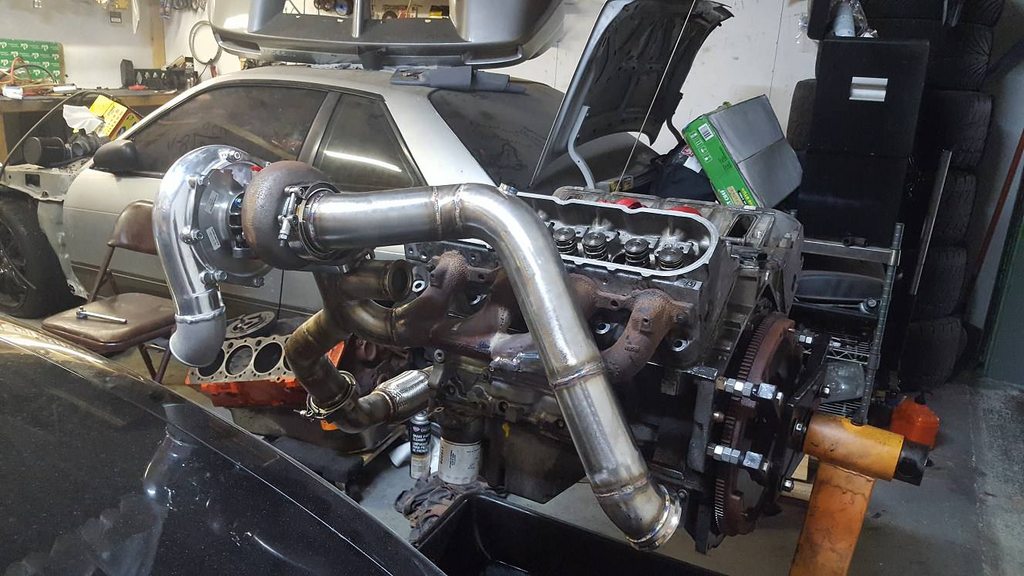 And that's really it for right now. I'll be sure to update this more as I progress. |

|

|
| Sponsored Links |
|
10-31-2017, 08:05 AM
|
#3 |
|
Zilvia Addict
Join Date: Nov 2006
Location: Southeast Division
Age: 35
Posts: 818
Trader Rating: (6)
Feedback Score: 6 reviews
|
Recent pics after working on the new motor.
Got the new rear cover & rear main on, installed my oil pump with an improved racing pickup tube clamp & improved racing oil pan baffle. New lifters & lifter trays tossed in, got the heads torqued down with the ARP head bolts then started bolting on the front accessories & made a heat shield for the alternator. 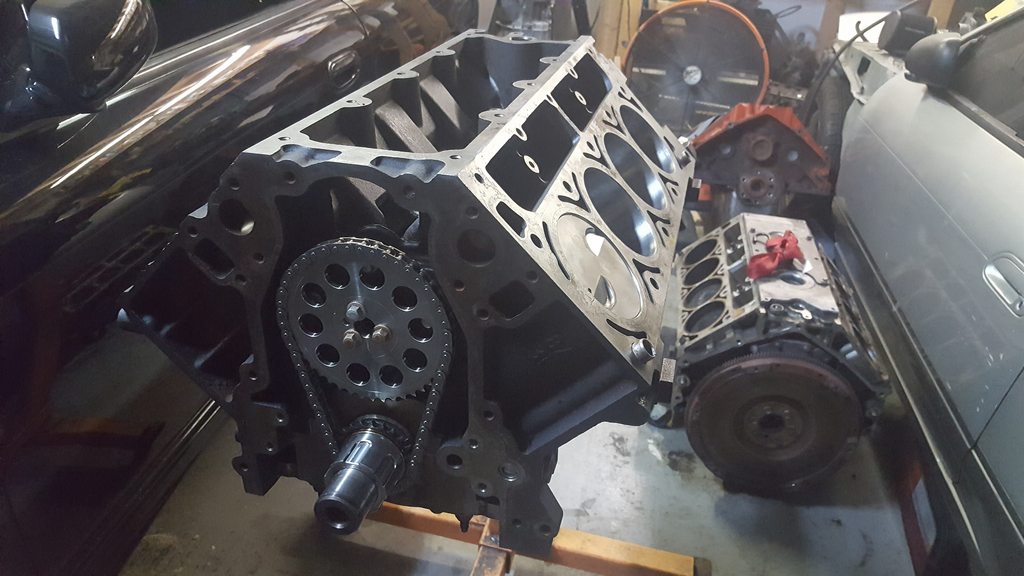 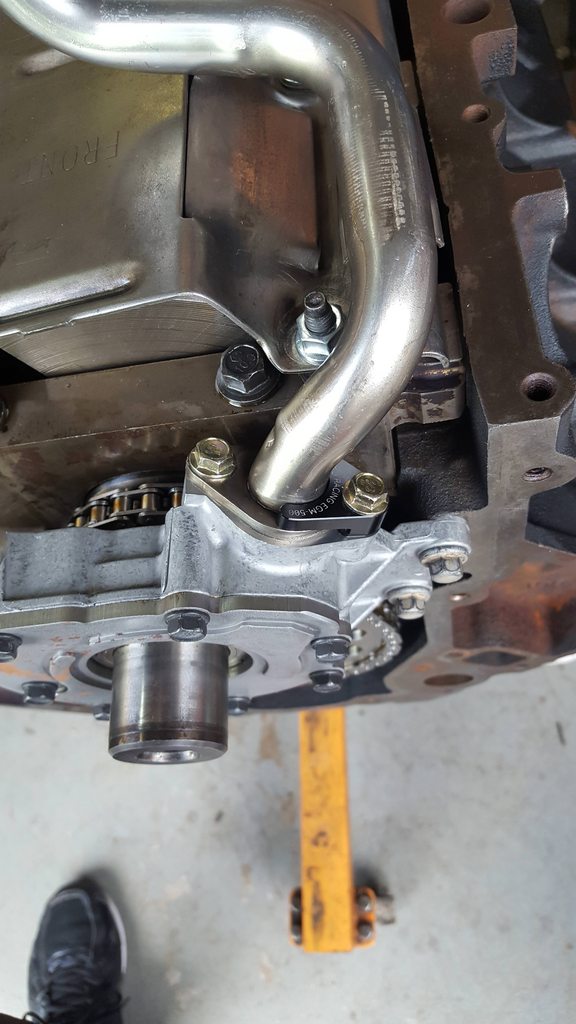  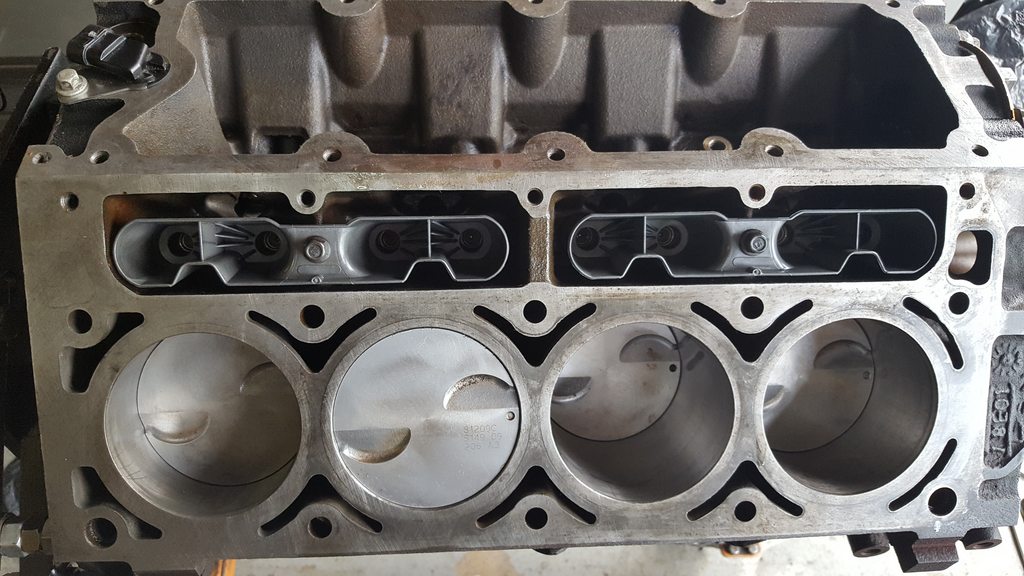 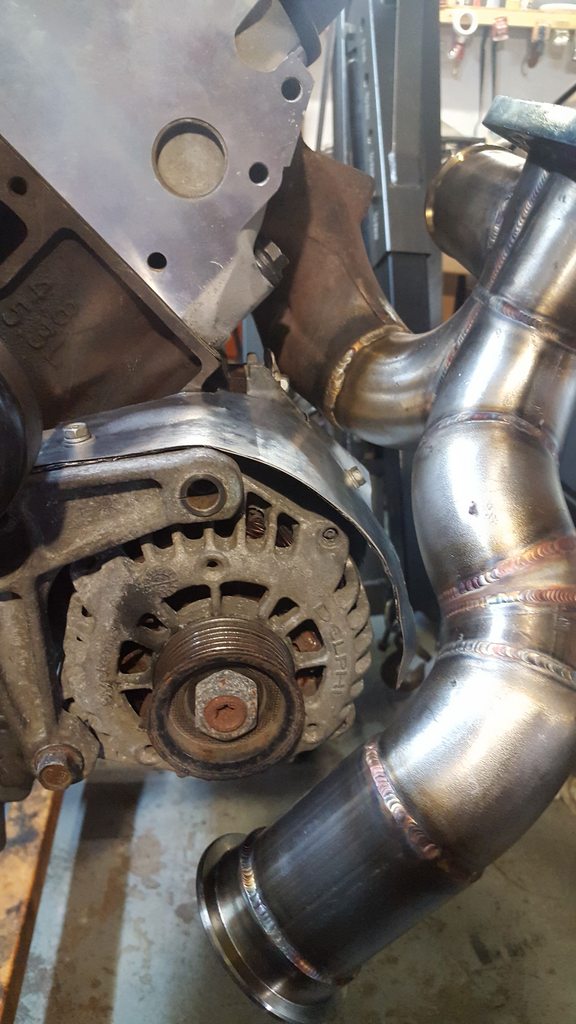 |
|
|
|
|
10-31-2017, 08:47 PM
|
#5 | ||
|
Nissanaholic!
 |
Quote:
__________________
Quote:
|
||
|
|
|
|
11-17-2017, 10:45 AM
|
#7 |
|
Zilvia Addict
Join Date: Nov 2006
Location: Southeast Division
Age: 35
Posts: 818
Trader Rating: (6)
Feedback Score: 6 reviews
|
Just a bit of an update.
My new -4 a.n. fitting for the hydraulic slave showed up finally so I was able to get my clutch line & tick speed bleeder reinstalled. I didn't want to reuse my old fitting since I originally purchased it in like 2010 lol. Once I got that on I was finally able to bolt up the transmission, starter etc so now the motor is finally ready to go back into the chassis. I can't wait, there's absolutely no room to work in my bay anymore. Also, I still need to tighten down the harmonic balancer 100% but cant until the motor is in the car again because I cant lock the flywheel from spinning. 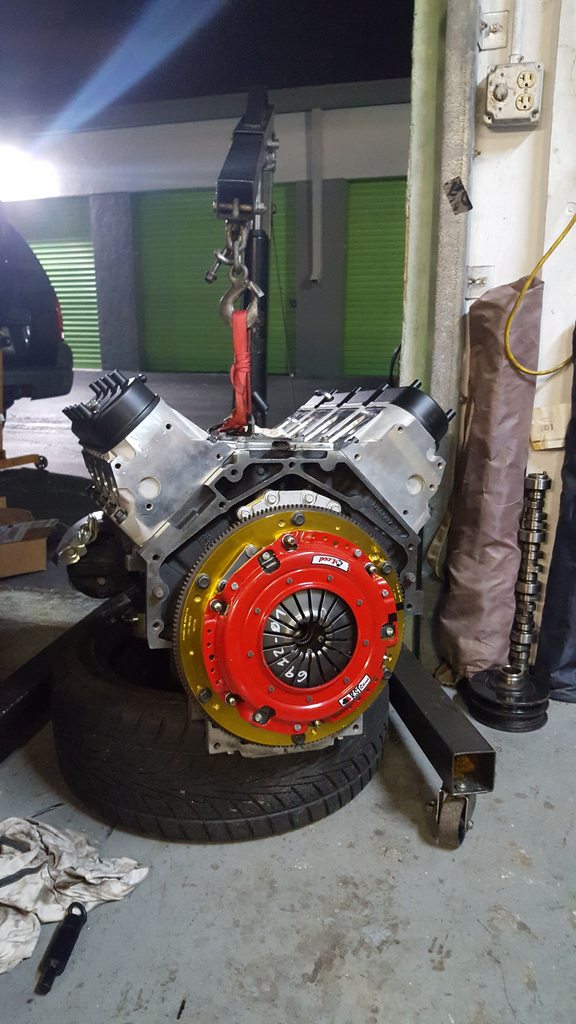 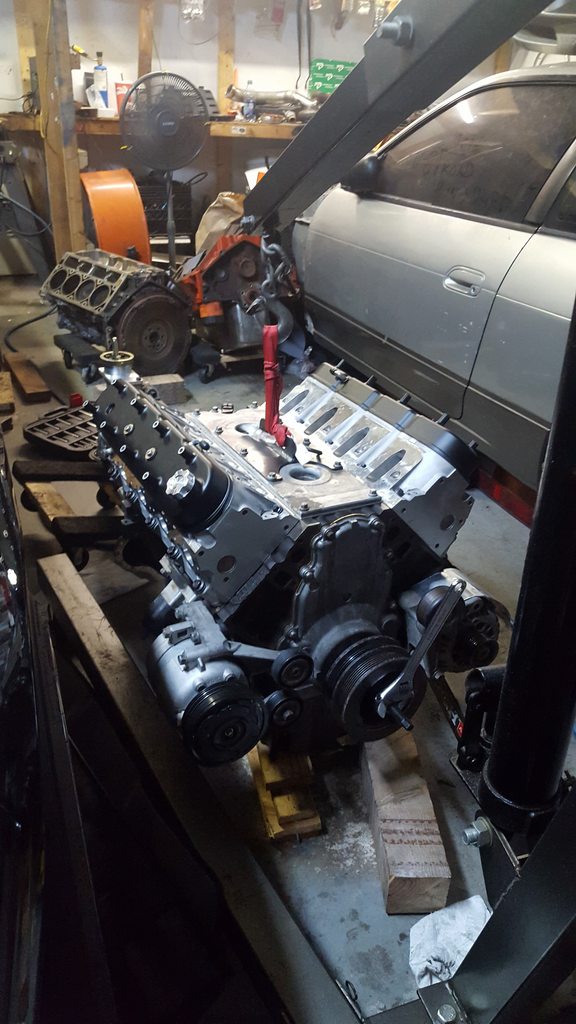 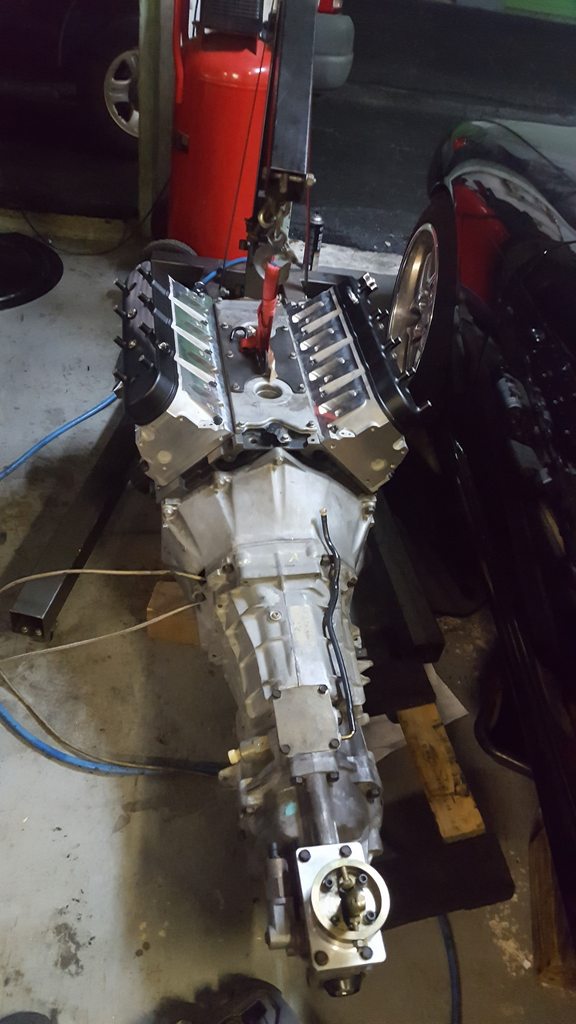 I also got quoted $700 + to sandblast & ceramic coat the manifolds, crossover pipe, downpipe & turbo exhaust housing. I know it's worth it but I couldn't get myself to spend that money soooooo, I decided to make a cheap sandblast booth with stuff I had laying around. Alot cheaper than a Harbor Freight sandblast booth too. 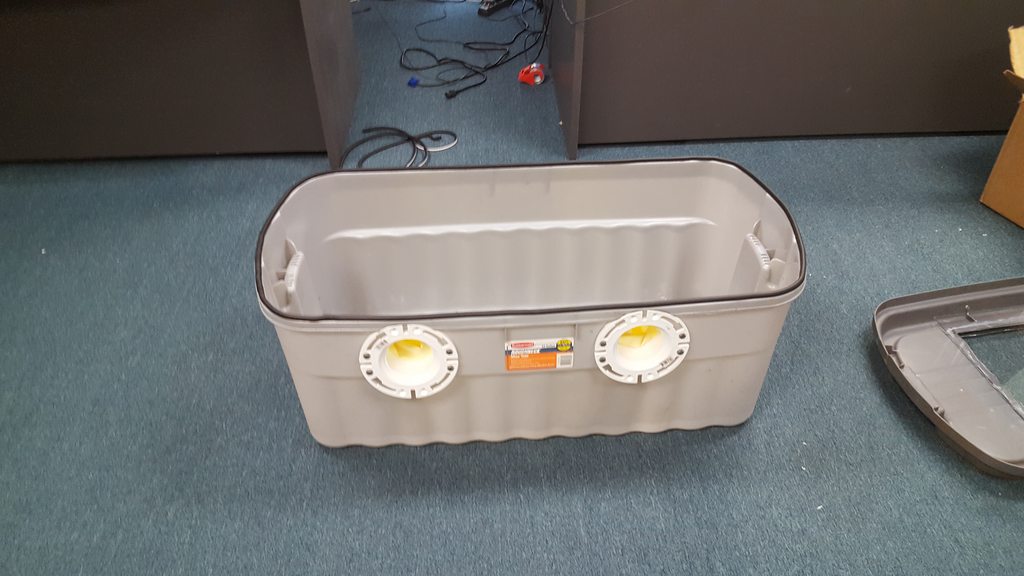 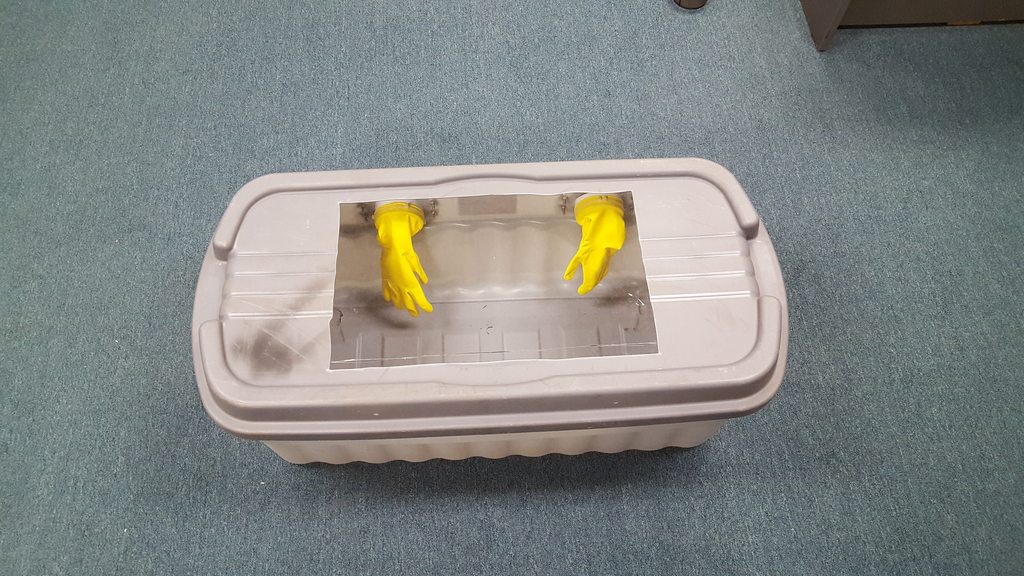 I havent finished doing everything but I started my pass. side manifold to check out how it works & it aint too bad if I say so myself. I included a picture of my driver side manifold to give you a reference of what the pass. manifold looked like before. I'll be coating the manifolds with Cerakote automotive air cure ceramic coating since I dont have an oven to bake the stuff in. 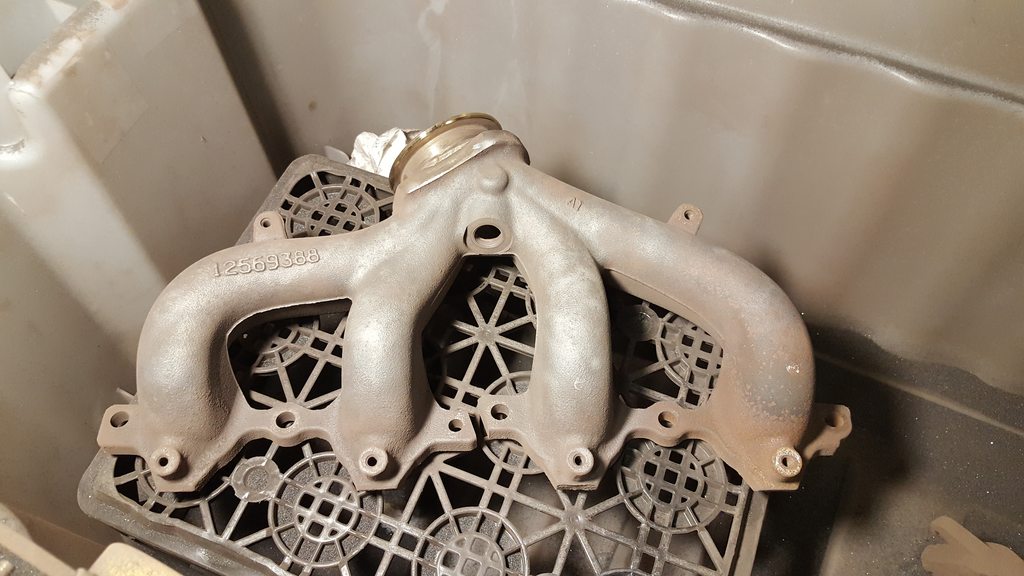 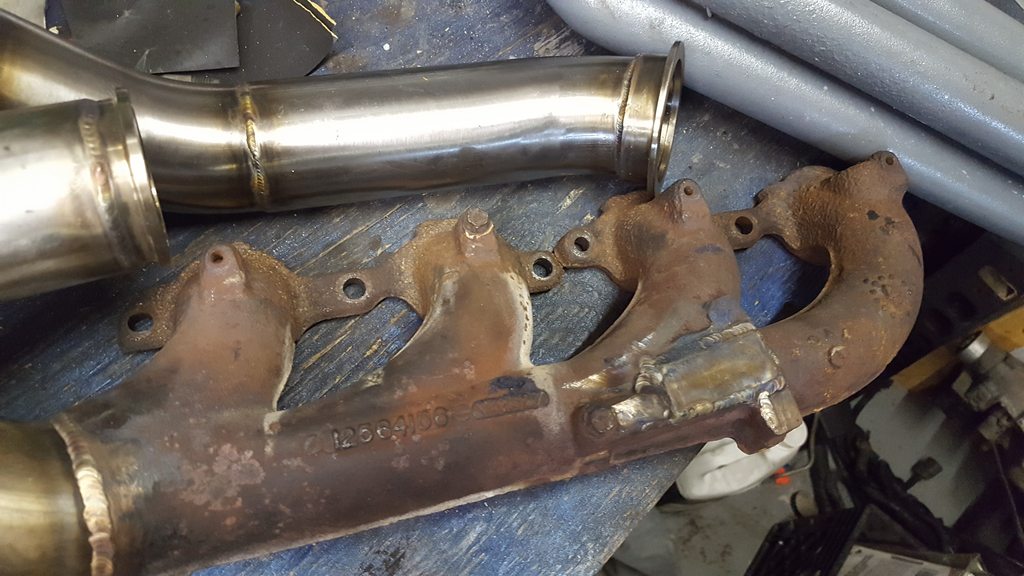 |
|
|
|
|
12-08-2017, 06:35 AM
|
#8 |
|
Zilvia Addict
Join Date: Nov 2006
Location: Southeast Division
Age: 35
Posts: 818
Trader Rating: (6)
Feedback Score: 6 reviews
|
Haven't updated this thread in a while, figured I would. The car is just about ready for me to try & turn it over for the first.
I got Cerakote's air cure coating since I didnt have an oven to bake everything in. Let me tell you, people weren't lying when they say this stuff smelllllssss. WEAR A MASK! 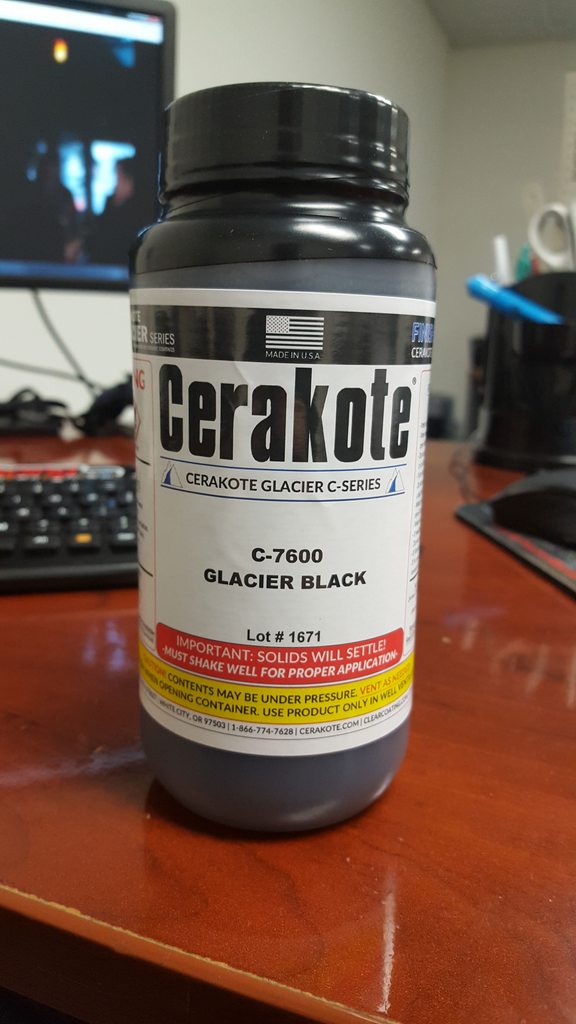 My make-shift rack to hold everything & the finished product + some accidental scuffs from my rack falling over....go figure haha. 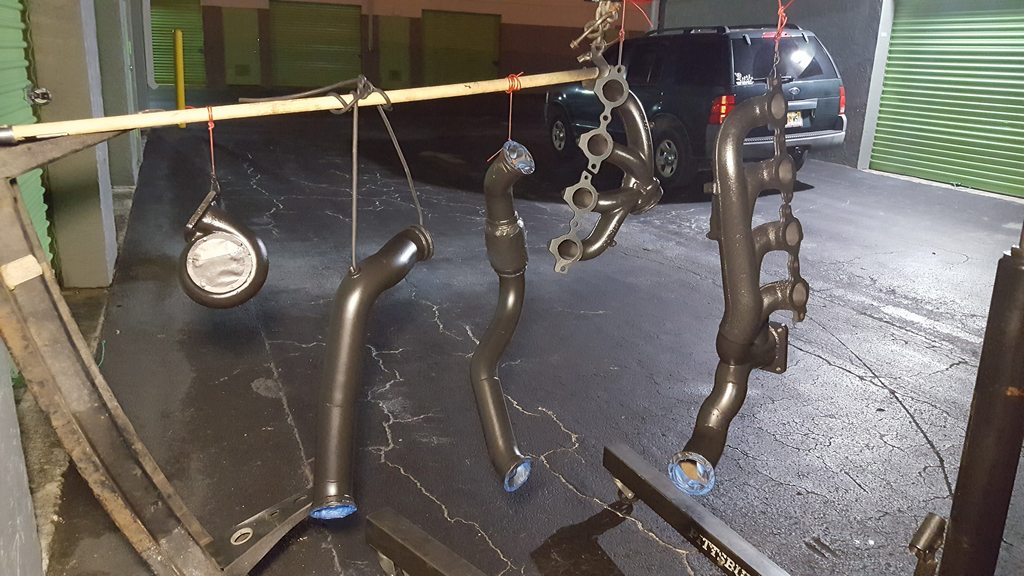 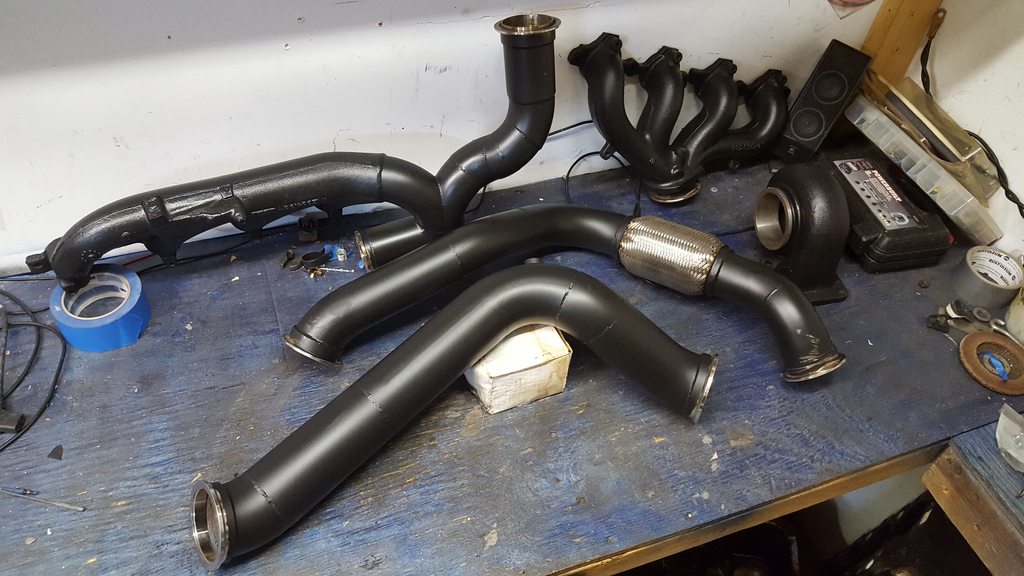 As of last night I finally have the turbo kit heat wrapped also & bolted up, injectors in, wiring harness all hooked up, oil feed/ return line routed, waste gate & dump tube in, belts on, radiator back in, power steering cooler installed, water pump heat ports blocked. I also tapped the top of the water pump for the steam vent tube since thatch the highest point in my cooling system. 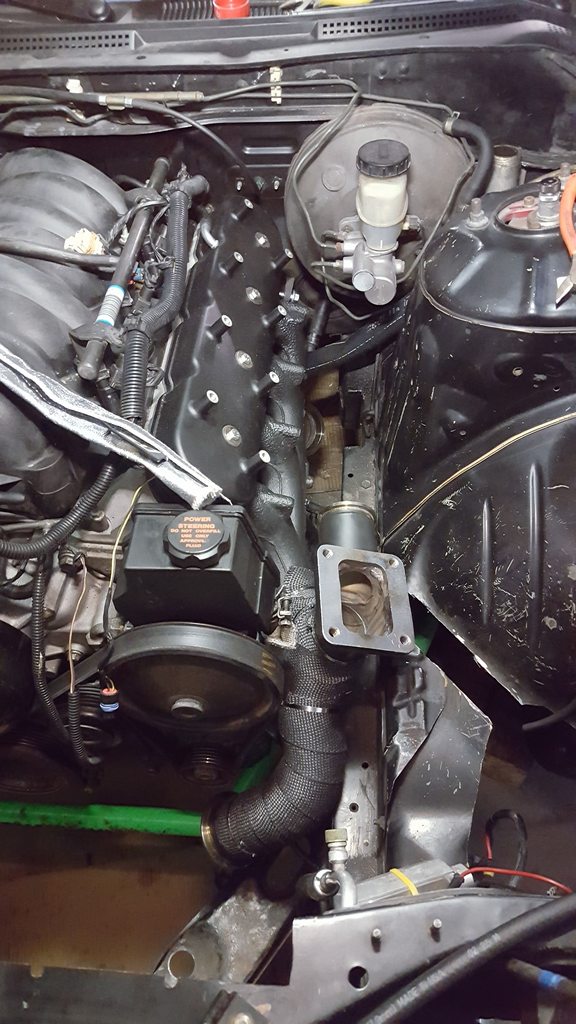 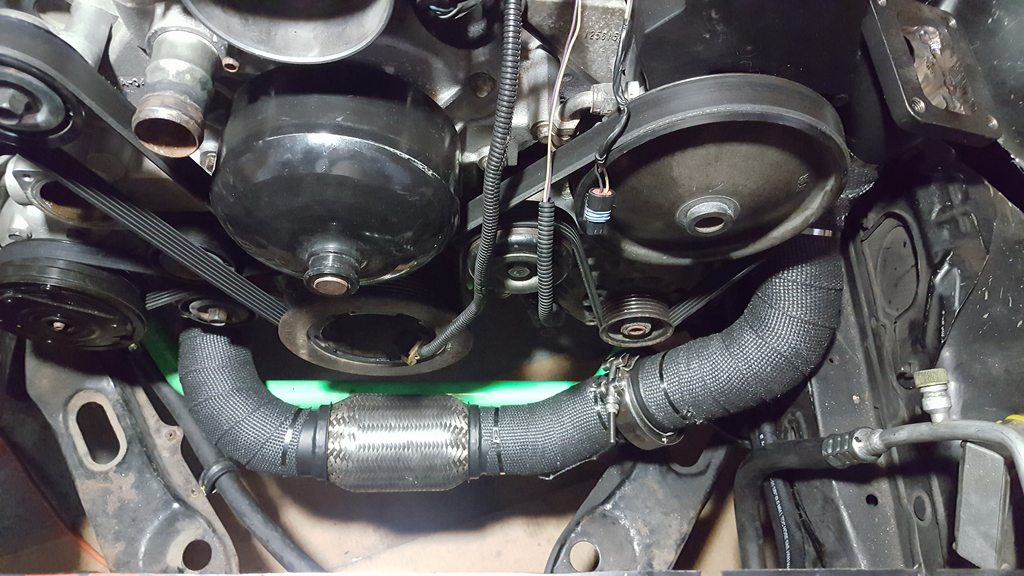 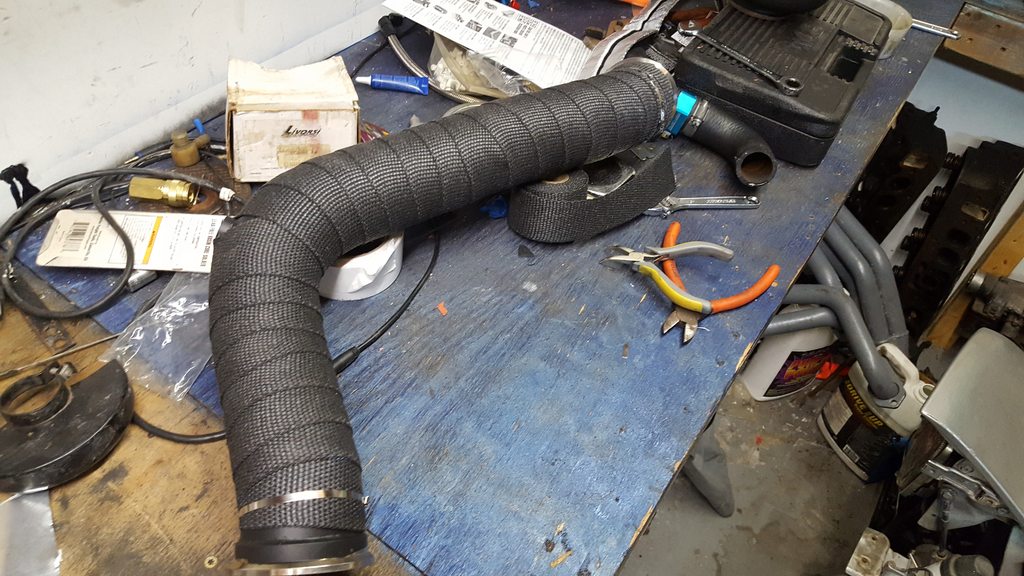 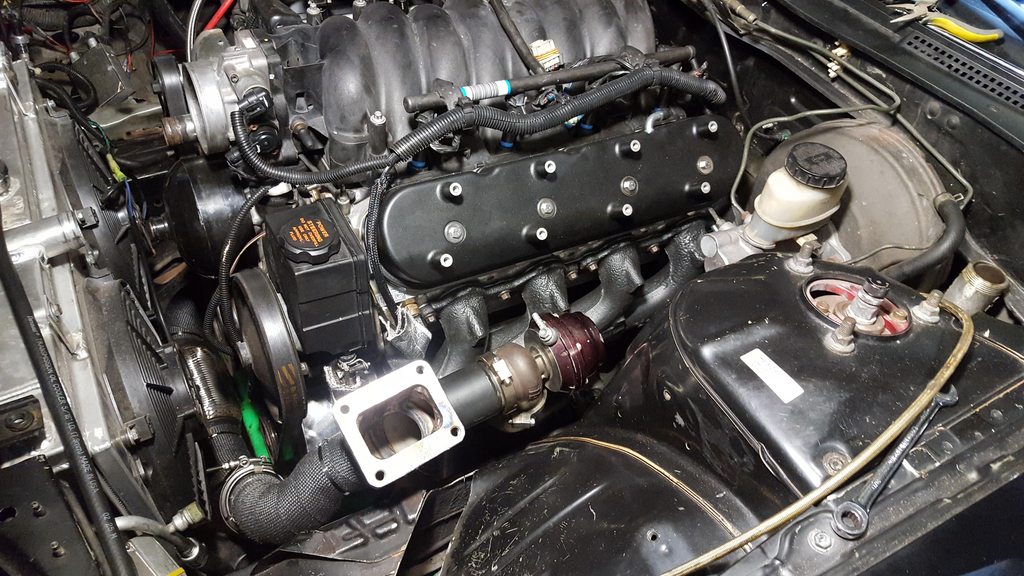 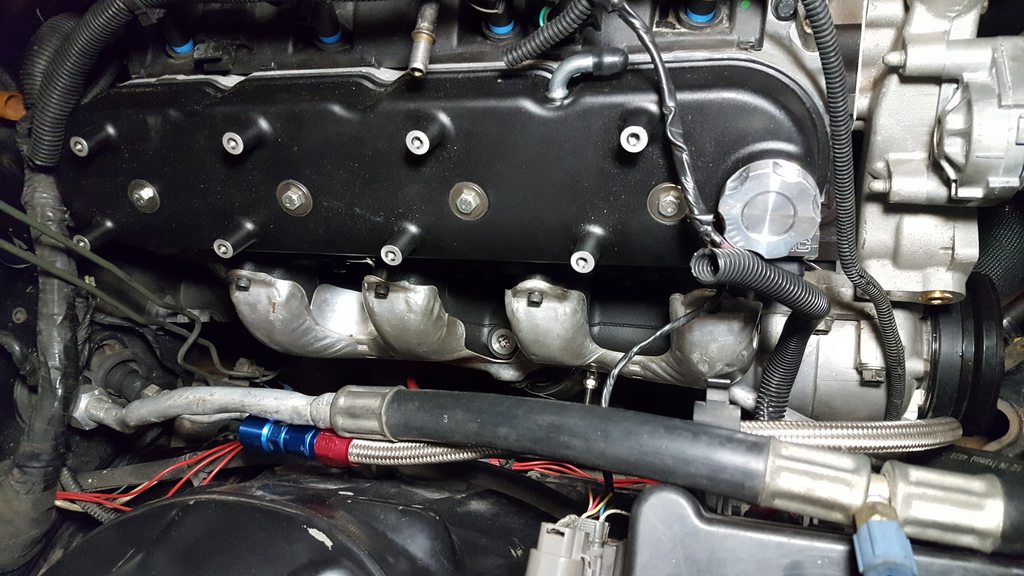 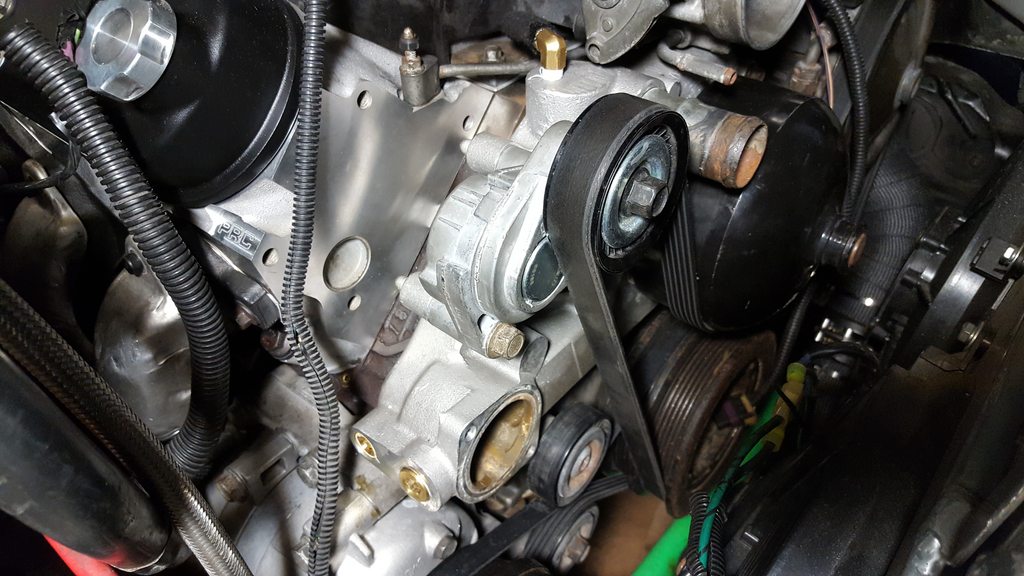 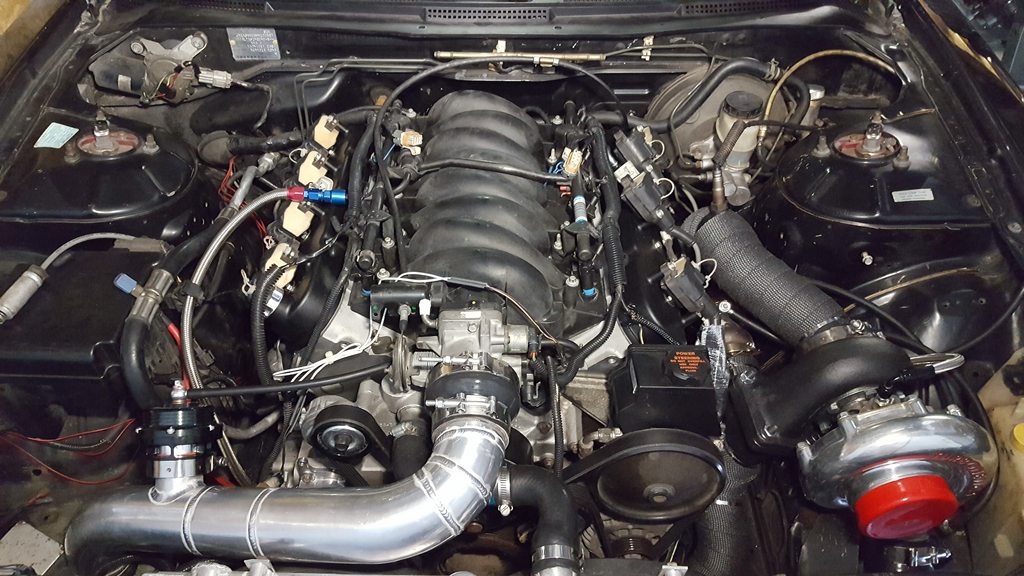 I still have a a few little things to do to the car before I try to start it. Mount my boost controller solenoid, wire up the gauges for the wideband & boost controller, bleed the clutch, make a mount for my dipstick so it doesn't pop out etc. Hopefully my next update I'll have the car running! |
|
|
|
|
12-13-2017, 07:22 AM
|
#10 | |
|
Zilvia Addict
Join Date: Nov 2006
Location: Southeast Division
Age: 35
Posts: 818
Trader Rating: (6)
Feedback Score: 6 reviews
|
Quote:
Just waiting on a reply from my tuner now to see when he can swing by & get a base map loaded onto my ECU so I can finally start this thing. 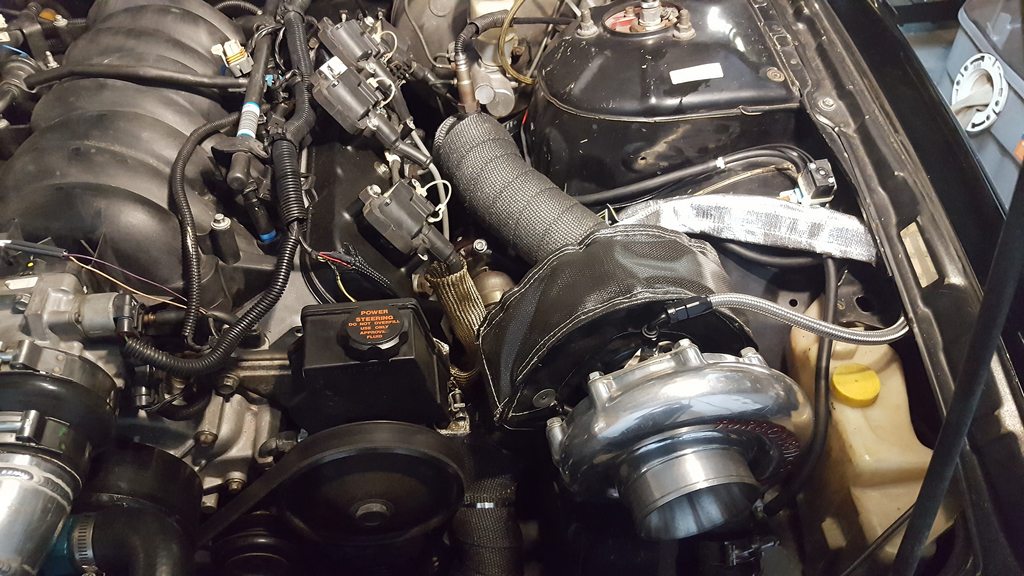 |
|
|
|
|
|
12-14-2017, 10:53 AM
|
#12 | |
|
Premium Member
 
|
Quote:
|
|
|
|
|
|
12-15-2017, 07:15 PM
|
#13 | |
|
Zilvia Addict
Join Date: Nov 2006
Location: Southeast Division
Age: 35
Posts: 818
Trader Rating: (6)
Feedback Score: 6 reviews
|
Quote:
AC wise its a mixture of the Nissan & GM a/c lines all customized to fit. OEM Nissan condenser & drier. |
|
|
|
|
|
08-15-2018, 09:59 AM
|
#15 |
|
Zilvia Addict
Join Date: Nov 2006
Location: Southeast Division
Age: 35
Posts: 818
Trader Rating: (6)
Feedback Score: 6 reviews
|
I guess 8 months later an update is warranted
moved out of my old warehouse & into a new one. So much more room to work on the cars & finally have a lift.  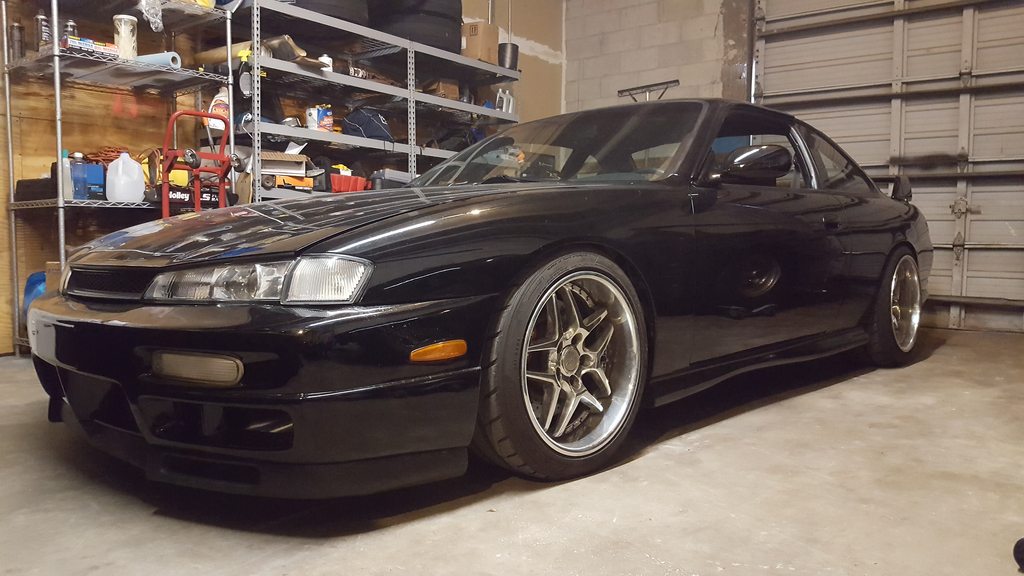  Finally fitting my garage defend style cooling panel I've had laying around for years 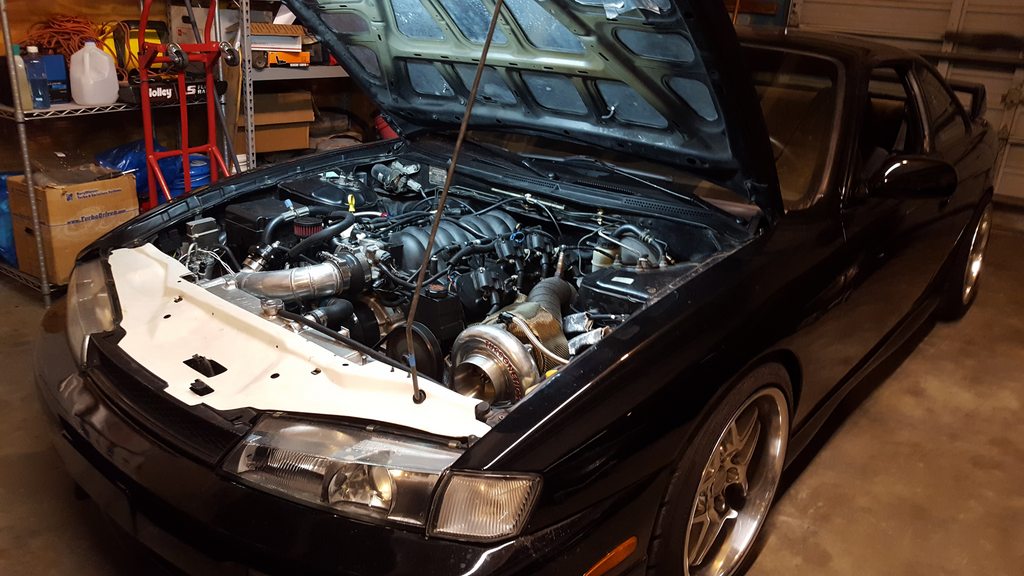 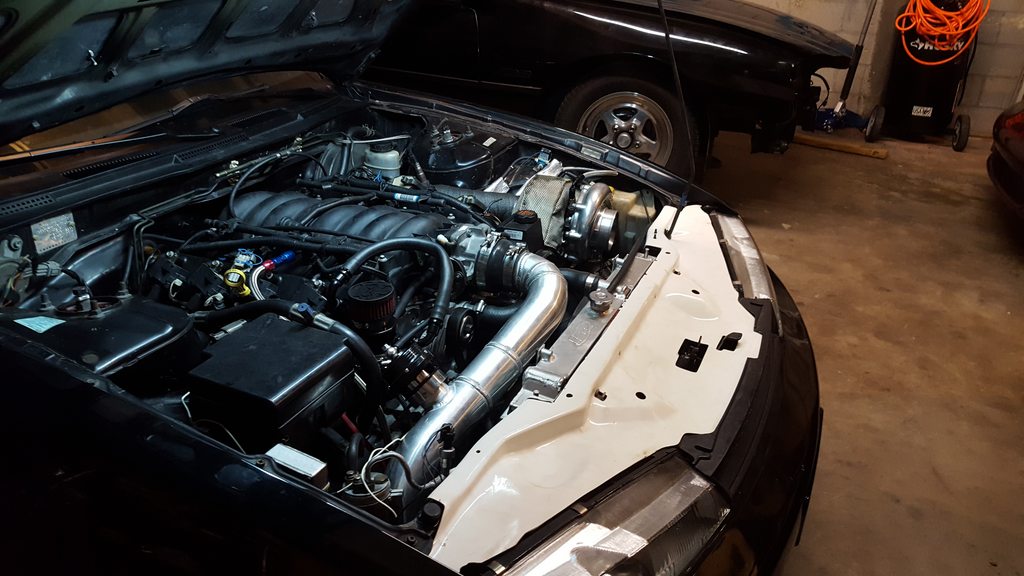 This past week since the car finally had a few things sorted out, I decided to finally tackle upgrading the fuel system. dual Walbro 450 e85 pumps, new rails, FPR, inline fuel filter w/ a 6 micron ethanol filter, e85 fuel lines etc. I didnt feel like spending $400+ on the PHR fuel hat which doesnt have a hanger or the $850+ setup from this shop in Australia so I decided to make the dual pump setup myself with -8 feed & -6 return. I also ordered the Radium venturi valve so I didnt have any pressure build up modding the old crappy plastic valve we have in our cars stock. 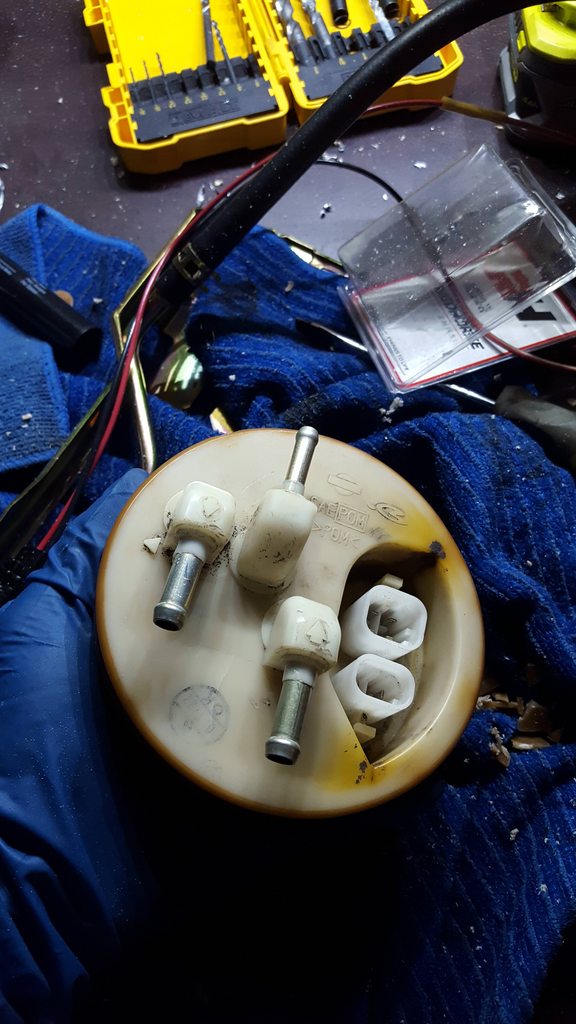 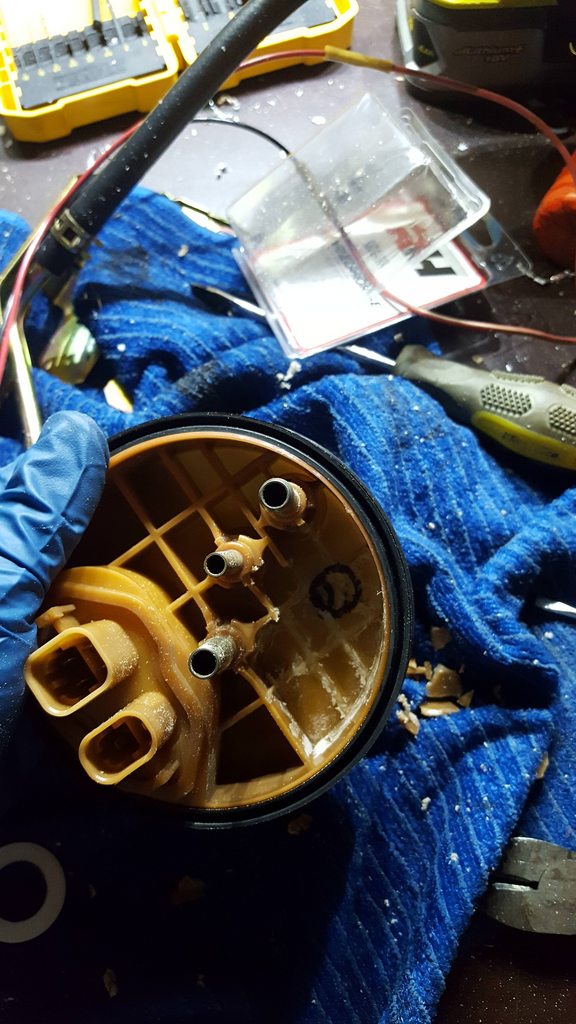 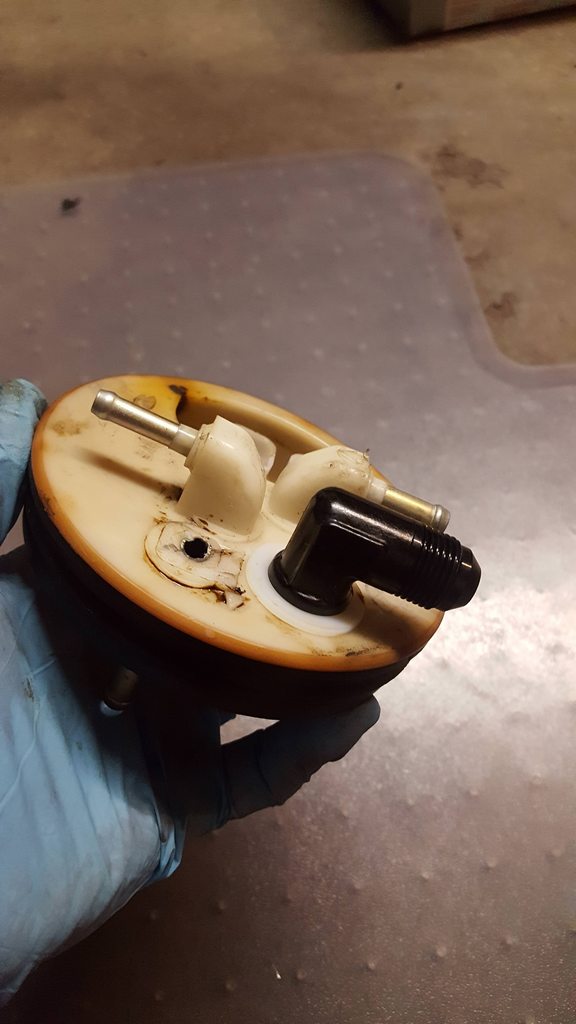 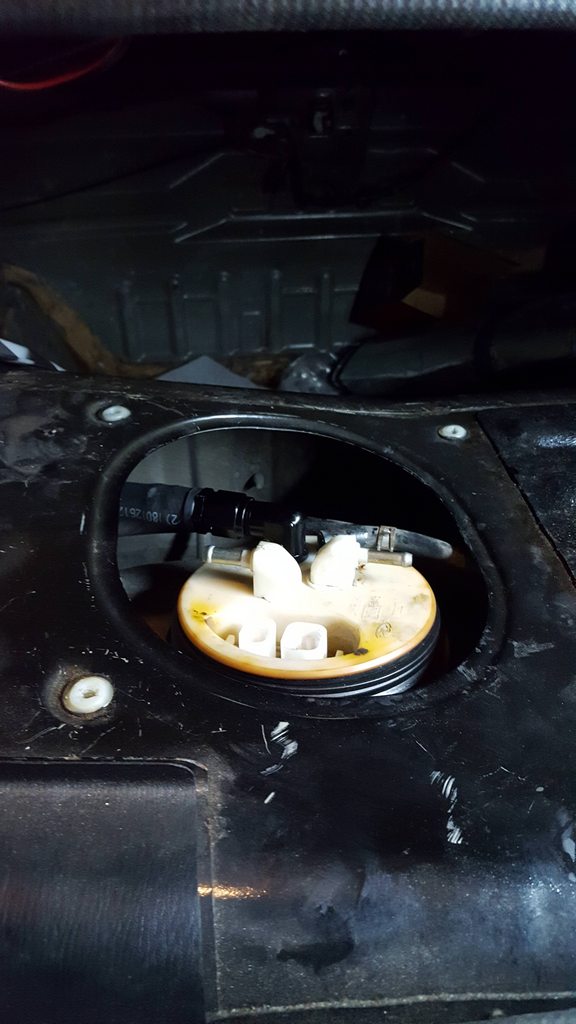 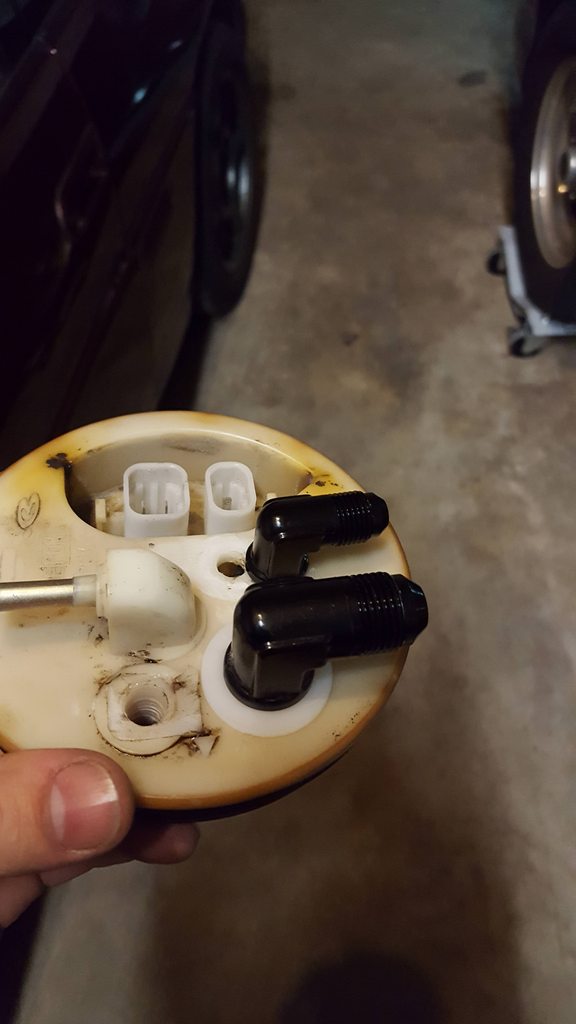 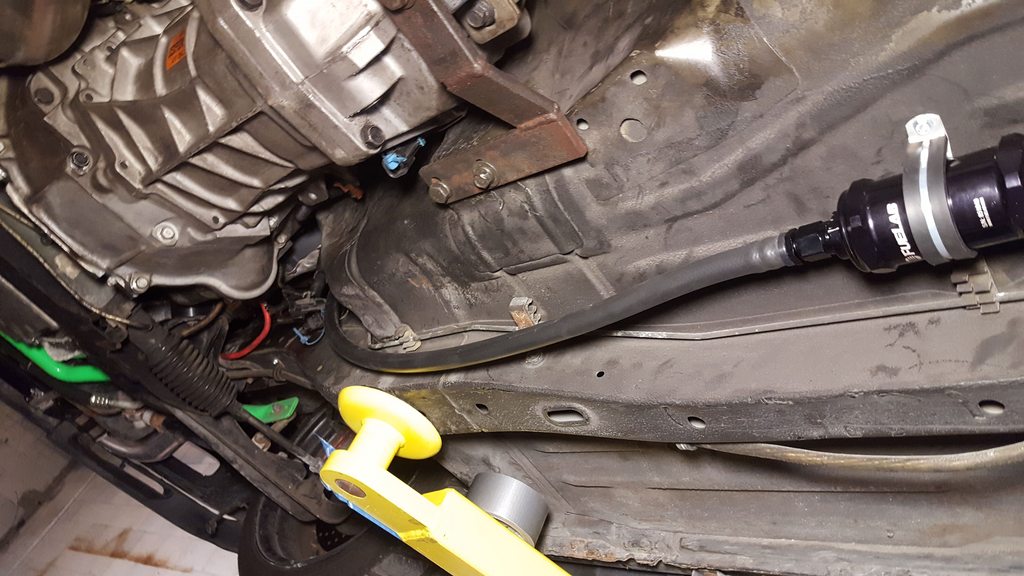 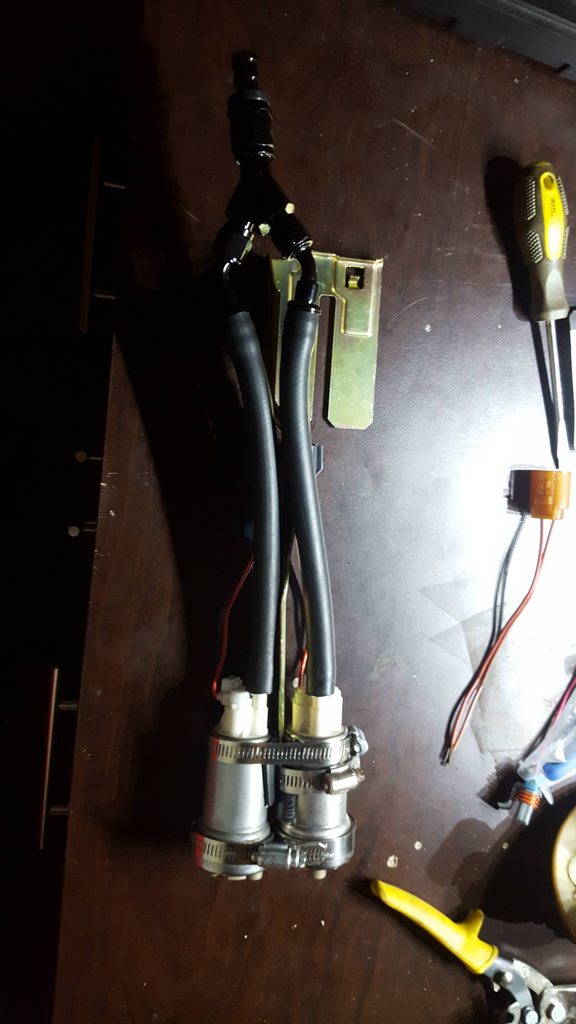 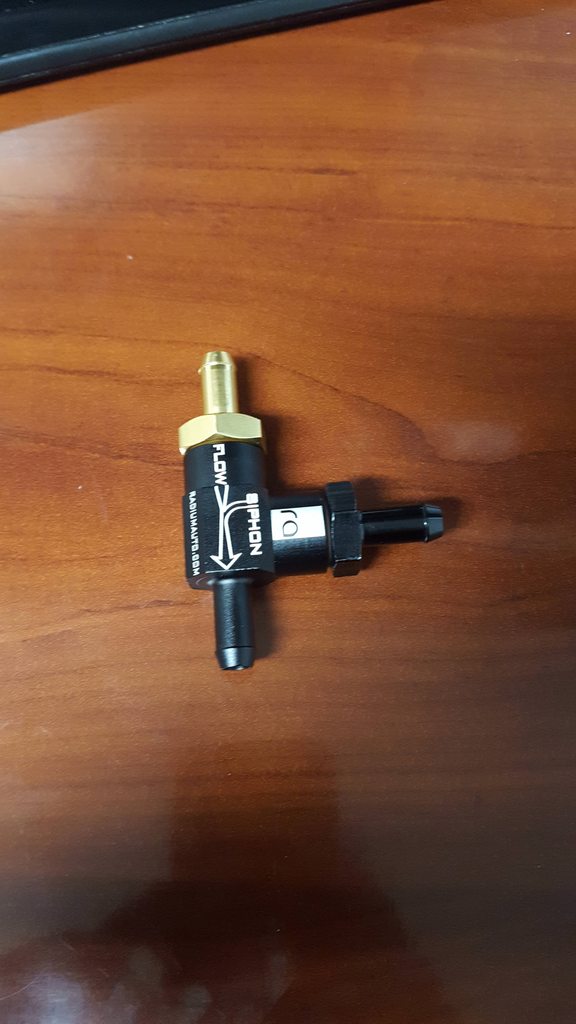 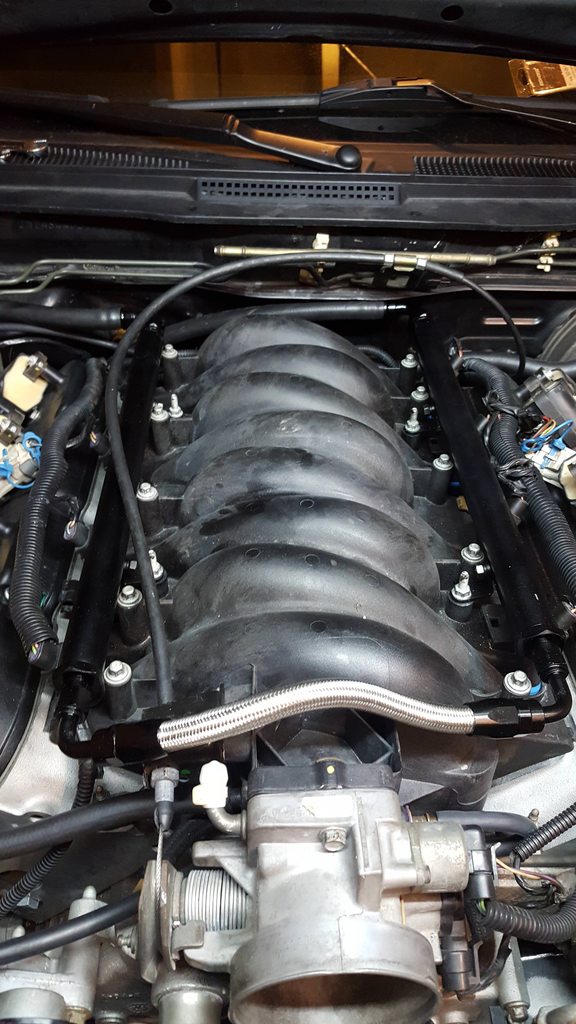 Today i'm going to be finishing up the wiring for the new relays. Going to be wiring in a 4psi pressure switch for the 2nd pump that way they both aren't running constantly. 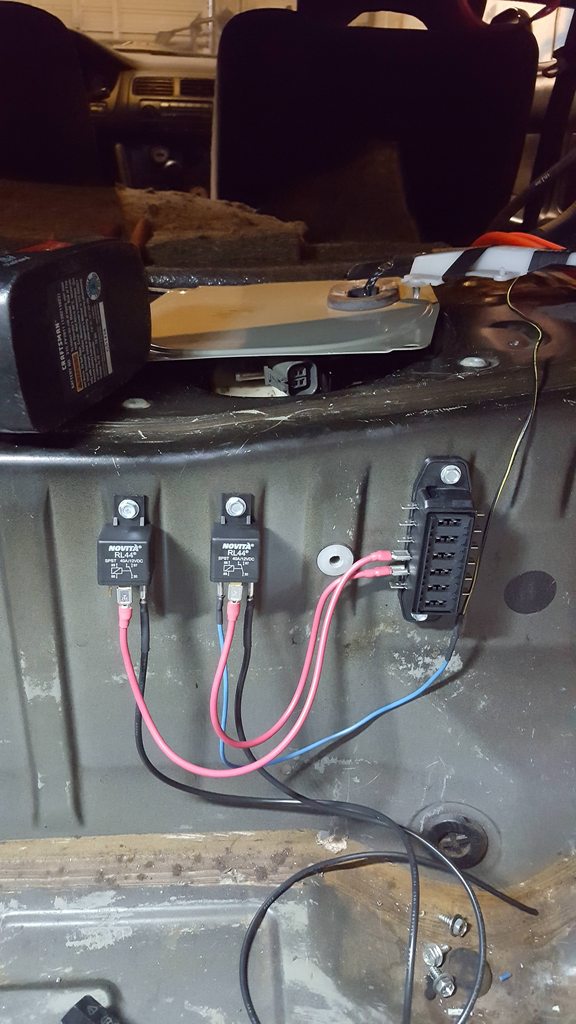 |
|
|
|
|
08-28-2018, 10:25 AM
|
#16 |
|
Zilvia Addict
Join Date: Nov 2006
Location: Southeast Division
Age: 35
Posts: 818
Trader Rating: (6)
Feedback Score: 6 reviews
|
I went Saturday morning to get tuned finally, couldnt figure out how to embed a video from my IG account so the link is below.
https://instagram.fmia1-1.fna.fbcdn....40652032_n.mp4 I really need to add a resonator though because now it sounds like I drive a Silverado with a 40 series flowmaster muffler haha Also need bigger injectors if I want to get more power too. 675whp on 15psi isnt too bad though. We ended up turning the boost down just a bit so I wasnt maxxing out the injectors. Also went out to Cars n Coffee WPB Sunday with some people. 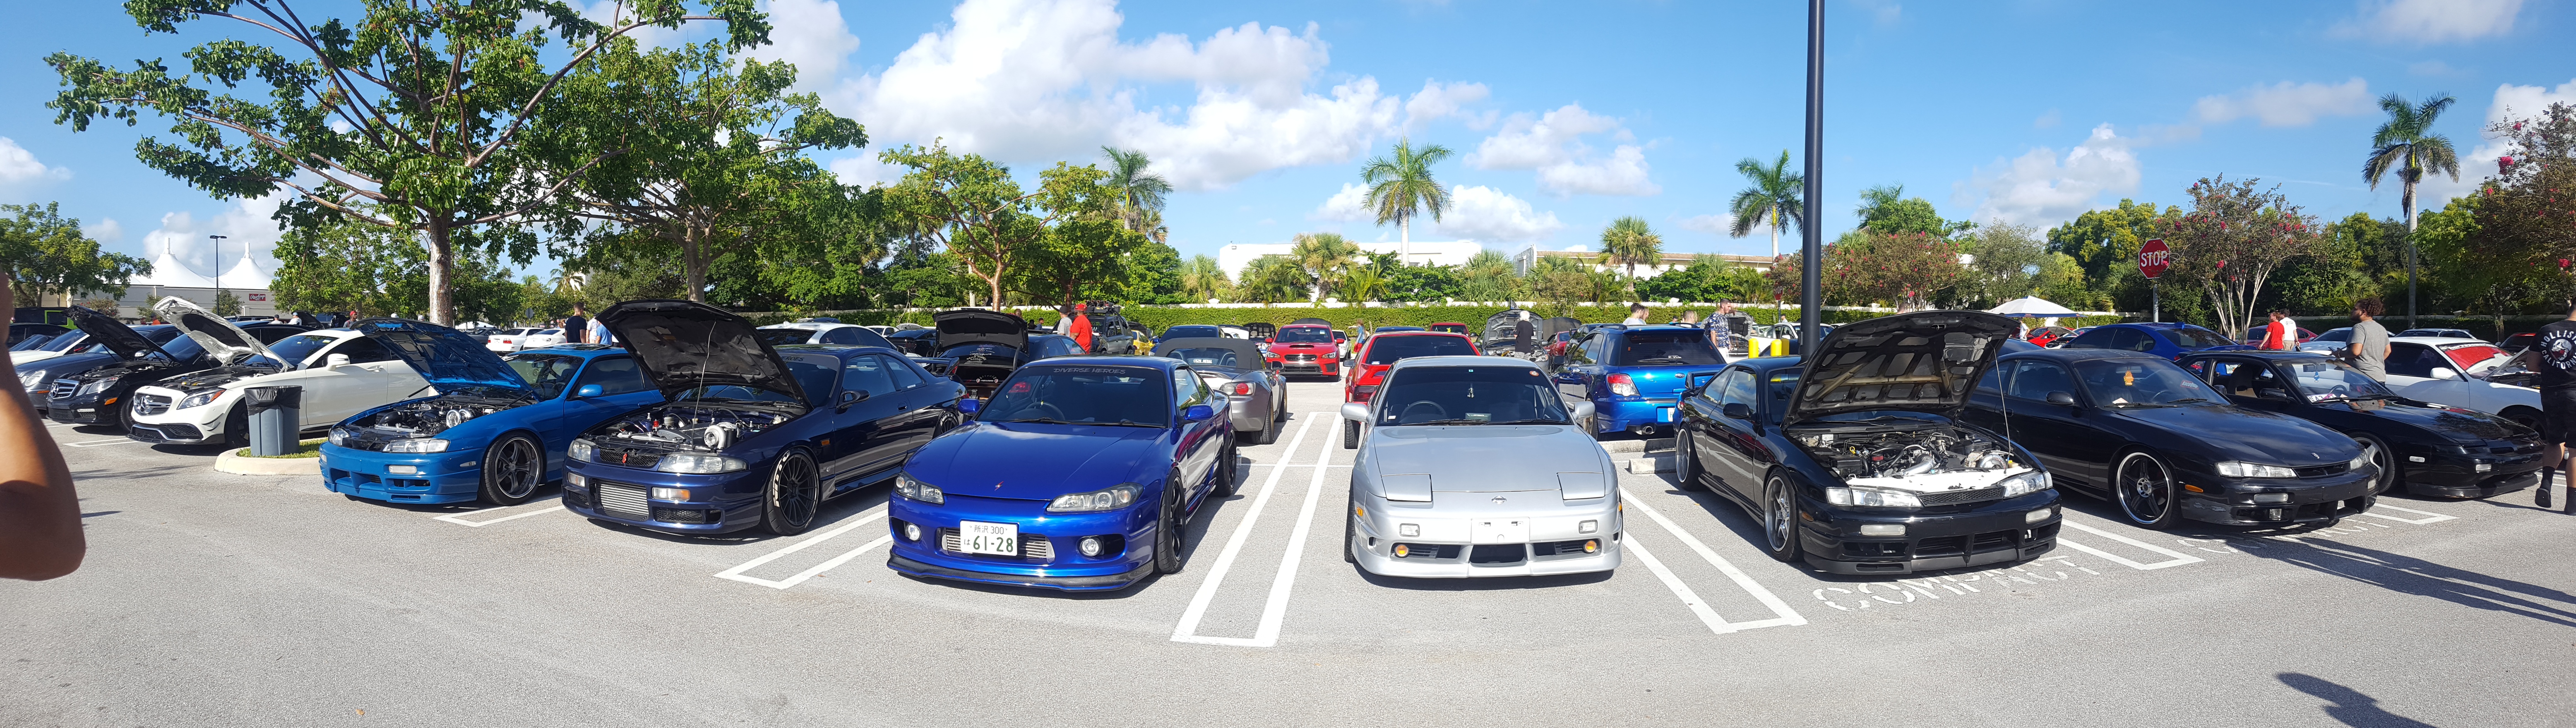 **wow, sorry about the image sized, used a different site because Imgur was giving me issues & it didnt have a resize option** |
|
|
|
|
| Bookmarks |
| Thread Tools | |
| Display Modes | |
|
|


 Linear Mode

