
 |
|
|||||||
| Home | Rules & Guidelines | Register | Member Rides | FAQ | Members List | Social Groups | Calendar | Mark Forums Read |
| Builds (and builds only) Got a build thread? It goes here, build threads anywhere else on the forum will be locked and never moved. |
 |
|
|
Thread Tools | Display Modes |
|
|
#34 |
|
Zilvia Junkie
 Join Date: Sep 2012
Location: LongBeach, CA
Age: 28
Posts: 371
Trader Rating: (4)
     Feedback Score: 4 reviews
|
Sadly it looks as if the previous owner did not do frequent oil changes.
Tore it apart, all new seals, trunions, springs, and push rods. For any LS owner; dont hesitate on the trunion upgrade. Just look at how easy these rollers come apart... Im running the canton oil pan specifically for the LS in S13. It clears stock sway bar and subframe with no modification and has 4 trap doors. Also running Hooker headers made for LS s13. Last edited by Suprareal; 12-12-2014 at 02:07 AM.. |
|
|

|
|
|
#35 |
|
Zilvia Junkie
 Join Date: Sep 2012
Location: LongBeach, CA
Age: 28
Posts: 371
Trader Rating: (4)
     Feedback Score: 4 reviews
|
Decided to make my own solid mounts to save money to use on other parts. Stick welded them so not to pretty because of multiple passes but they are strong
Heres the clearance with the headers everything fits nice and snug, so much that its annoying. But thats the problem you get with the V8. Shifter sits right where it should Clutch slave and master are all in and bled. Running new LS7 clutch/flywheel. Pedal feels pretty perfect in stiffness. Still trying to get the best fiberglass fitment when i find time. Whole car will be getting painted in the near future I finnally got around to making my trans mount, came out perfect. Using a energy poly mount for LS. Turn one power steering restrictor to get the right pressure for the nissan rack you can tell the difference. I have to say the Turn one has great over the phone representatives. Bought a brand new LS6 valley cover, just makes sense. Wrinkled coated the intake. Made a quick dust plate for the trans since the canton pan does not cover the flywheel. Ran my oil filter relocation, lines go under the oil pan between the subframe and route to the driver side wheel well. Its getting close Last edited by Suprareal; 12-12-2014 at 02:16 AM.. |
|
|

|
|
|
#36 |
|
Zilvia Junkie
 Join Date: Sep 2012
Location: LongBeach, CA
Age: 28
Posts: 371
Trader Rating: (4)
     Feedback Score: 4 reviews
|
Swap was done until i drove it up the street and it spun a bearing due to no oil pressure. ( had no gauge ) rookie mistake. I seen this as a chance to have a brand new engine and chance to learn how to rebuild a engine for the first time. SO we did a stock rebuild on it including a brand new crank, and did some upgrades while inside.
Melling high pressure oil pump, ls7 lifters, ARP rod bolts, LS2 timing chain. Didn't end up getting many pics of the process. AND A STACK OIL PRESSURE GAUGE so ill never make the same mistake Once again its done, runs great, oil pressure is always good... still making little tweaks. My friends and I made friends with OMG Drift and got a article done in their online magazine seen here on PG.86 http://issuu.com/omgdrift/docs/issue_03 Heres a few shots from the day Power steering fluid was shooting out of the reservoir when drifting so i went ahead and added a Mishimoto fluid cooler with fan and it works great. Last edited by Suprareal; 03-21-2015 at 12:38 AM.. |
|
|

|
|
|
#37 |
|
Zilvia Junkie
 Join Date: Sep 2012
Location: LongBeach, CA
Age: 28
Posts: 371
Trader Rating: (4)
     Feedback Score: 4 reviews
|
Lots of upgrades being added at the end of the year this year.
Dual brake booster (painted with purple flake) 3 Quart Canton accusump with switched valve to ignition. All push lock -10 AN lines with a very nice Vibrant check valve. I recently got a sponsorship with mishimoto and this 25 row single pass oil cooler was the first thing i used my discount with. Also using push lock -10 AN. Mounted to get great flow through my bumper. I made a new set of modded lower front arms this time 1.5" extended. Notched for tie rod clearance of course. And fresh ball joints. First time modding knuckles. Just your typical shorten tigged up multiple passes and painted brass. (brass knuckles  ) ) These pictures shown are full lock with 255/40/18 on a 9" wide rim. Bottoming out on tension and sway bar that will later be upgraded. |
|
|

|
|
|
#38 |
|
Zilvia Junkie
 Join Date: Sep 2012
Location: LongBeach, CA
Age: 28
Posts: 371
Trader Rating: (4)
     Feedback Score: 4 reviews
|
Here are the last pictures taken on this car while it looked like a bag of skittles.
Body is now being prepped for paint. Body filler areas are very light where you see them. No filled holes or anything like that. This paint job wont be flawless because at the end of the day it is my drift car but will be very nice. |
|
|

|
|
|
#40 |
|
Zilvia Junkie
 Join Date: Sep 2012
Location: LongBeach, CA
Age: 28
Posts: 371
Trader Rating: (4)
     Feedback Score: 4 reviews
|
I made my very first bash bar here. Came out great fits snug and holds up my bumper. This was made from 1 3/4" DOM but next time will be using a smaller OD.
Coat of Poly primer and weeks of block sanding ... Ive got a discount on VIS kit parts so im trying out some fenders. The fitment is not all that bad but i can already tell i will replace them with wider fenders as my wheels are max cambered in and still barely clear. Lots of camber is not my style. Finally starting to wrap up paint. Heres some teaser pics. Im now buffing/polishing and putting everything back on the car. (as you can see my tent flew away during EL NINO) |
|
|

|
|
|
#41 |
|
Zilvia Junkie
 Join Date: Sep 2012
Location: LongBeach, CA
Age: 28
Posts: 371
Trader Rating: (4)
     Feedback Score: 4 reviews
|
Was able to get my first mini photoshoot of the car before the car gets beat on.
My buddy even put in the time to draw the car. Amazing colored pencil work. |
|
|

|
|
|
#45 |
|
Zilvia Junkie
 Join Date: Sep 2012
Location: LongBeach, CA
Age: 28
Posts: 371
Trader Rating: (4)
     Feedback Score: 4 reviews
|
Decided to get started on my hydro set up that i have been designing in my head for a long time.
(Anyone who sees this and wants to copy my concept go ahead) Ive only seen a couple set ups similar to mine being extended. I used this design for 2 reasons, im tall and my knees would hit the Master cylinder if i placed it up front, and with a full interior car making things as sleek and hidden as possible is a plus for me. Im using the GKtech dual caliper bracket that still allows me to use the Z32 ebrake. So yes i now have 3 separate brakes on the rears. I fabbed the handle at a friends machine shop, SS lines made at Baker precision, and the bracket holding the master i made of some 304 stainless i had around. Keep in mind under the car there is a supporting plate to stiffen up the area i am bolting to that i did not get a pic of. If you dont do this the floor will flex like crazy when the brake is pulled. The extension is stainless and threaded specific for the swivel joint on the lever and the master. The bracket holding the lever is designed to fit like stock directly under the shift boots with absolutely no trimming of the center console. All scews to take off the console are still accessible as well. |
|
|

|
|
|
#46 |
|
Zilvia FREAK!
 |
I am currently making a similar setup myself. I really like the extra space of remote mounting the master toward the rear. I think both the Enjuku Racing Pro 2 cars use a similar setup. Very clean install, I love it. May I ask what rod you used and where you sourced it?
__________________
IG: @scotheocelot |
|
|

|
|
|
#47 | |
|
Zilvia Junkie
 Join Date: Sep 2012
Location: LongBeach, CA
Age: 28
Posts: 371
Trader Rating: (4)
     Feedback Score: 4 reviews
|
Quote:
|
|
|
|

|
|
|
#48 |
|
Zilvia Member
 Join Date: Feb 2007
Location: 'Merica
Age: 34
Posts: 198
Trader Rating: (0)
 Feedback Score: 0 reviews
|
That's the same hydro setup I was planning on running.
Car looks cool and all, but something just seems off to me. I can't figure out what it is. Good thing it's not my car, right? Hahaha. Keep up the good work, man.
__________________
Determined to be famous, destined to be infamous.
|
|
|

|
|
|
#50 |
|
Zilvia Junkie
 Join Date: Sep 2012
Location: LongBeach, CA
Age: 28
Posts: 371
Trader Rating: (4)
     Feedback Score: 4 reviews
|
It’s been years since any update and that’s mainly because the car stayed the same with little to no changes.
But now some big changes are in progress. I took a big leap and sold my entire turnkey LSX swap and now going 2JZ CD009. All pulled and picked up promptly from another member here actually. 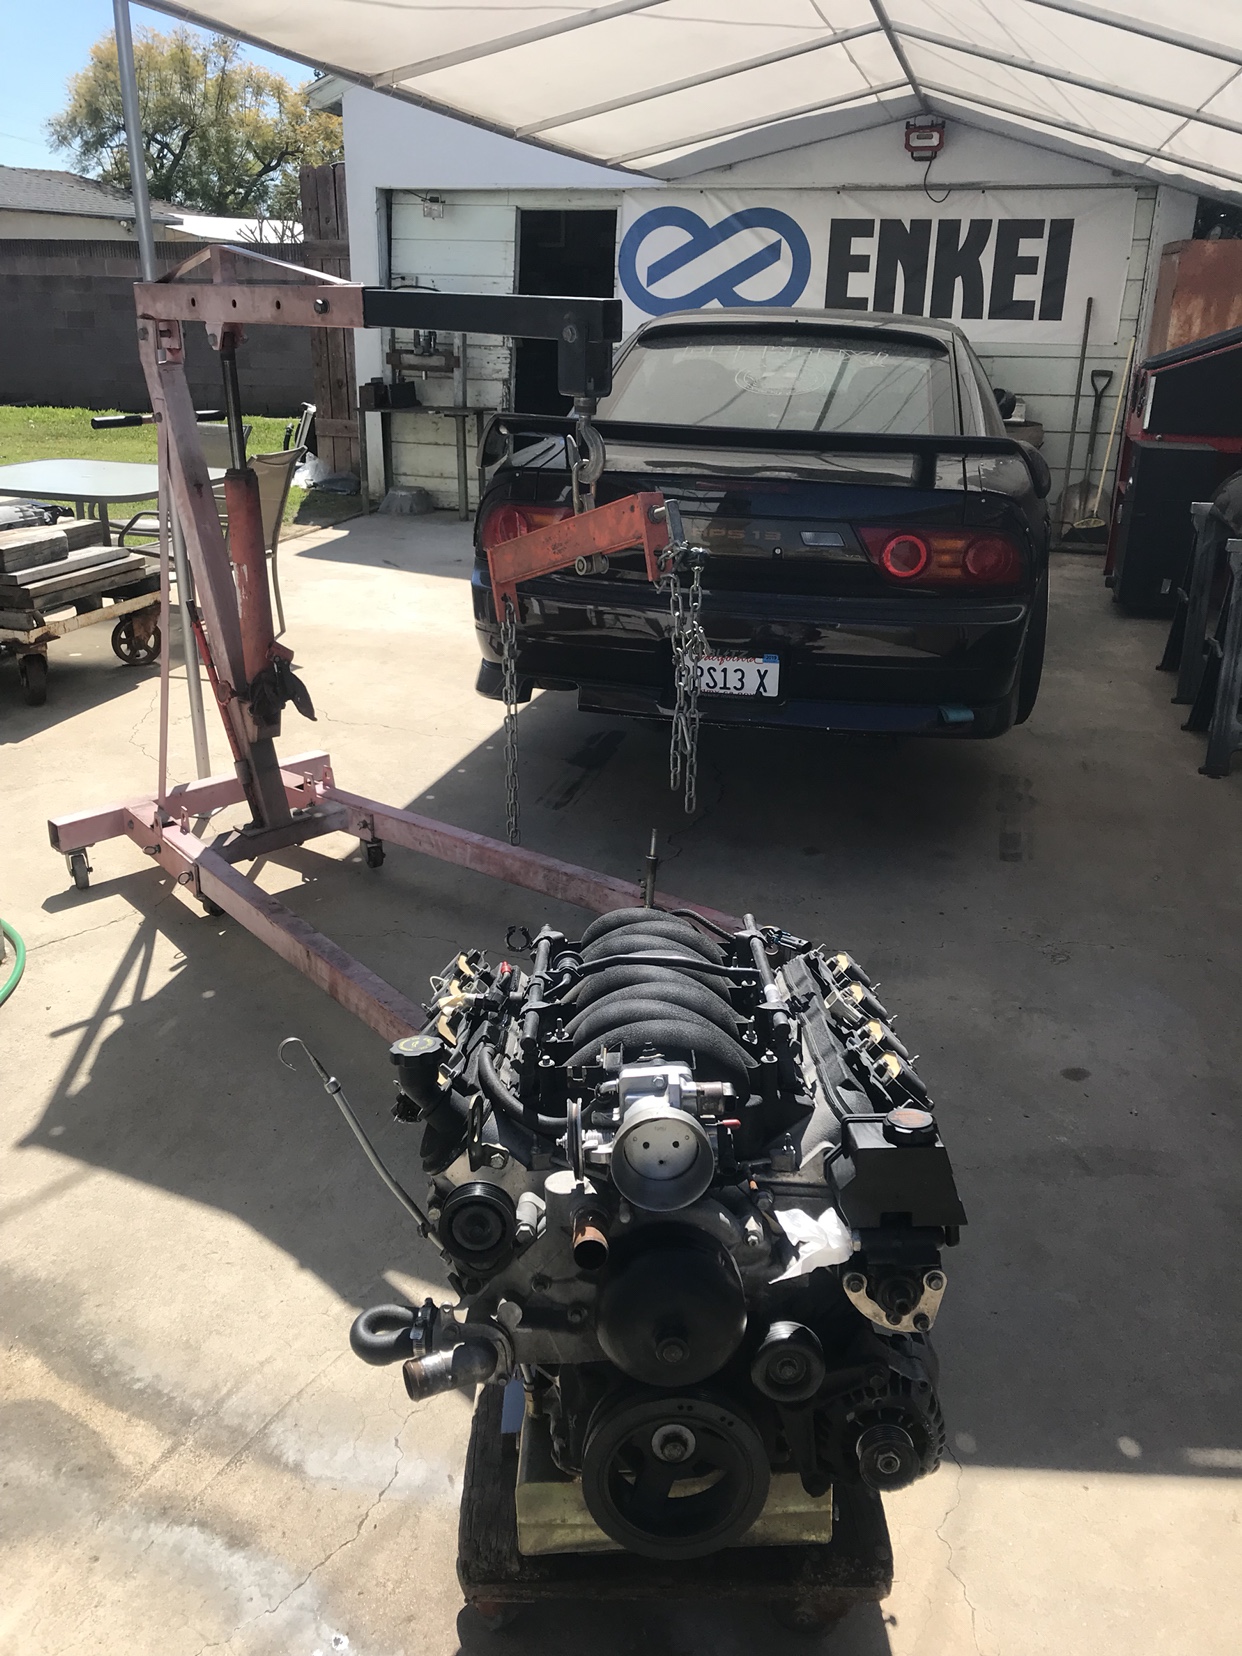 Took one last hot lap before pulling and finally got to take a picture of the 2 cars together 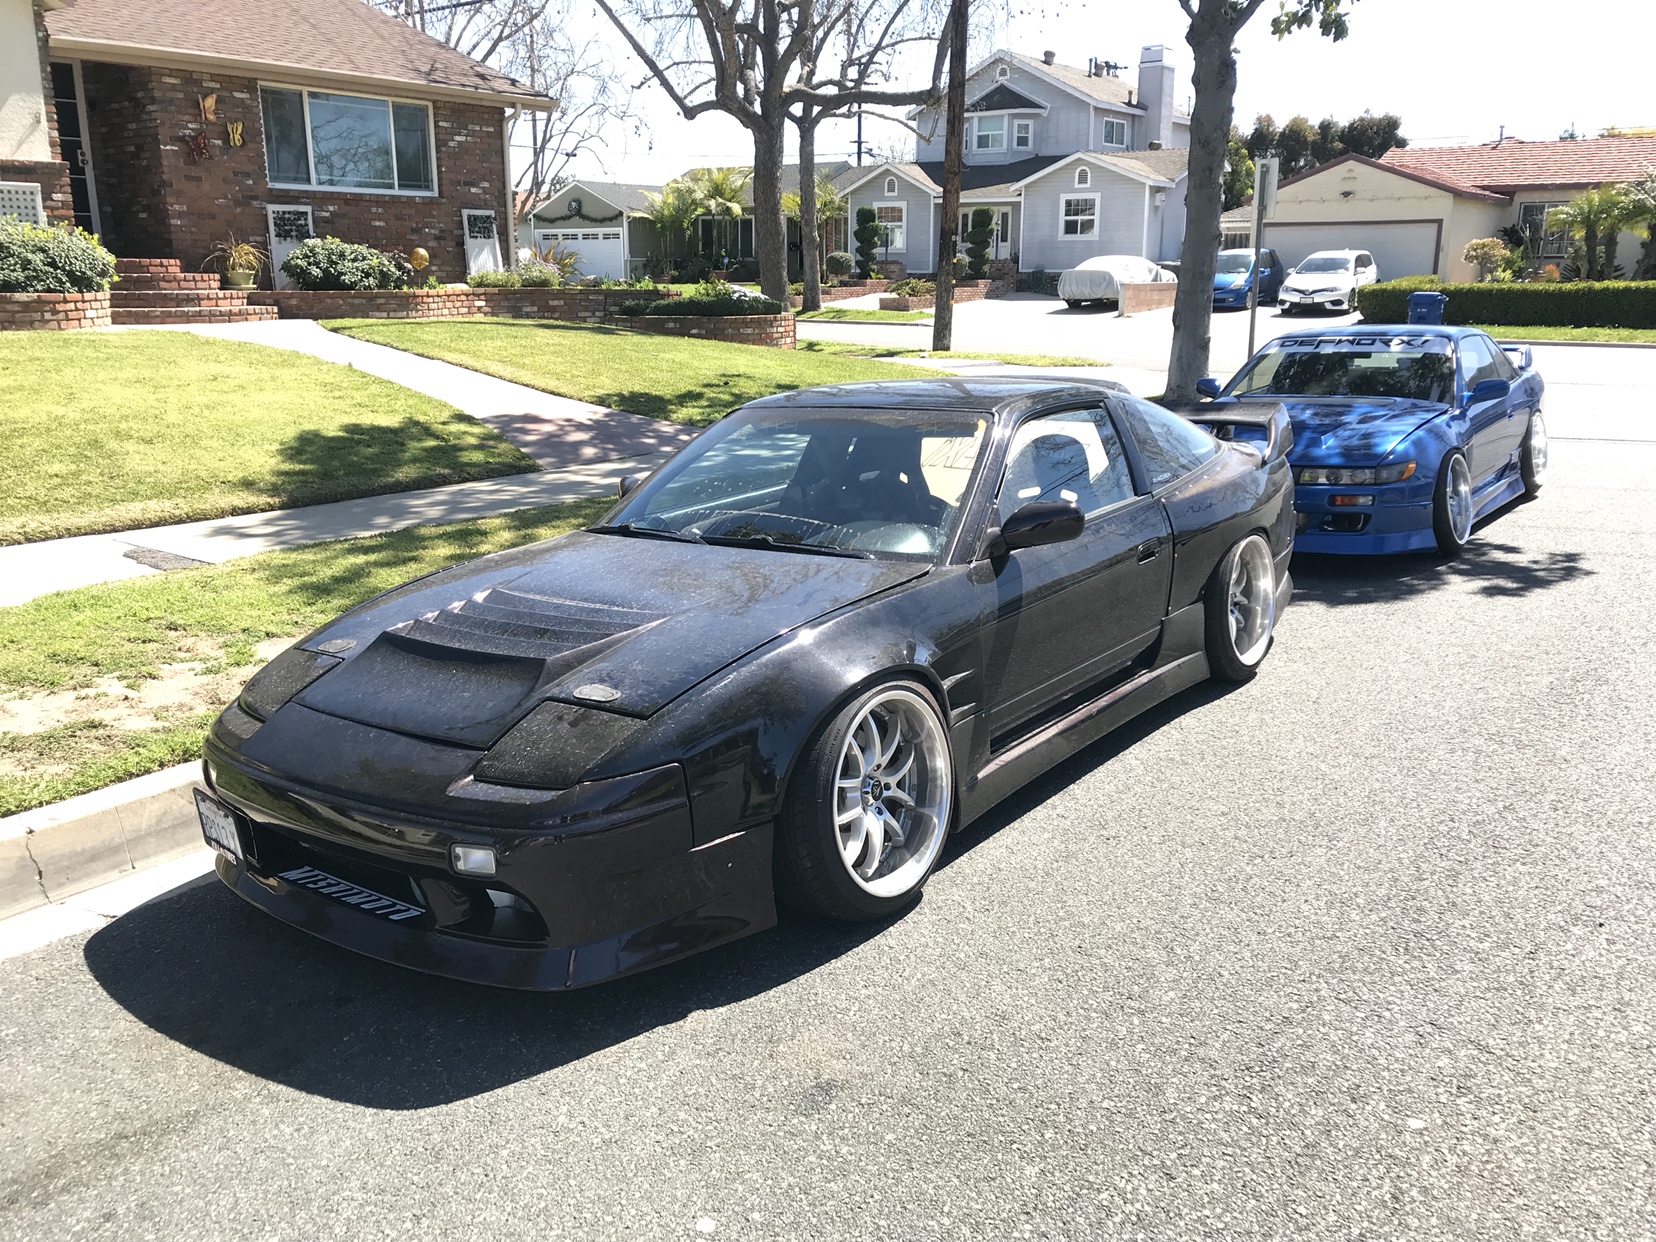 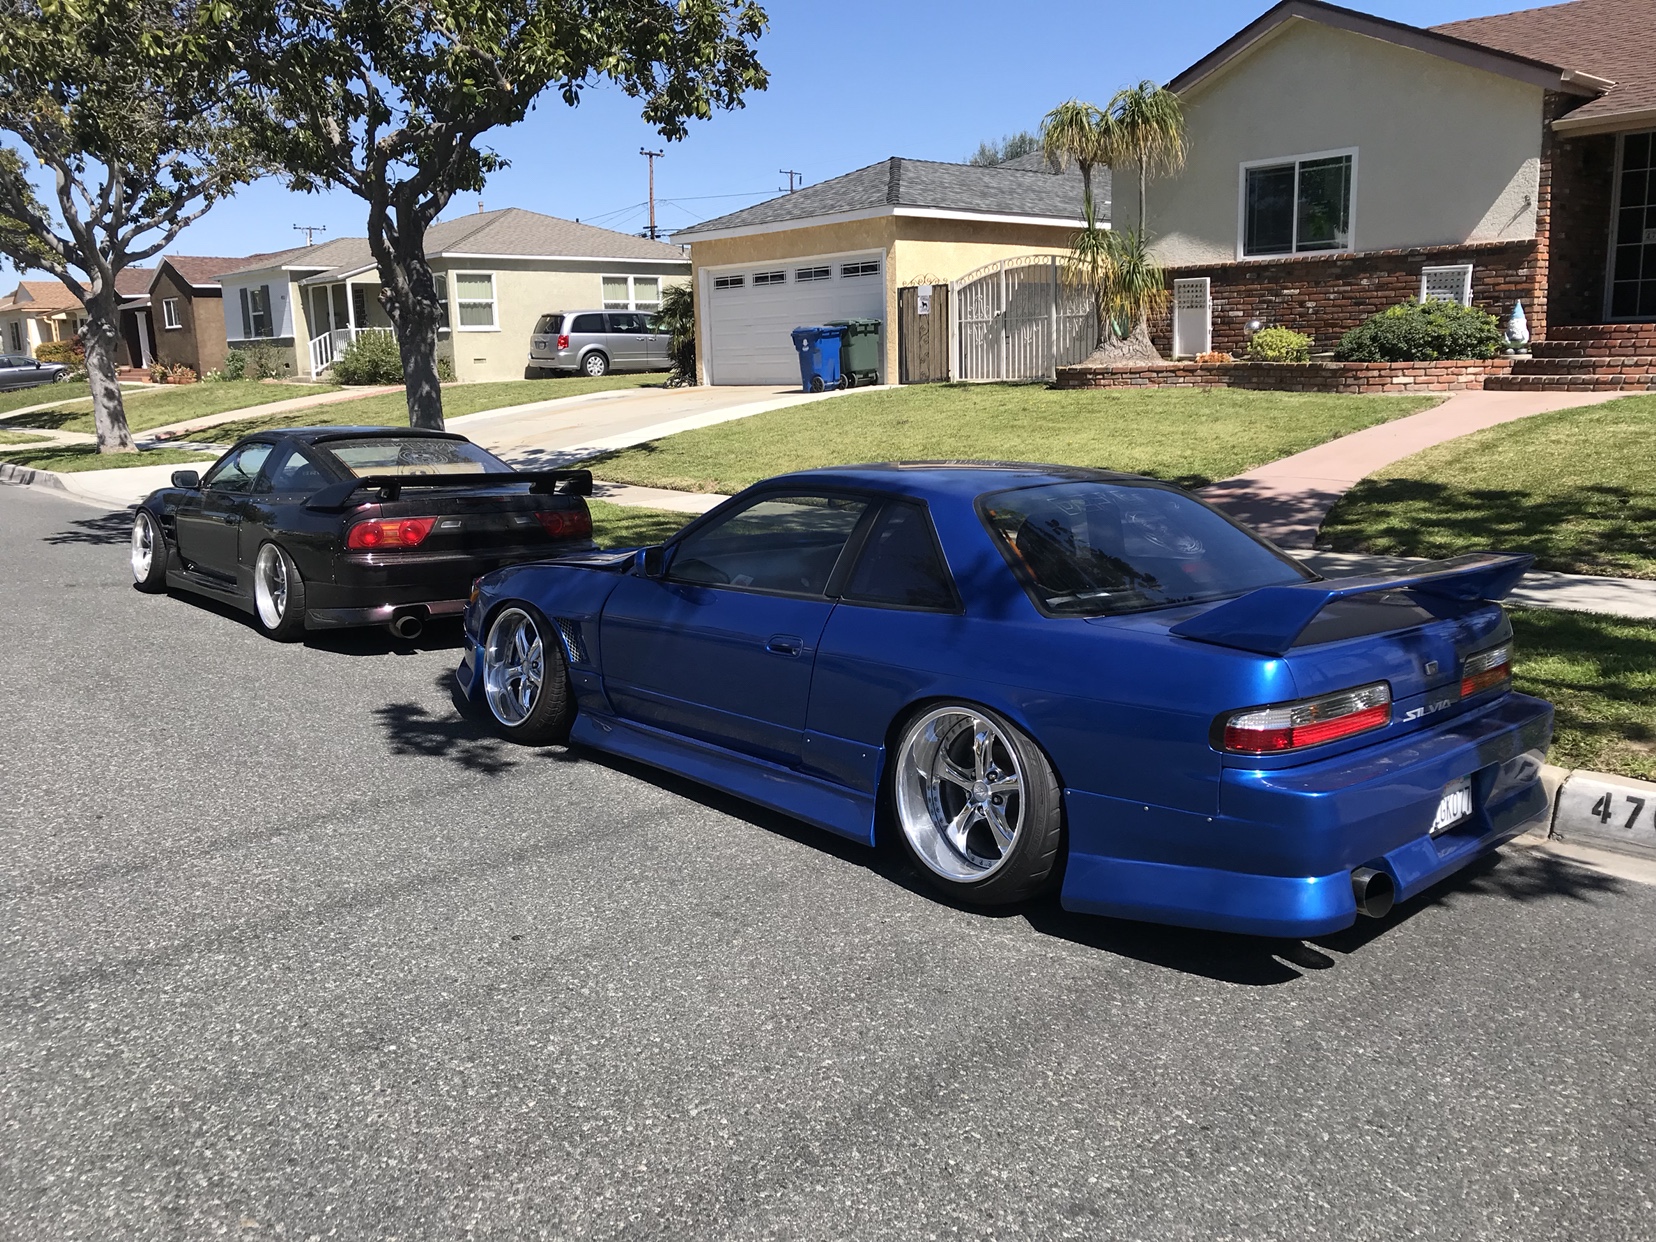 Sent from my iPhone using Tapatalk |
|
|

|
|
|
#51 |
|
Zilvia Junkie
 Join Date: Sep 2012
Location: LongBeach, CA
Age: 28
Posts: 371
Trader Rating: (4)
     Feedback Score: 4 reviews
|
Suprareal's S13 FB build (sr20det eventually)
I didn’t move on from the LS for any bad reason. It ran great, was giving me no problems, and the torque power band was amazing. It was sad seeing it go.
My main reason for moving on was to use the money and fund my growing business. 2nd - The 2JZ I’ve had for over a year now and have been getting great deals on everything I’ve bought for it so I’m not anywhere near as much money into it as I was the LS. 3rd- I’ve been wanting to fix my frame rails from a prior crash years ago you’ve seen much earlier in this thread The JZ is a JDM VVTI aristo motor with a non vvti intake manifold and throttle body with the IACV chopped off and welded up. This set up is basically a cleaner way of doing a drive by wire delete on it. It’s a stock motor just cleaned up nice. Fully oem resealed and cleaned. BC cam gear, CX manifold, Garrett GT35 1.04 (Probably too big may be changed later), emusa pulleys, modified non vvti clear cam cover, powdercoated almost everything, and AN everything ! I’m running the complete Collins kit with the 6 puck sprung disk 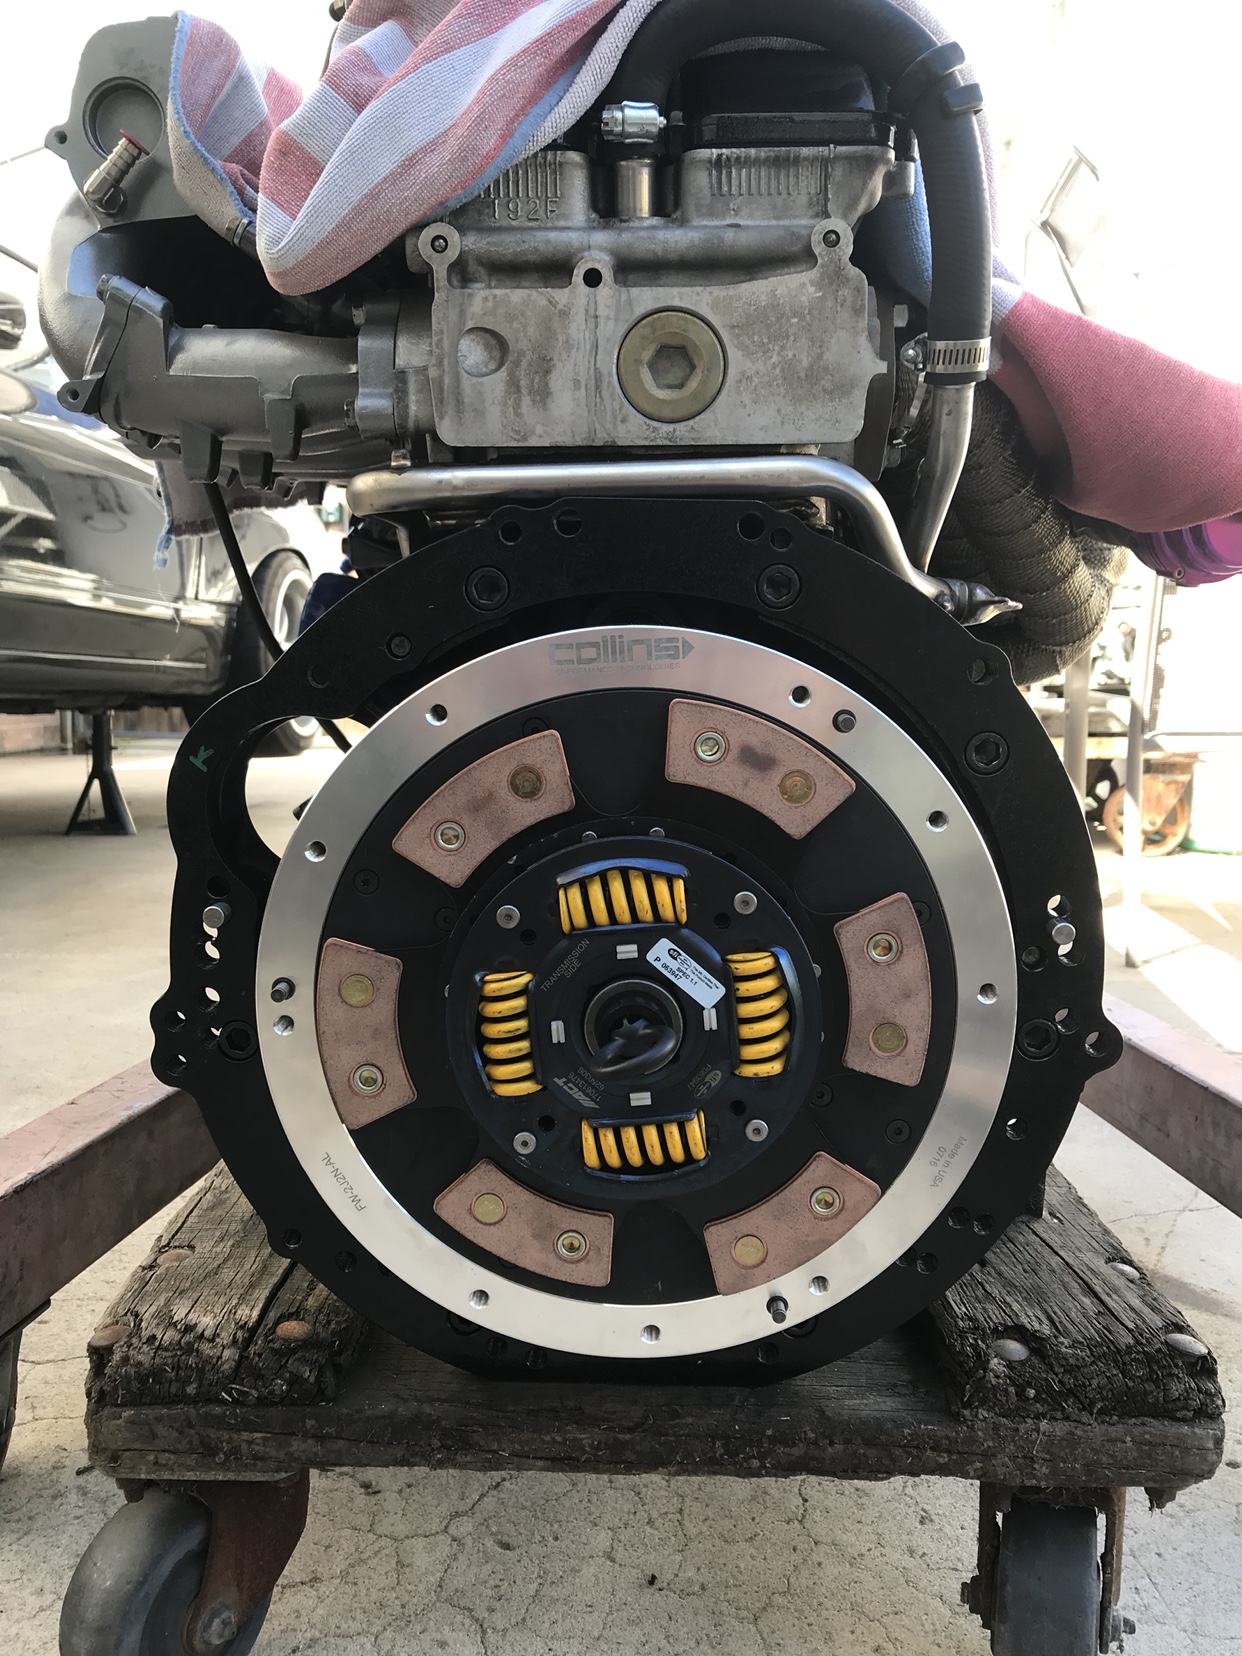 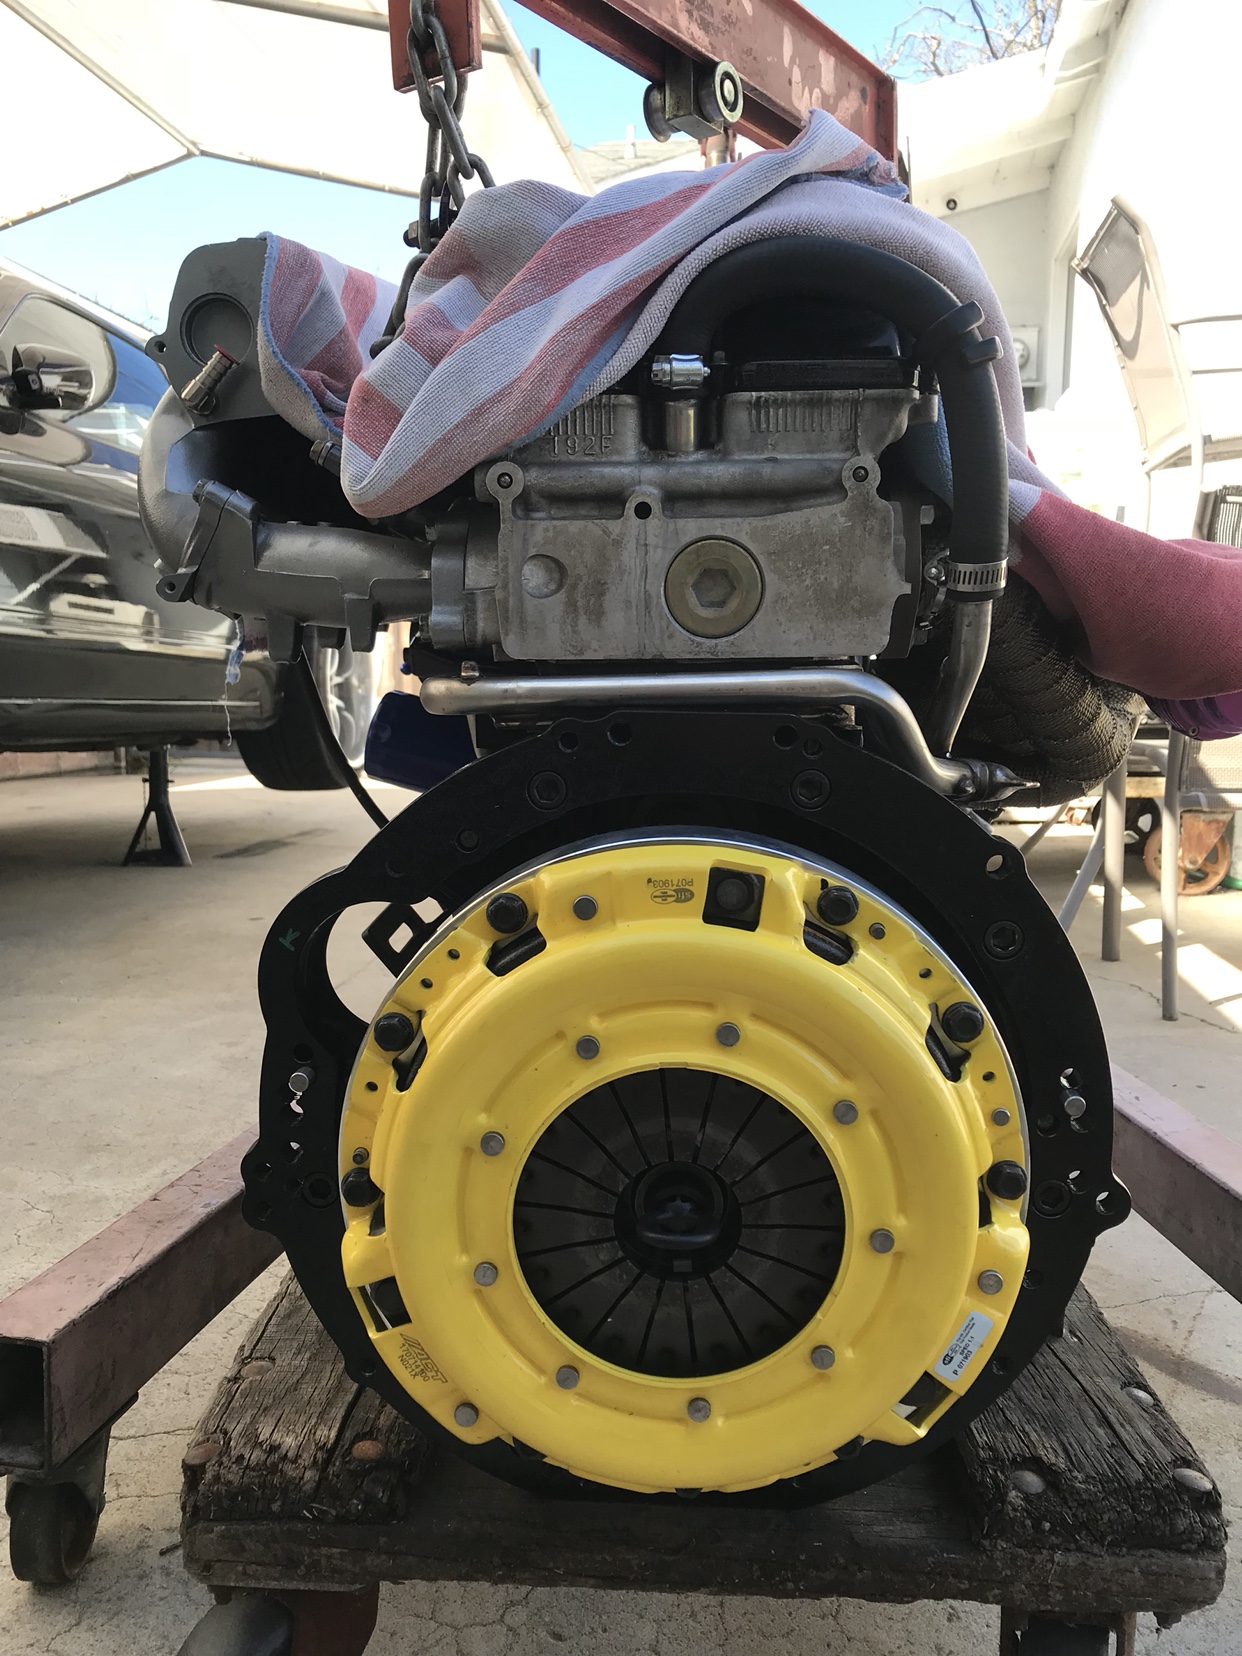 Here you’ll see the old damage my chassis had and a few test fits before getting on with the surgery 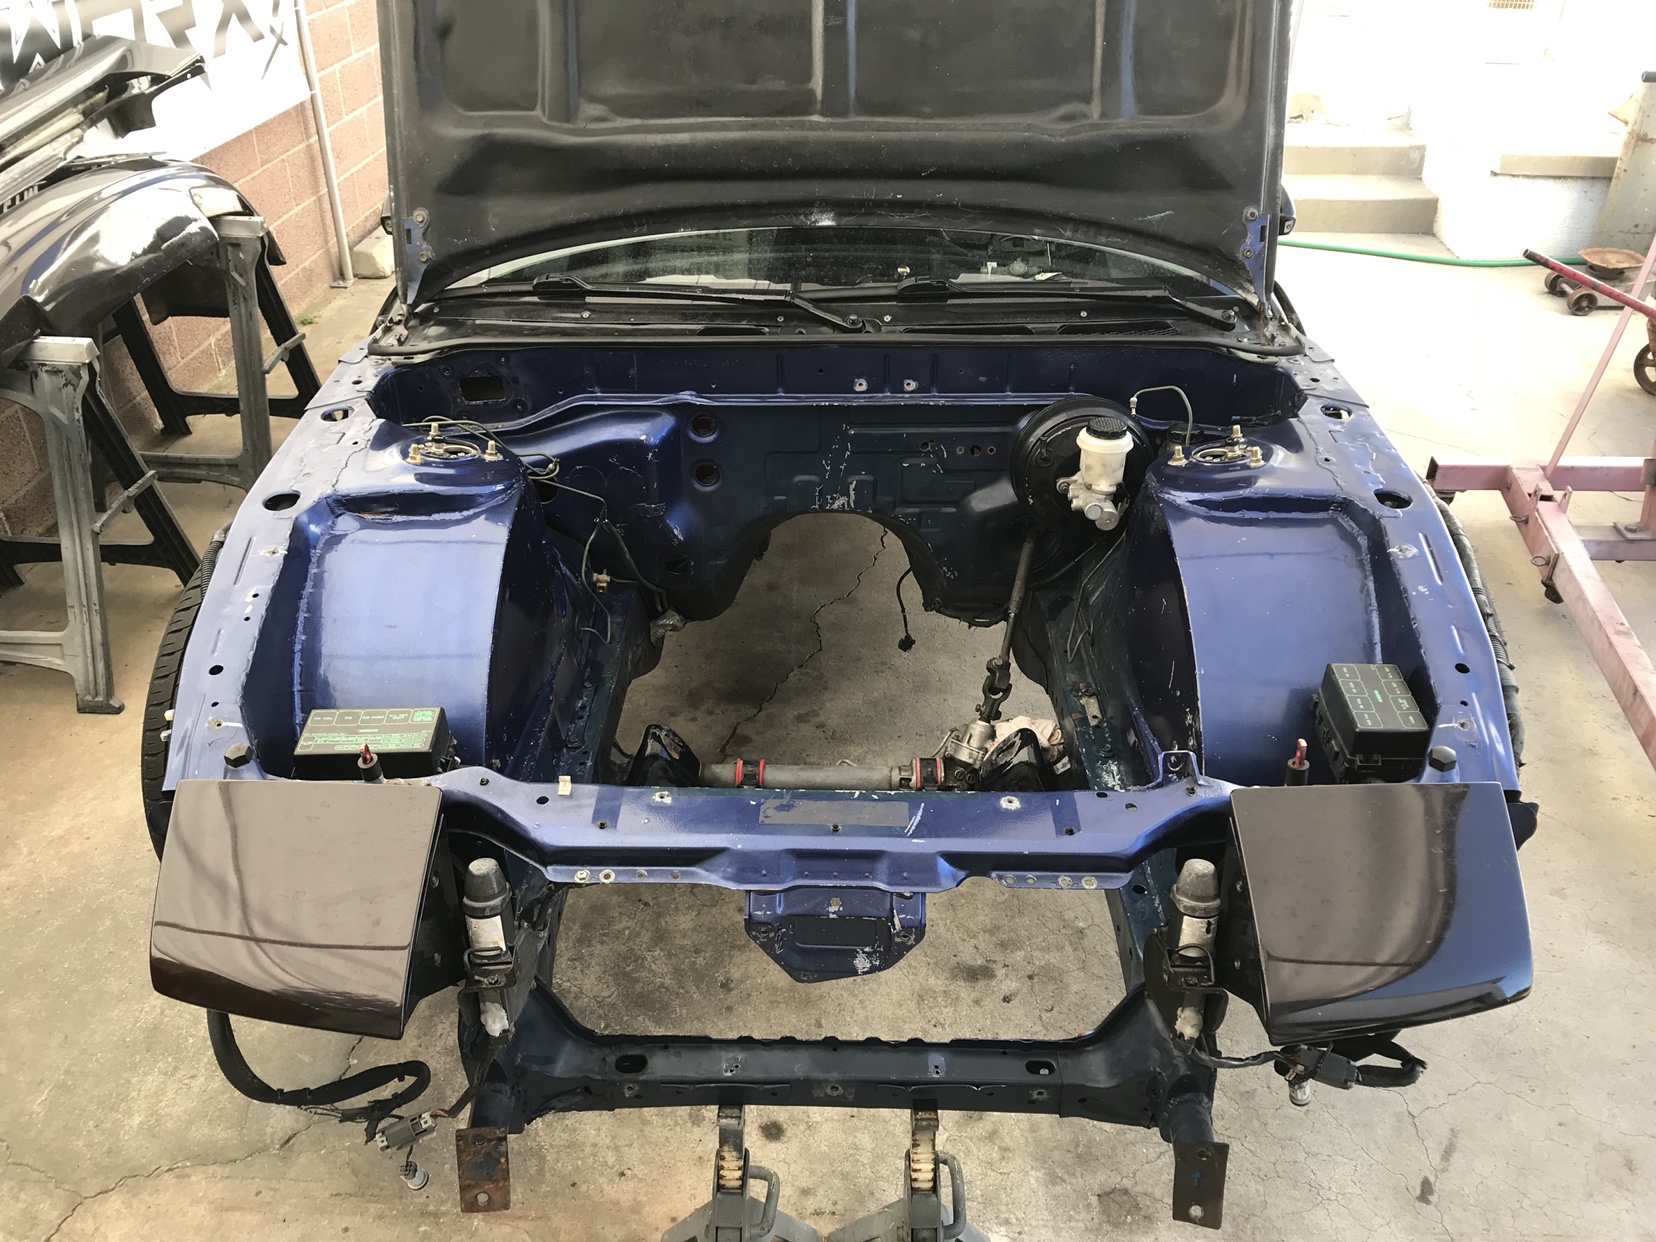 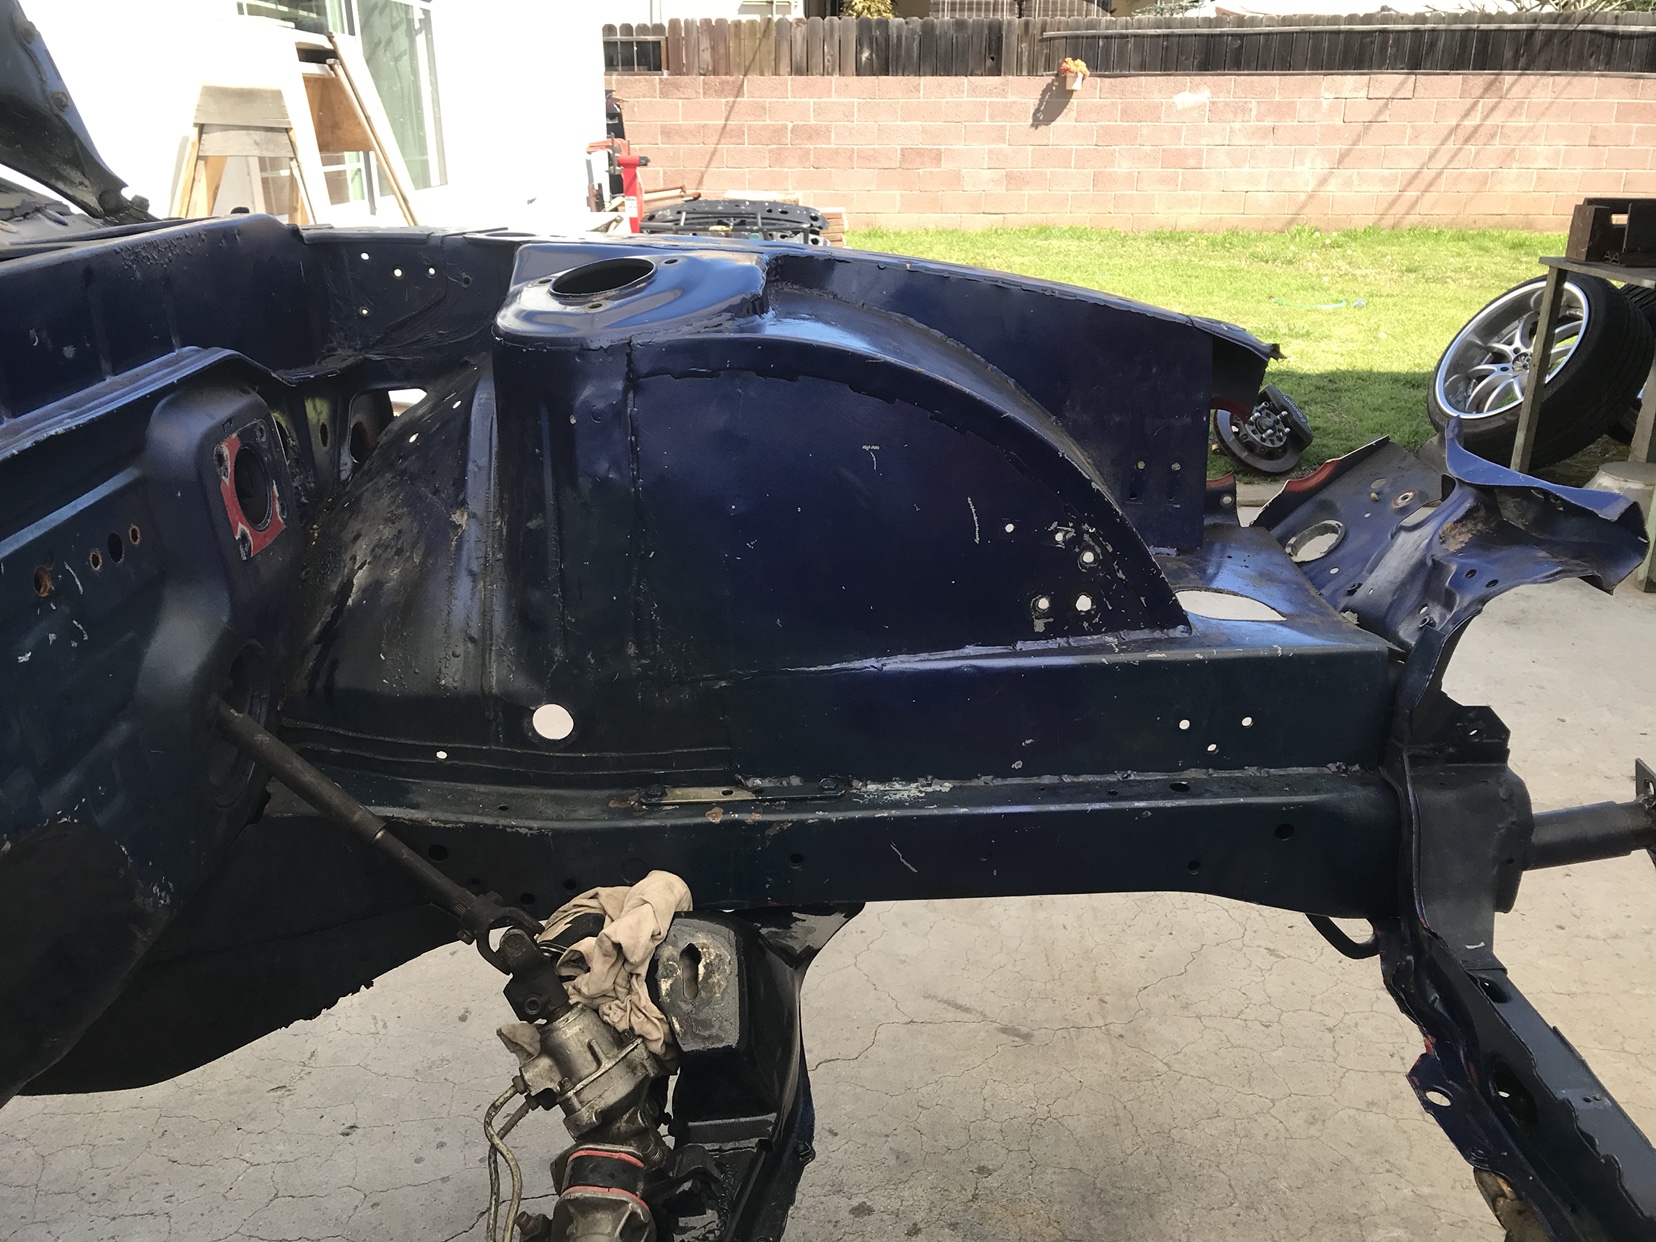 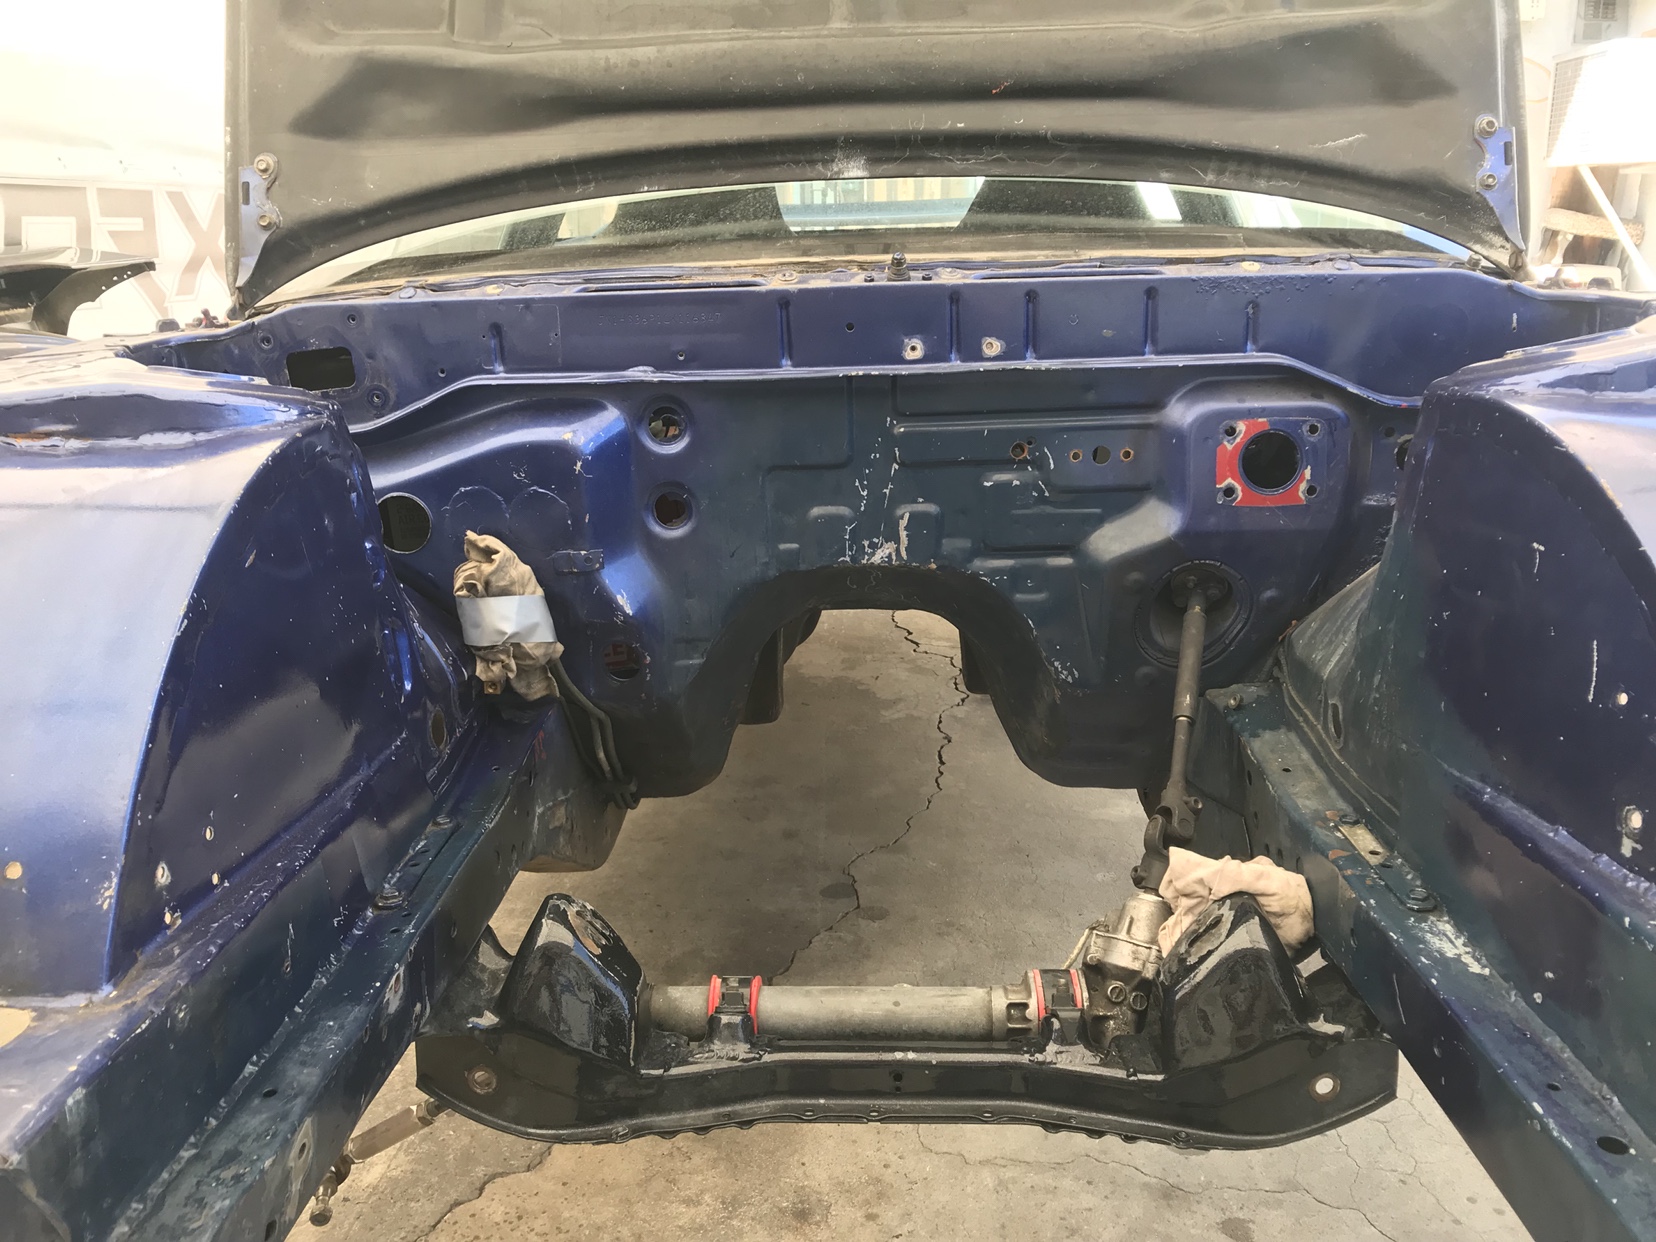 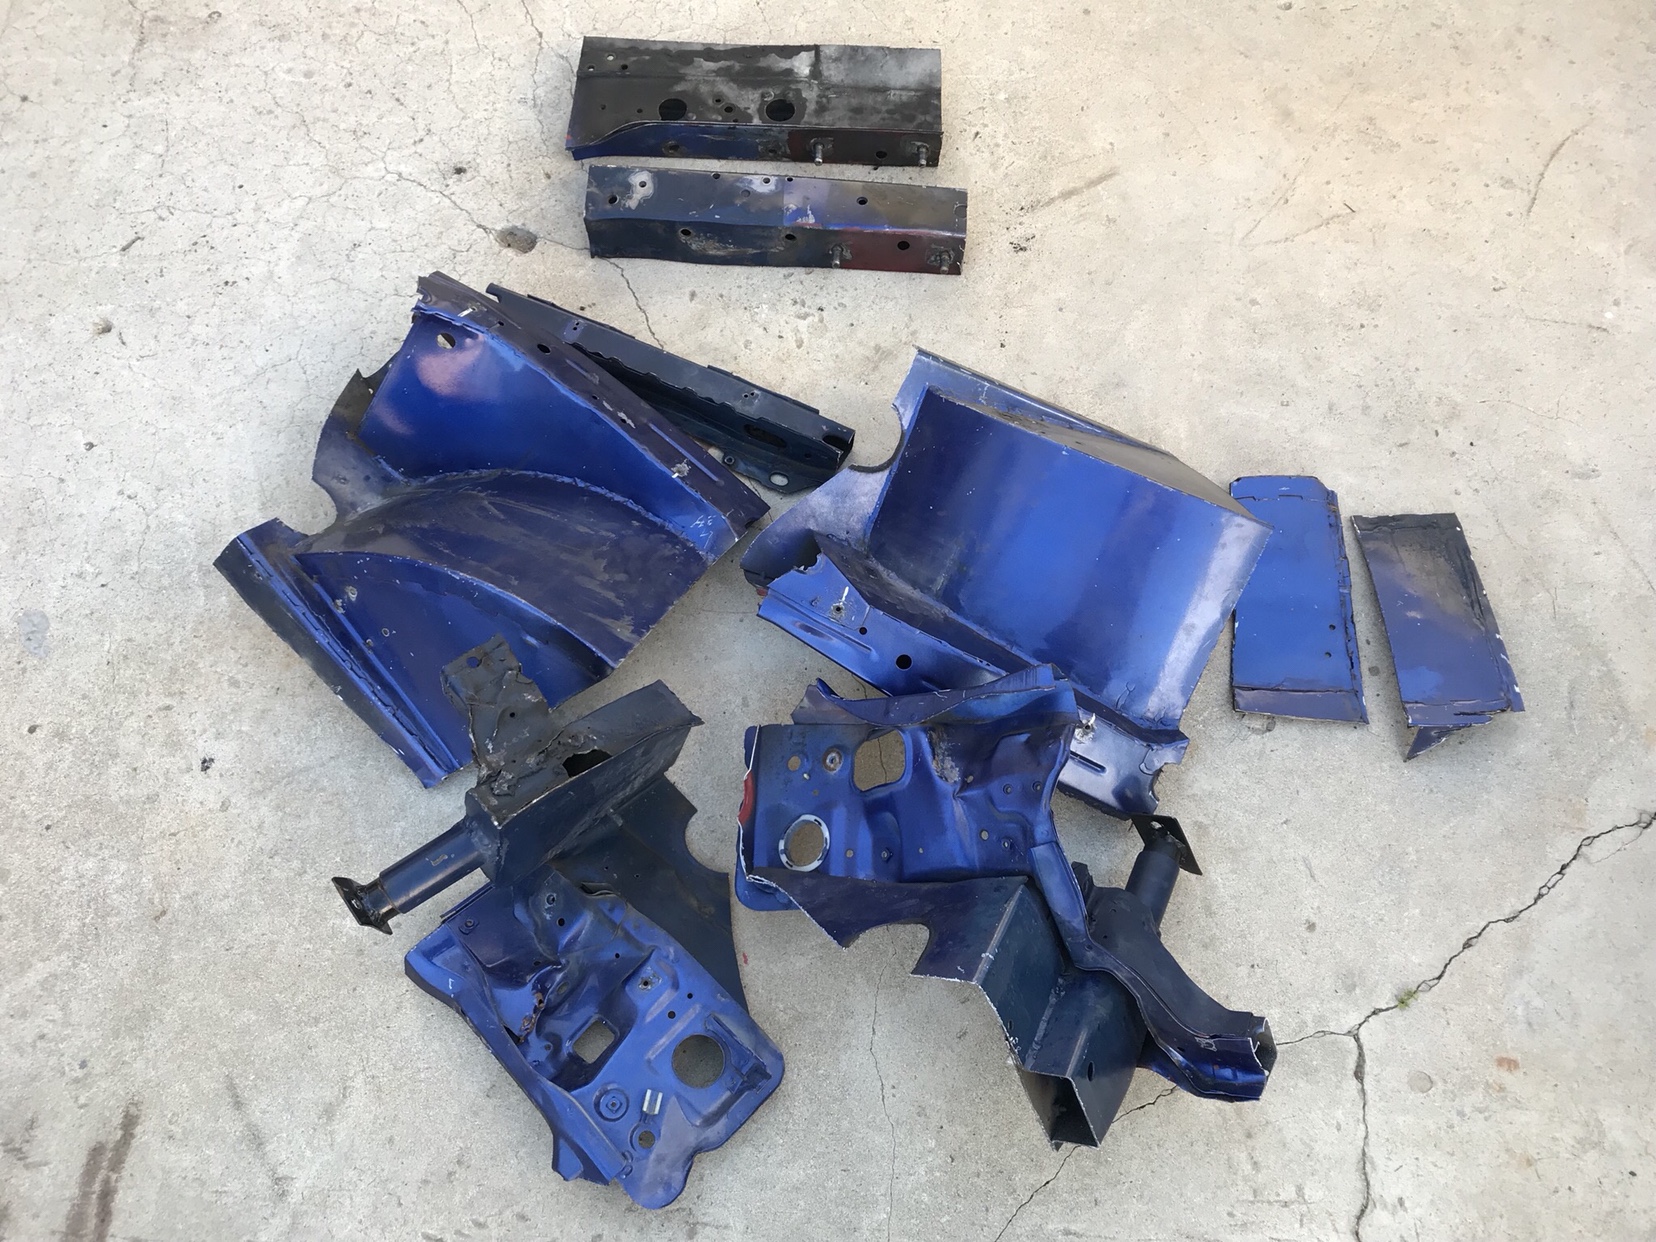 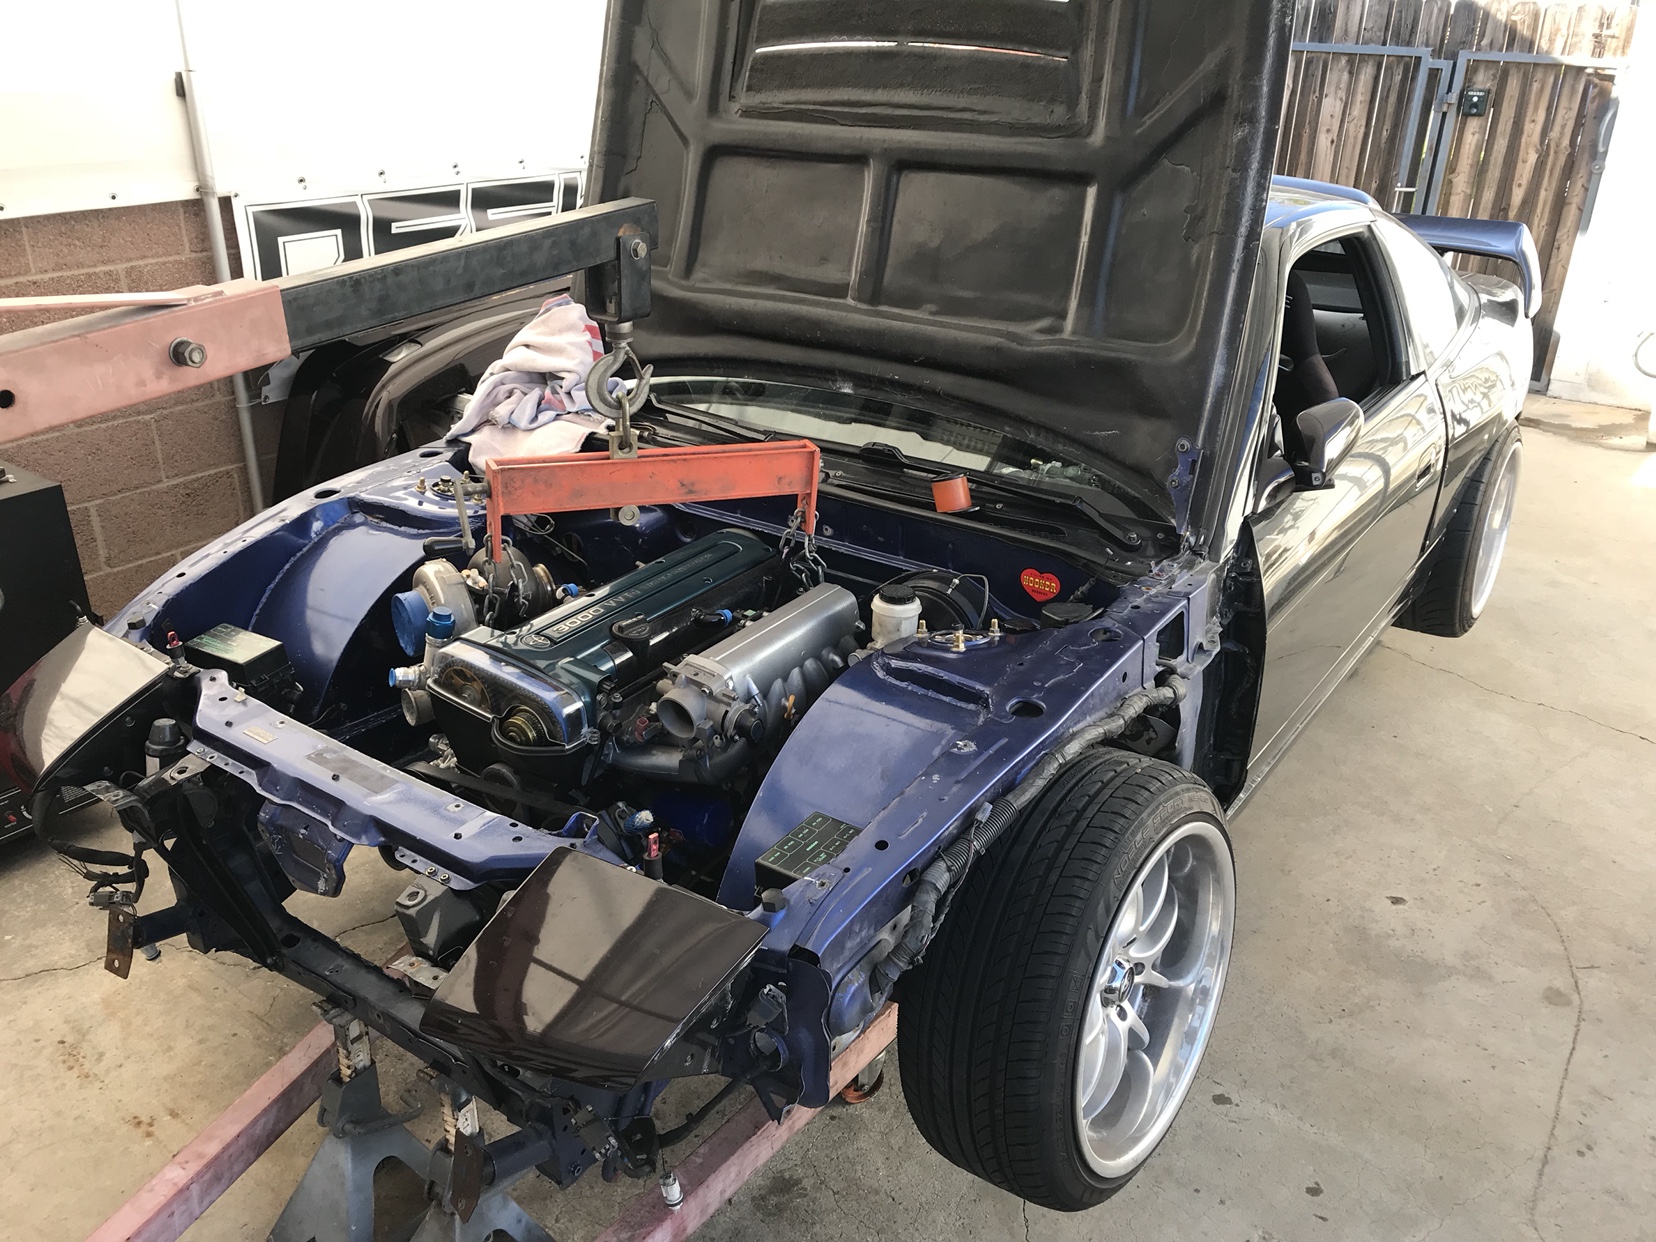 Sent from my iPhone using Tapatalk Last edited by Suprareal; 03-21-2019 at 12:38 AM.. |
|
|

|
|
|
#52 |
|
Zilvia Junkie
 Join Date: Sep 2012
Location: LongBeach, CA
Age: 28
Posts: 371
Trader Rating: (4)
     Feedback Score: 4 reviews
|
Suprareal's S13 FB build (sr20det eventually)
It just so happens we did the tub work 6 years ago down to the month as I start this new front end. Not planned!
If it were possible to replace the frame rails without chopping off the tubs completely I Probably would have done it. My frame rails were tweaked just until the very end of the rear subframe bolts making the job just that much harder since the subframe will need to be remounted. Lots of measurements ! I ended up chopping just a inch past the rear subframe bolt. The strut bar and lower bar are in place to keep anything from shifting. For the frame rails I’m using 1.5”x3” tubing. This will slide into the stock frame rails like a sleeve after shimming one side with 1/4” plate You’ll see here the 1/4” plate shim. This makes it possible to weld both sides of the frame rail thru the old in a spot weld fashion. I could have gotten away with using a 2”x3” tube and forced it thru but chose not to. The new frame rail sleeve in nearly all the way into the old frame rail while the shim plate is only 6” My thinking is if I do crash the car again it’ll create a weak spot that’ll bend again if not time for a new shell at that point. Tons of measuring, mocking up, clamping down, measuring, tacking, and measuring before fully welding down The holes for the subframe were drilled before welding everything in place to ensure proper fitment Sent from my iPhone using Tapatalk |
|
|

|
|
|
#53 |
|
Zilvia Junkie
 Join Date: Sep 2012
Location: LongBeach, CA
Age: 28
Posts: 371
Trader Rating: (4)
     Feedback Score: 4 reviews
|
The motorset will have to go in and out a bunch of times for mock-up and fitment purposes
You can here see the rails aren’t fully welded yet I plan on tig welding them. But you can see the spot weld idea thru the side view. Sent from my iPhone using Tapatalk |
|
|

|
|
|
#55 |
|
Zilvia Junkie
 Join Date: Sep 2012
Location: LongBeach, CA
Age: 28
Posts: 371
Trader Rating: (4)
     Feedback Score: 4 reviews
|
I can use the practice with tig welding in hard to get spots so I’m tigging any and everything I can. Not to mention it looks way better
Since I cut the tubs out the strut towers didn’t have much surface to work with. I tossed around a few ideas but this was the best finished look I came up. It’s 10 gauge steel that I put a bend on all the way around and folded/welded up into the underside Sent from my iPhone using Tapatalk |
|
|

|
|
|
#56 |
|
Zilvia Junkie
 Join Date: Sep 2012
Location: LongBeach, CA
Age: 28
Posts: 371
Trader Rating: (4)
     Feedback Score: 4 reviews
|
It’s hard to come up with an original tube front design with the amount of them that are being done now
In my opinion the pop up headlight tube fronts are the hardest due to the way the lights mount in so many places. I could have came up with some over the top crazy design with all sorts of bends and make the car look like a piece of art but I’m choosing not to and that’s because this is now a full track car. Everything I design and build for this car now backs the idea that it can be replaced easily if damaged, ease of access, and just have a good work flow in general. With all of that being said I still wanted to prove to myself I can do something different and not keep it too basic. I will be running a V Mounted intercooler/radiator set up so the main tubes needed to allow clearance for them. This is the beginning to a design I think will almost fallow the stock lines 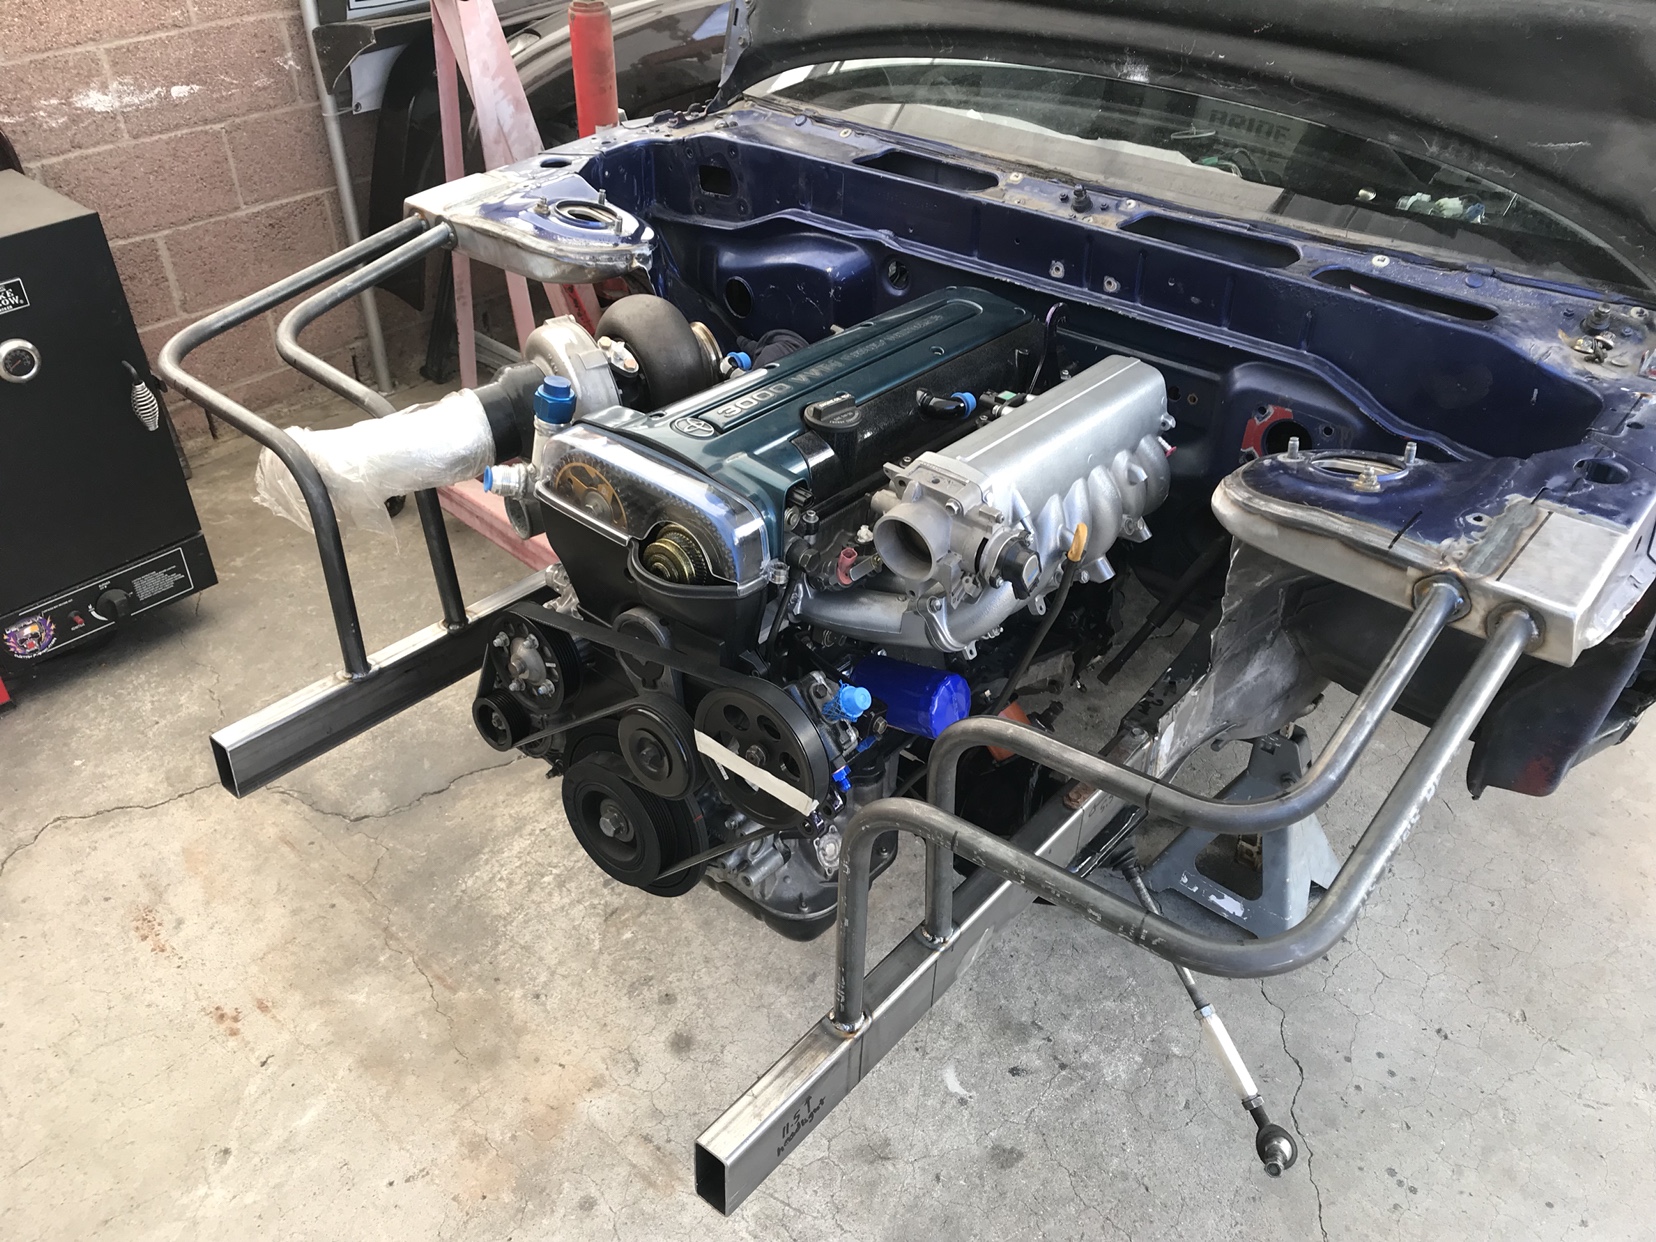 There will be gusset work with dimple dies and bead rolling between the two bars creating them almost into one bar section. Originally I wanted to tie in new tubs to this design. But after seeing how reachable the engine is to work on without them I may stick to no tubs. Sent from my iPhone using Tapatalk |
|
|

|
|
|
#57 |
|
Leaky Injector
Join Date: Nov 2018
Location: Winnipeg, Manitoba, Canada
Posts: 55
Trader Rating: (0)
 Feedback Score: 0 reviews
|
never seen that design before. looks good though for lots of room to tackle almost anything! Assuming that this is still going to be driven on the streets do you plan on putting some sort of fender liner in there?
|
|
|

|
|
|
#58 | |
|
Zilvia Junkie
 Join Date: Sep 2012
Location: LongBeach, CA
Age: 28
Posts: 371
Trader Rating: (4)
     Feedback Score: 4 reviews
|
Quote:
Originally I planned to but I’m most likely not going to add any paneling down the sides. We’ve had good luck with open fender wells on other track cars even at the dirtiest tracks. My car sees the streets less and less every year, I’ve probly taken it out 5-10 times in the last year. Sent from my iPhone using Tapatalk |
|
|
|

|
 |
| Bookmarks |
| Thread Tools | |
| Display Modes | |
|
|