
 |
|
|||||||
| Home | Rules & Guidelines | Register | Member Rides | FAQ | Members List | Social Groups | Calendar | Mark Forums Read |
| Builds (and builds only) Got a build thread? It goes here, build threads anywhere else on the forum will be locked and never moved. |
 |
|
|
Thread Tools | Display Modes |
|
|
#151 |
|
Post Whore!
 Join Date: Oct 2007
Location: Las Vegas
Age: 36
Posts: 4,590
Trader Rating: (53)
           Feedback Score: 53 reviews
|
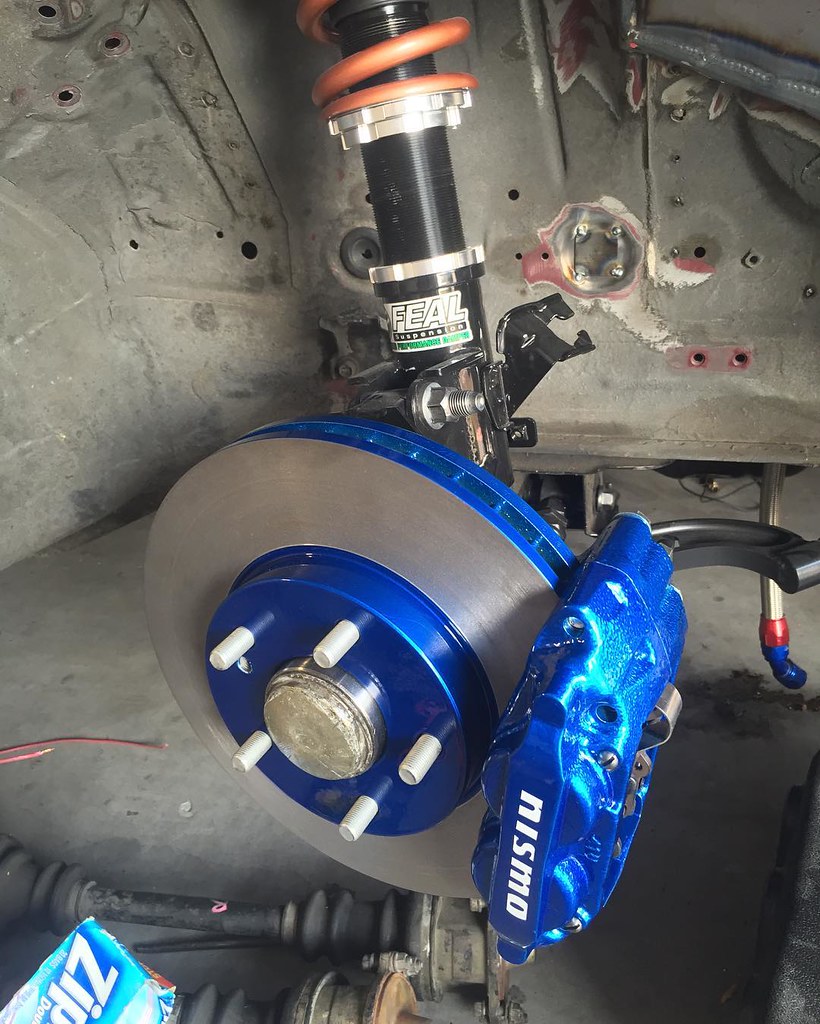
Put in a little work and got the rotors and calipers bolted up.
 Bought some new OEM coilpacks and decided to throw some jimmies on them to hopefully prevent cracking down the road. 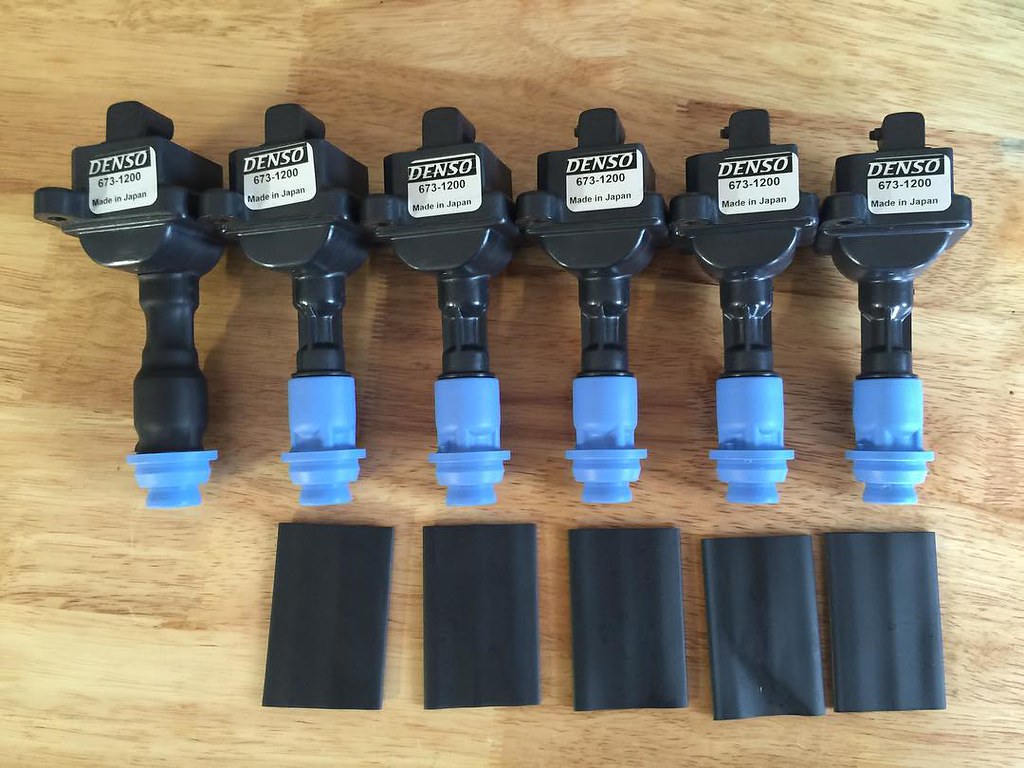 I had to tear both rear knuckle assemblies apart so that I could trim the dust shield to fit the rear calipers. Grinding off sharp things is entertaining. I decided to trim off the entire dust shield and keep only the parts needed for the assembly and operation of the e-brake. I don't want a big ass hydro brake handle in my face, so this is the route that I will be going for now. I figured I may as well trim the plates for the dual calipers as well and paint then now in case I end up changing my mind down the road. After grinding the backing plates, I hit them with some spare silver engine enamel that I had laying around. 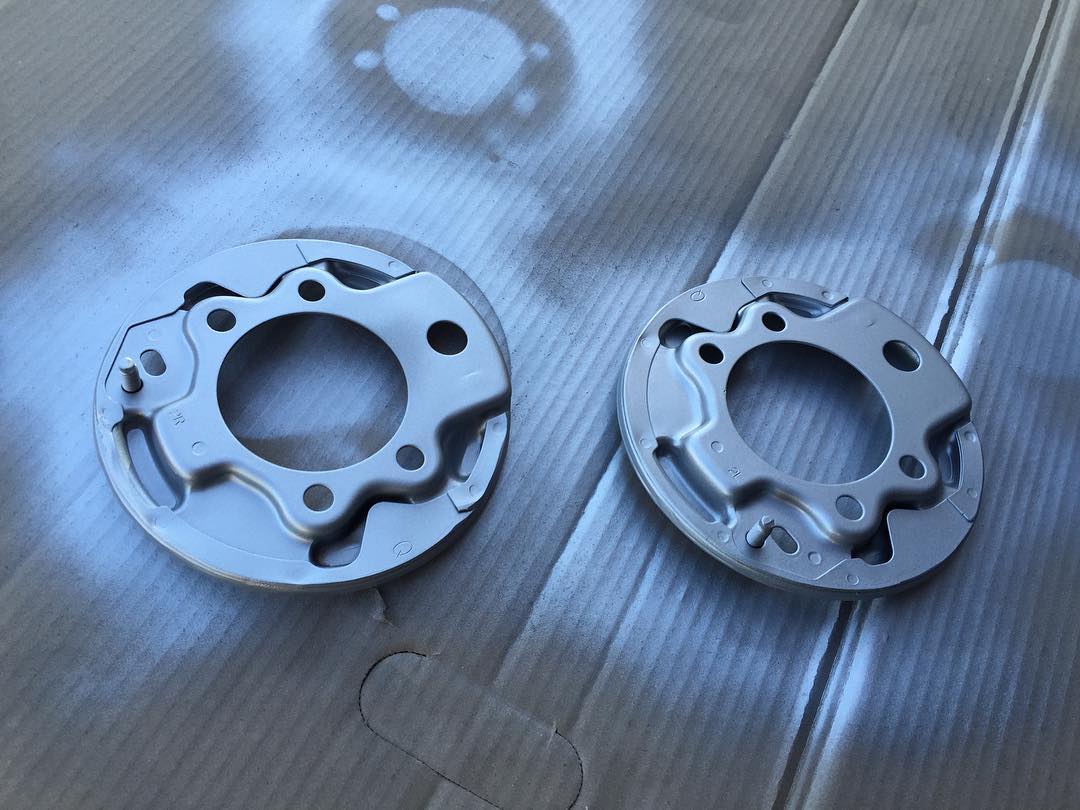
__________________
|
|
|

|
| Sponsored Links |
|
|
#152 |
|
Post Whore!
 Join Date: Oct 2007
Location: Las Vegas
Age: 36
Posts: 4,590
Trader Rating: (53)
           Feedback Score: 53 reviews
|
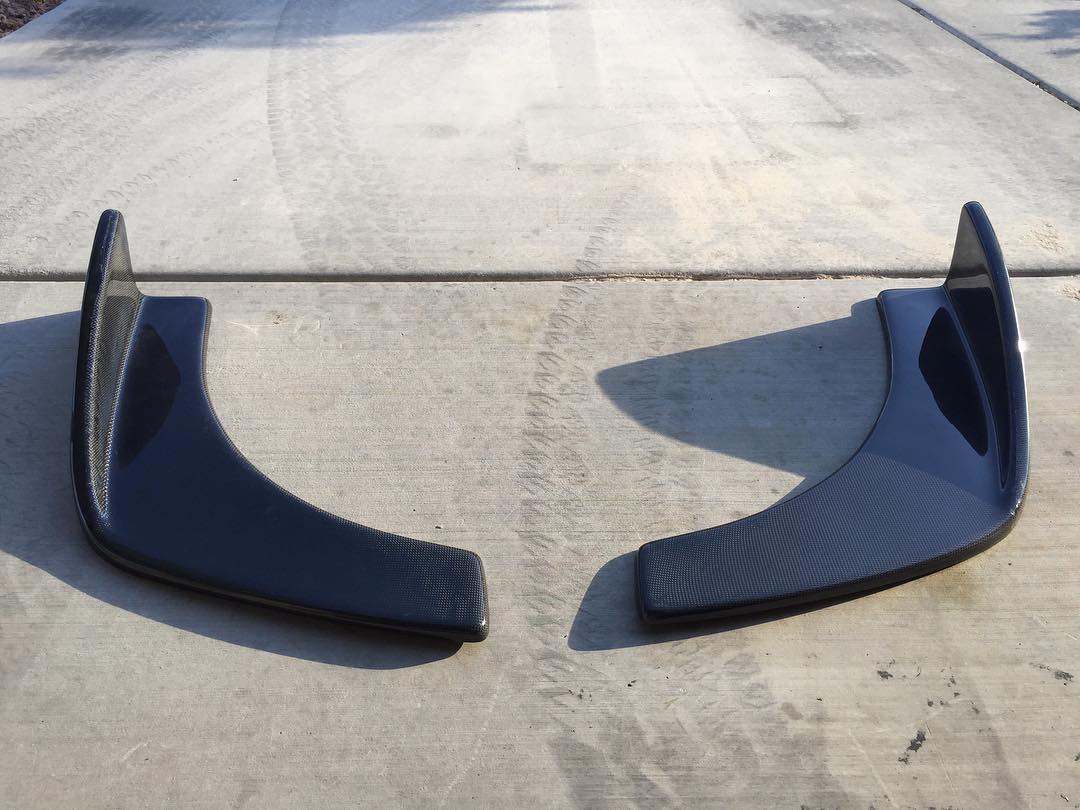
Picked up some Origin carbonium alloy canards to be used at a later date.
 ShaftMasters delivered with the quickness! Very solid product, I can't wait to get it into the car. Unbeatable prices on aluminum driveshafts, would highly recommend. 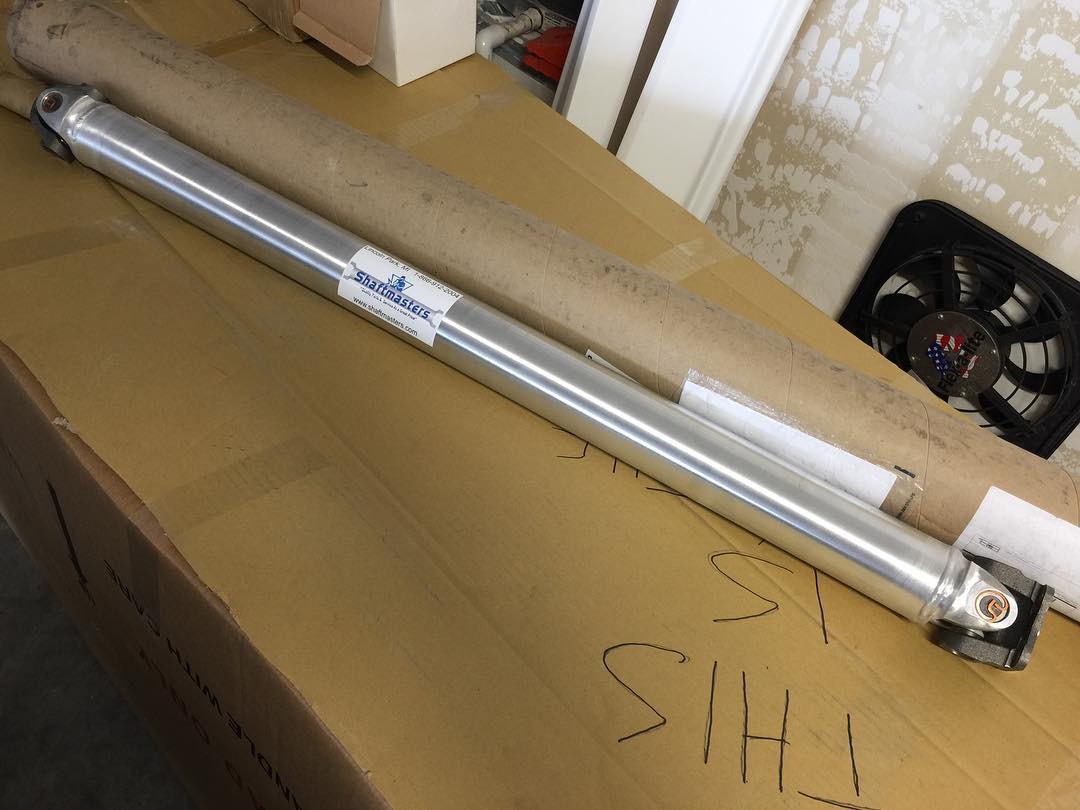 My IG Post: "@originlab PLEASE do me a solid and make some zenki type 3 front fenders! The D-max 30mm's aren't cutting it and I accidentally Tuerck'd my shit. It's new lips or new fenders...your move." Oddly enough, not too long after this they had some Type 3 Zenki fenders. 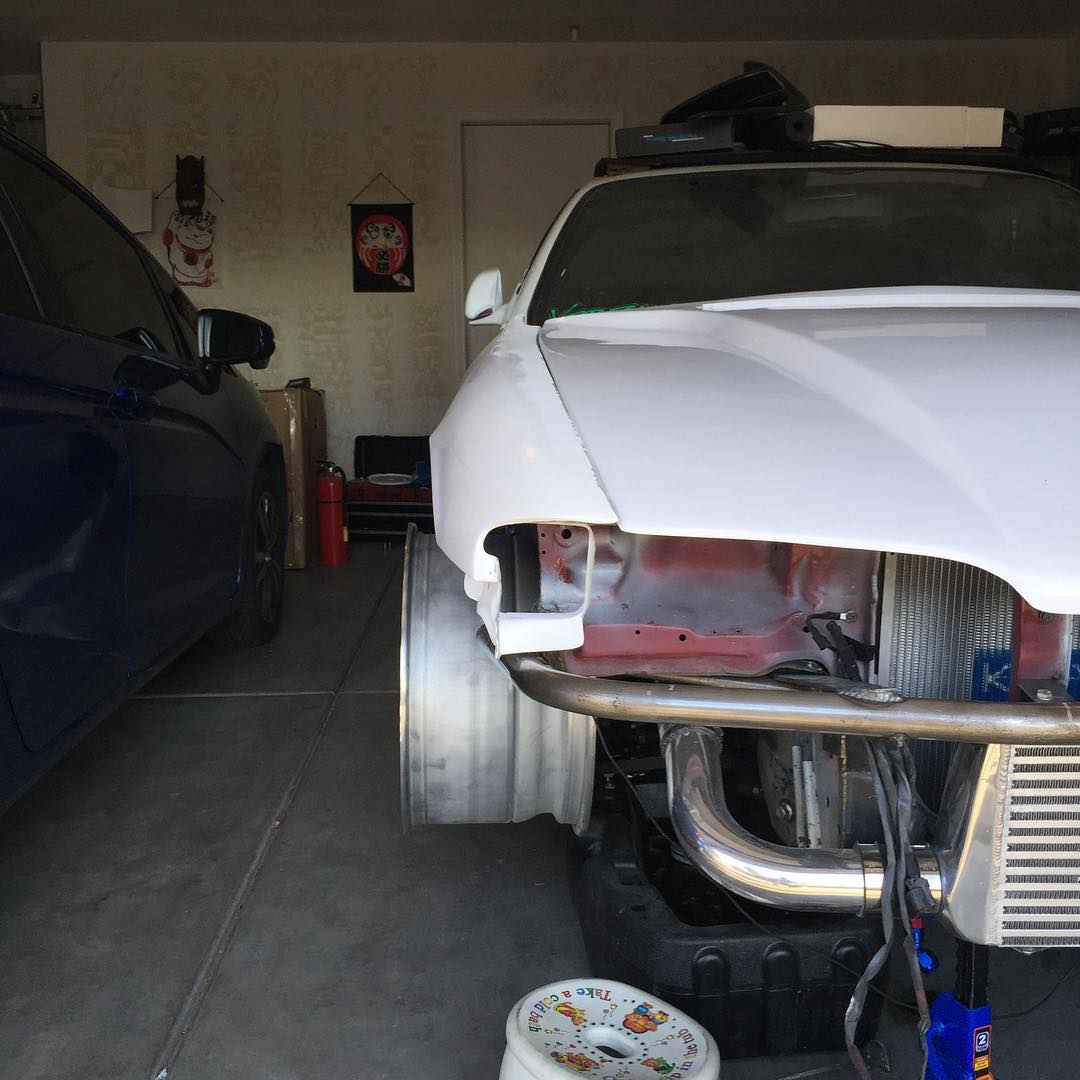 Derp mode 9000 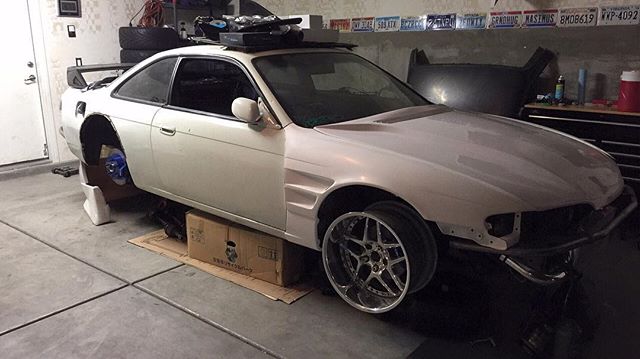 On days like this, I wish I could just have someone finish my car for me, but I know I'd go back and redo everything anyway. Such is the life of a picky OCD dickhead. 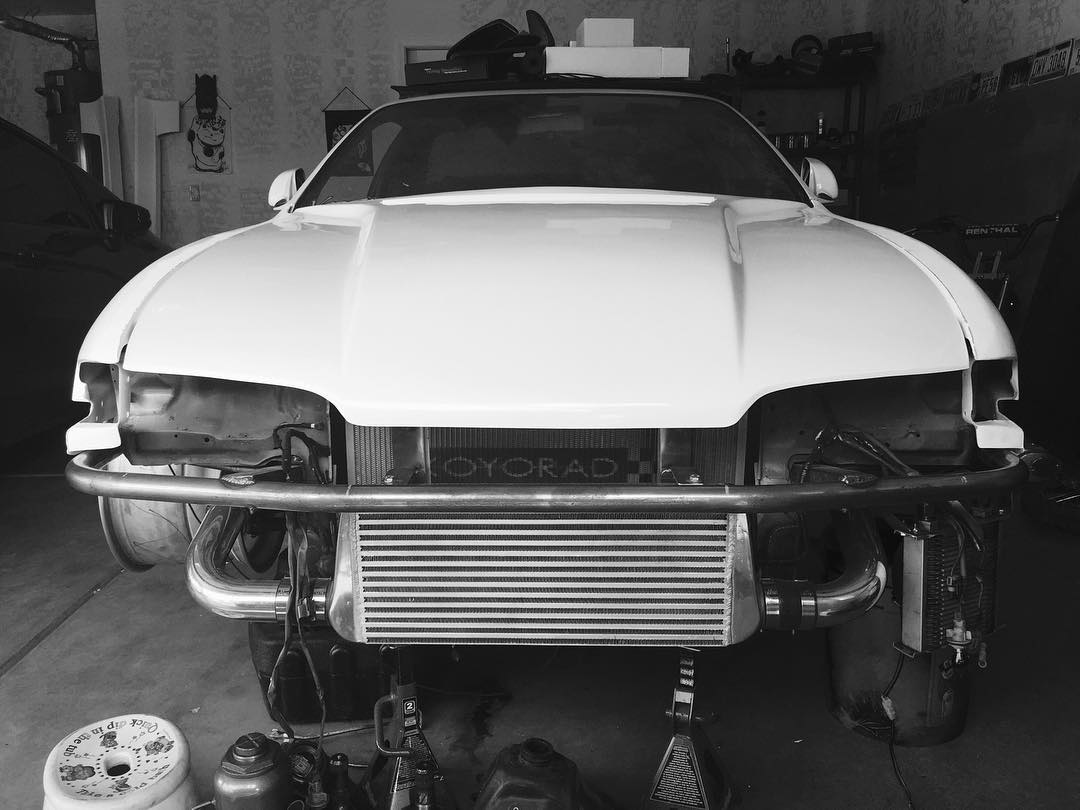
__________________
|
|
|

|
|
|
#153 |
|
Post Whore!
 Join Date: Oct 2007
Location: Las Vegas
Age: 36
Posts: 4,590
Trader Rating: (53)
           Feedback Score: 53 reviews
|
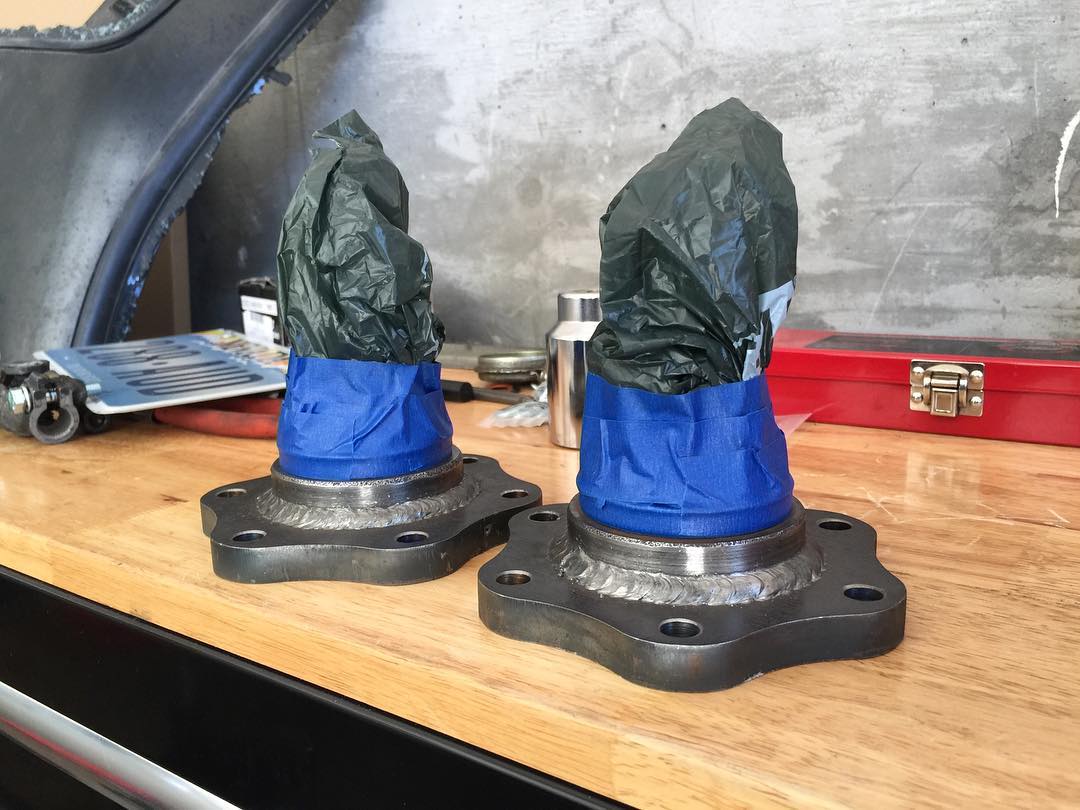
Apparently dog shit baggies make great masking material. Sorry to the 3 or so fans that follow this build, I've been MIA "adulting" and being cold. I'm hoping to get back on this thing here and have it done before spring.
 Getting ready to trim some more unneeded fat. The car is an SE so it had the crappy factory amplifiers that inevitably failed and had to be bypassed. The amp was in the back of the car so it has around twice the amount of speaker wire than the base model. I'll be ripping out anything stock related to the stereo and installing anything I need myself. 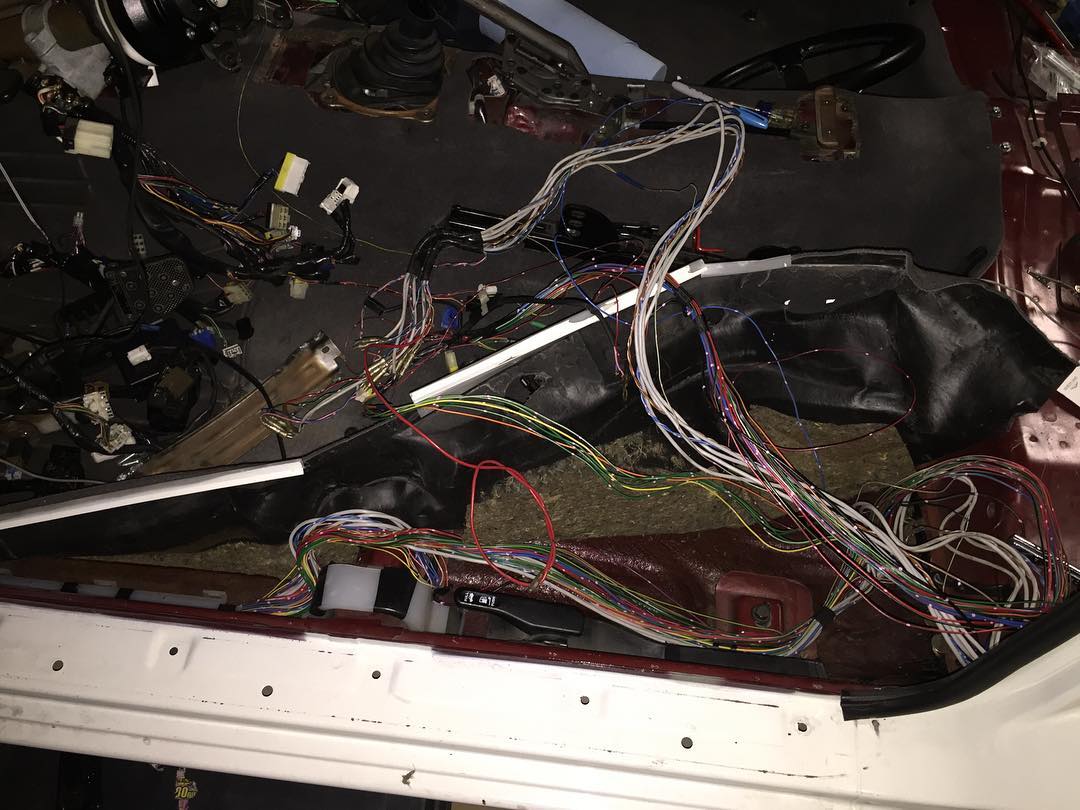 One of the best ways to spend time with your children is to get them involved in your hobbies. We picked up some wire cutters and got down to business. 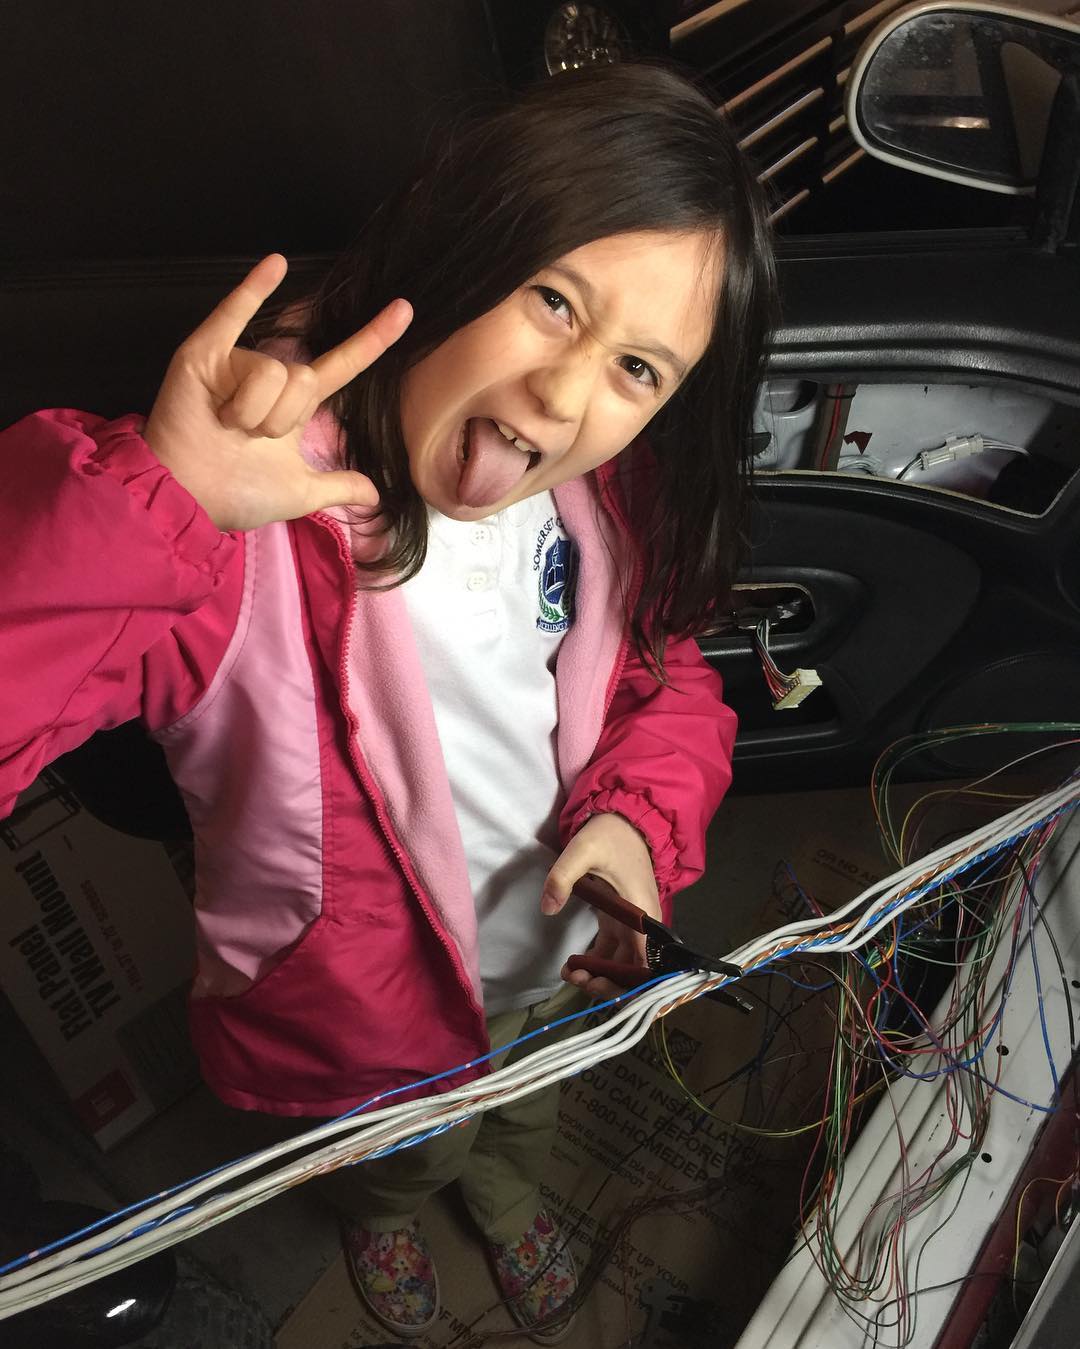 Worked a bit more on the wiring tornado. It looks like a huge mess, but I have it mostly under control. I got tired of working on the wiring and decided to clean out the interior by removing the nasty carpet and vacuuming up as much broken plastic, dust, and other crap as I could. I'm trying to put in at least 1 hour after work per day and get this thing done. Wish me luck! 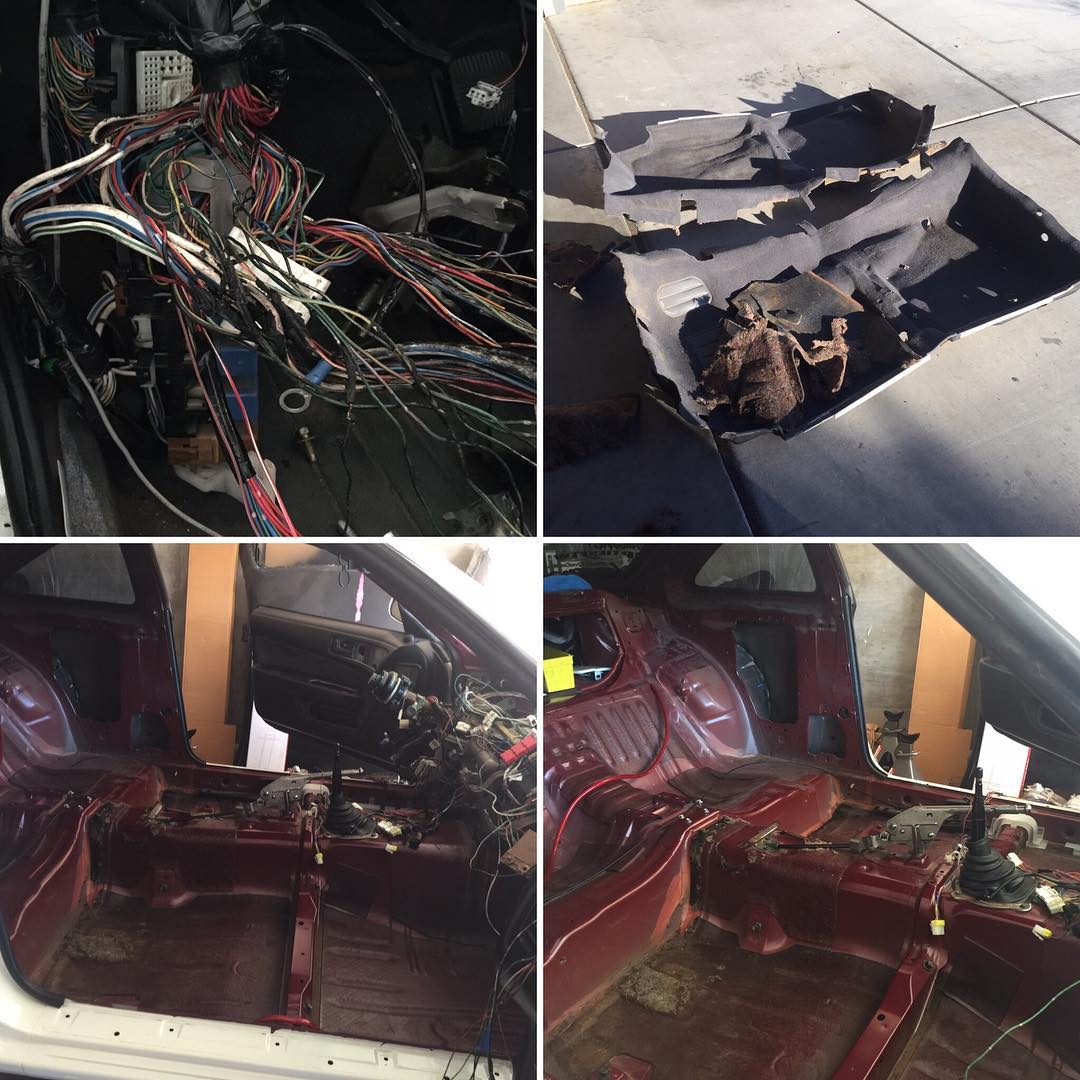 This was the main haul from a couple of days ago. Still a lot of trimming and other exciting wiring things to be done. 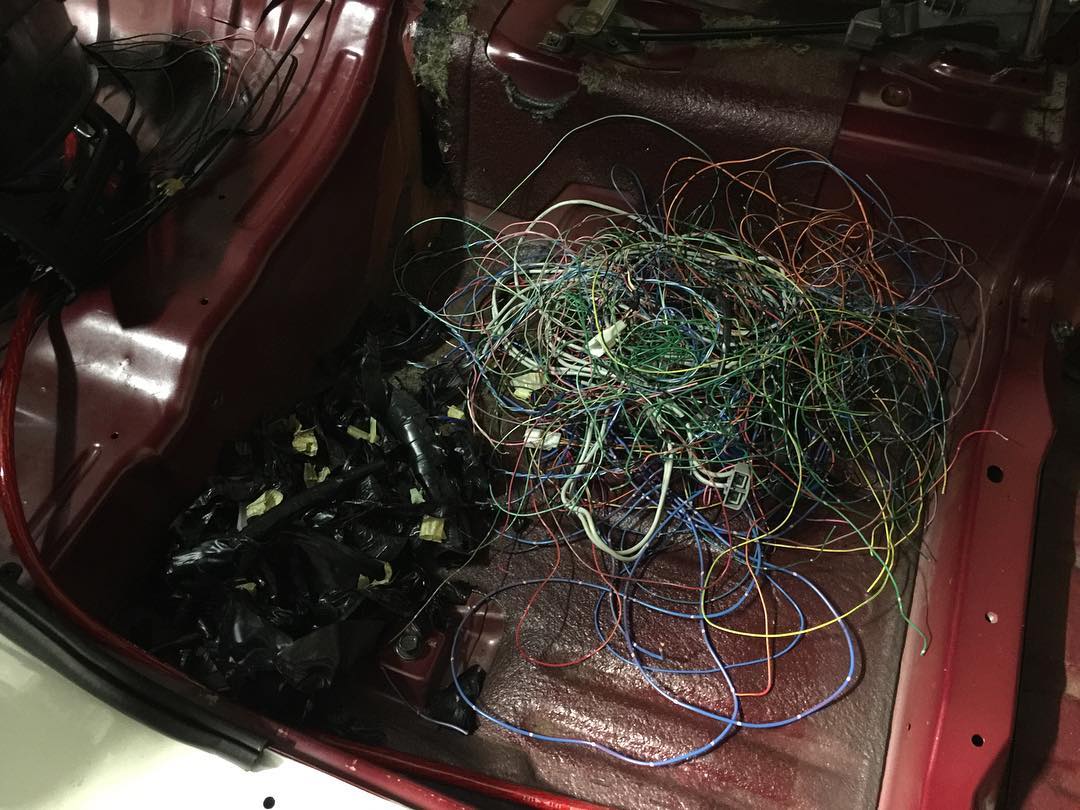 Never really de-pinned any automotive connectors (properly...), so I took this opportunity to sit down and figure it out. If you have a bit of experience with wiring and connectors it isn't all that hard to figure out. After the small connectors I got to move on to the SMJs; there is a lot of de-pinning to be done there. It looks a lot cleaner than it did though. More wiring work to come soon. 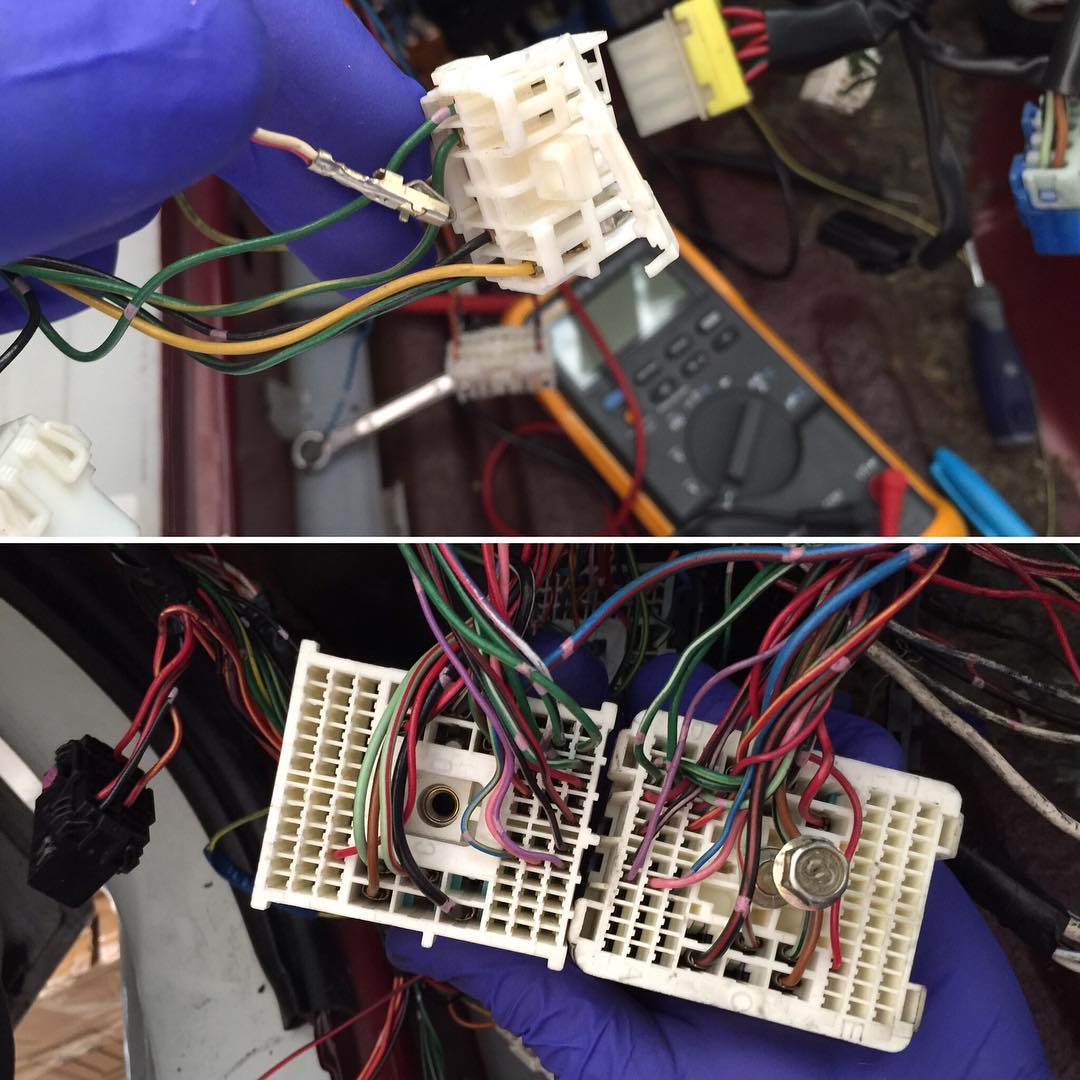
__________________
|
|
|

|
|
|
#155 |
|
Post Whore!
 Join Date: Oct 2007
Location: Las Vegas
Age: 36
Posts: 4,590
Trader Rating: (53)
           Feedback Score: 53 reviews
|
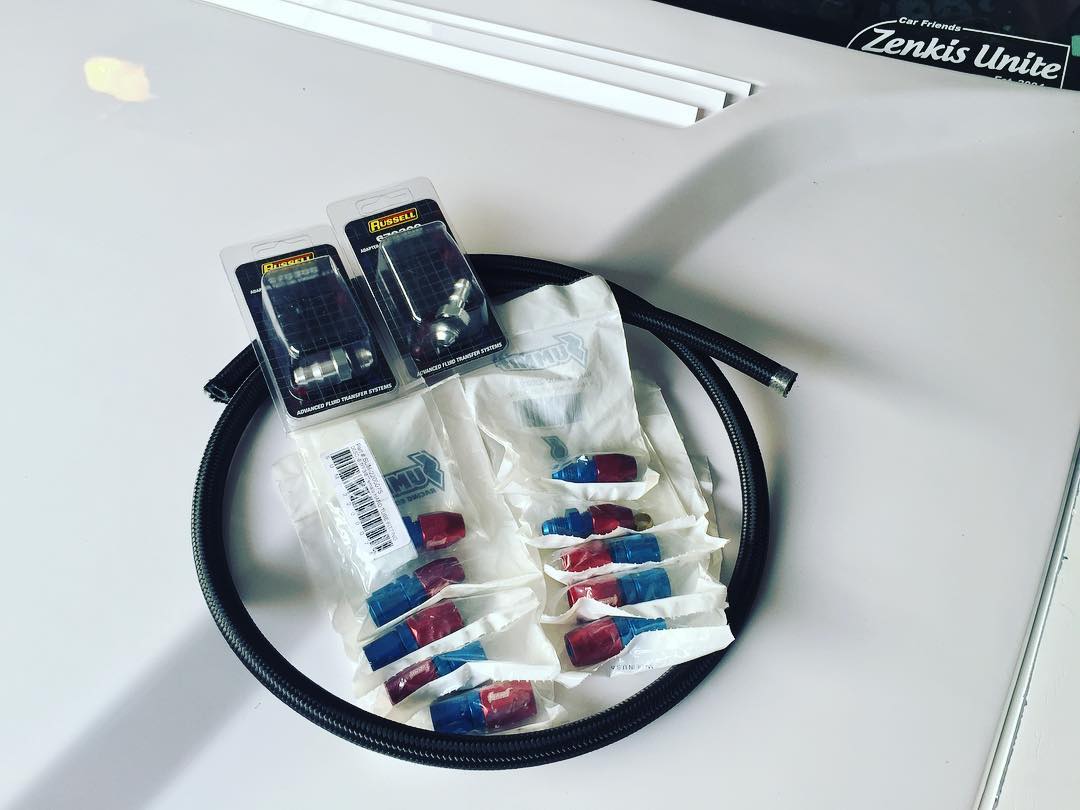
Idiot moment of the century... I had been putting off finishing my fuel system because I needed to order fittings, lines, and figure out the routing. Well apparently I already had this thought once before and ordered everything I needed already; it was in my "new parts" drawer. Good on me but dumb on me at the same time. Maybe I can actually start this thing sometime this year.
 Time to add some oil and throw this thing in the car. 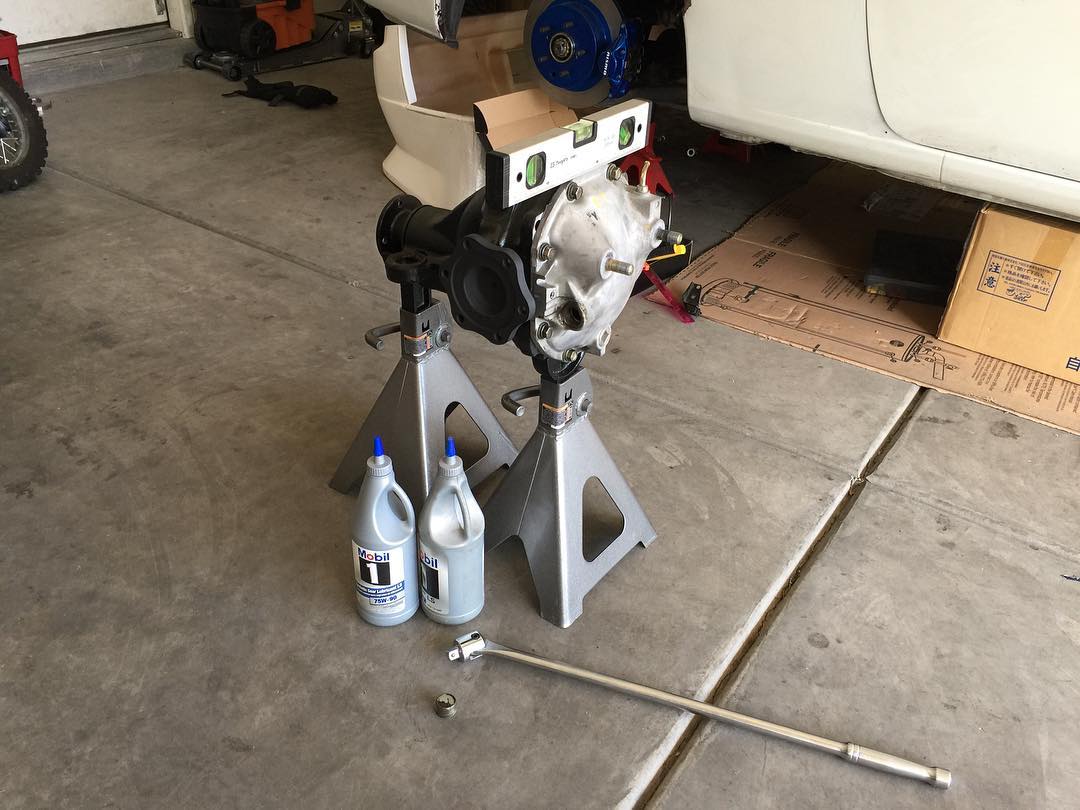 Just got back from having some rubber put on these dusty paperweights. I'm still feeling sick but even a little progress is progress, right? 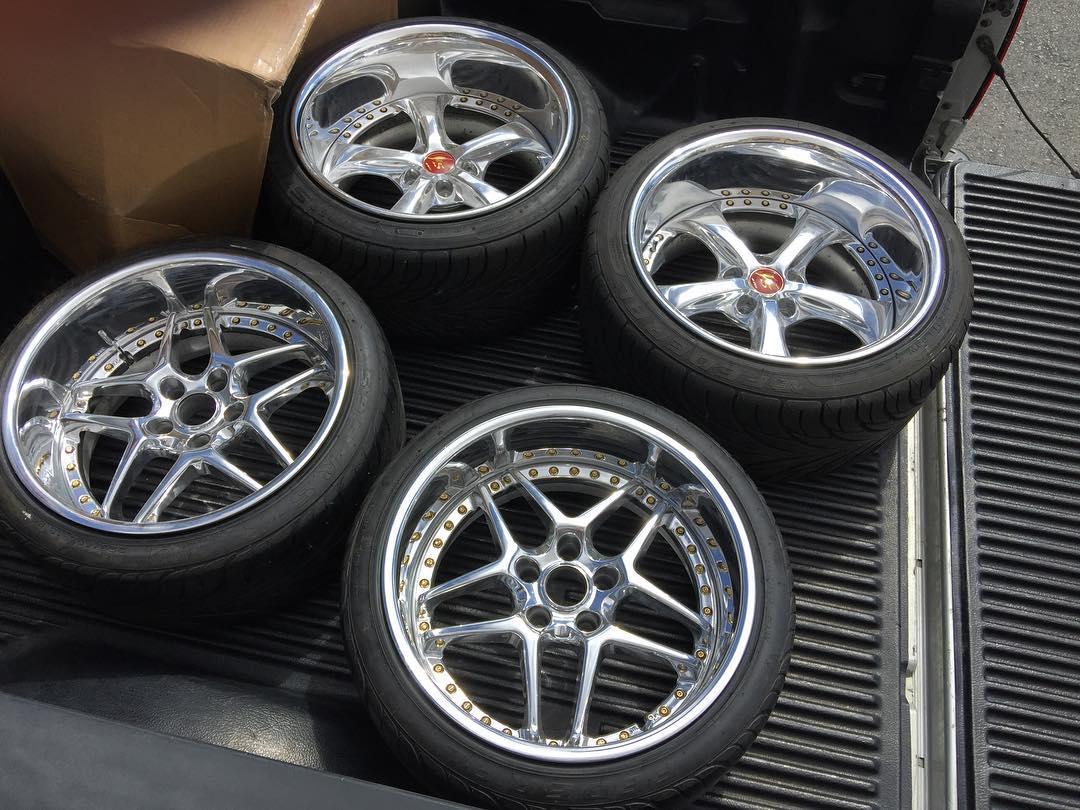 I knew I was going to have some clearance issues between the fitting for the brake booster line and the fuel pressure sensor and I did; it was really bad. Luckily I picked up this 1/8 NPT right angle adapter from Summit. The design of the Aeromotive FPR allowed the fat sensor to point straight down and hug the FPR. Plenty of clearance now and no issues of anything breaking when the engine moves. 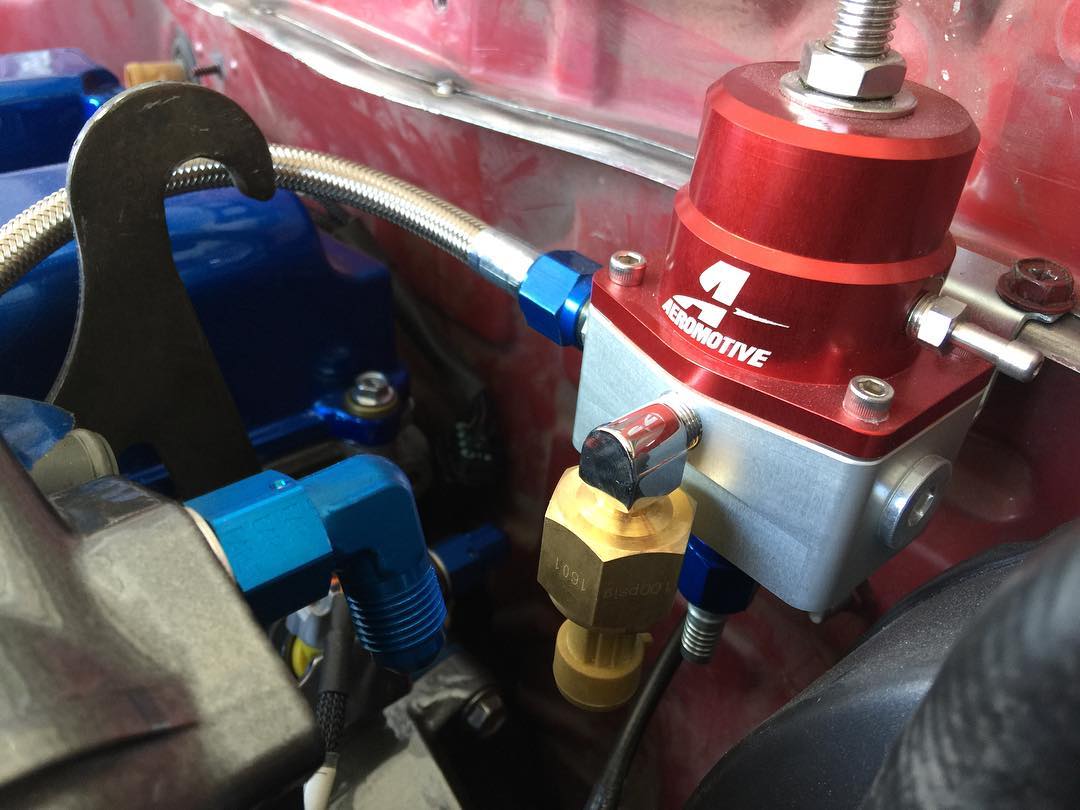 Took this picture to slightly motivate myself after finding out that I need a full garage door replacement for $1300. Fuck finishing my car, right? 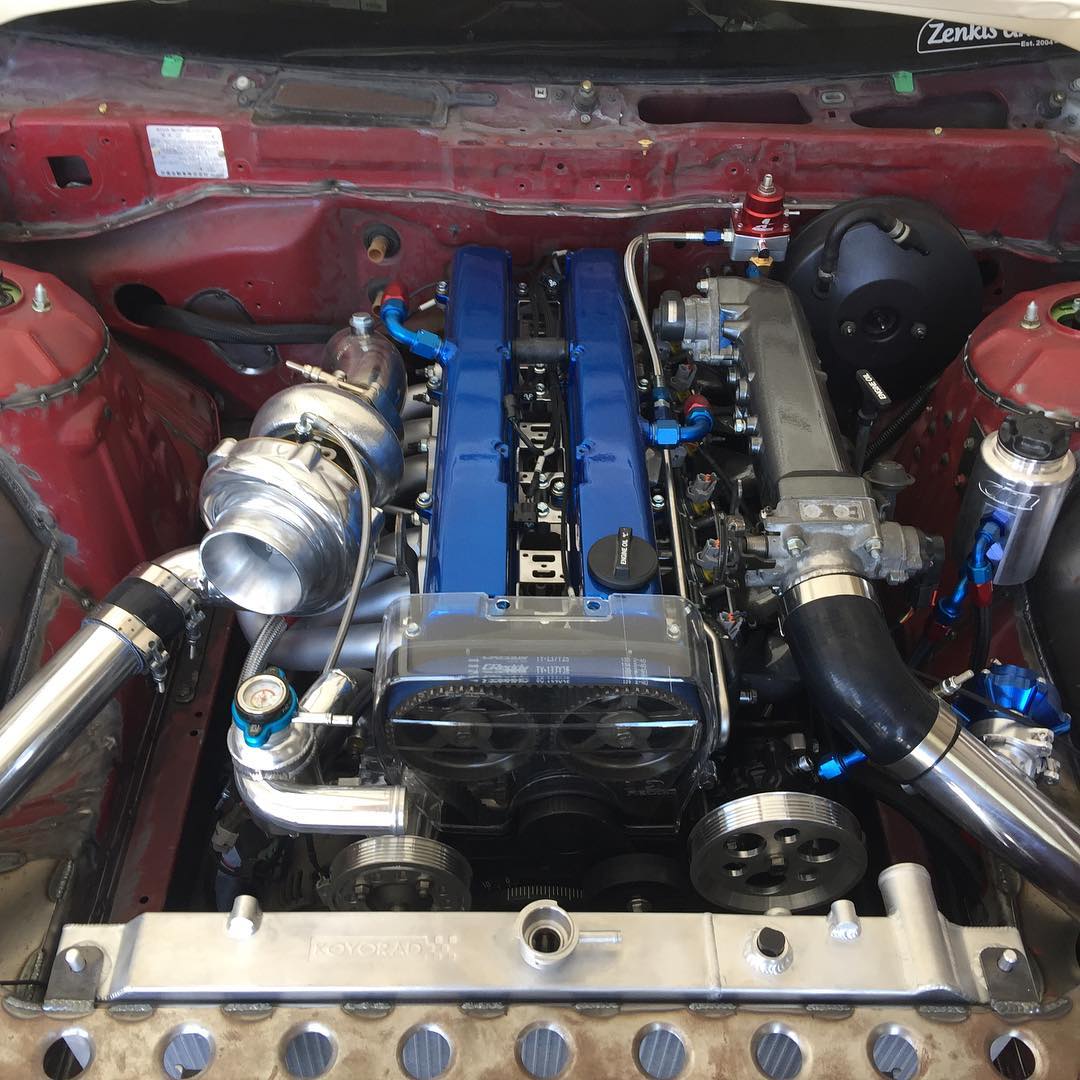 Finally got back to doing some work on the car. I got the steering rack and alternator removed so that I can have both rebuilt. 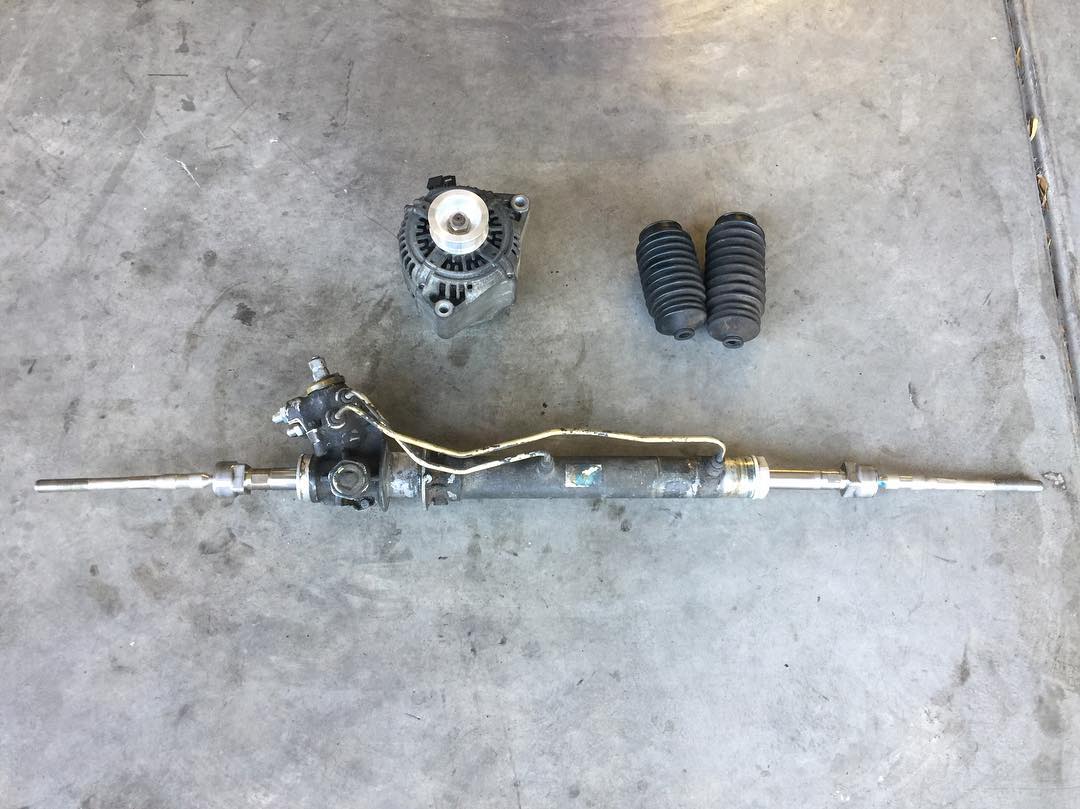 Tein Z33 tie rods vs. GKTech Stupid Dumb Long extended tie rods (not official product name). Just what I need for that extra angle. 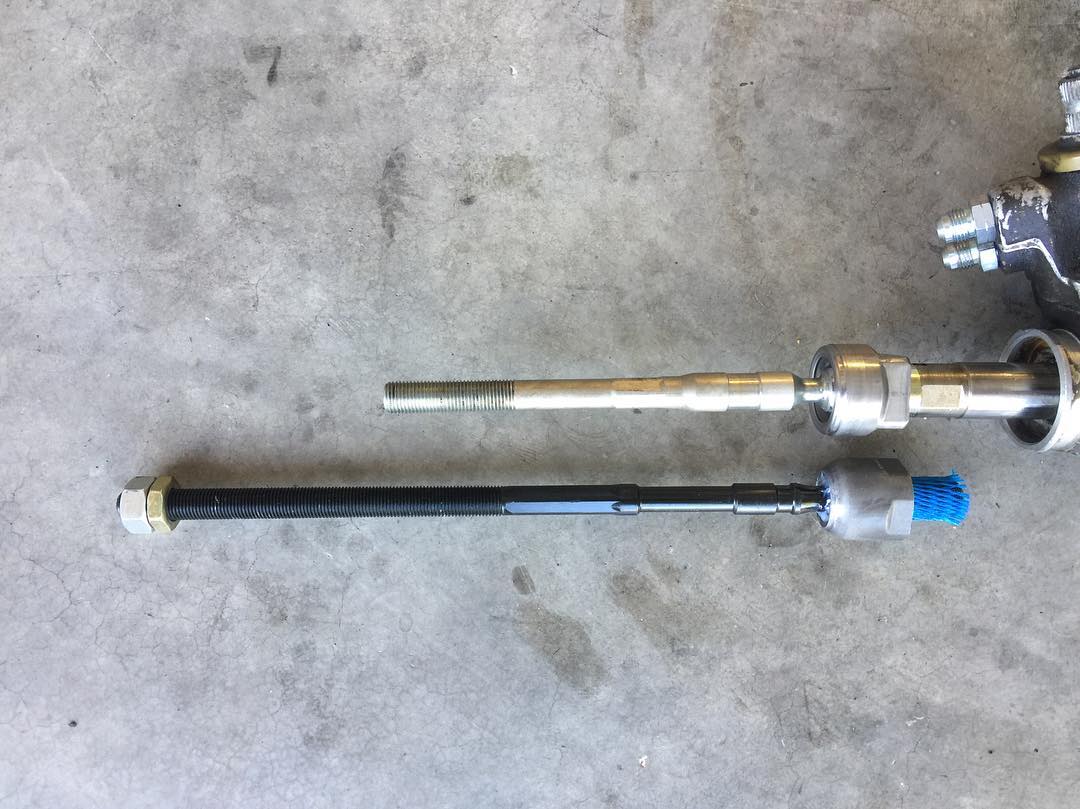
__________________
|
|
|

|
|
|
#156 |
|
Post Whore!
 Join Date: Oct 2007
Location: Las Vegas
Age: 36
Posts: 4,590
Trader Rating: (53)
           Feedback Score: 53 reviews
|
Sorry about the lack of content. Life's been a real coaster since the last updates.
I mounted the Walbro 400lph fuel pump. It's pretty tiny, but I'm going to give it a shot since I already have it. I also found a 2" conduit bracket that looks like it fits perfectly around the fuel filter. 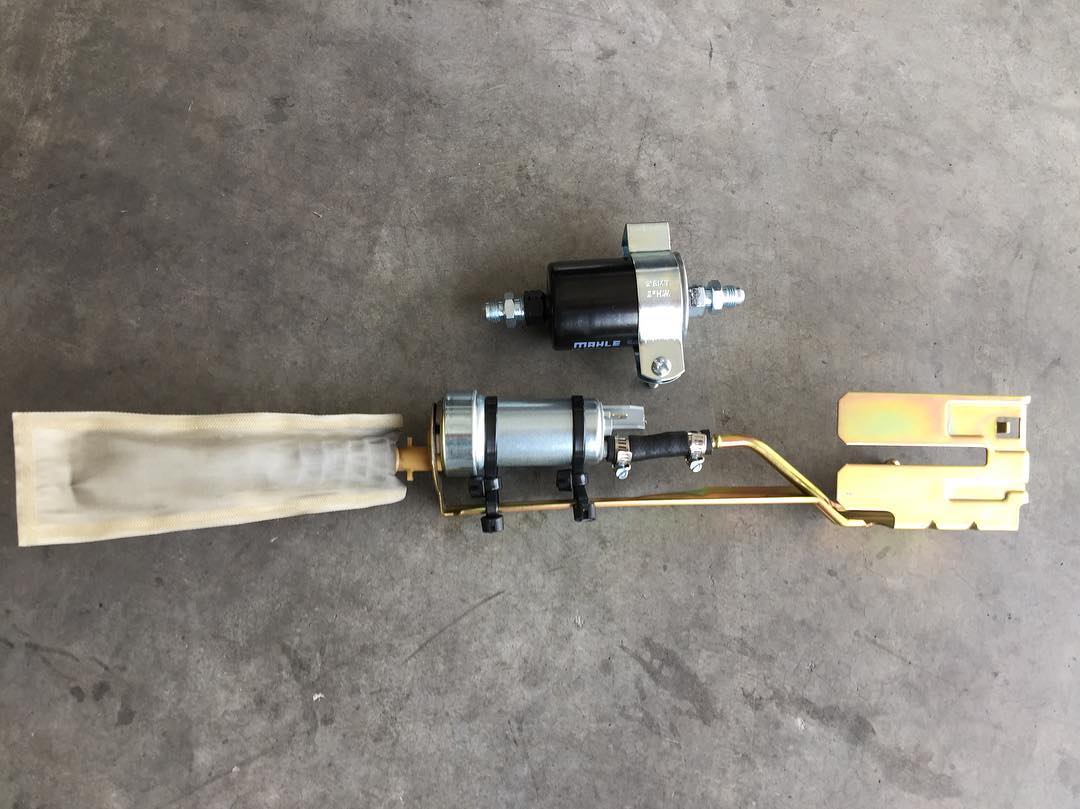 I managed to trim out the last of the things that I won’t be using. I de-pinned this last connector and got rid of the ugly pigtails. To some people, cutting them down to a nub at the connector may suffice, but I love to fidget and tinker with shit and wanted to figure out how to de-pin the connectors on this car. Mission accomplished and it’s now time to start cleaning up the harness and getting things in the interior reassembled. 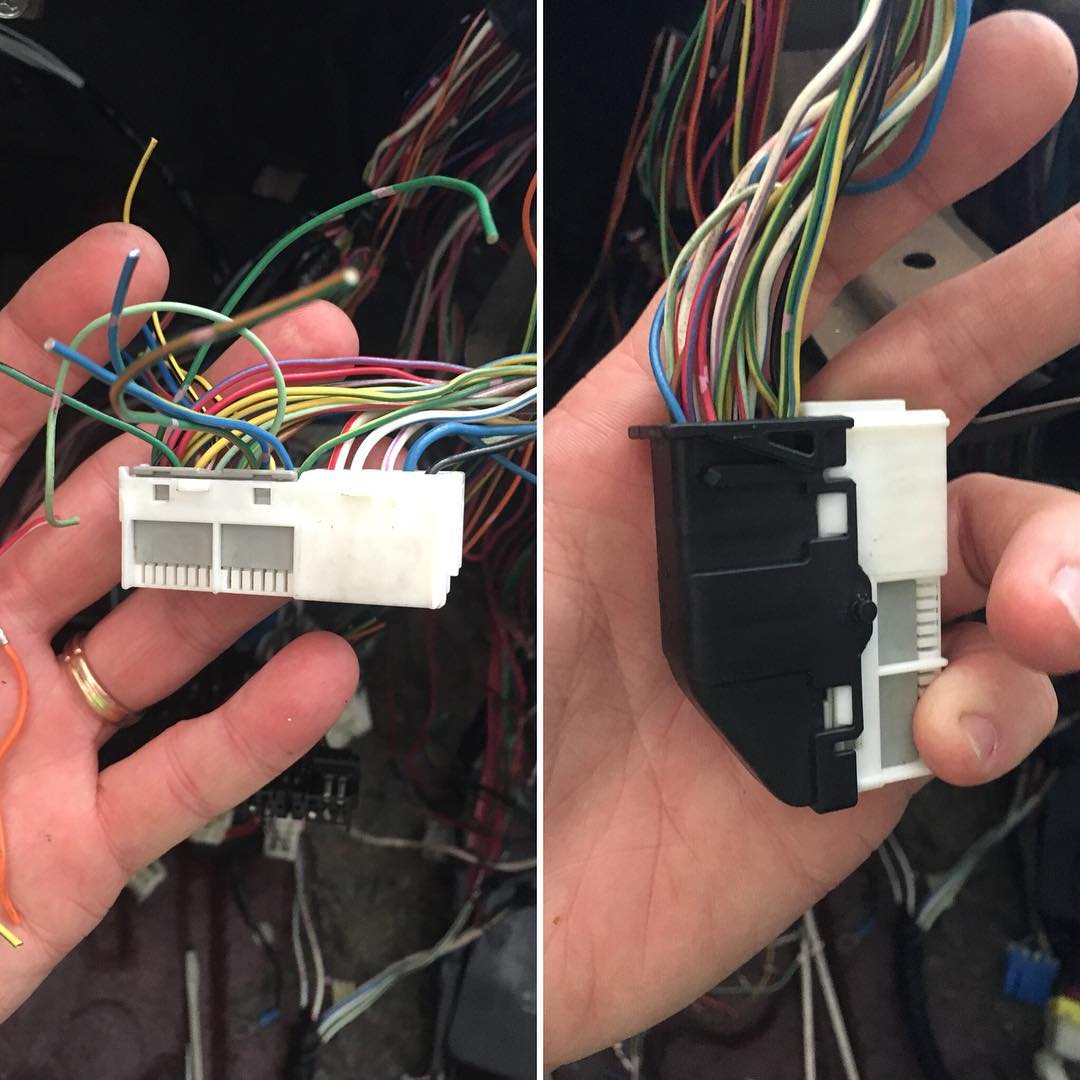 I’m not a huge fan of the split loom and tape look but it’s far better than bare wire, a full tape wrap, or that corrugated crap from the factory. I just so happen to have a bunch of both materials on-hand and the harness is under the dash out of plain view, so the choice was obvious to prevent further build delays. I didn’t have time to do much today, but it’s a start and I think it looks pretty decent. If I can get this interior wiring tamed I’ll be a lot more motivated to work on this thing more often. I’ll be the first to admit that I started way too many projects on this build without finishing them completely and it made me a little demotivated at times, but now is the time to finalize everything and hopefully have this car rolling under it’s own power within the next few months. 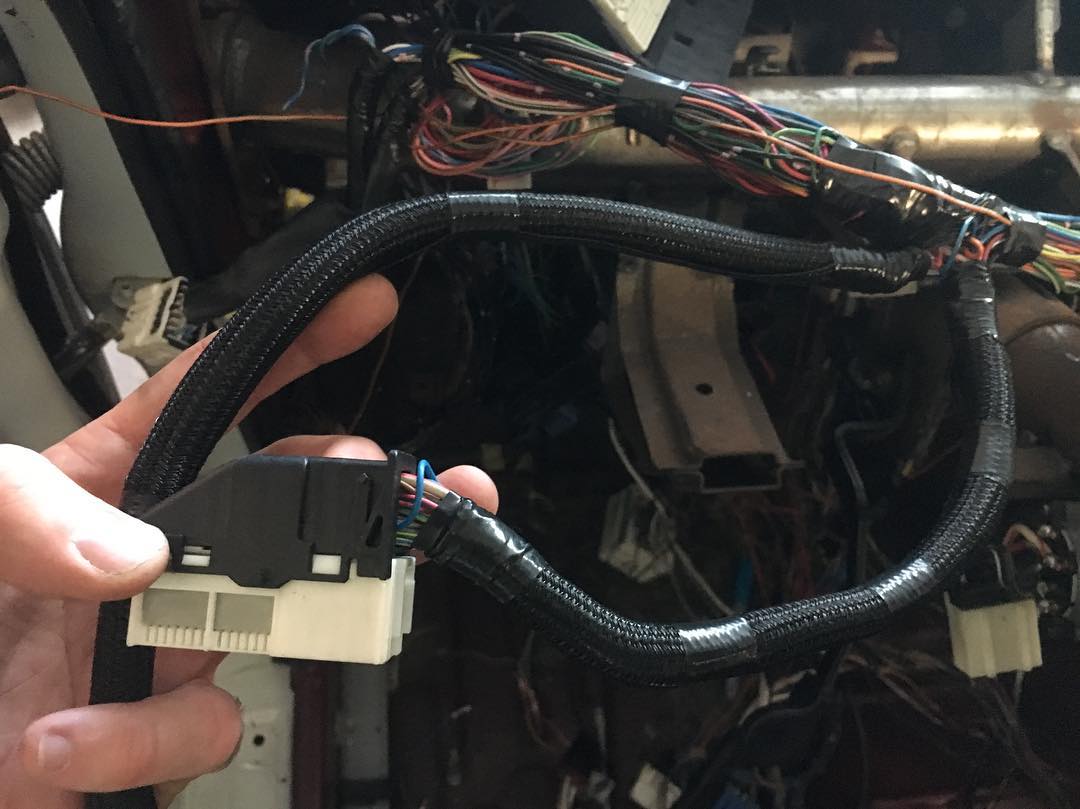 This is the body harness on the driver’s side that runs back to the harness for the rear lights and fuel components. I got halfway through wrapping this thing and realized that I had forgotten to trim the wiring for the fuel pump out and depin those leads. I knocked that out real quick and got back to chopping and screwing this thing. All finished it looks good and I’m pleased with it. It’s probably stupid to retain the SMJ for only 8 wires, but I really don’t feel like eliminating all of that at the moment and it works this way for the time being. Once the car is “finished” I plan to rewire everything with all new wiring throughout the entire car. For now I just want to see the car run. 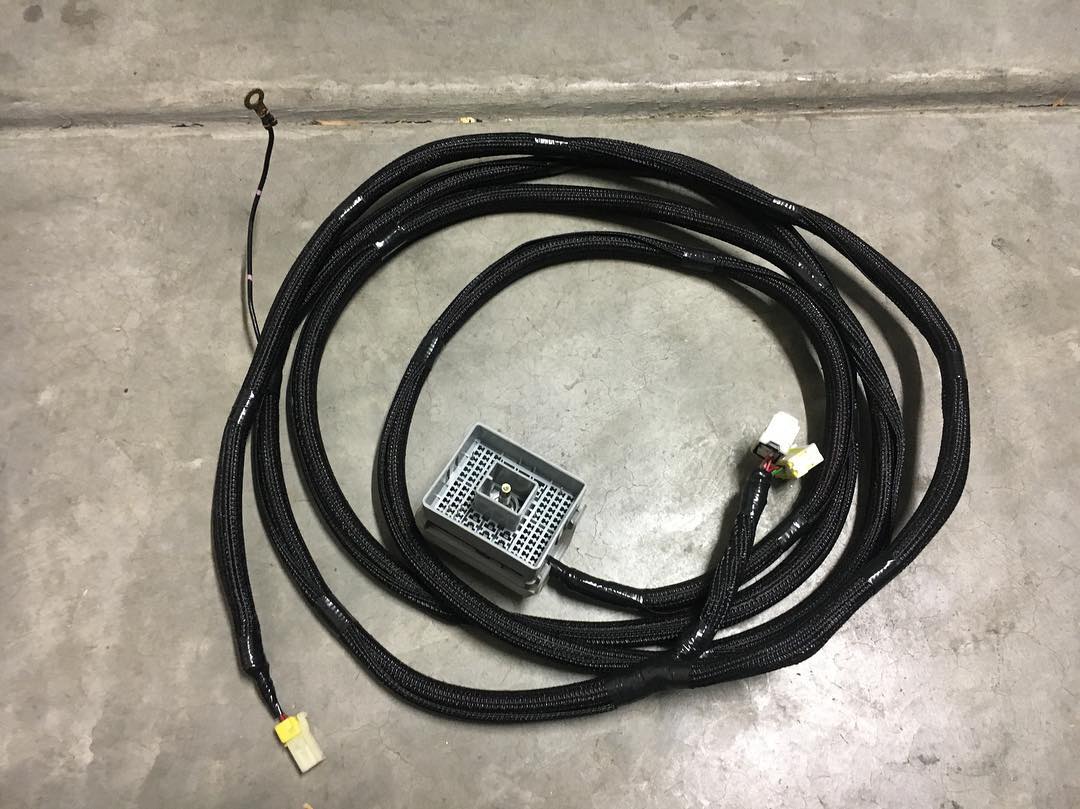 Got busy with the dremel and ground all of the protruding screws off of the back of the fuse panel I made so that it sits perfectly flat on the dash bar mounts. I also stripped the rest of the fuel pump wiring and relay out of the dash harness. I will be running a separate relay system with more robust wiring for the fuel pump. 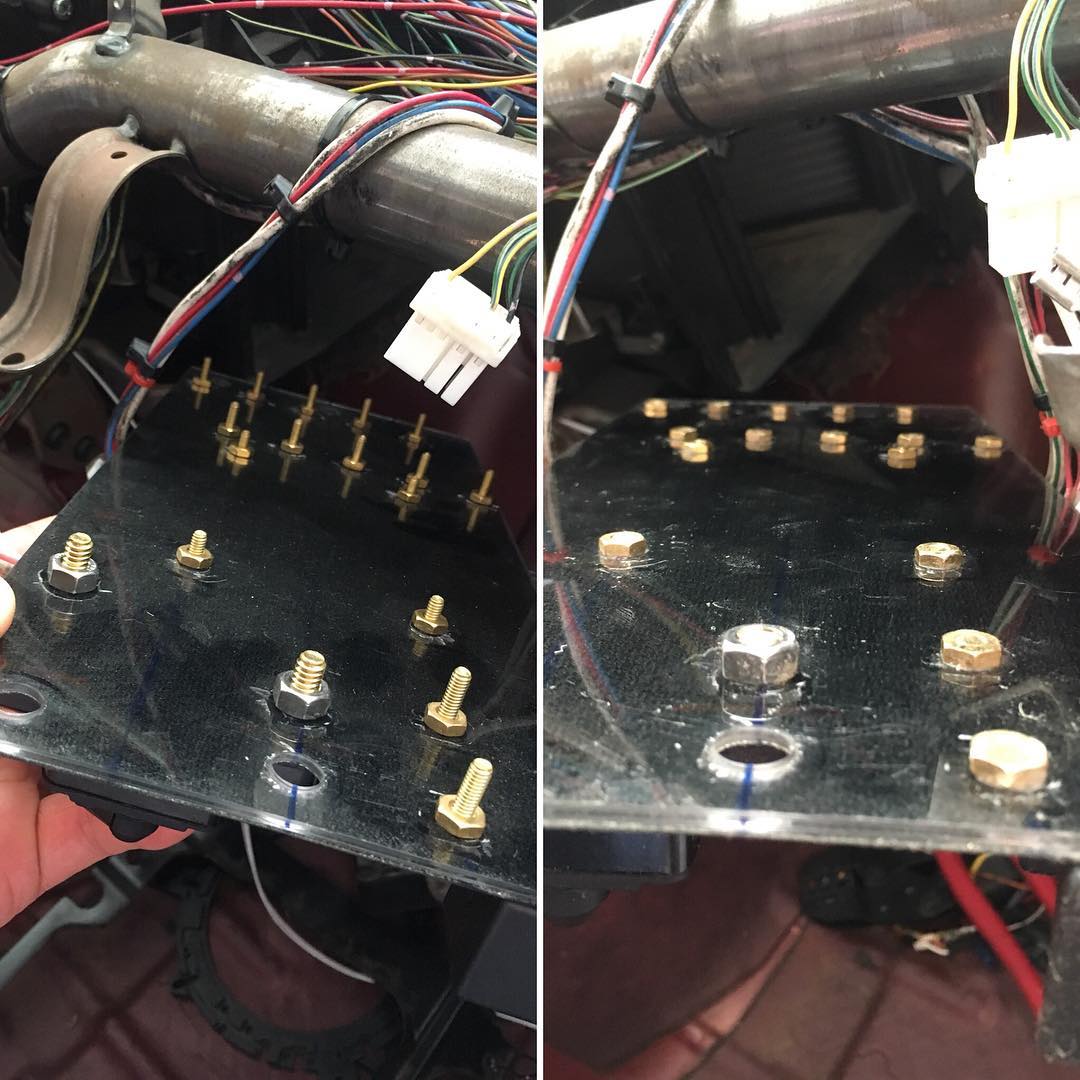 This is what’s left of the dash harness. I’m going remove all of the tape from the crimped joints and retape all of them with that new-new before looming everything up. 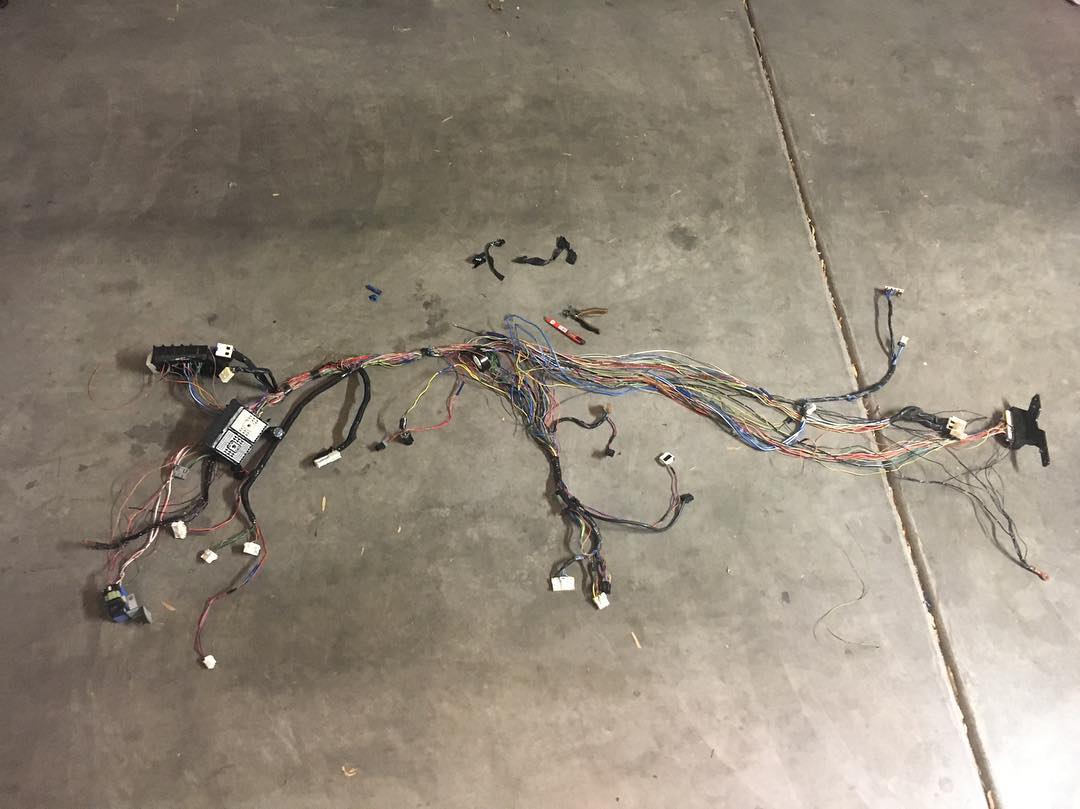 On a list of things never to do again in life, this hits somewhere near the top. Wiring work is so tedious and time consuming and I’m glad to finally have this piece of the puzzle completed. 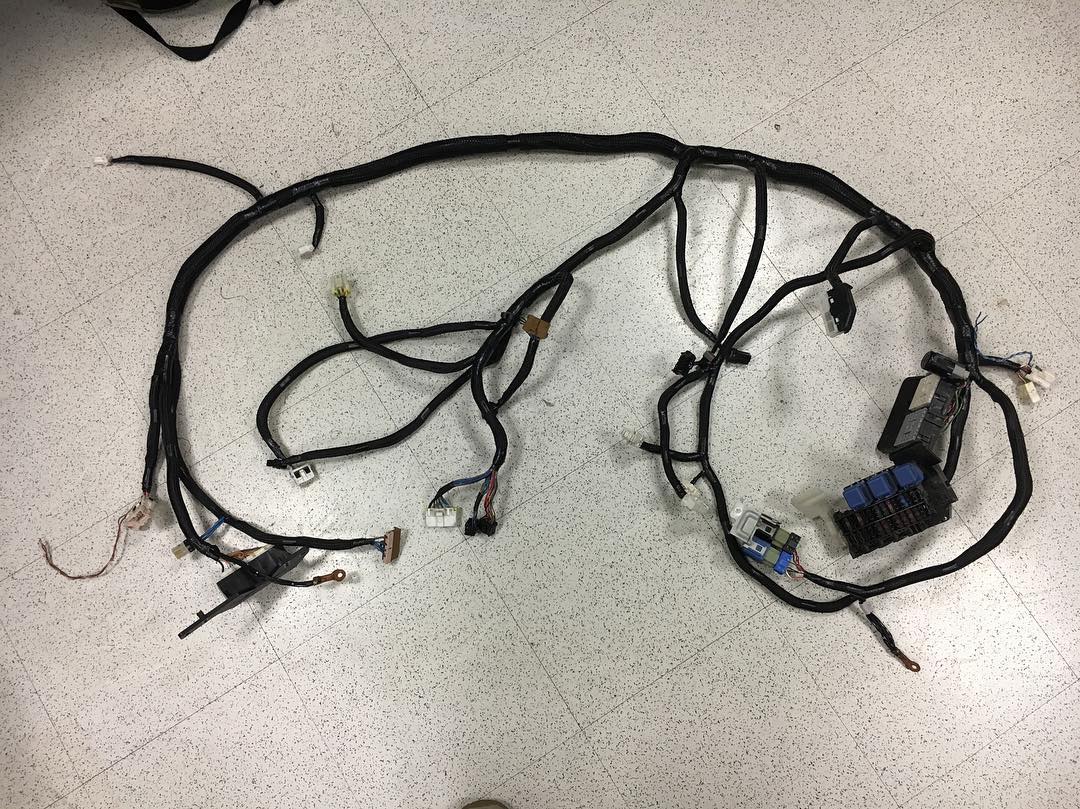 I had a bit of time to pull the motor and transmission back out of the car. I have to get some fab work done and get some things powder coated prior to dropping the motor back into the car. This will give me time to change out the shift forks in the transmission and drop both oil pans to reapply gasket maker. After all of that I can mount the clutch and work on getting everything back in. Good vibes! 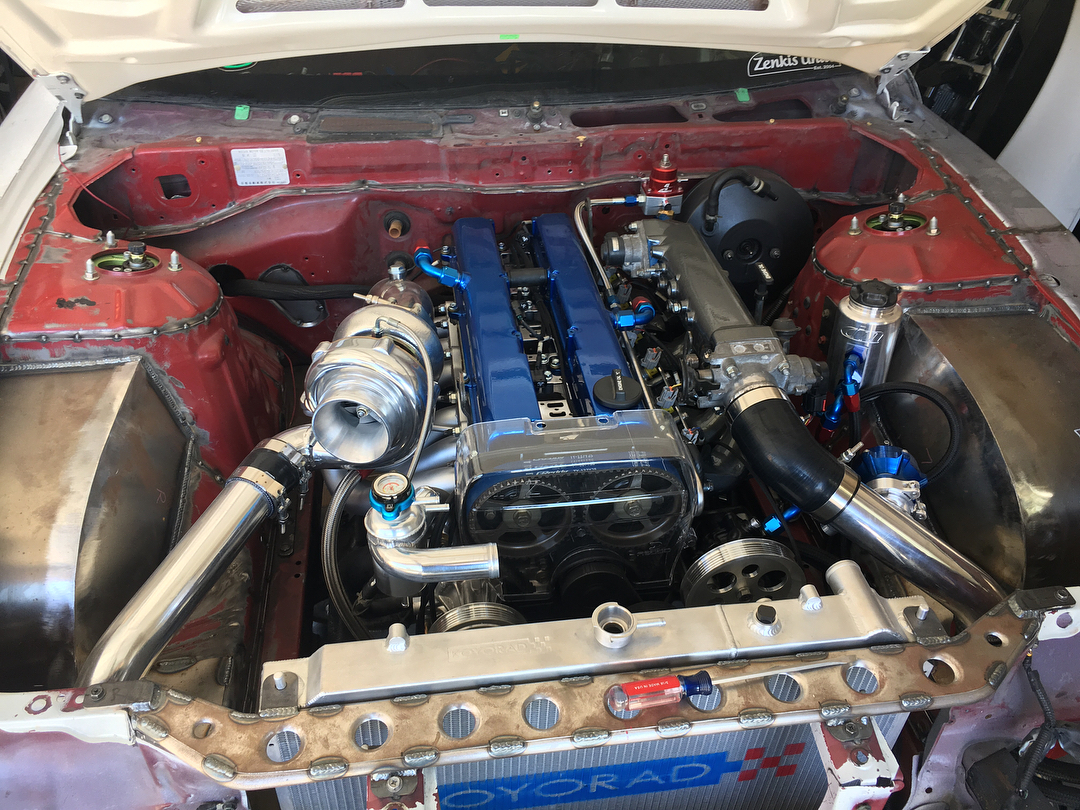 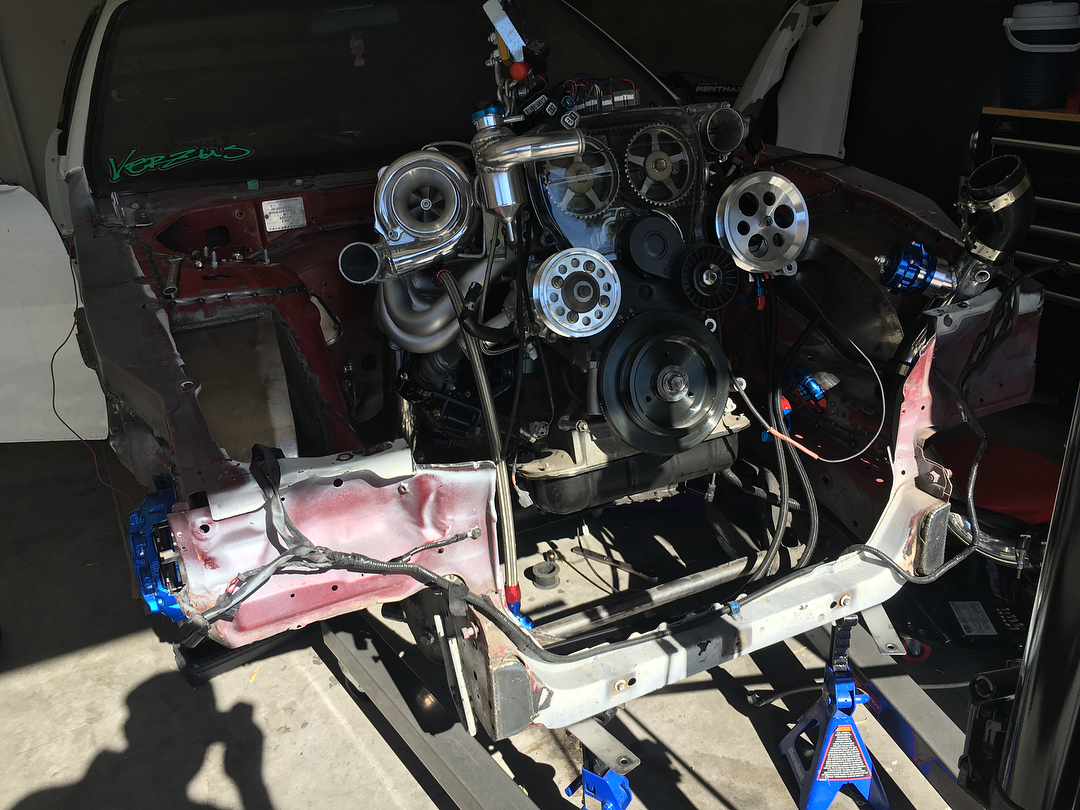 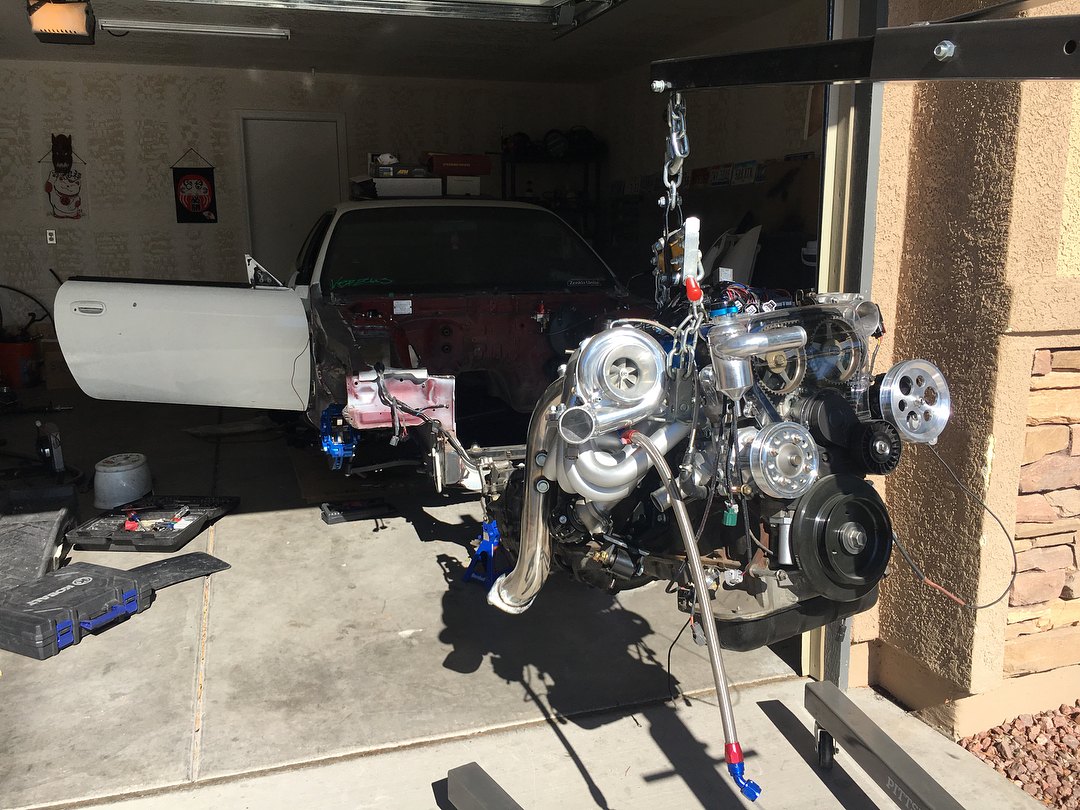 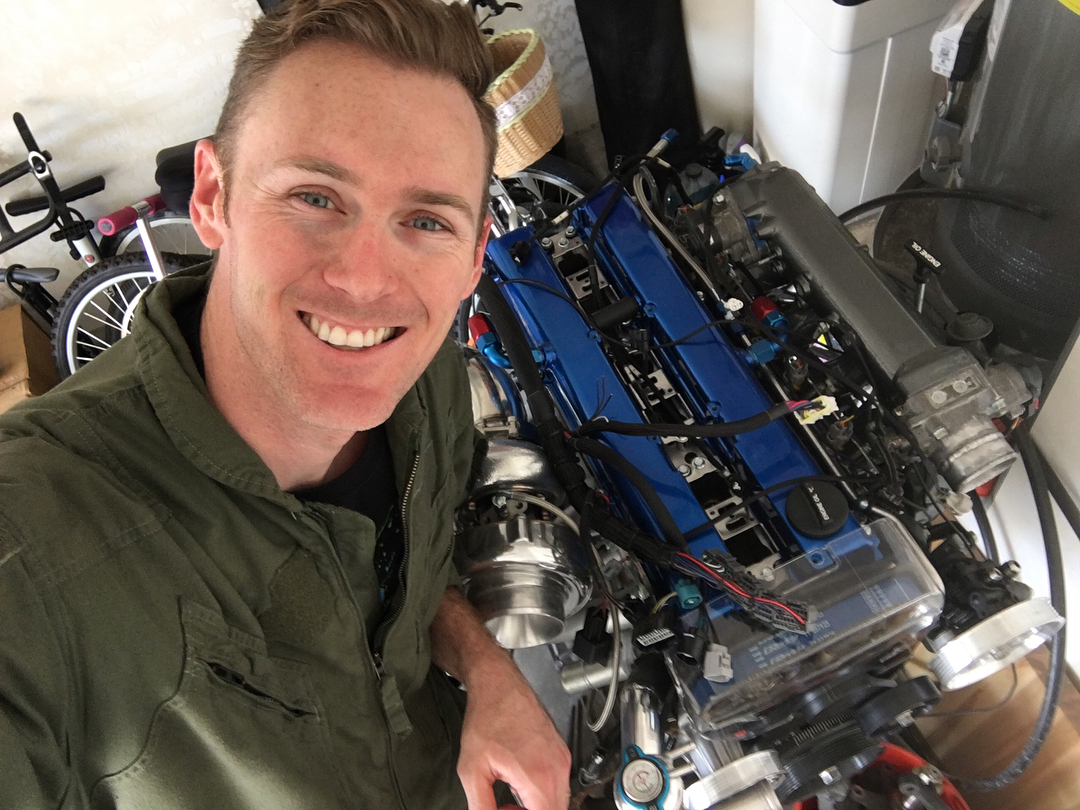
__________________
|
|
|

|
|
|
#157 |
|
Post Whore!
 Join Date: Oct 2007
Location: Las Vegas
Age: 36
Posts: 4,590
Trader Rating: (53)
           Feedback Score: 53 reviews
|
I went to clean out my backpack at work today and apparently I’m the type of guy that forgets he has a complete wiring harness tucked in there. This one wasn’t as bad as the main chassis harness so I got it all done up at home. That’s a wrap!
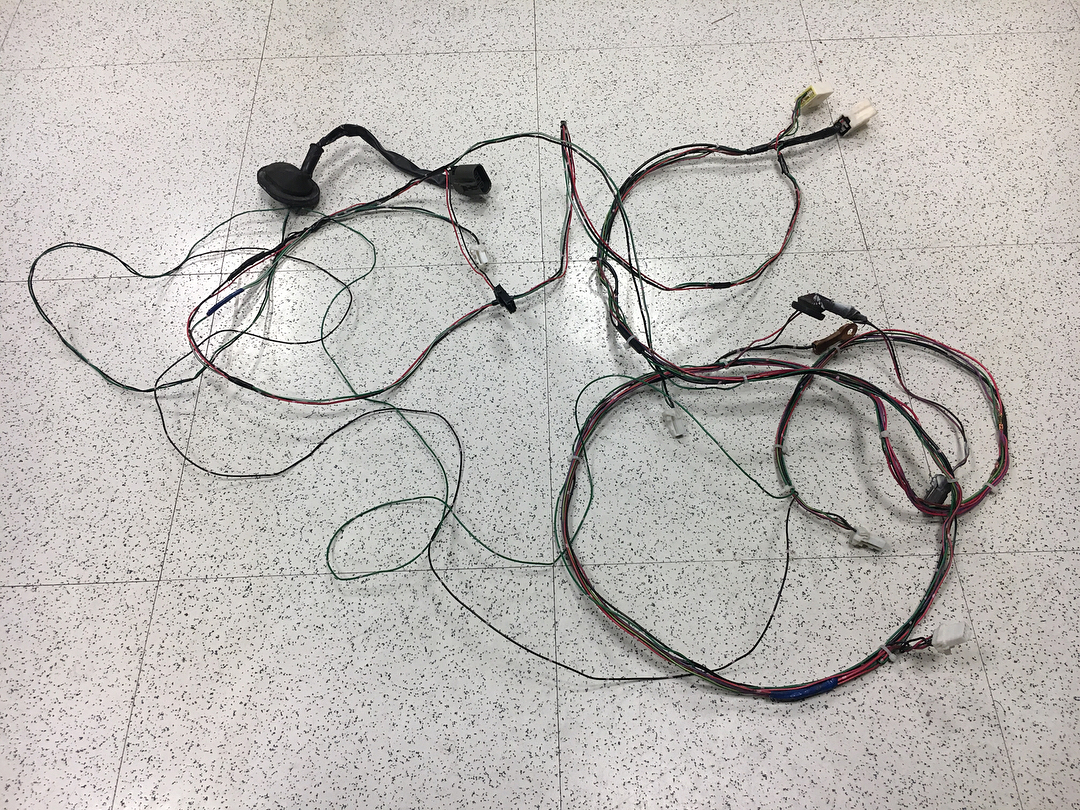 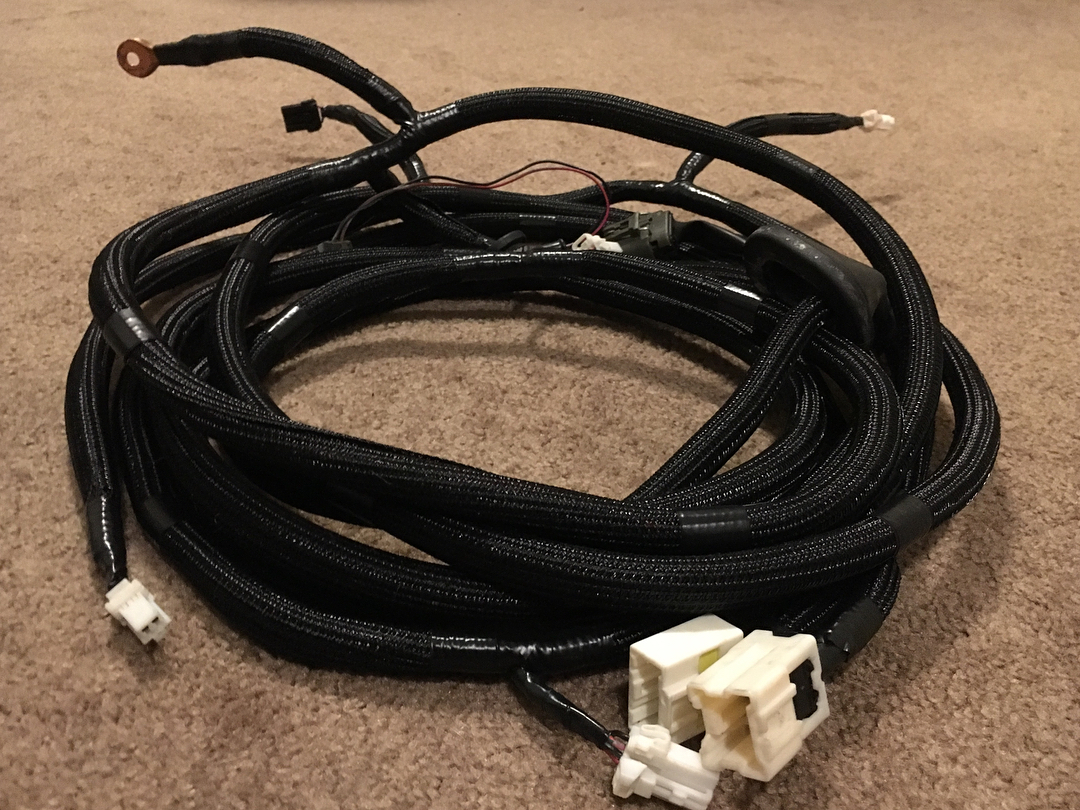 Also working on redoing the kick panel sticker to better suit my needs and the changes I made. 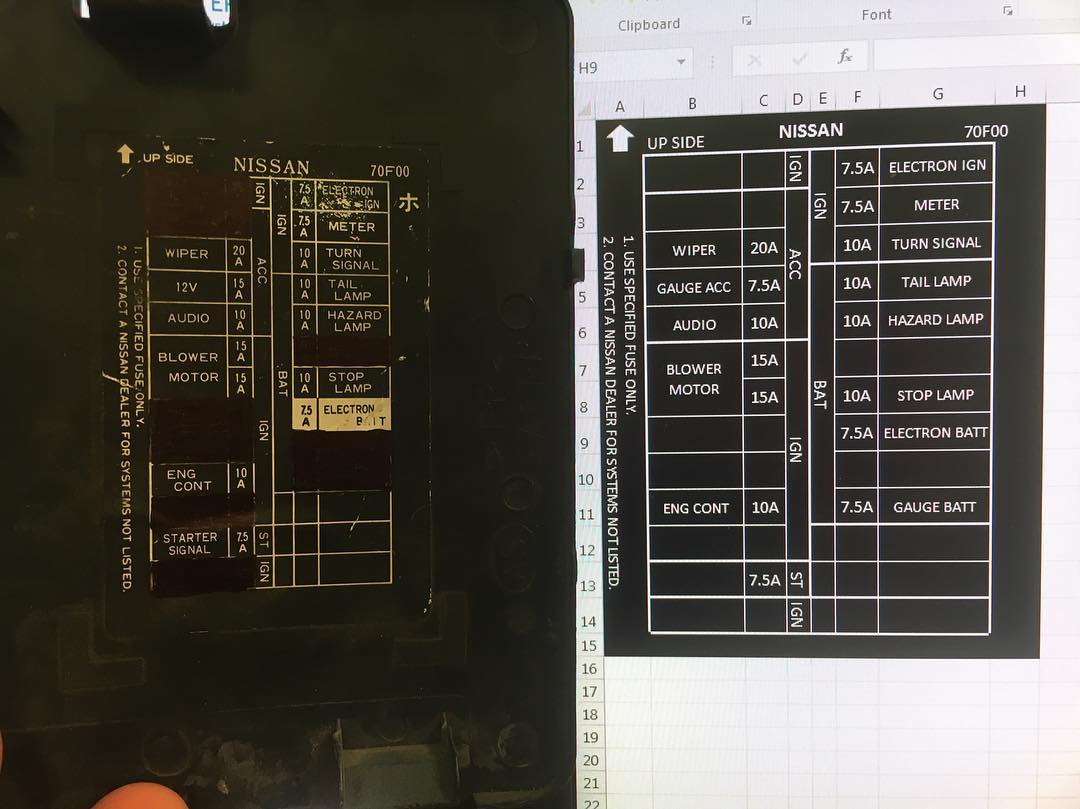 I had some time to remove the dash bar and heater core which gave me access to the rest of the factory sound deadening. I made quick work of what was left. This stuff is incredibly heavy and will be replaced with something else in the future. With everything out of the way I reinstalled the main chassis harness and plugged in as much as I could. The loom is black so it’s hard to see it, but you get the idea. 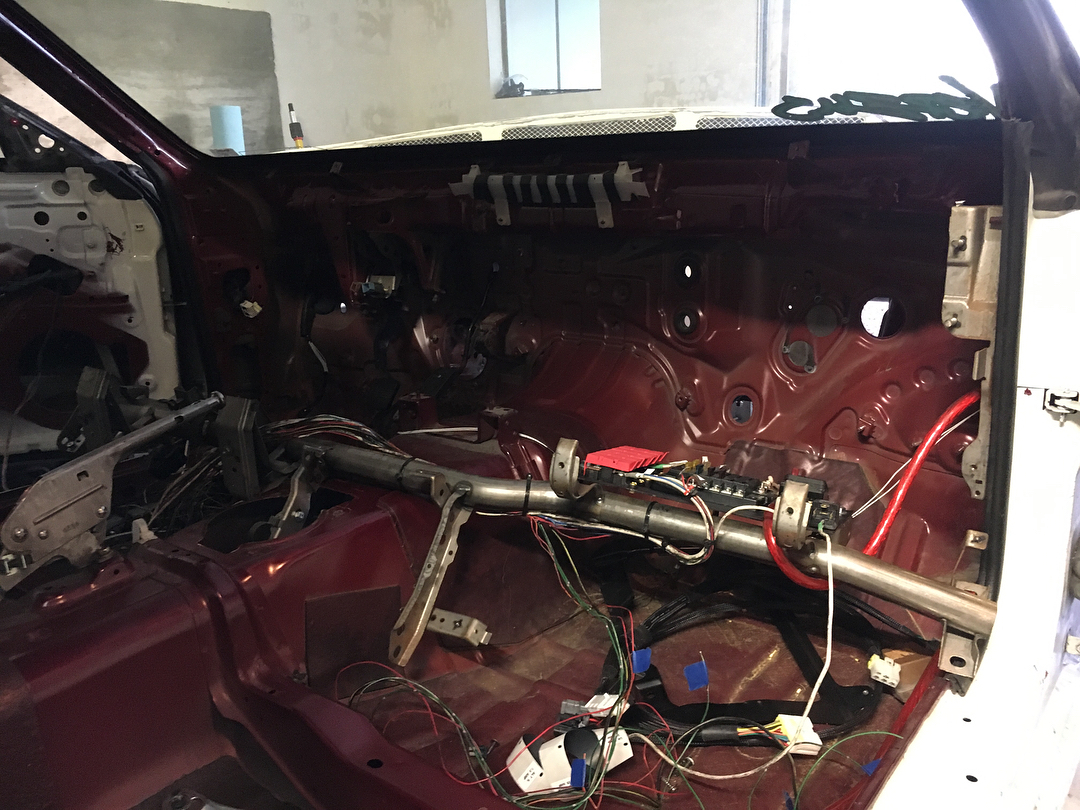 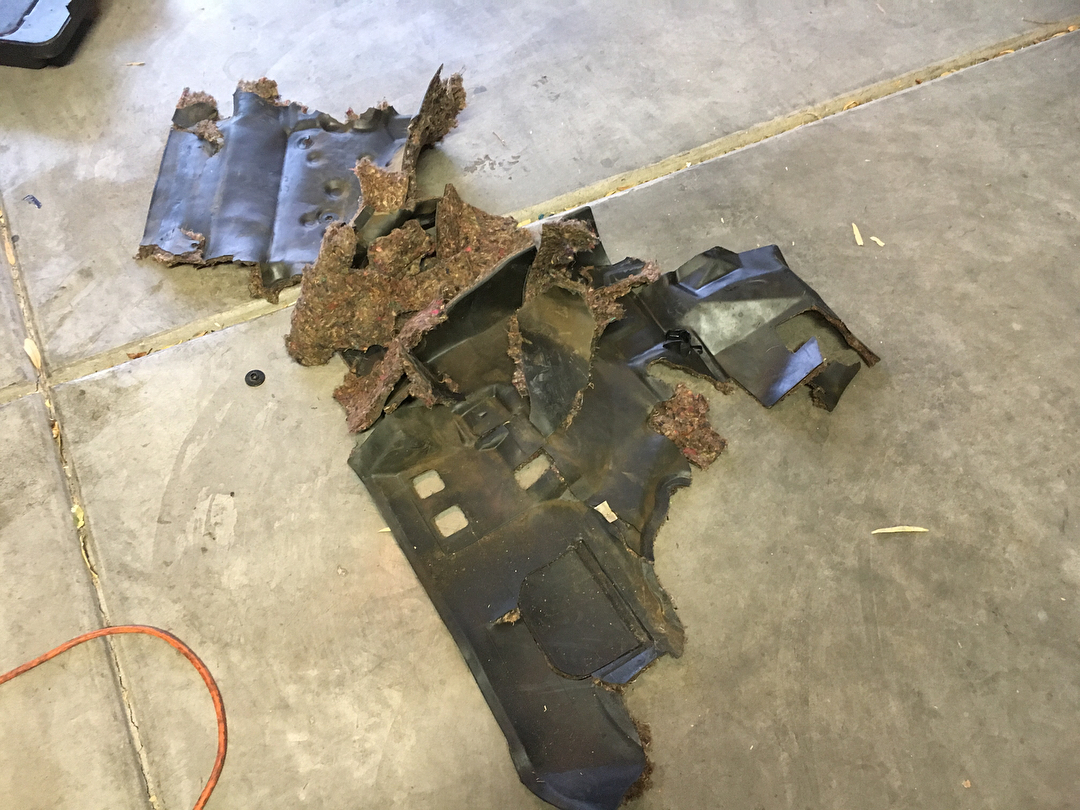 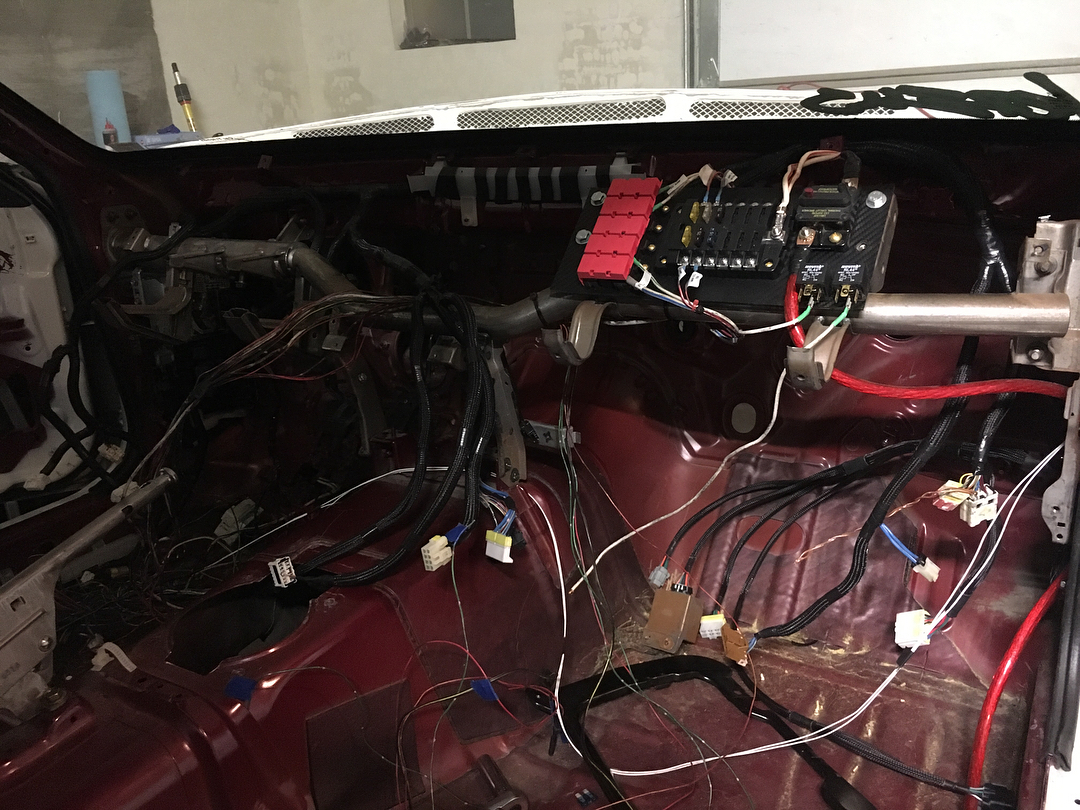 I don’t really know if my starter was bad or not, so I had it rebuilt locally anyway. To be honest I don’t want to have to tear this car apart too many times after I’m done with it, so it was a good idea to get it done. 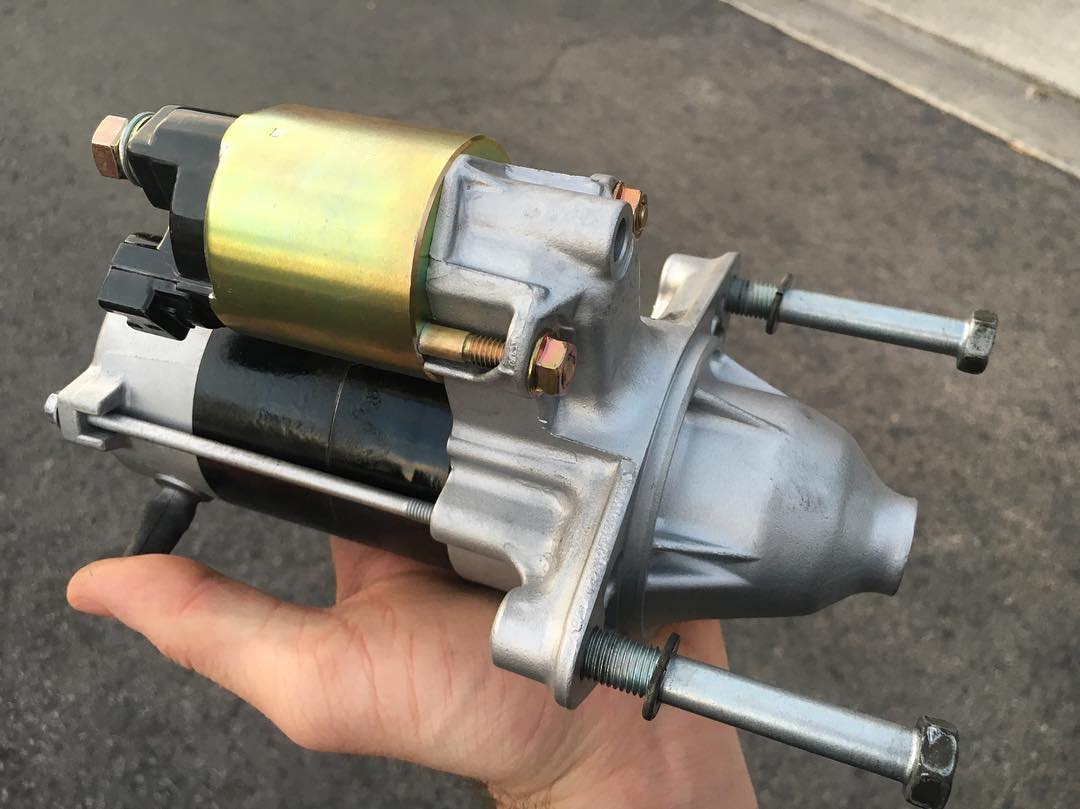 I went and got some small, but important, things done. I had him chop the barb off of the brake booster and weld it on the 1JZ coolant pipe. It replaces a straight barb that was there and will just make things a little more tidy under the intake manifold. I also had him chop the coolant filler neck and bleeder port off of the top of the radiator. I replaced them with some 1/8 npt bungs to use as provisions for bubbly things. I’m waiting on more parts to arrive; stay tuned. 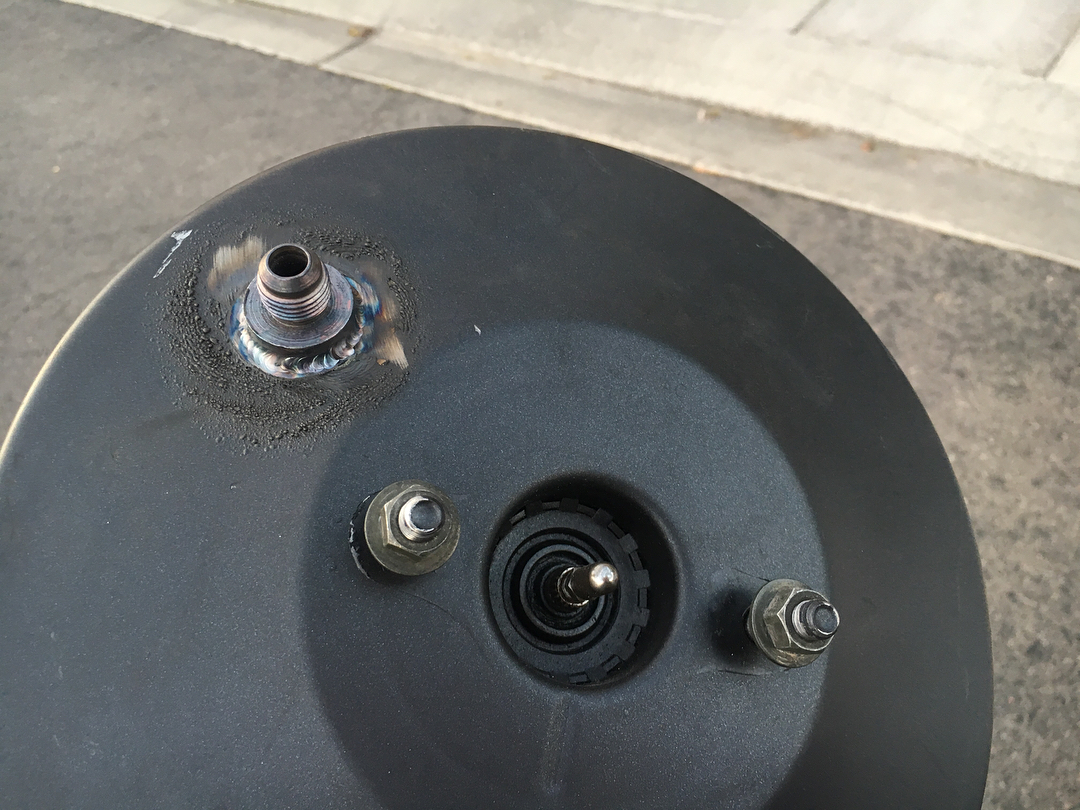 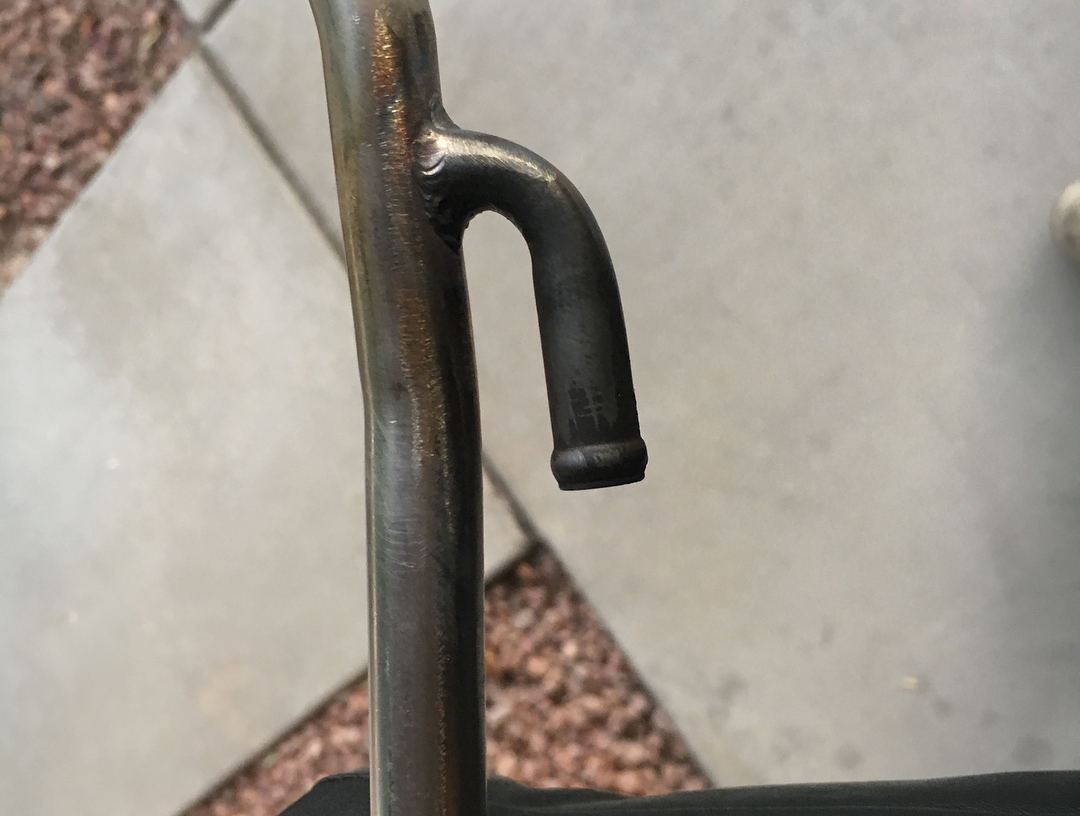 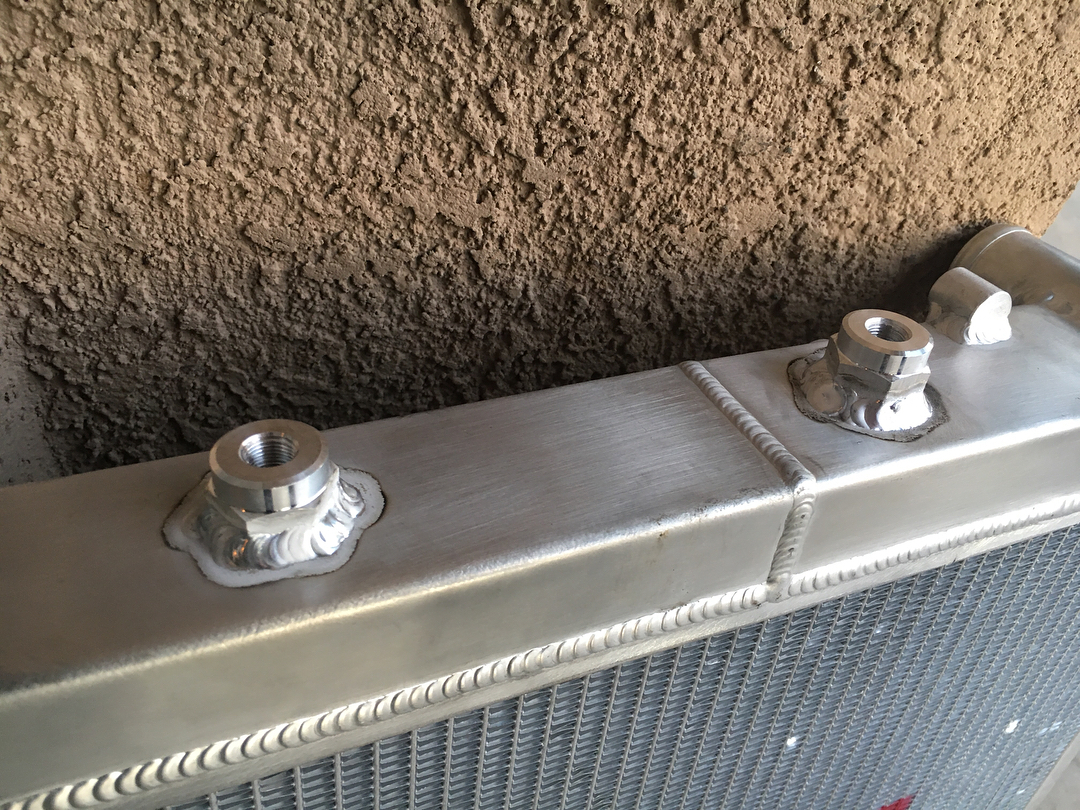 My brake line relocation kit from Whalen Speed R&D arrived today. It looks and feels like a really solid kit. Also got some additional parts in from DriftMotion so I can get to work on the transmission and resealing the upper and lower oil pans. 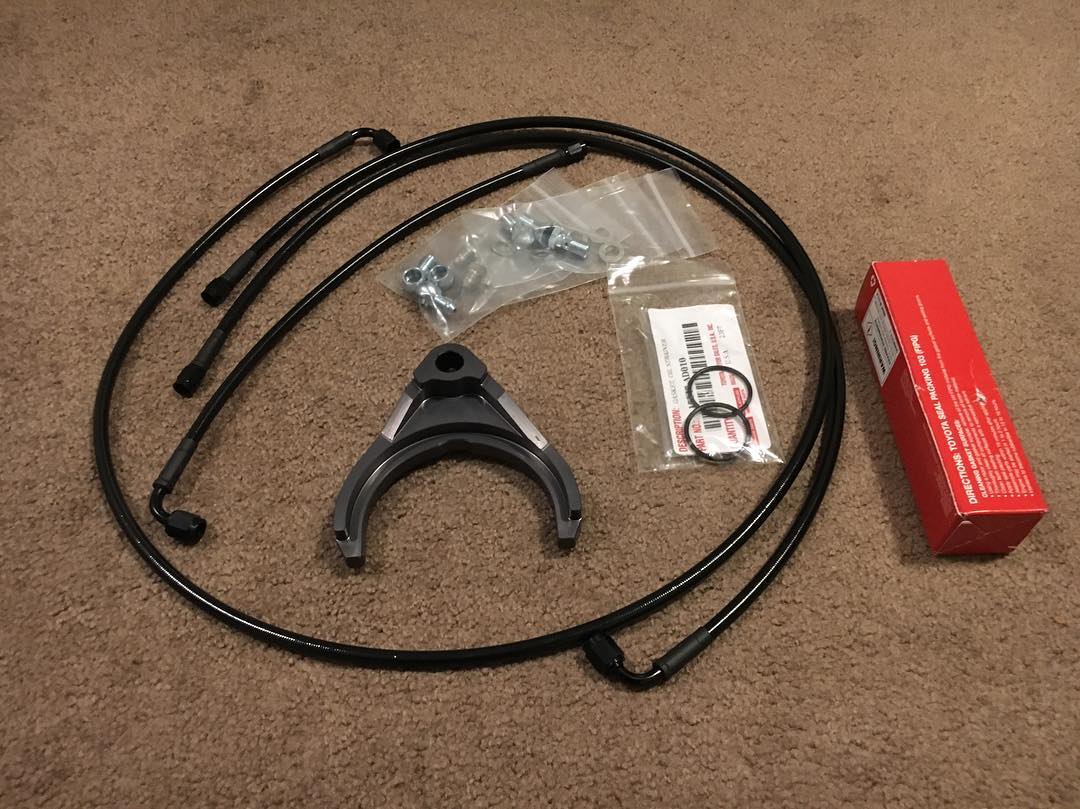 Took a bunch of nasty bits to the powder coaters and they turned them into pretty bits. I bolted up everything but the cross member, I’m going to wait until I solve my steering rack situation before I actually put that back in. That is not the final resting place for the Wiring Specialties engine harness, I have a few more things I need to button up before I can secure it properly. 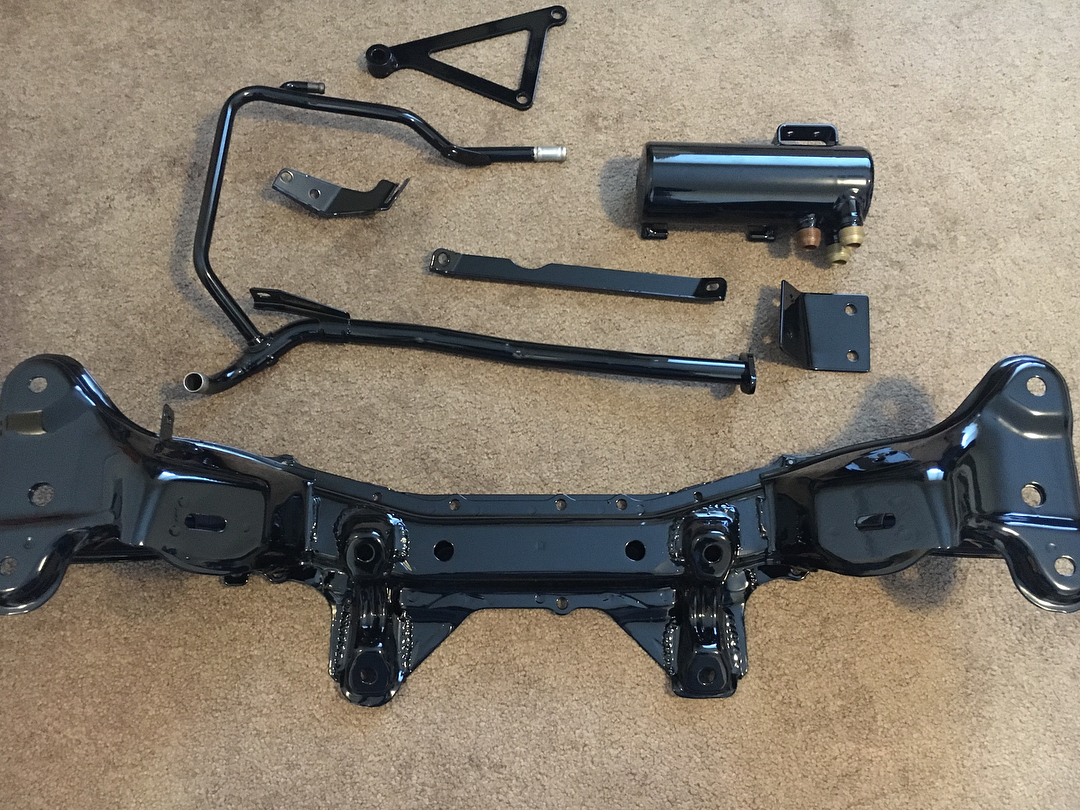 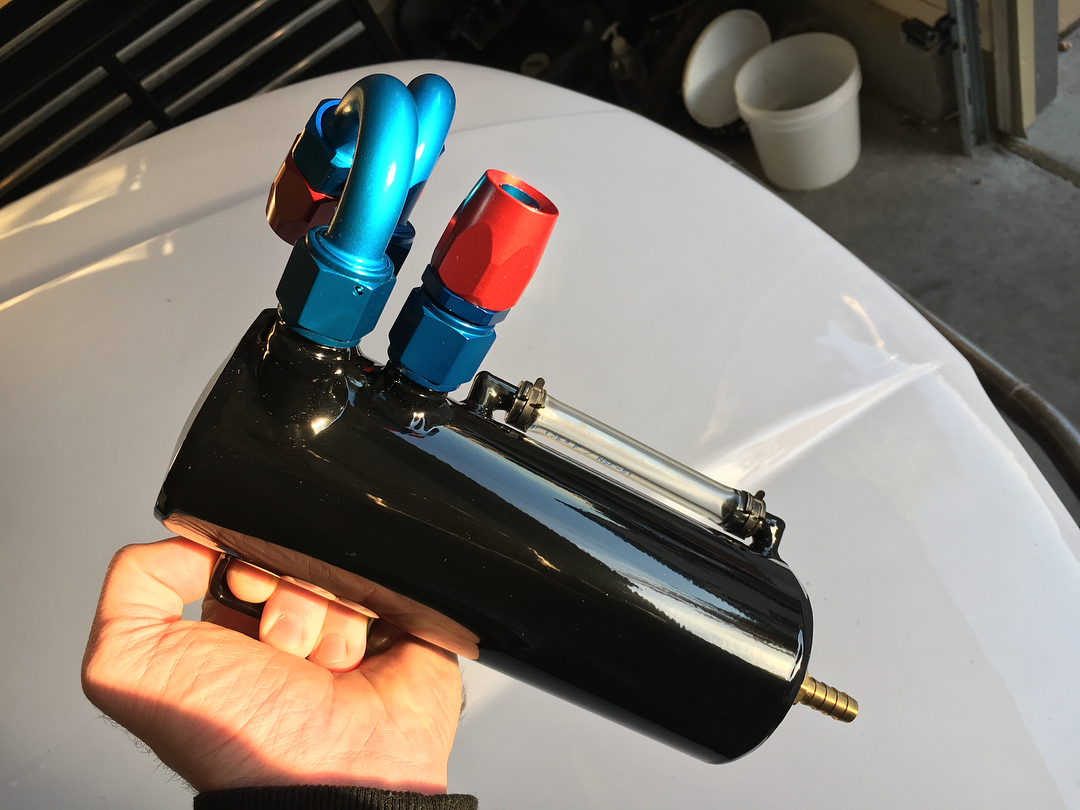 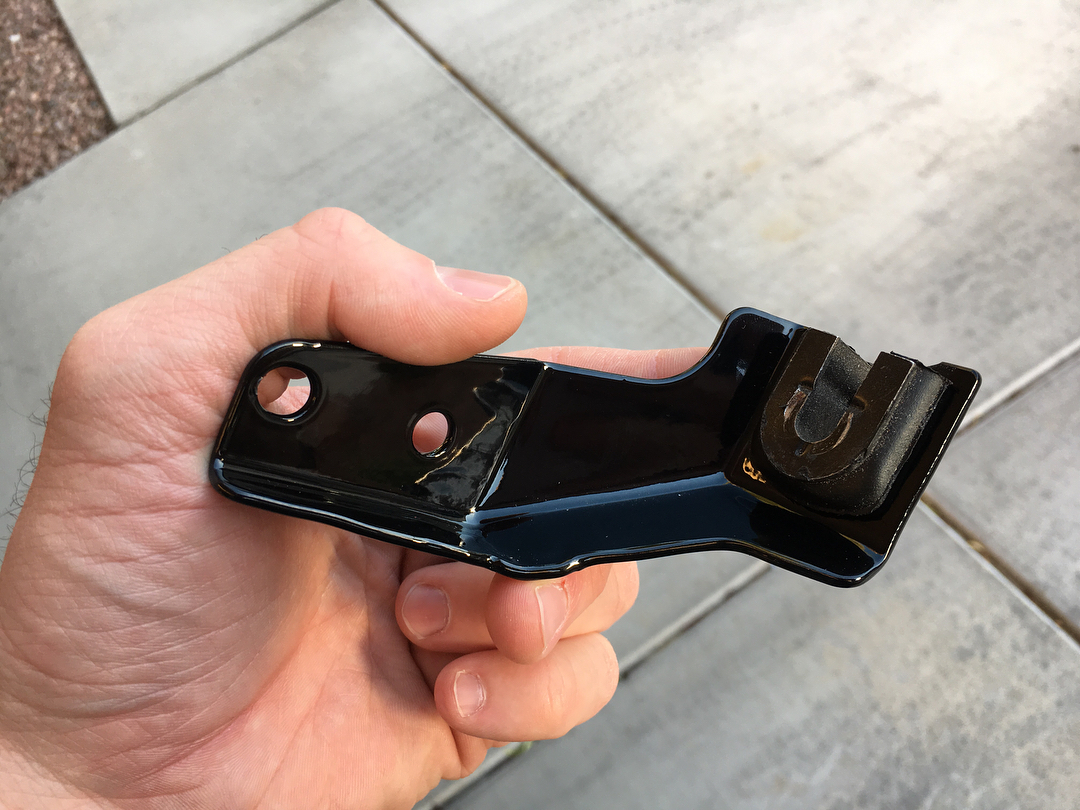 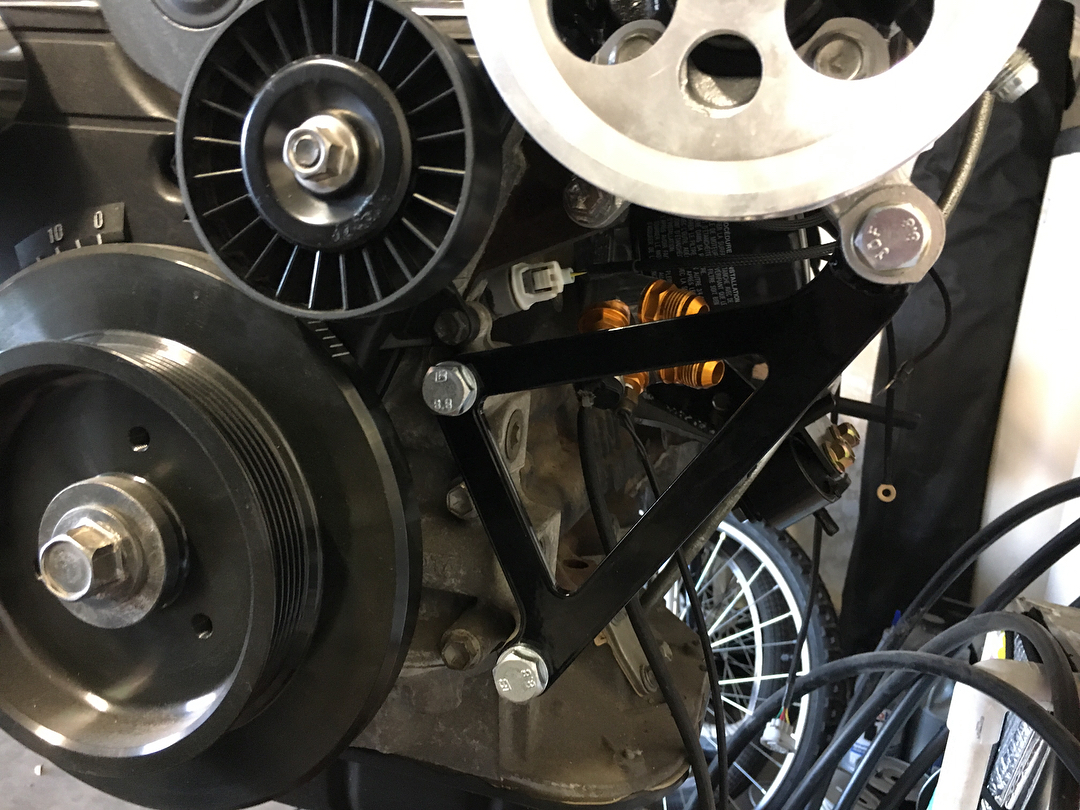  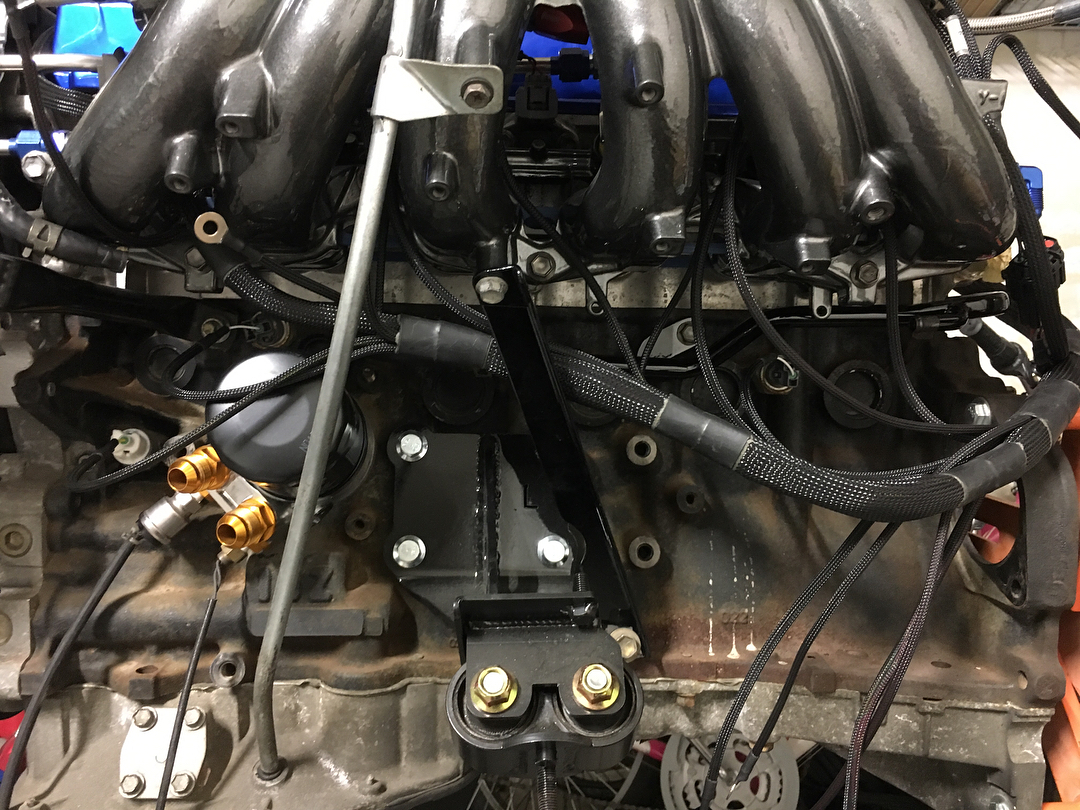
__________________
|
|
|

|
|
|
#158 |
|
Post Whore!
 Join Date: Oct 2007
Location: Las Vegas
Age: 36
Posts: 4,590
Trader Rating: (53)
           Feedback Score: 53 reviews
|
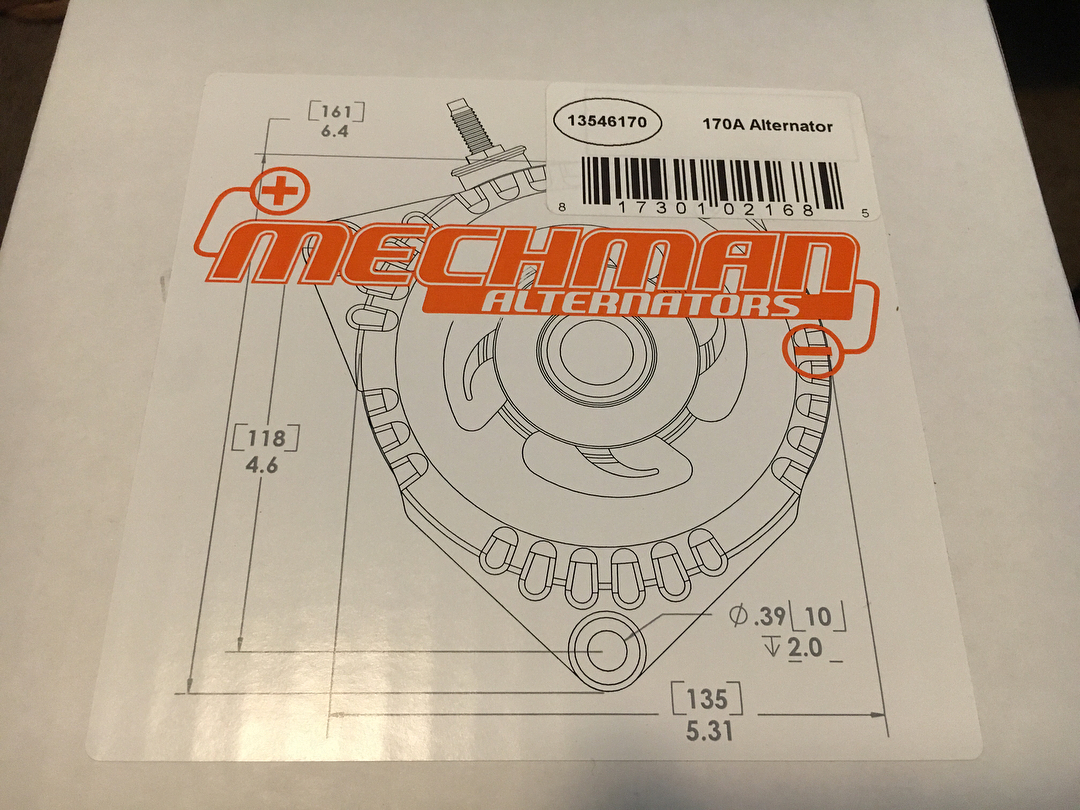
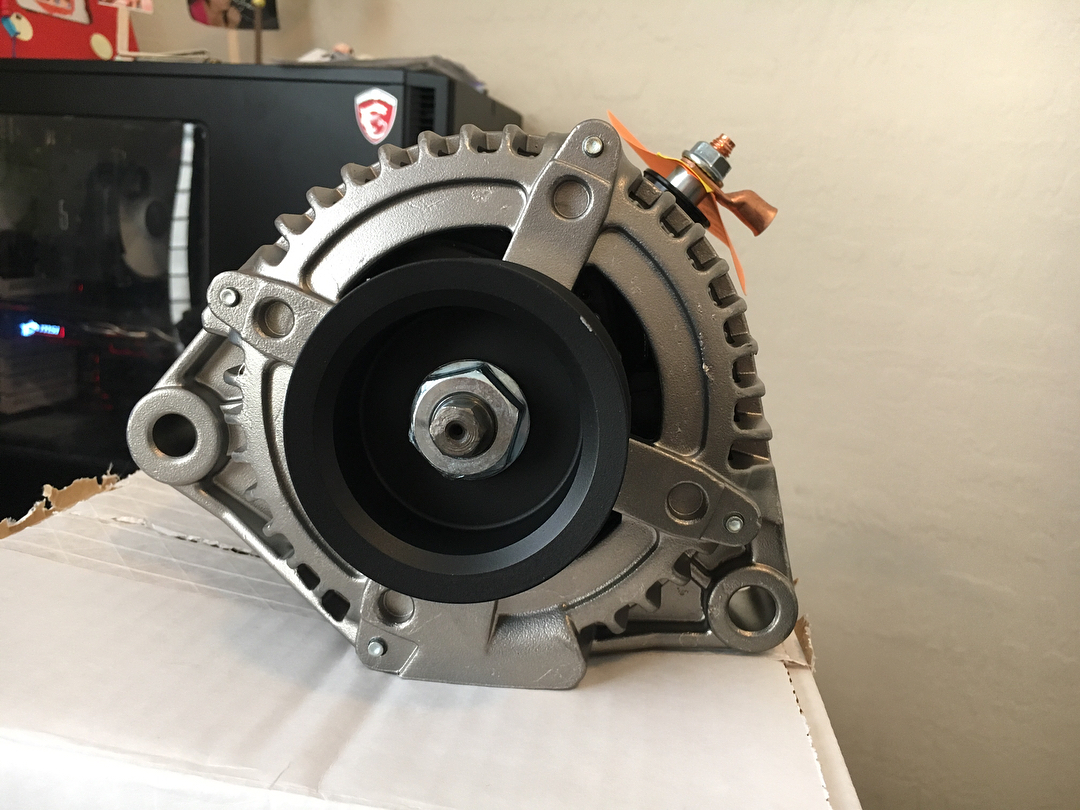
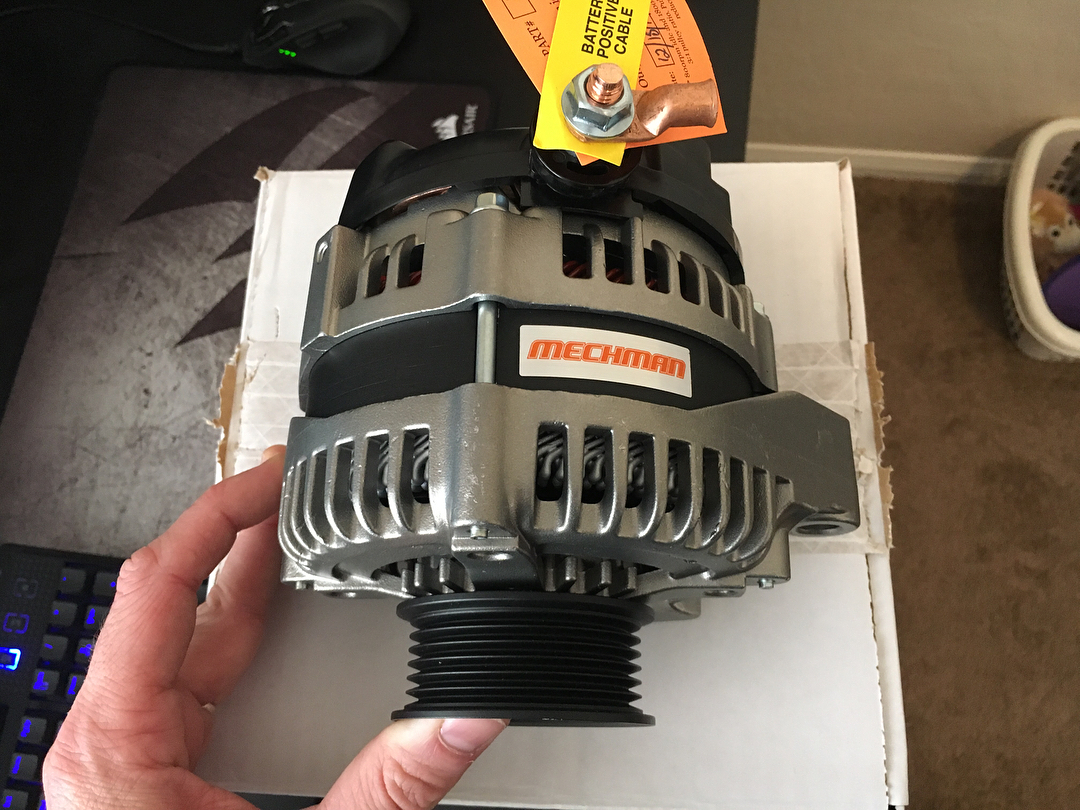
Prior to opening the box I had already planned on saying that your first concern with keeping your motor in good health should be buying quality operating parts and saving the pretty bits for later. To my surprise, though, the Mechman alternator is not only a beast but it’s a beauty as well. Made to order, built in the USA...yeah, I won’t need another alternator for a LONG time. Highly recommend Mechman! I’m going to go back to being sick now.
   I got the alternator mounted up and then put the serpentine belt on. I also flipped the motor over and separated both the lower and upper oil pans for cleaning. The insides of the motor look good on the bottom end so that’s a plus. 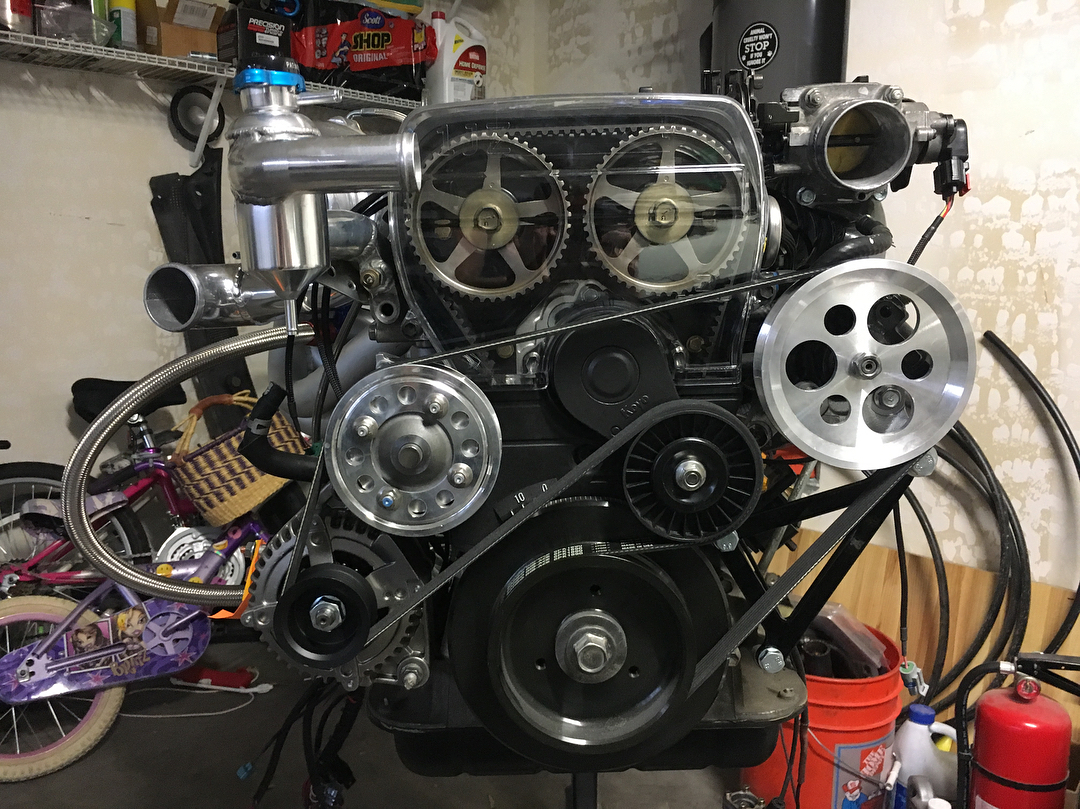 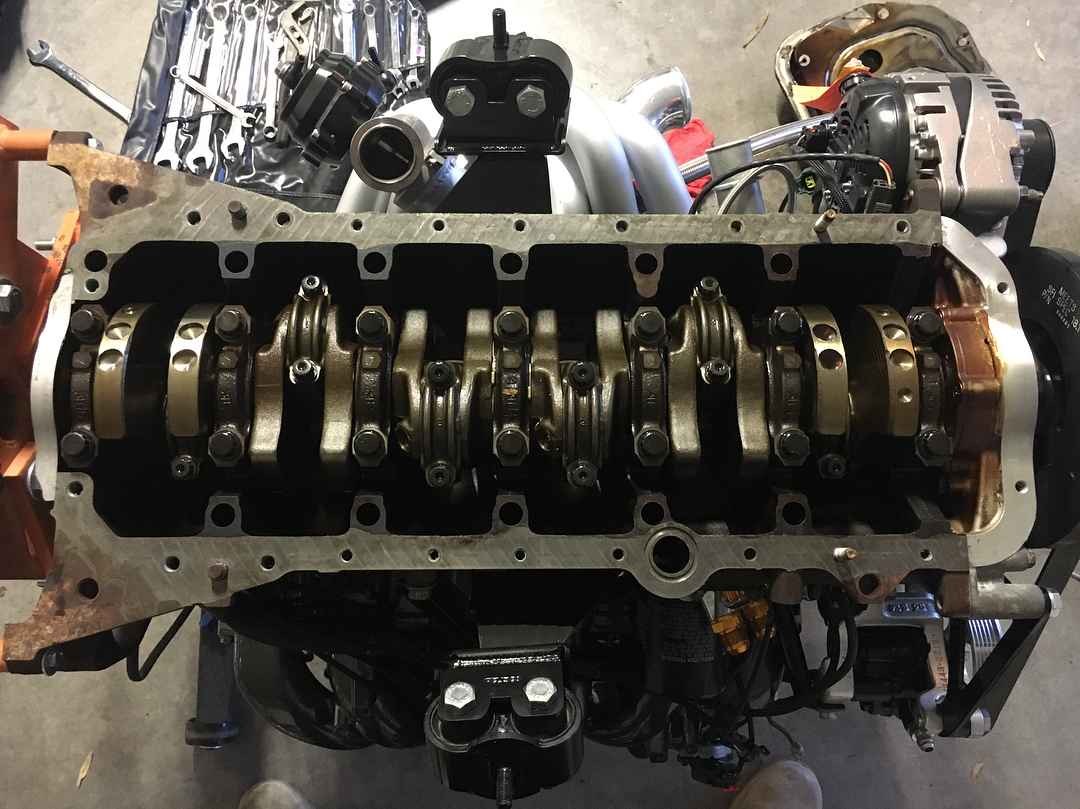 Test fitted the LRB Speed door panels, not once, but twice because I forgot the bling handles the first time. 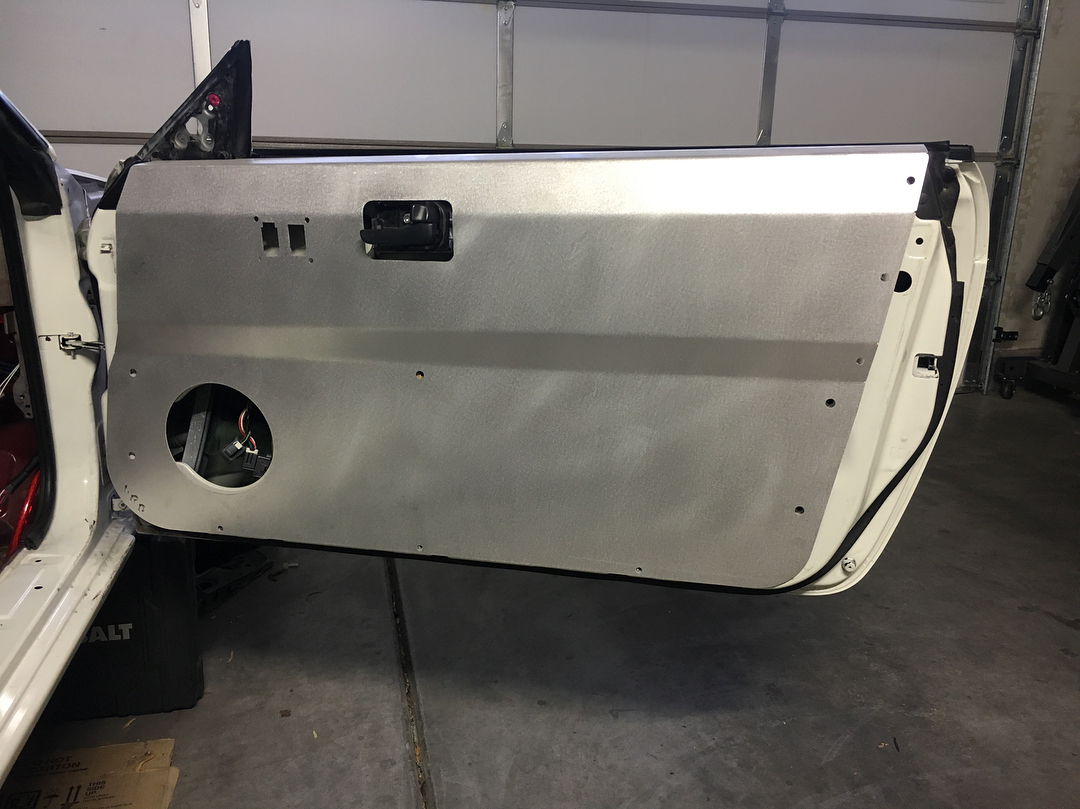 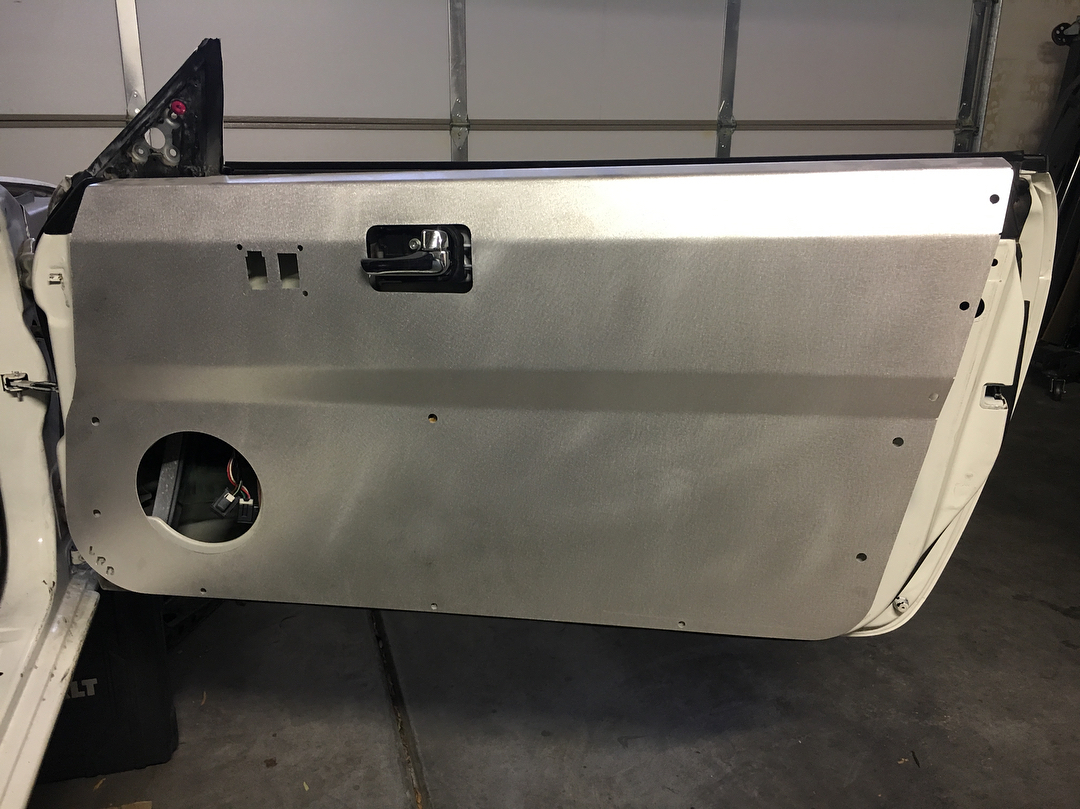 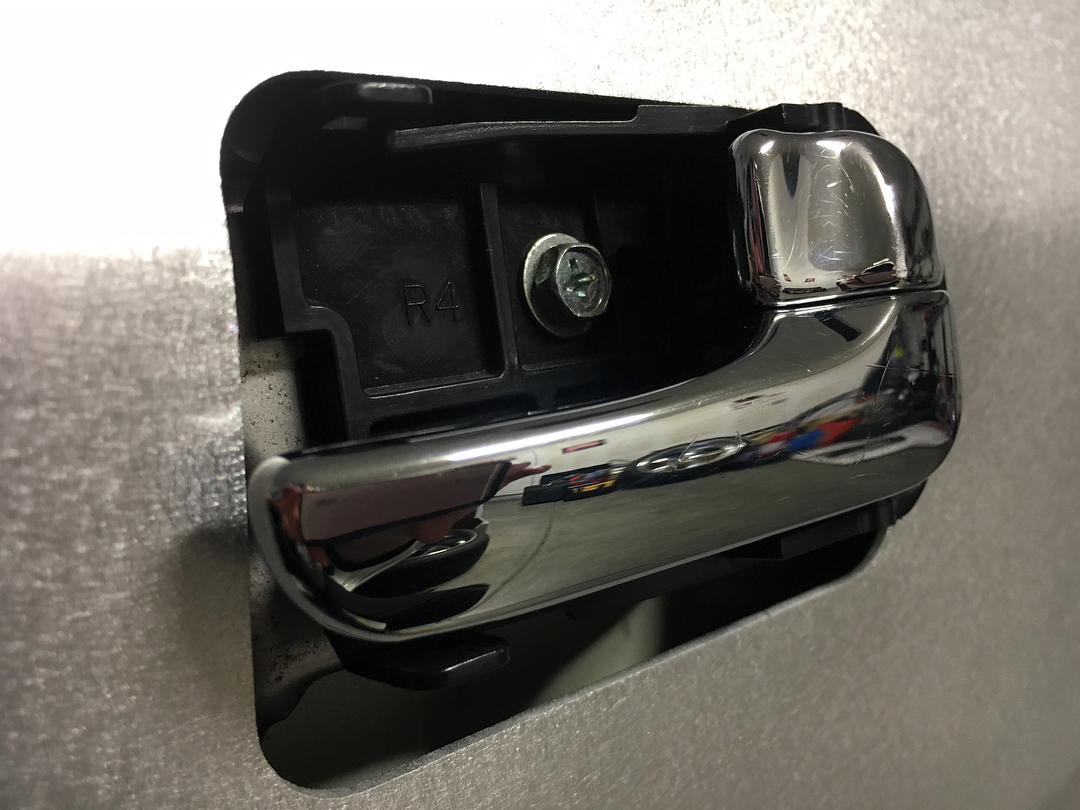
__________________
|
|
|

|
|
|
#159 |
|
Post Whore!
 Join Date: Oct 2007
Location: Las Vegas
Age: 36
Posts: 4,590
Trader Rating: (53)
           Feedback Score: 53 reviews
|
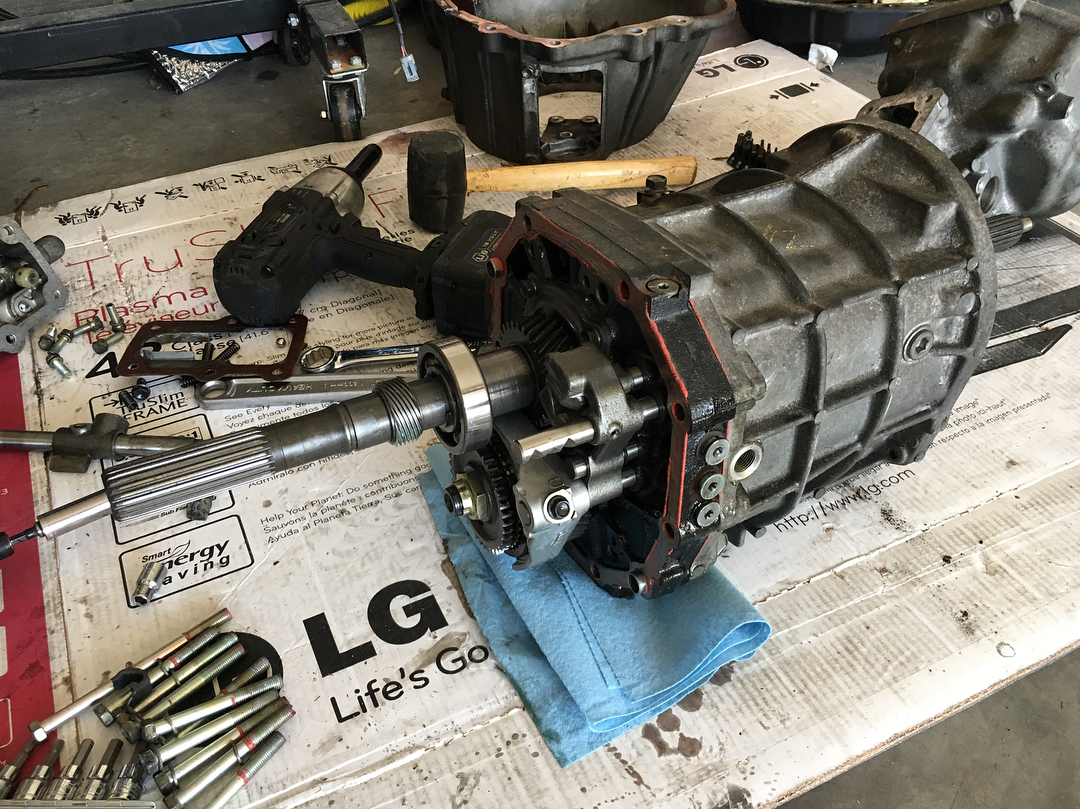
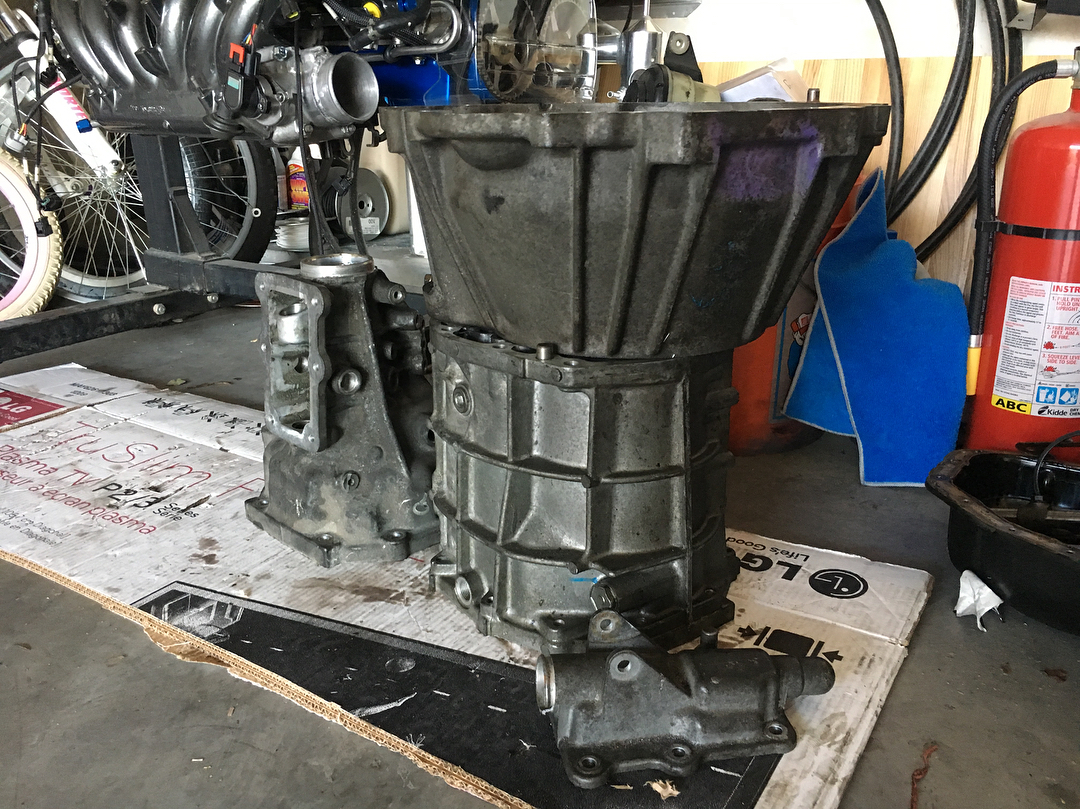
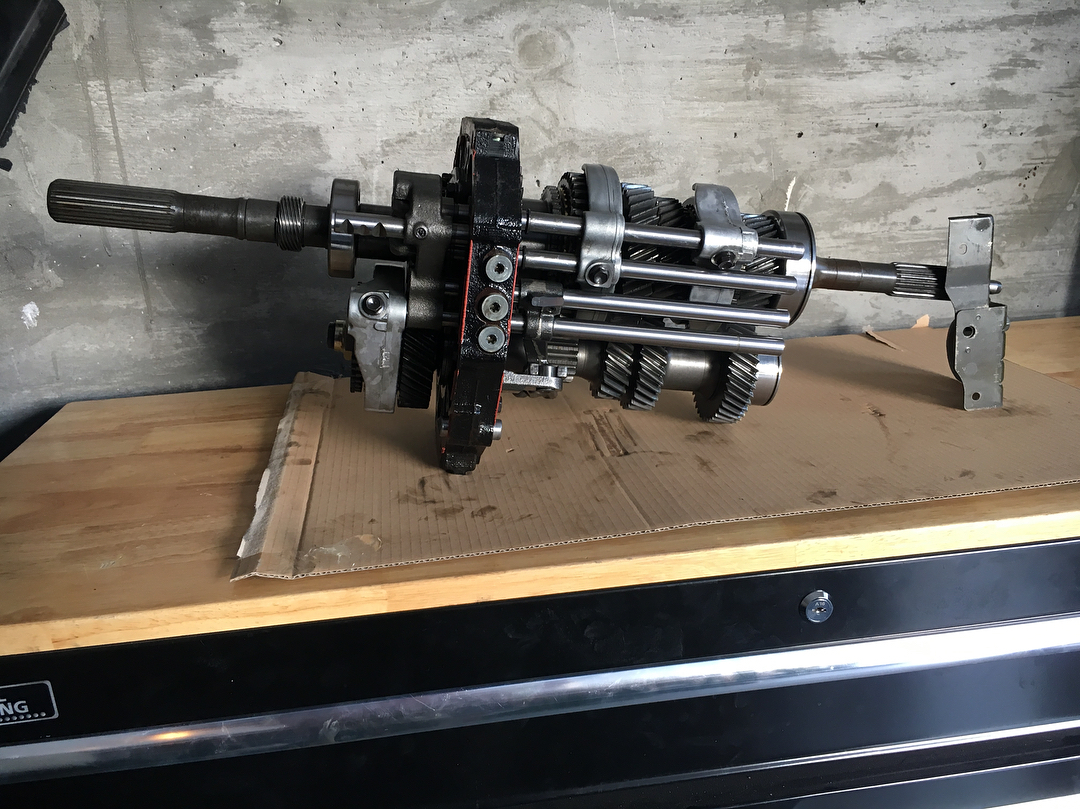
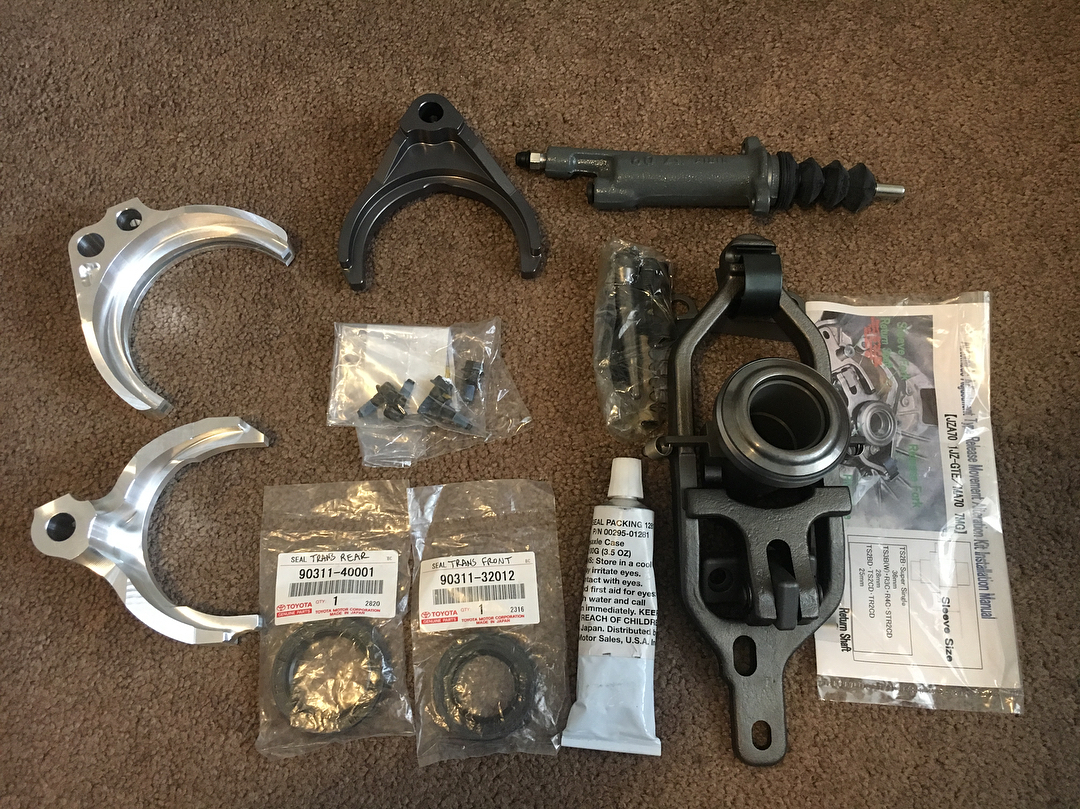
I was able to get some time in today after work to tear into my transmission. Thankfully having the FSM printed out makes tasks like this fairly easy. Most of the things I’m doing to my car in this build are firsts for me. If you have a little bit of knowledge, a decent set of tools, and some good documentation, you can likely accomplish many of the tasks on your build yourself. Behind the scenes I bag and label parts just to ensure I don’t screw anything up. Know yourself and compensate for your faults. I have a decent amount of parts to install during reassembly but before any of that, I need to have the casings all cleaned up. More to come...
__________________
|
|
|

|
|
|
#163 | |
|
Post Whore!
 Join Date: Oct 2007
Location: Las Vegas
Age: 36
Posts: 4,590
Trader Rating: (53)
           Feedback Score: 53 reviews
|
E's '95 S14 Build - The true "forever" build
Quote:
Yes, I must have forgotten that part. I ended up with the V3’s, so all is good to go now. I think I forgot to take pics. GKTech are good people and I won’t hesitate to buy anything in the future. Highly recommended. After moving on from that I’m now in a real pickle with this steering rack situation. If it isn’t one thing it’s another. Sent from my iPhone using Tapatalk
__________________
|
|
|
|

|
|
|
#165 | |
|
Post Whore!
 Join Date: Oct 2007
Location: Las Vegas
Age: 36
Posts: 4,590
Trader Rating: (53)
           Feedback Score: 53 reviews
|
E's '95 S14 Build - The true "forever" build
After taking my oil pans to a local machine shop to get cleaned, the upper pan came back dirtier than when I took it down. It looked like it may have been hot tanked, which even I know doesn’t really do cast aluminum justice in the looks department. You can see in the photos where the “cleaned” oil pan now has flecks of RTV on the INSIDE. Looks like someone kinda hit it with a high speed wire brush melting the RTV and flinging it everywhere. It also melts and smears it on the flange as seen in the pics. I’ve done this, many times removing RTV from parts. I’m blown away that all of that was done and there is still RTV in some of the channels on the flanges. After that I ended up going with my original gut instinct and getting it powder coated. They clean the parts so damn well and it comes back with a great coating; it doesn’t get much better than that. Thanks to Ram ProLine
 for tackling the job and knocking it out of the park. for tackling the job and knocking it out of the park.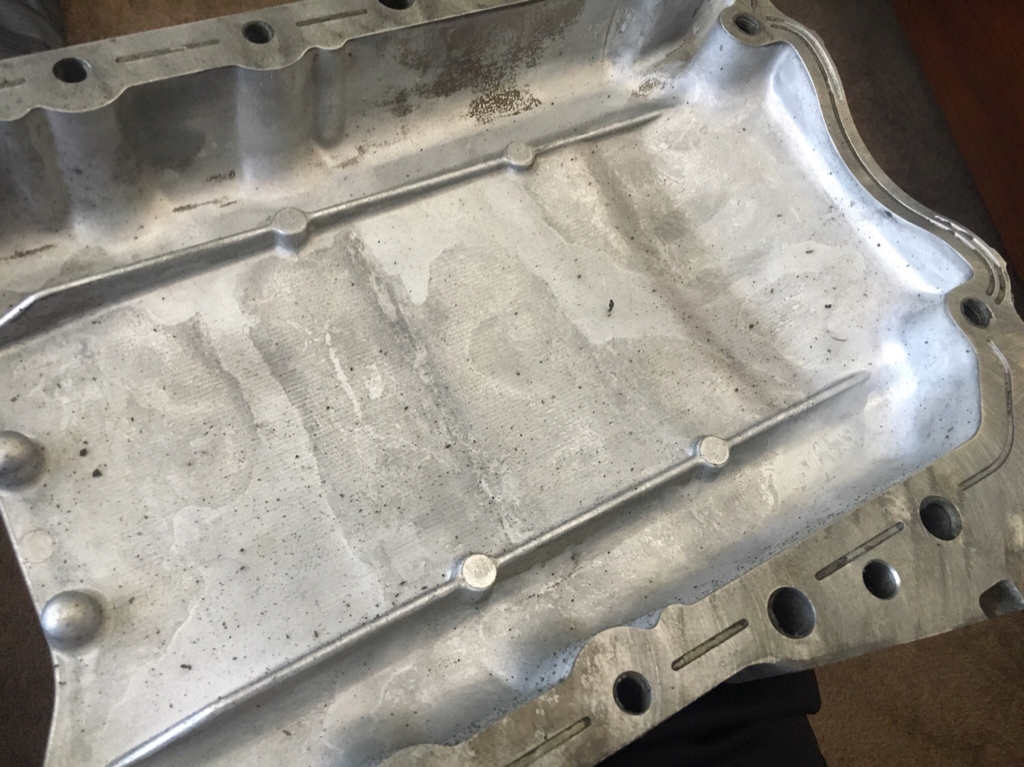 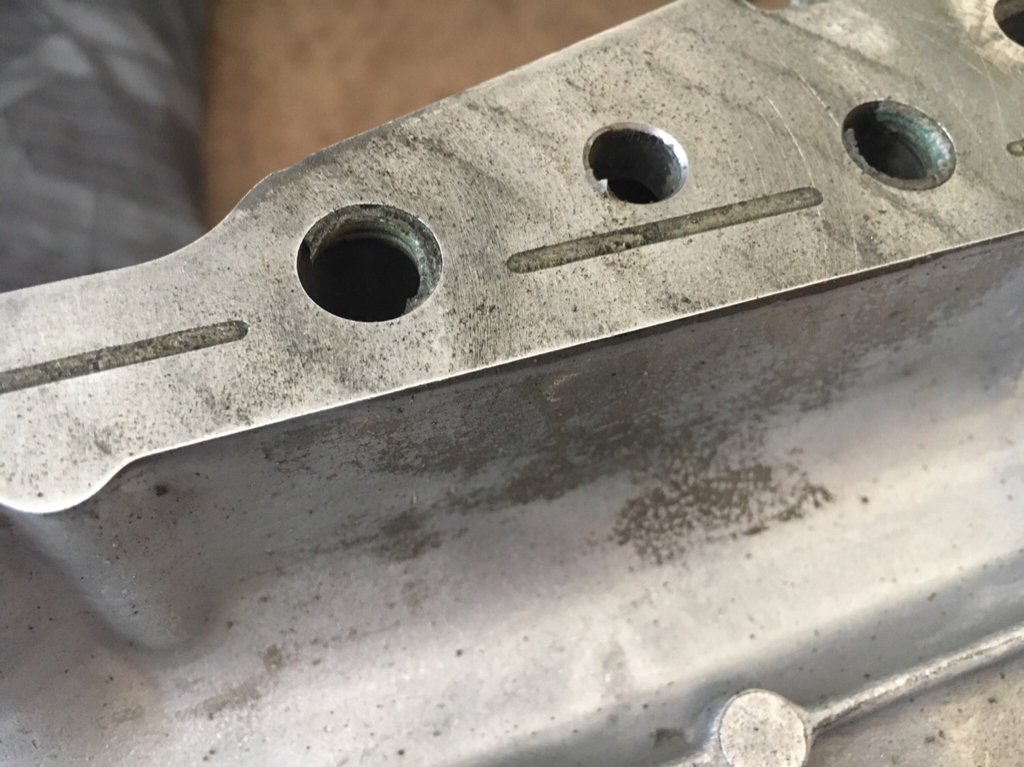 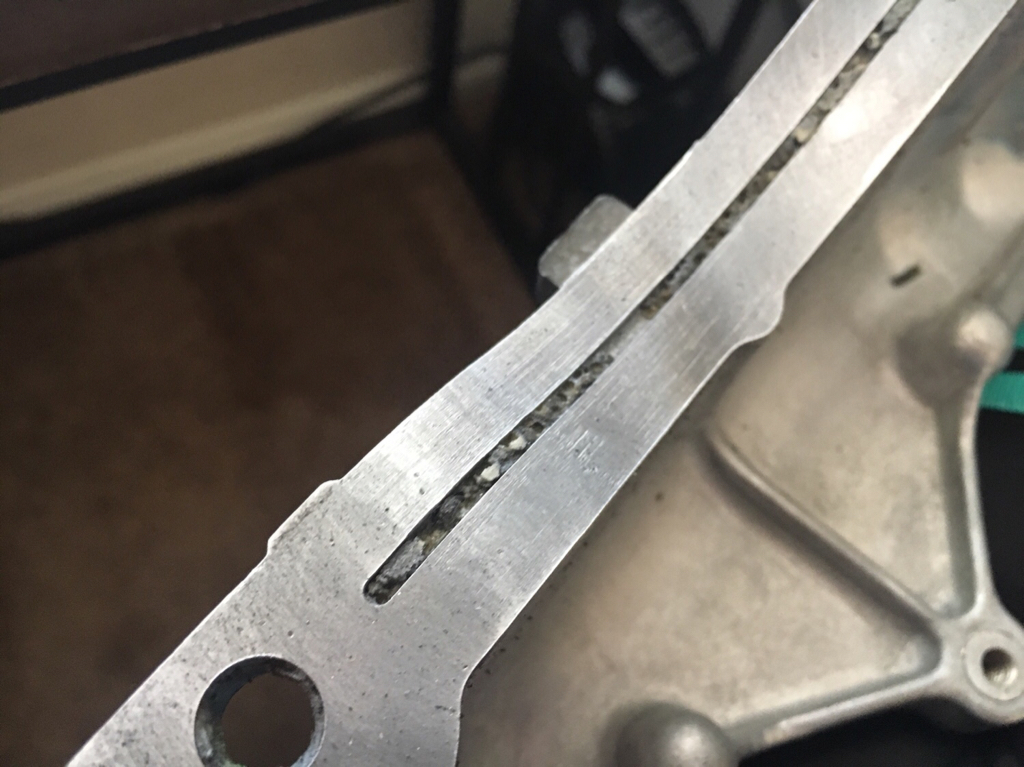 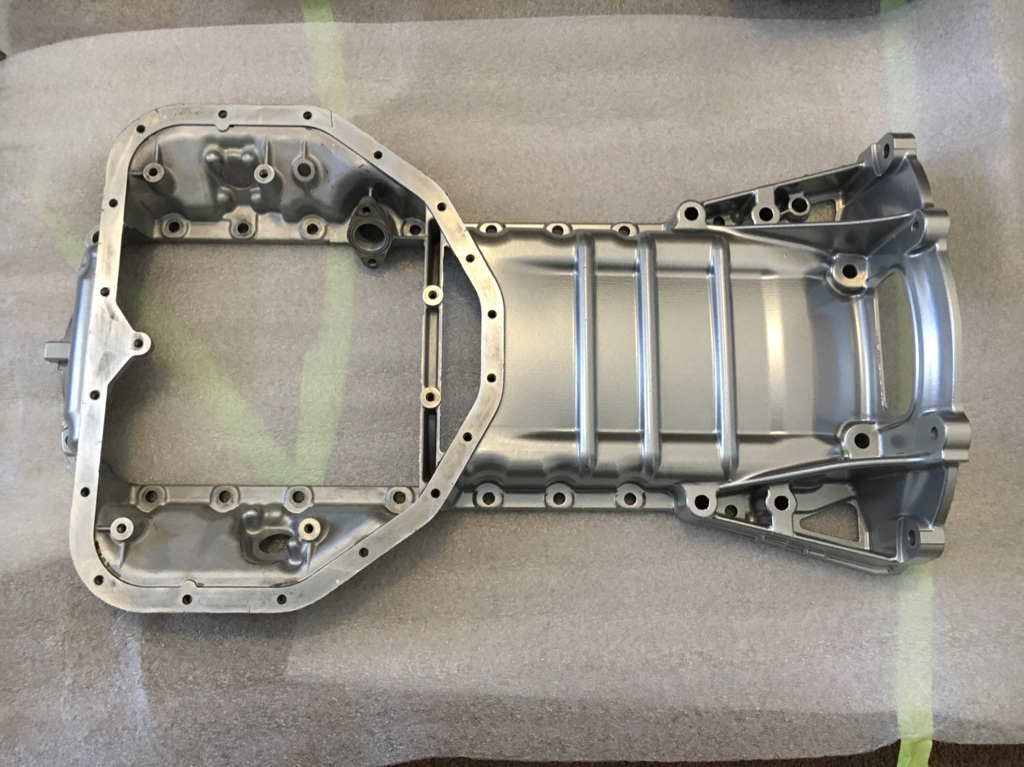 Quote:
Til death do us part. I’ll never sell it so either the car dies first or I do. Sent from my iPhone using Tapatalk
__________________
|
|
|
|

|
|
|
#166 |
|
Leaky Injector
Join Date: Nov 2012
Location: Las Vegas
Age: 26
Posts: 90
Trader Rating: (0)
 Feedback Score: 0 reviews
|
Didn't realize this was your build thread erik! I was scrolling through the first page and was like cool japan, and then i was starting to notice the cars and people started looking familiar, and realized it was your s14 build on the xd-9's! Can't wait for you to finish this up! also I have the GKtech V2's on my car with the washer and its working perfectly fine for me! I'm not as OCD as some so im content with it, appreciate all the help as well! Ill lyk on the rack situation once my phone charges ! Also will pick up a new wiring specialties harness once I get some extra funds and figure out what damn ECU i have on my blacktop! I have no sticker on it Dx
__________________
Don’t mind me, I’m just an irrelevant little shit. |
|
|

|
|
|
#169 | |
|
Post Whore!
 Join Date: Oct 2007
Location: Las Vegas
Age: 36
Posts: 4,590
Trader Rating: (53)
           Feedback Score: 53 reviews
|
Quote:
 Thanks, I appreciate all of the love. Thanks, I appreciate all of the love.Fishy is correct. I bought them on eBay IIRC. Check your local junkyards as well.
__________________
|
|
|
|

|
|
|
#170 |
|
Post Whore!
 Join Date: Oct 2007
Location: Las Vegas
Age: 36
Posts: 4,590
Trader Rating: (53)
           Feedback Score: 53 reviews
|
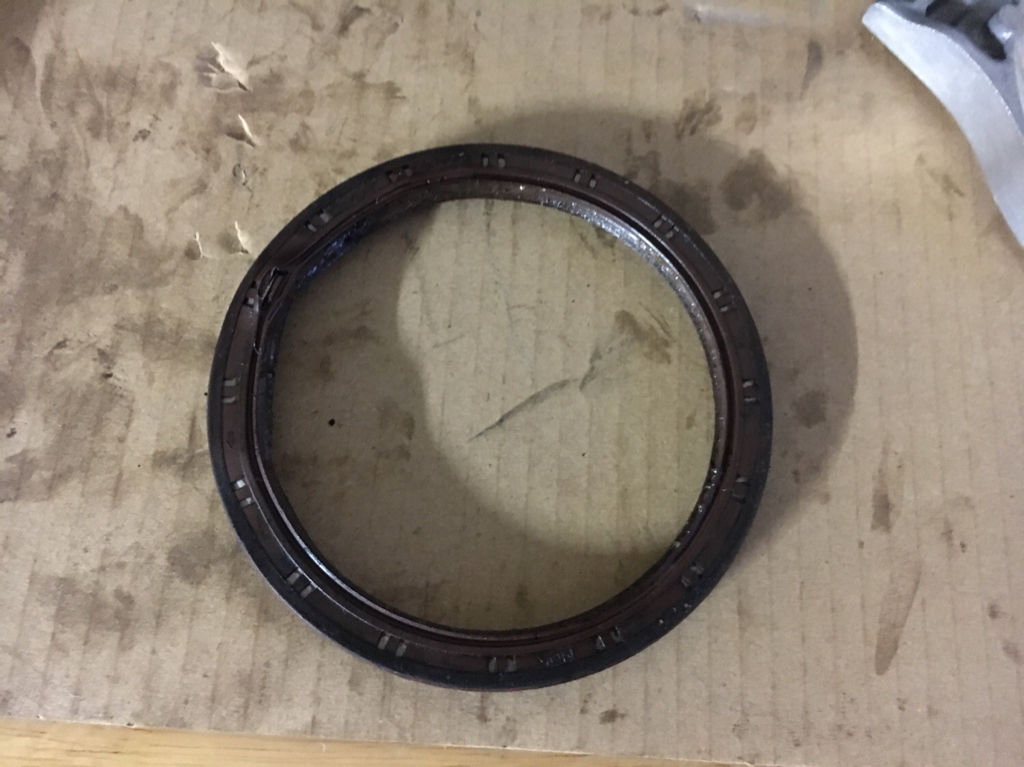
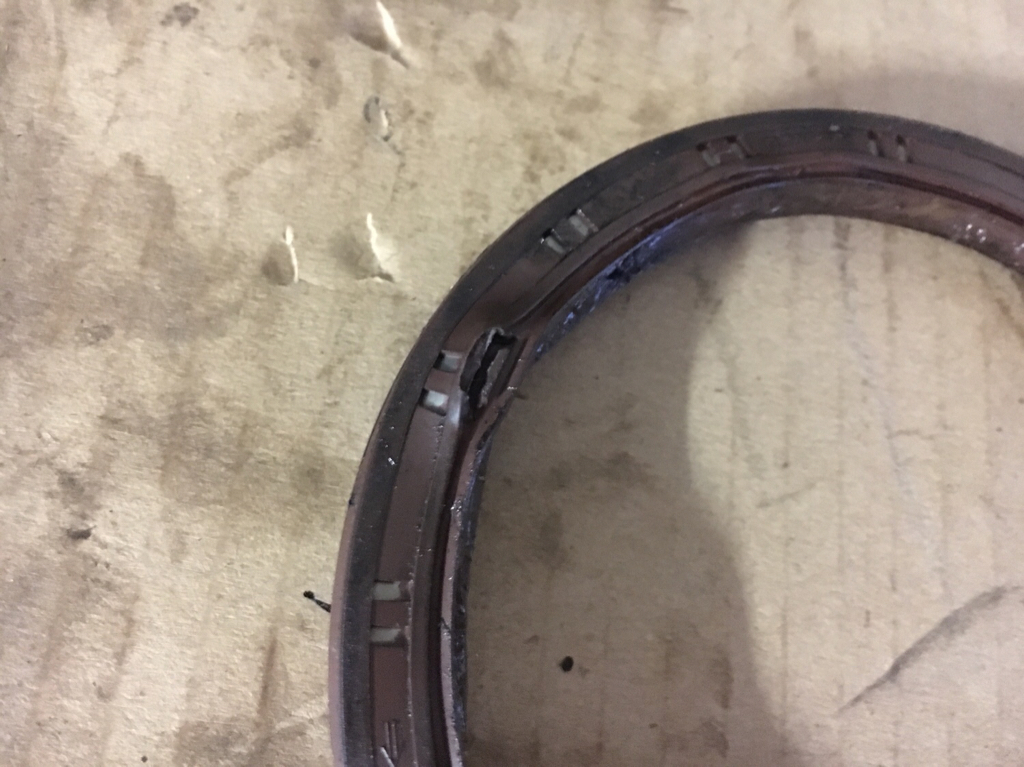
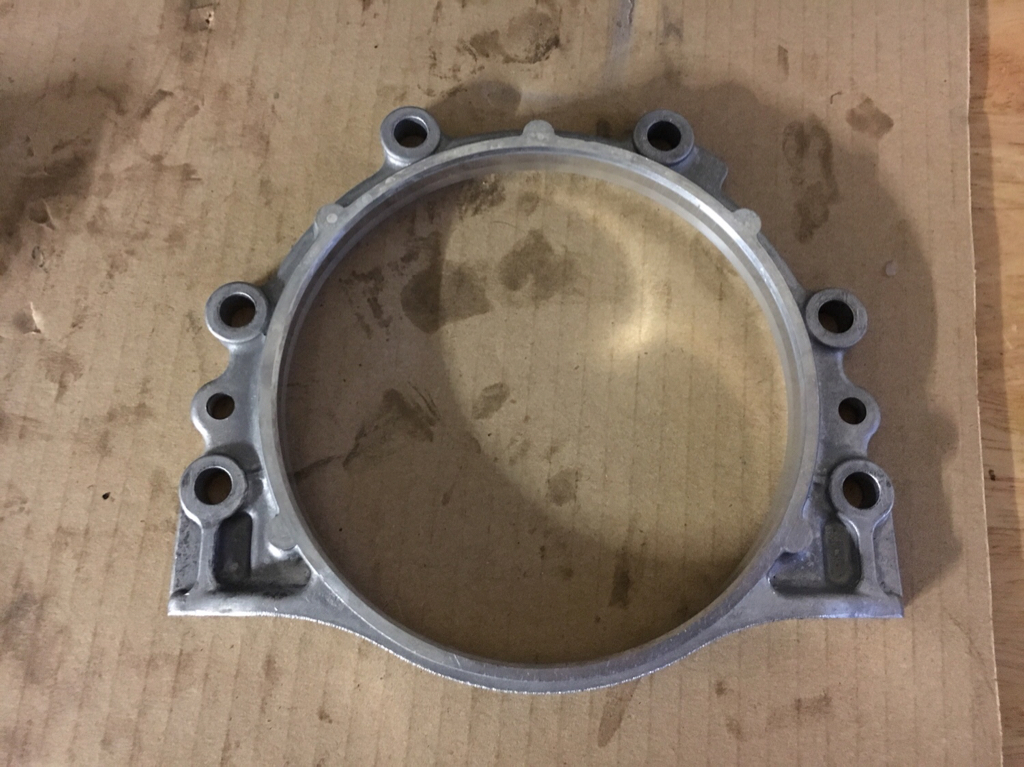
I had some time yesterday to put in a little work. My daughter and I removed the housing for the rear main seal to give it the old cleaning, new liquid gasket, and new seal treatment. We quickly mutilated the old gasket removing it and hit the housing with a pressure washer, some Purple Power, and a drill brush. While that was drying I spent the next 30 minutes looking for the new rear main seal and discovered that I had already replaced it. I’m guessing that I replaced it a long time ago and just completely forgot about it. I never thought I was going to drop the oil pans so removing the rear main housing and cleaning it was something I didn’t originally plan to do. Nothing I can do but chalk it up as an “L” and order a new seal. At least the housing looks mint!
   There’s no way I was going to finish assembling the bottom end without the seal so we moved from working on the motor to working on the transmission. After disassembling and reassembling the forks and rods about 10 times I got everything buttoned back up and looking nice. For some reason during reassembly I kept ending up with one extra locking ball so I had to tear it apart over and over because one was falling out of place without me noticing (cardboard dampened the noise). Now I just have to reassemble the casings and the trans will be good to go. 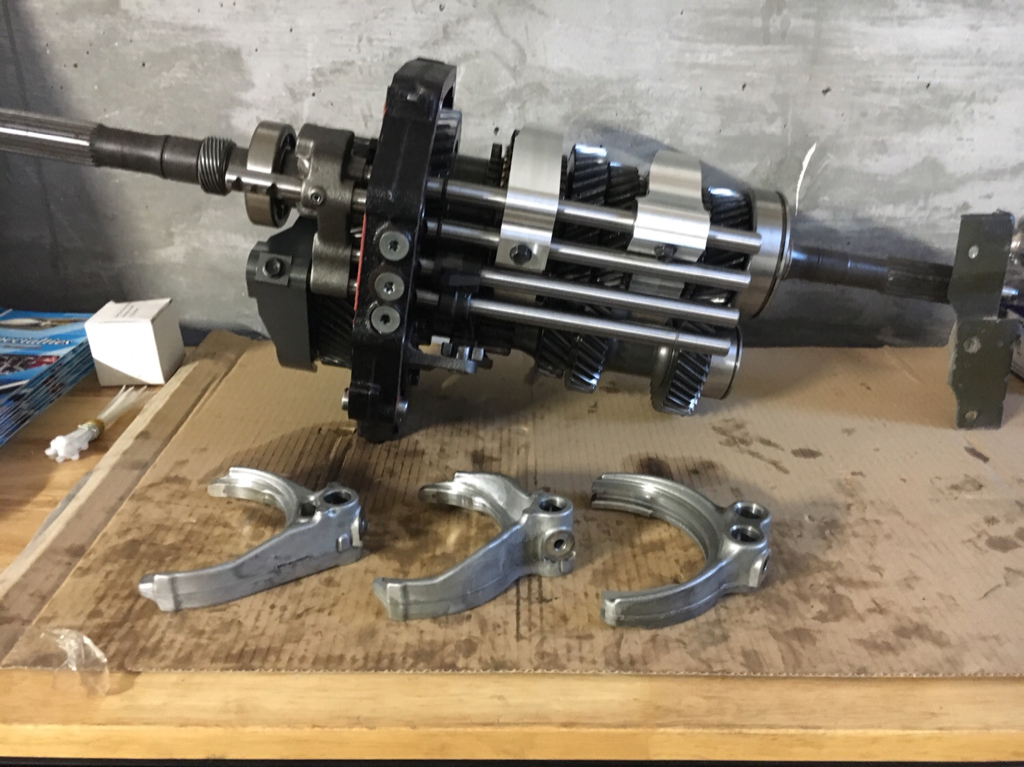 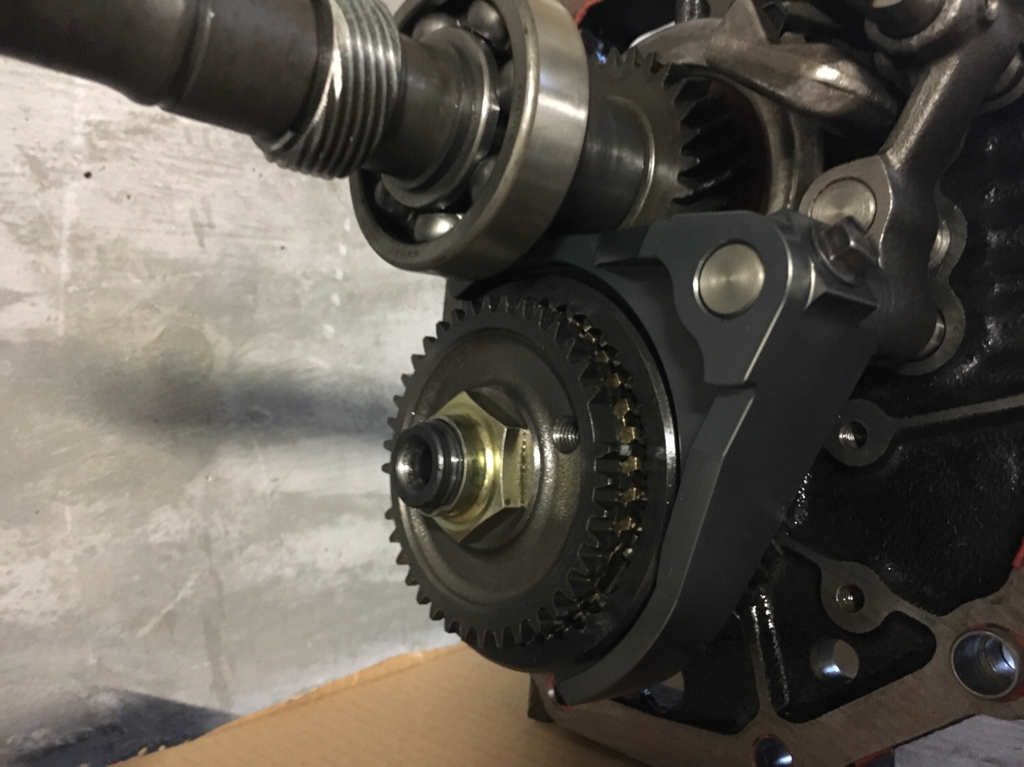 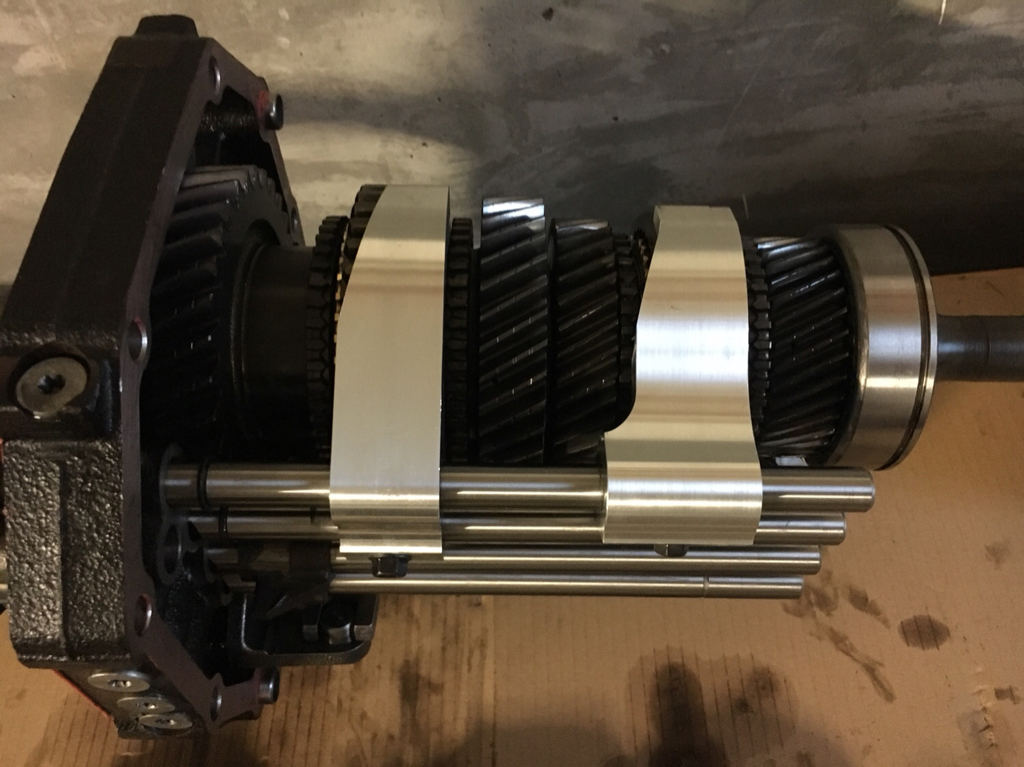 Sent from my iPhone using Tapatalk
__________________
|
|
|

|
|
|
#171 | |||
|
Post Whore!
 Join Date: Oct 2007
Location: Las Vegas
Age: 36
Posts: 4,590
Trader Rating: (53)
           Feedback Score: 53 reviews
|
E's '95 S14 Build - The true "forever" build
Quote:
For anyone wondering, my situation with my steering rack is that they simply aren’t available. I’ve tried to get two racks rebuilt locally and the steering shafts were too bent to rebuild. None of the major parts stores suppliers can get them either. I’ve been talking to multiple people about a more permanent solution and we are all thinking something along the lines of using 350z racks. Basically everything on those racks is the same as an S-Chassis aside from the driver’s side mount. I have purchased a remanufactured S13 rack to use on my S14 for the time being but I’m still looking into solving what will be a huge problem for the community when we can’t source racks for either chassis anymore. I’m not sure how many people know, but Street Faction already makes an aftermarket front subframe. https://streetfaction.net/collection...front-subframe I hit them up to see if they would re-engineer their current design and they got back to me this morning. My email: Quote:
Quote:
Sent from my iPhone using Tapatalk
__________________
Last edited by Mister.E; 05-25-2018 at 12:11 PM.. |
|||
|
|

|
|
|
#172 |
|
Post Whore!
 |
I'm also running a s13 rack in my s14. However, the only places I know that have replacements or rackdoctor.com and meridianautoparts.com.
__________________
|
|
|

|
|
|
#173 | |
|
Post Whore!
 Join Date: Oct 2007
Location: Las Vegas
Age: 36
Posts: 4,590
Trader Rating: (53)
           Feedback Score: 53 reviews
|
Quote:
I was able to get mine through O’Reillys, they just couldn’t get them for the S14. No doubt it’s only a matter of time before suppliers run out of parts for S13 racks too. Sent from my iPhone using Tapatalk
__________________
|
|
|
|

|
|
|
#175 |
|
Post Whore!
 Join Date: Oct 2007
Location: Las Vegas
Age: 36
Posts: 4,590
Trader Rating: (53)
           Feedback Score: 53 reviews
|
I suppose I was lucky then. I didn't actually think they were going to have it when I asked, so I was a bit shocked. I'm glad they did, though, I really want to get this junker back on the road.
__________________
|
|
|

|
|
|
#176 |
|
Zilvia Addict
 Join Date: Nov 2015
Location: Where the bad guys are
Posts: 887
Trader Rating: (6)
  Feedback Score: 6 reviews
|
Hey, I completely reread this thread and fk its amazing. BUMP!
On a side note, when you did your fuel pump, did you get a new sock? When you ripped out the carpeting and vacuumed the inside, how else did you clean it up? Ive partially stripped my interior for cleaning, but there is a bunch of dirt built up that vacuuming wont pick up and some stains that Id love to clean up. Any suggestions?
__________________
Skurr  Skurr Skurr
|
|
|

|
|
|
#177 | ||
|
Post Whore!
 Join Date: Oct 2007
Location: Las Vegas
Age: 36
Posts: 4,590
Trader Rating: (53)
           Feedback Score: 53 reviews
|
Quote:
The kit came with one, however, I opted to reuse the old one because no matter how hard I tried I couldn’t find one that sat at the same angle as the factory one. Quote:
I have some build up as well. My hope is to get the entire car dustless blasted inside and out prior to paint so I haven’t put too much thought into it. You could try some degreaser like Purple Power or Simple Green combined with a hard bristle brush and some brute force strength to break the debris loose. Then use a ShopVac to suck everything out. I’d probably also hit the same areas with water, a rag, and the vacuum again to remove any left over degreaser. Sent from my iPhone using Tapatalk
__________________
|
||
|
|

|
|
|
#178 |
|
Post Whore!
 Join Date: Oct 2007
Location: Las Vegas
Age: 36
Posts: 4,590
Trader Rating: (53)
           Feedback Score: 53 reviews
|
E's '95 S14 Build - The true "forever" build
The new rear main seal was delivered so I got it installed into it’s housing.
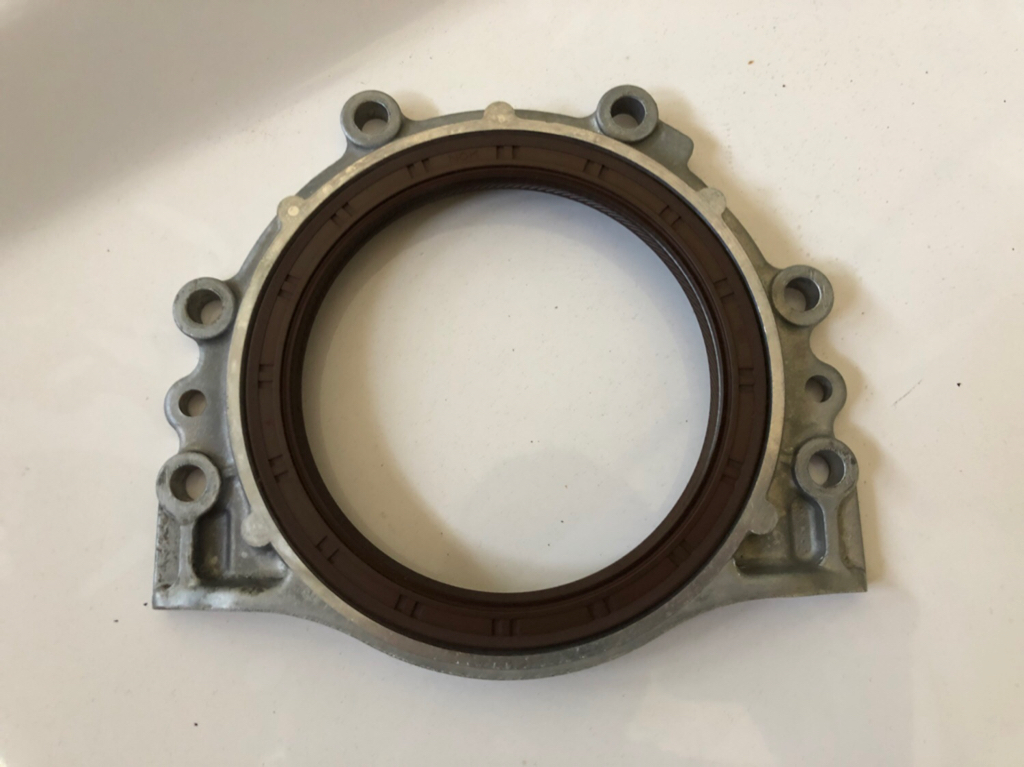 I also had to order a new set of Energy Suspension steering rack bushings since I was forced to switch to an S13 rack. I got the rack installed but had to postpone the tie rod install to wait for some answers from GKtech. I should have waited because they were super quick as usual and had an answer to me before I even got out of the shower. I’m set to put them in now, though. 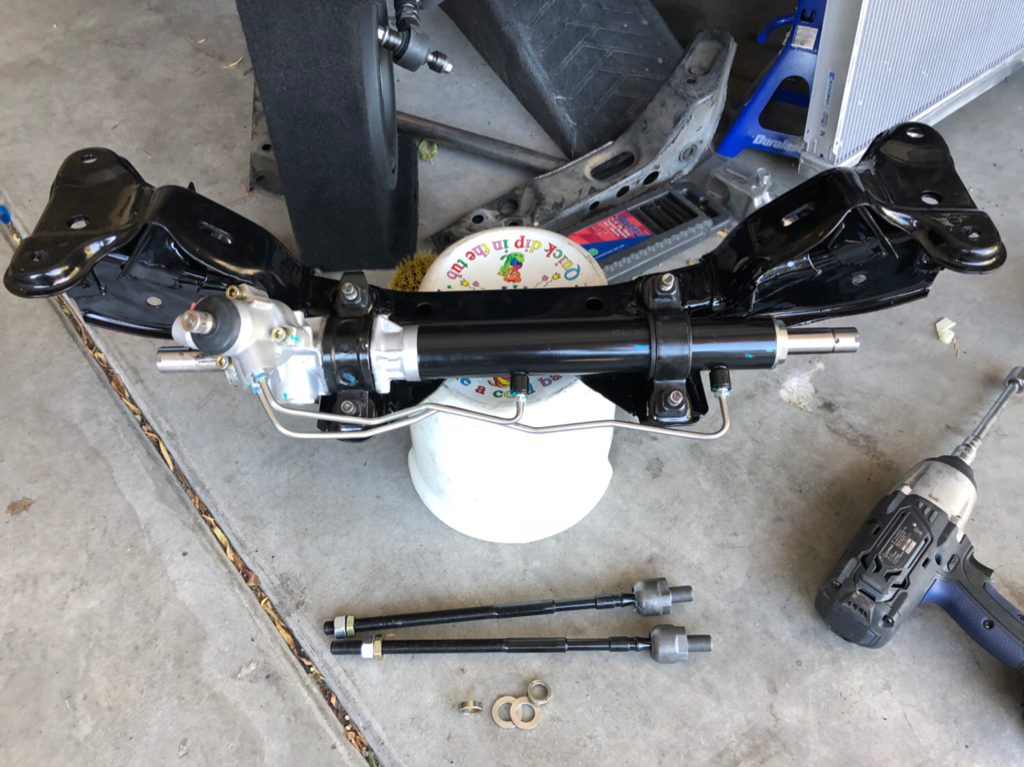 I hand washed the oil pan bolts. They still look like absolute crap, but all of the loose residue is gone. I may replace these in the future. 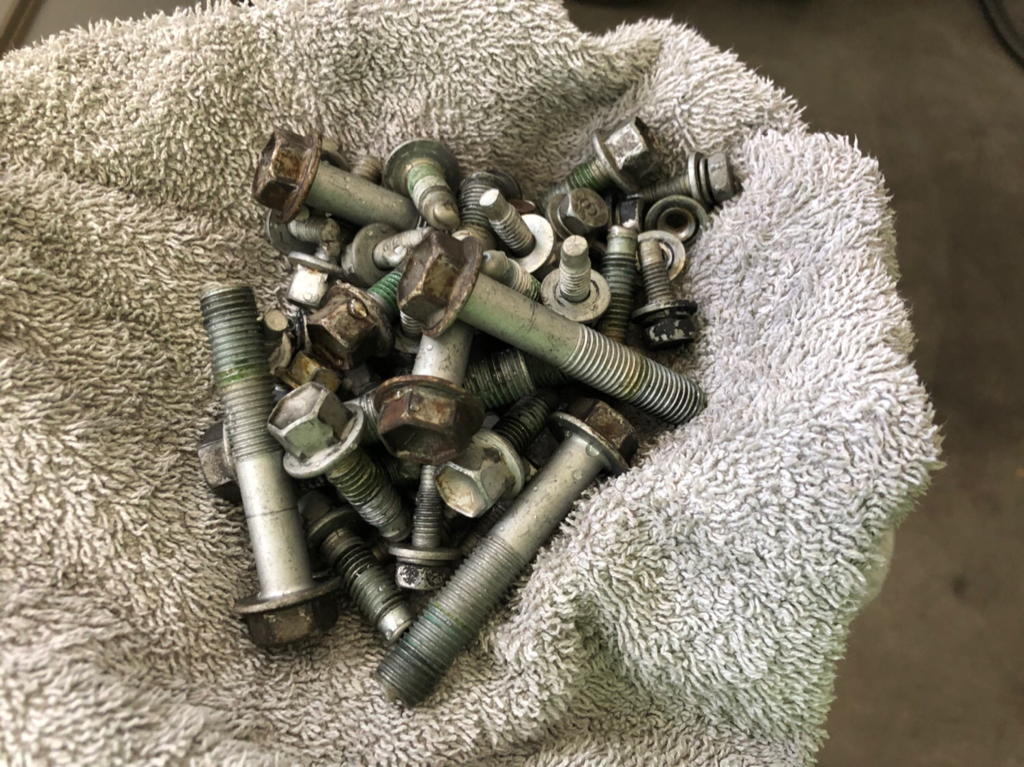 The most important part of today’s work involved resealing the oil pans. The FSM obviously recommends Toyota sealant and they are definitely right. The Toyota FIPG isn’t cheap but it is an incredible sealant; highly recommend. 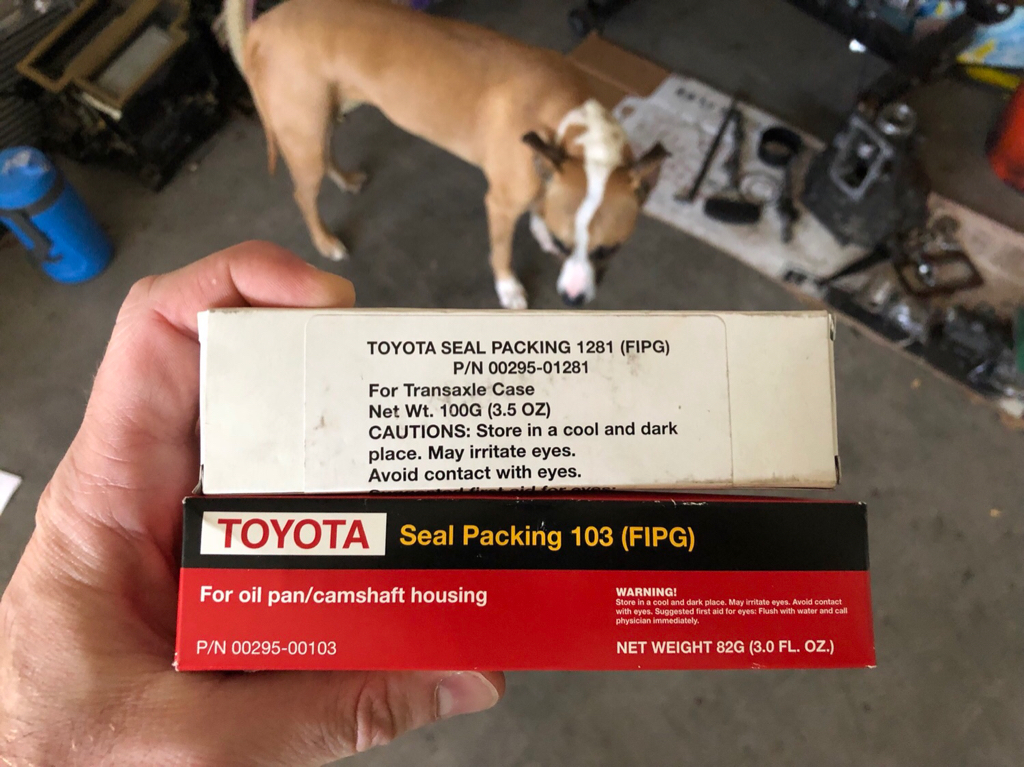 The gooing process went as expected. My hands were covered in sealant and I couldn’t get any pics. I just HAD to touch it. Definitely worth it though, everything looks mint now that it’s installed. 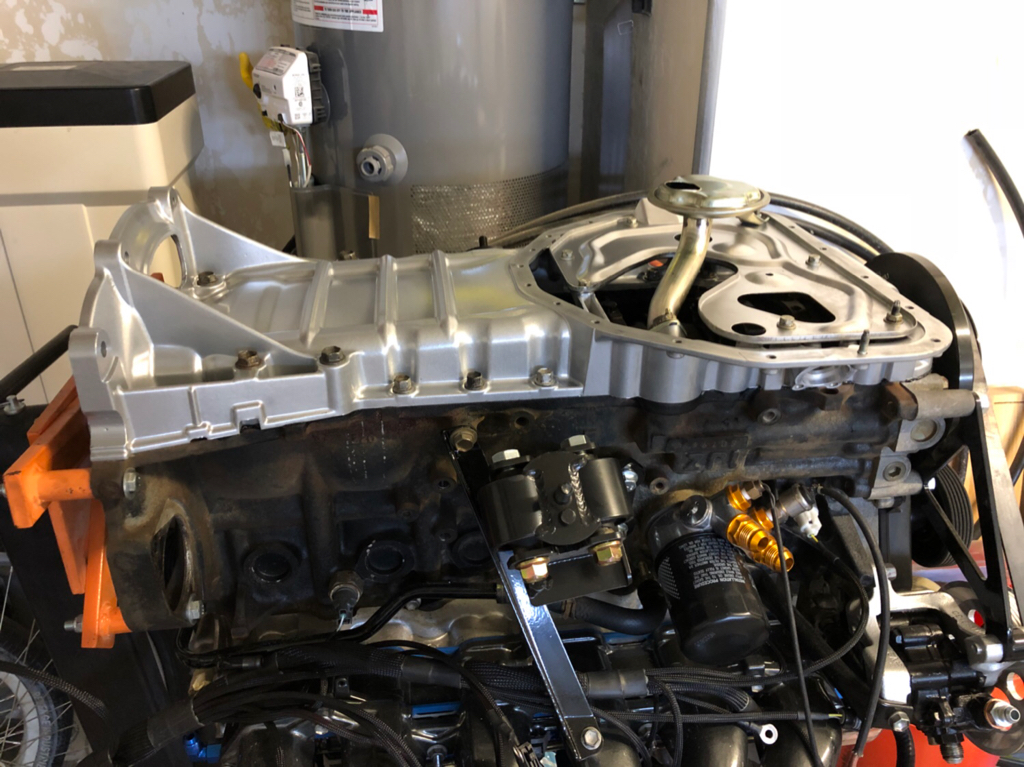 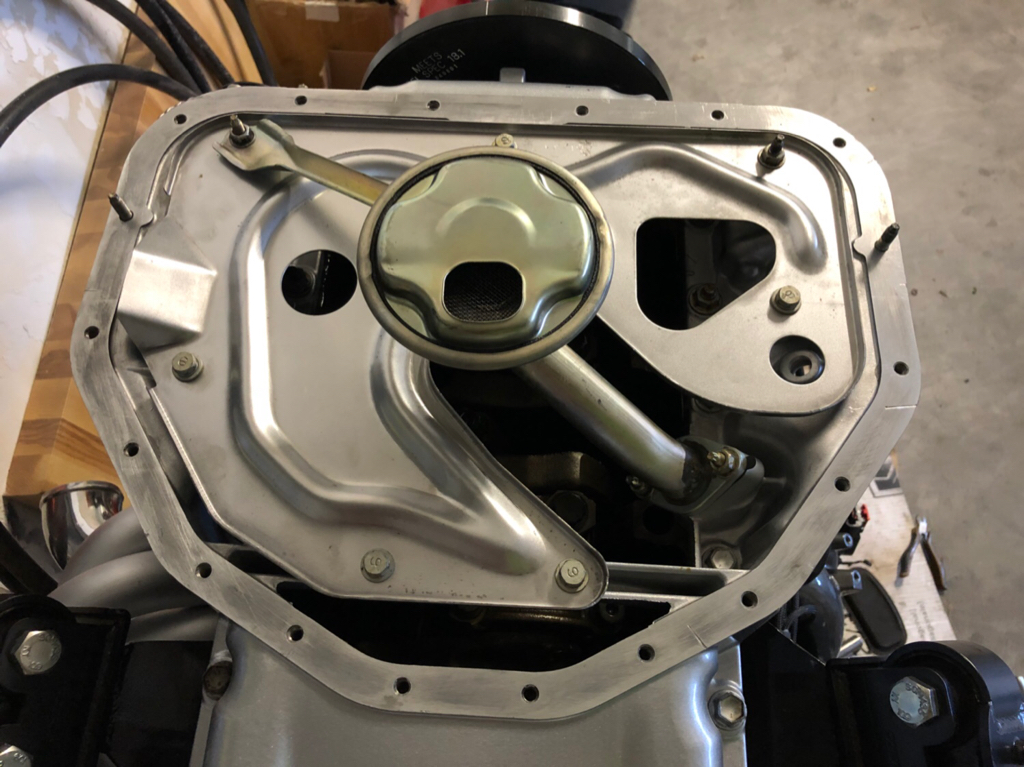 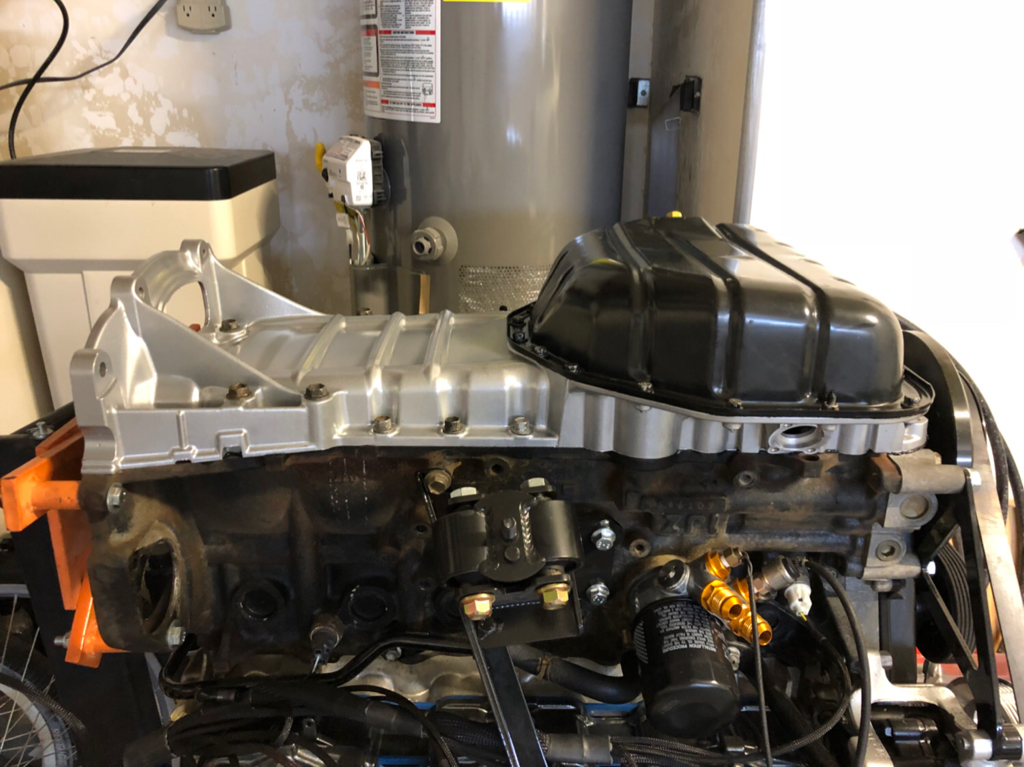 I finished off the pan with a PBM gold magnetic drain plug, because gold all the bolts, right? 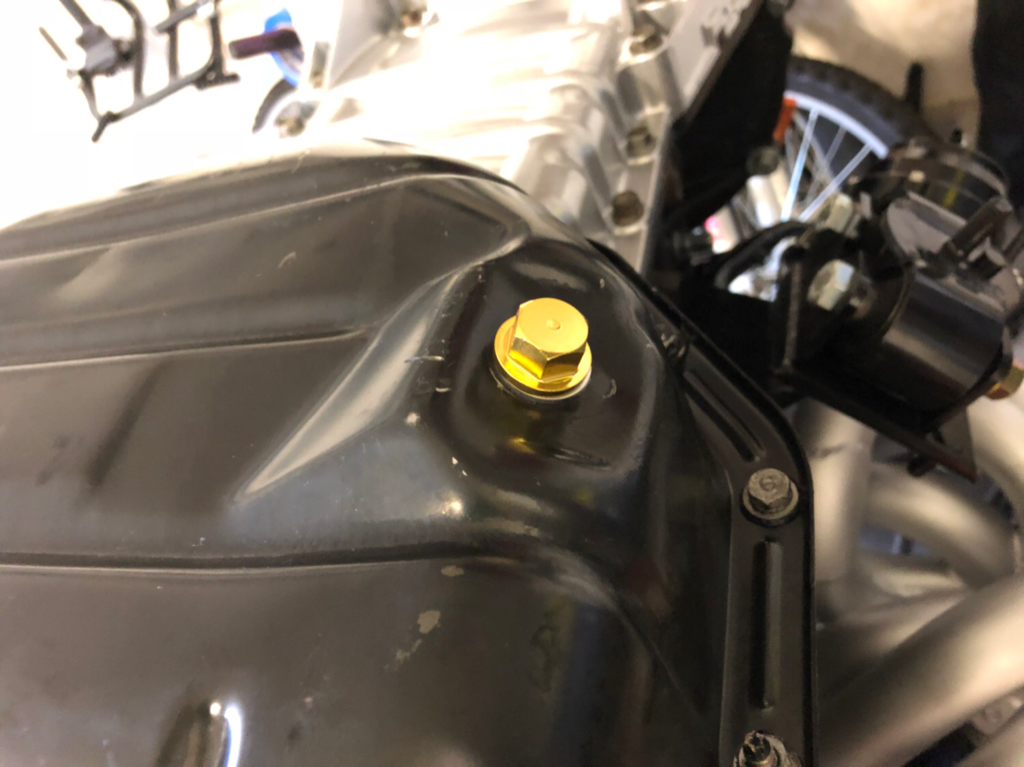 I also gapped my plugs to .25 and got them installed along with the coil packs. Last minute I decided to switch it back up to the factory black timing belt cover and coilpack cover. Looks way better with my valve cover color, in my opinion, so I’ll probably be selling the aftermarket covers I bought. 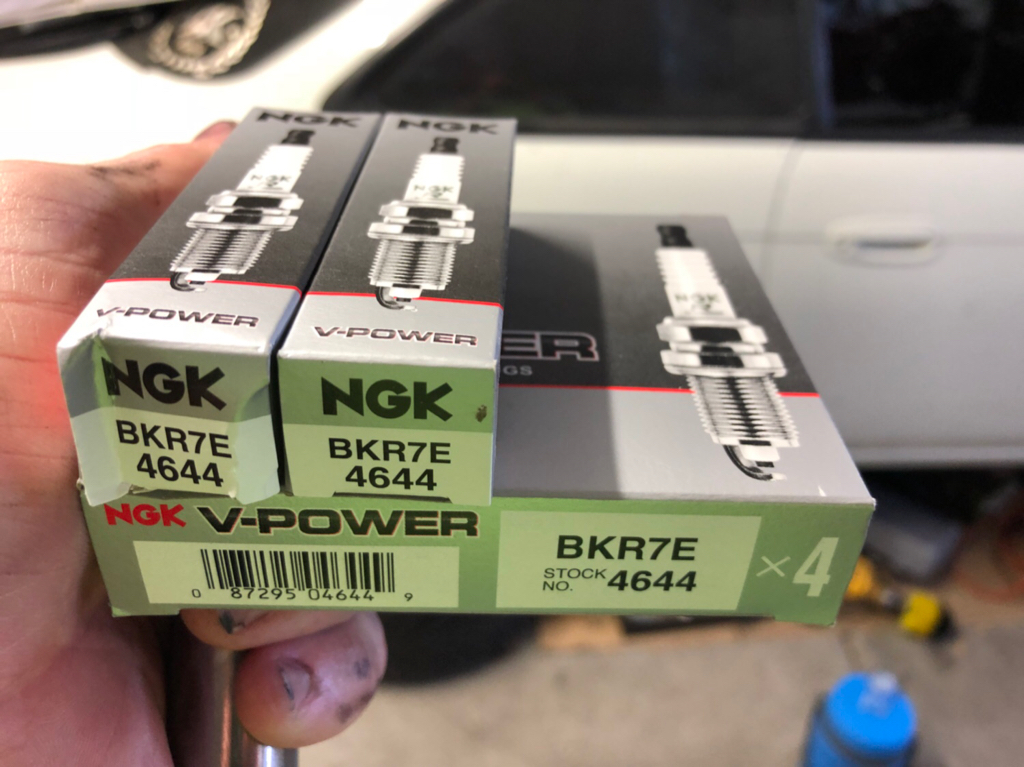 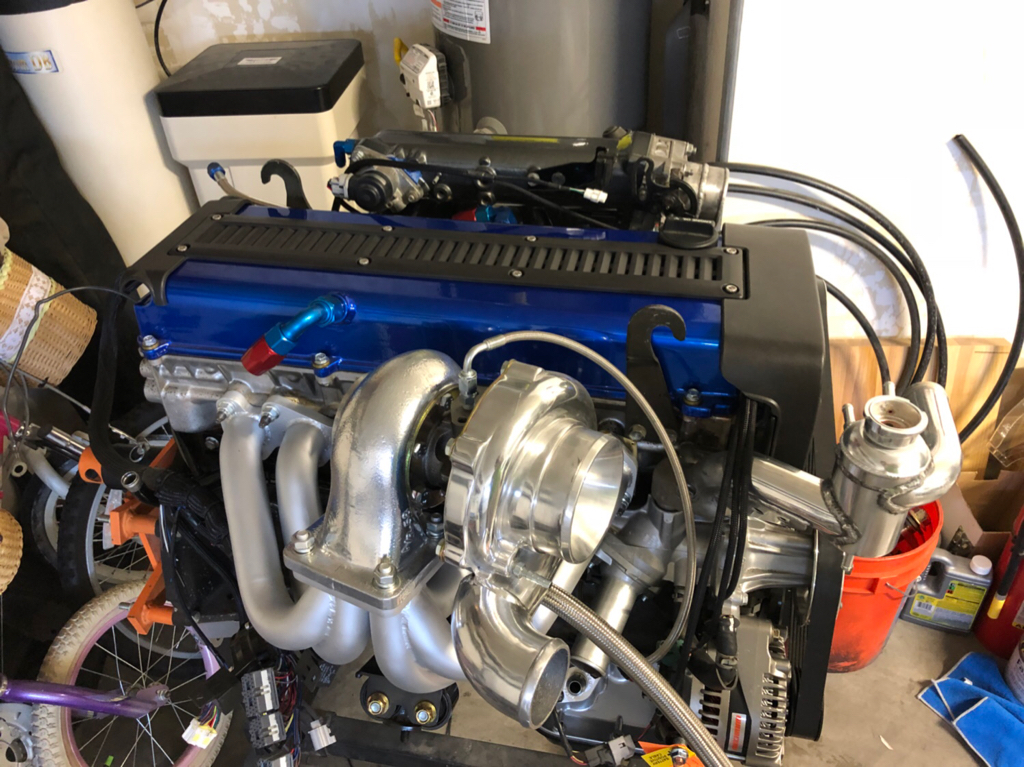
__________________
|
|
|

|
 |
| Bookmarks |
| Thread Tools | |
| Display Modes | |
|
|