
 |
|
|||||||
| Home | Rules & Guidelines | Register | Member Rides | FAQ | Members List | Social Groups | Calendar | Mark Forums Read |
| Builds (and builds only) Got a build thread? It goes here, build threads anywhere else on the forum will be locked and never moved. |
 |
|
|
Thread Tools | Display Modes |
|
|
#181 | |
|
Post Whore!
 Join Date: Oct 2007
Location: Las Vegas
Age: 36
Posts: 4,590
Trader Rating: (53)
           Feedback Score: 53 reviews
|
E's '95 S14 Build - The true "forever" build
Quote:
Just a super basic question. I’m just an idiot and have to validate anything I might be suspicious about. If I don’t, it will just stew in the back of my head that I’ve done something wrong until I go crazy and end up asking anyway. 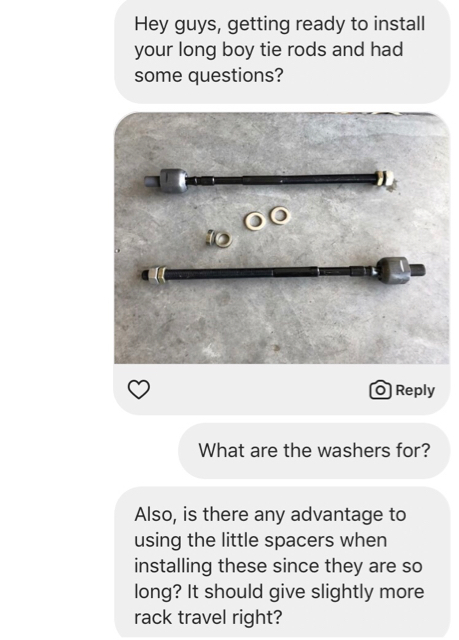 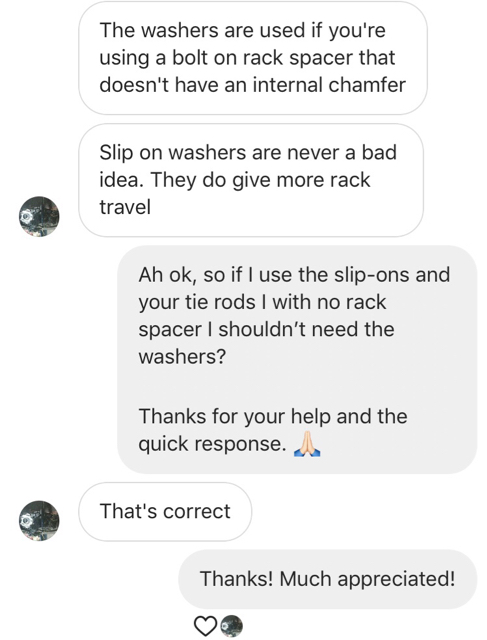
__________________
|
|
|
|

|
| Sponsored Links |
|
|
#182 |
|
Zilvia FREAK!
 Join Date: Oct 2009
Location: Near that guy you know
Posts: 1,561
Trader Rating: (11)
 Feedback Score: 11 reviews
|
that's exactly why i asked what you asked. its probably something that others have wondered. i've never 100% understood the purpose of those spacers either.
|
|
|

|
|
|
#183 | |
|
Post Whore!
 Join Date: Oct 2007
Location: Las Vegas
Age: 36
Posts: 4,590
Trader Rating: (53)
           Feedback Score: 53 reviews
|
Quote:
I’m familiar with the spacers, however, I’d never bought tie rods and received washers so I wasn’t sure what they were for. I try to put as much detail into my posts as I can, but if any of you guys ever have questions, please don’t hesitate to ask.
__________________
|
|
|
|

|
|
|
#184 |
|
Post Whore!
 Join Date: Oct 2007
Location: Las Vegas
Age: 36
Posts: 4,590
Trader Rating: (53)
           Feedback Score: 53 reviews
|
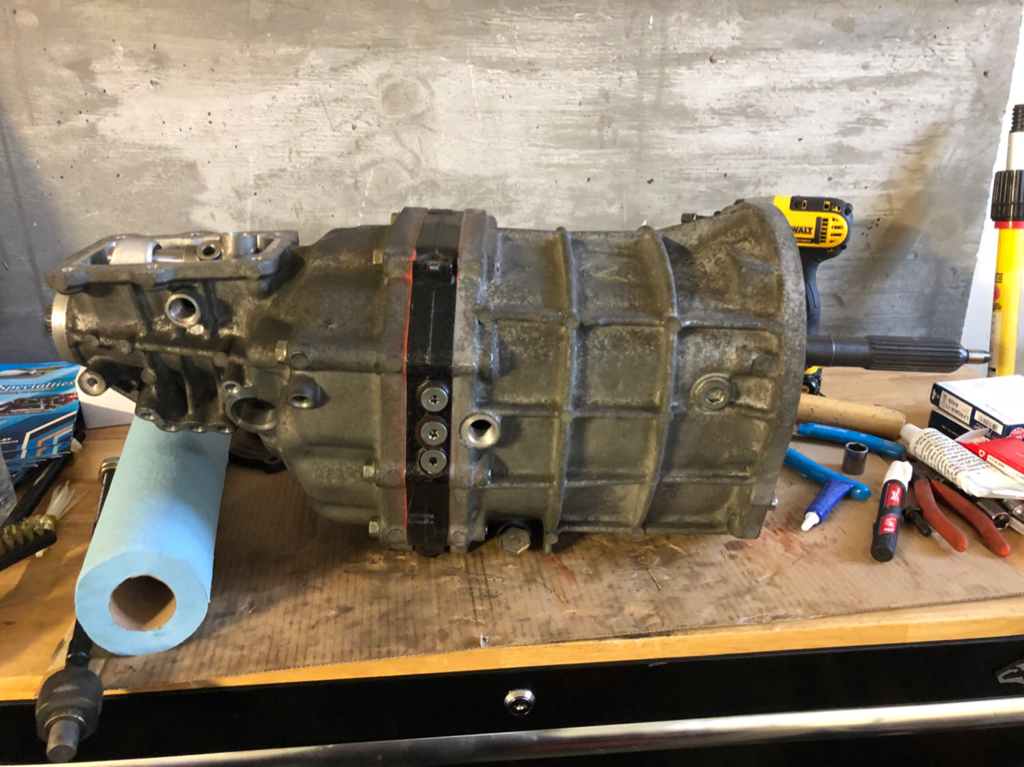
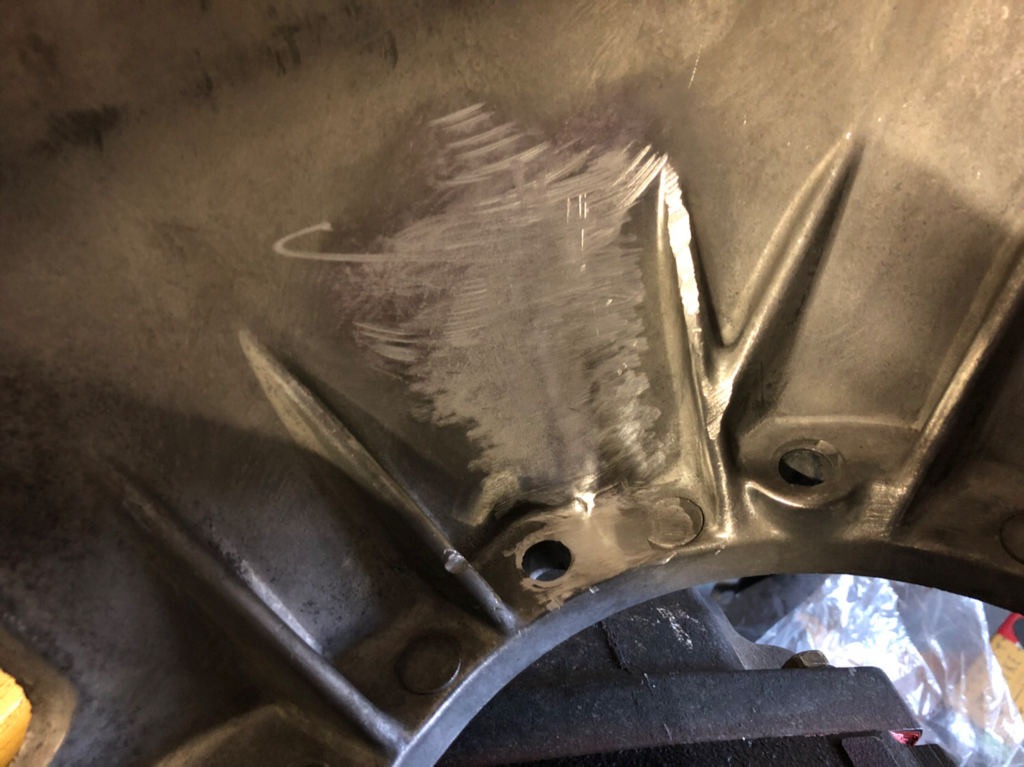
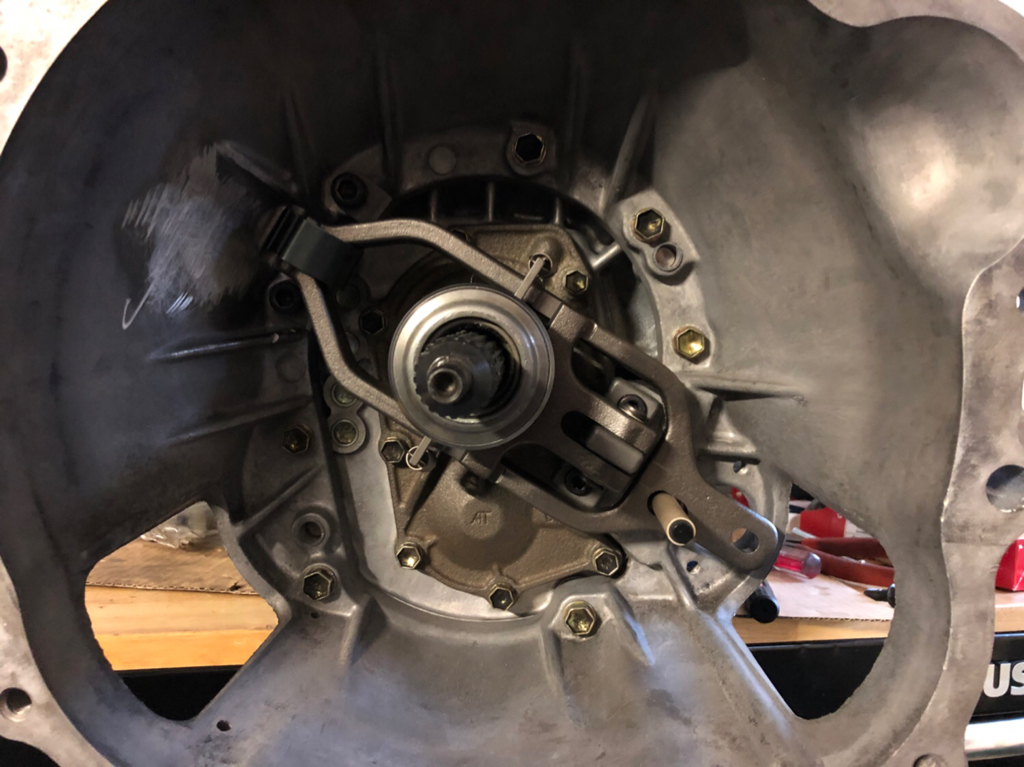
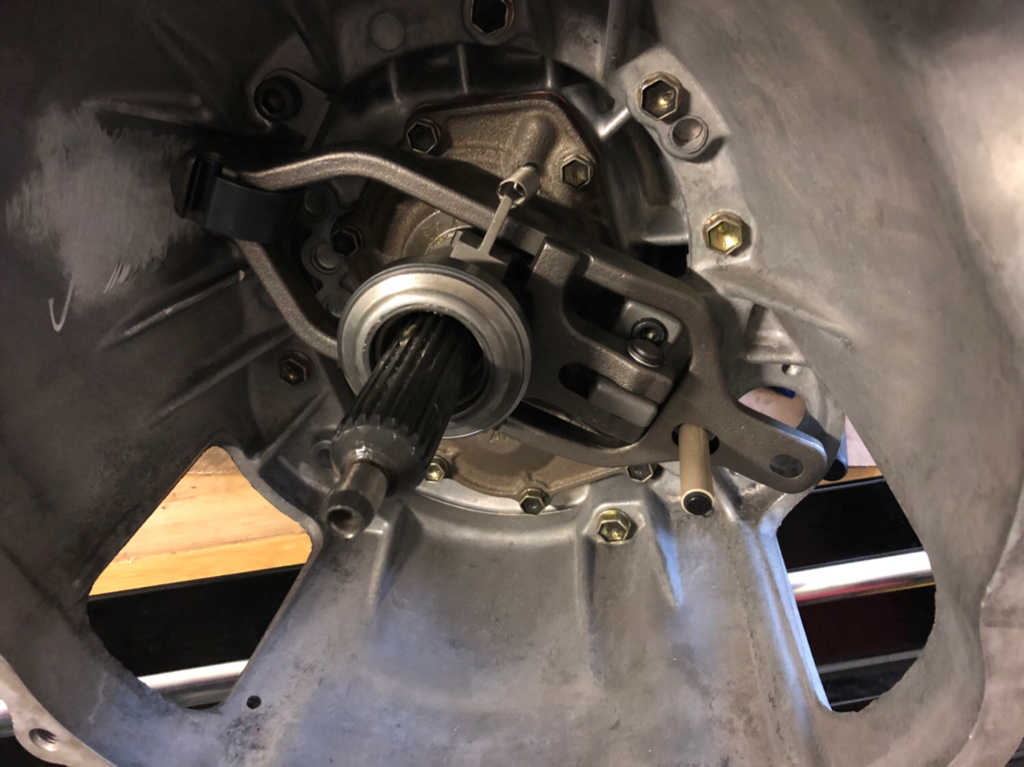
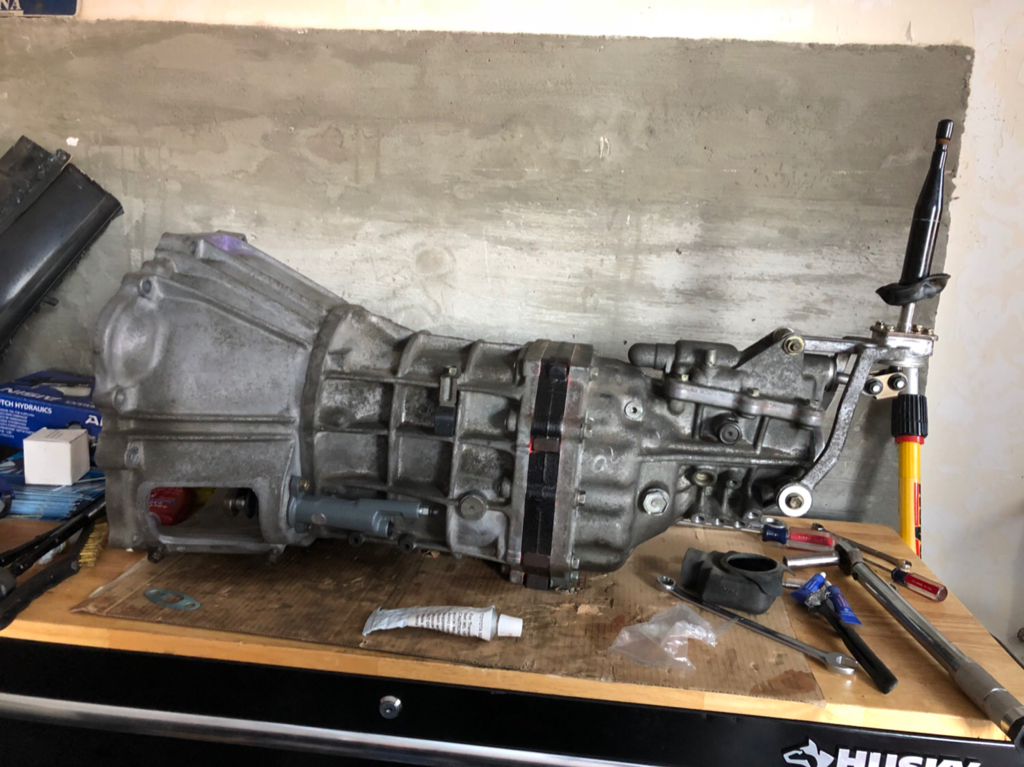
One step forward, two steps back. I spent three days after work trying to make sure I put this thing back together correctly. Apparently I didn’t, though, because it won’t go into gear. To be a little more specific, I believe that the transmission was already in gear when I disassembled it and since I didn’t know what I was looking at once inside, I reassembled it not even thinking about that. All of the parts reassembled perfectly. The shifter is in neutral but turning the input shaft turns the output shaft and it won’t go into any gear. 🤦🏼*♂️ I suppose that these things are bound to happen when doing projects like this for the first time. I thought that me and my trusty service manual had really knocked it out of the park, but it was a waste of time, sealant, and motivation. It shifted very well before I messed with it, so I know the trans is in good condition. I have no other option but to tear it apart again and start on step one. I’m not sure how to get the damn thing in neutral once disassembled, so I’ll probably have to take it to the tranny shop for assistance. I’m taking a break from this BS this weekend.
__________________
|
|
|

|
|
|
#185 |
|
Post Whore!
 Join Date: Oct 2007
Location: Las Vegas
Age: 36
Posts: 4,590
Trader Rating: (53)
           Feedback Score: 53 reviews
|
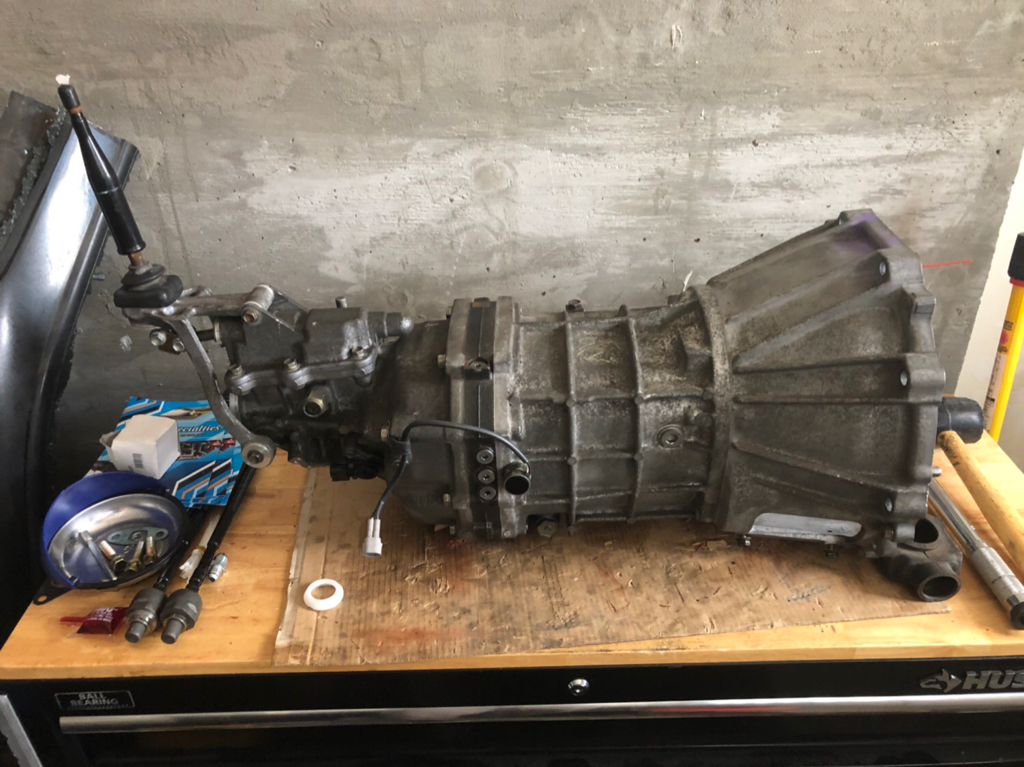
Stripped this thing down again yesterday after work. At first, I could not figure out what was wrong. None of the forks even wanted to slightly budge into gear. I almost gave up at first because I didn’t want to get pissed and accidentally damage something, but then....then I found the problem. When reassembling the forks, balls, springs, and rods the arm for the reverse idler gear had fallen off. When I put everything back together the first time I assembled it with the gear engaged, which as we all know now is apparently a no-no.
 I disengaged the reverse idler gear and the transmission was freed! It now acted like it was in neutral, so I sorta kinda put half of it back together and ran it through the gears that I could. It looks like the problem is solved, so now I just have to clean all of the flanges again and reassemble everything. Stay tuned. I disengaged the reverse idler gear and the transmission was freed! It now acted like it was in neutral, so I sorta kinda put half of it back together and ran it through the gears that I could. It looks like the problem is solved, so now I just have to clean all of the flanges again and reassemble everything. Stay tuned.  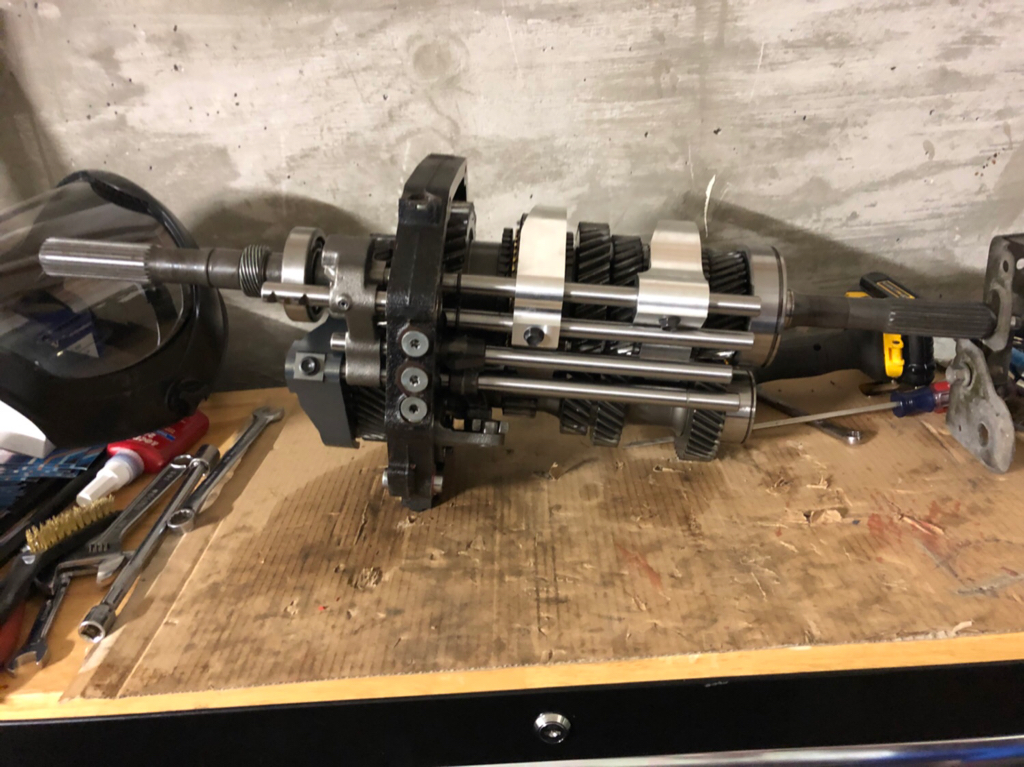 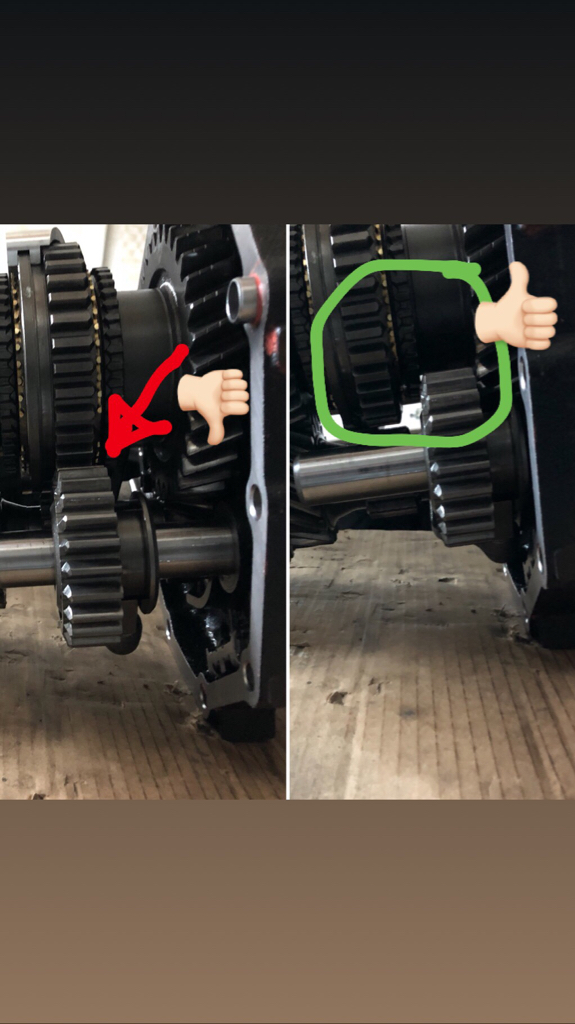 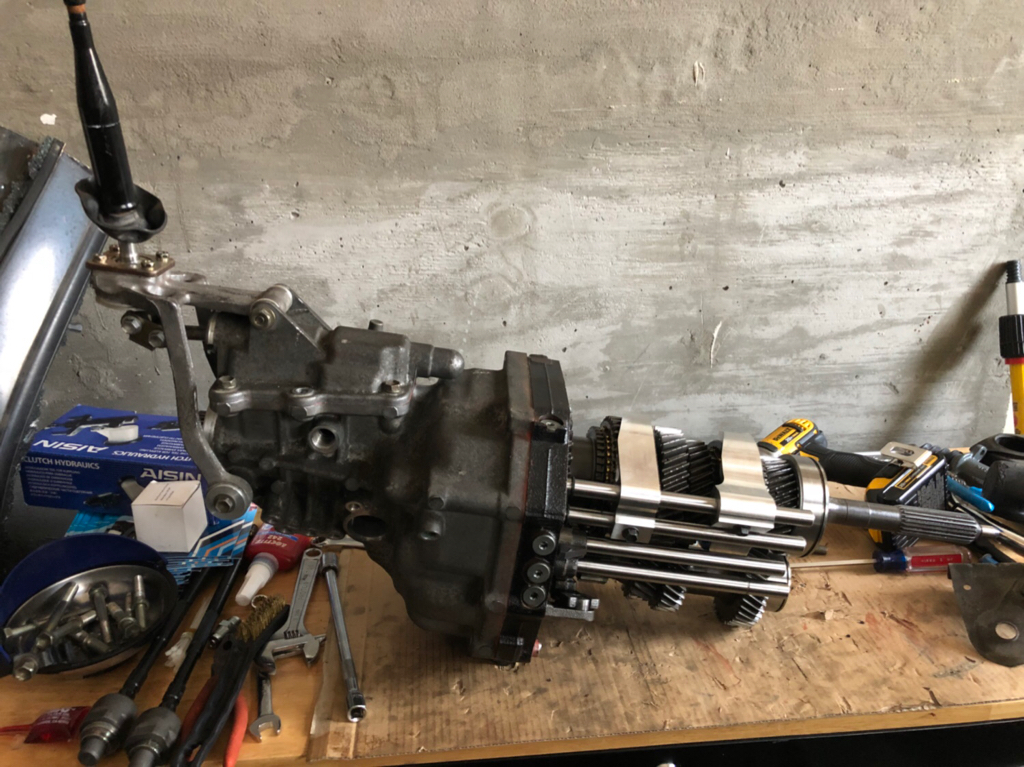
__________________
|
|
|

|
|
|
#187 | |
|
Post Whore!
 Join Date: Oct 2007
Location: Las Vegas
Age: 36
Posts: 4,590
Trader Rating: (53)
           Feedback Score: 53 reviews
|
Quote:
Car was sold as pictured, minus the wheels. It has since been mutilated and sent to junk heaven.
__________________
|
|
|
|

|
|
|
#188 |
|
Post Whore!
 Join Date: Oct 2007
Location: Las Vegas
Age: 36
Posts: 4,590
Trader Rating: (53)
           Feedback Score: 53 reviews
|
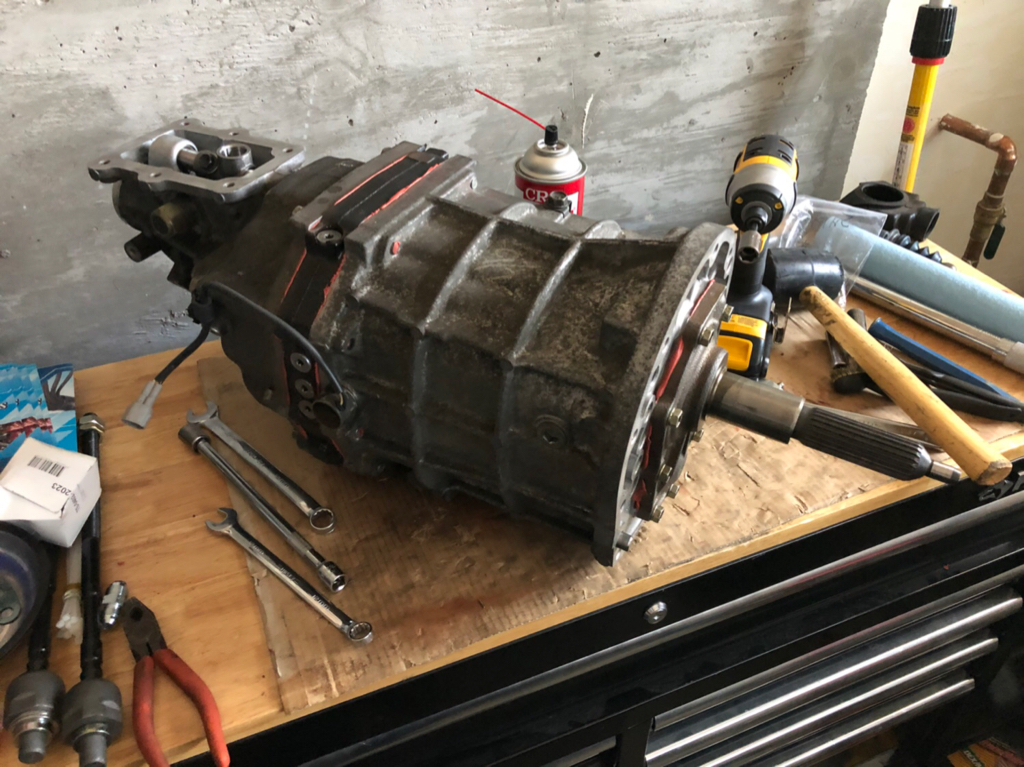
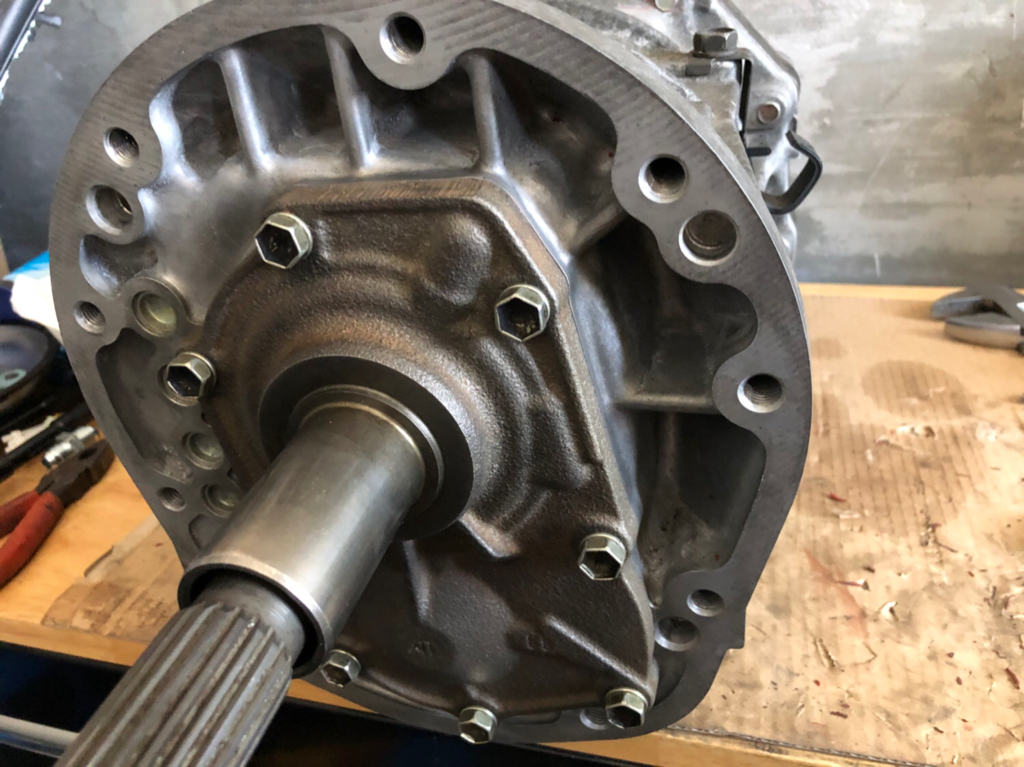
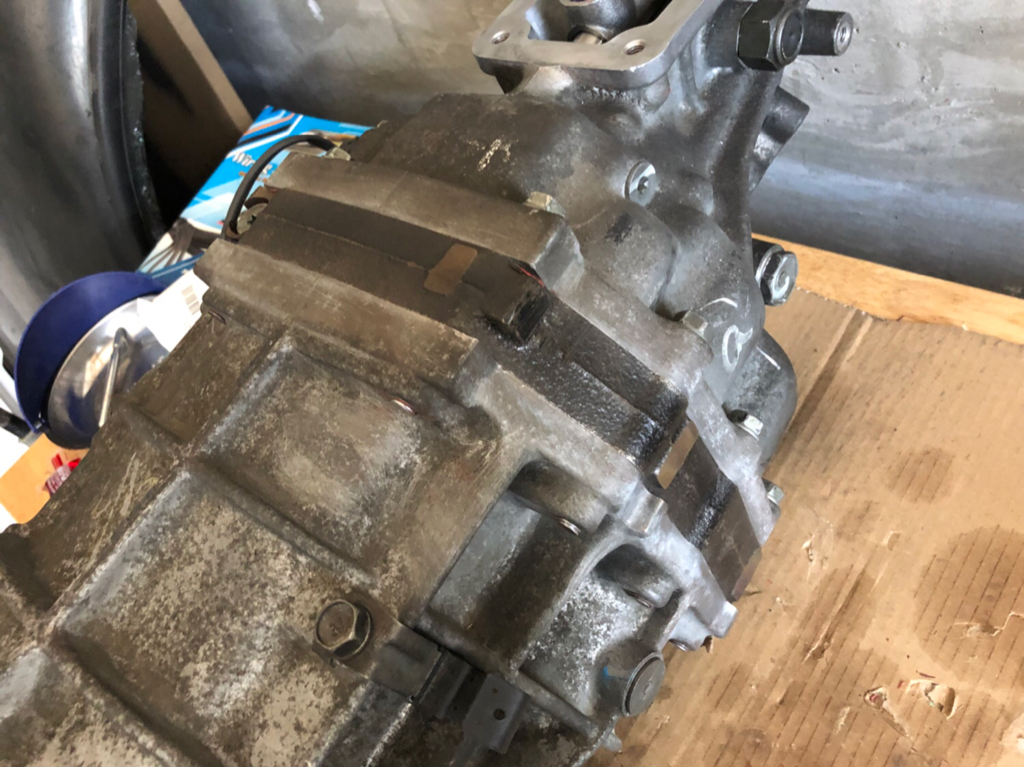
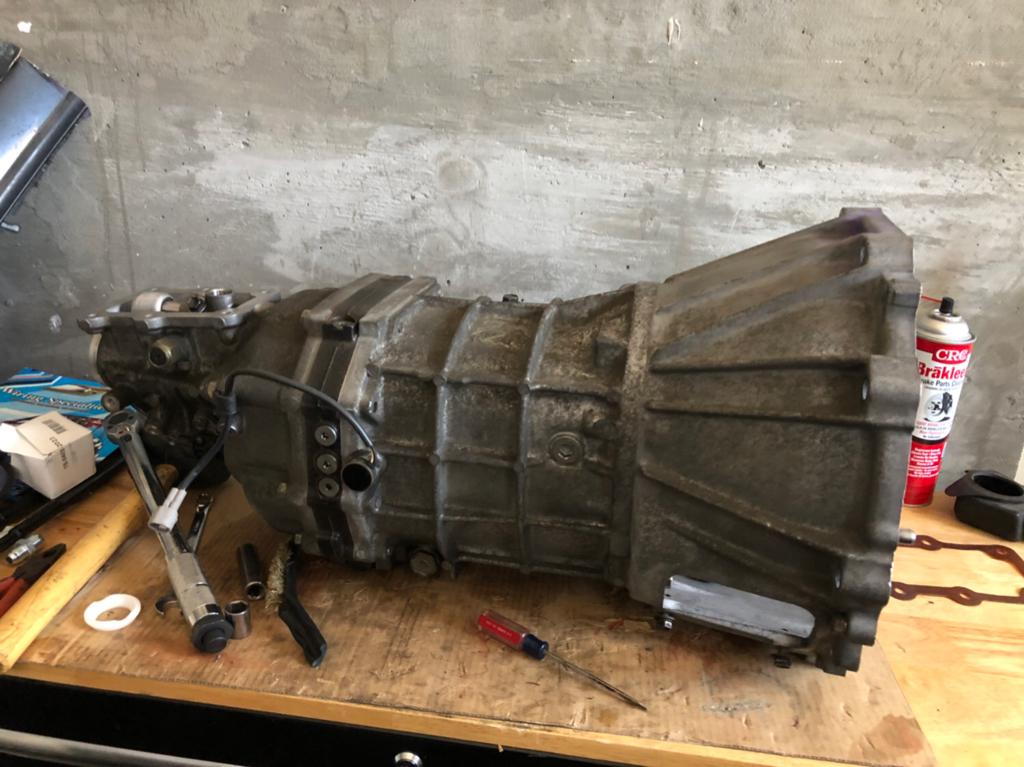
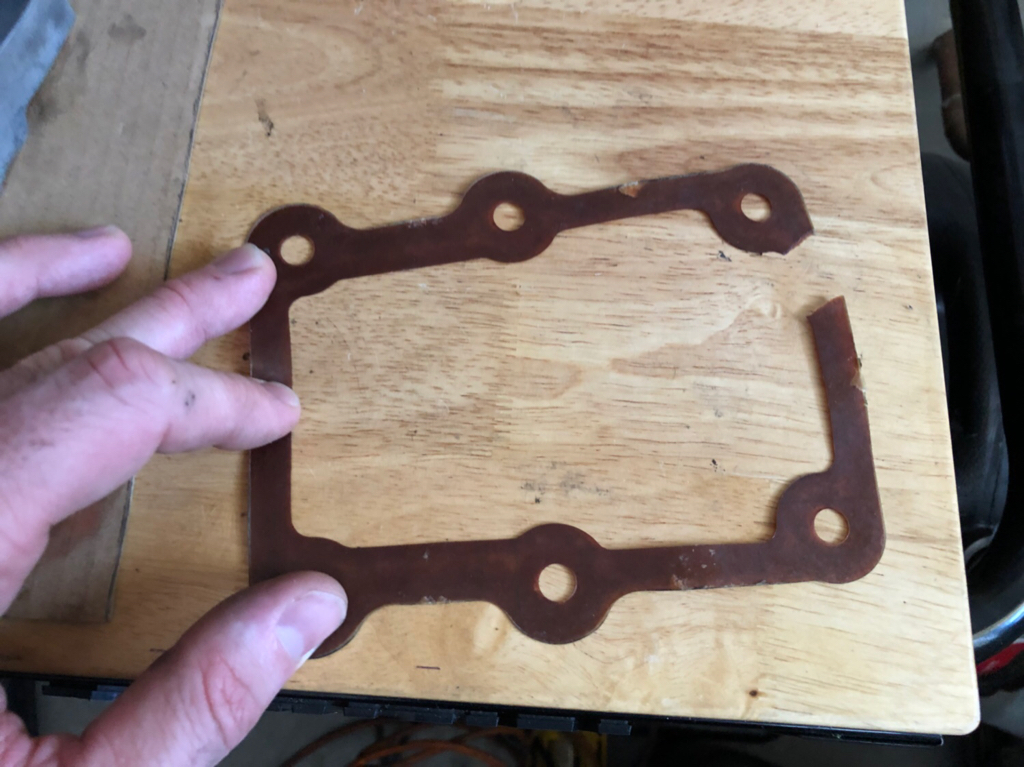
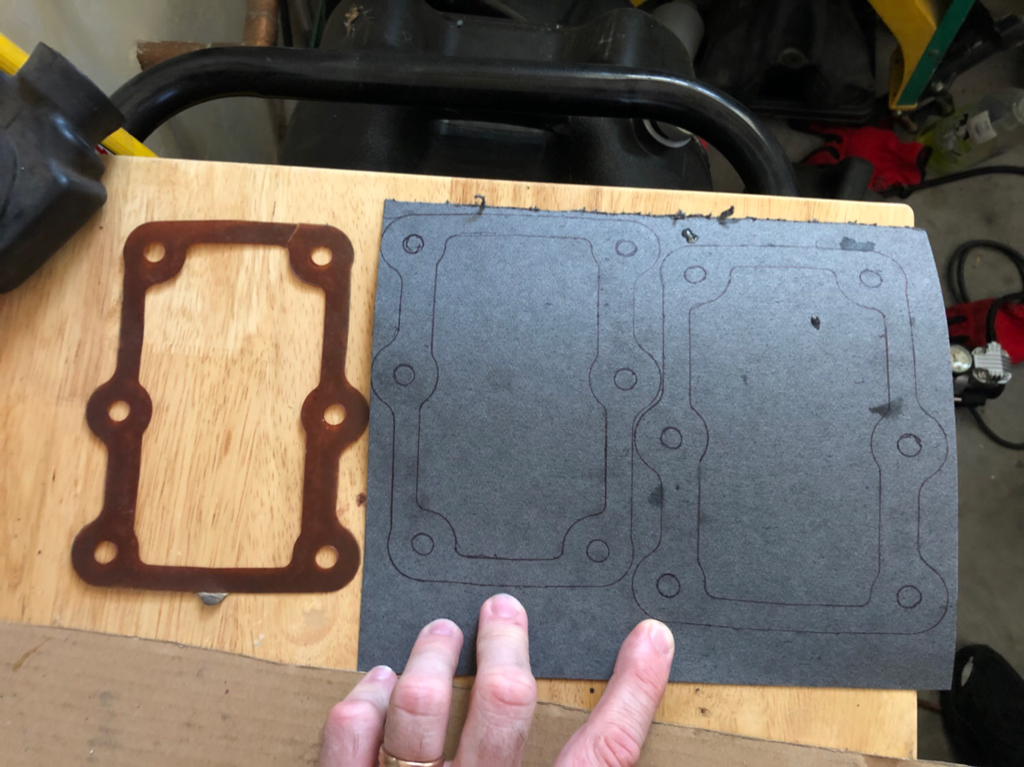
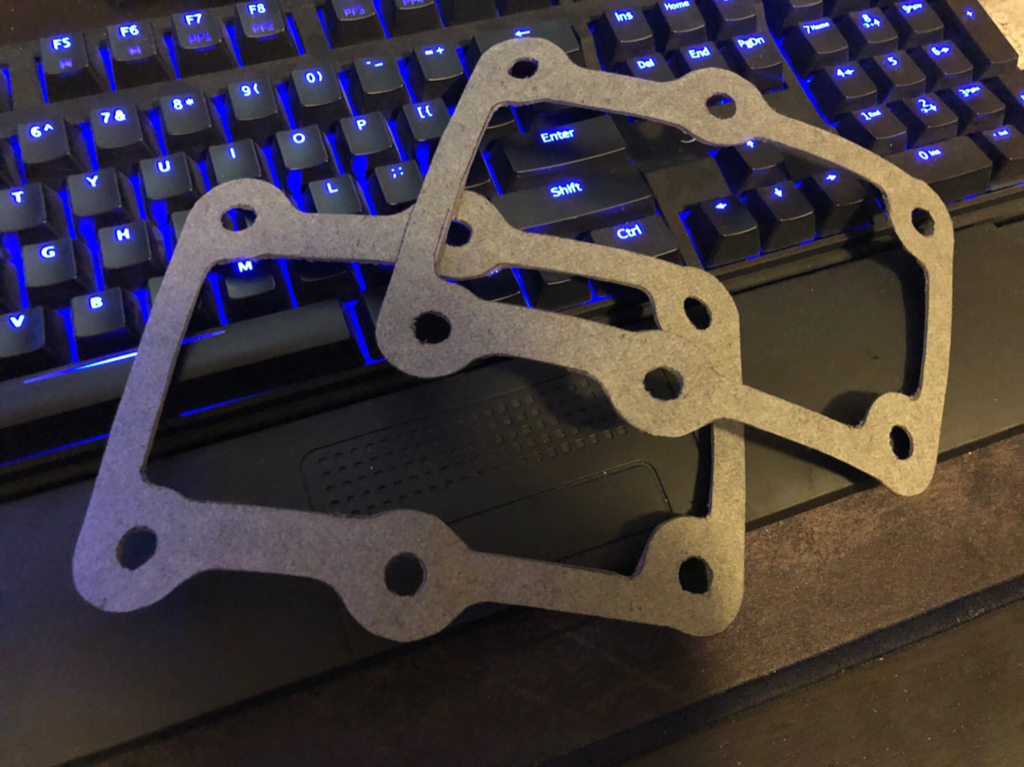
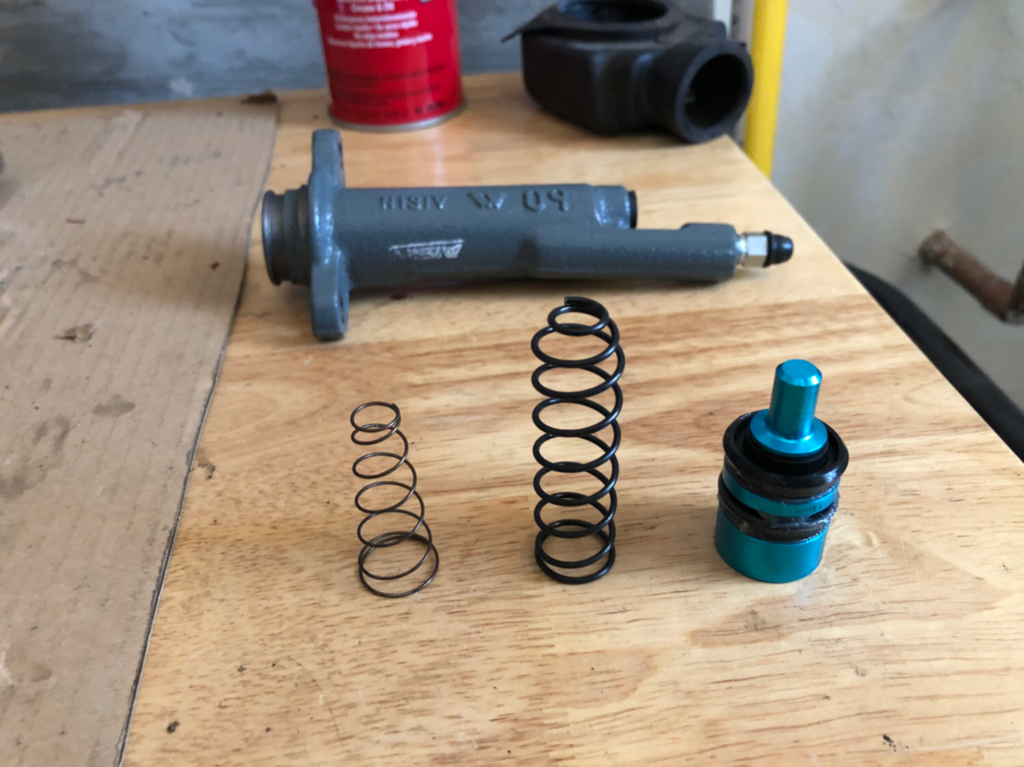
Sorry for the wait, but I’m finally here with another update. When I disassembled the trans and figured out the problem I realized that the red FIPG wasn’t setting properly. Possibly because it was old and sat out in the garage for a year? I don’t honestly know, but I ordered a new tube just in case. During the last assembly, I also used FIPG to seal the shifter retainer because the factory gaskets were no longer usable. I didn’t like this, so this time around I ordered gasket material and sealed the retainer properly. The new FIPG set properly and once it cured I went back with a razor blade and brass wire brush to remove all of the excess. The OS Giken clutch kit requires you to change the OEM spring in the slave cylinder so I knocked that out as well. The new gaskets I made for the retainer are ultra tough so they should last for a long time. I’m so happy to have this part of the project completed. Until next time...
__________________
|
|
|

|
|
|
#190 |
|
Zilvia FREAK!
 Join Date: Jan 2010
Location: SHOW ME WHAT YOU GOT
Posts: 1,115
Trader Rating: (1)
           Feedback Score: 1 reviews
|
its just gasket paper/material. any local auto parts store should have it (where I get it). if you buy it rolled up, flatten it out with a paperweight and you can thank me later. use a really sharp razor blade or exacto knife to get a clean cut like OP's.
|
|
|

|
|
|
#191 |
|
Post Whore!
 Join Date: Oct 2007
Location: Las Vegas
Age: 36
Posts: 4,590
Trader Rating: (53)
           Feedback Score: 53 reviews
|
Post above me basically covers it, right down to the X-Acto knife.  If you’re looking for something specific, though, this is what I bought: 9611MRG 9”x36” roll - it’s amazing, would buy again. Do not attempt to cut without extremely sharp blade.
__________________
|
|
|

|
|
|
#193 |
|
Post Whore!
 Join Date: Oct 2007
Location: Las Vegas
Age: 36
Posts: 4,590
Trader Rating: (53)
           Feedback Score: 53 reviews
|
E's '95 S14 Build - The true "forever" build
I had thought about getting a gasket punch set, but I really don’t make gaskets that often so I just cut them out with the exacto knife. I was worried that the drill was going to tear up the fiber material. The key to cutting them really well is to cut out the holes first when the sheet is still whole. There is more surface area for your hands to hold the gasket in place while cutting without risking slicing into your fingers.
Edit: words
__________________
Last edited by Mister.E; 07-25-2018 at 07:36 PM.. |
|
|

|
|
|
#194 |
|
Zilvia FREAK!
 Join Date: Jan 2010
Location: SHOW ME WHAT YOU GOT
Posts: 1,115
Trader Rating: (1)
           Feedback Score: 1 reviews
|
ive played around with drill bits on a hand drill and it does take some experimenting, but once you figure it out, it can be done. you did an excellent job cutting those out by hand. I cant even get anywhere near a circle.
looking forward to more. love how detail oriented you are! |
|
|

|
|
|
#195 |
|
Post Whore!
 Join Date: Oct 2007
Location: Las Vegas
Age: 36
Posts: 4,590
Trader Rating: (53)
           Feedback Score: 53 reviews
|
Shortest path of least resistance...In other words, this hose is too damn long! I finished up checking all of the bolts on the motor to make sure they were torqued down and decided to finally chop this hose to the right length. I mocked up the lower radiator hose to make the drain hose as short as possible without kinking and avoiding clearance issues later.
Measure once, cut once...  R-I-S-K-Y R-I-S-K-Y  but thumbs up, it worked. but thumbs up, it worked. I dressed the hose with a heat resistant sleeve before putting the end back on. The sleeve is really good quality and stretches a bit too. This is on -10 hose and I’m pretty confident that I could have slid it on over the fittings, however, it was far easier to do it with the hose end off. All I have to say is “COOL IT”  A lot of people ask me what parts I use when it’s not blatantly obvious, so I’ve included a pic. I’m not sponsored by any company other than Wiring Specialties, so whatever I buy is what I personally think is best for my car and within reasonable cost. 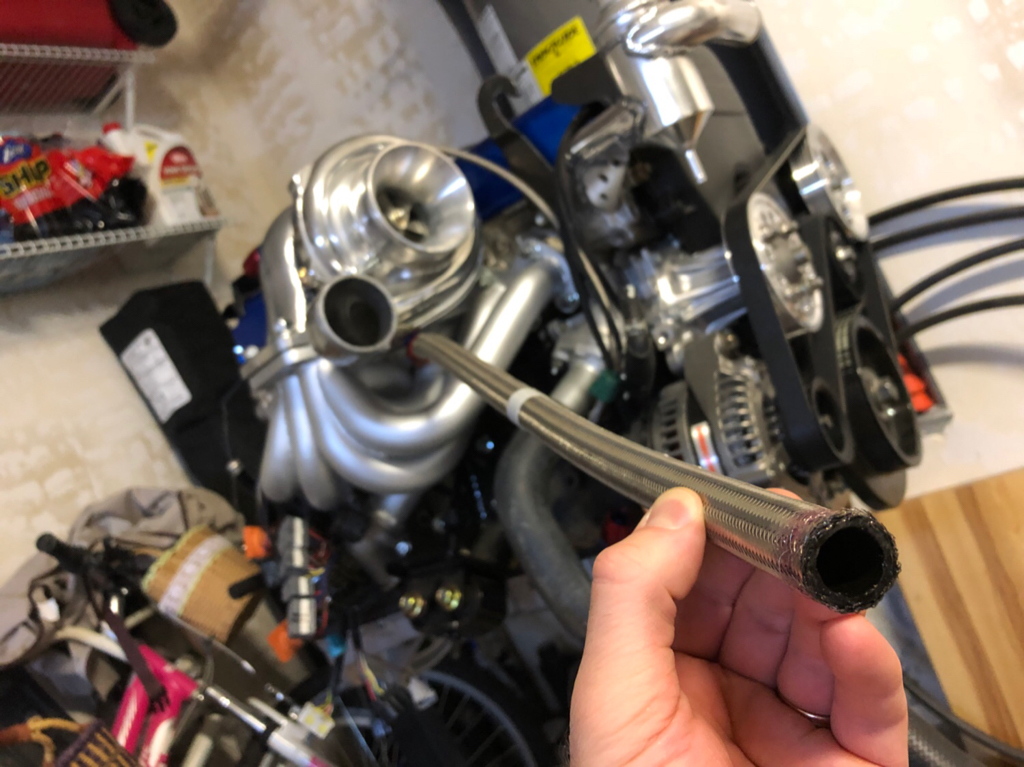 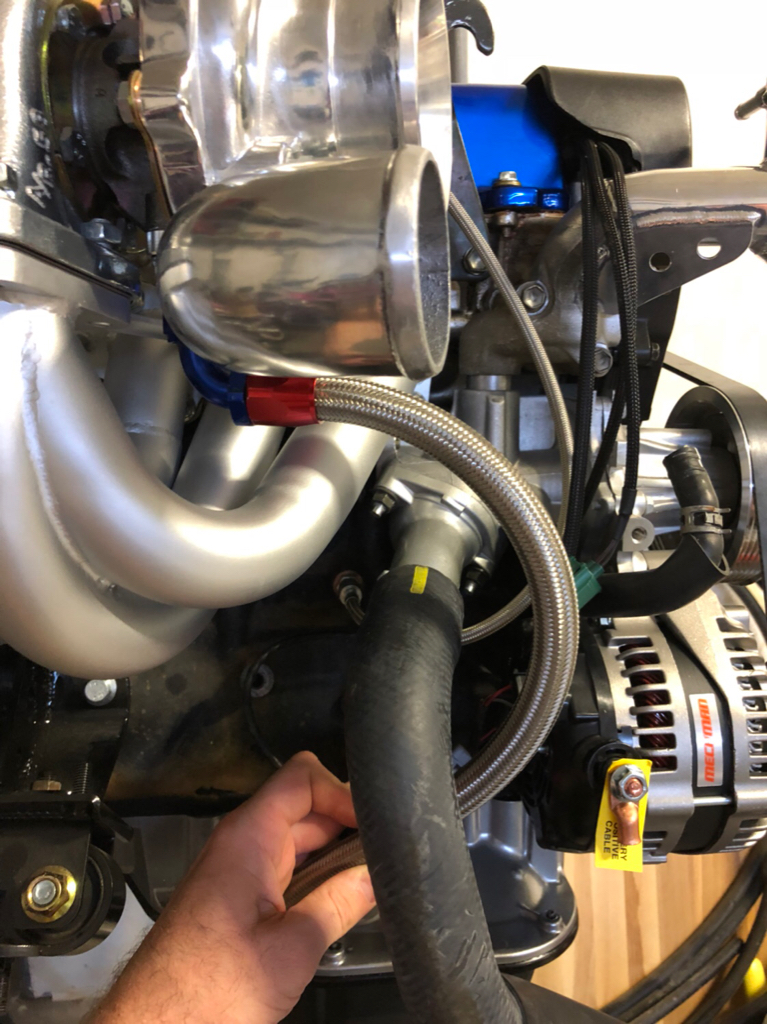 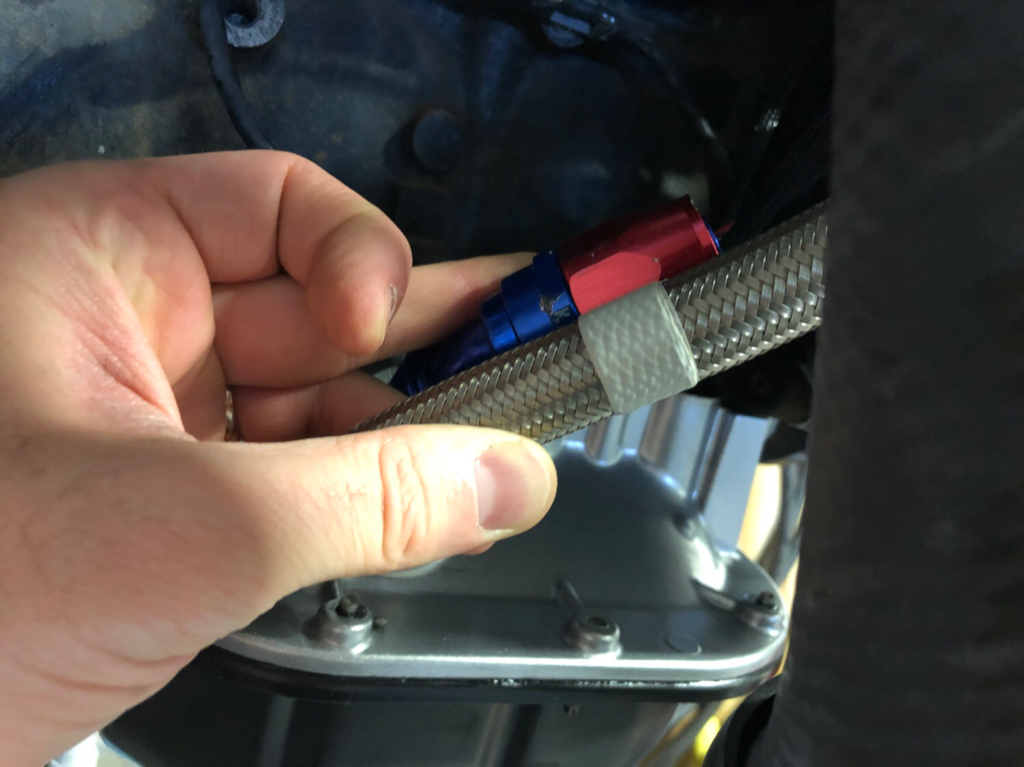 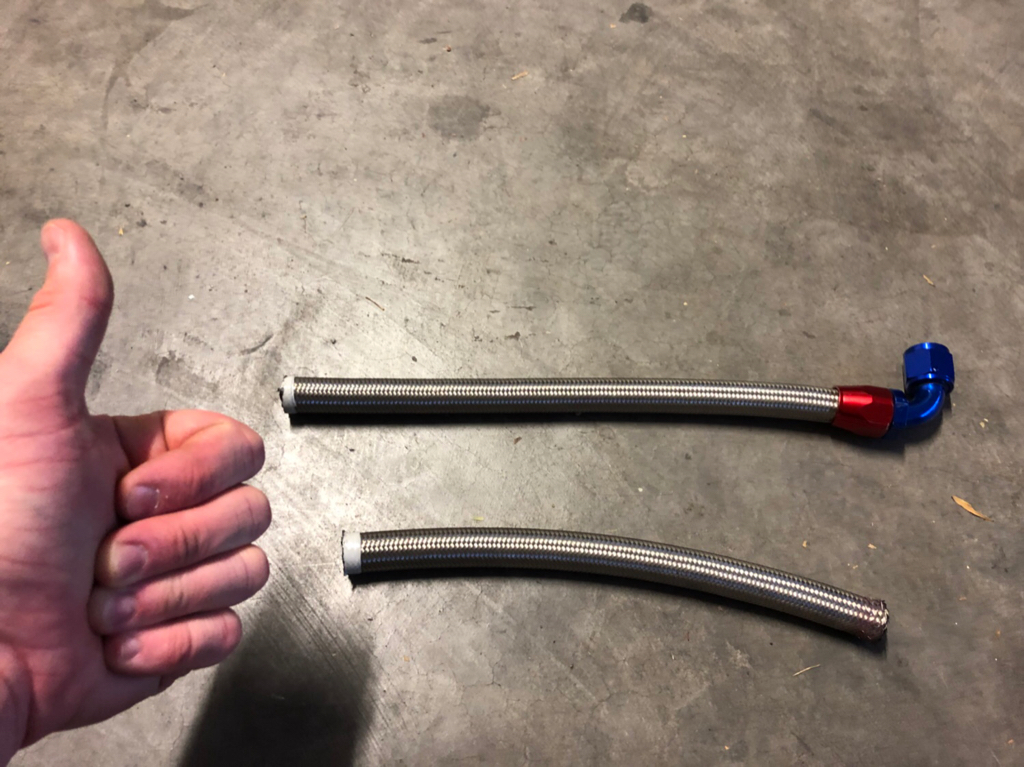 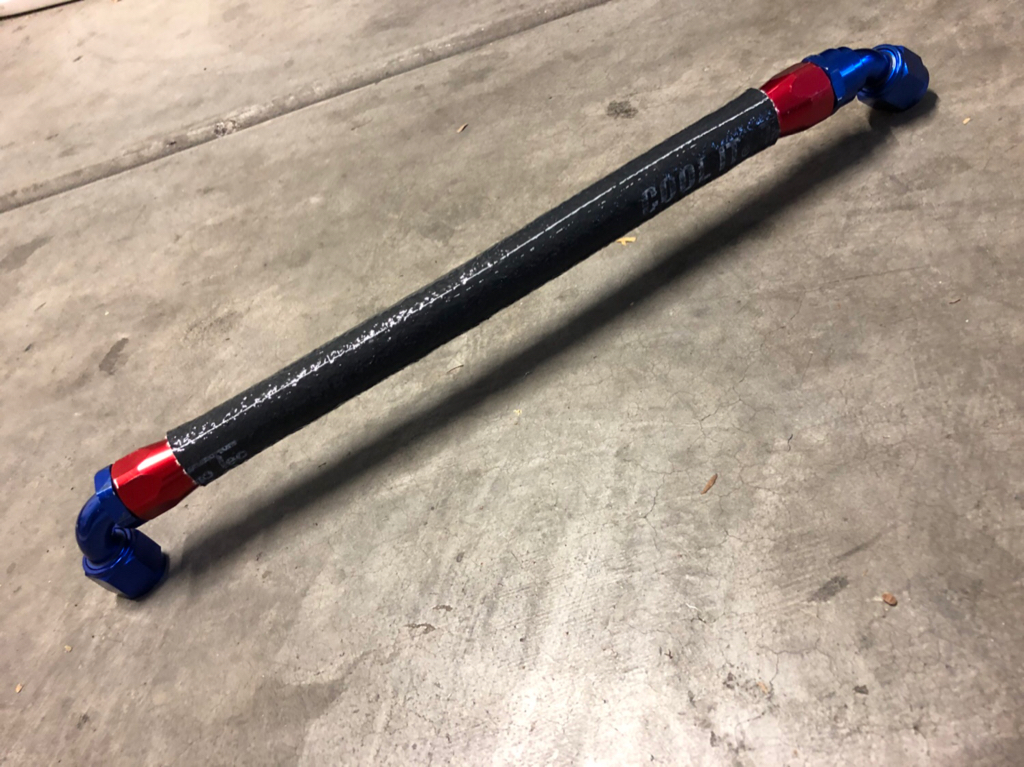 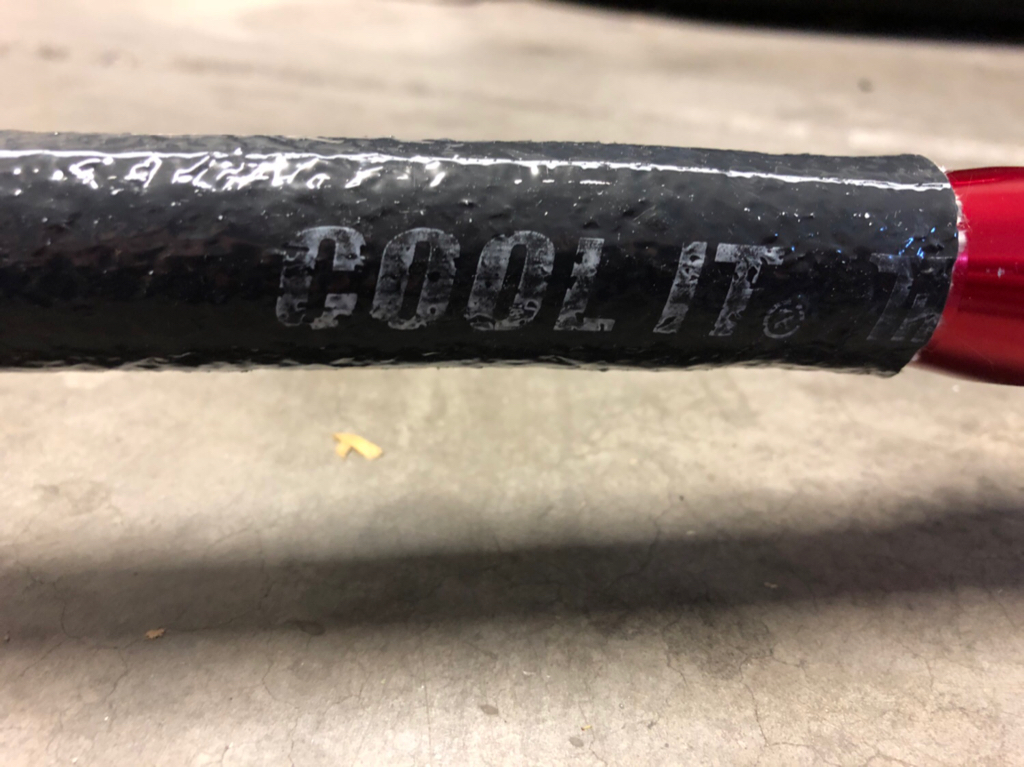 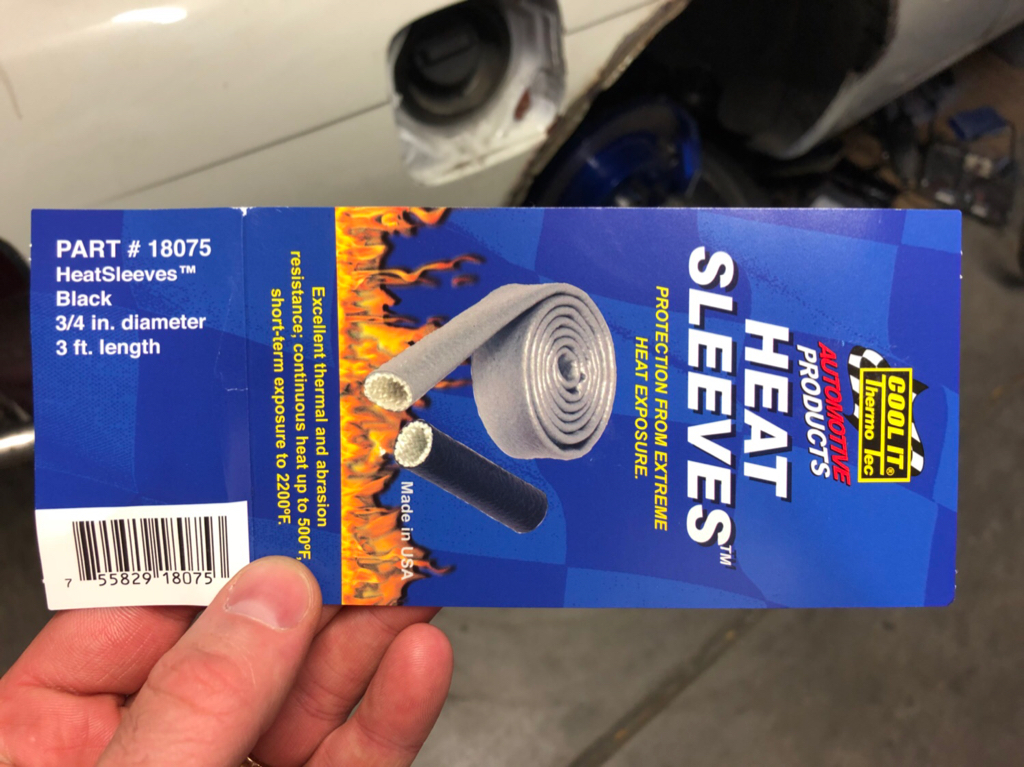
__________________
|
|
|

|
|
|
#196 |
|
Zilvia FREAK!
 |
Hey man,
You may experience an issue having that tight radius 90* bend coming off of the turbo drain not being able to evacuate the oil fast enough. Ideally that would be a straight fitting but a 45* would be a step in the right direction if you can fit it. Keep in mind that the only thing draining the oil from the CHRA is gravity, there is no pressure behind it. So when you introduce a sharp bend you're opening yourself up to a drainage issue. Also please don't take this as nit-picking or keyboard warrior'ing, I sell turbos amongst other parts for a living and have first hand seen this cause an issue that I don't want you to have to address in the car where it's a pain in the ass. |
|
|

|
|
|
#197 | |
|
Post Whore!
 Join Date: Oct 2007
Location: Las Vegas
Age: 36
Posts: 4,590
Trader Rating: (53)
           Feedback Score: 53 reviews
|
Quote:
Next time I work out there I’ll see if I can flip the hose around. Those were the fittings that came with the DriftMotion turbo kit so I didn’t think twice about it. I don’t know if I ever even tried to see if the 45* fitting fit on the turbo and cleared the manifold. Also, no hard feelings at all. I can take constructive criticism, especially if it can potentially save me from disaster. So thank you.
__________________
|
|
|
|

|
|
|
#198 |
|
Post Whore!
 Join Date: Oct 2007
Location: Las Vegas
Age: 36
Posts: 4,590
Trader Rating: (53)
           Feedback Score: 53 reviews
|
I swapped the 90 for a 45, but that’s as good as it gets. Can’t put a straight fitting on the turbo side and the straight on the pan end was causing the hose to hit the radiator hose. I had to clock the CHRA a little bit, but overall I think this should be good.
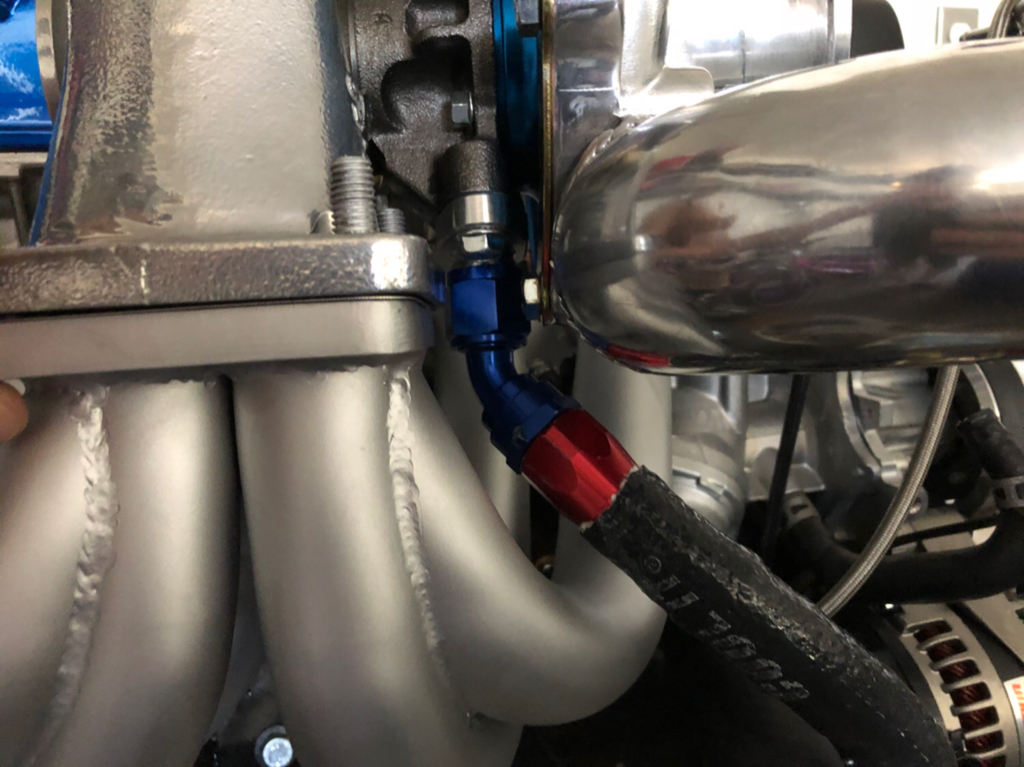 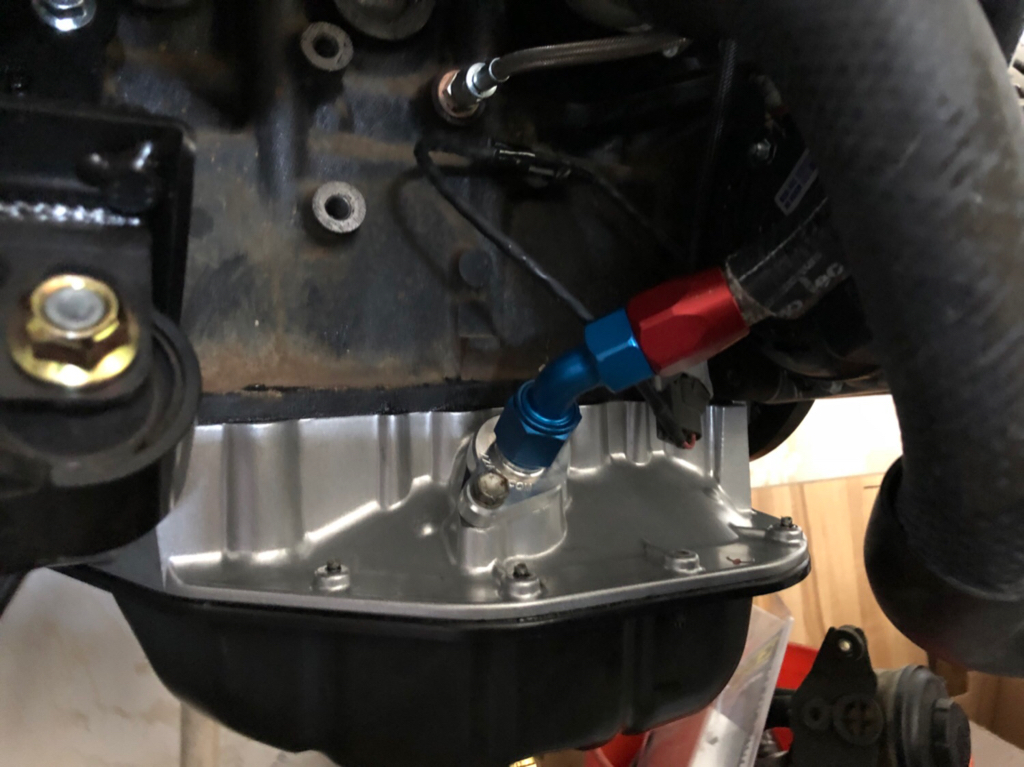
__________________
|
|
|

|
|
|
#199 |
|
Zilvia FREAK!
 |
Looks much better man! I would've hated to see you get it running and have the turbo puke everywhere lol.
|
|
|

|
|
|
#200 |
|
Post Whore!
 Join Date: Oct 2007
Location: Las Vegas
Age: 36
Posts: 4,590
Trader Rating: (53)
           Feedback Score: 53 reviews
|
E's '95 S14 Build - The true "forever" build
So I have no idea why my brand new PBM magnetic drain plug is leaking. I haven’t even started the engine or added oil...I guess I’ll need to pick up a softer gasket than the solid washer that was included. Until then, let’s move on to the good stuff.
It was finally time after YEARS to unbox the clutch and throw it on the motor. The OS Giken clutch is about as straightforward as any other clutch install. The movement alteration kit on the transmission is a bit of a pain, but overall it wasn’t too difficult. It’s worth it to me to convert from a pull-type clutch to a push-type. After the clutch was installed I threw the transmission on and decided to drop the whole package back into the car. It really helps having a removable core support when you do a lot of the work yourself. It took a little bit of maneuvering but I got the motor seated into the crossmember and got the transmission mounts bolted up. There is still so much work to be done, but I can’t begin to express how stoked I am to be at this point.  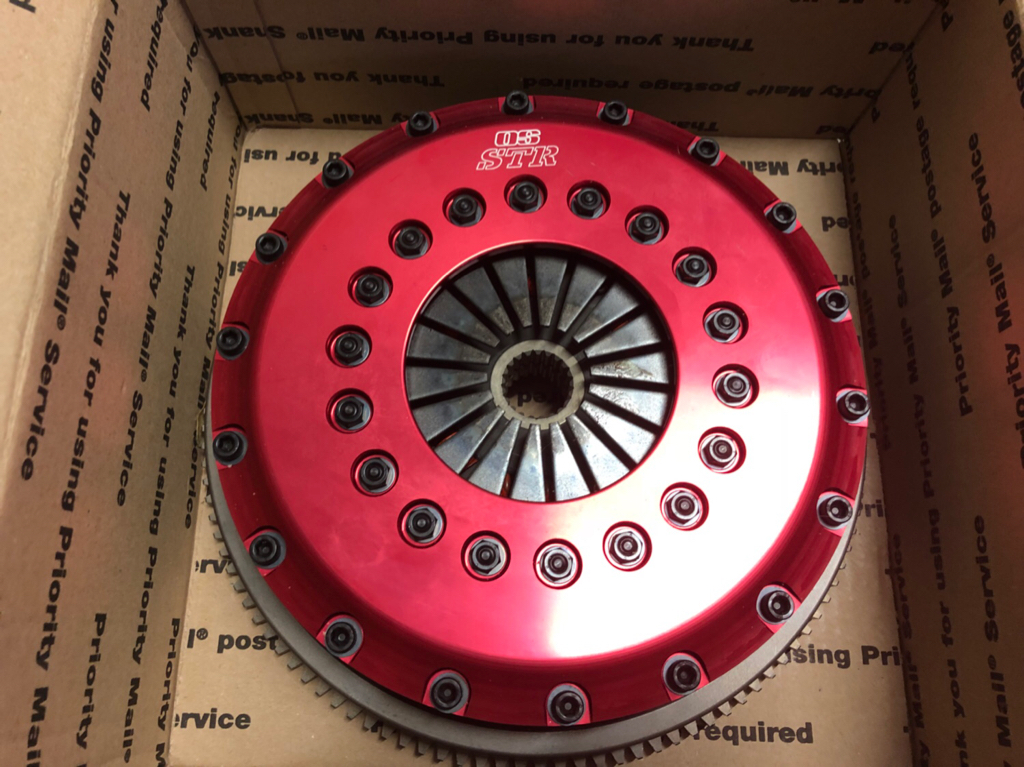 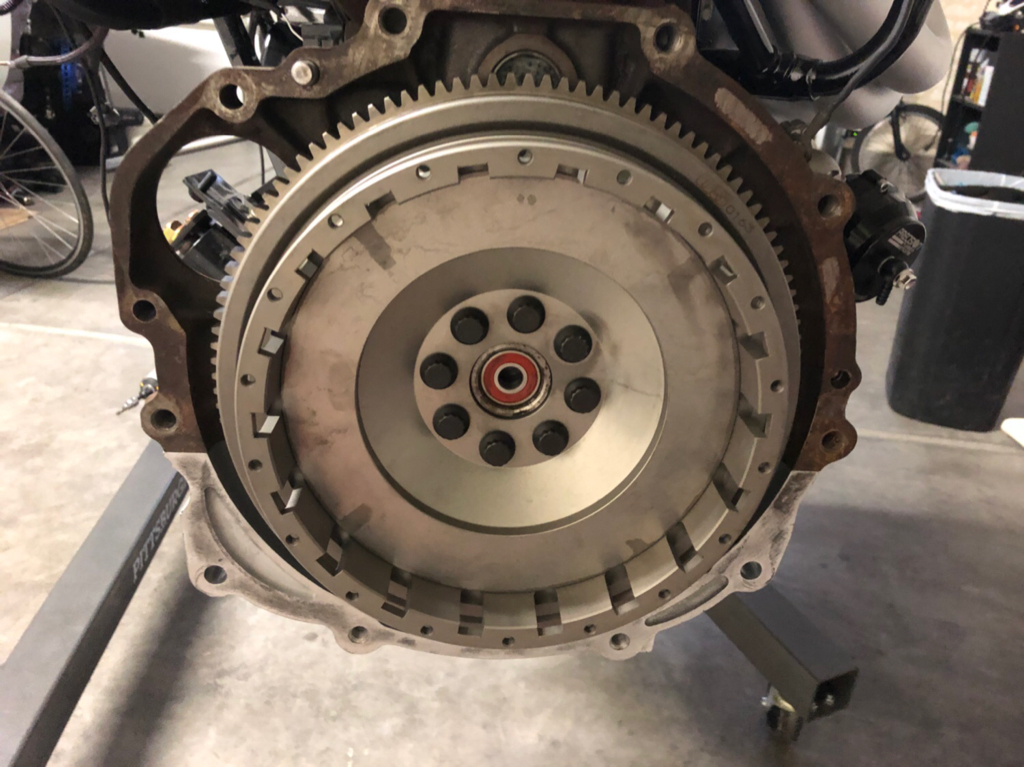 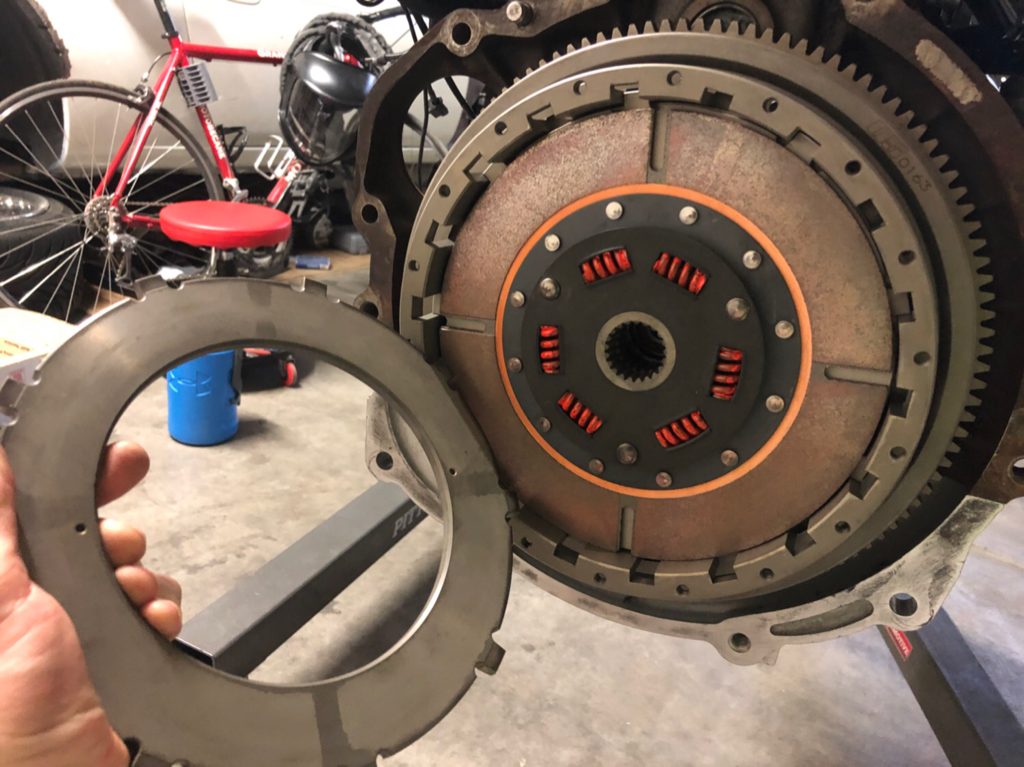 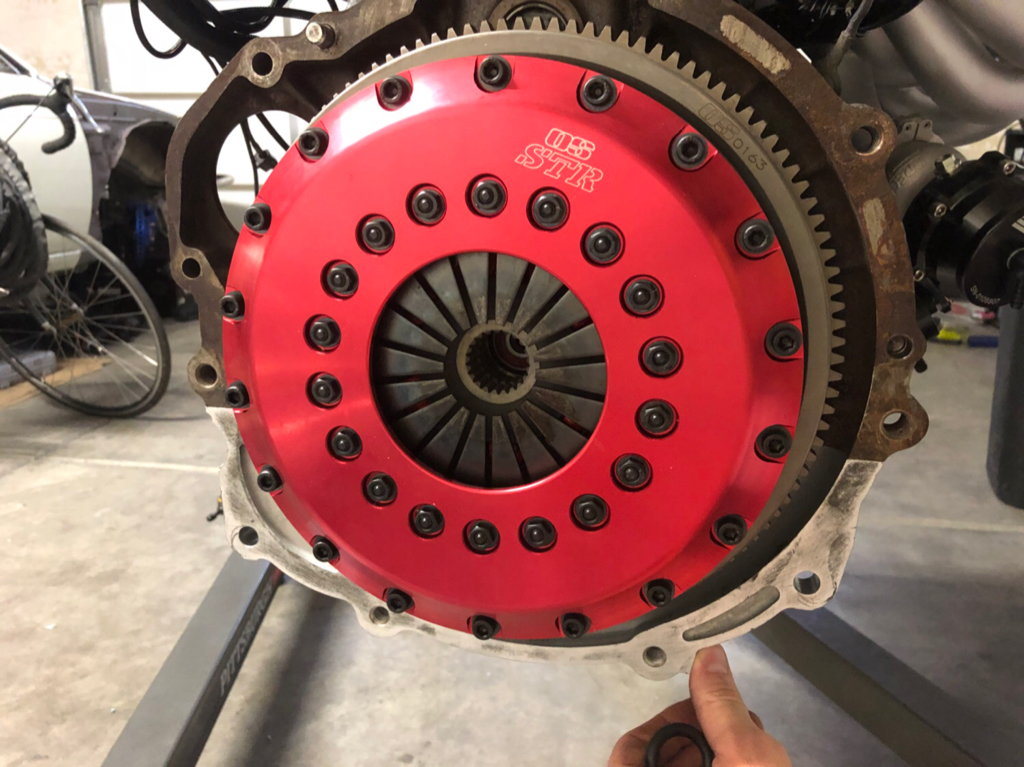 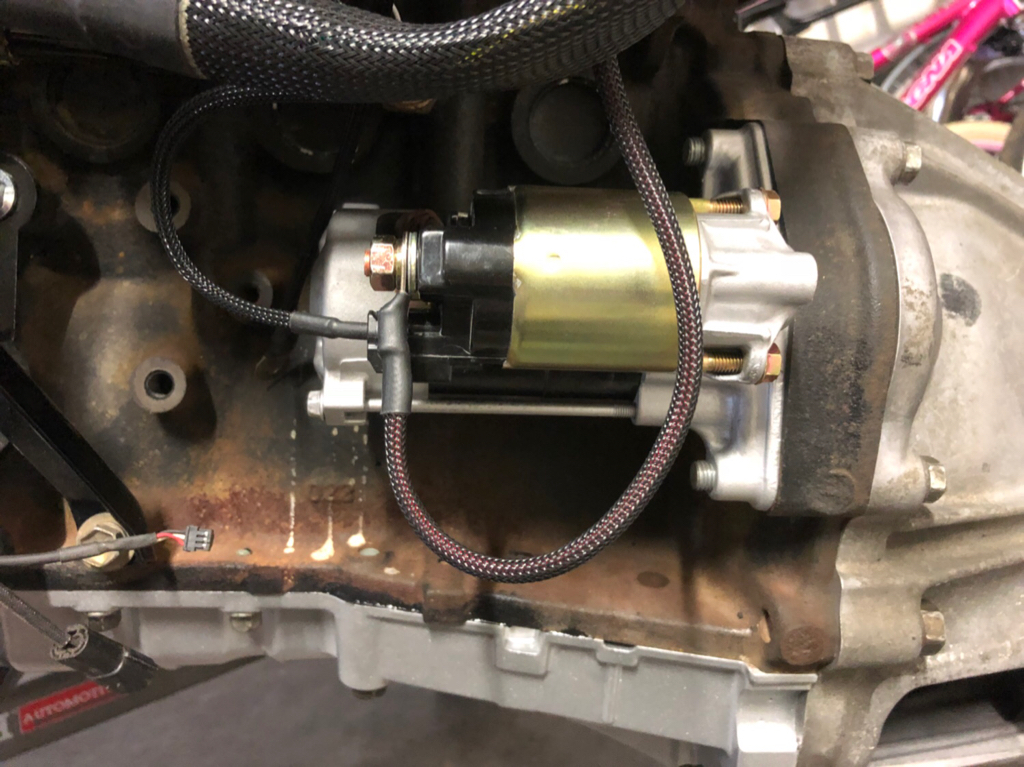 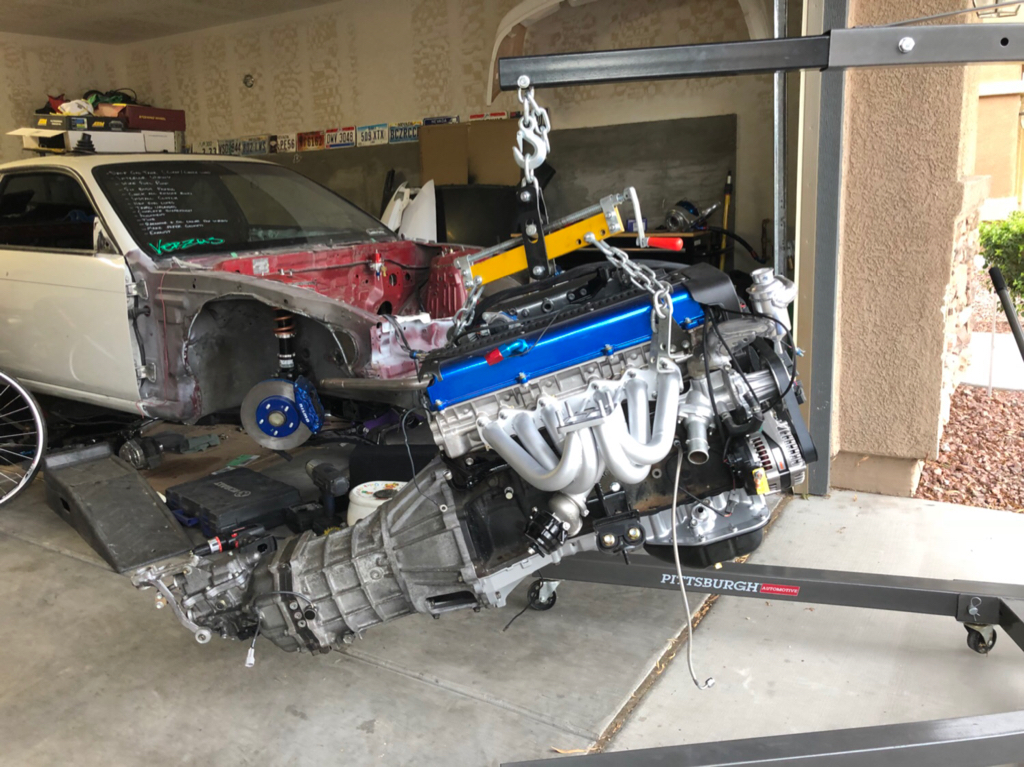 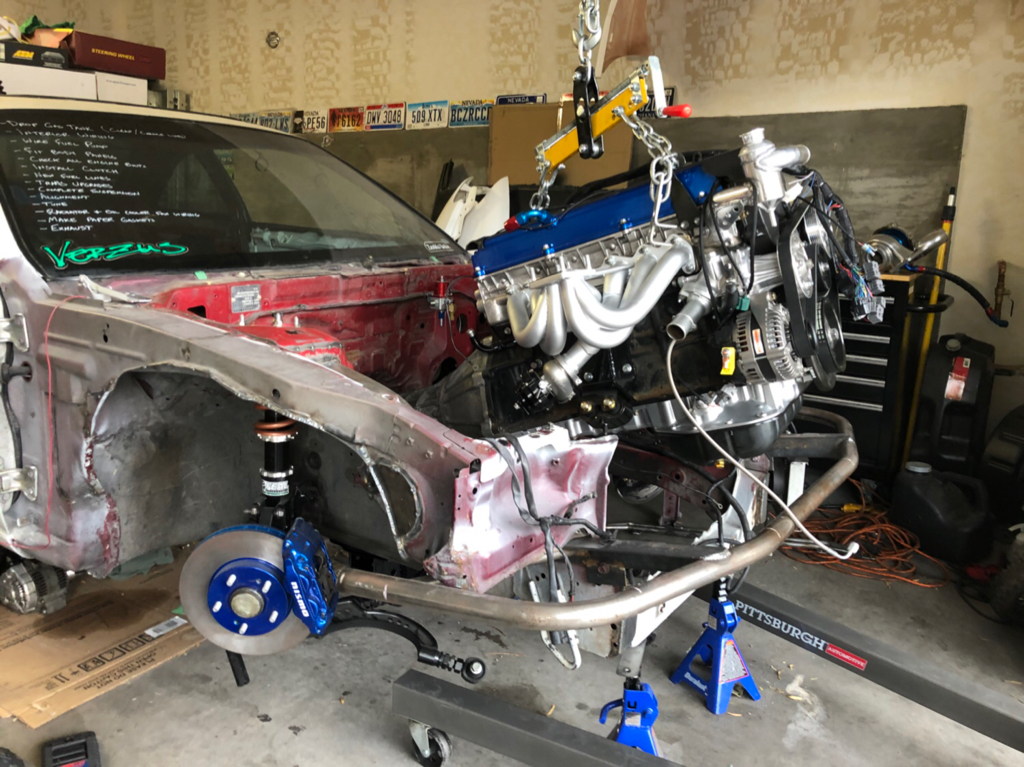 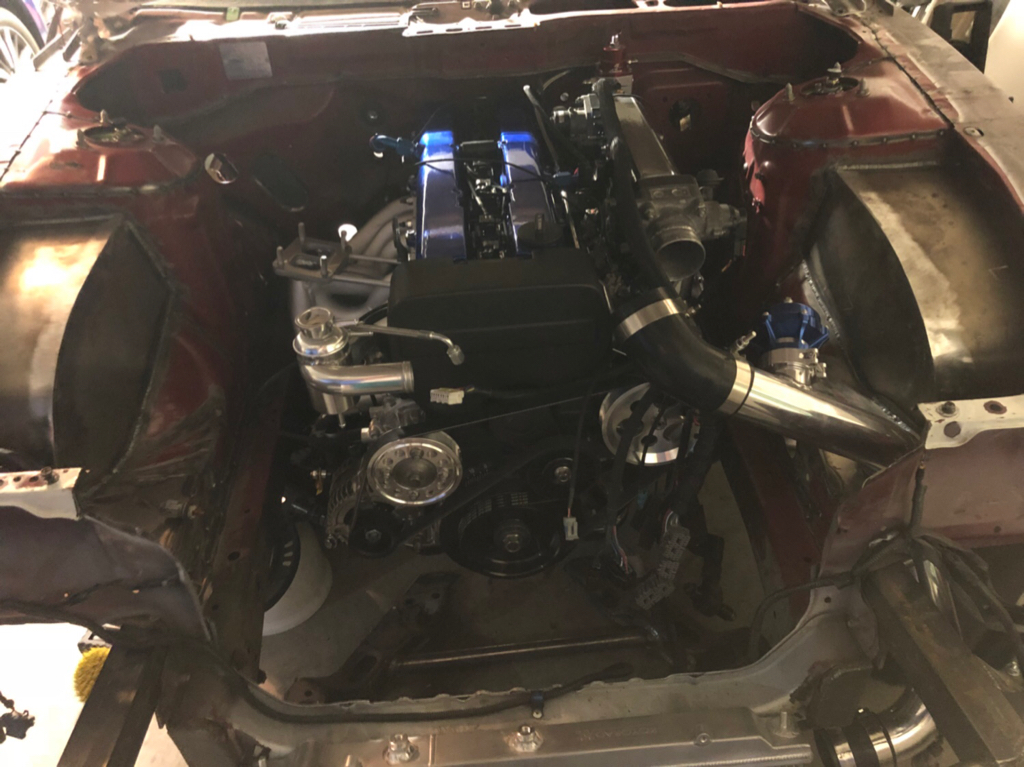
__________________
|
|
|

|
|
|
#204 |
|
Post Whore!
 Join Date: Oct 2007
Location: Las Vegas
Age: 36
Posts: 4,590
Trader Rating: (53)
           Feedback Score: 53 reviews
|
I’m just going to get a better plug eventually. Since my post, I’ve already had a few different people tell me that the PBM plugs are garbage anyway.
__________________
|
|
|

|
|
|
#206 | |
|
Post Whore!
 Join Date: Oct 2007
Location: Las Vegas
Age: 36
Posts: 4,590
Trader Rating: (53)
           Feedback Score: 53 reviews
|
Quote:
It comes with the standard plastic alignment tool. I used it but didn’t pop it in until i had both discs and plates put in and was ready to attach the pressure plate. I just didn’t get any pics with it in.
__________________
|
|
|
|

|
|
|
#207 |
|
Post Whore!
 Join Date: Oct 2007
Location: Las Vegas
Age: 36
Posts: 4,590
Trader Rating: (53)
           Feedback Score: 53 reviews
|
Today wasn’t too productive but I managed to prop my phone up and get a completely necessary picture with my shaft. When I decided to stop screwing around, I was able to take the subframe back out of the car. @harborfreight furniture dolly’s made a one man subframe job a whole hell of a lot easier. I was able to move it all over the place this time without dragging it across my garage floor. As you can see, the subframe and suspension components were really dirty and this setup hasn’t even seen the road yet.
 I think a good portion of it is shit that fell off of the fuel tank and lines when I was removing the fuel pump. Once the subframe was out of the way, I was able to drop the gas tank. It was about as dirty as I expected it to be. I sprayed the tank down with a pressure washer and even scrubbed it a little with a brush. I’m going to wait a bit before reassembling everything just to make sure there is no residual water anywhere in/on the tank. I finished tearing out the old fuel lines as well. Since I had the pressure washer out I spent a little time spraying down the subframe and components. Then I dried it all off with an air compressor blow gun. At this point I had to run, so I cleaned up and tucked everything away for the time being. I think a good portion of it is shit that fell off of the fuel tank and lines when I was removing the fuel pump. Once the subframe was out of the way, I was able to drop the gas tank. It was about as dirty as I expected it to be. I sprayed the tank down with a pressure washer and even scrubbed it a little with a brush. I’m going to wait a bit before reassembling everything just to make sure there is no residual water anywhere in/on the tank. I finished tearing out the old fuel lines as well. Since I had the pressure washer out I spent a little time spraying down the subframe and components. Then I dried it all off with an air compressor blow gun. At this point I had to run, so I cleaned up and tucked everything away for the time being.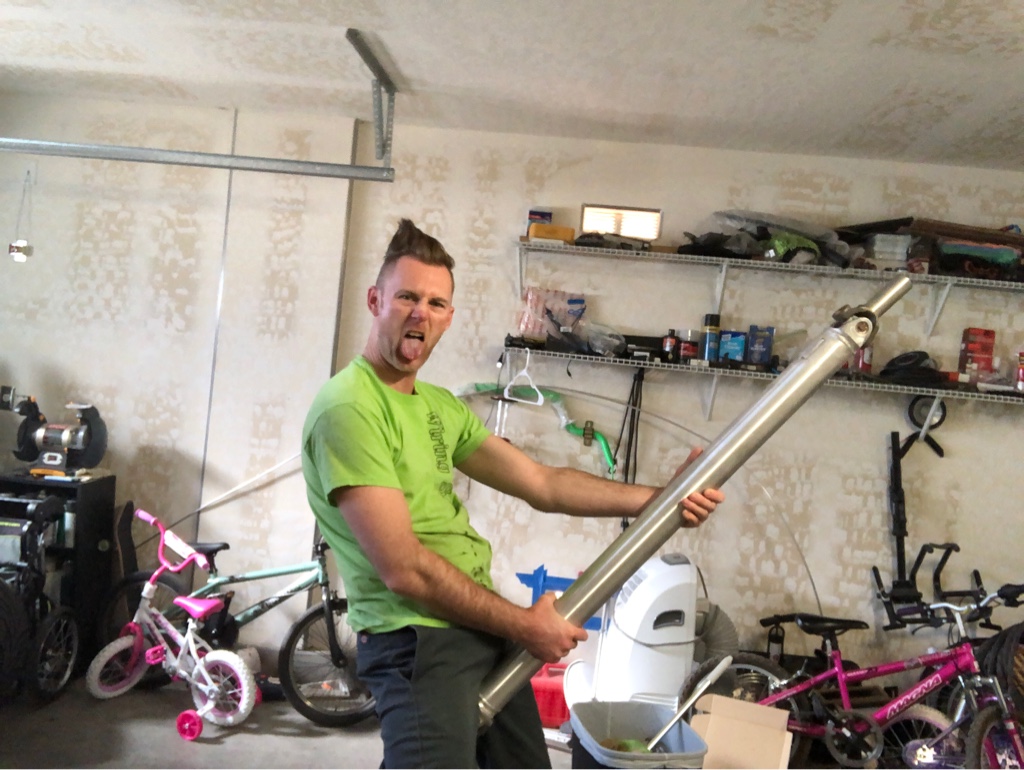 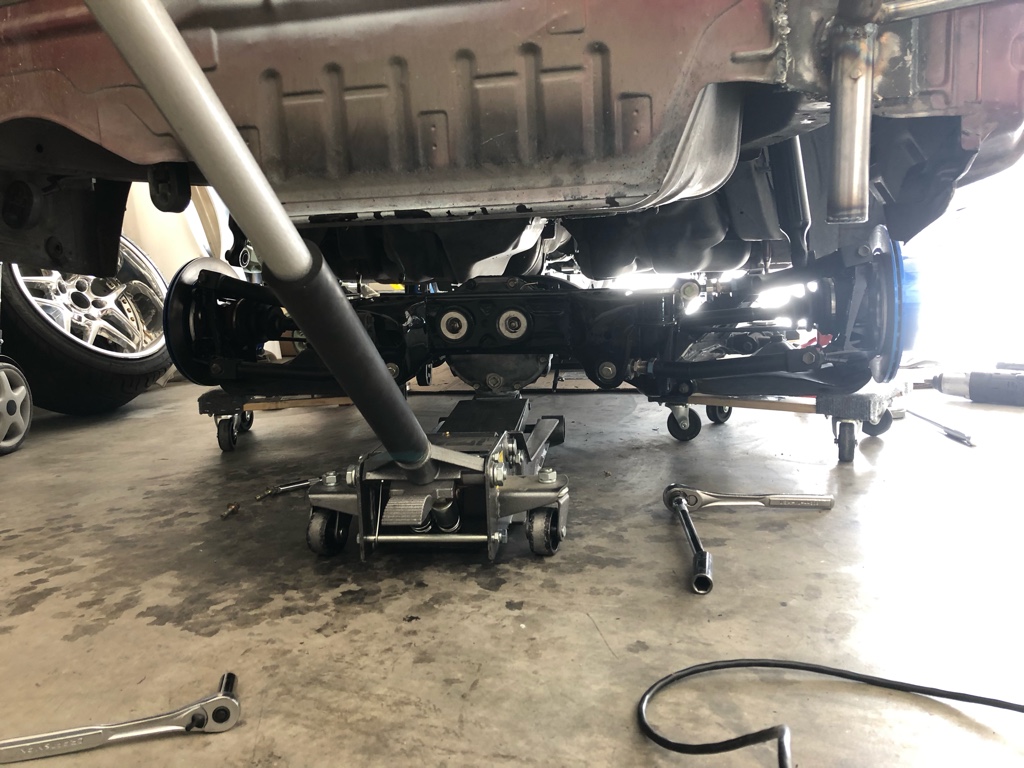 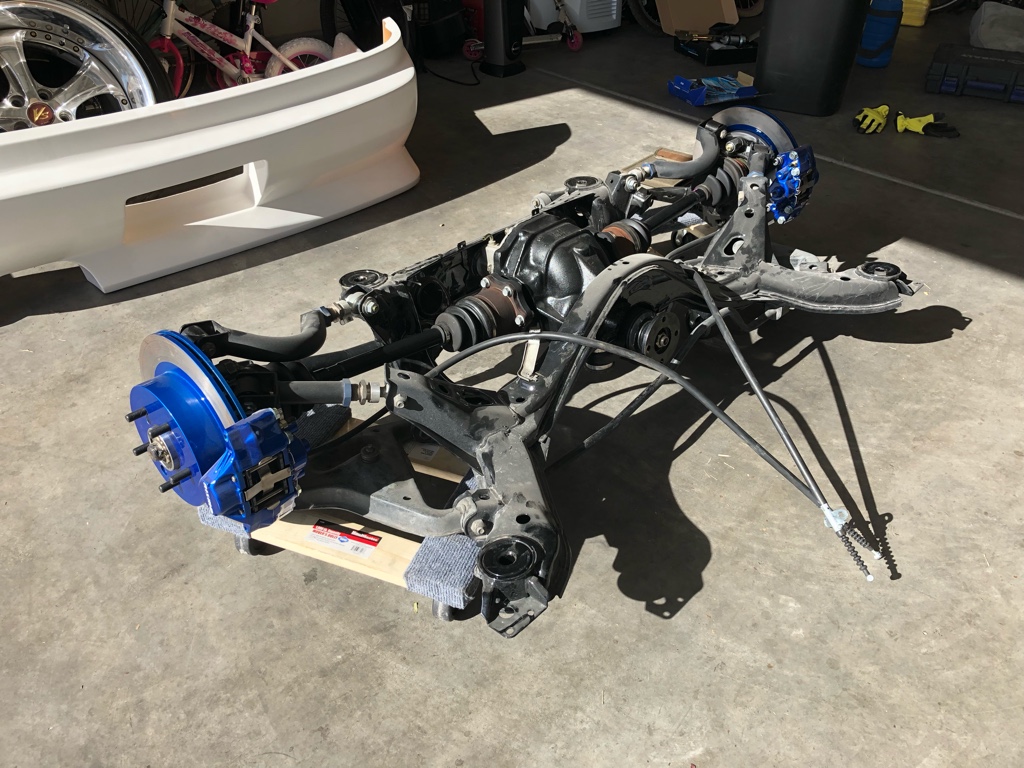 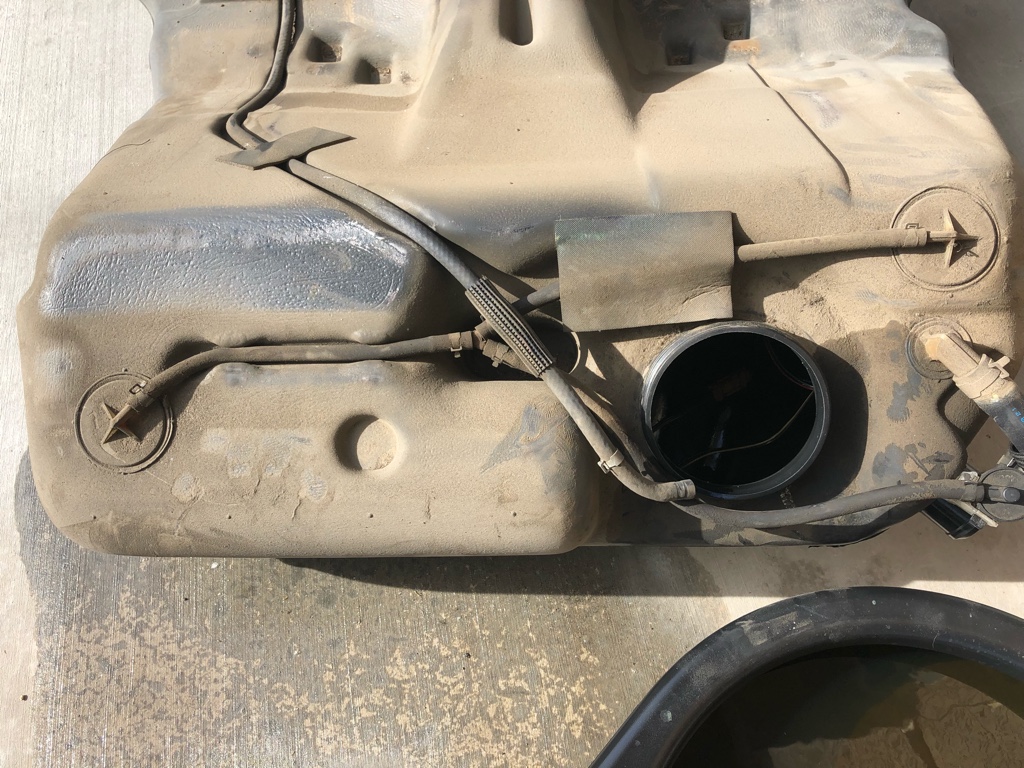 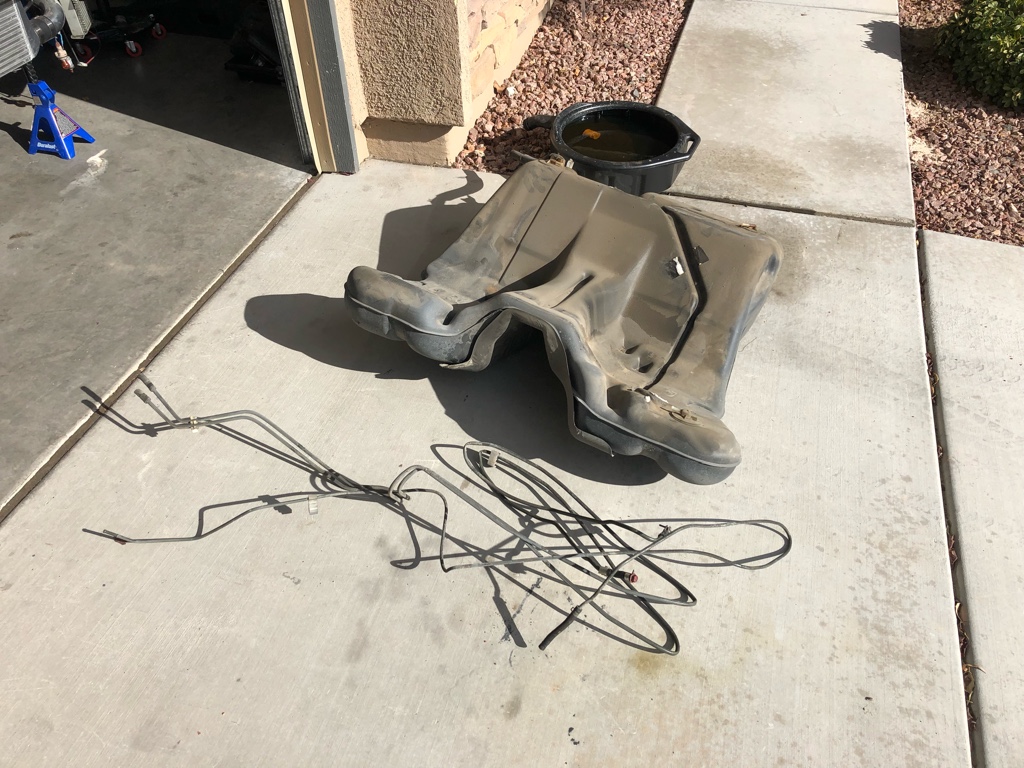 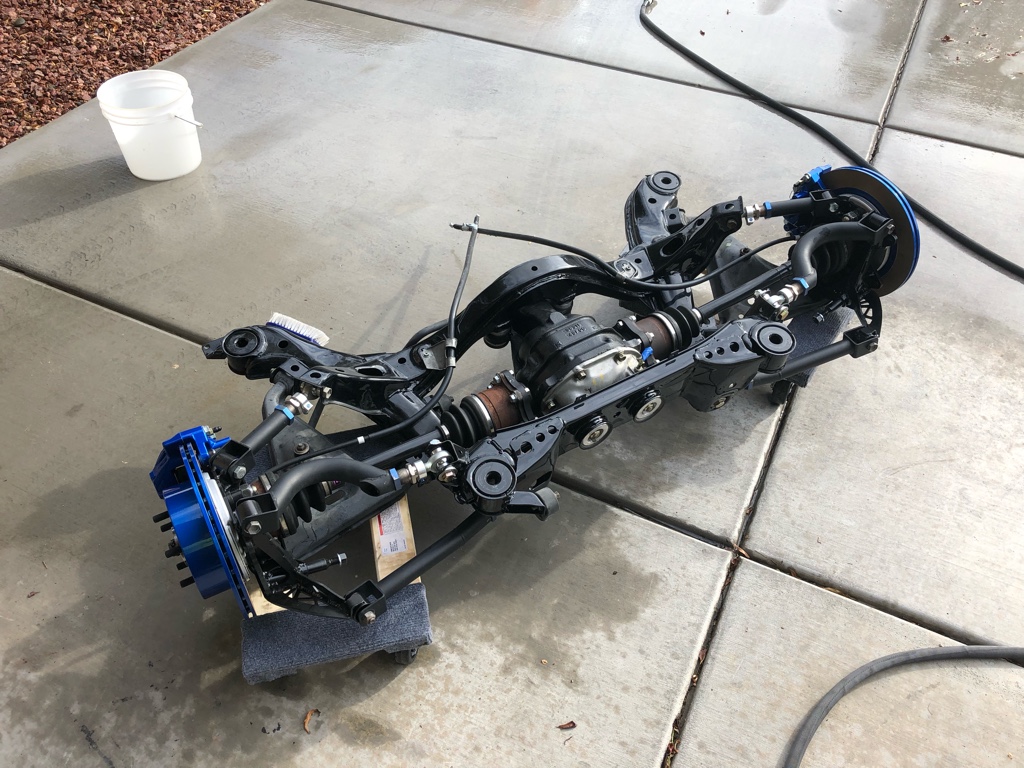 Sent from my iPhone using Tapatalk
__________________
|
|
|

|
|
|
#208 |
|
Post Whore!
 Join Date: Oct 2007
Location: Las Vegas
Age: 36
Posts: 4,590
Trader Rating: (53)
           Feedback Score: 53 reviews
|
So I did a thing...I traded in the old Titan and moved on to something a whole decade newer.
The new tow vehicle is a 2018 Ford F150 3.5L Twin Turbo EcoBoost. I honestly haven’t been this excited in quite some time. 2019 has been good to me so far, so it was time pass my old love on to someone else and try my luck with a new friend. Thanks for everything Titan, you won’t be forgotten.  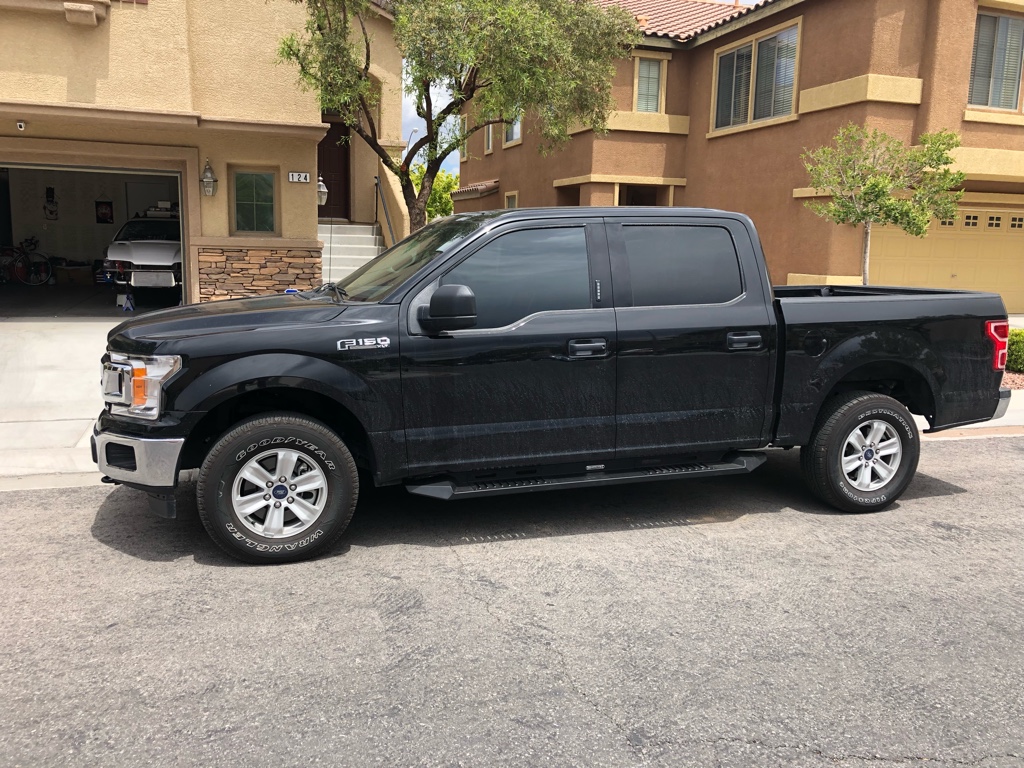 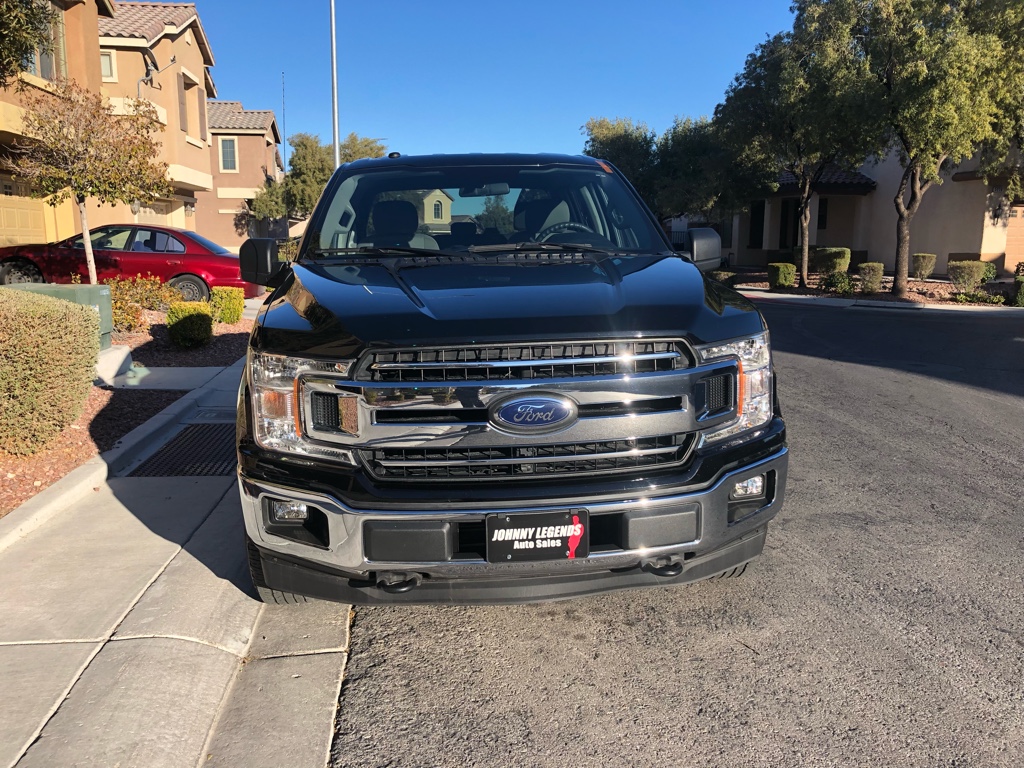 Sent from my iPhone using Tapatalk
__________________
|
|
|

|
|
|
#209 |
|
Post Whore!
 Join Date: Oct 2007
Location: Las Vegas
Age: 36
Posts: 4,590
Trader Rating: (53)
           Feedback Score: 53 reviews
|
E's '95 S14 Build - The true "forever" build
Well...it’s been a while. ごめんなさい
  。I’ve had a lot going on in my life since the last update, but I had some time today after work to get a little bit done. I recently bought this PTFE fuel line from @radiumengineering and it just arrived a couple of days ago. The quality of this hose is insane, it’s certainly something I’ll never need to replace...ever. I was looking for submersible fuel hose when I ran across this gem online. I bought the 12.8” long line, which is damn near the exact same length as the factory line in the S14 tank. The entire unit went back into place perfectly with the new Radium line. I cleaned up the bulkhead, locking ring, and the little pressure valve for the vent before reassembly. When placing the bulkhead back in the tank, I turned it 180° because I tore out the factory fuel lines and will be running the new ones down the opposite (driver’s) side of the car. After that I went about replacing all of the original lines with brand new fuel line. I used some fresh strips of aluminum tape to hold things down. The whole thing turned out pretty decently and should last a little while. Might do a sump setup later to avoid starvation issues if I’m feeling cute. I still need to run the feed and return lines before throwing the tank back in the car. Once the tank is in, I can move on to running the hard lines and finishing the plumbing of the fuel system. 。I’ve had a lot going on in my life since the last update, but I had some time today after work to get a little bit done. I recently bought this PTFE fuel line from @radiumengineering and it just arrived a couple of days ago. The quality of this hose is insane, it’s certainly something I’ll never need to replace...ever. I was looking for submersible fuel hose when I ran across this gem online. I bought the 12.8” long line, which is damn near the exact same length as the factory line in the S14 tank. The entire unit went back into place perfectly with the new Radium line. I cleaned up the bulkhead, locking ring, and the little pressure valve for the vent before reassembly. When placing the bulkhead back in the tank, I turned it 180° because I tore out the factory fuel lines and will be running the new ones down the opposite (driver’s) side of the car. After that I went about replacing all of the original lines with brand new fuel line. I used some fresh strips of aluminum tape to hold things down. The whole thing turned out pretty decently and should last a little while. Might do a sump setup later to avoid starvation issues if I’m feeling cute. I still need to run the feed and return lines before throwing the tank back in the car. Once the tank is in, I can move on to running the hard lines and finishing the plumbing of the fuel system.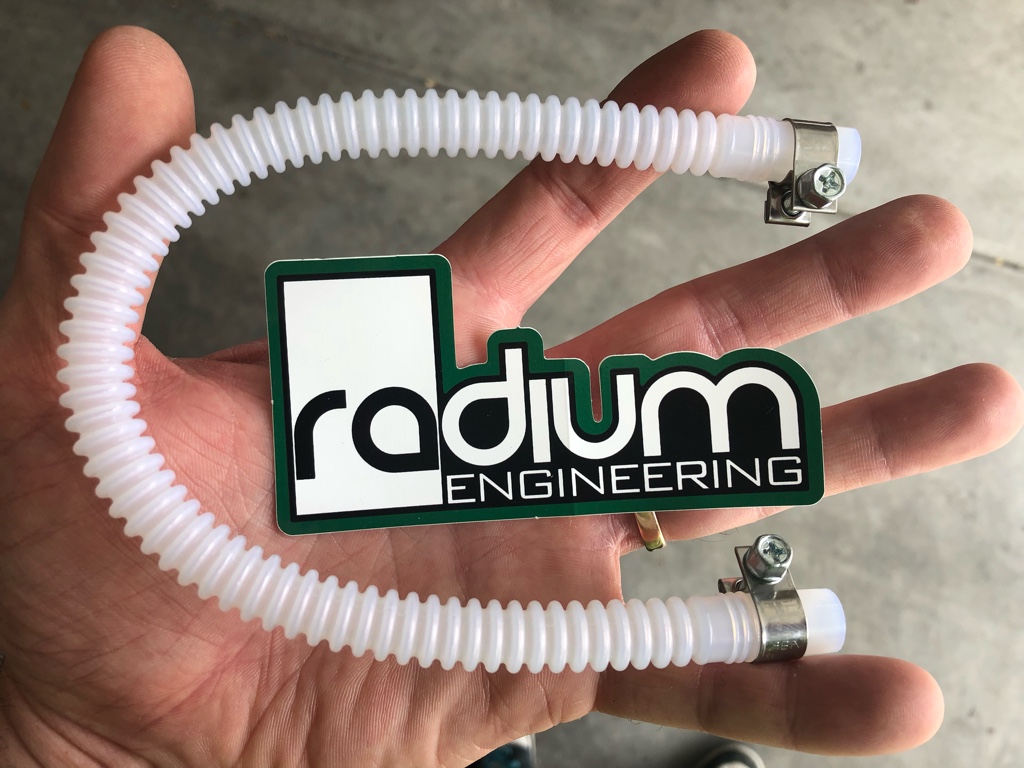 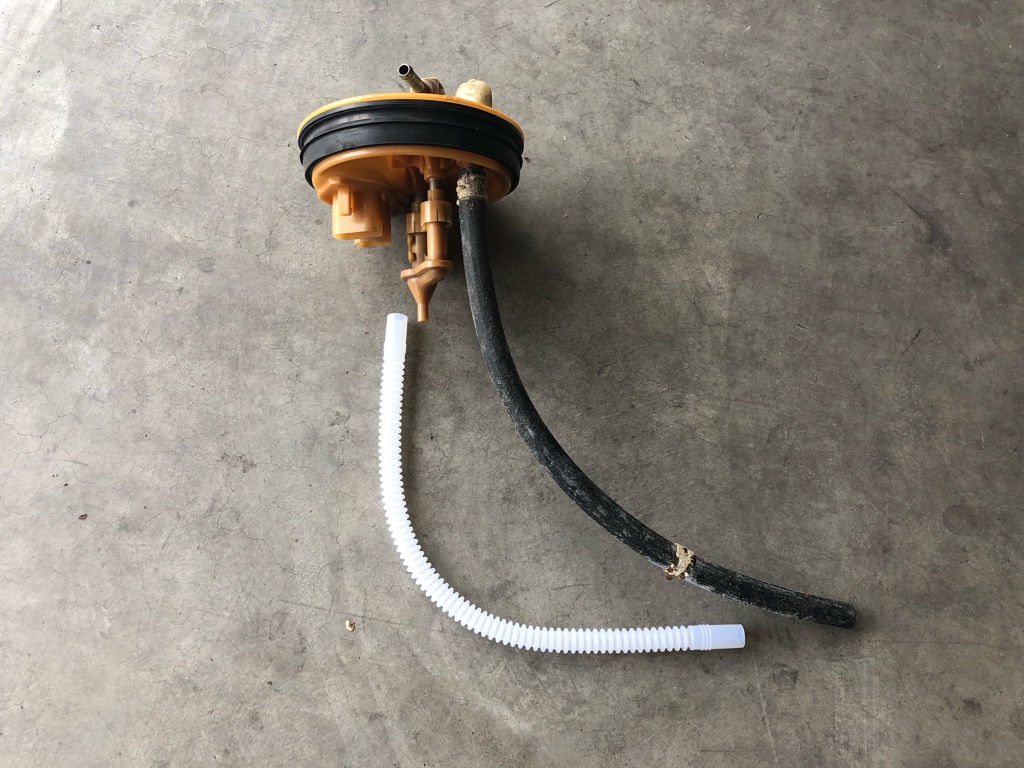 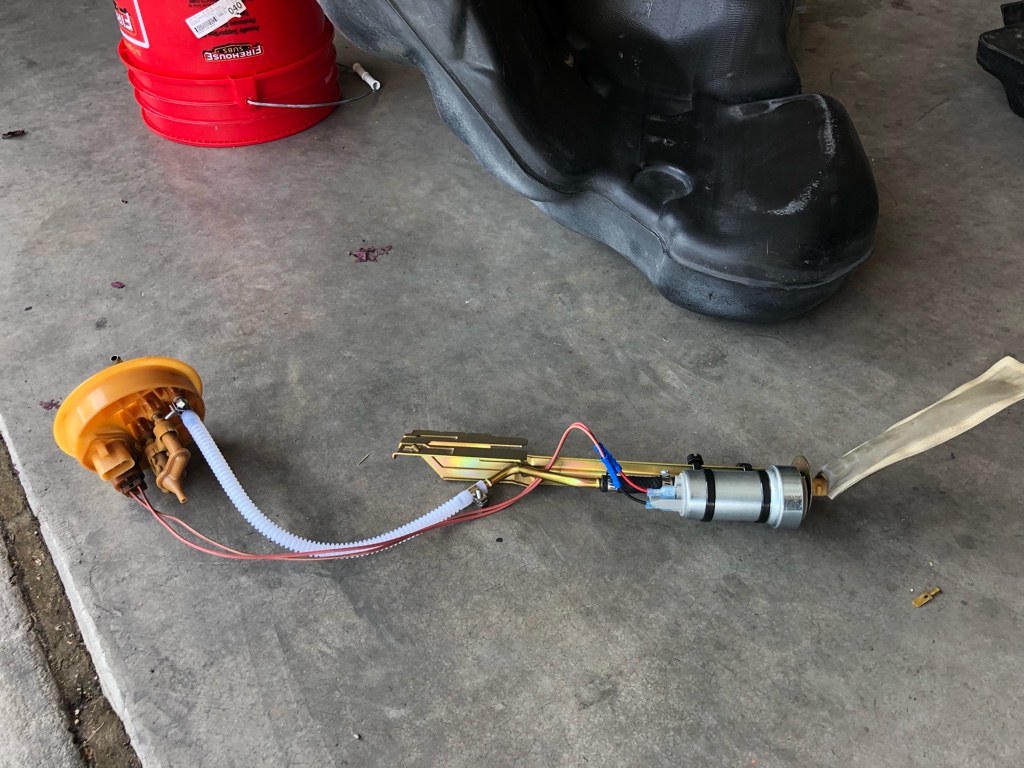 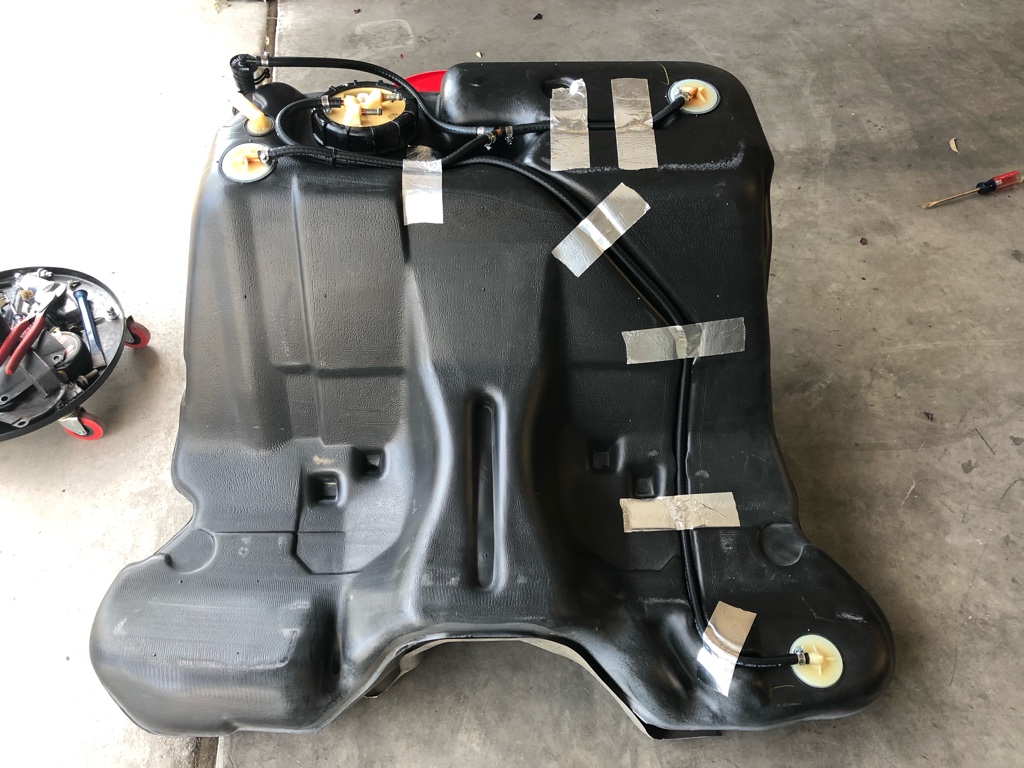 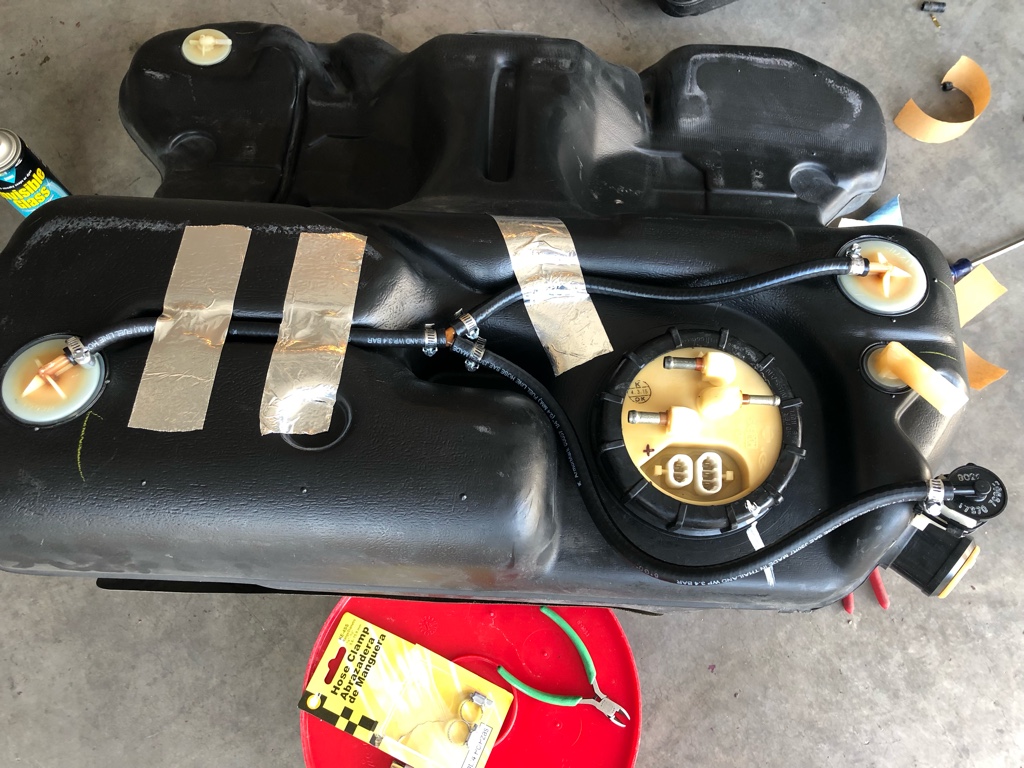 Sent from my iPhone using Tapatalk
__________________
|
|
|

|
|
|
#210 |
|
Post Whore!
 Join Date: Oct 2007
Location: Las Vegas
Age: 36
Posts: 4,590
Trader Rating: (53)
           Feedback Score: 53 reviews
|
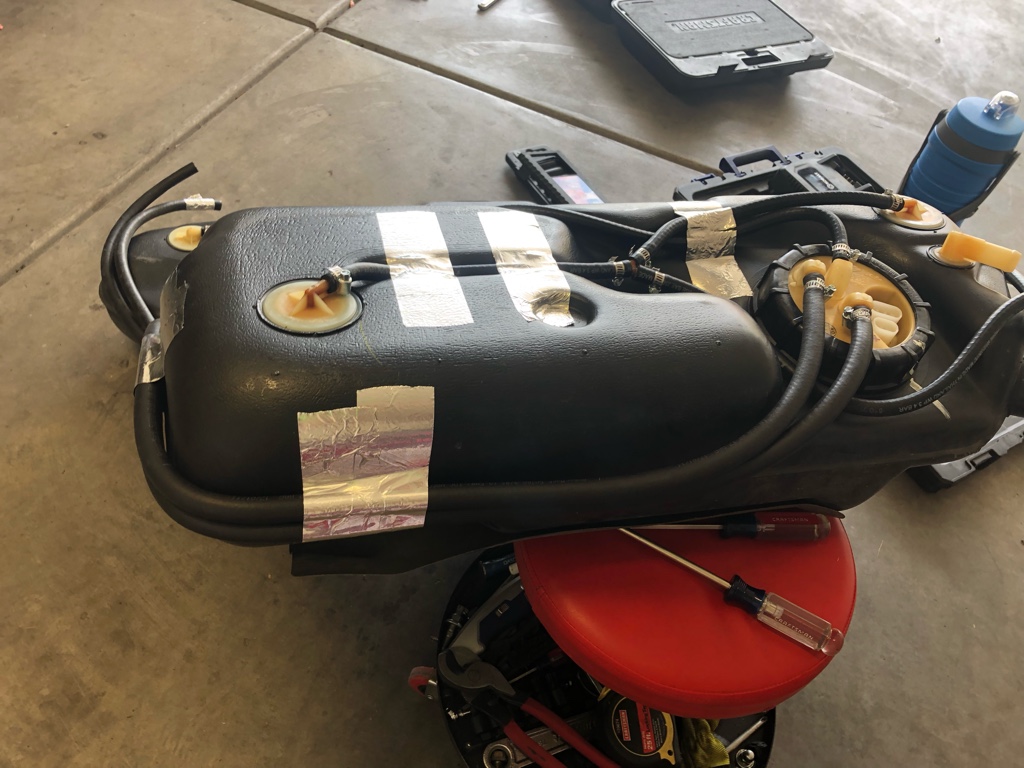
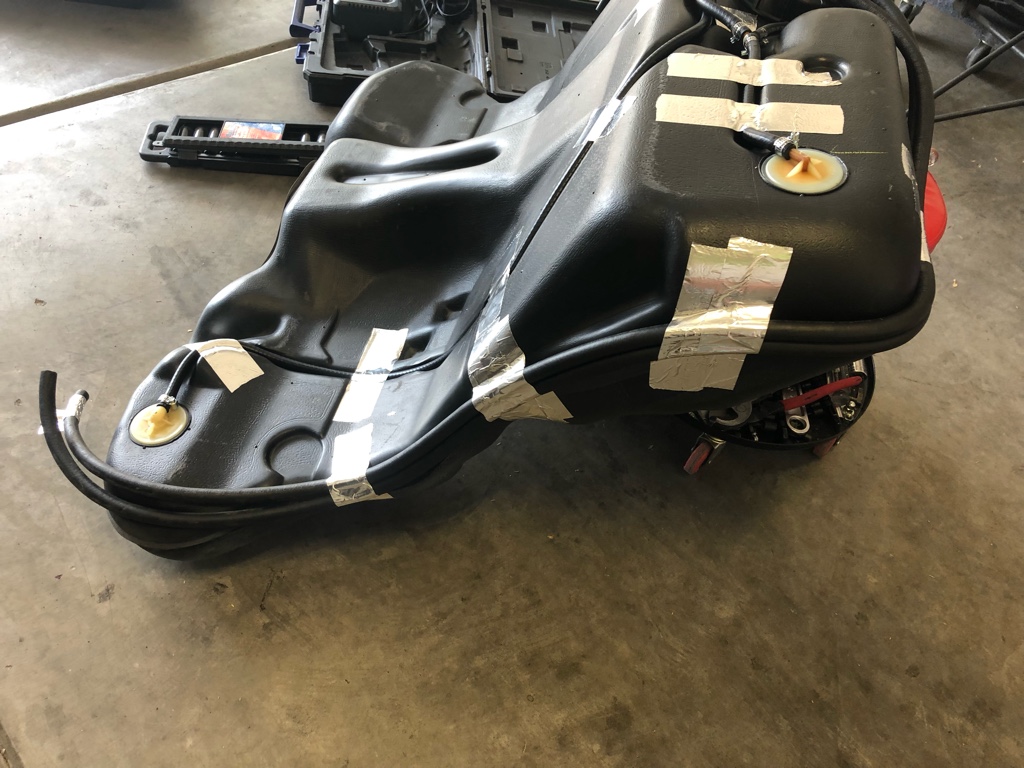
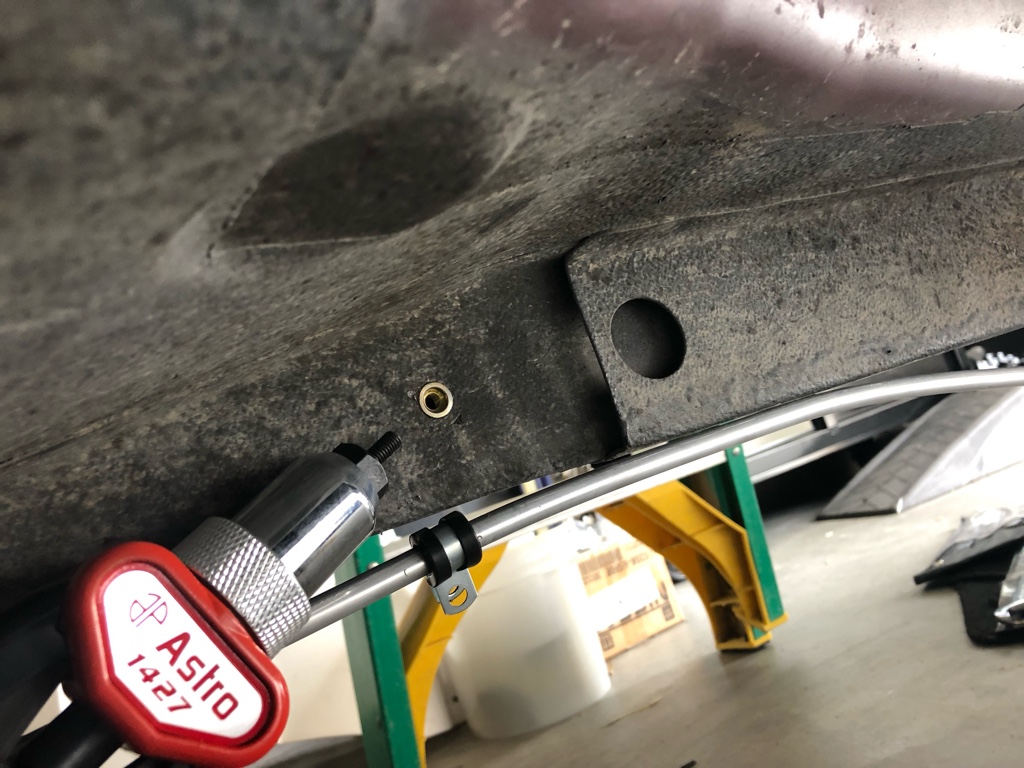
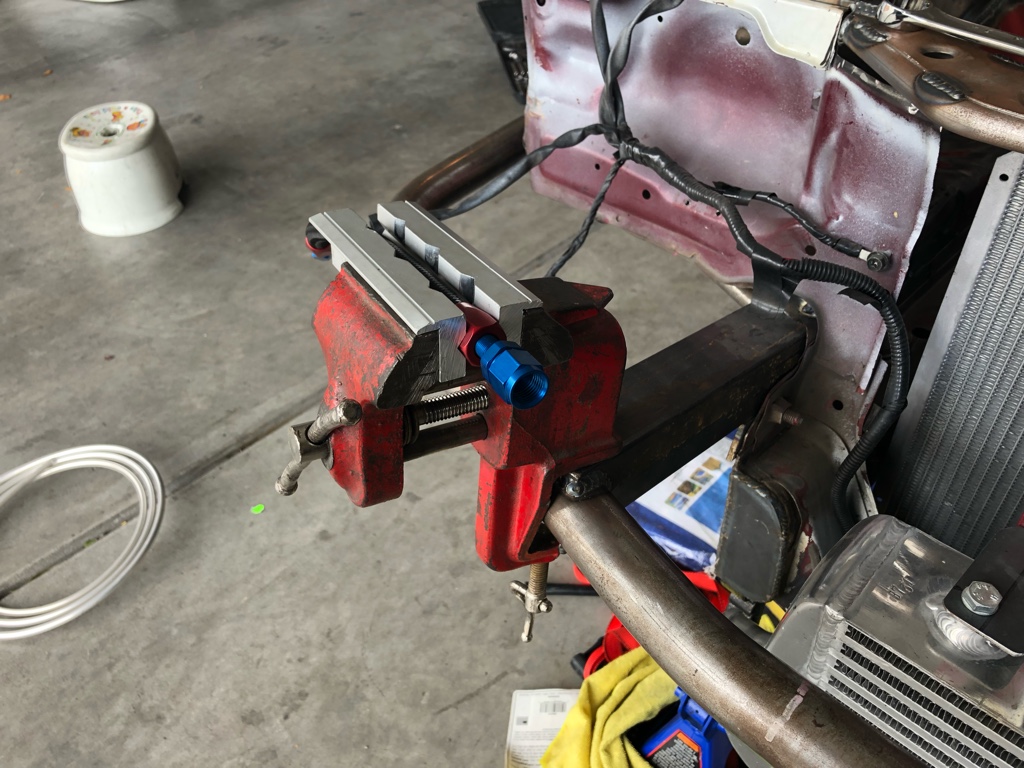
So I had the tank back in the car...I didn’t really like how I had it with the lines running over the top because I wasn’t sure if they were being squished or not when the tank was fully bolted up. I decided to take it back out and re run the lines. I had to take the line bulkhead back out, which was an absolute bitch after having just put in a new gasket. This needed to be twisted a little to avoid any harsh bends. After that was done we ran lines around the back of the tank and down the side. I was originally going to use self tappers, but I hated that idea so I grabbed the old rivnut gun and popped in some rivet nuts to hold the solid lines up. Next up was the hoses. In my ghetto ass workshop I strap the vise to my bash bar, that’s how I roll. I got all of the lines fitted with AN fittings and installed the whole setup. It’s far from perfect, but I don’t hate it. More to come soon.
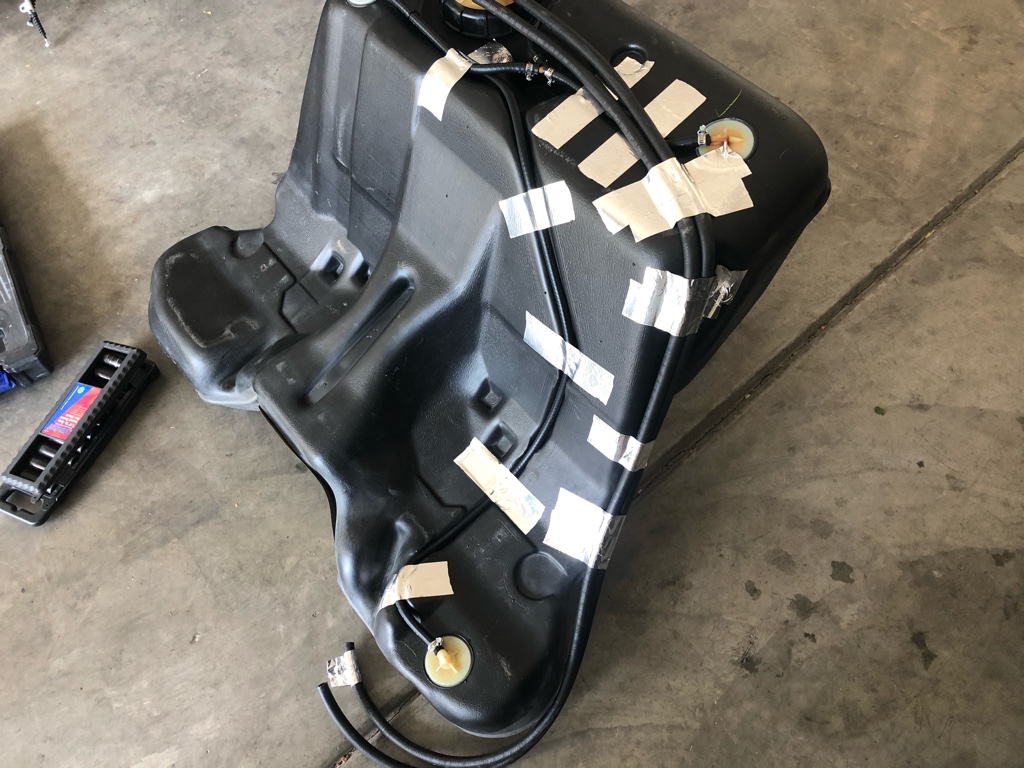 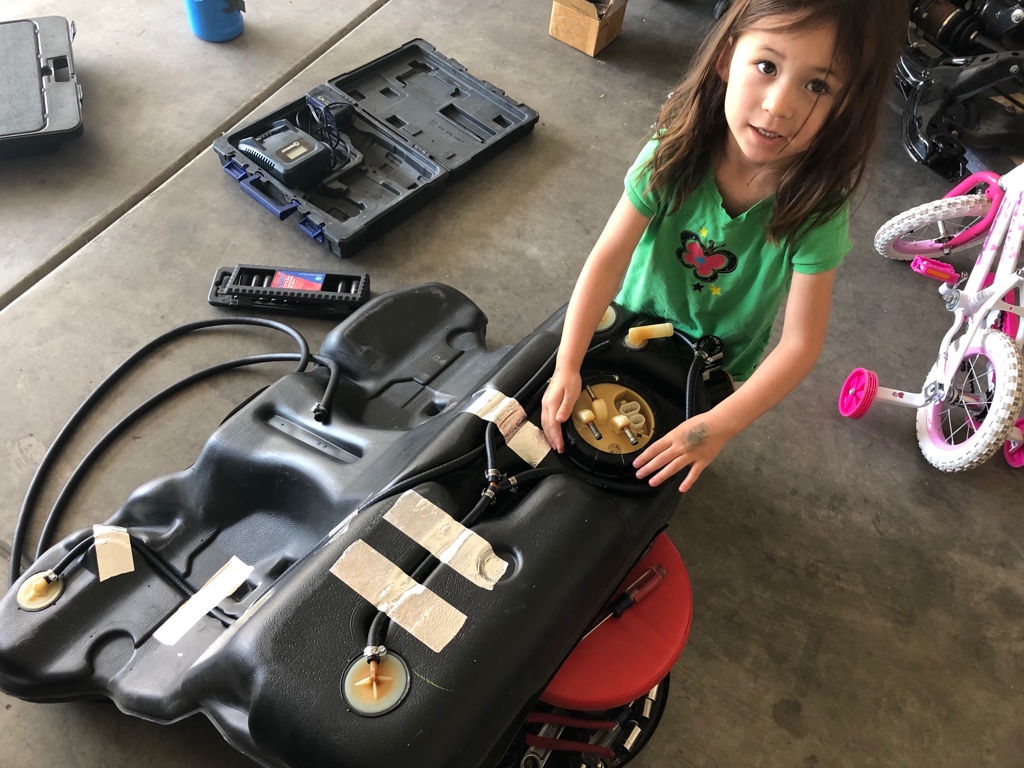 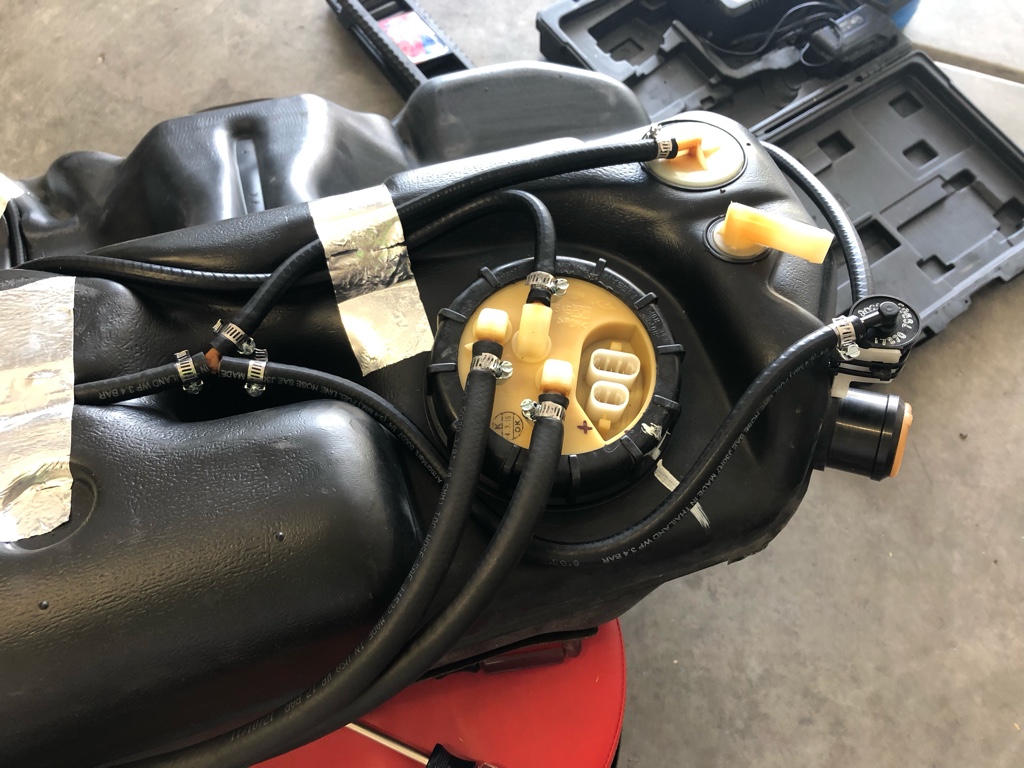     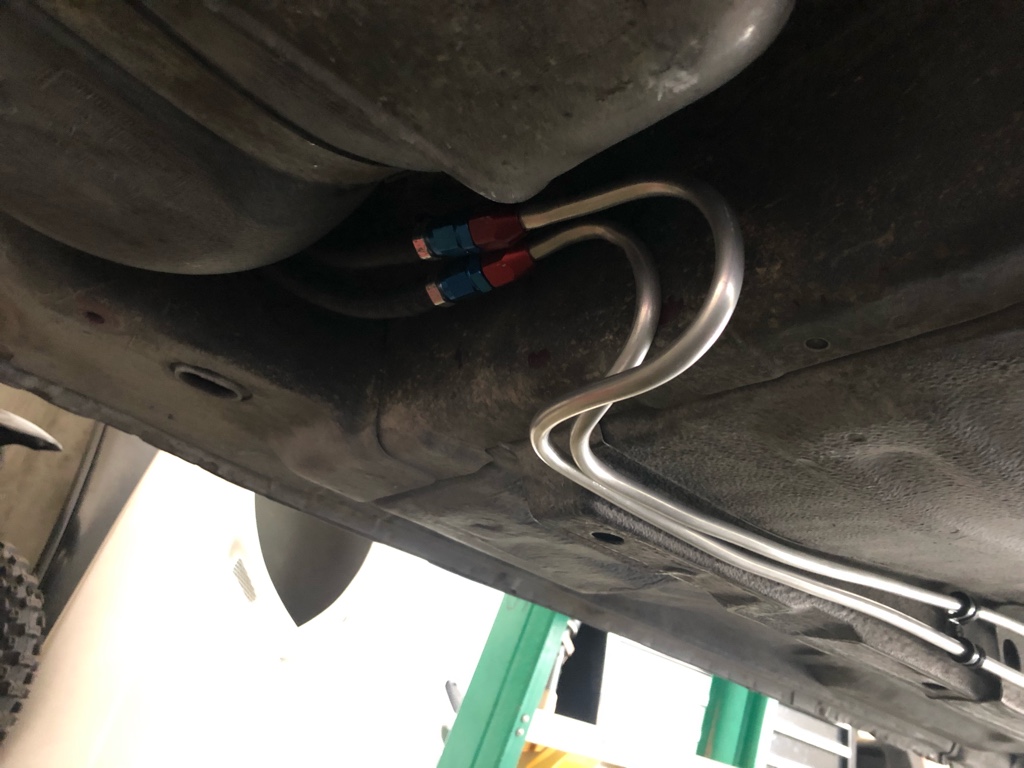  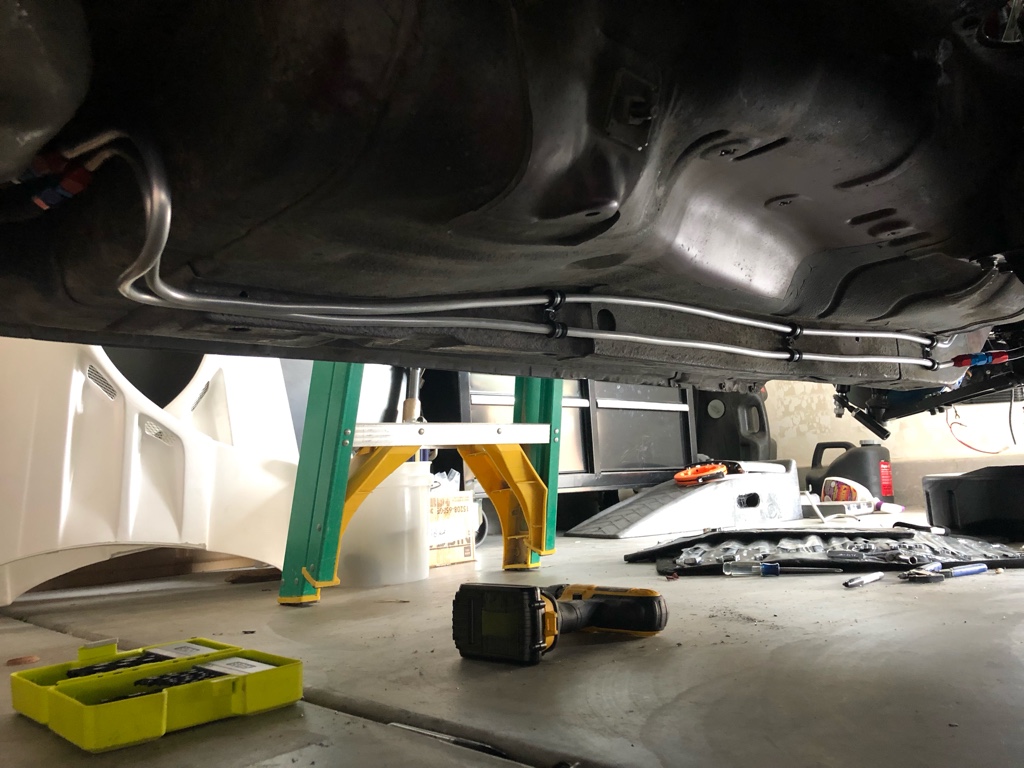 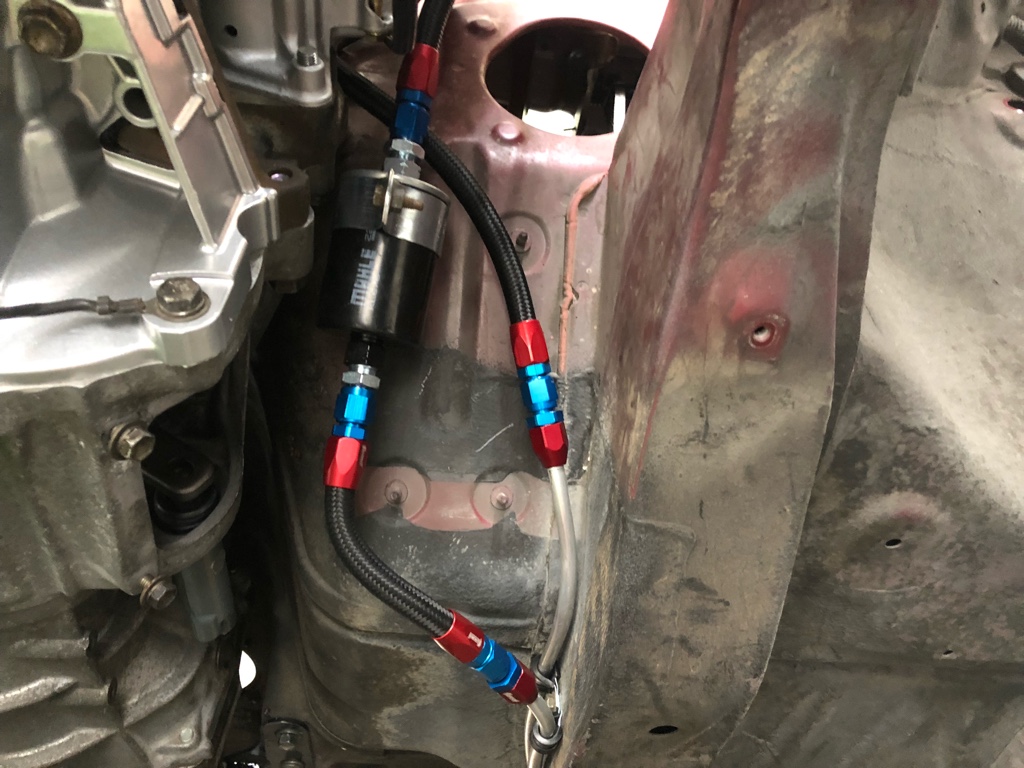 Sent from my iPhone using Tapatalk
__________________
|
|
|

|
 |
| Bookmarks |
| Thread Tools | |
| Display Modes | |
|
|