
 |
|
|||||||
| Home | Rules & Guidelines | Register | Member Rides | FAQ | Members List | Social Groups | Calendar | Mark Forums Read |
| Builds (and builds only) Got a build thread? It goes here, build threads anywhere else on the forum will be locked and never moved. |
|
|
Thread Tools | Display Modes |
|
|
#1 |
|
Zilvia Member
 |
amigo s13 hatch
My first s-chassis was a coupe I purchased in 2012. I never got too far into that car, it was a side project of sorts while I was skating and doing other things. When I finally got into driving it and enjoying it towards the final months of 2014, I decided I did not want to destroy a coupe. I consequently sought after an S13 hatchback to build during the winter of 2015 so I could really get into drifting. This is where the story begins. Finding a decent starting shell is quite difficult, but after meticulous hunting and a slight predatory instinct, I finally found one!
The owner was reluctant to sell, and I recall being a complete nuisance. After about a month of pestering him (let?s call him Lionel) he finally agreed to meet up. I hopped in the truck with my pops and a rented u-haul and arrived at a vexing neighborhood south of Baltimore. While we were pulling in, there were groups of people quarreling on the sidewalk, so we needed to scoop the hatch and get the hell out of there. Lionel fibbed and stated the car was ?rust-free.? The brake line areas under the strut towers had a bit of rust from leaks eating away at the undercoating. This helped knock the price off a little. The car ran, but didn?t drive because he said it ?needed a clutch.? Anyway, I gave the man his money and we all mashed the car on the trailer. I?d like to apologize for the quality of the photos in the earlier part of the story, I was more concerned with the car and not aesthetically documenting the process. HA! 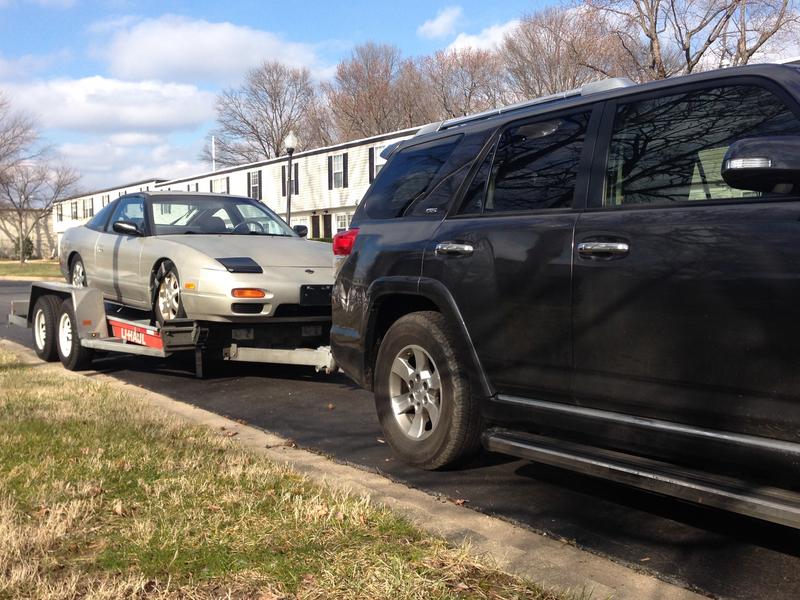 Once I got the car back home, it was time to tear it apart! I got the car up on stands and realized why the car wouldn?t move. The slave cylinder was dangling from the rubber clutch line and damper. There were also boxes of junk and random parts in the trunk, and I had no idea what I had gotten myself in for. Then came the worst part of all, the damn car had both HICAS and ABS! I didn?t know this at the time, but one of the parts that was laying in the trunk was the ABS module, and explained the rats nest of tee?d off brake lines in the engine bay from what I assume was an ABS delete. Anyway, I wanted to fully get rid of HICAS, so I swapped subframes with the coupe. 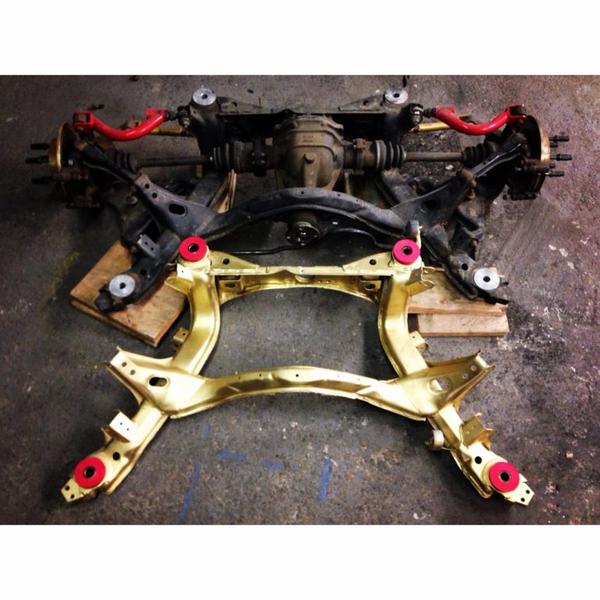 I picked up that spare (gold) one for the coupe so it wasn?t left with a HICAS subframe. My friends Marc and Alfonso kindly came by and helped me swap them out. The coupe subframe already had subframe risers, and battle version arms that would come in handy for the hatch.  At this point, I thought things were going quite well. I had the suspension from the coupe, and I would have this car running in time for the first event of the year! After I removed and converted all the HICAS and ABS crap (I?m going to upload a guide for this soon), I should be ready to go, ideally. Well, after grinding down the rust by the brake line bracket, it ended up being worse than I originally thought. I really despise rust, it bothers the hell out of me so I needed to repair this ASAP. I picked up a Miller welder with my pops to help with his projects, and I used this as a learning opportunity. Cut the panel out: 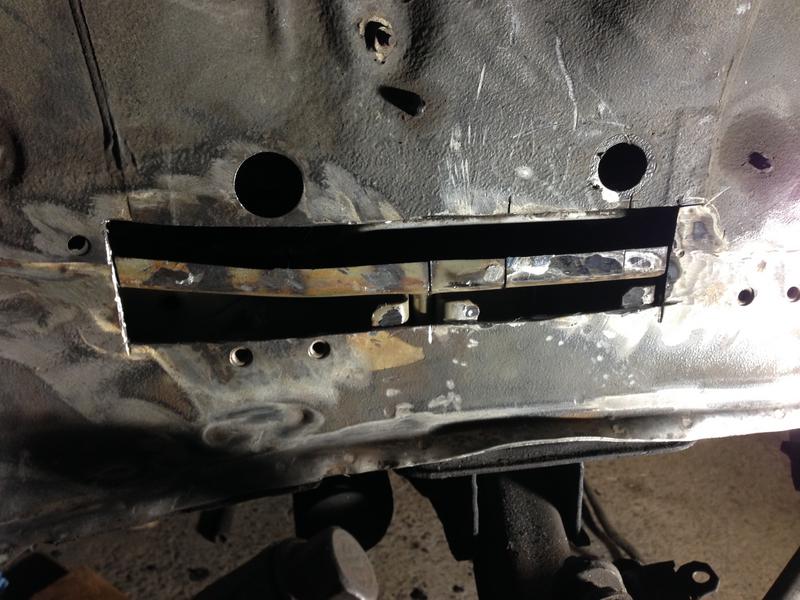 ] ]Made a template out of cardboard and welded the new piece on:  Welding thin metal was super tricky, and I had to be careful not to concentrate too much heat in one area. It obviously wasn?t something worth posting on WeldPorn, but it was sealed and annihilated the rust. But now, I was faced with a slight dilemma. Fresh MIG welds are highly prone to rust, and although I had repaired the damage, the other side (in the engine bay) needed to be sealed and rust proofed as well. Doing that with the engine in the car was an unfeasible task. The engine needed to come out to gain access to the other side of the repair. Otherwise, the rust would return, making all this work useless. The next Saturday morning I rushed to the car and removed an engine for the first time! My bud Goey came by and helped me pull it out and made the task a bit less fastidious.  I cut the core support and welded tabs under it to facilitate the overhaul. The new goal was to clean up and repaint the engine bay. I had only planned for a simple rust repair, but things snowballed into pulling the KA. It was at this point that I began to fully understand the domino-effect of building a car. As you work, you start to uncover minor issues that require attention and the amount of unanticipated moves you have to make to realize your goals grows exponentially. This can be especially frustrating for someone in my position as relatively new to cars (more on this later). Anyway, I pressure washed and ground off the old seam sealer:  I looked online for inspiration on how to do my bay, and particularly enjoyed how VW cats shaved and tucked their entire bays. I was fascinated with the illusion they created of a ?floating? engine, with no visible wires or holes, just a smooth cradle for the engine. Obviously, I wasn?t adept enough for such a feat at the time, but I did attempt a subtle shave, and it was good welding practice! 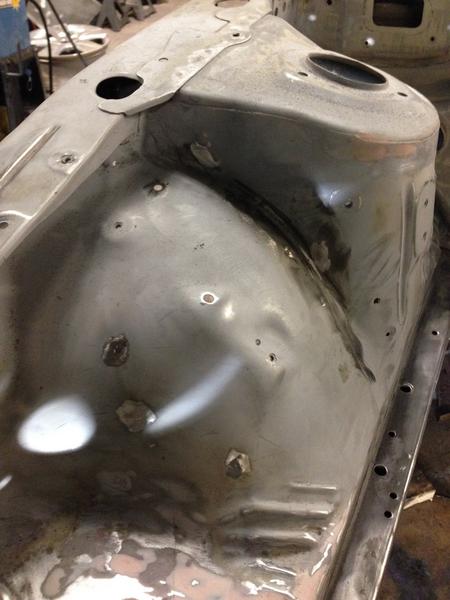  Removing the battery tray carefully without trashing the metal underneath was a feat. I wasn?t going to keep A/C so i shaved those holes too:   This project was great for practicing thin metal welding. I had to remove the front subframe so it was easier to work in there. 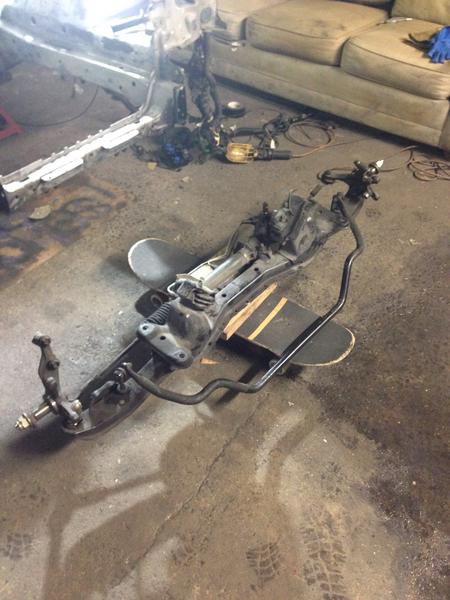 Got part of the bay primed to see if there was any smoothing left to do where I welded and shaved: 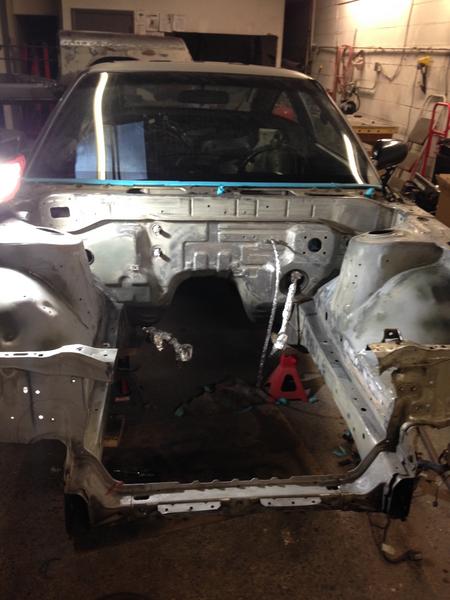 The engine bay prep was beginning to take a toll on my well being. Between a full day?s worth of classes and my job, it was becoming really overwhelming and I?ll admit I wanted to just give it up. My pops was starting to notice that I had no energy, and said that I should take it easy with the car, and offered to help whenever he could. I developed a type of obsessive nature once I got the ball rolling. He was the reason I got into this hobby in the first place, as a kid my life revolved around his cars. He?s into restoring classics, and keeping them in near factory condition. I respect that a lot, but my enthusiasm went in a totally different direction! I will never forget the look on his face when I showed him what I wanted to do with the car. Either way, he?s super supportive of what I do, and I?m greatly appreciative of that! I finally got the bay primed, everything was looking up! My friends came by to help do the final prep work to the base coat 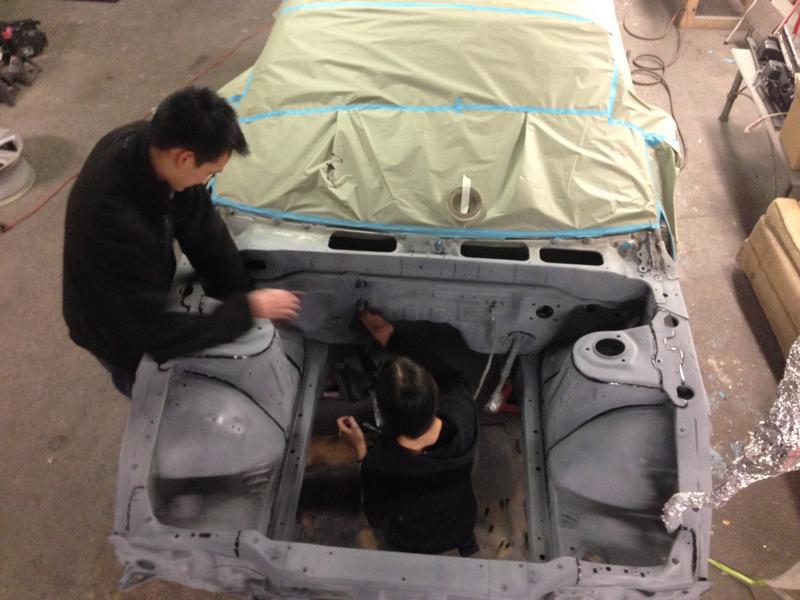 I?m ashamed of the color choice in retrospect but hey, we all make mistakes. At the time I thought it was ?cool.?  I started putting the shit back in the engine bay, I assembled my own power steering setup after getting rid of the HICAS junk. These are Earl?s fittings and hoses with a permacool universal oil cooler. A solid power steering system is essential, the fluid is under a LOT of pressure. 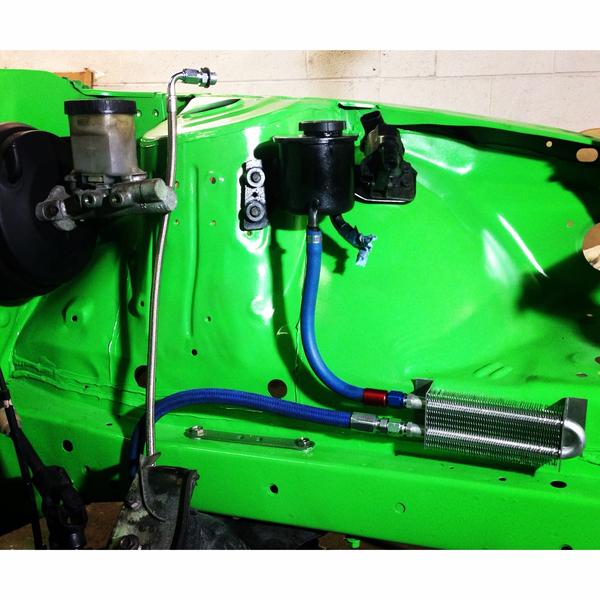 Continued to re-install the rest of the stuff in the engine bay. Things were coming together and I was pretty excited. Those brake lines are courtesy of Marc, really funny looking back on them now. Even with the kink those lines lasted around 1.5 years with no issues!  With the engine compartment in order, I wanted to tackle the engine itself. The odometer read 311k miles, a chilling fact. I was able to get in contact with the guy that owned the car before me, and he confirmed the mileage! We even became friends as he was a local cat with mutual buds, funny how things work. I didn?t want to get to crazy tearing this engine apart, I just replaced all the main seals and gaskets and hoped for the best. I also tried an emissions delete, and it worked out nicely!  Got a paper plate clutch kit (Exedy oe replacement)  Alfonso came by again and helped me put the engine in the car. For two people that hadn?t done this before, things went semi-smoothly after some finessing. 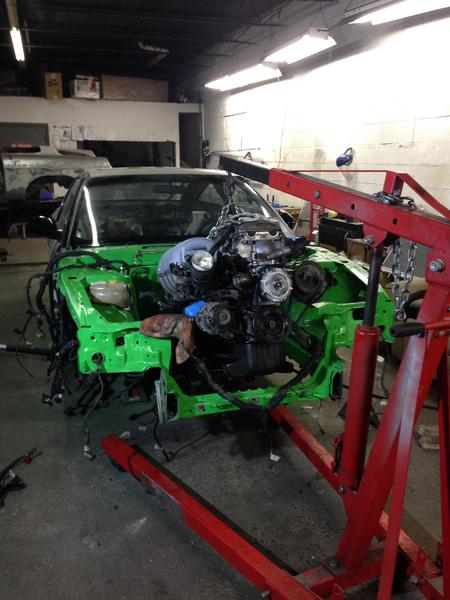 Got all the other odds and ends mashed in there too: 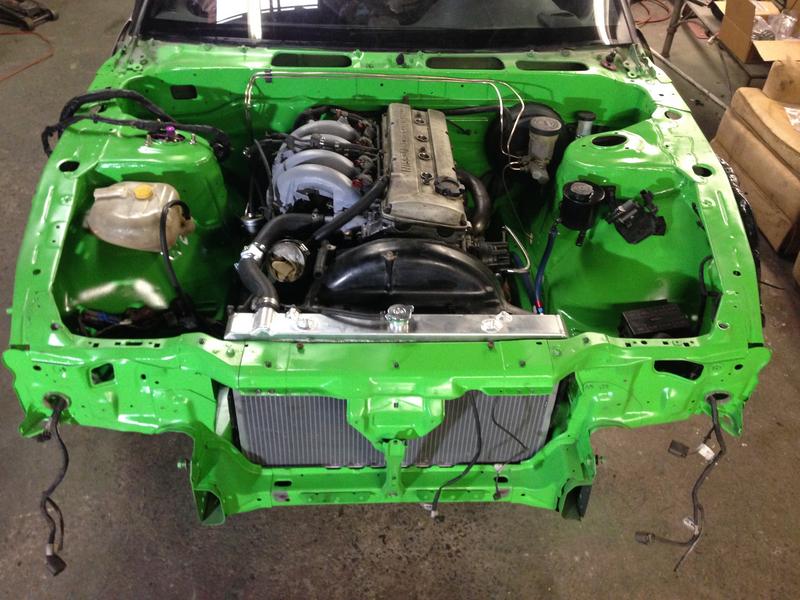 Got myself some new wheels for the front as a reward for making it this far! Enkei Kojin 17??9+35 (horrendous sizing for the front but I didn?t know any better back then)  It was at this exact point in the build that I hit a massive barrier. Everything is on, and the car is ready to start. I had put a lot money and effort, and even lost a girlfriend to this thing! I tore into it more than I had ever planned, and was really wondering if it was going to start. I plugged the battery in, and the car had power. Turned the key; nothing! I looked over things and realized the ECU wasn?t plugged in. Nice. Simple enough of a mistake. *Crank crank crank* Still nothing! The car would backfire on occasion, so I checked the timing probably over 20 times. I ended up flooding the cylinders so badly with fuel that I locked the engine up. It wouldn?t crank anymore and the starter would make an pitiful noise. The first Drift Valley event of the year was coming up, and I was wholly devastated that all this effort was for nothing. To me, it wasn?t fair. It wasn?t fair to have put all this work into a project and have it all fail at the critical moment. My friend Nick Pullin was kind enough to have offered me an engine he had laying around, but the first Drift Valley event was looming near and I wouldn?t have it done in time. He is a pretty big hoarder, so I appreciated the gesture heavily. I lost interest in the car for a few months, and let it sit while I skated and pursued other interests. One day, I had to get something out of the warehouse where I kept the car and I got a sudden itch to pursue this project once more. I still couldn?t rotate the crank by hand, that thing was locked tight. I looked online, and most of what I read about locked engines stated that the thing was as good as roasted. I figured the fuel in the cylinders washed the oil out and created a lot of heat while I was cranking it and fused the piston rings to the cylinder walls. Life lesson- don?t go in dry. Anyway, I wanted to be absolutely sure it was seized, so I hooked up a 6′ pipe to my 1/2 breaker and climbed on top of the bar. After a massive leap of faith and a few bruises later, the crank actually rotated! I drained the oil, filled it with some good-good and went back to square one. G was kind enough to come back and help me with this issue. In this game, it?s really nice to have friends that can answer your dumb questions. I would consistently pester Nick, Ivan, and G for guidance and direction. Anyway, G came over and taught me the importance of being simplistic in your diagnosis. It?s easy to get caught up in the problem and oversee obvious solutions. We double checked the timing, and it was fine. I had tried to replace injector O-rings while I put the engine together, and didn?t lube them; essentially trashing them. Don?t go in dry, remember!? Instead of spraying a fine mist of fuel, the spray more closely resembled a garden hose. I replaced the rail and injectors, and it still wouldn?t start. G sprayed carb cleaner into the intake, and it fired up! I was hyped! I replaced the pump with a Walbro 255, fixed some grounds, and cleaned up the wiring and we were back in motion. I addressed the front end with some tein tie rods, put my D-max coils from my coupe on this car, and was ready for Drift Valley! Hell yeah 5 lug!  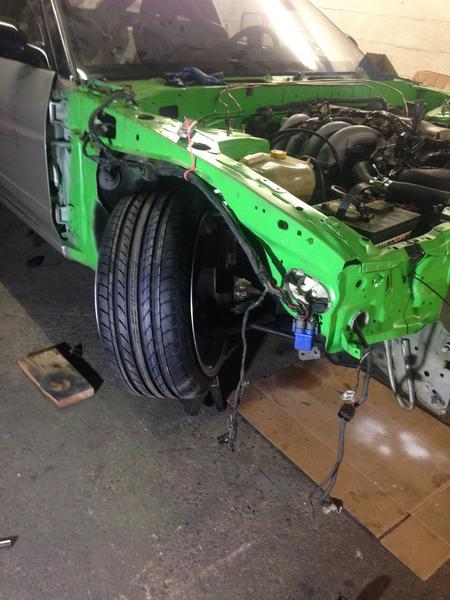 With the car running, I wanted to address ?aesthetics.? In the rear the body was cracking. This could only mean one thing, BONDO, AND LOTS OF IT. Apparently the car had been hit in a parking lot, and the body shop (if we can even call it that) simply filled the whole damn thing with filler. I was in no position to pull all that damage out, and set it straight. It was more of a task for an artist than a kid like me. B-Magic overs it is. I couldn?t even sand the bondo off, I had to get all 1/2″ of it off with a grinder Measure twice, cut once:  FYI, looking back on this, I should have cut higher. If you plan on tucking rim, cut 4-5″ above the body line. After pulling my overs off recently I need to address this and raise the arch. The tire rubs ever so slightly under load tucking a 17″ on 215/45. Note the killer bodywork by whoever tried to repair this before:  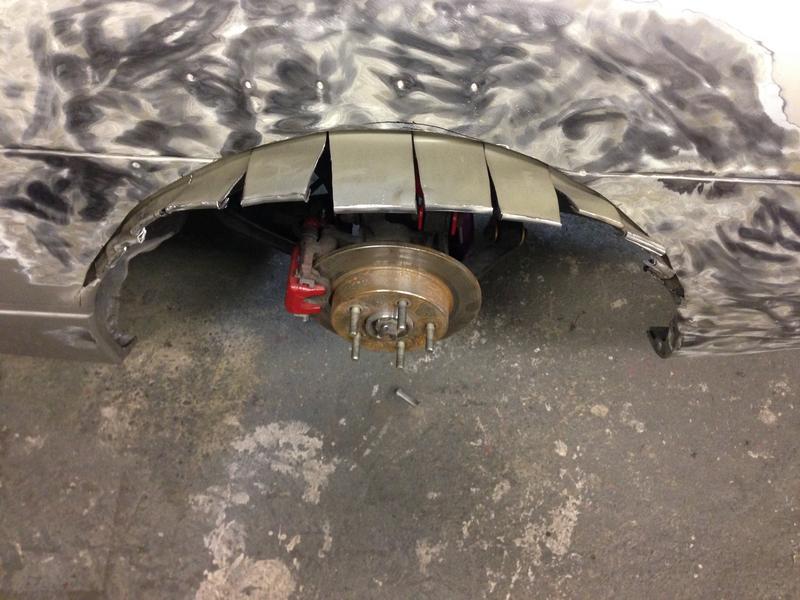 More welding practice!  3M two-part Hardened body seam sealer!  With this out of the way, it was time for the maiden voyage! I lowered the car on the stands, slowly released the clutch, and the car moved! This was a truly gratifying feeling, never in my life have I dedicated so much of myself to a project.  Drove it around the compound, and everything seemed good. I painted the valve cover and proceeded to break in the clutch. A slight uneasiness lingered in the back of my head driving the car on the street. A lot of moving parts were disassembled and reassembled!  Cruised around with Marc in his hatch:  G gave me a bumper, and I made a half-assed attempt at a ?paint match.?   I thought I was so cool with my ?drift-spec? 240sx. Chuki extensions on a pignose, bumper sag, no signals, and a spray painted bumper. I didn?t care at the time, I felt on top of the world with my running and driving s-chassis. I continued to break the clutch in and prepared for Drift Valley after missing a good chunk of the season. A few days prior to the event, the car sputtered and wouldn?t rev past 2.5K RPM. I wasn?t sure if someone?s abuela had cast a curse on me, but I was tired of stuff breaking! Maybe I wasn?t cut out for this. Anyway, I woke up the next morning with a clear head and found a ruptured fuel hose by the tank and a disconnected MAF plug. Nice. Got that taken care of and kept mashing on. There were four events left in the season, stocked up on spares and was ready to go! 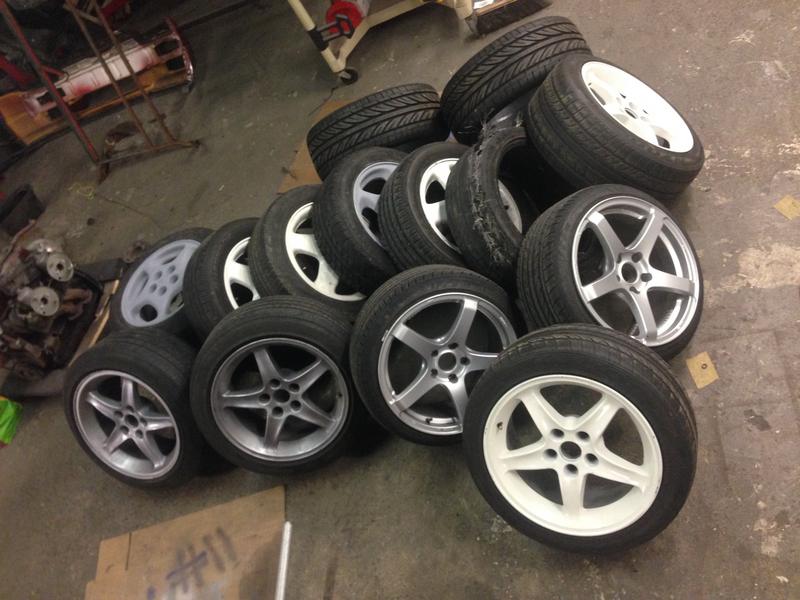 The first event was awesome! I started to get the hang of driving this car, and by the end of the event I was linking the course. I took things slowly at first, just a corner at a time. This was the final test of my perseverance, and I?m glad I stuck through with it.  Got some better fitting wheels for the front and I continued to do some more events that season to make up for lost time: 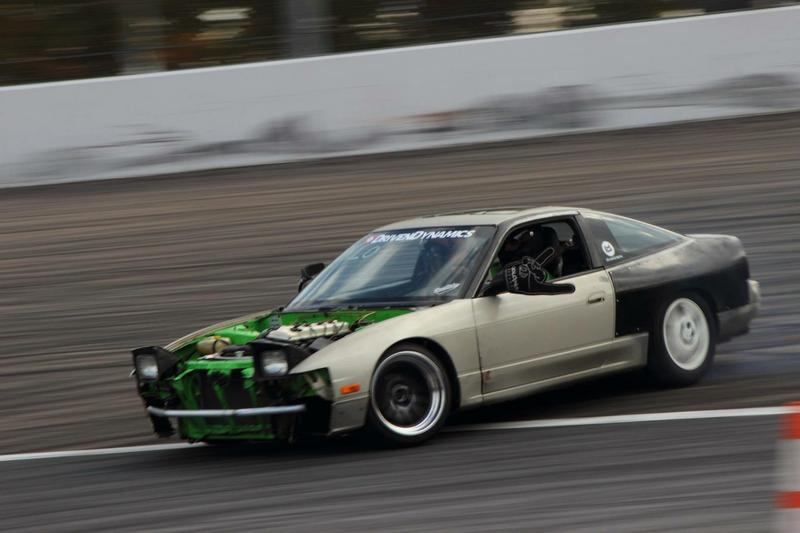  The damn thing was so funny looking during these stages it?s hilarious to reminisce! I began having a ton of cooling issues after a hose burst on me at the track. I frantically bled, changed thermostats, did the whole works and nothing seemed to help. I kept mashing on and repairing things as they broke. Ended up overhauling the entire cooling system and cleaning the engine galleries as best I could.  I kept on driving, learning, and researching! The journey was getting fun by this point; I was getting pretty comfortable driving the car and was confident repairing things as I destroyed them. Drifting is abusive! Last edited by relaxamigo; 12-15-2020 at 07:46 AM.. |
|
|

|
| Sponsored Links |
| Bookmarks |
| Thread Tools | |
| Display Modes | |
|
|