
 |
|
|||||||
| Home | Rules & Guidelines | Register | Member Rides | FAQ | Members List | Social Groups | Calendar | Mark Forums Read |
| Builds (and builds only) Got a build thread? It goes here, build threads anywhere else on the forum will be locked and never moved. |
 |
|
|
Thread Tools | Display Modes |
|
|
#61 | |
|
Zilvia Junkie
 Join Date: Sep 2012
Location: LongBeach, CA
Age: 28
Posts: 371
Trader Rating: (4)
     Feedback Score: 4 reviews
|
Quote:
Thanks ! My tunnel was already beat from the LS being in it. But yes this set up requires the tunnel to be bashed a bit. I custom modded the stock shifter and it’s sitting decent. This is just a test fit and will need slight trimming for the actual linkage to move under the car 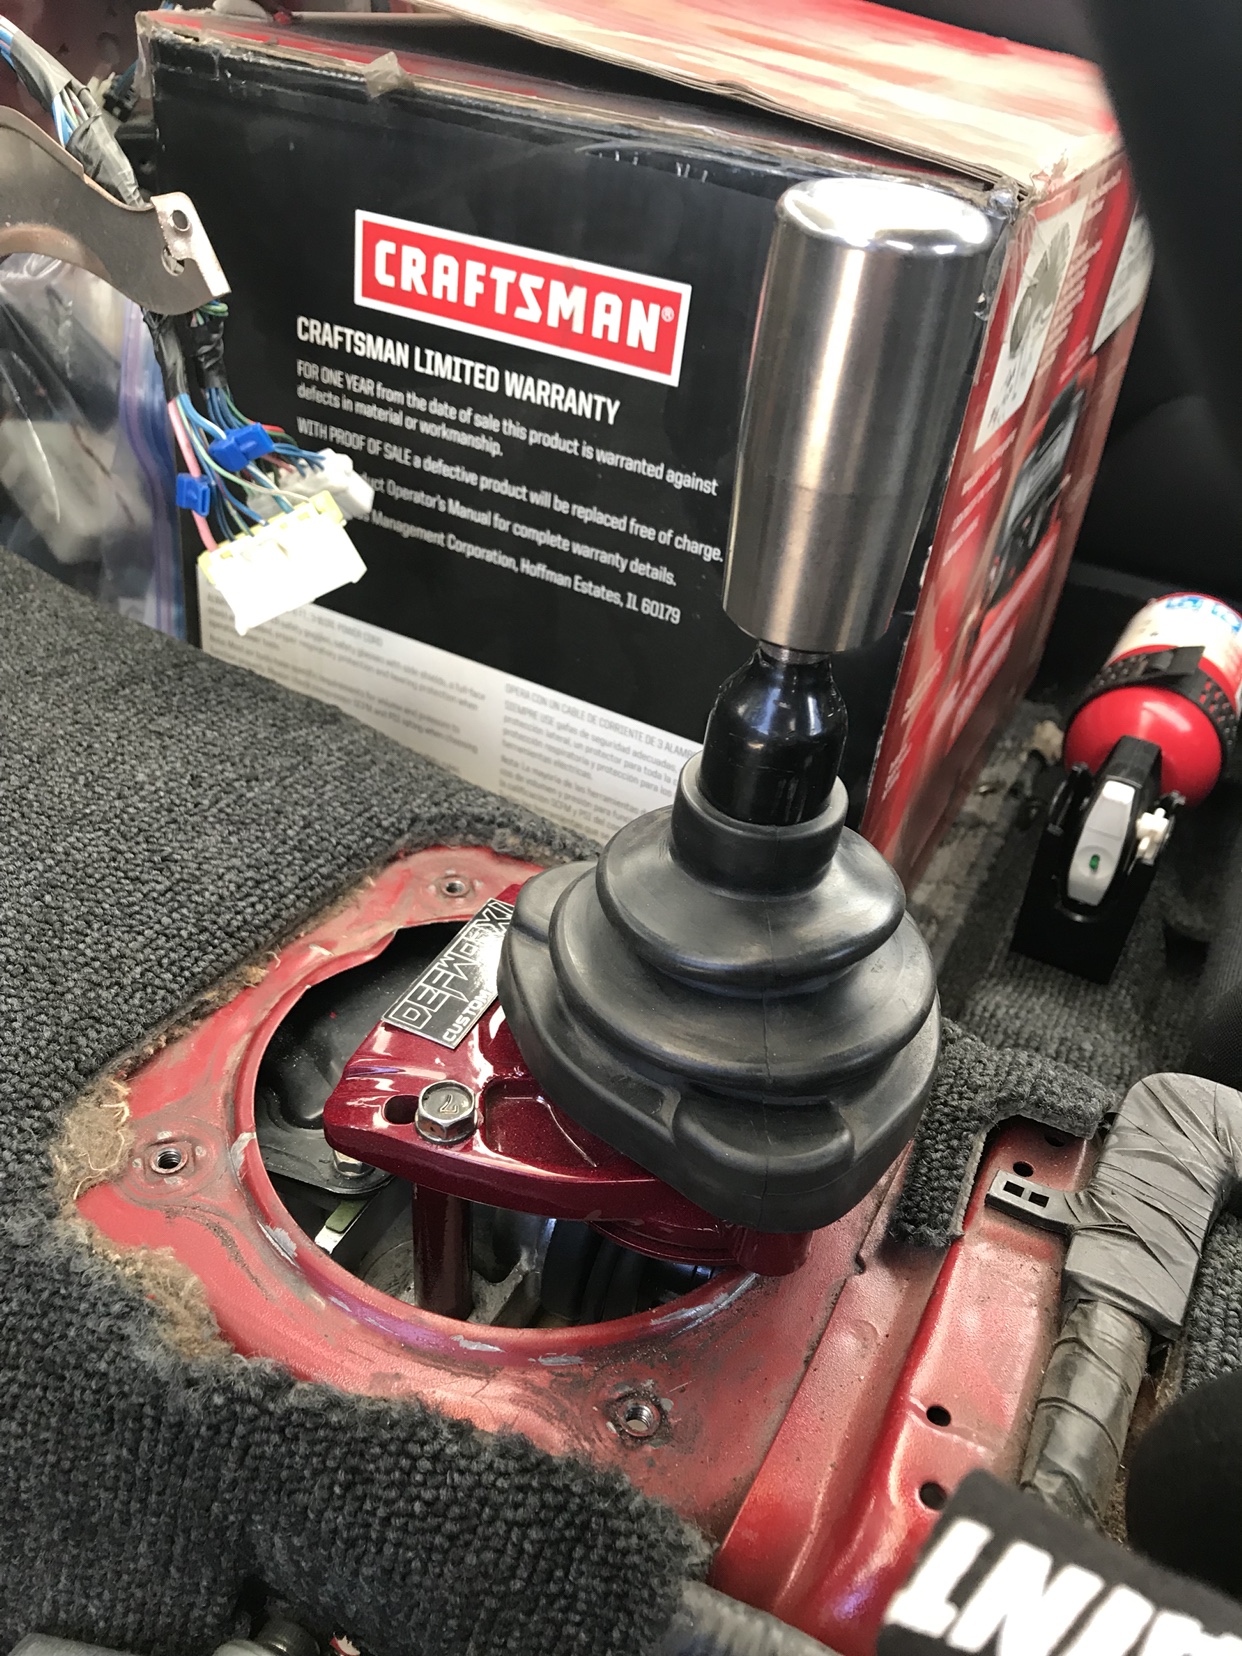 Sent from my iPhone using Tapatalk |
|
|
|

|
| Sponsored Links |
|
|
#62 |
|
Zilvia Junkie
 Join Date: Sep 2012
Location: LongBeach, CA
Age: 28
Posts: 371
Trader Rating: (4)
     Feedback Score: 4 reviews
|
The forward tubes will be connected with a dimple panel. As you can see my mock up with cardboard here but the design might change slightly
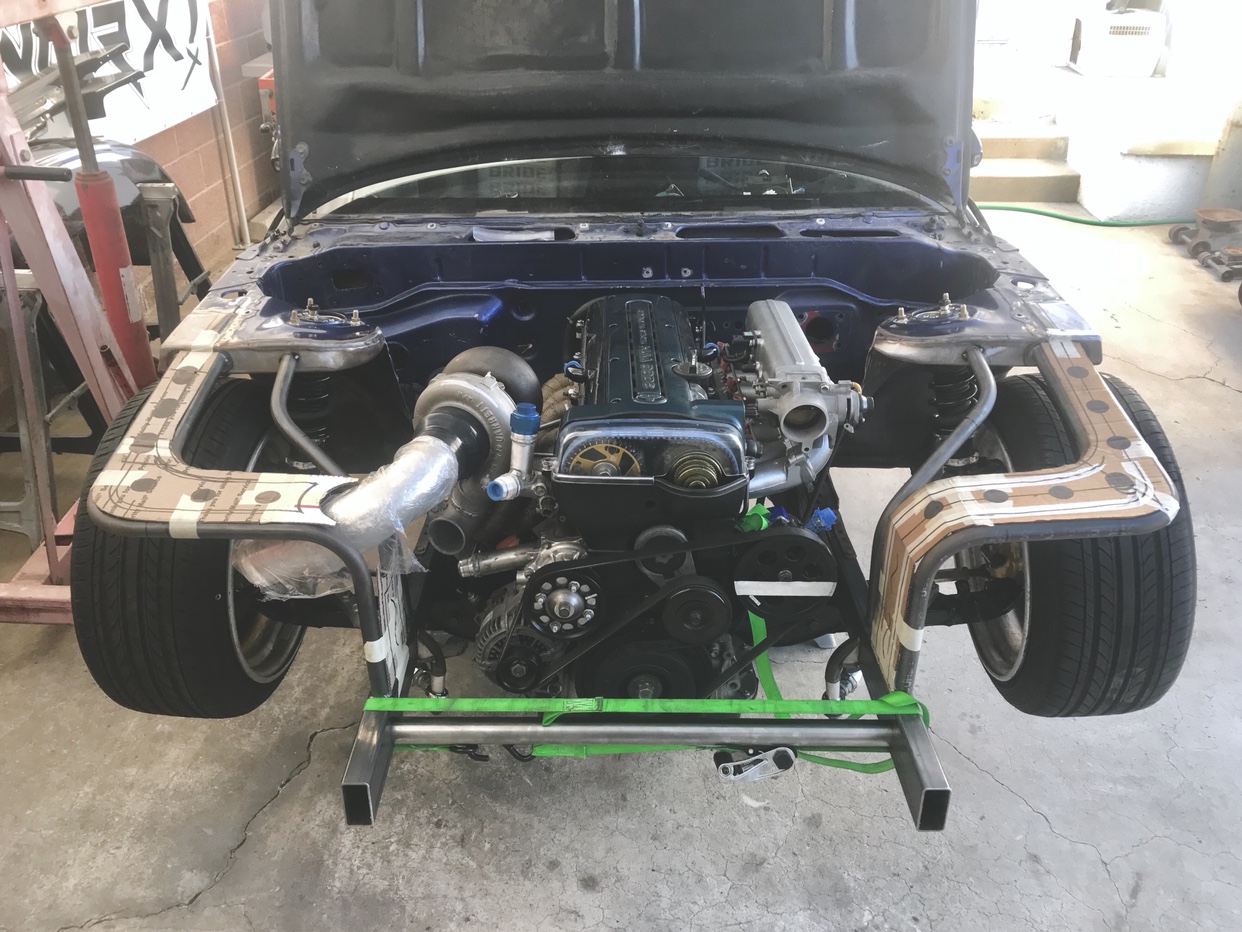 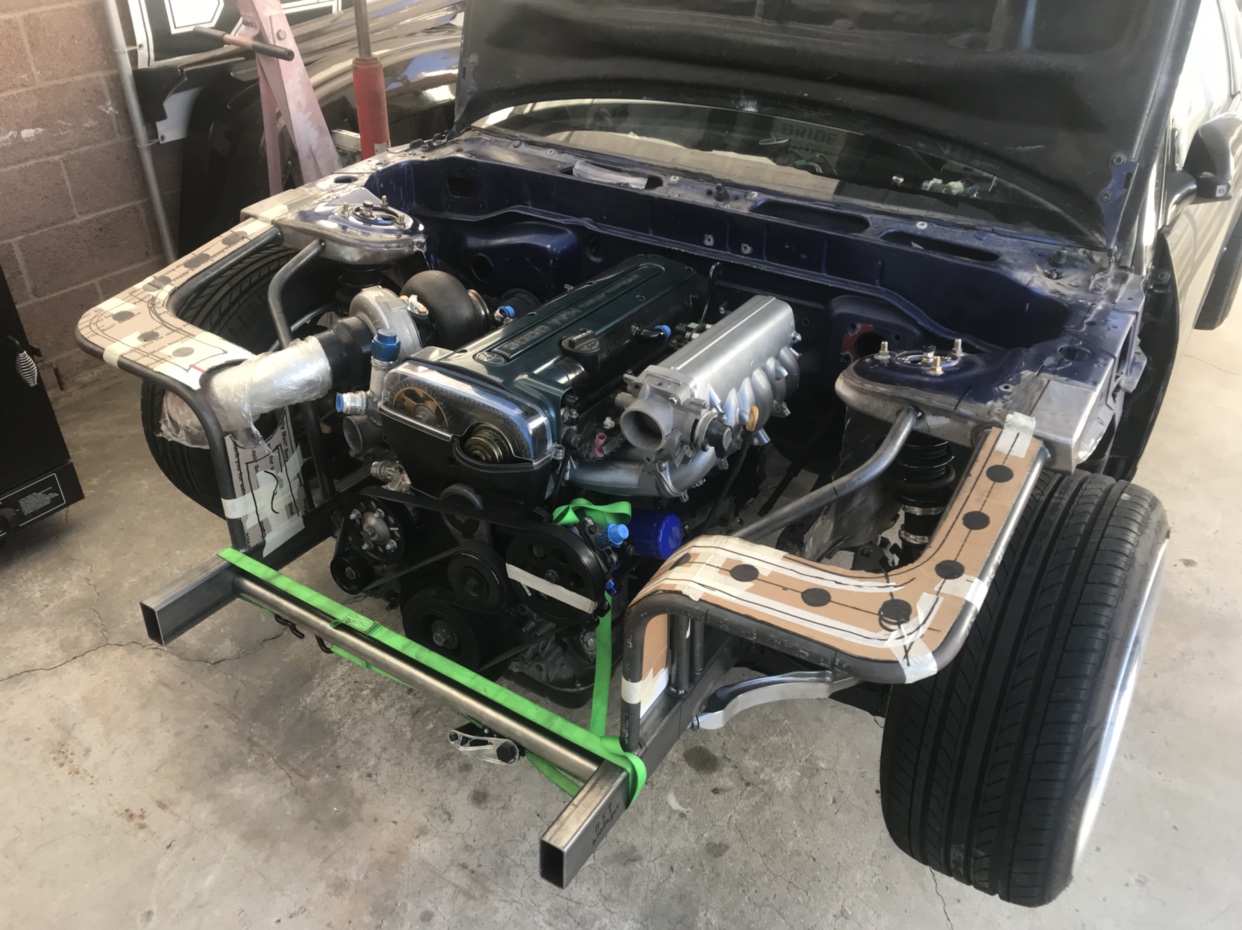 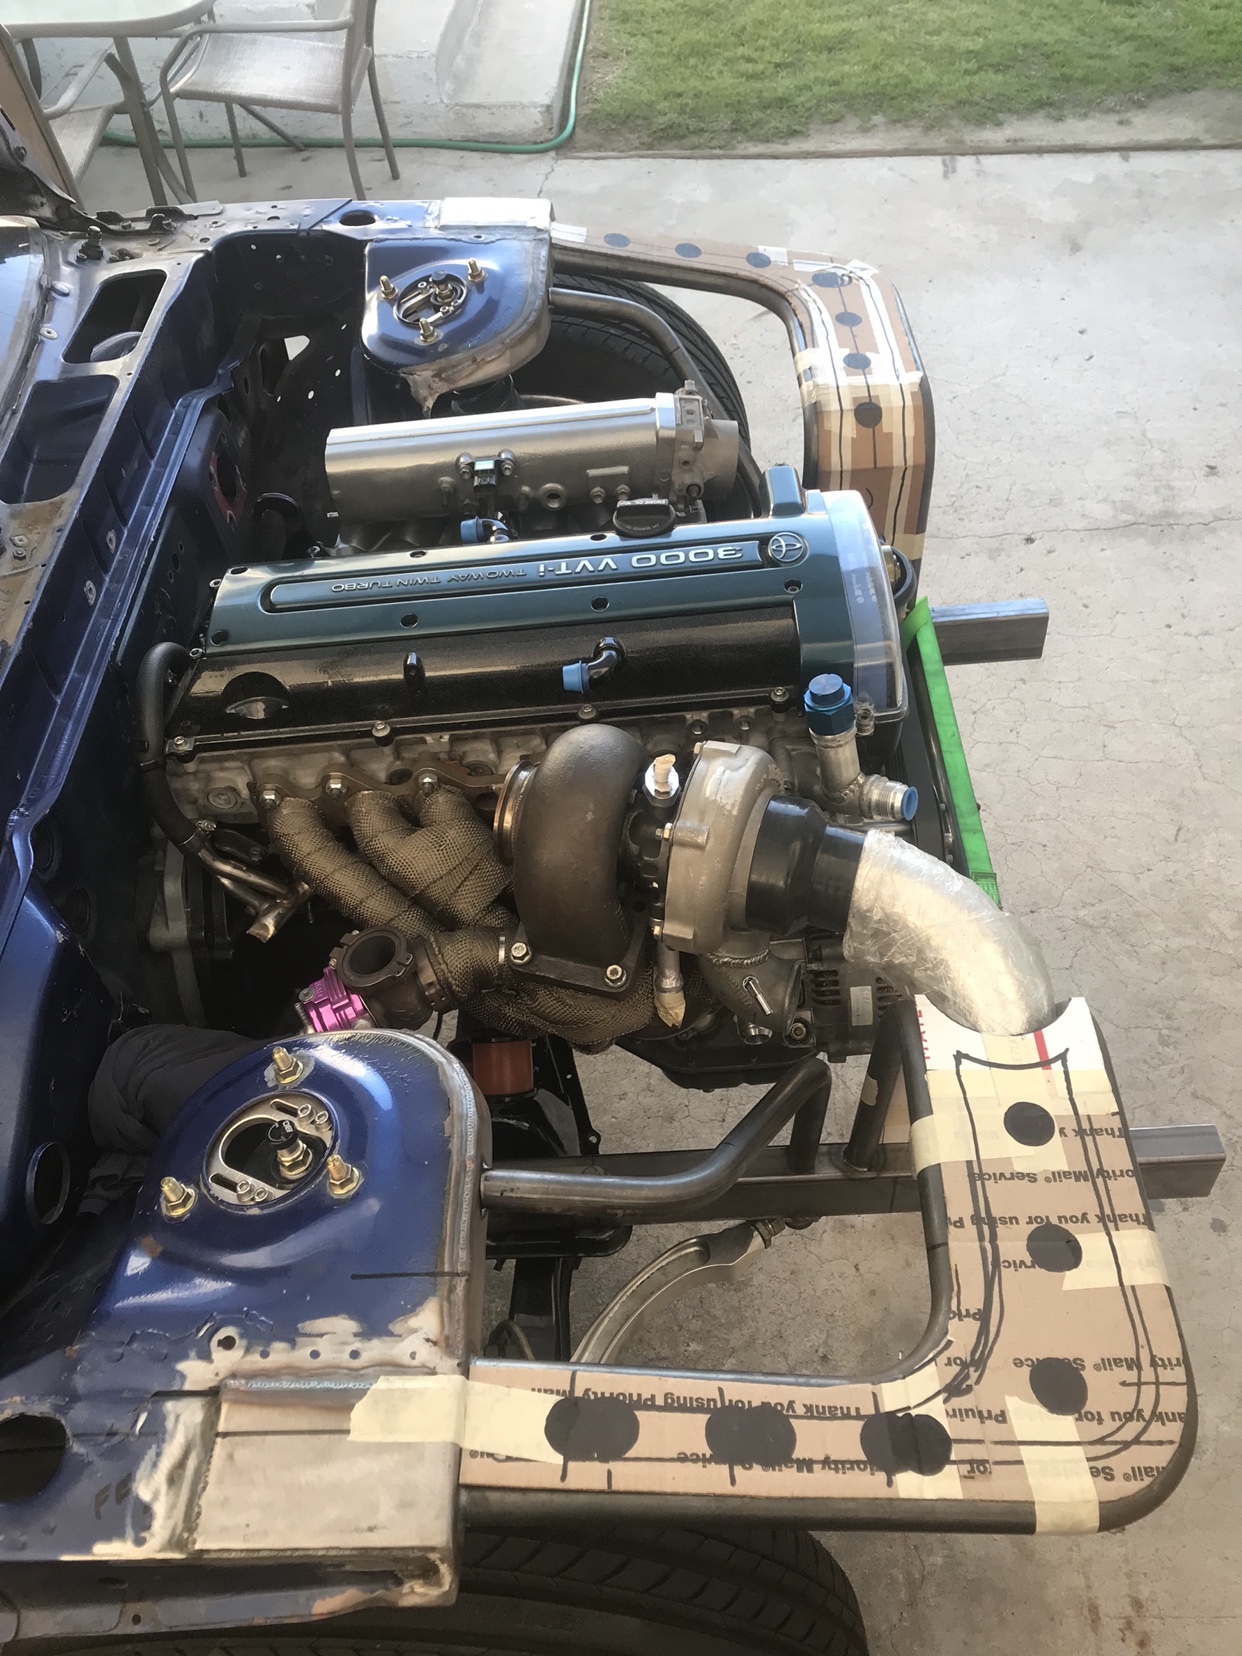 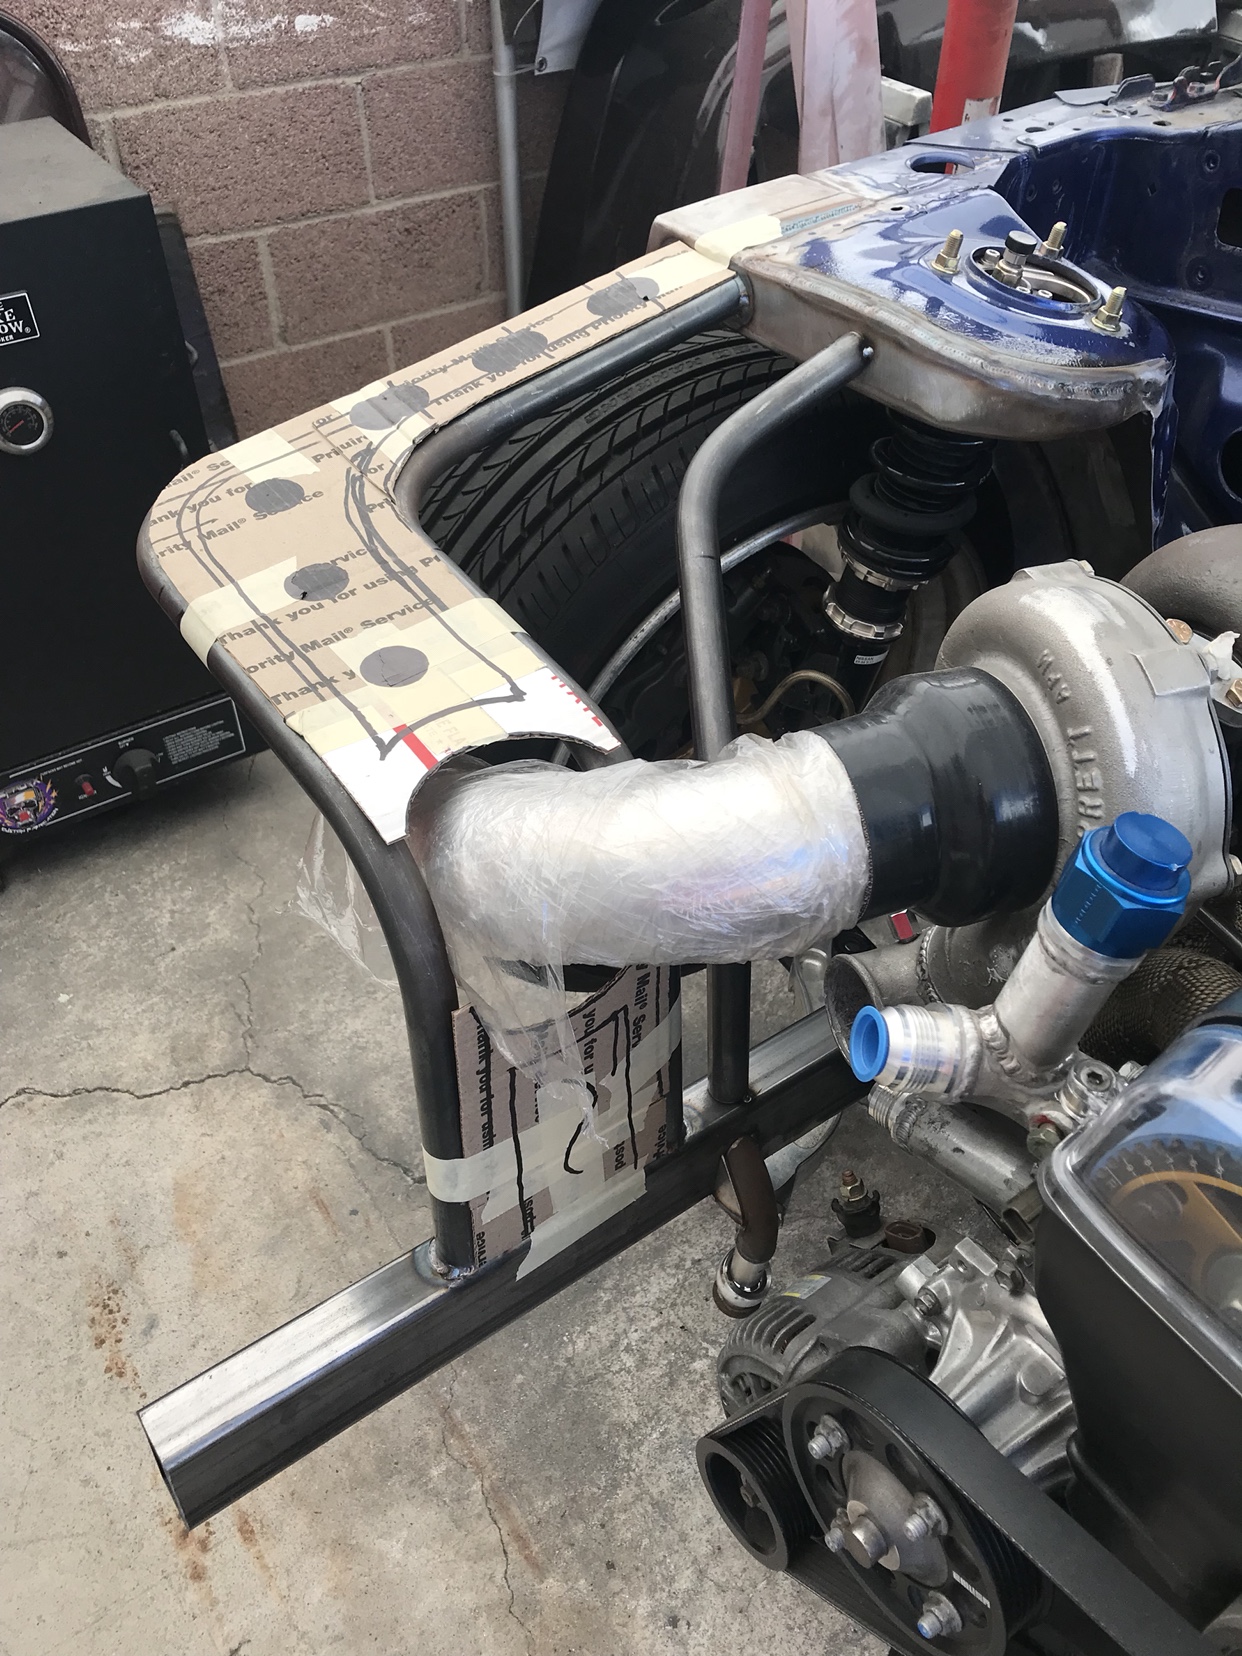 I kept the stock support to give me visuals along the way. As you can see the design somewhat fallows the stock lines in a way 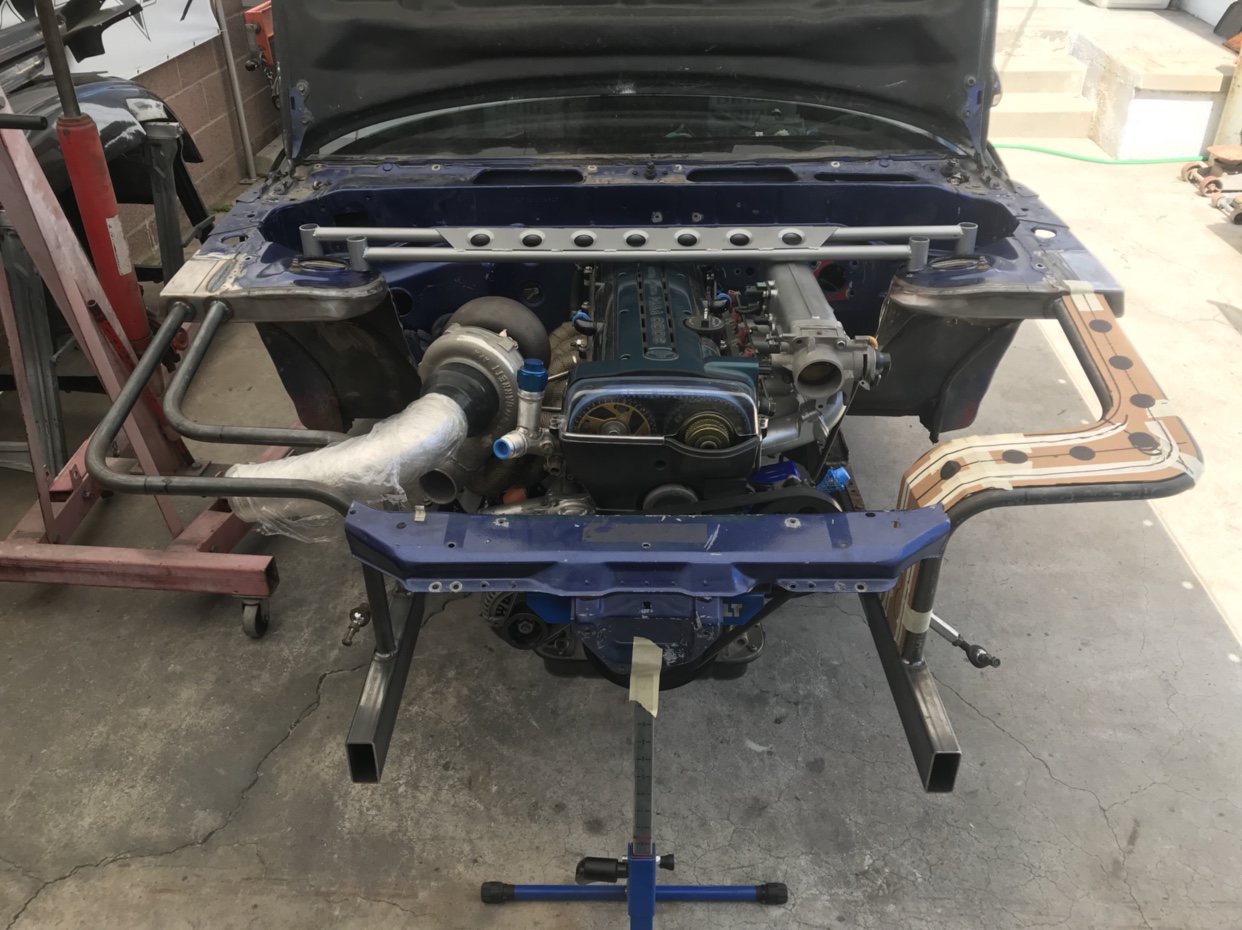 Since the entire structure is going to be tied together strong there’s really no need for the stock tension rod brackets / power brace so I came up with this design to free up some room for the v mount 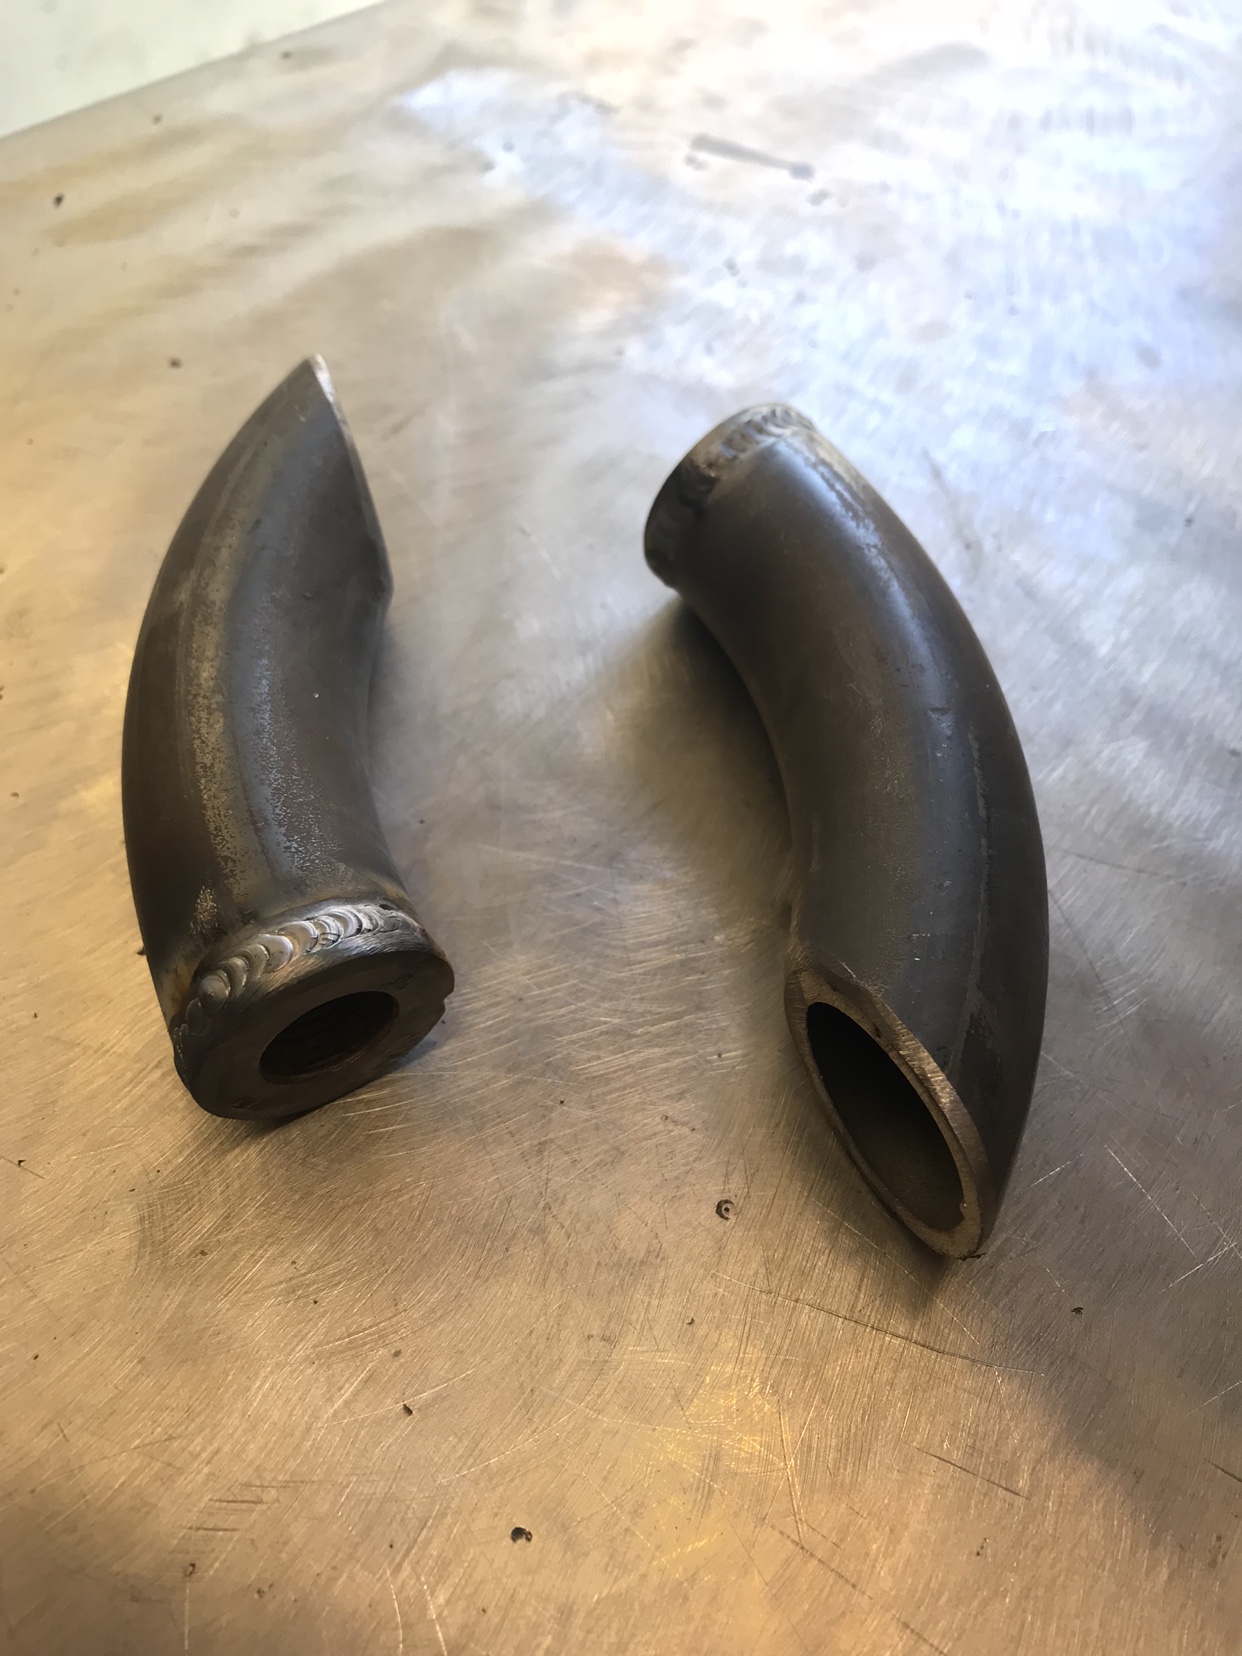 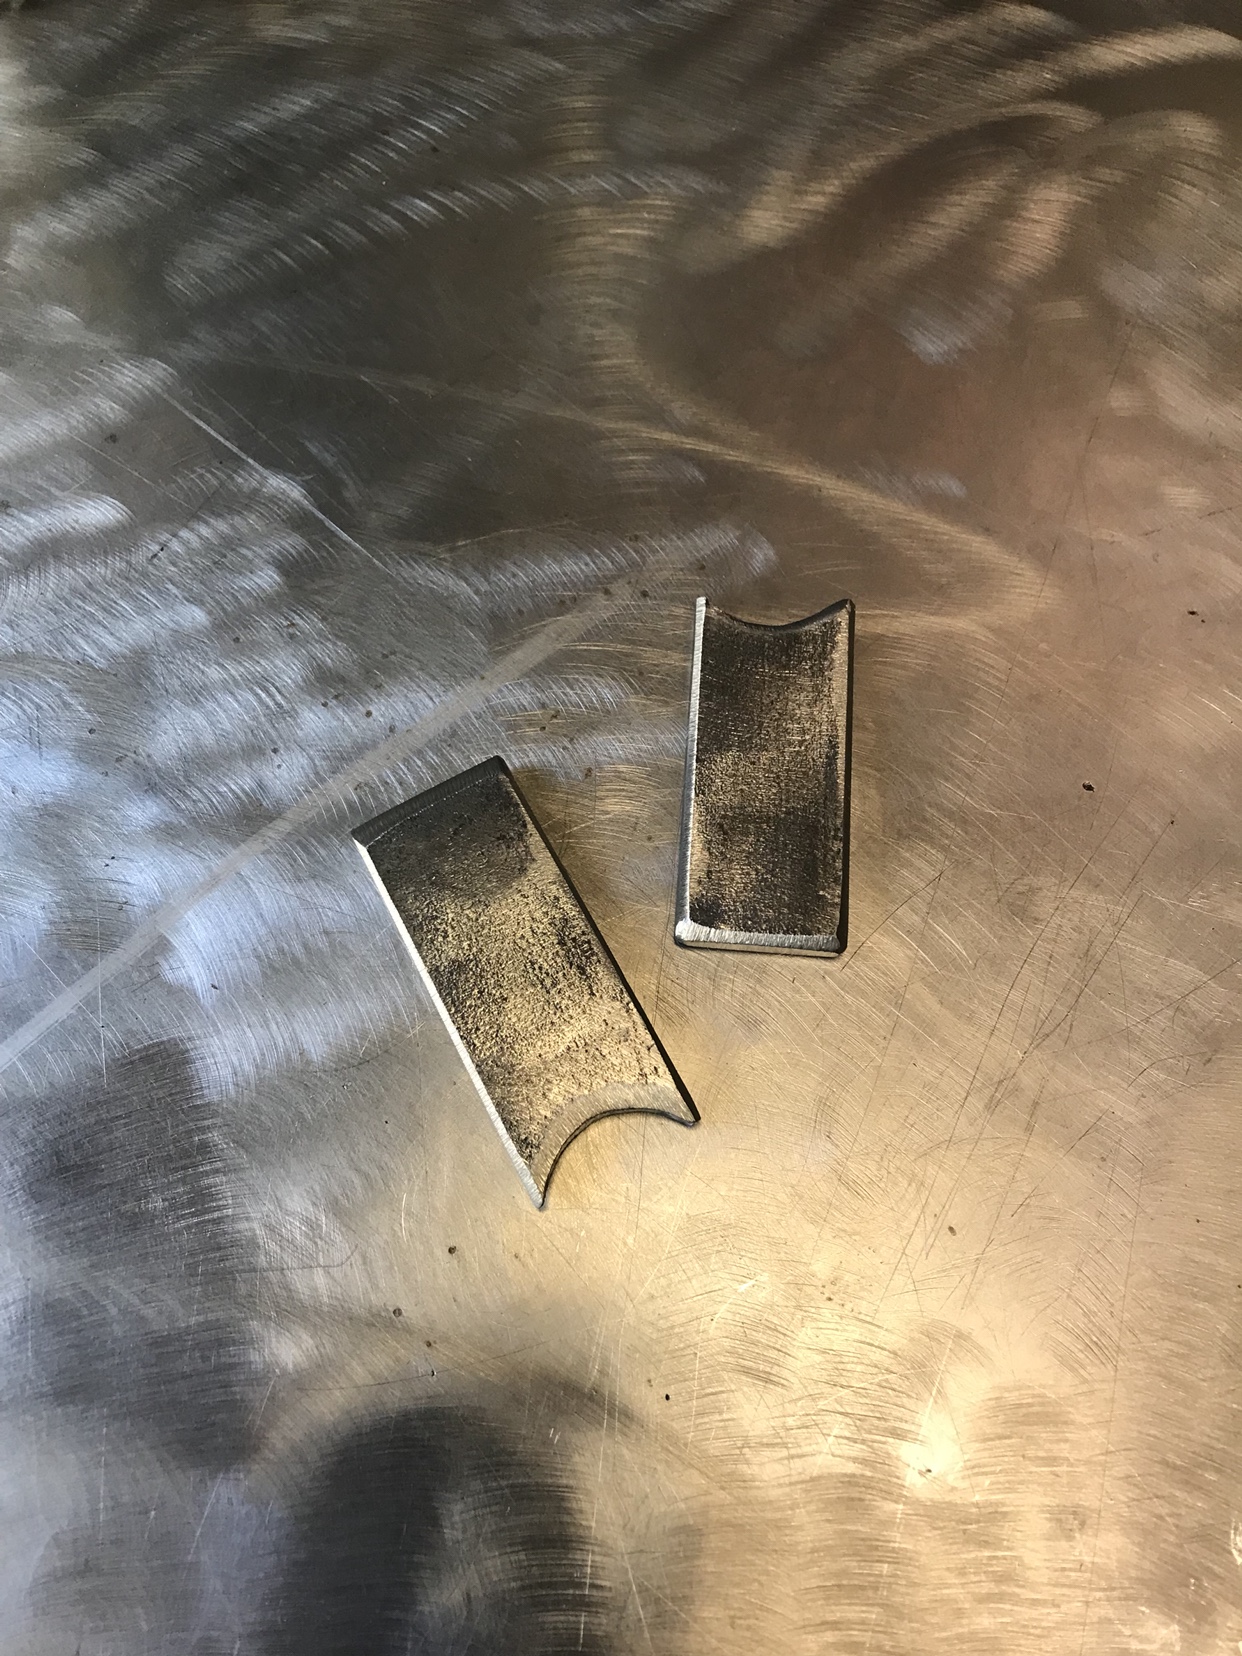 The tube is the same 1” .120 wall that I’ve been working with. The gussets are added under and on the face for strength. I’m not worried about these mounts breaking or bending but more so the strength of the bolt in this position but I’m very confident in it. 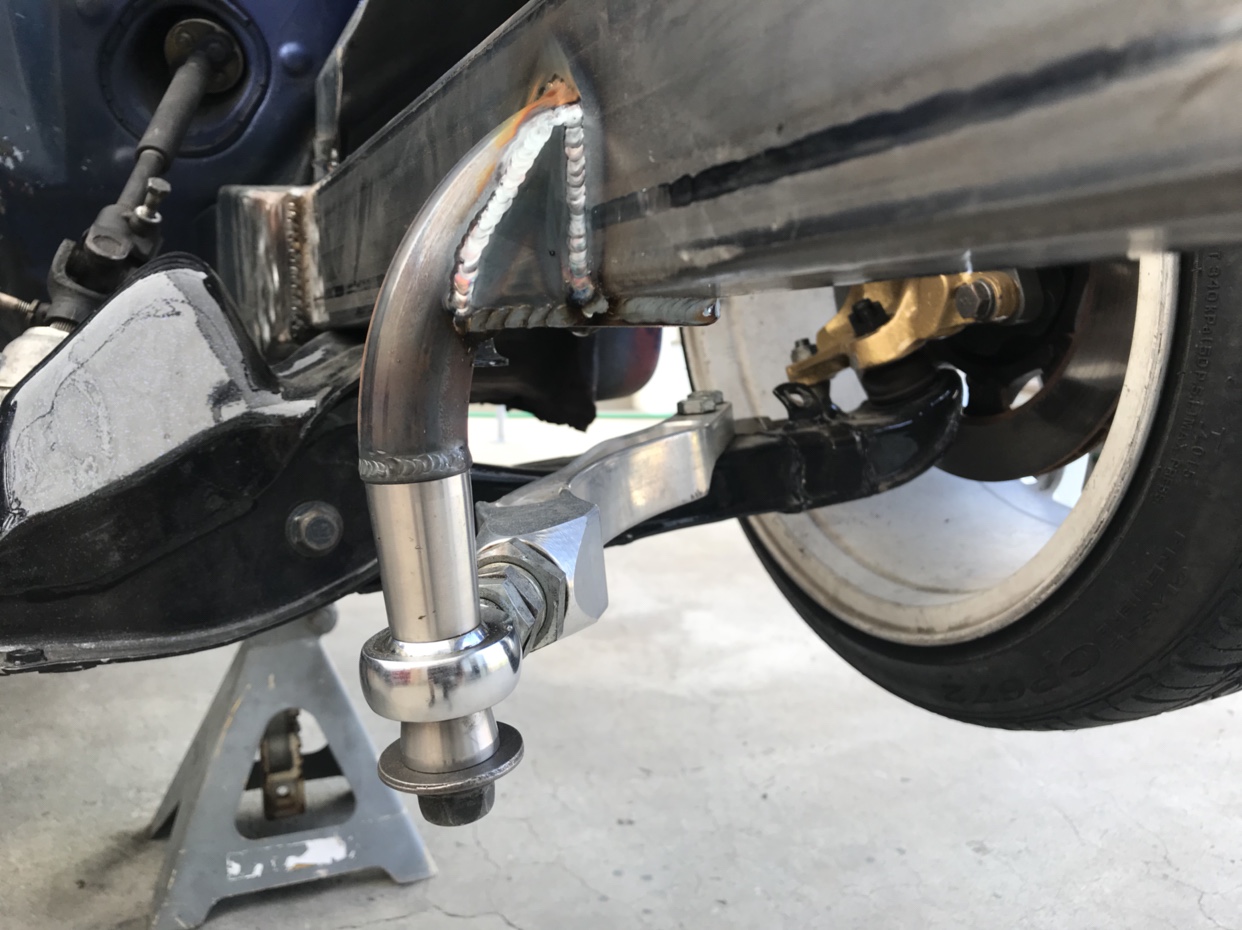 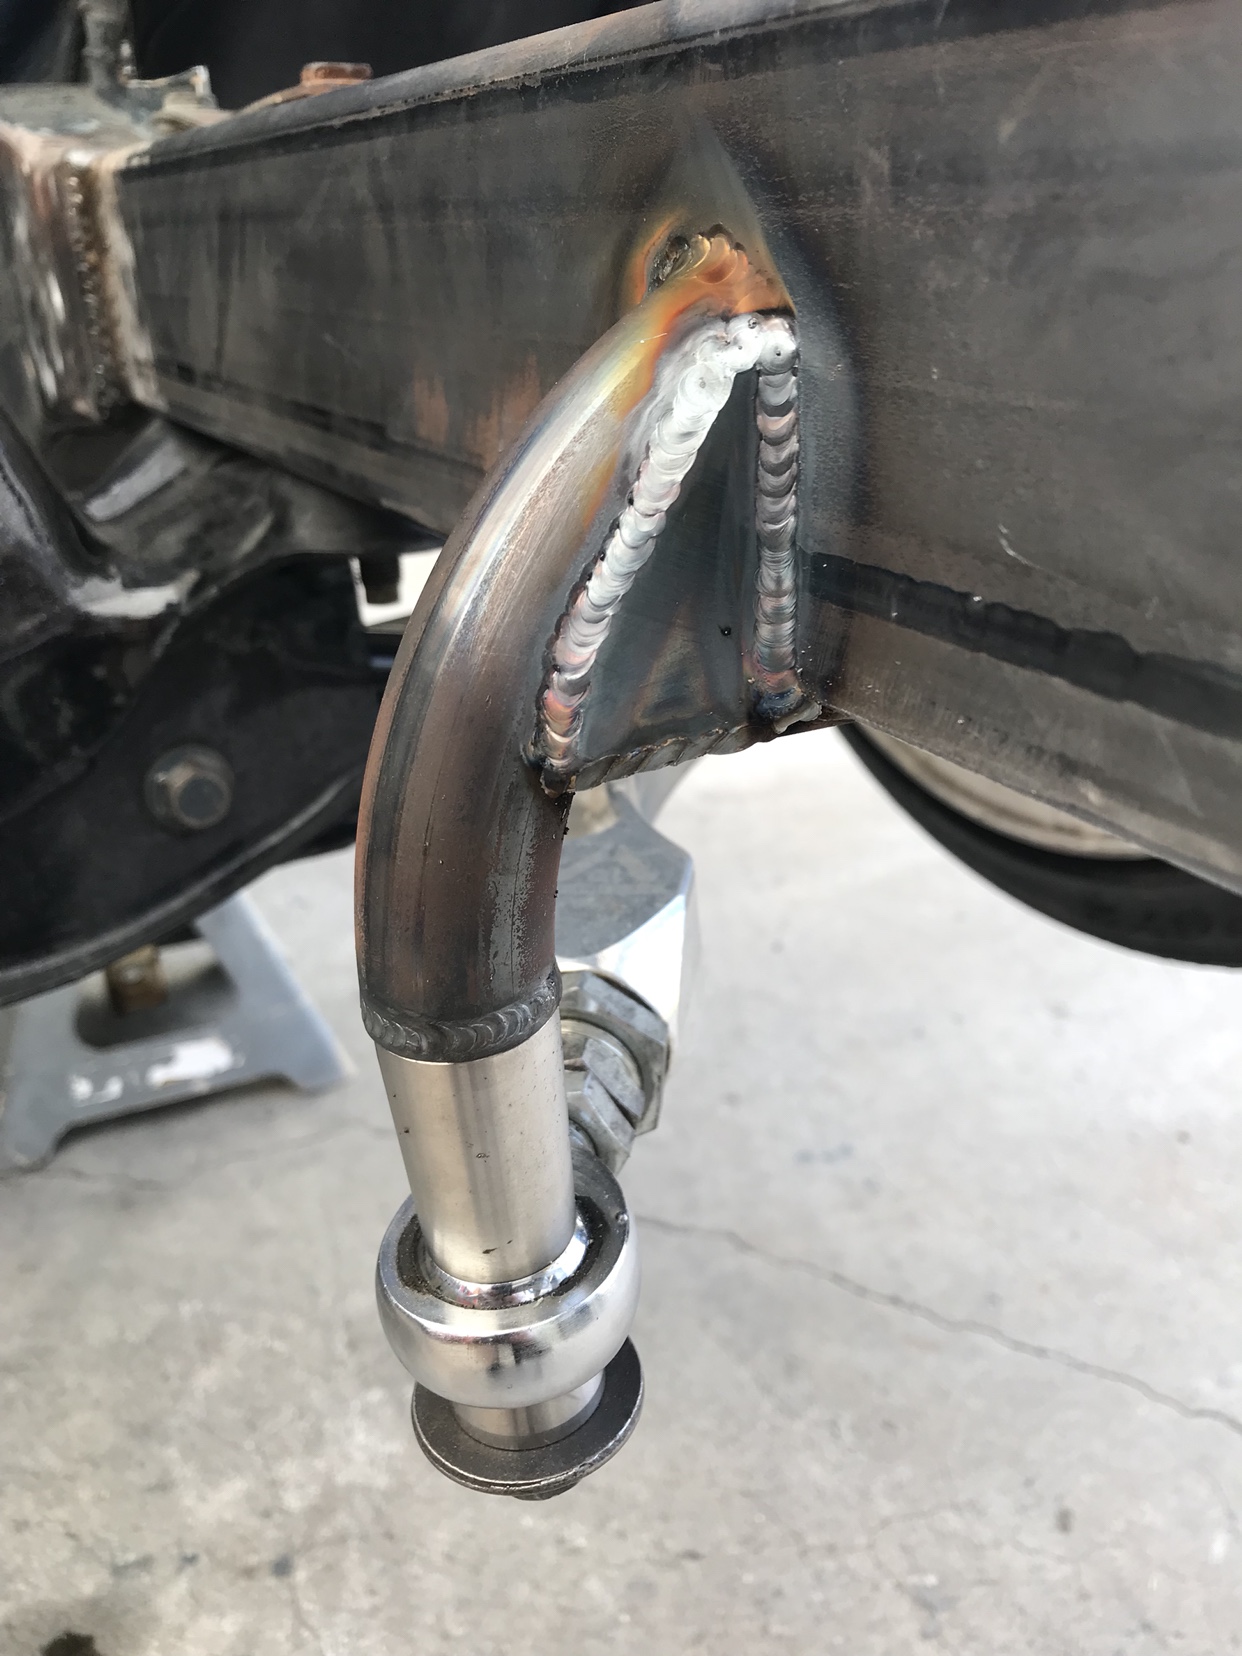 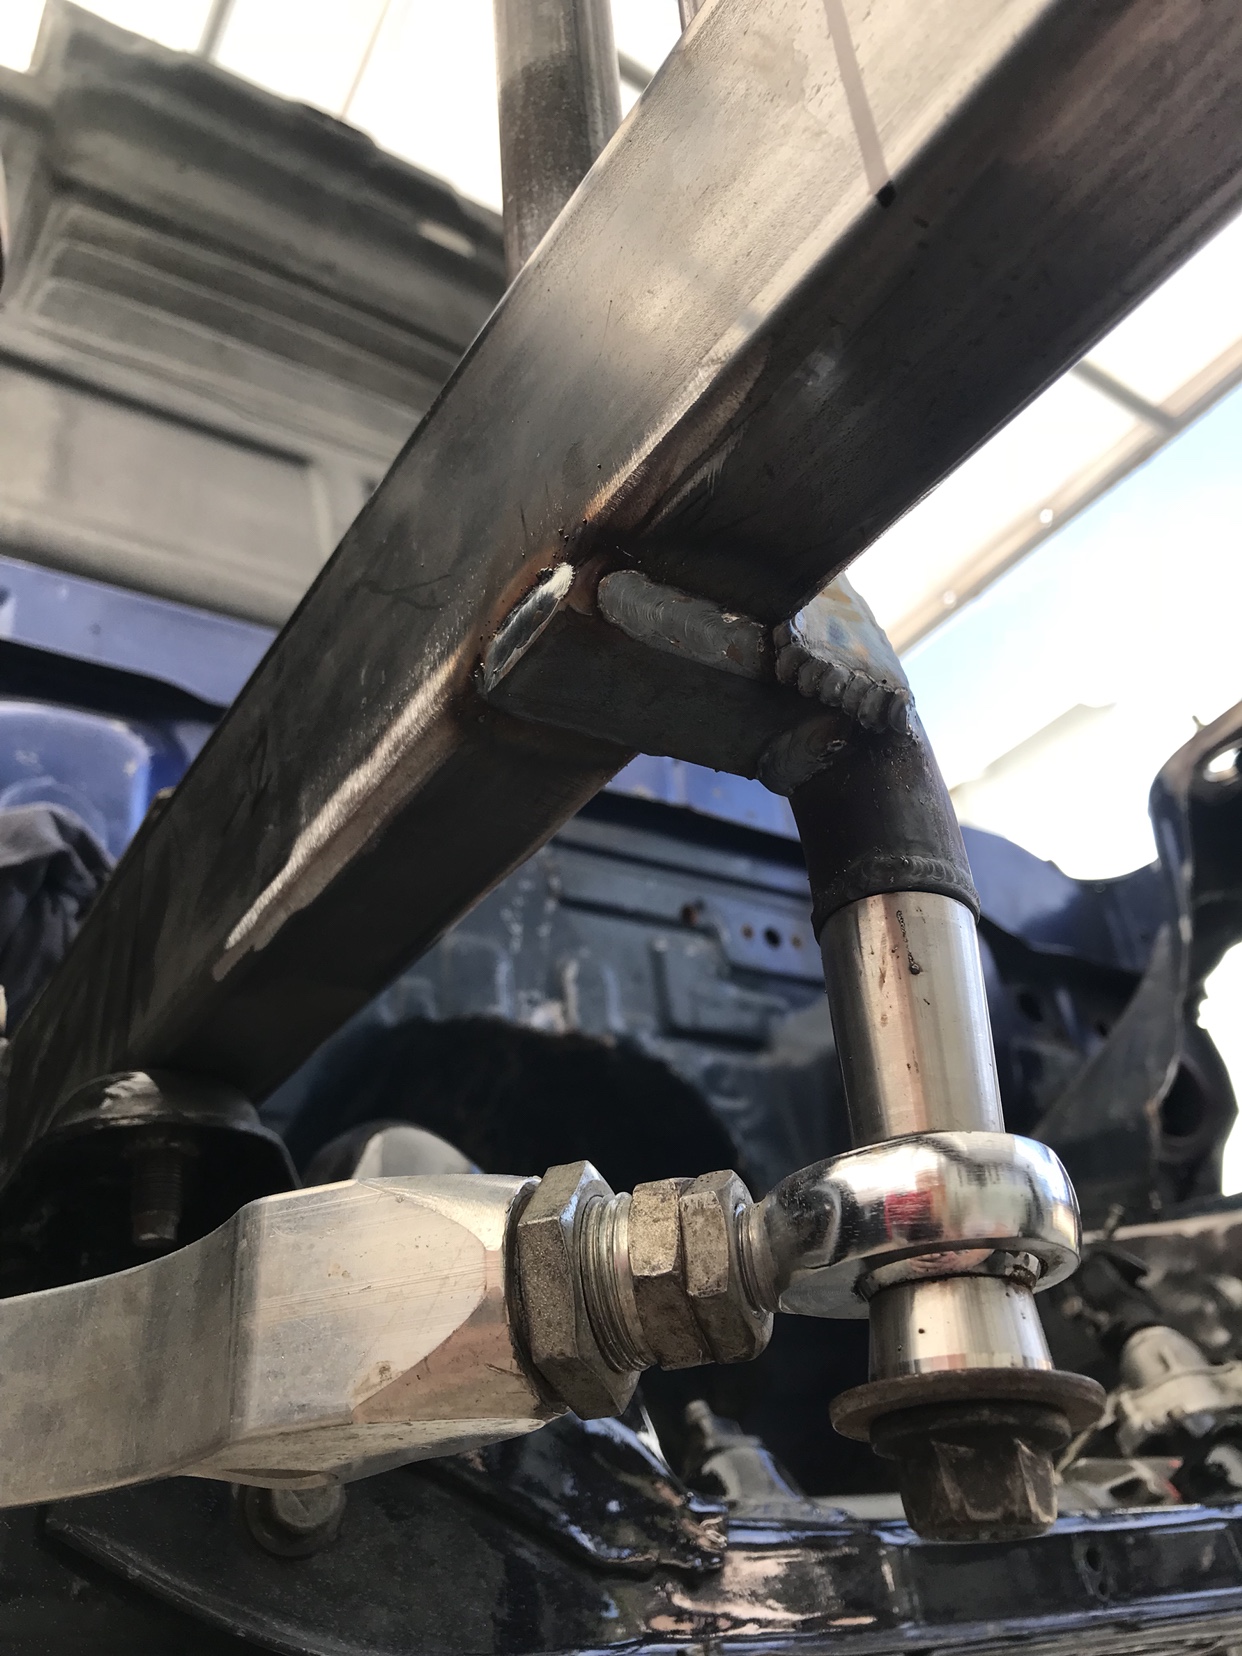 All the tubes and structure are now fully welded Next I’ll be mounting the panels back on and knocking out the gusset panels 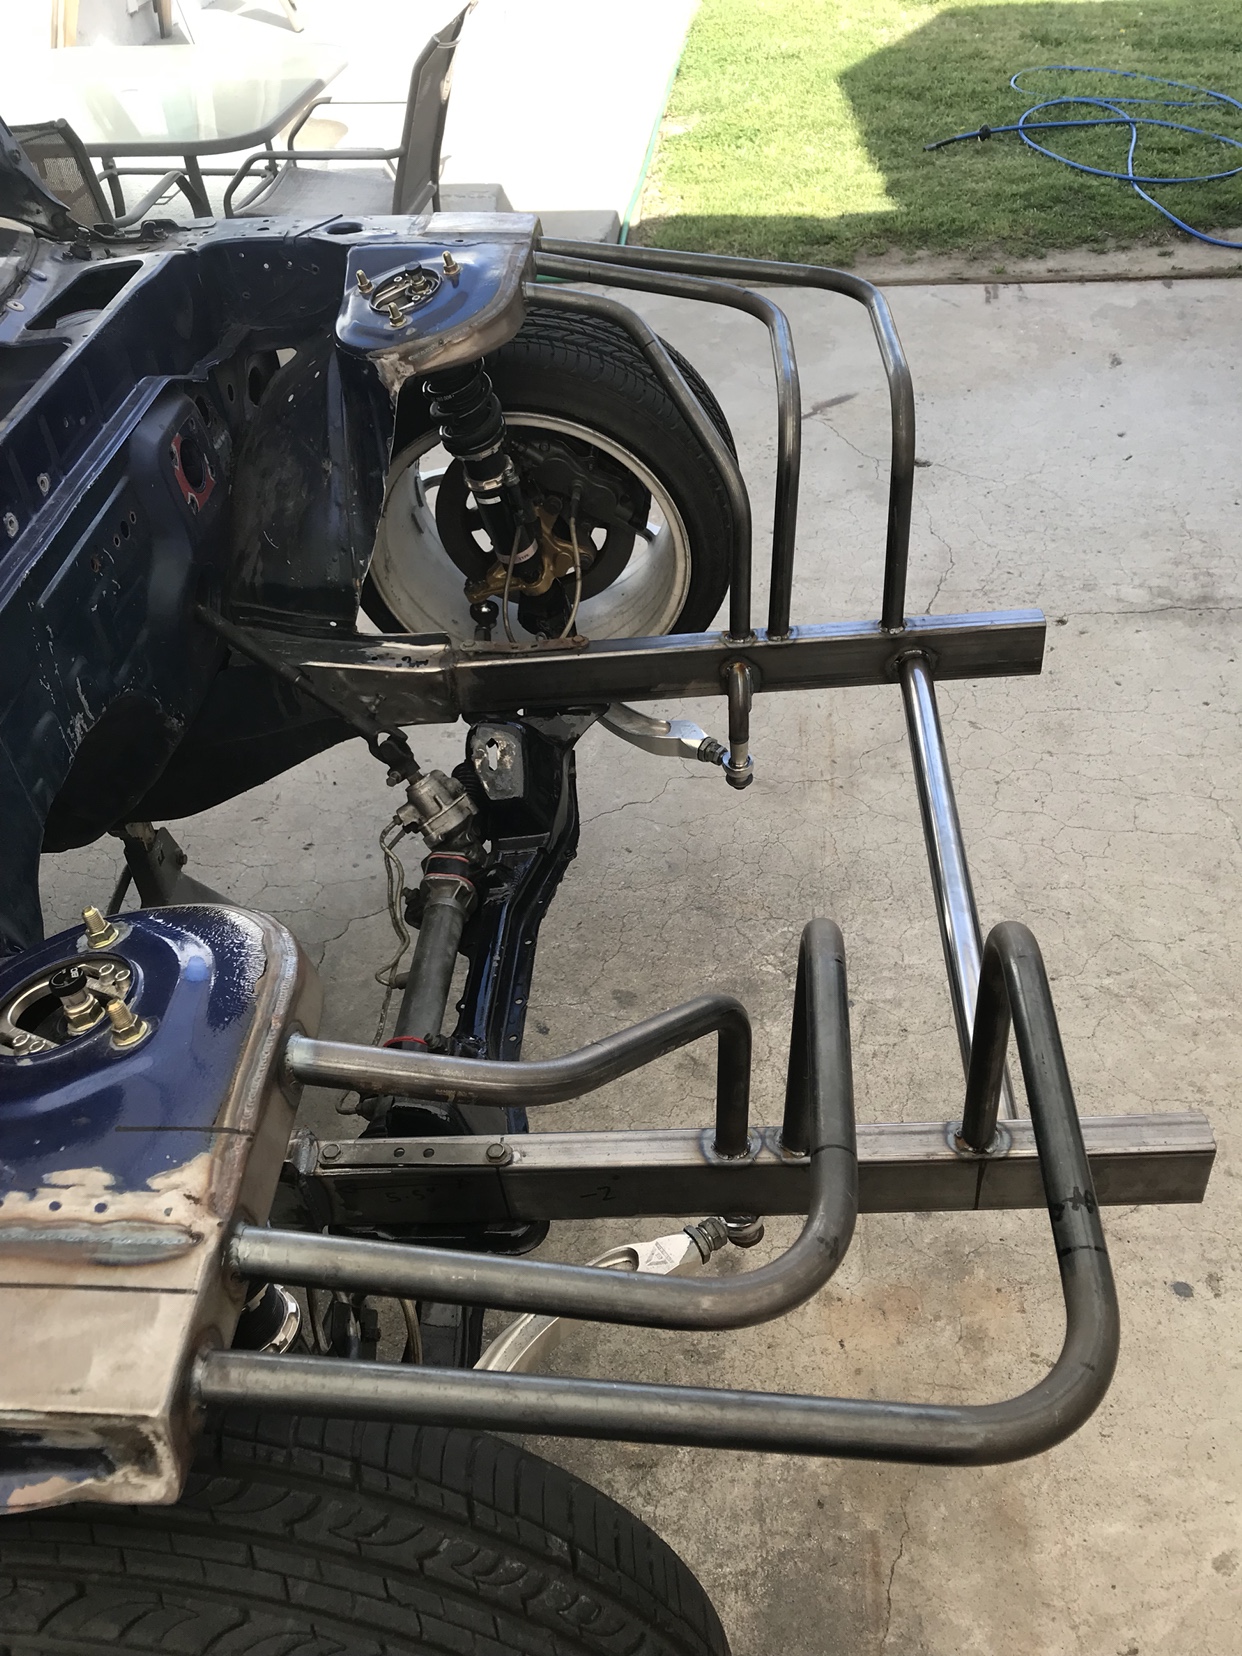 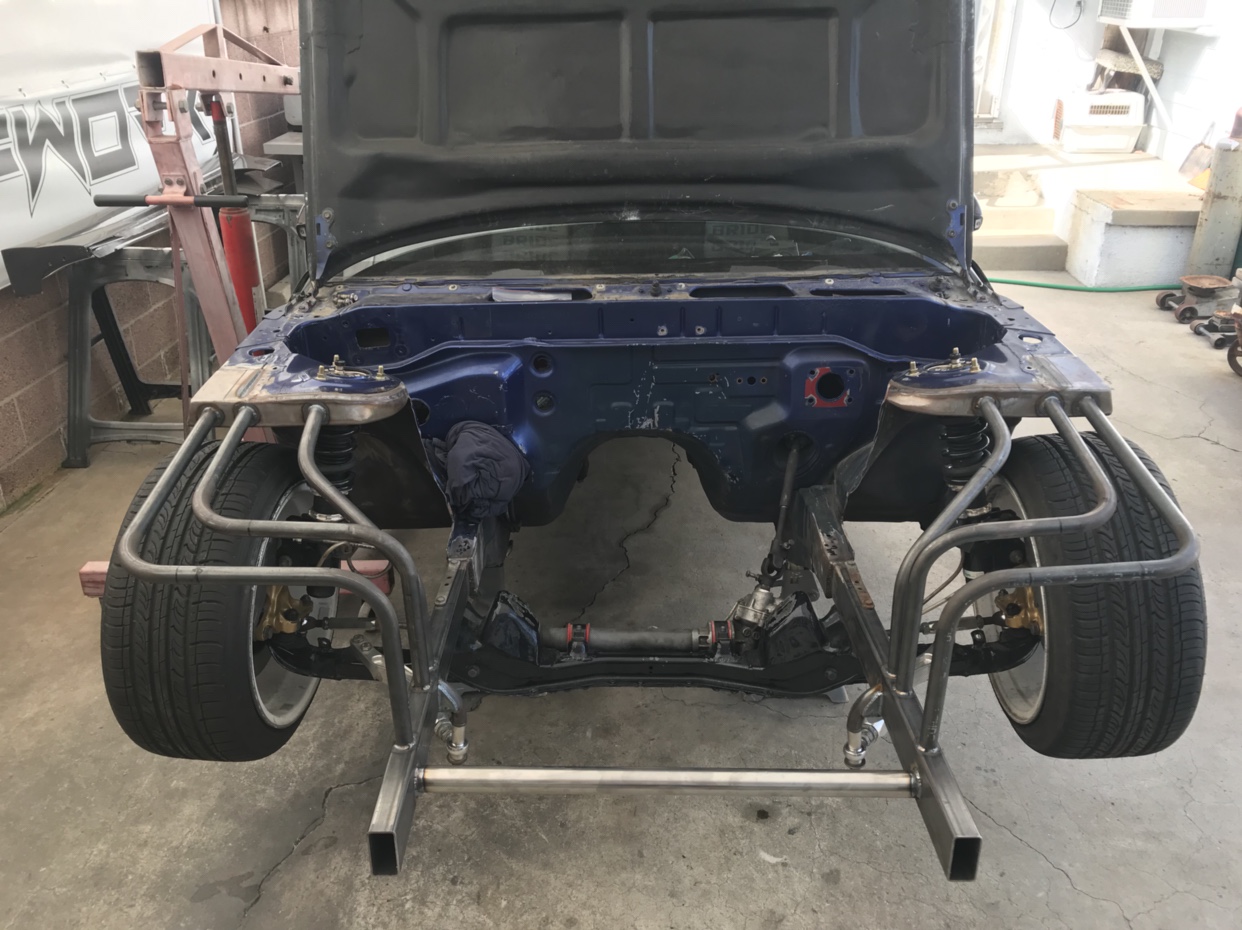 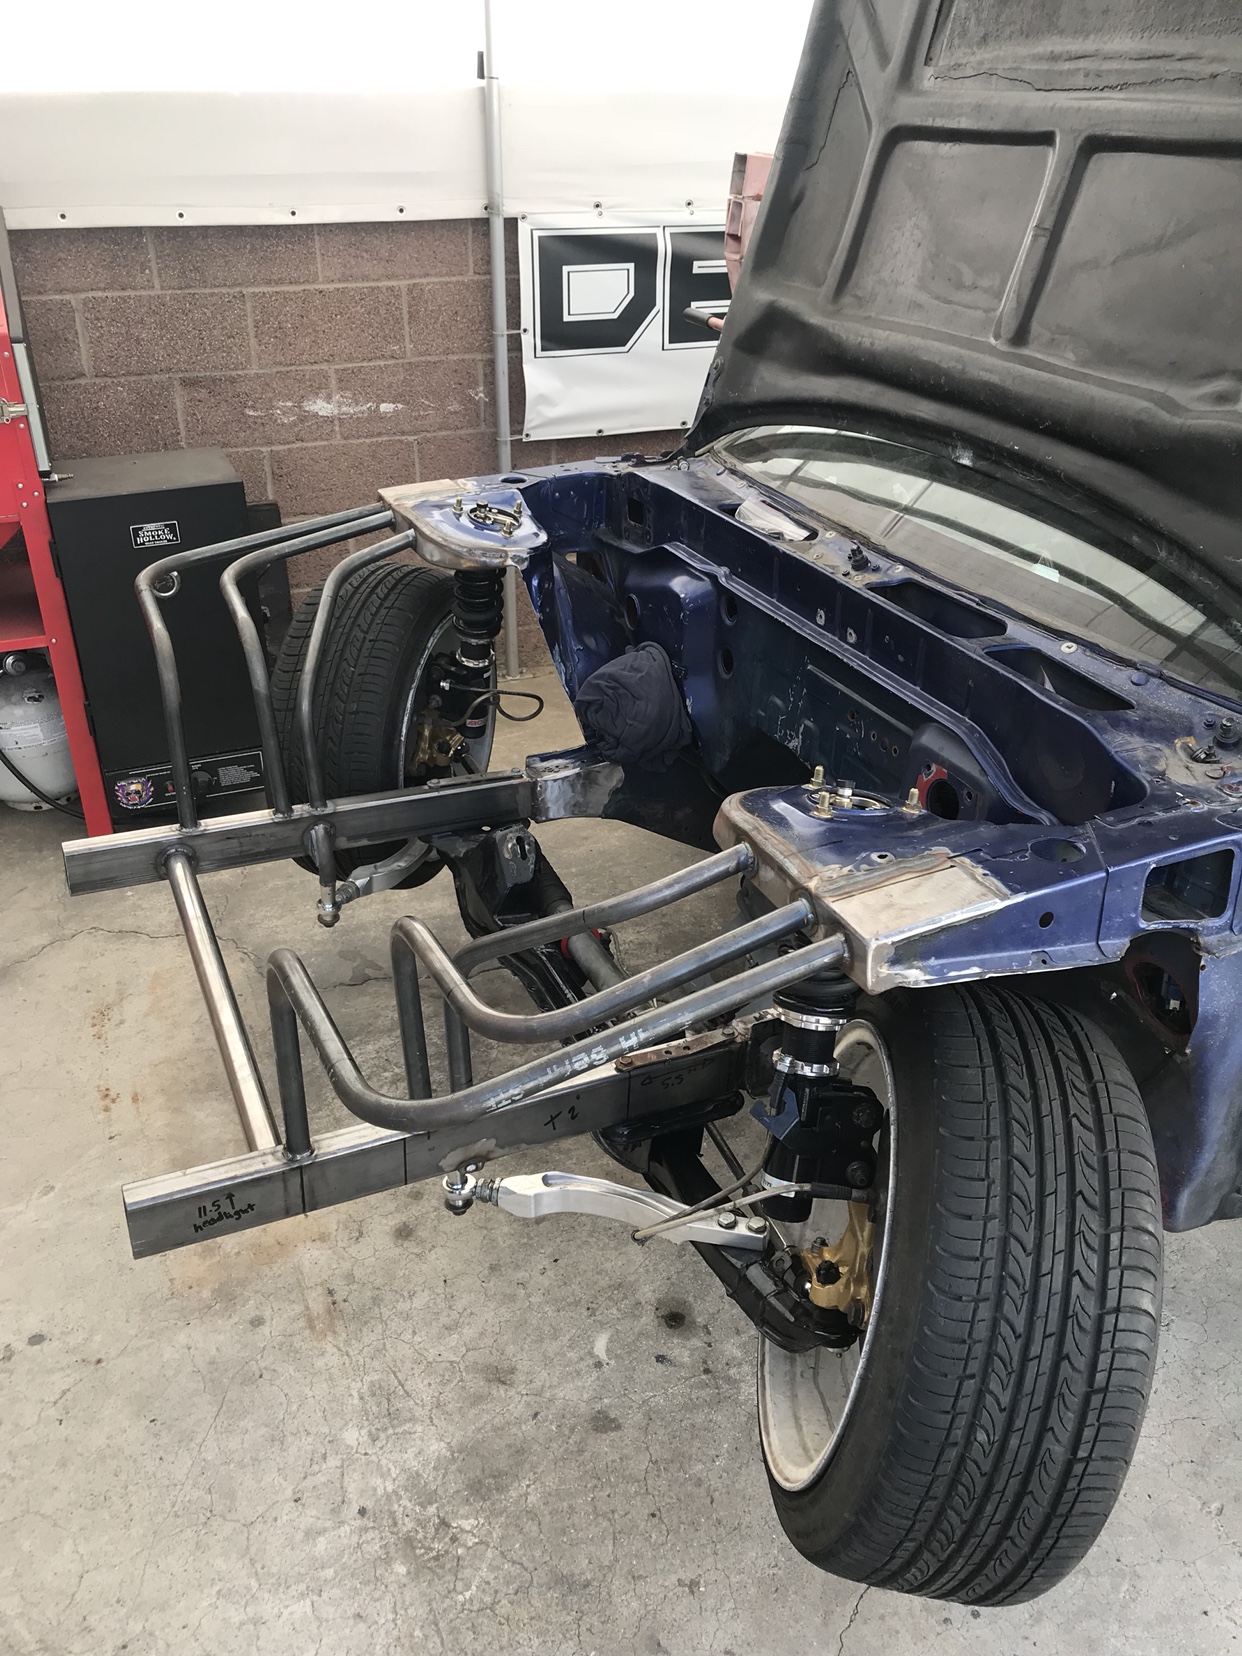 Sent from my iPhone using Tapatalk |
|
|

|
|
|
#66 |
|
Zilvia Junkie
 Join Date: Sep 2012
Location: LongBeach, CA
Age: 28
Posts: 371
Trader Rating: (4)
     Feedback Score: 4 reviews
|
Suprareal's S13 FB build (sr20det eventually)
Earlier I mentioned that pop up tube fronts are in my opinion the hardest and most time consuming. That’s because the way the headlights mount in a flat plane rather then vertical like Silvia/ s14 headlights. I find it a lot more difficult to level everything out to have the proper panel gaps.
Earlier I made sure my front most forward tubes center was at maximum headlight height that way I can run a flat piece off it to mount to and have plenty room for front to back error. If I was really good I could have made the front tube exactly the length and height so the headlight can mount directly on to that ... but I’m not that good yet. 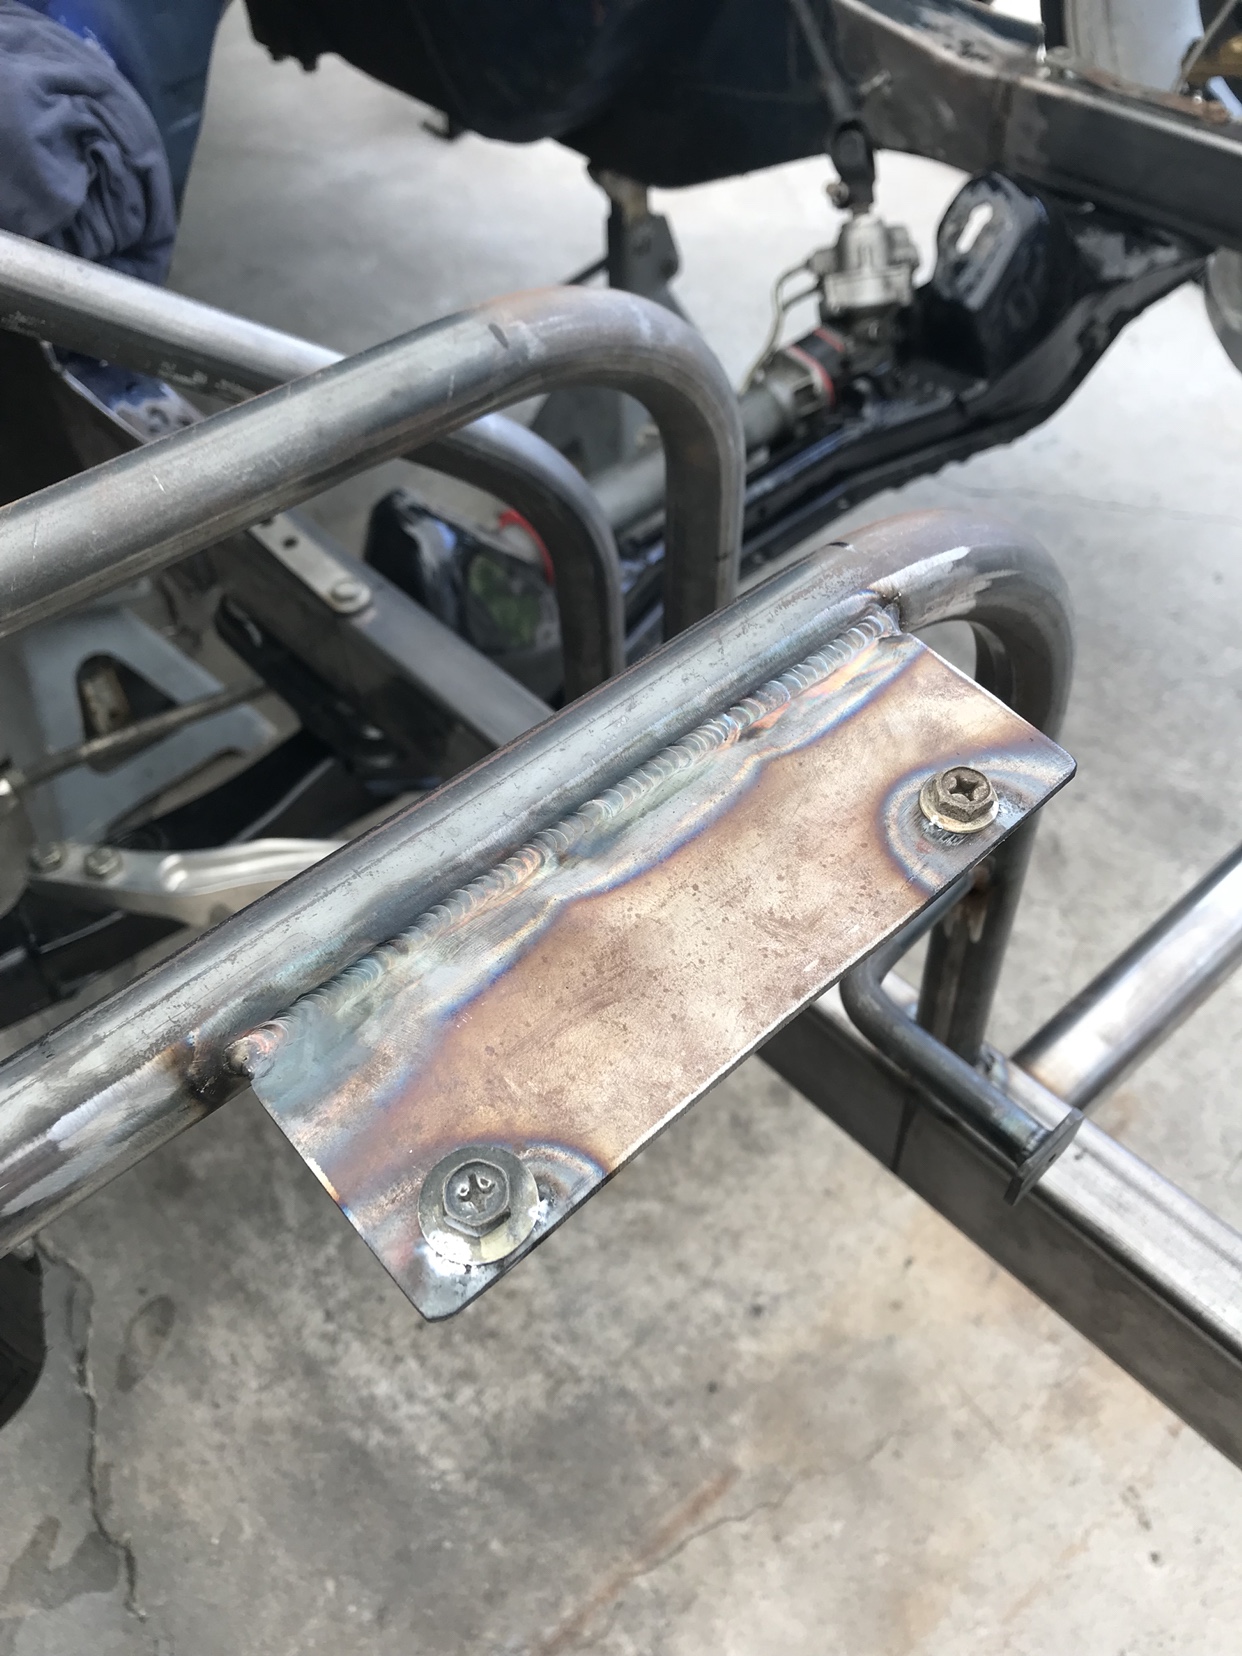 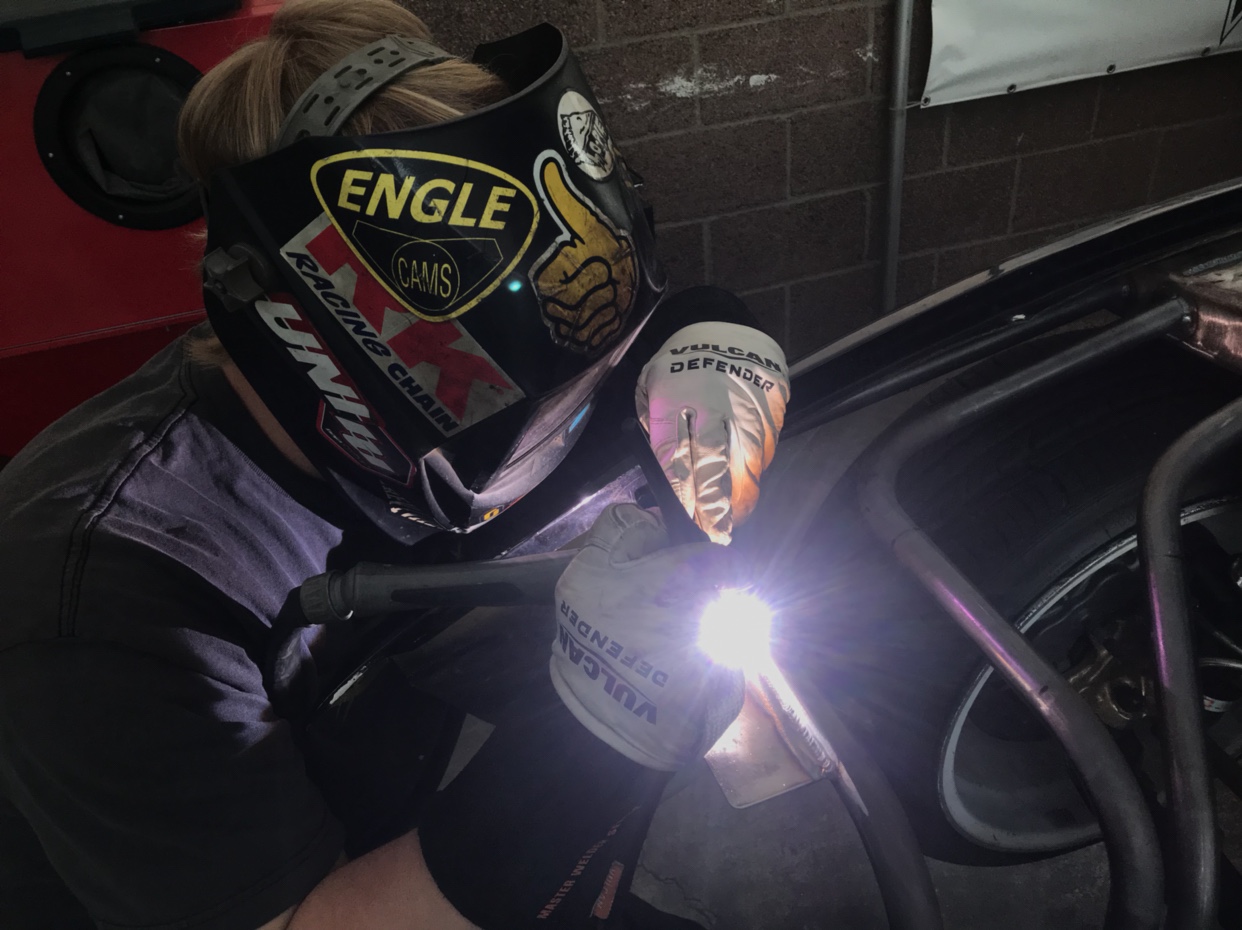 I’m choosing to only use one of the lower mounts for simplicity but it’s plenty to hold the lights solid. I’ve threaded the bar stock itself to bolt onto 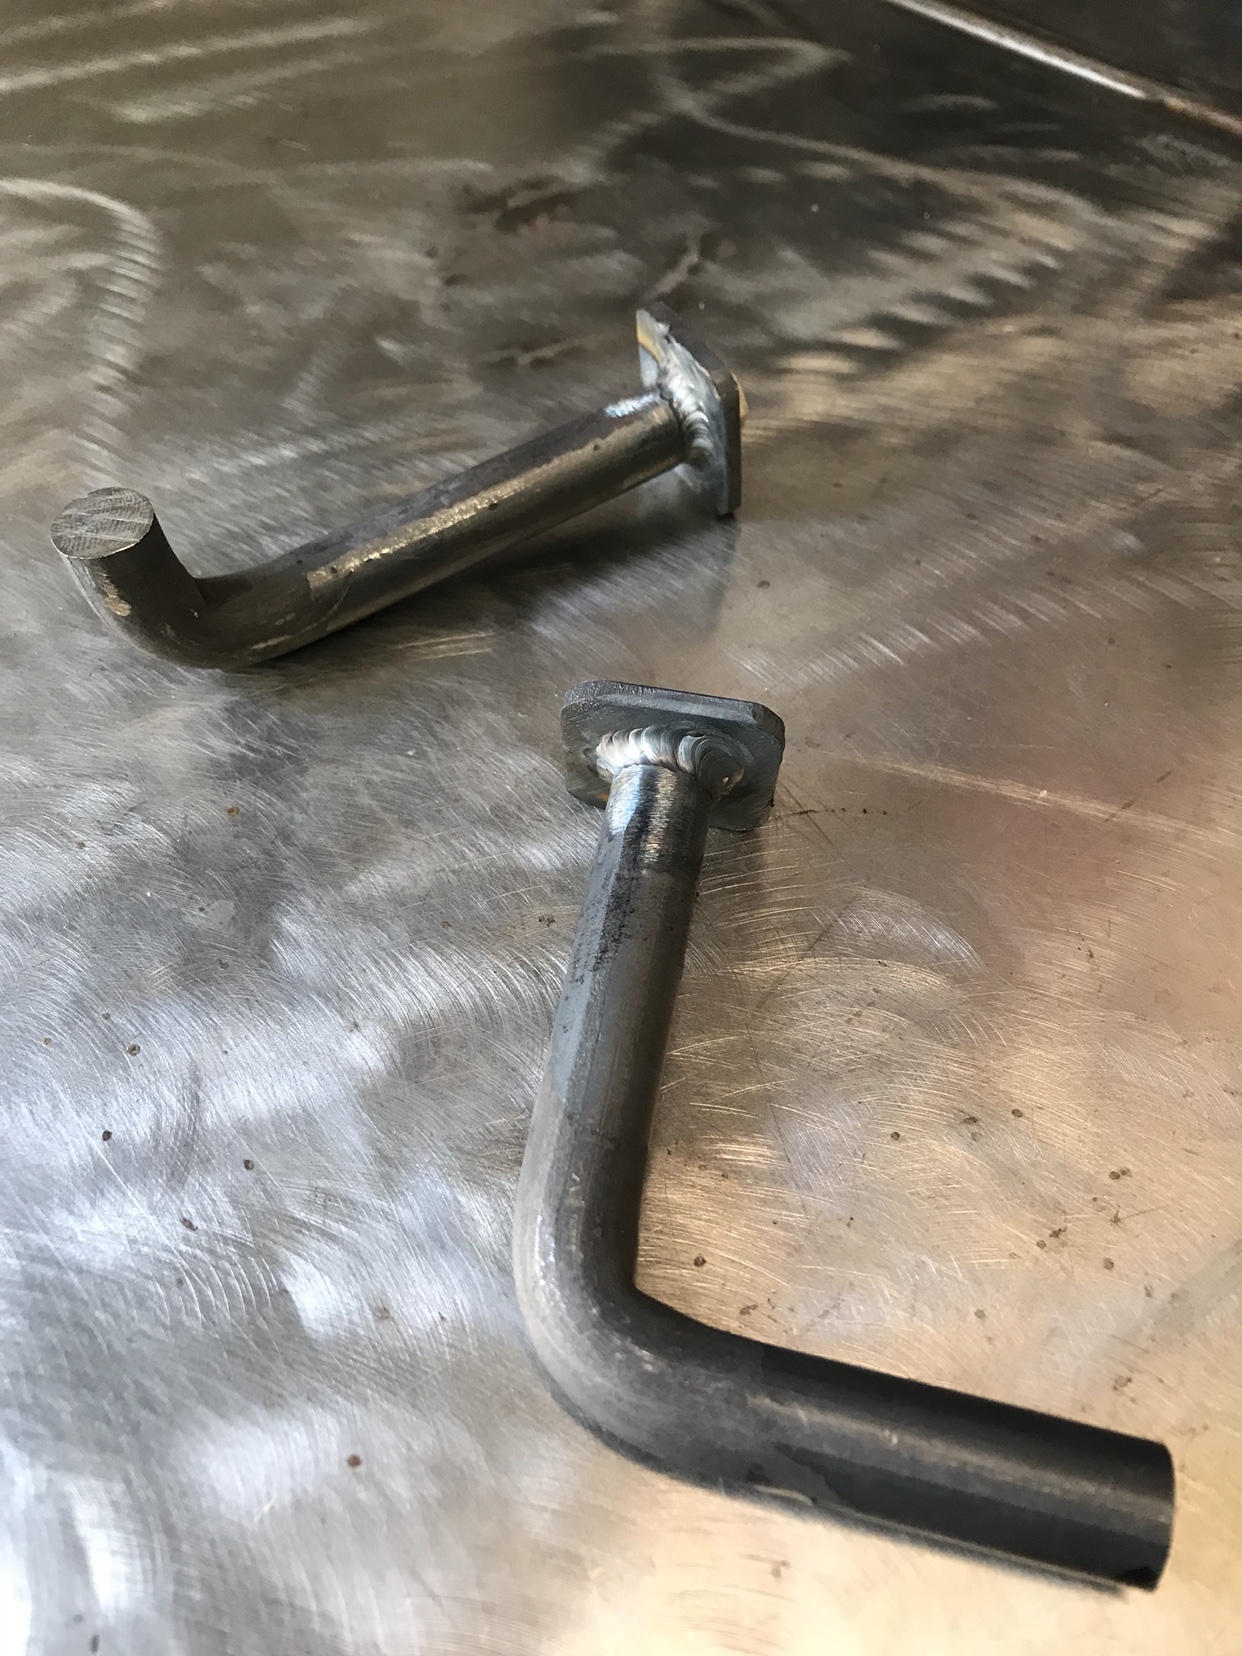 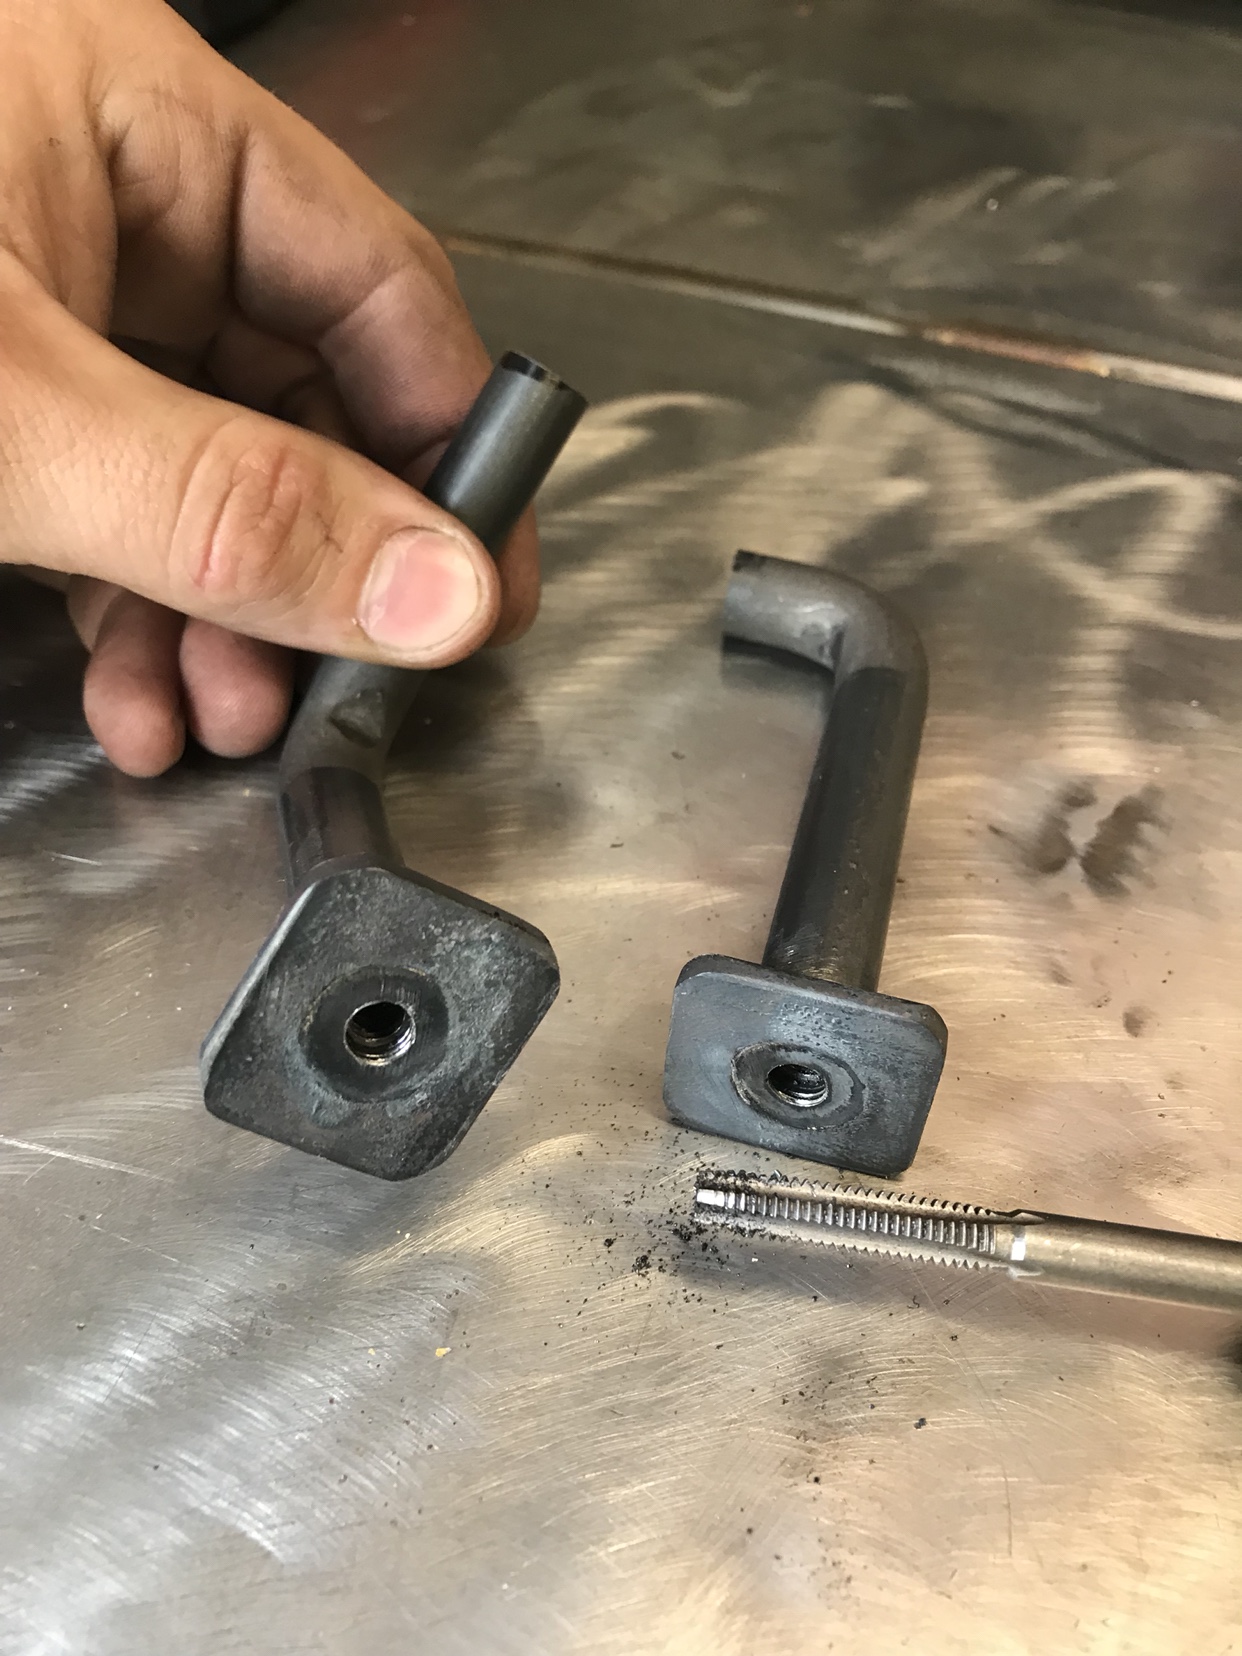 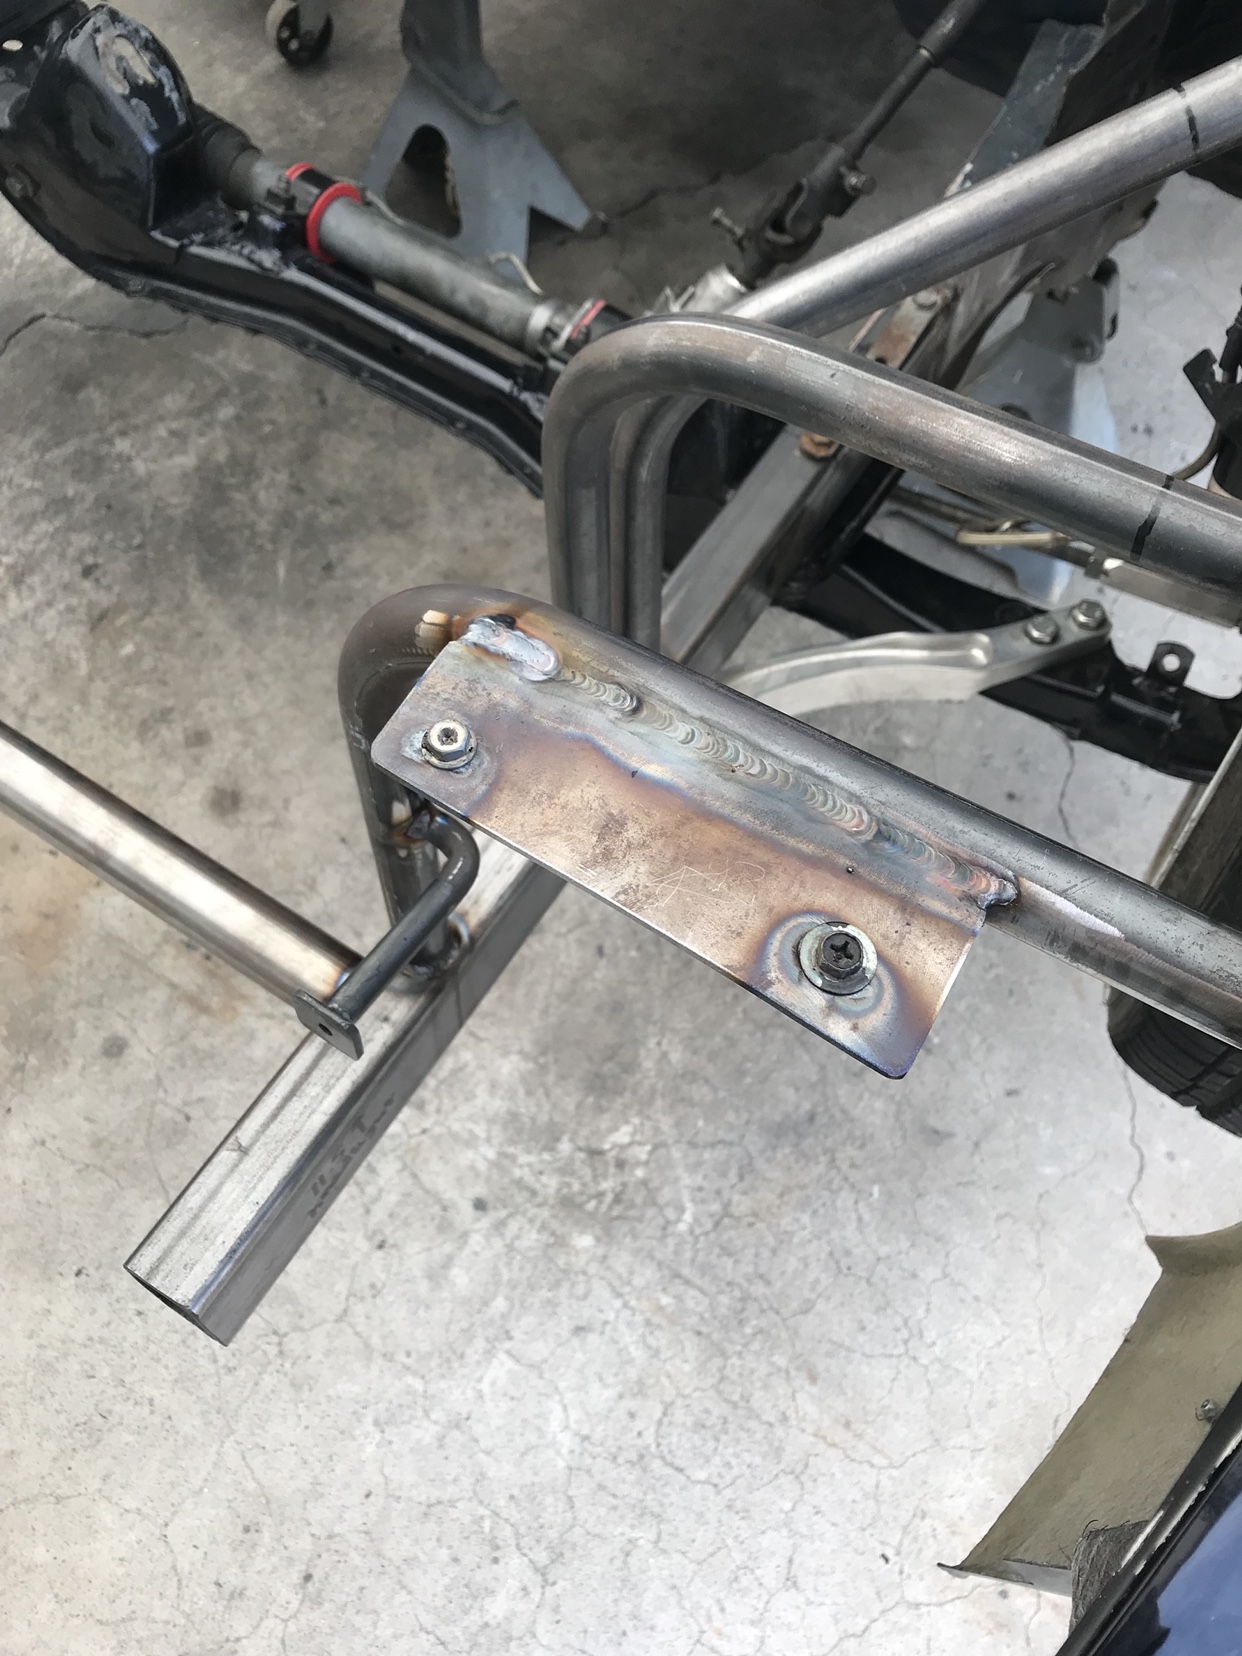 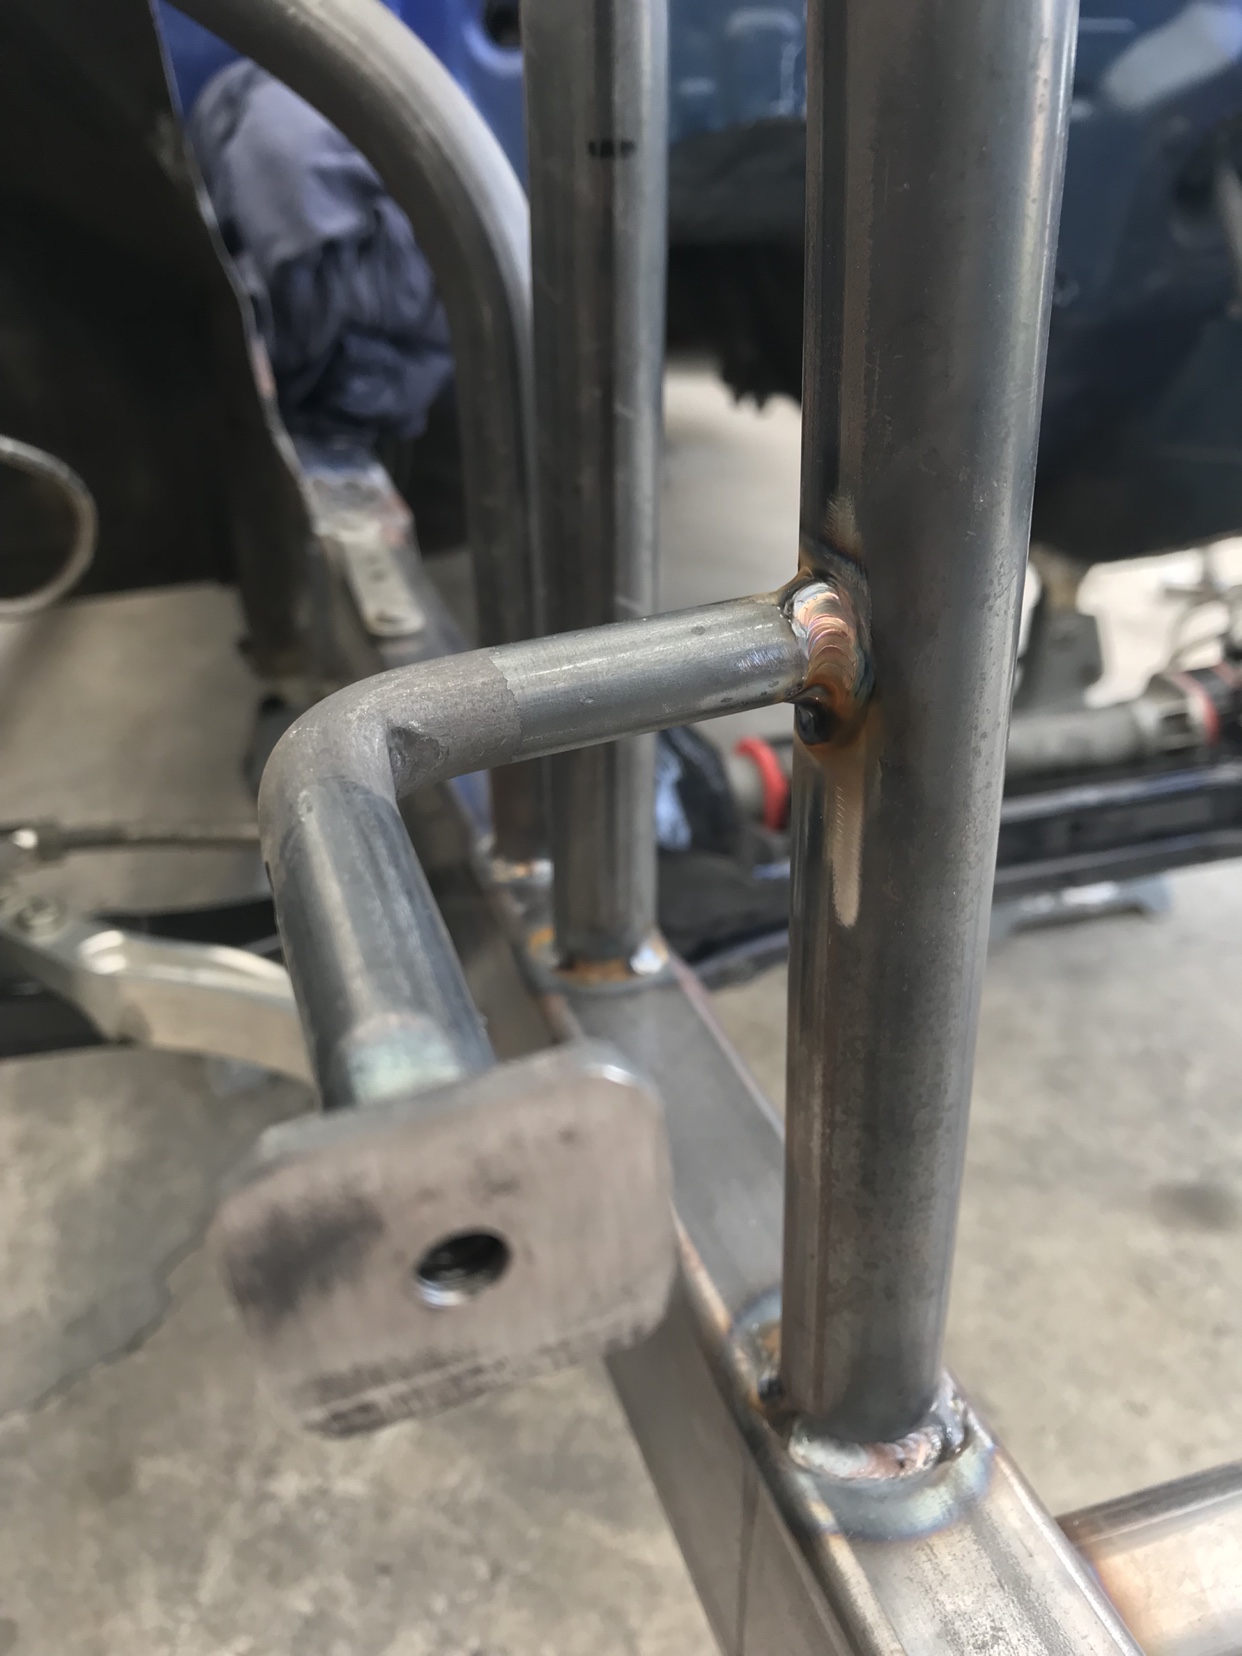 Next before I can get to mount the radiator or anything else in the engine bay for that matter I need to build the bash bar. I chose to cap the front of the frame rails with 1/4” plate. The plate is tapped but for extra thread contact I chose to weld nuts on the back side. Since I’m using 1.5” tubing to mount onto the bash bar the bolt hole locations are critical for room given the frame rails are only 1.5”x3” I could have made the plates larger much than the frame rails but I wouldn’t look as clean 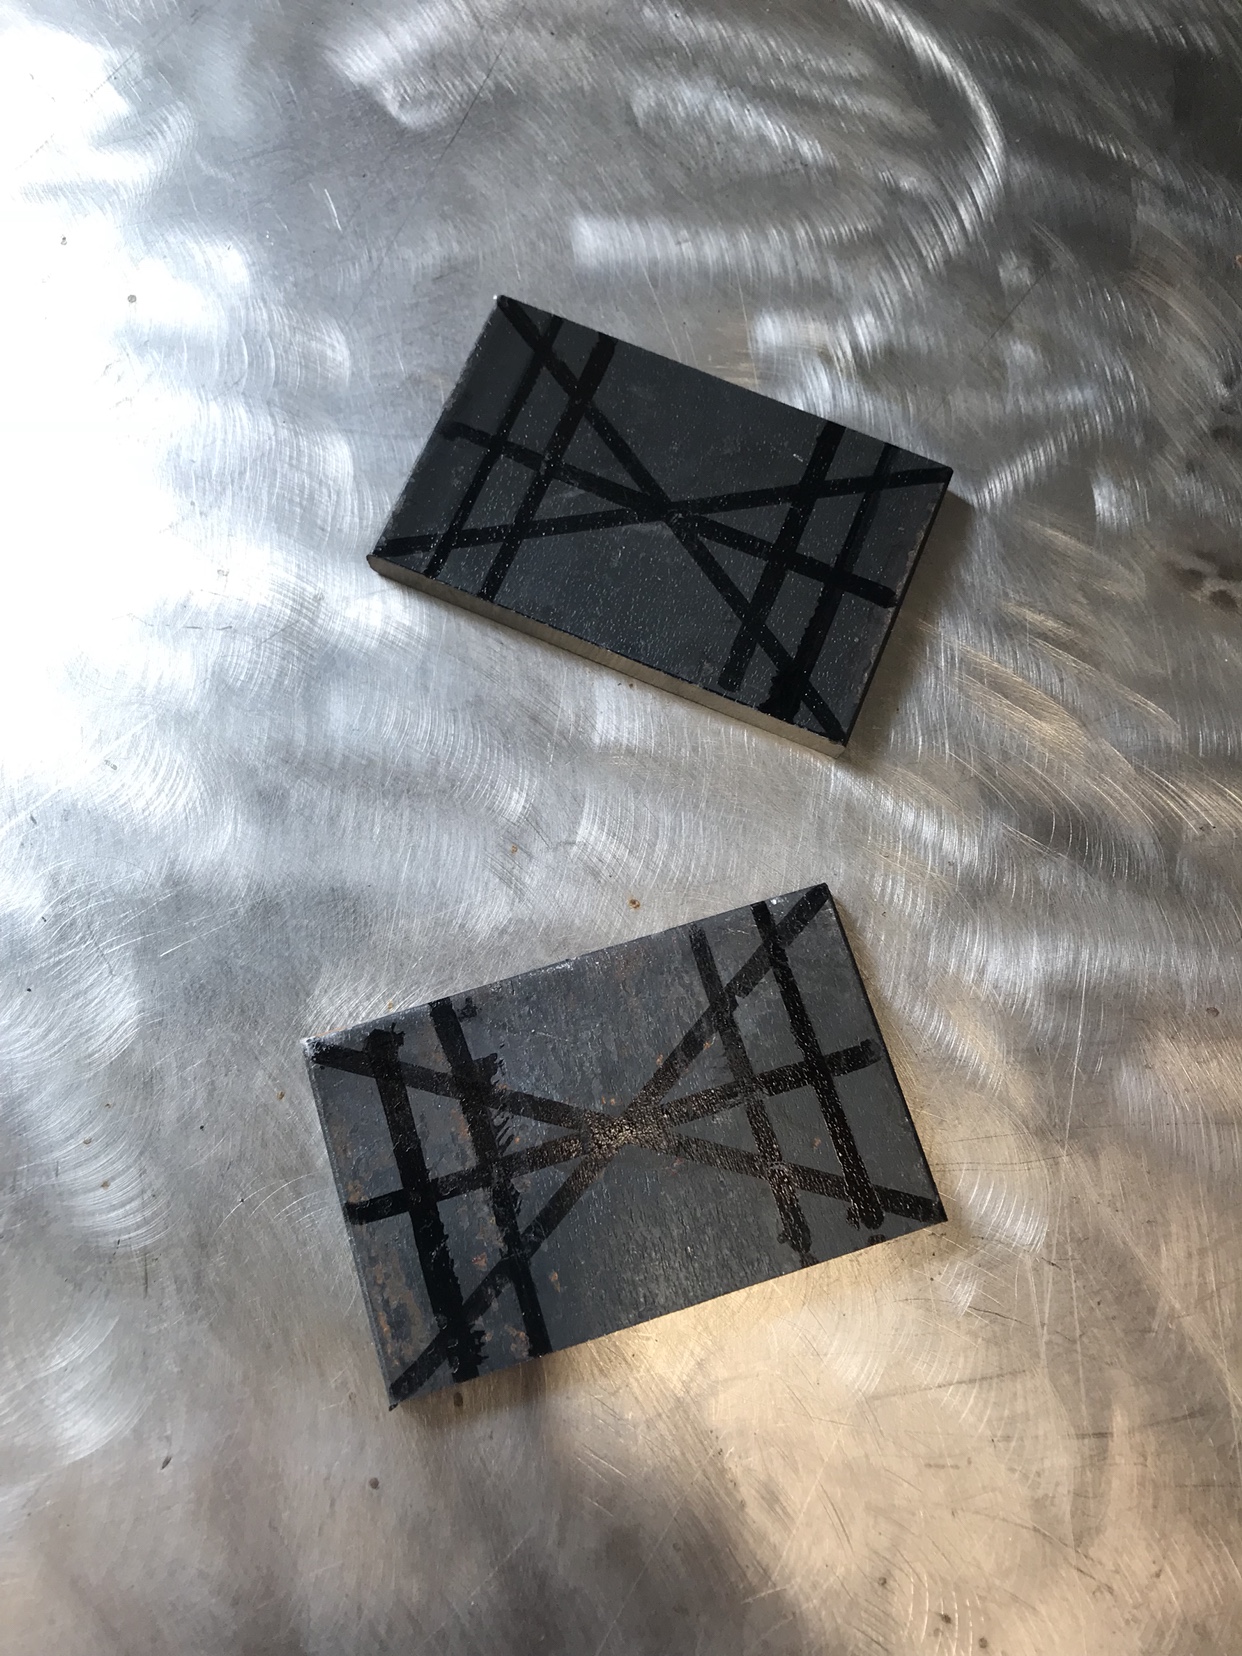 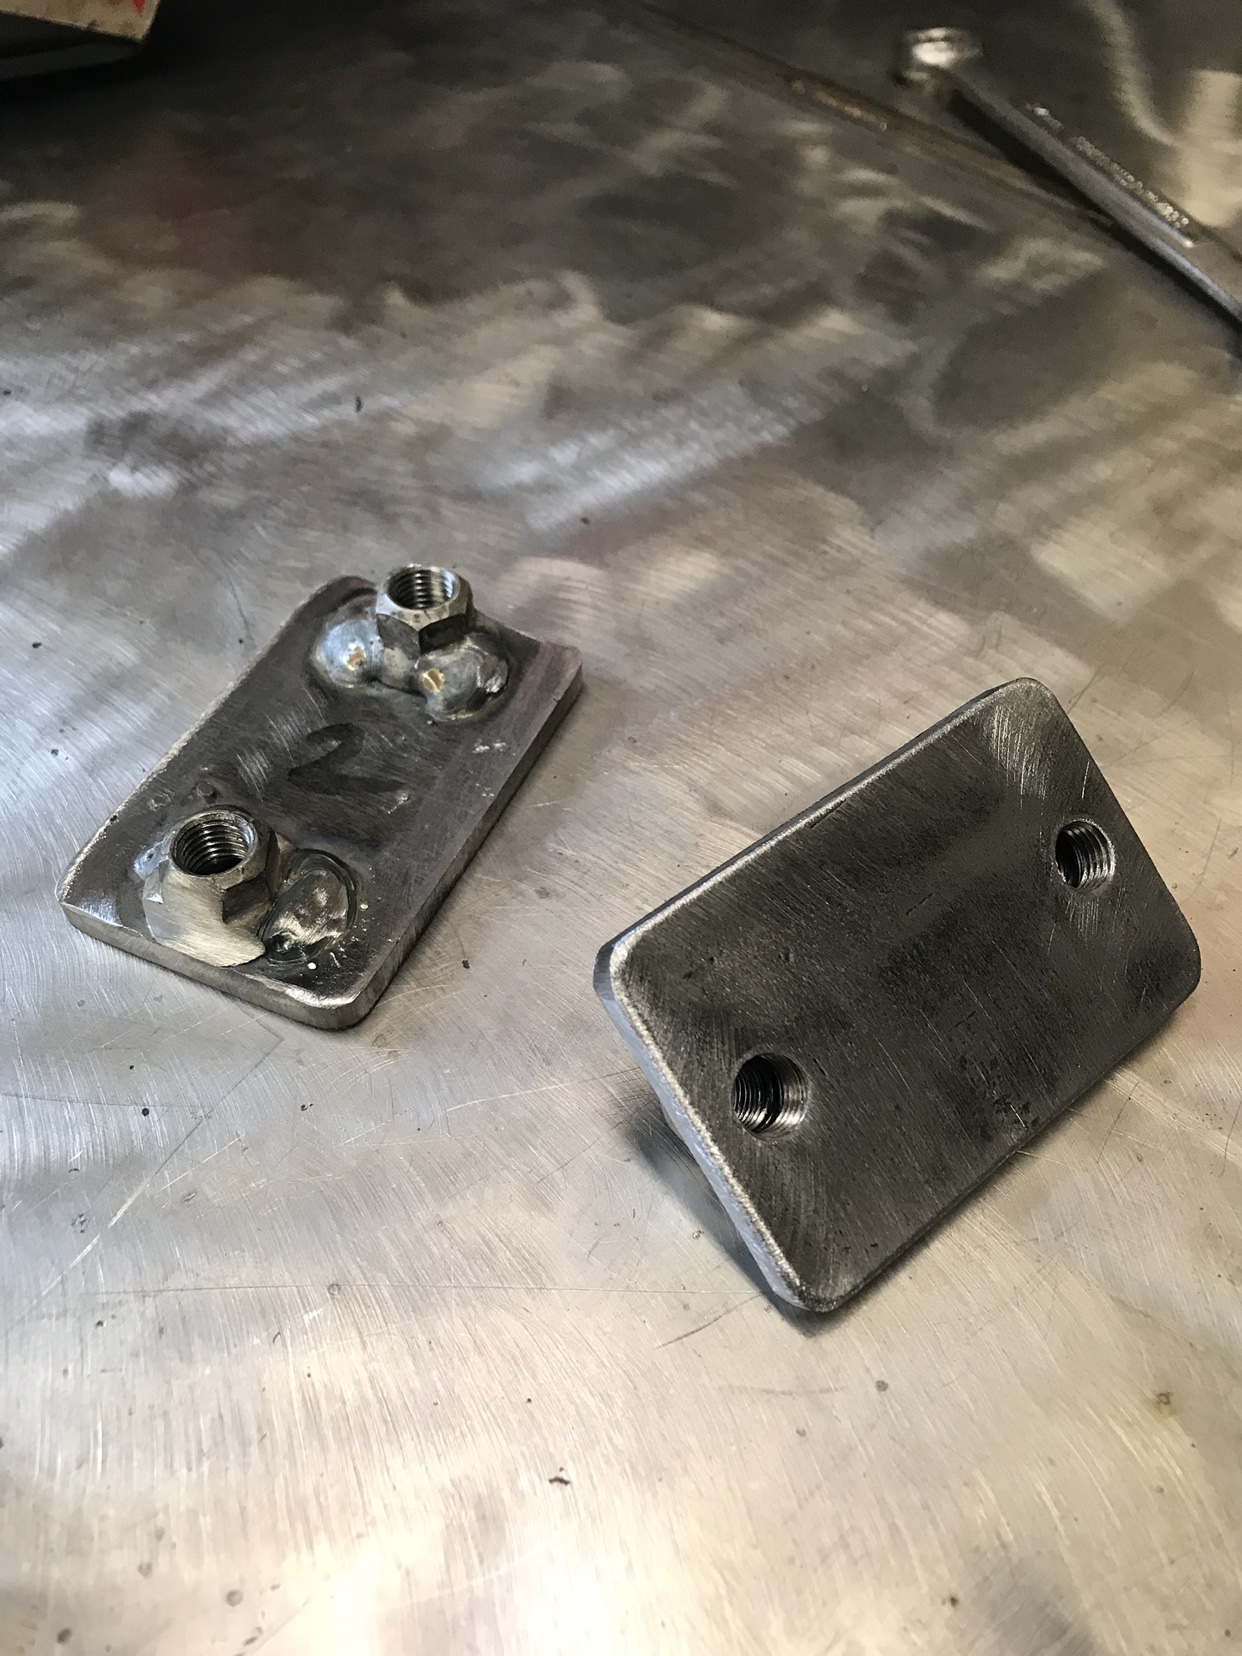 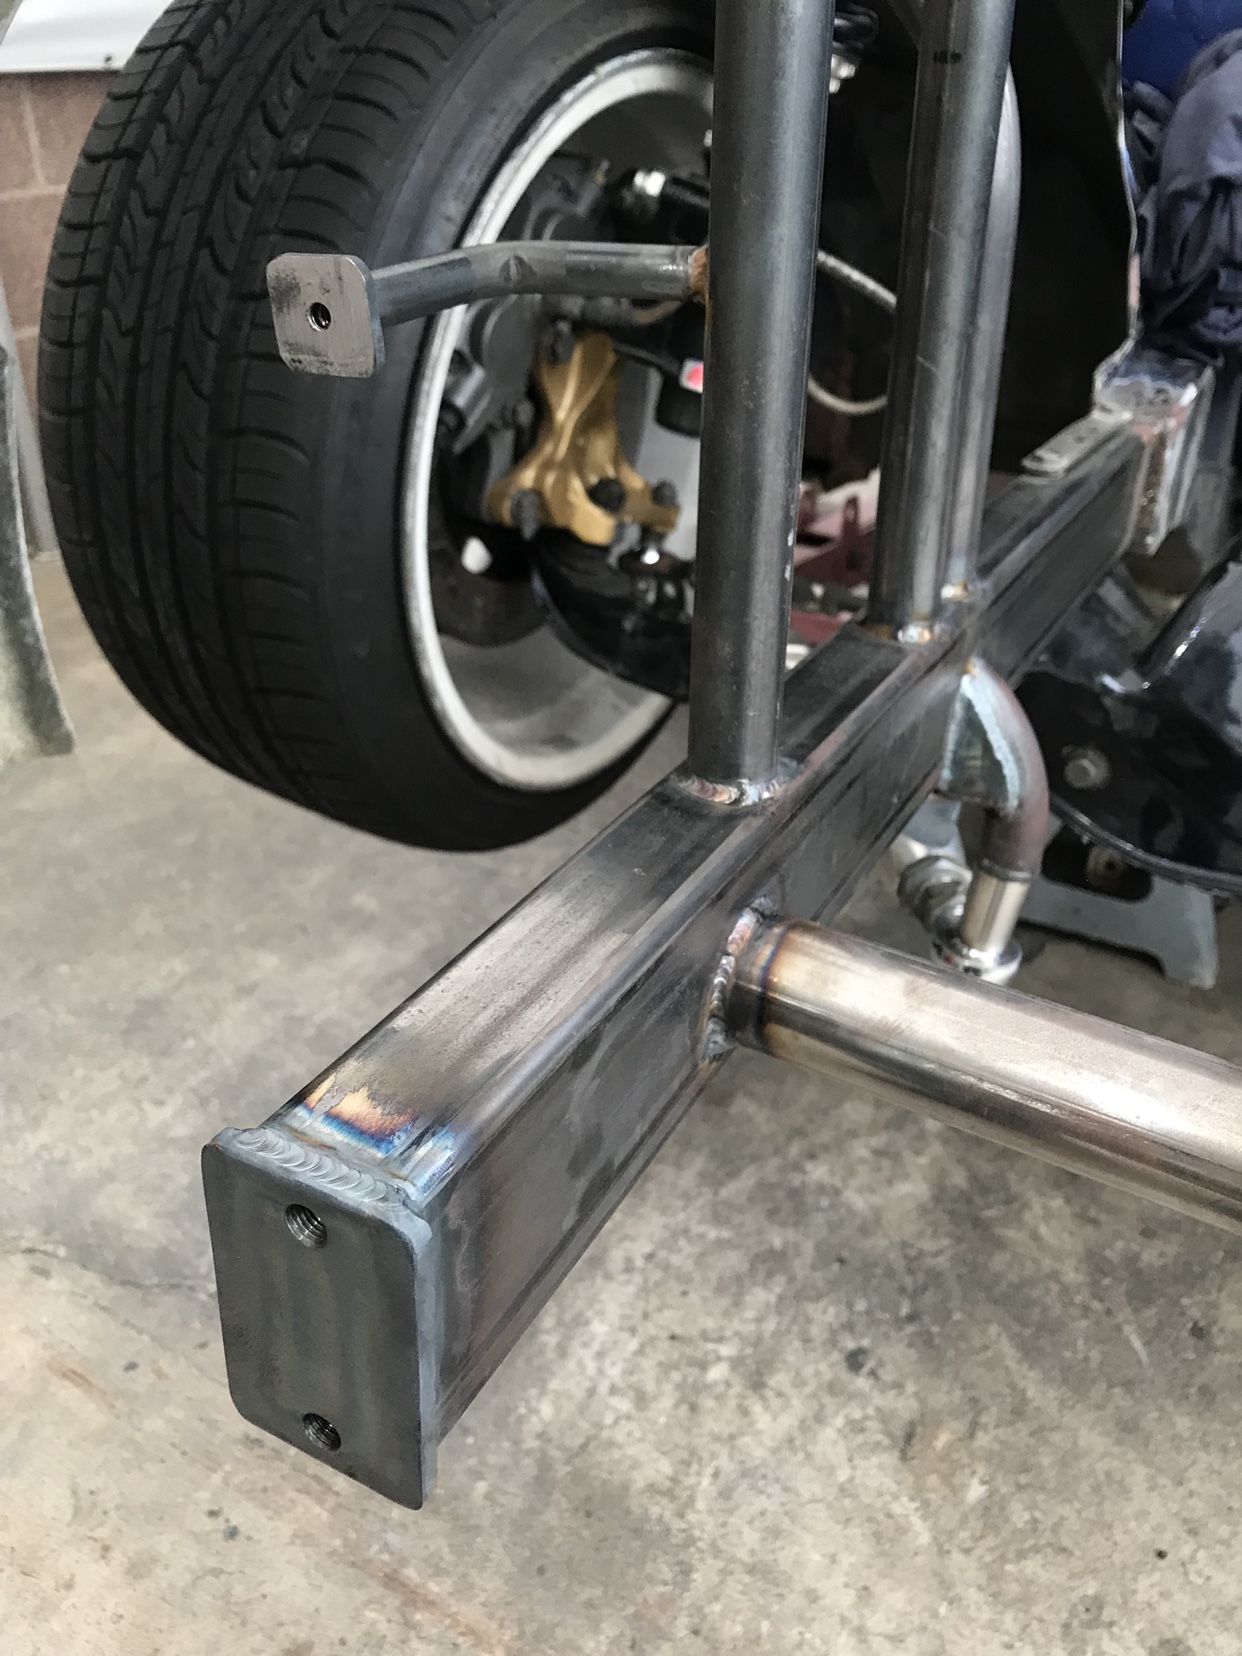 It’s starting to look like a car again and I can breathe haha 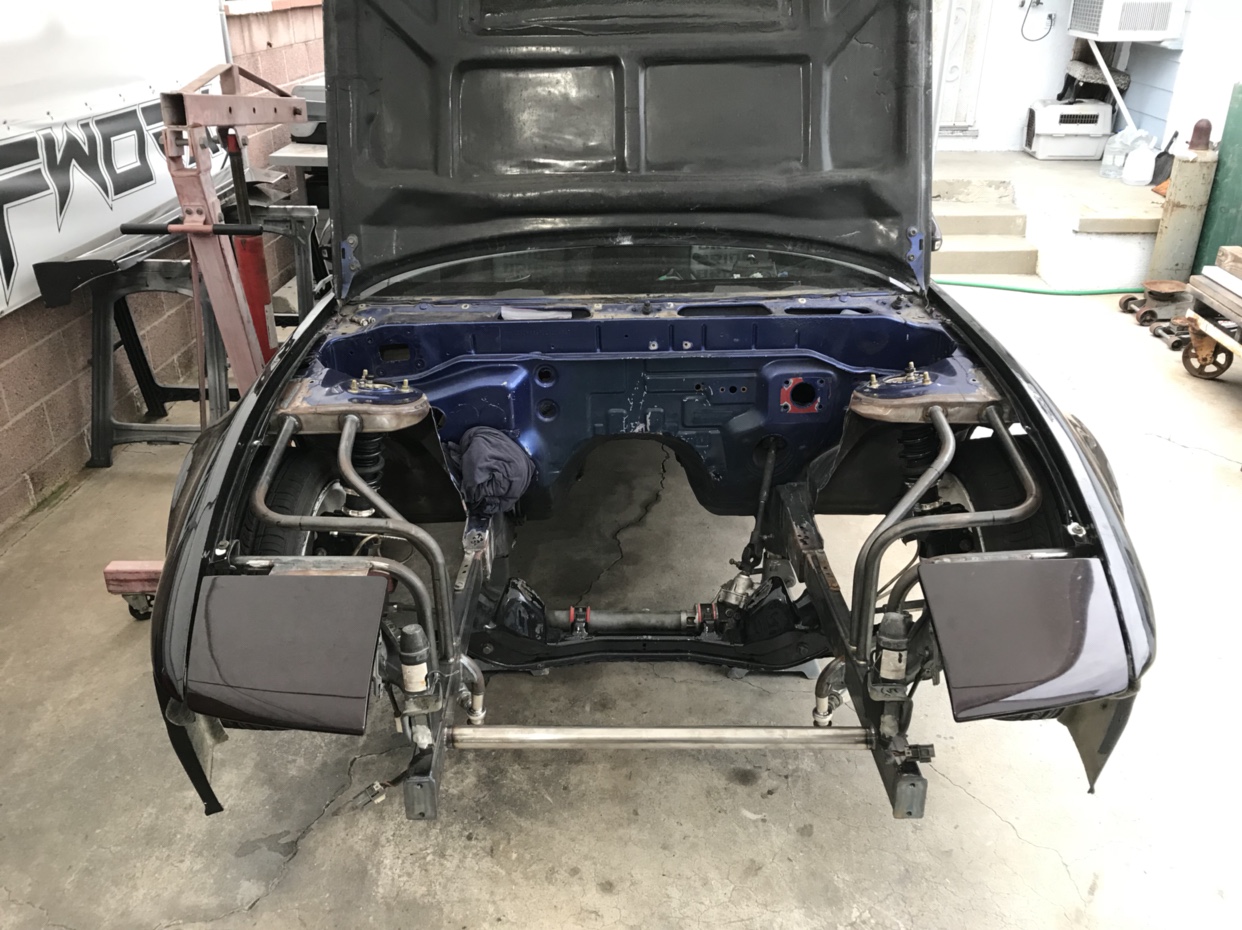 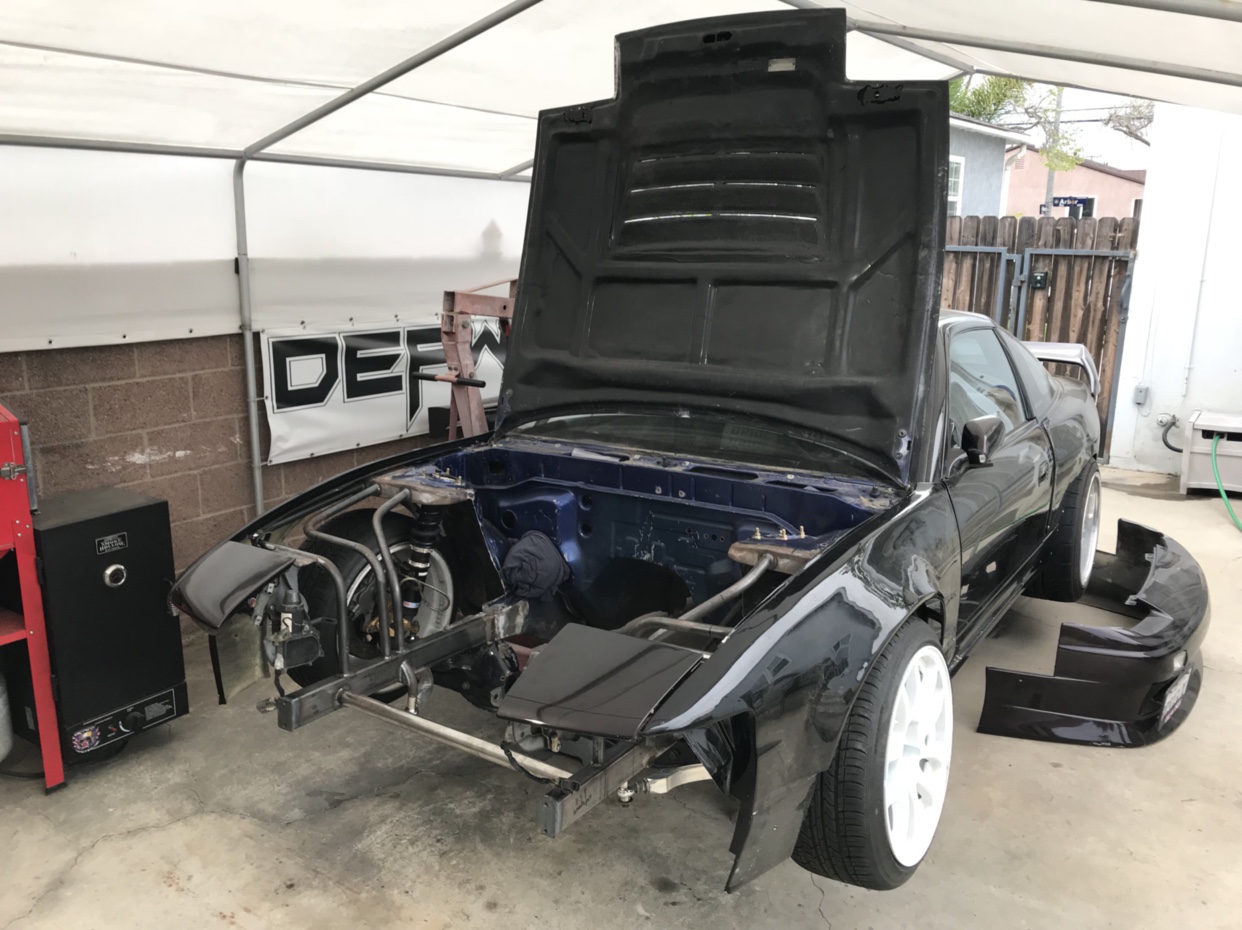 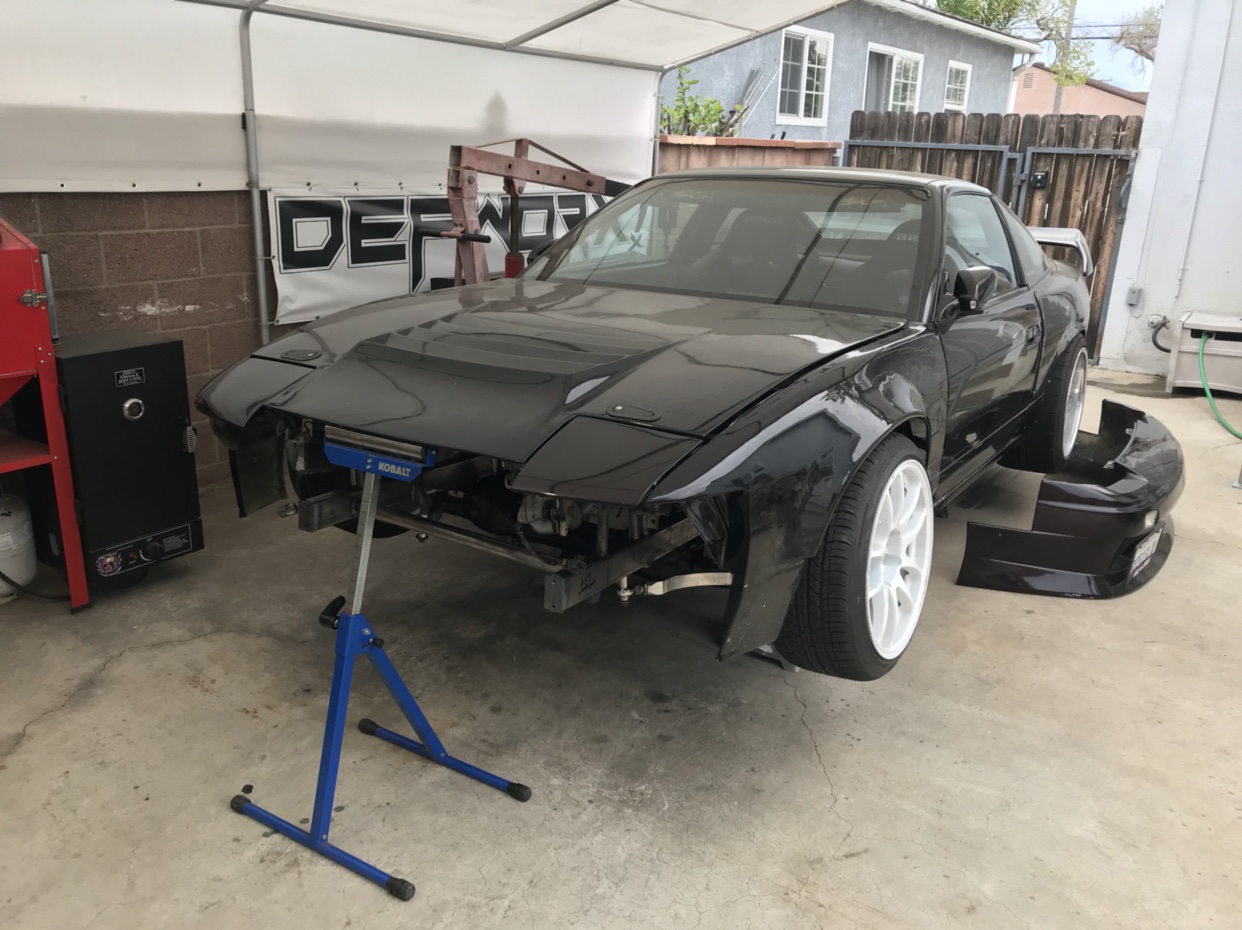 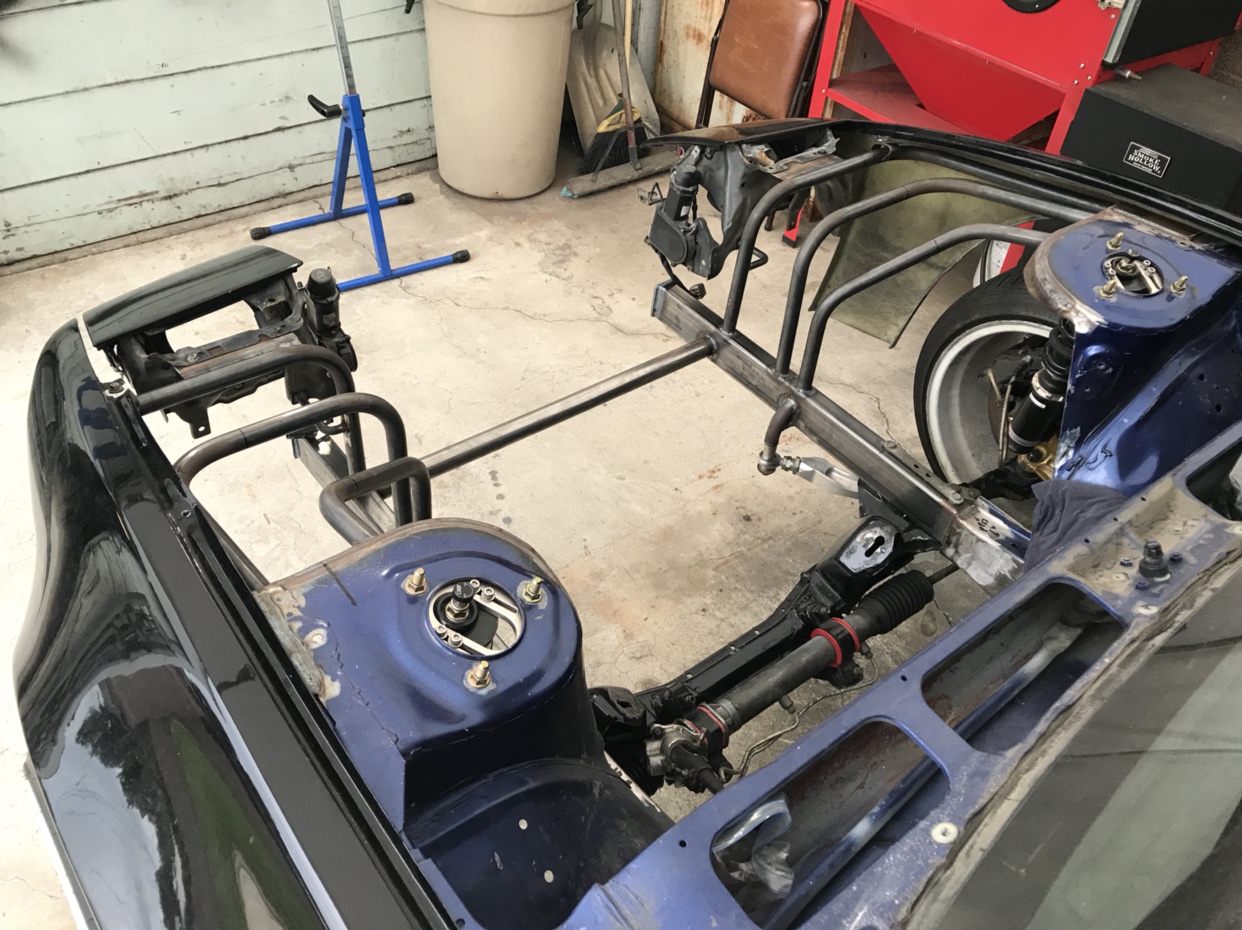 Sent from my iPhone using Tapatalk |
|
|

|
|
|
#69 | |
|
Zilvia Junkie
 Join Date: Sep 2012
Location: LongBeach, CA
Age: 28
Posts: 371
Trader Rating: (4)
     Feedback Score: 4 reviews
|
Quote:
The gap is wider than it should be. That’s because that’s where these fenders like to fit and still have great fitment on the door gap. I may tweak them overall though. Plus the hood I noticed is slightly narrow compared to stock so it adds to the gap Sent from my iPhone using Tapatalk |
|
|
|

|
|
|
#70 |
|
Zilvia Junkie
 Join Date: Sep 2012
Location: LongBeach, CA
Age: 28
Posts: 371
Trader Rating: (4)
     Feedback Score: 4 reviews
|
Before I could start mounting the radiator and intercooler set up the bash bar had to be made.
You’ll notice I did not add a lot of extra bracing on it. This is so it has some place to bend if I crash and be easily replaceable without pushing force onto the frame rails All tig welded ! 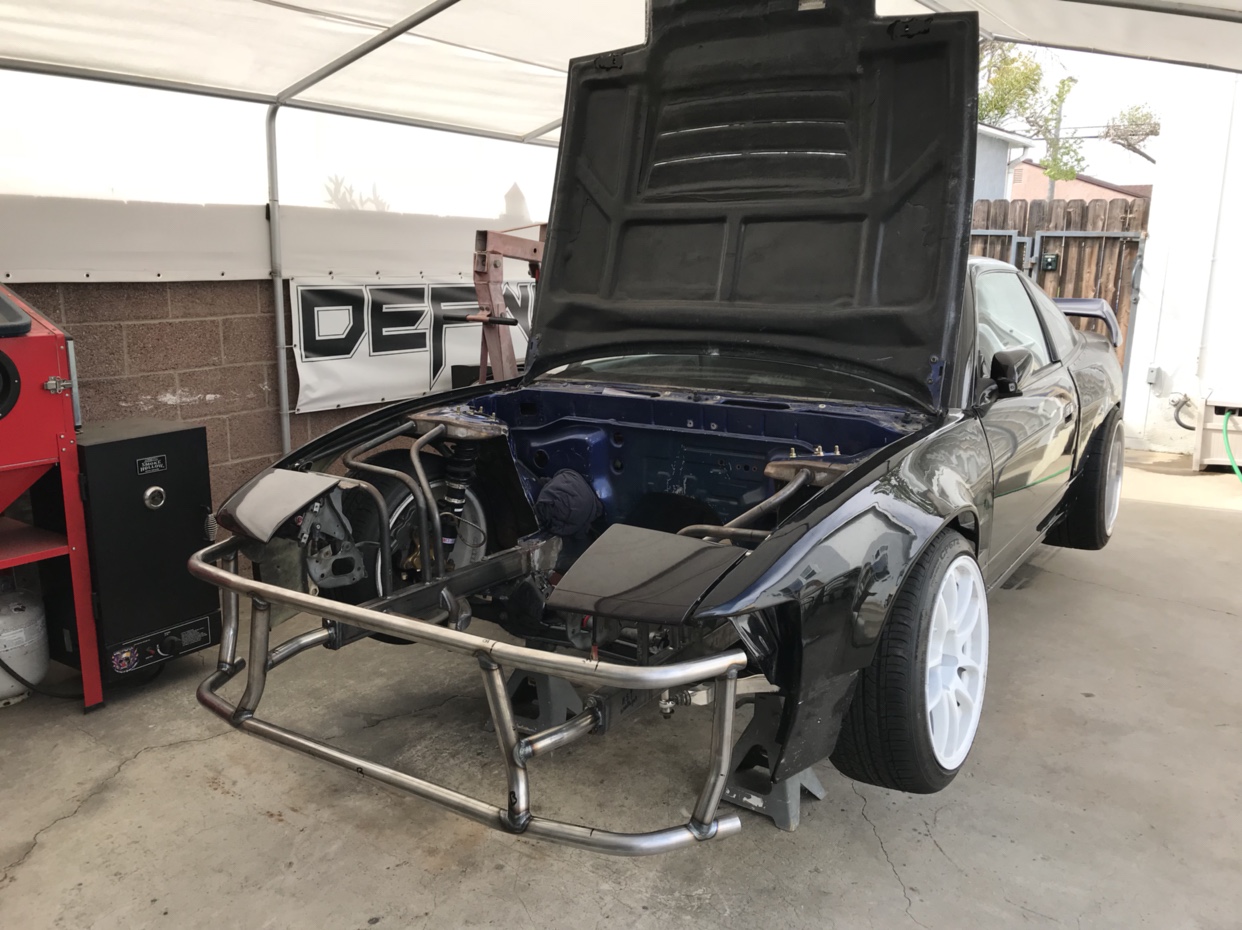 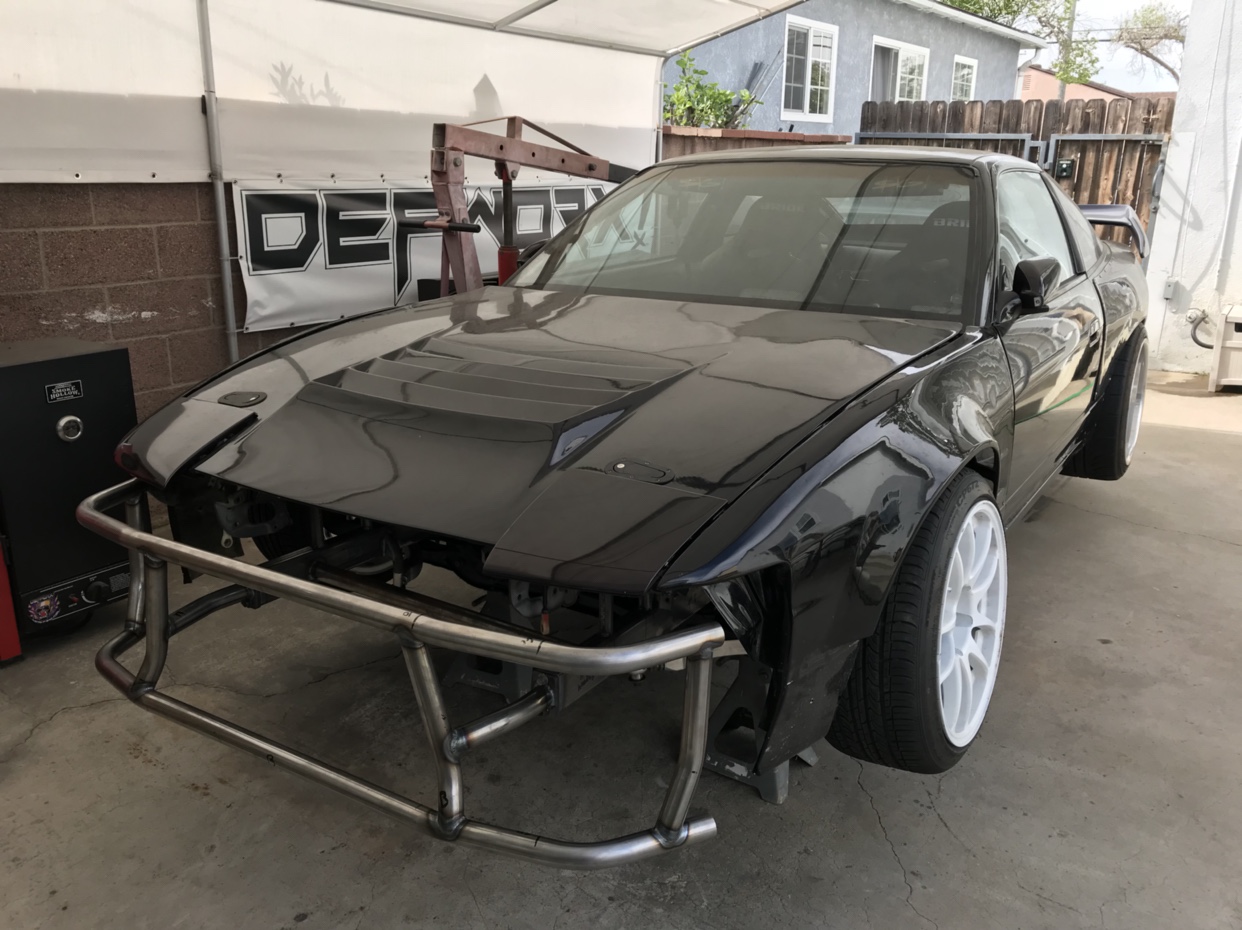 What makes this design actually come together is the gusset work on the front forward tubes. Originally I wanted to add bead rolling along with the dimples but the test piece wasn’t looking right so I have another idea for them that’ll be added later on 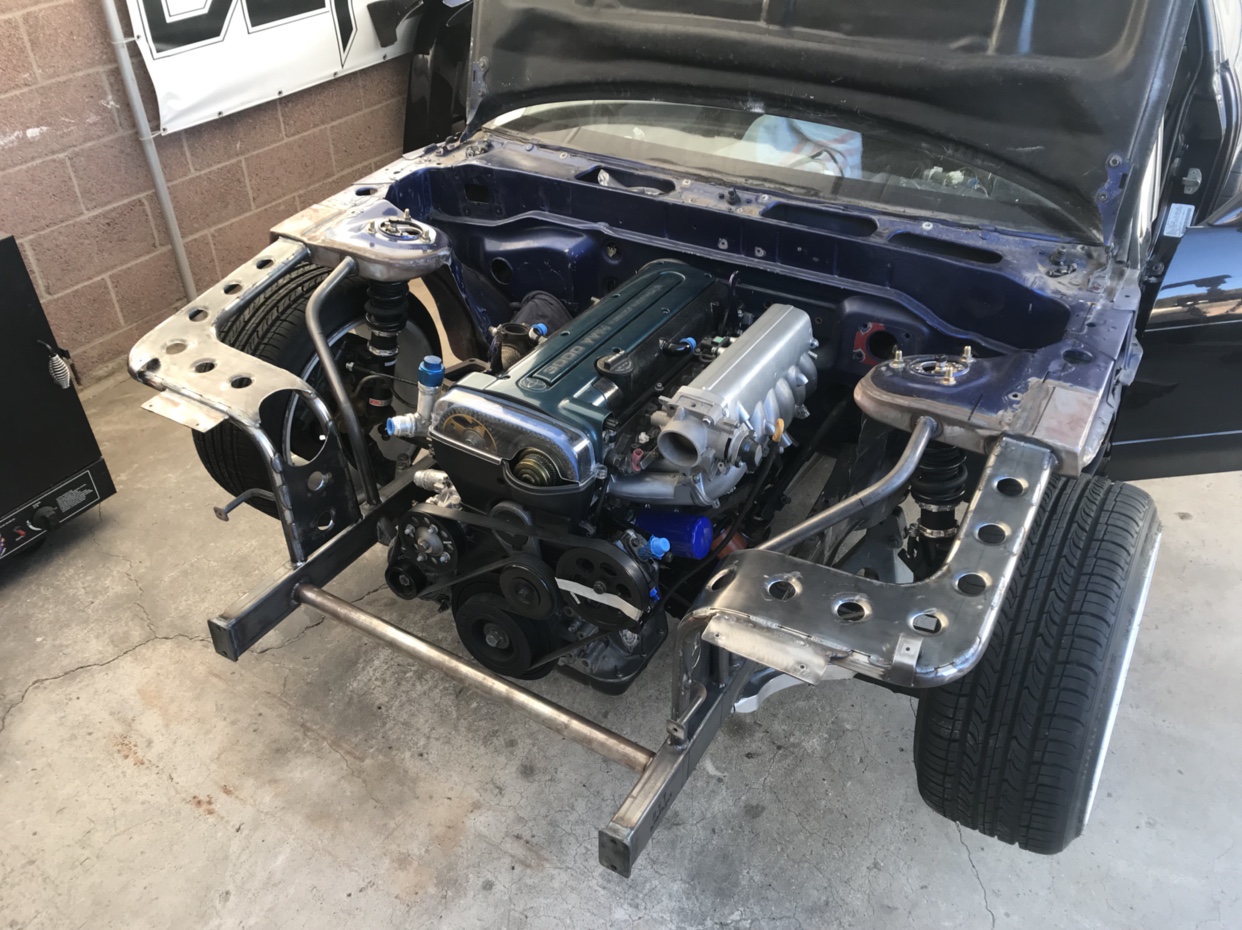 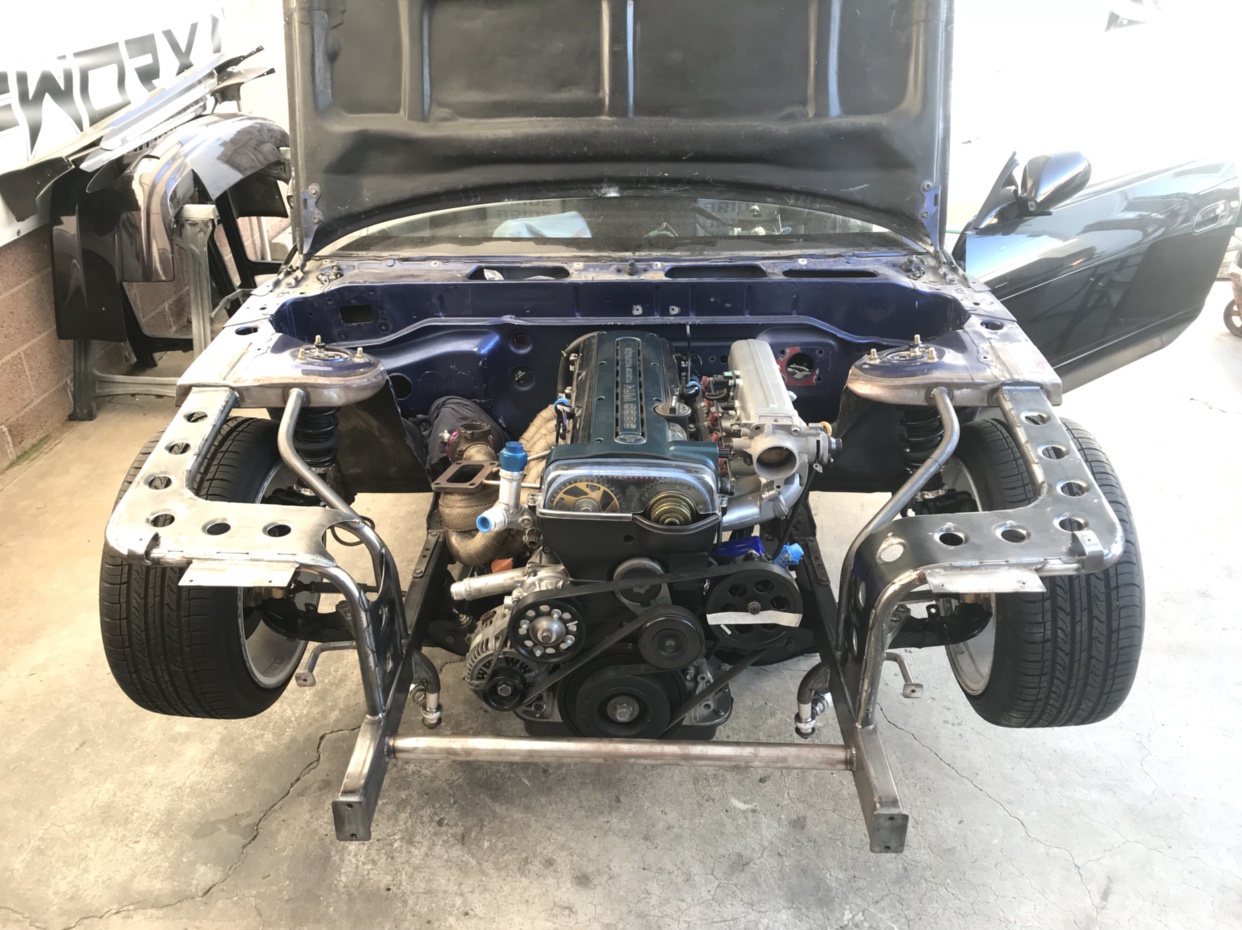 I THOUGHT I would have plenty of room with the radiator & fan shroud set up I bought before starting the tube front. Turns out I should have waited to order these 2 until I was at this exact point. This set up will work but not exactly as I planned. The radiator could be a couple inches shorter while the shroud could be a bit slimmer but this set up should cool the coolant awesomely 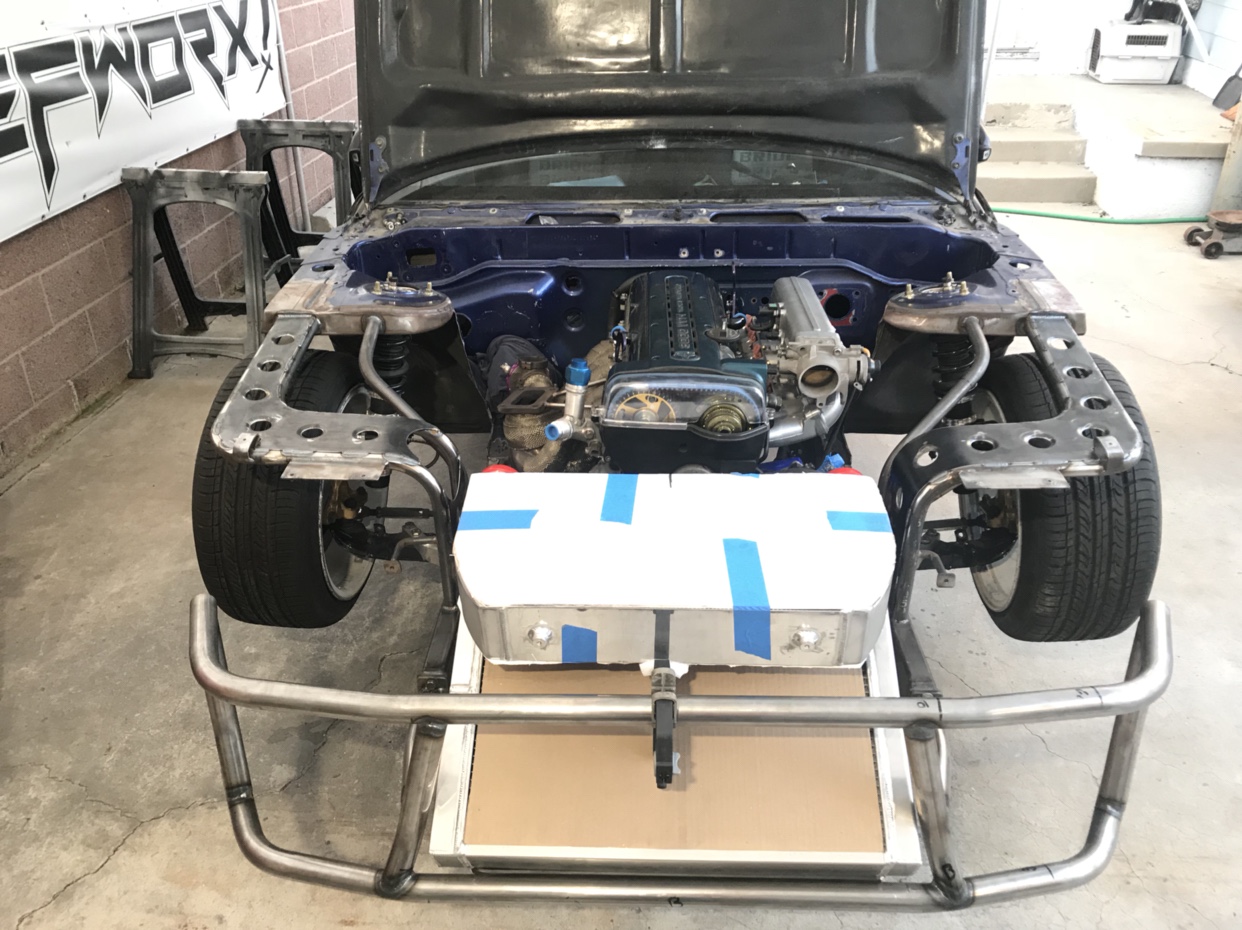 You’ll notice how low and far forward it’s sitting while in place I’ll be cutting out and replacing the tube in front connecting the frame rails to allow more clearance 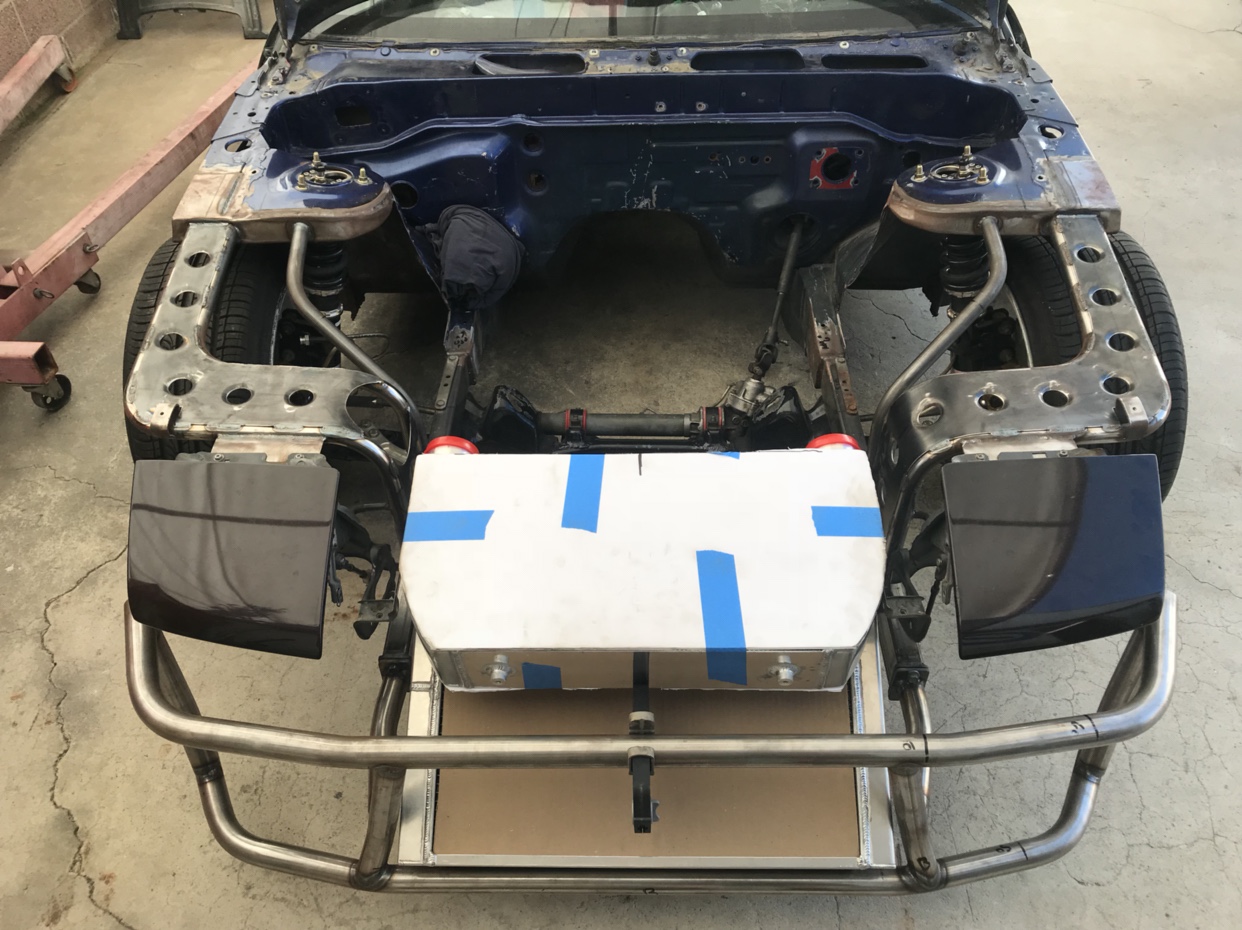 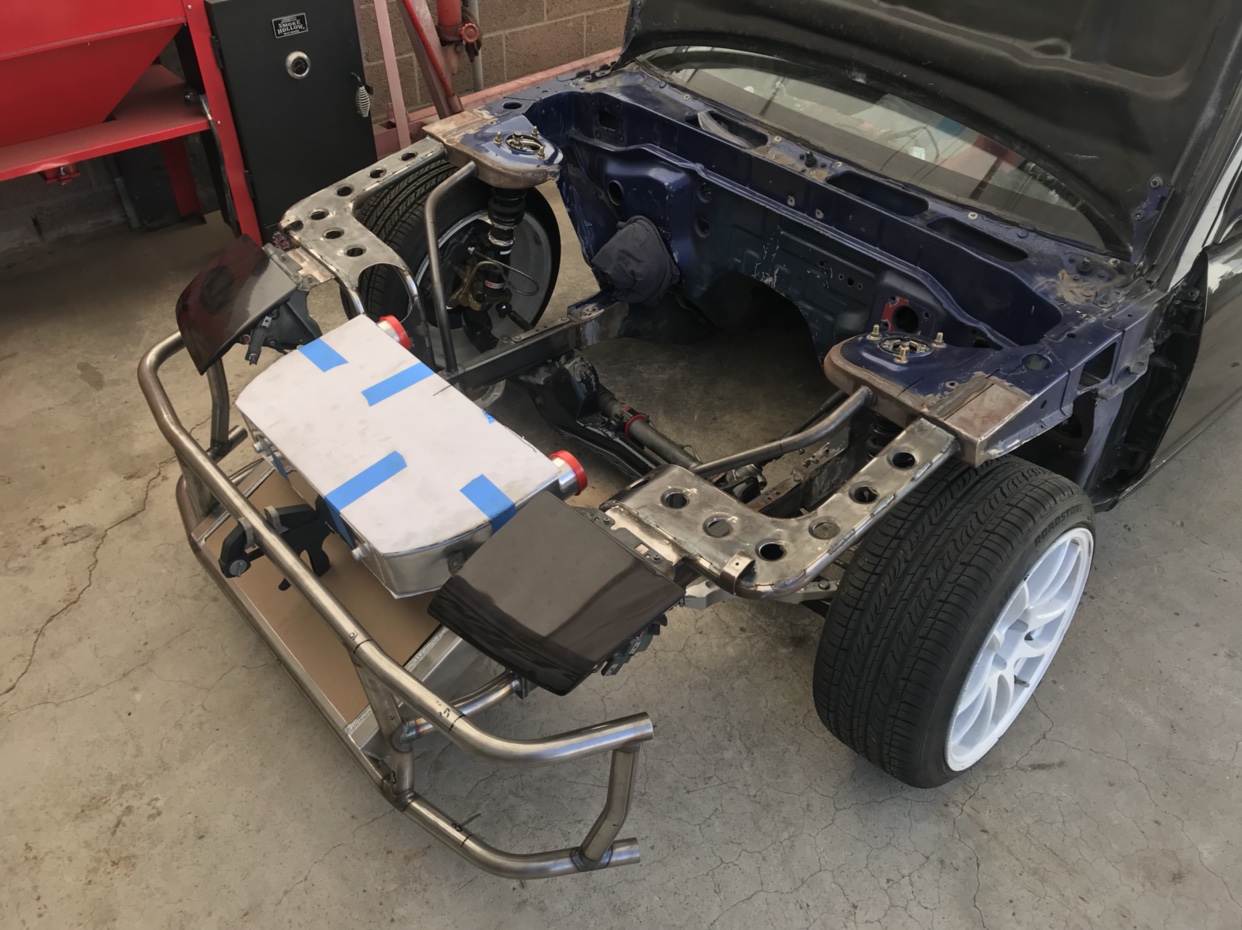 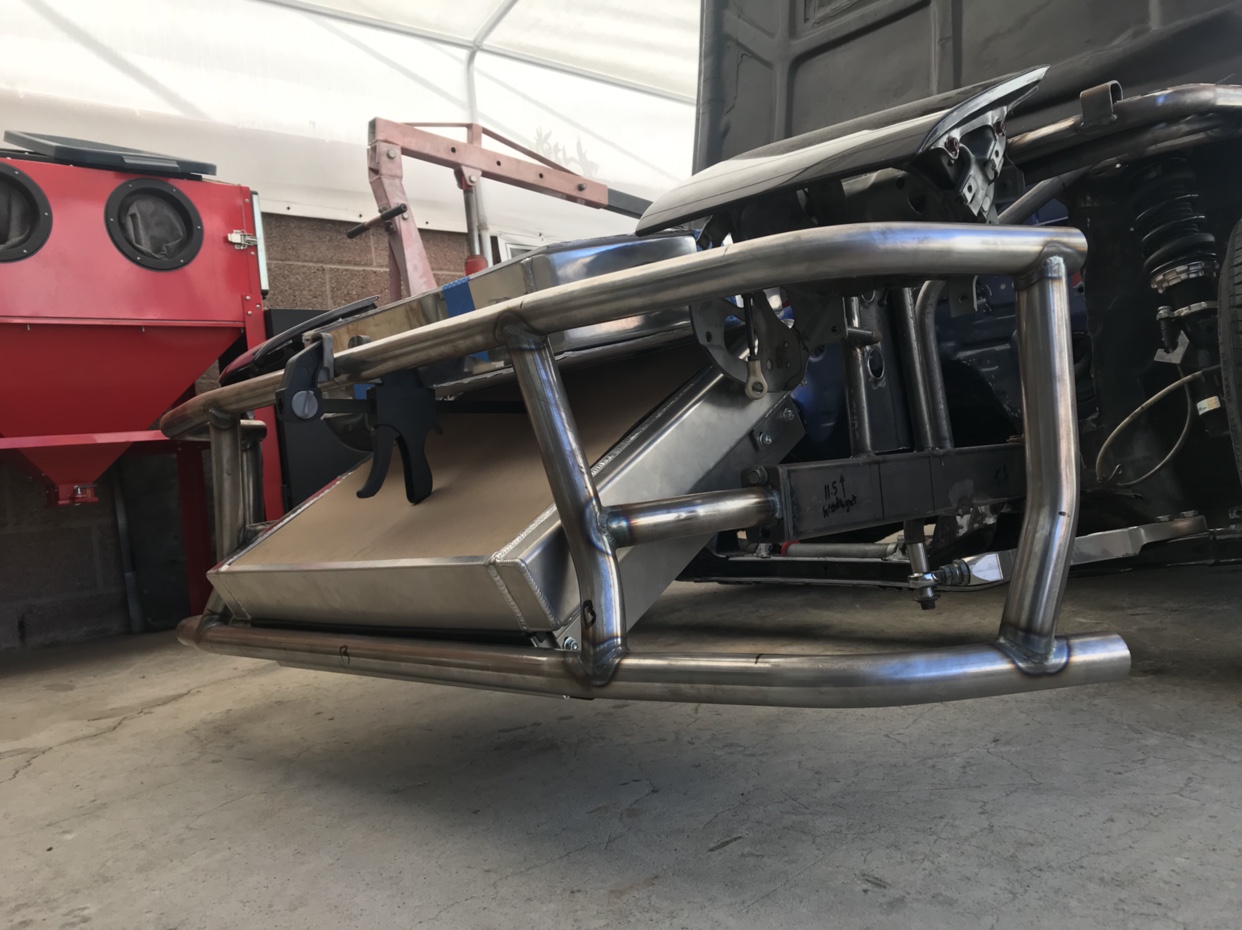 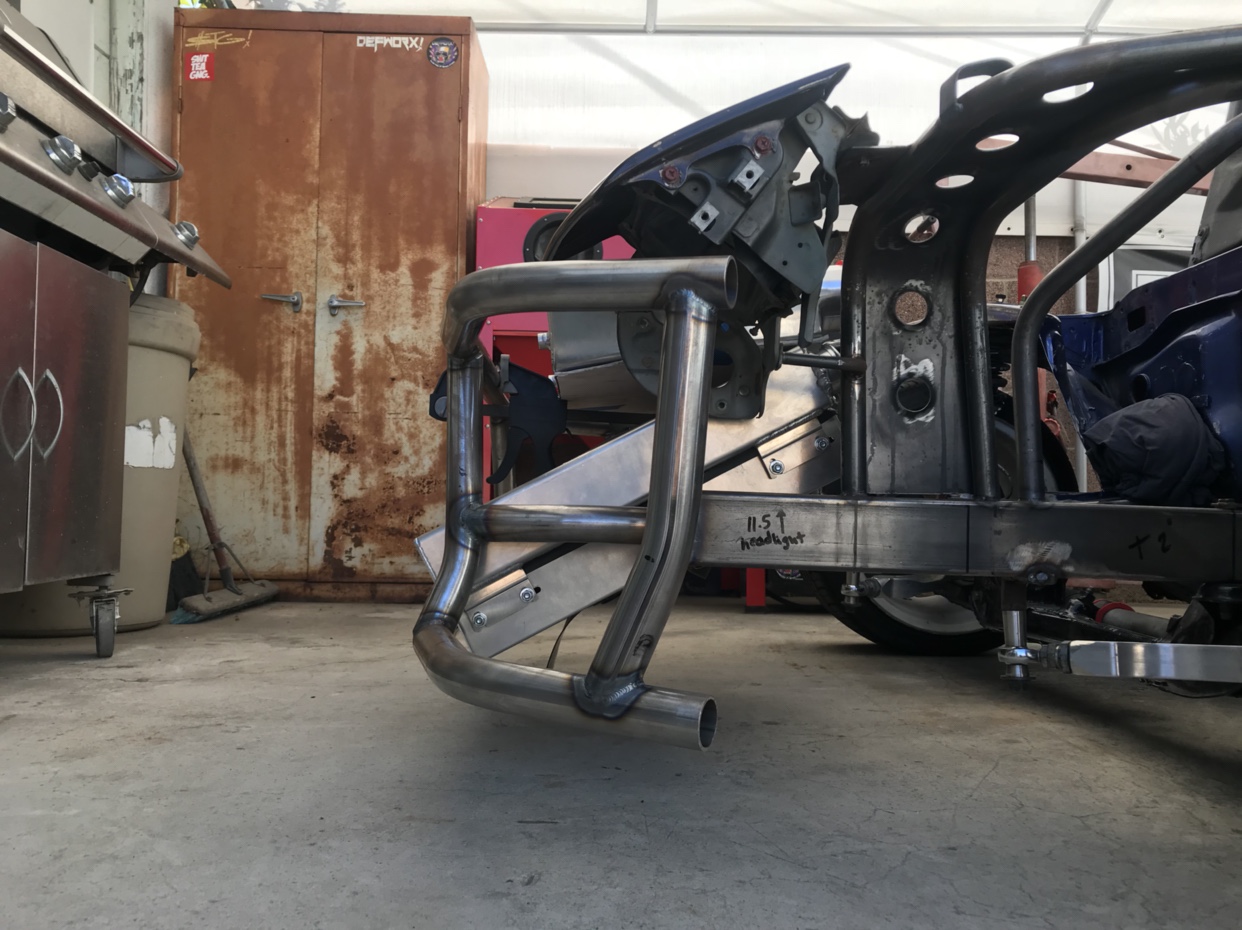 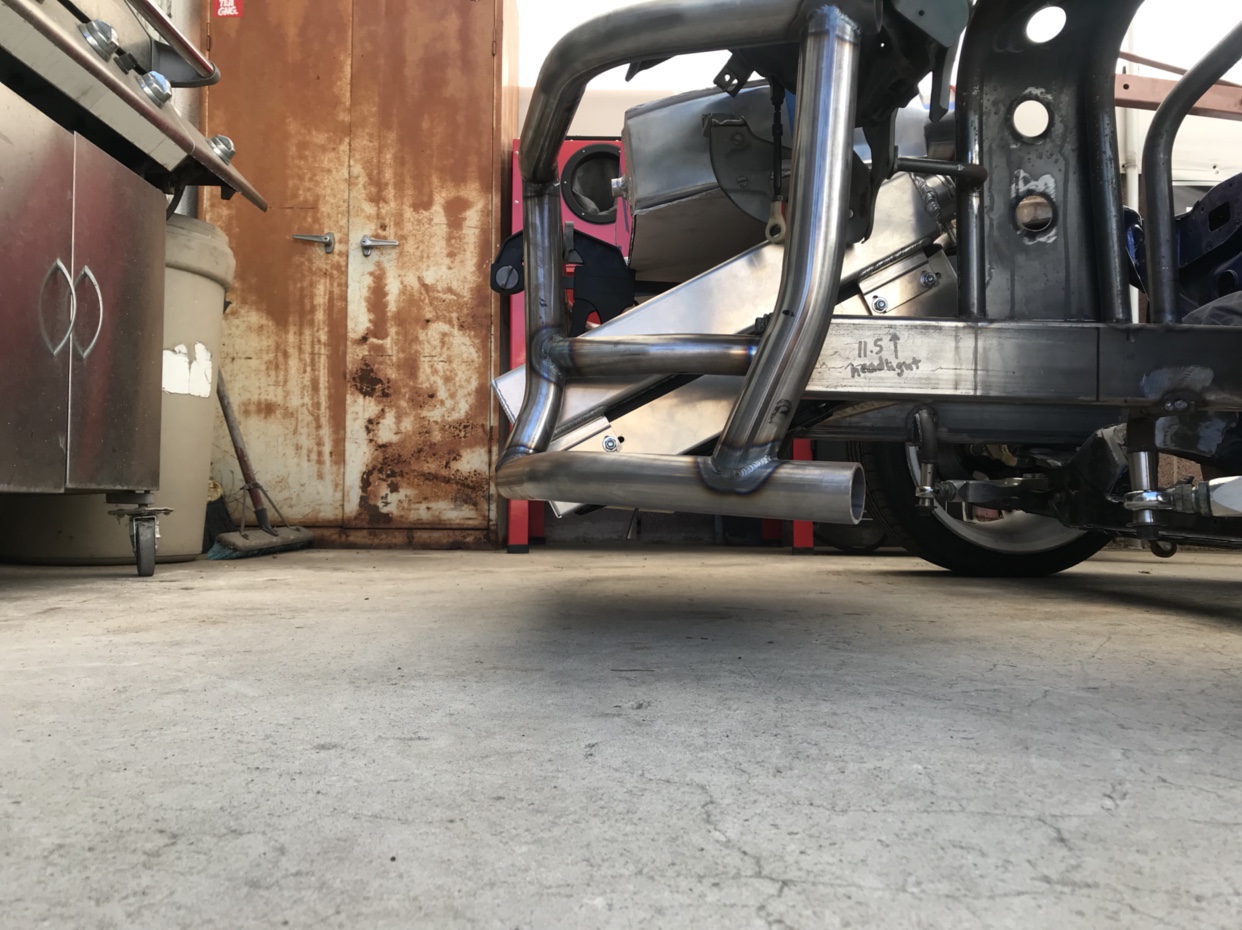 What do you guys think ? Keep tweaking and get this V-Mount to work OR go back to a plain old vertical set up ? Sent from my iPhone using Tapatalk |
|
|

|
|
|
#71 |
|
Leaky Injector
Join Date: Nov 2018
Location: Winnipeg, Manitoba, Canada
Posts: 55
Trader Rating: (0)
 Feedback Score: 0 reviews
|
assuming that the car will be used for drifting wouldn't the V-mount be rather inefficient? I don't know too much about drifting since I just street drive my s13 so my thought process might be wrong.
It looks cool but doesn't look the most efficient way of cooling to me. |
|
|

|
|
|
#72 | |
|
Zilvia Junkie
 Join Date: Sep 2012
Location: LongBeach, CA
Age: 28
Posts: 371
Trader Rating: (4)
     Feedback Score: 4 reviews
|
Quote:
From my understanding and logic I wouldn’t think the v mount would be any less efficient than a traditional stock vertical set up. The air coming in thru the bumper will go thru the radiator and draft directly into the airflow underneath the car instead of being pushed into the engine bay while the air traveling past the intercooler will be diverted out of the hood vents. ( I’ll be adding ducting thruout) Formula D cars run the radiator in the trunk but I can’t see myself doing that. Atleast anytime soon. And that requires properly placed and sealed ducts on rear quarter glasses to divert air while drifting sideways Sent from my iPhone using Tapatalk |
|
|
|

|
|
|
#75 | |
|
Leaky Injector
Join Date: Nov 2018
Location: Winnipeg, Manitoba, Canada
Posts: 55
Trader Rating: (0)
 Feedback Score: 0 reviews
|
Quote:
|
|
|
|

|
|
|
#76 |
|
Zilvia Junkie
 Join Date: Sep 2012
Location: LongBeach, CA
Age: 28
Posts: 371
Trader Rating: (4)
     Feedback Score: 4 reviews
|
More gussets !
Started by removing and replacing the lower support tube since it was interfering with radiator clearance. Now I’ve got good fitment! You’ll notice the strut bar design I went with is welded permanent. After cutting so much of the sheet metal off the lower strut towers they lost a good amount of structure. So adding this type of strut bar tying in with the firewall will add all the structure back needed 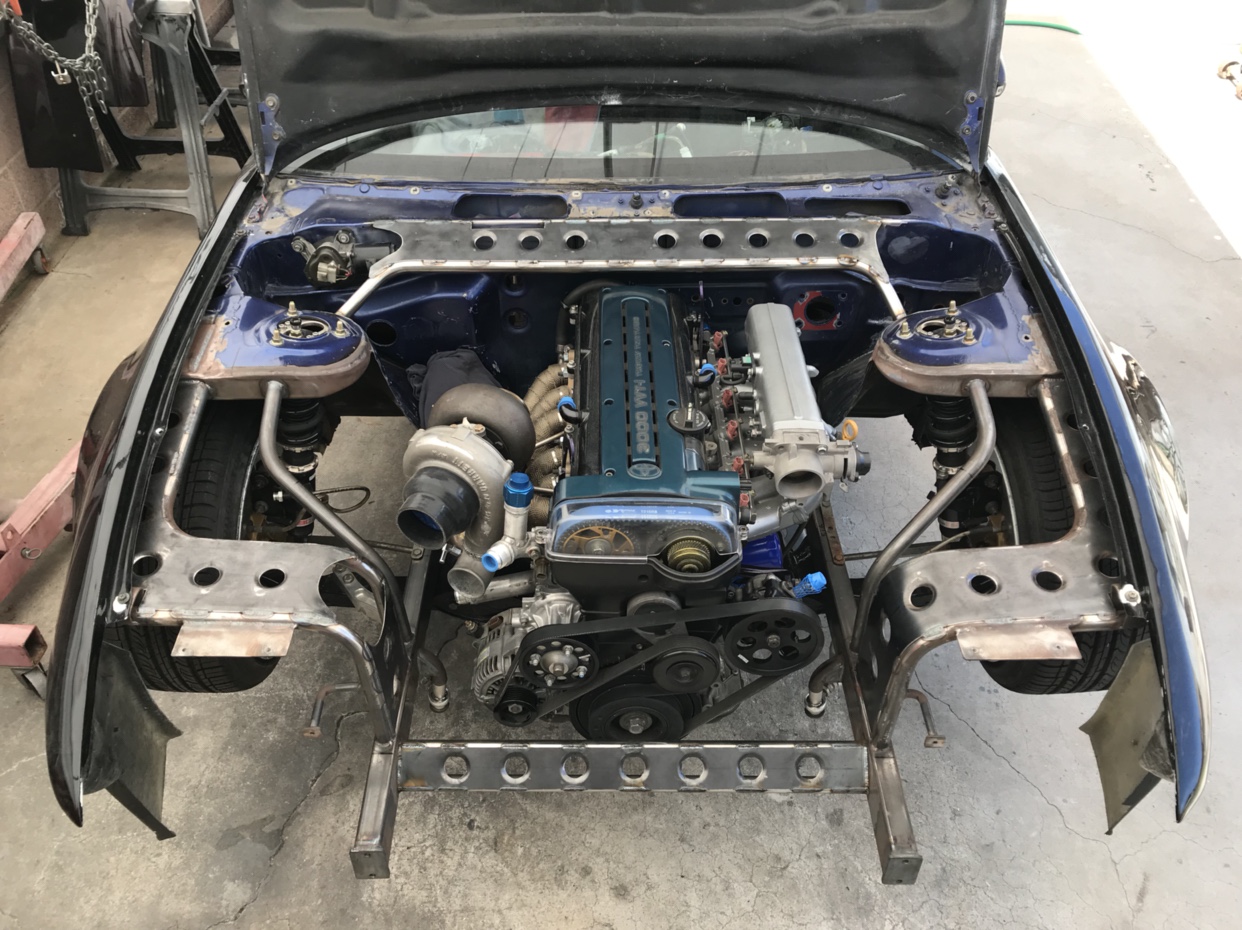 I notched the gusset to be able to view the stamped vin number. The actual vin plate will be riveted onto the gusset right where the stock location would be. Not exactly legal but the design of the gusset wouldn’t look right if it stopped before the vin plate so oh well it’ll look stock when everything’s painted 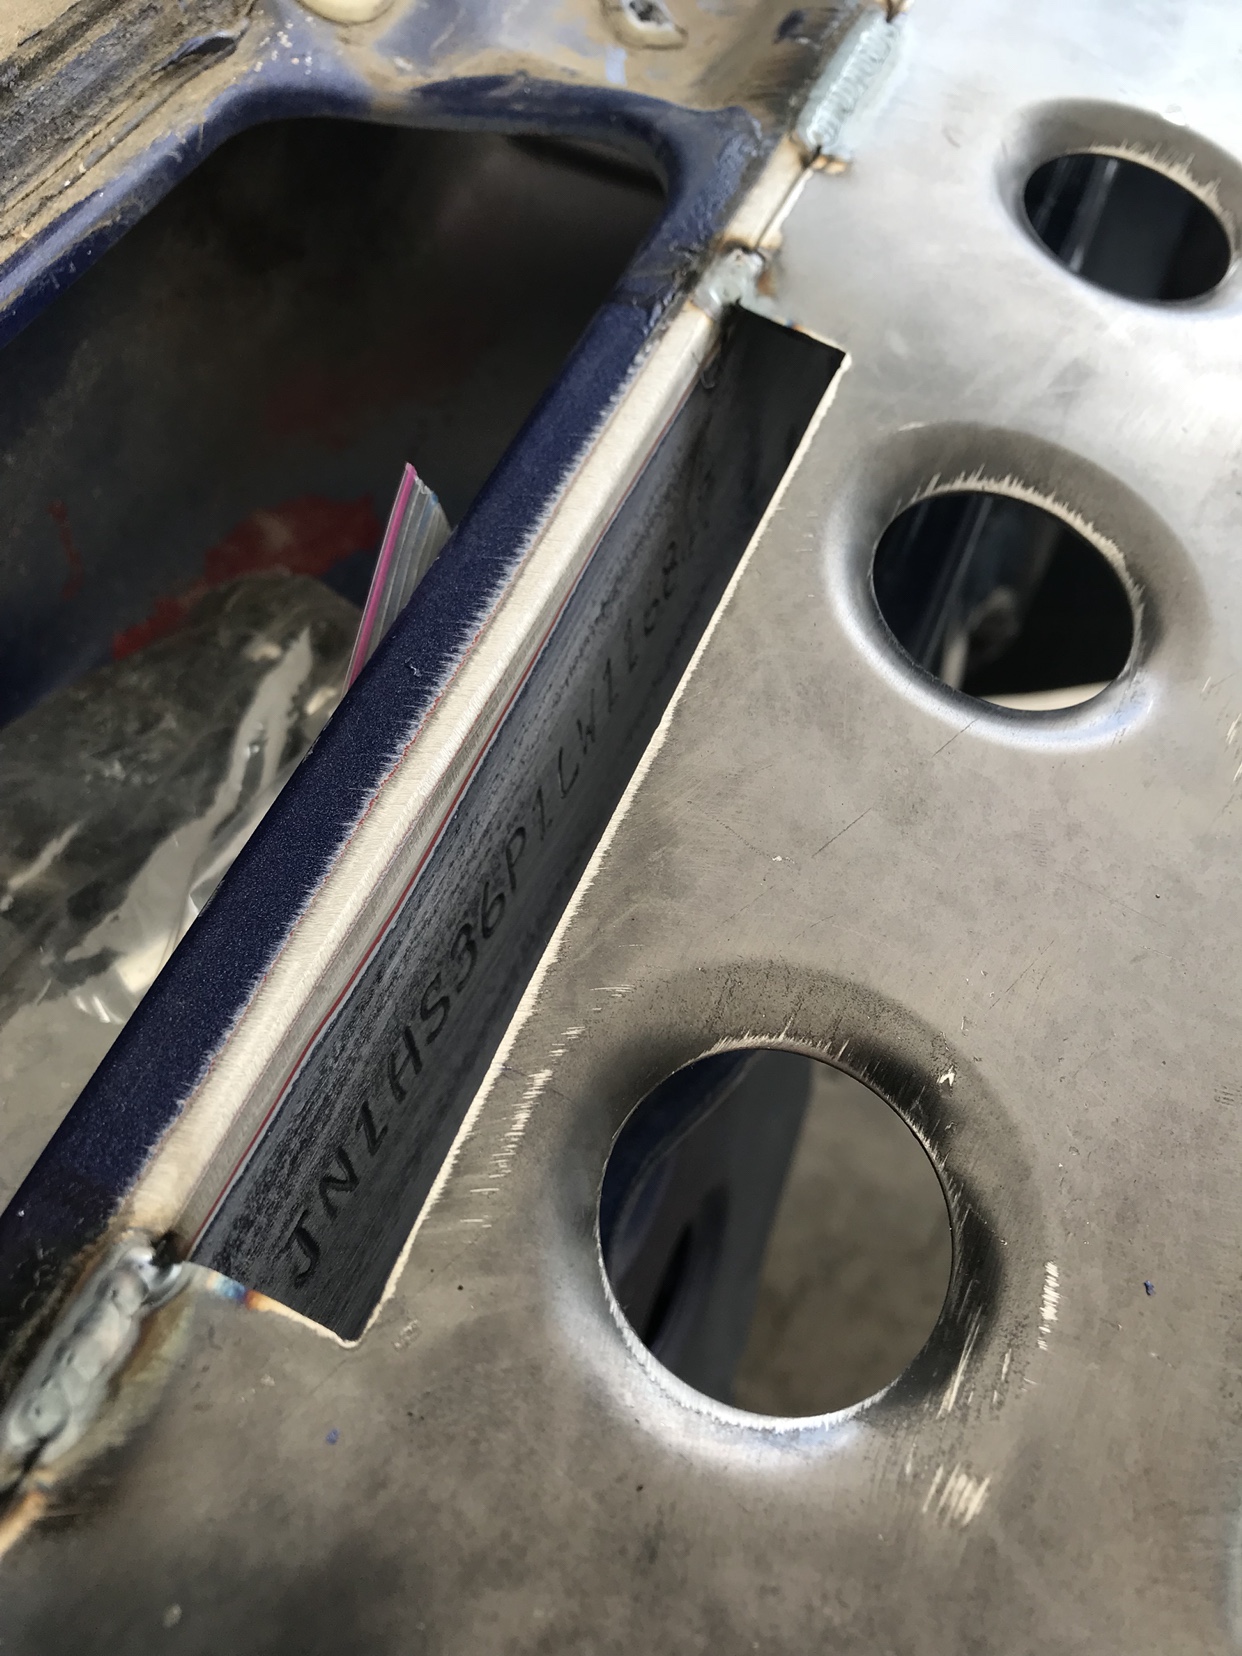 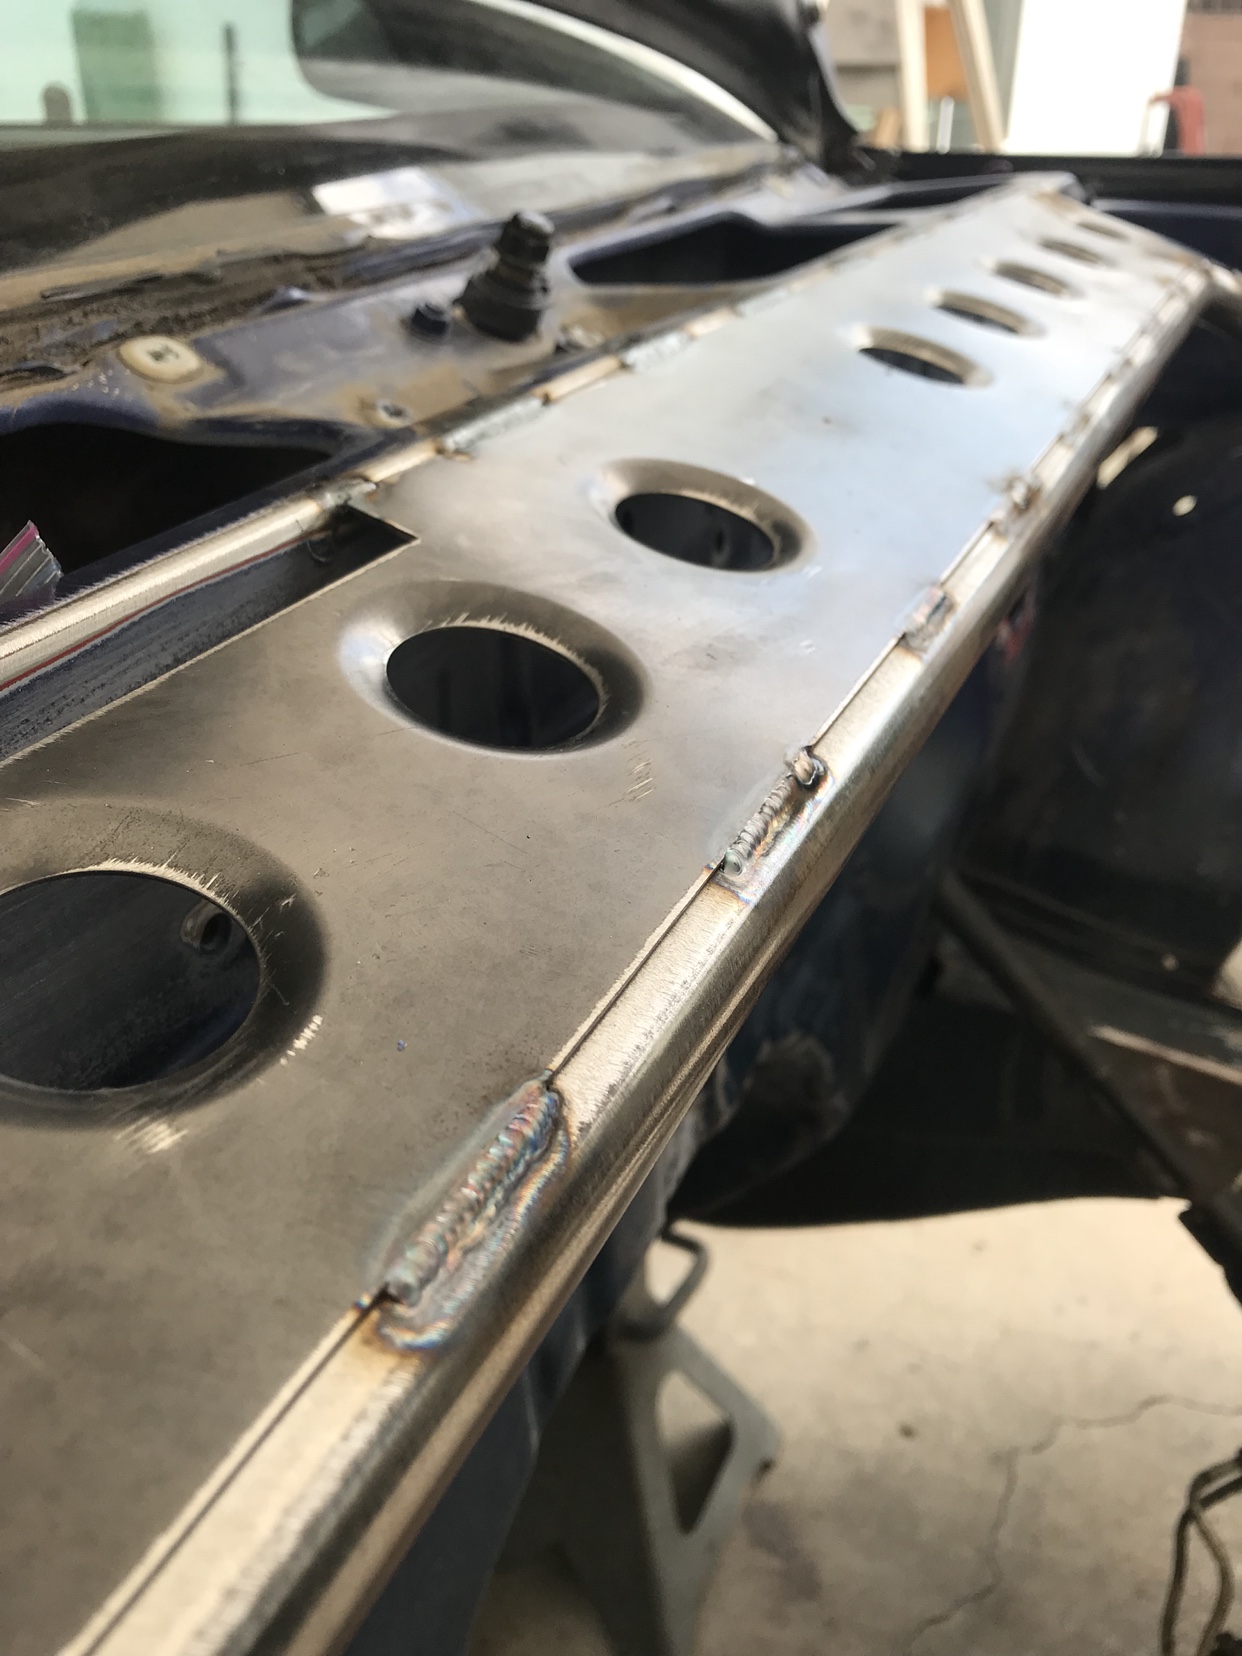 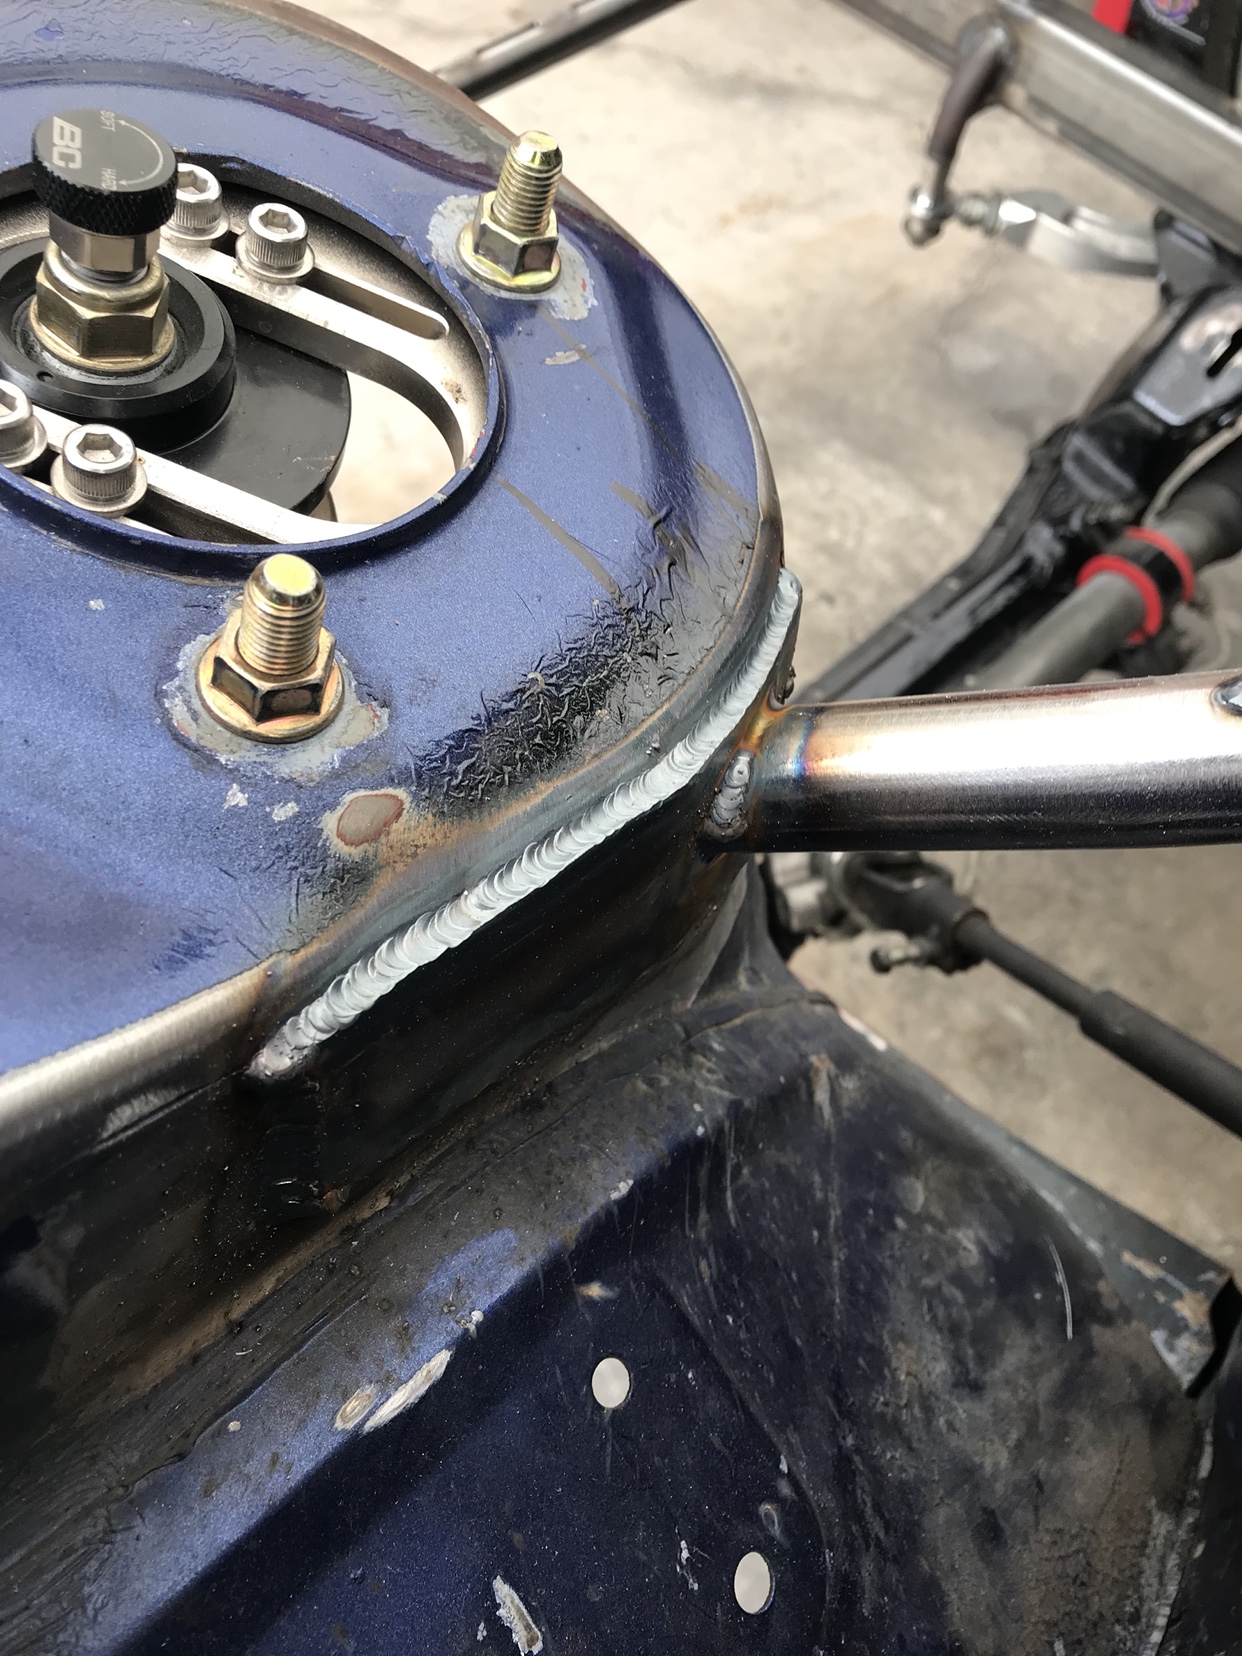 I’ve officially gotten the radiator mounted. I’ll go into that further on the next post 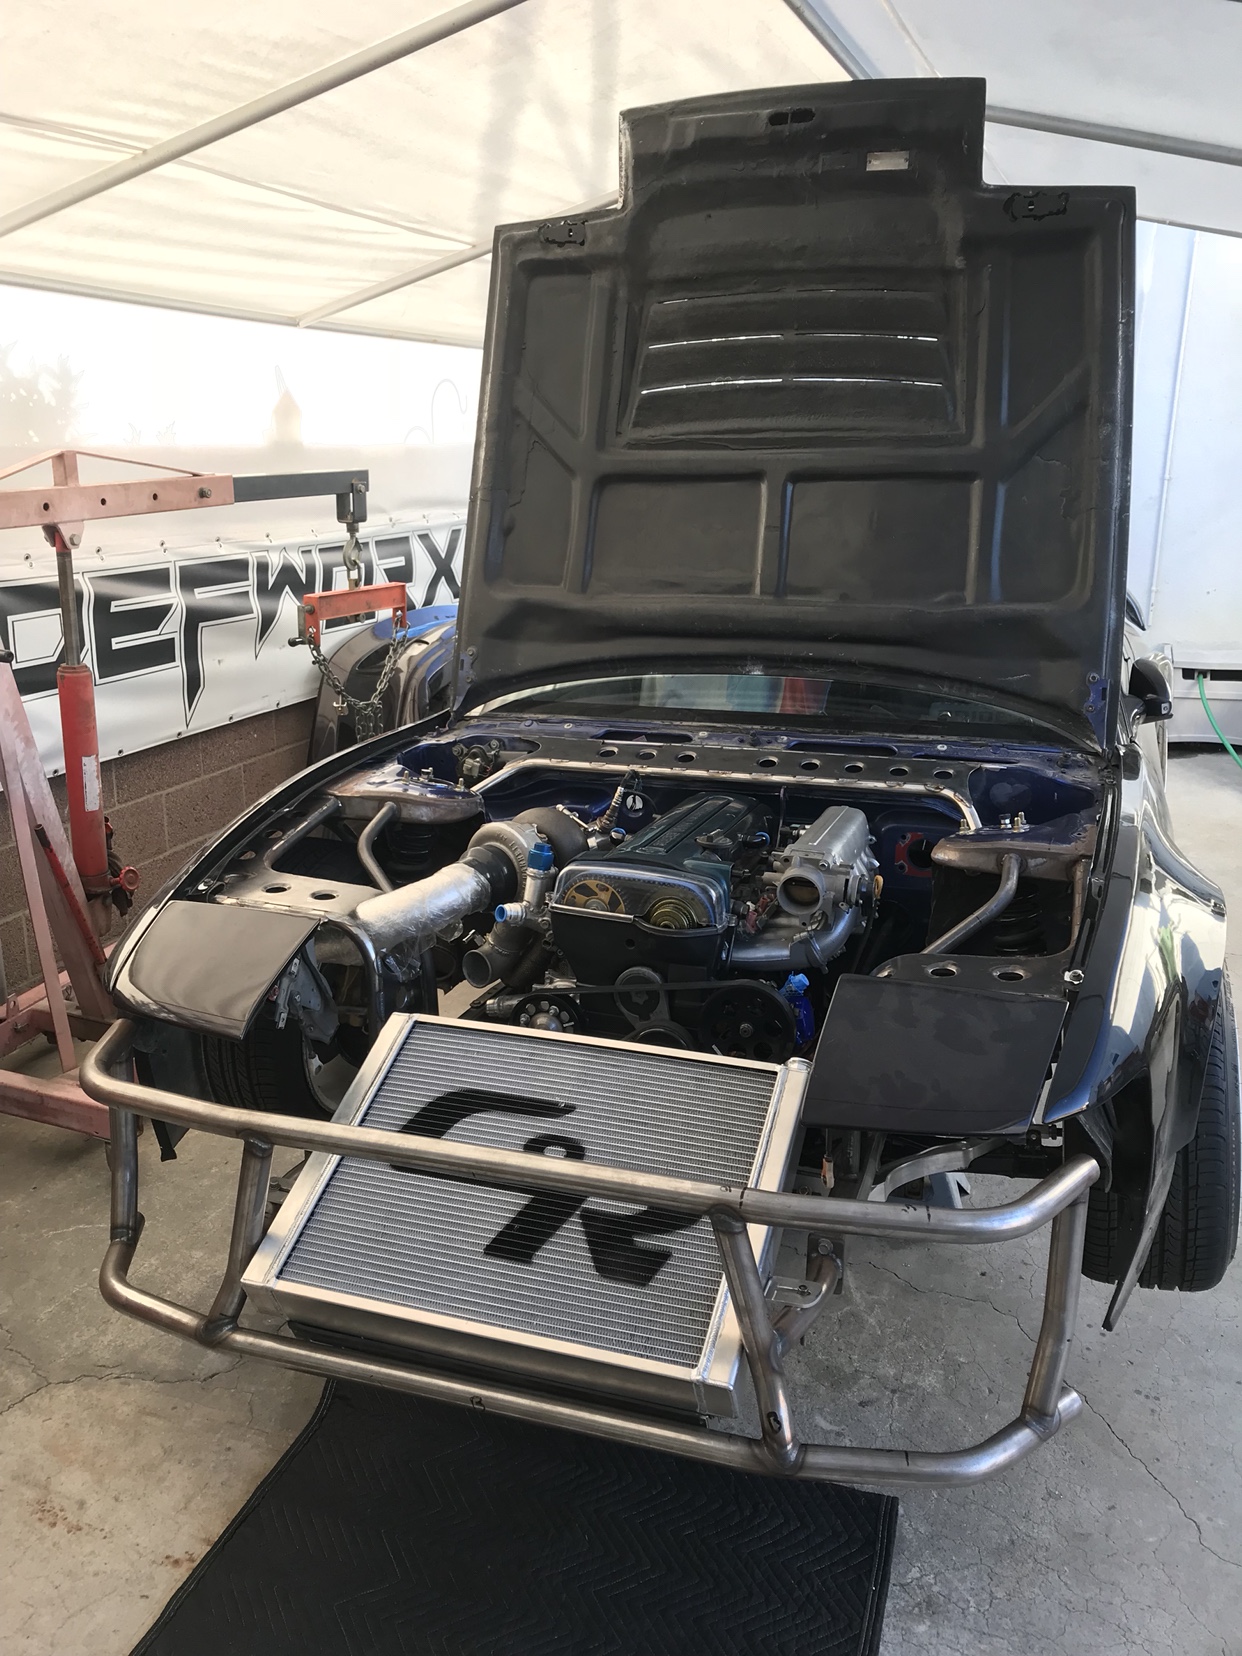 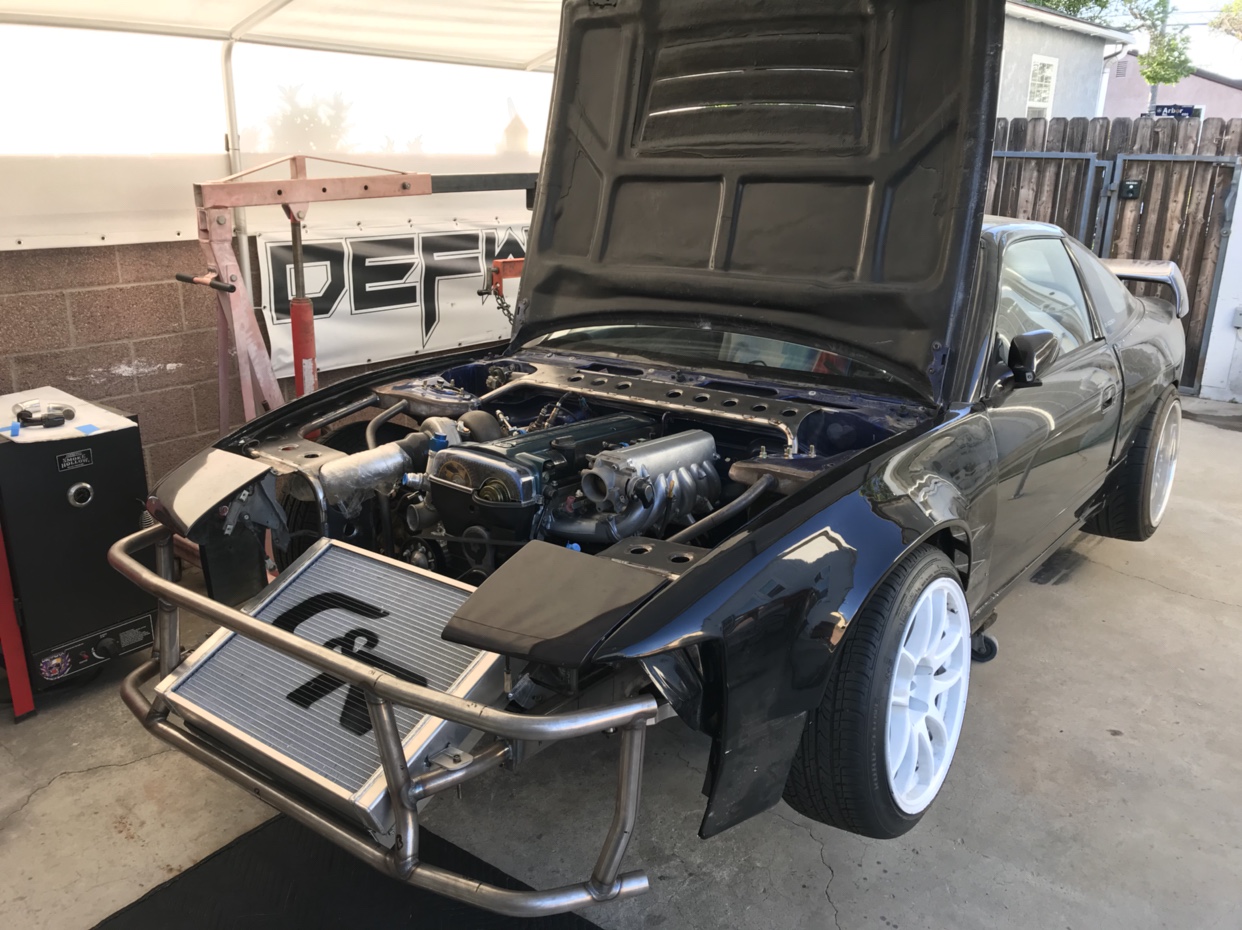 Sent from my iPhone using Tapatalk |
|
|

|
|
|
#78 | |
|
Zilvia Junkie
 Join Date: Sep 2012
Location: LongBeach, CA
Age: 28
Posts: 371
Trader Rating: (4)
     Feedback Score: 4 reviews
|
Quote:
For us any “tampering” can be a federal crime. Even just removing it for paint and reinstalling isn’t ok technically. I doubt most police would enforce it though but the states referees we have here would instantly Sent from my iPhone using Tapatalk |
|
|
|

|
|
|
#79 |
|
Zilvia Junkie
 Join Date: Sep 2012
Location: LongBeach, CA
Age: 28
Posts: 371
Trader Rating: (4)
     Feedback Score: 4 reviews
|
I got the intercooler all mounted up now as well as the intake tube that’ll sit behind the bumper opening for fresh cold air
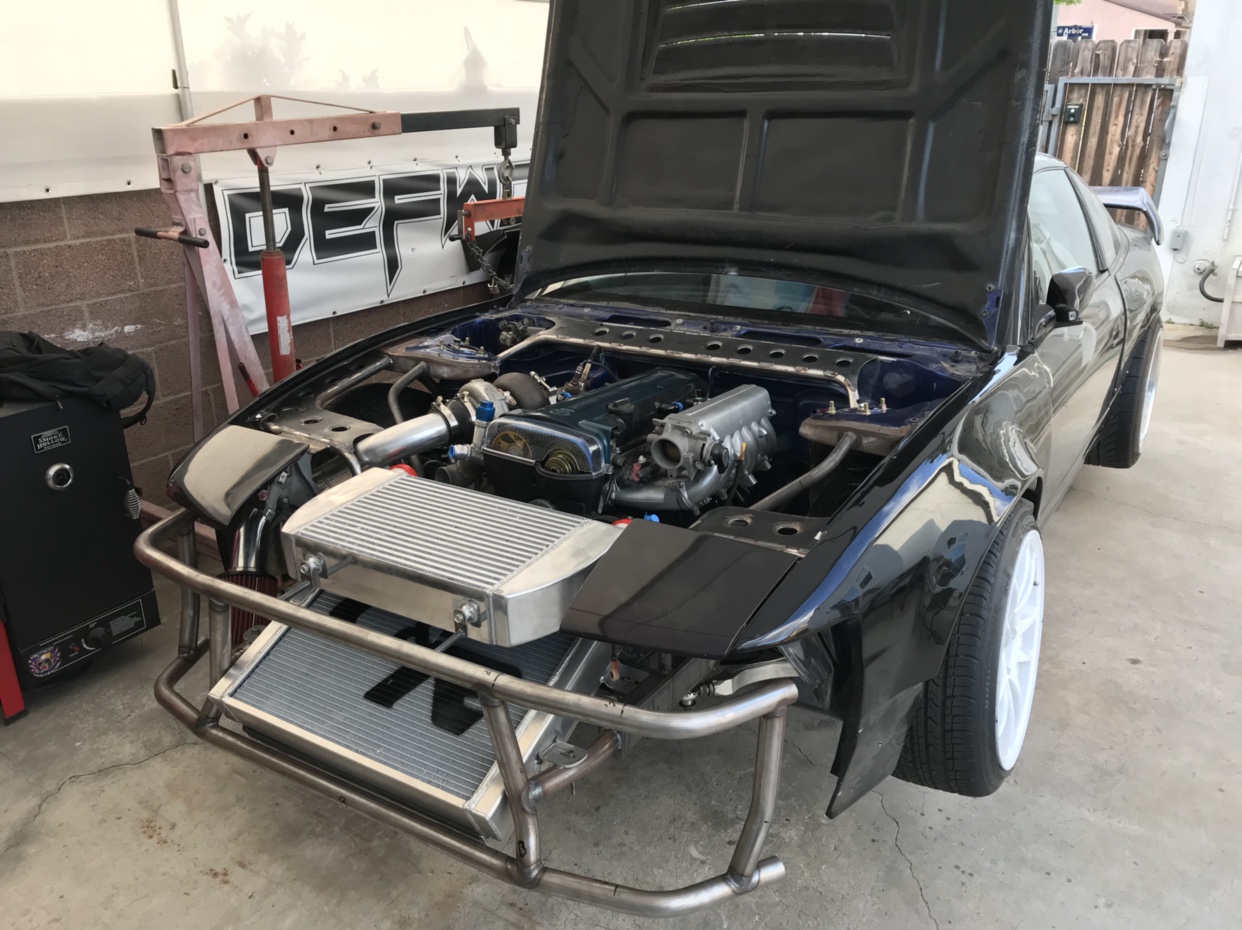 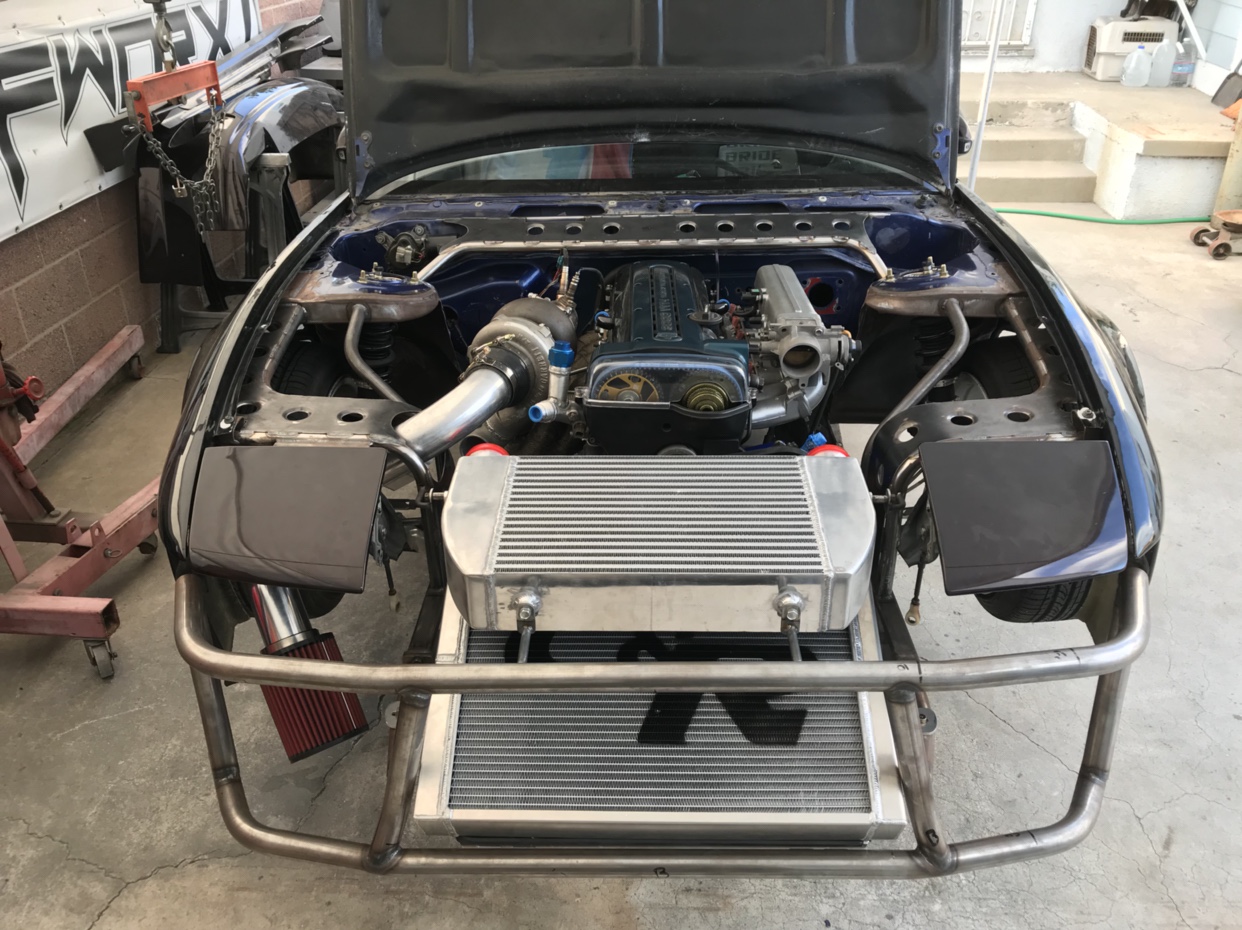 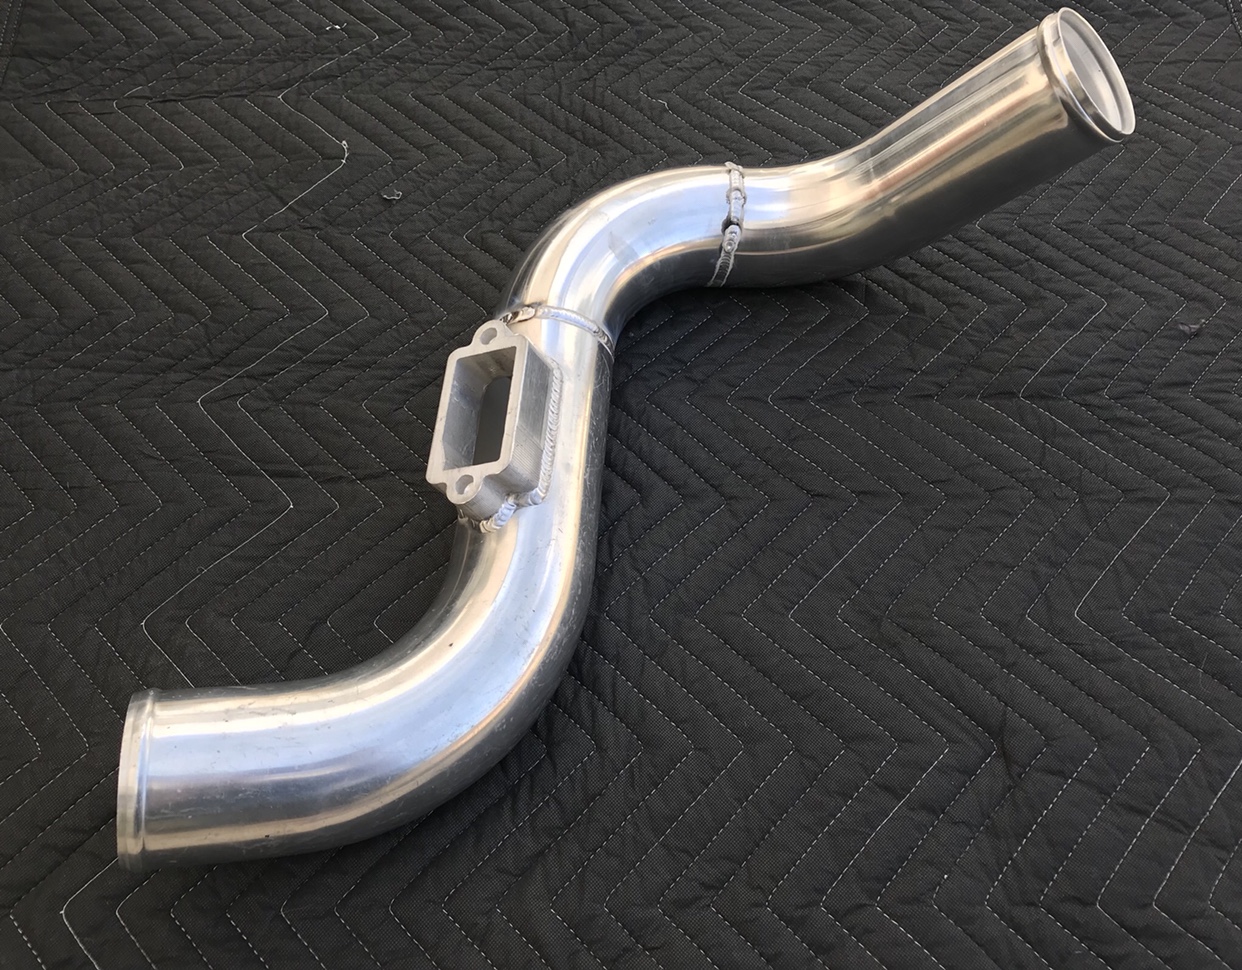 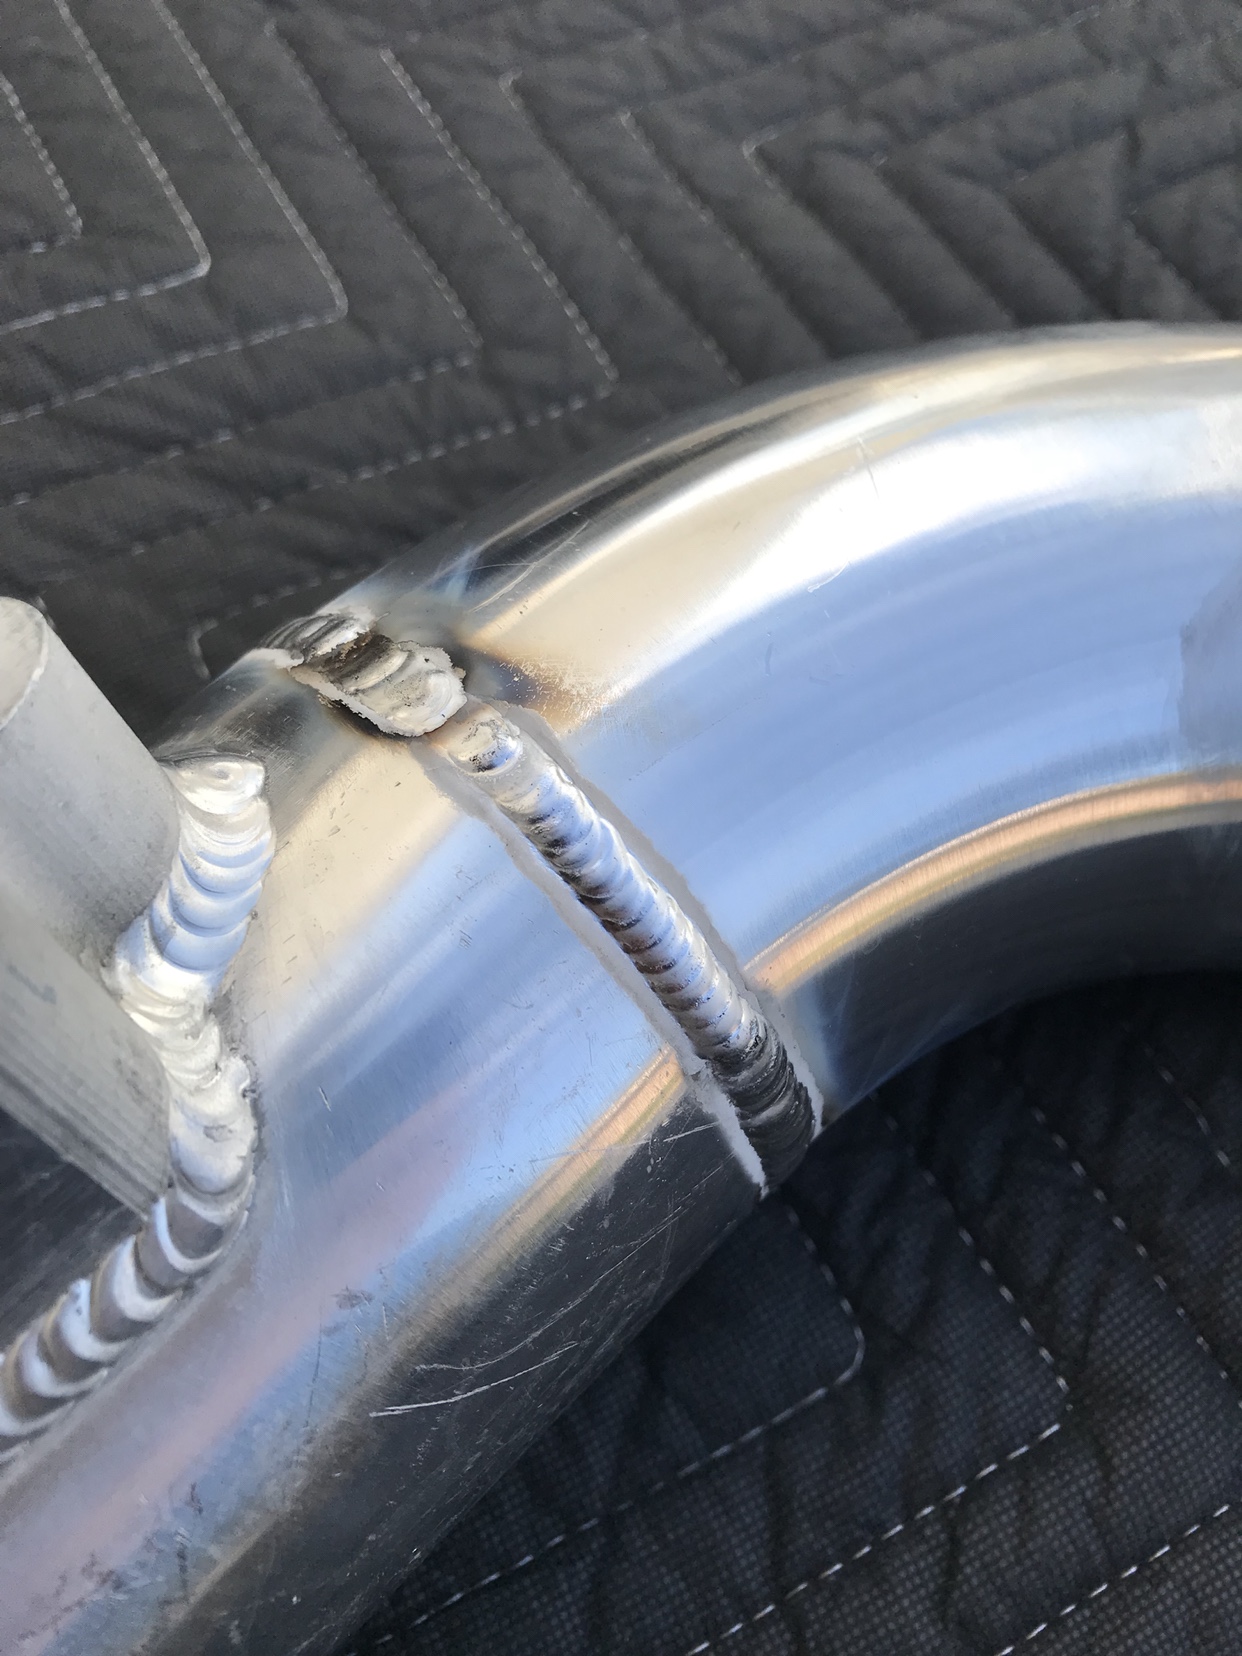 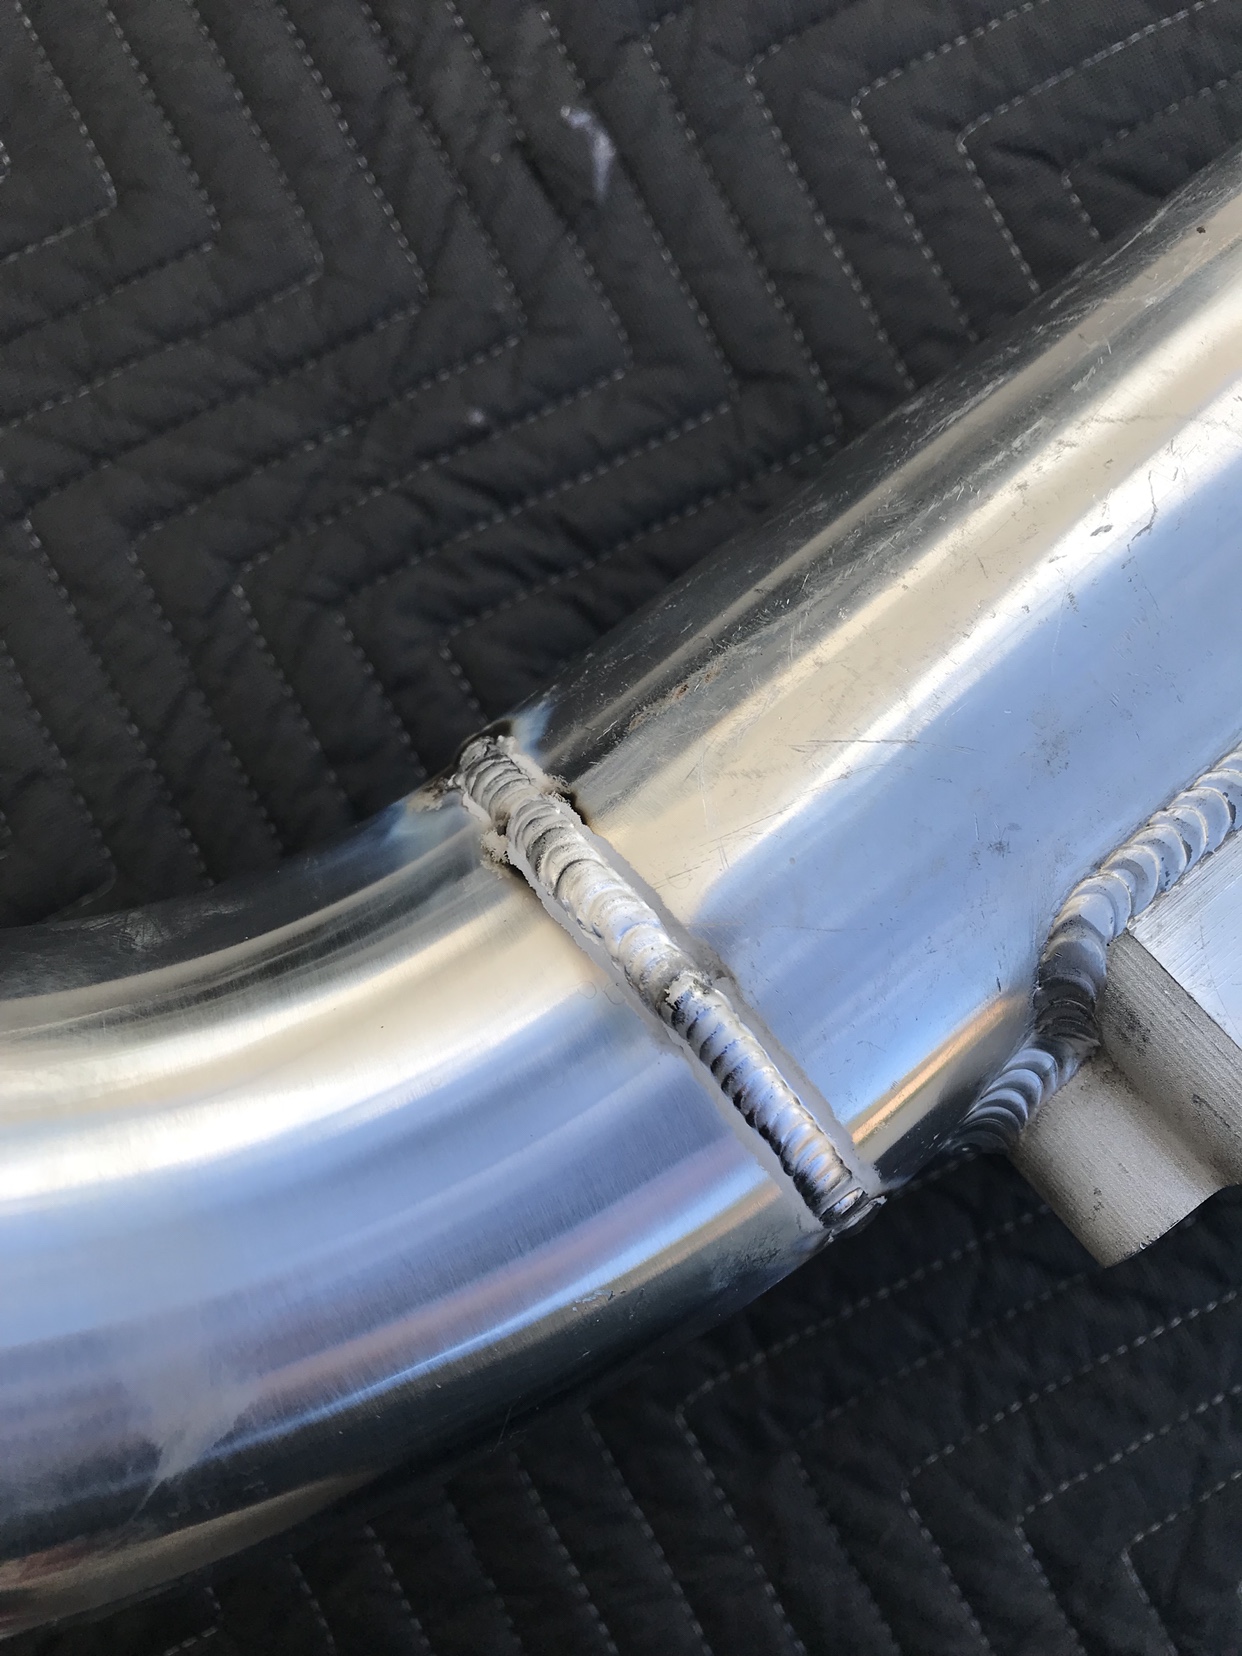 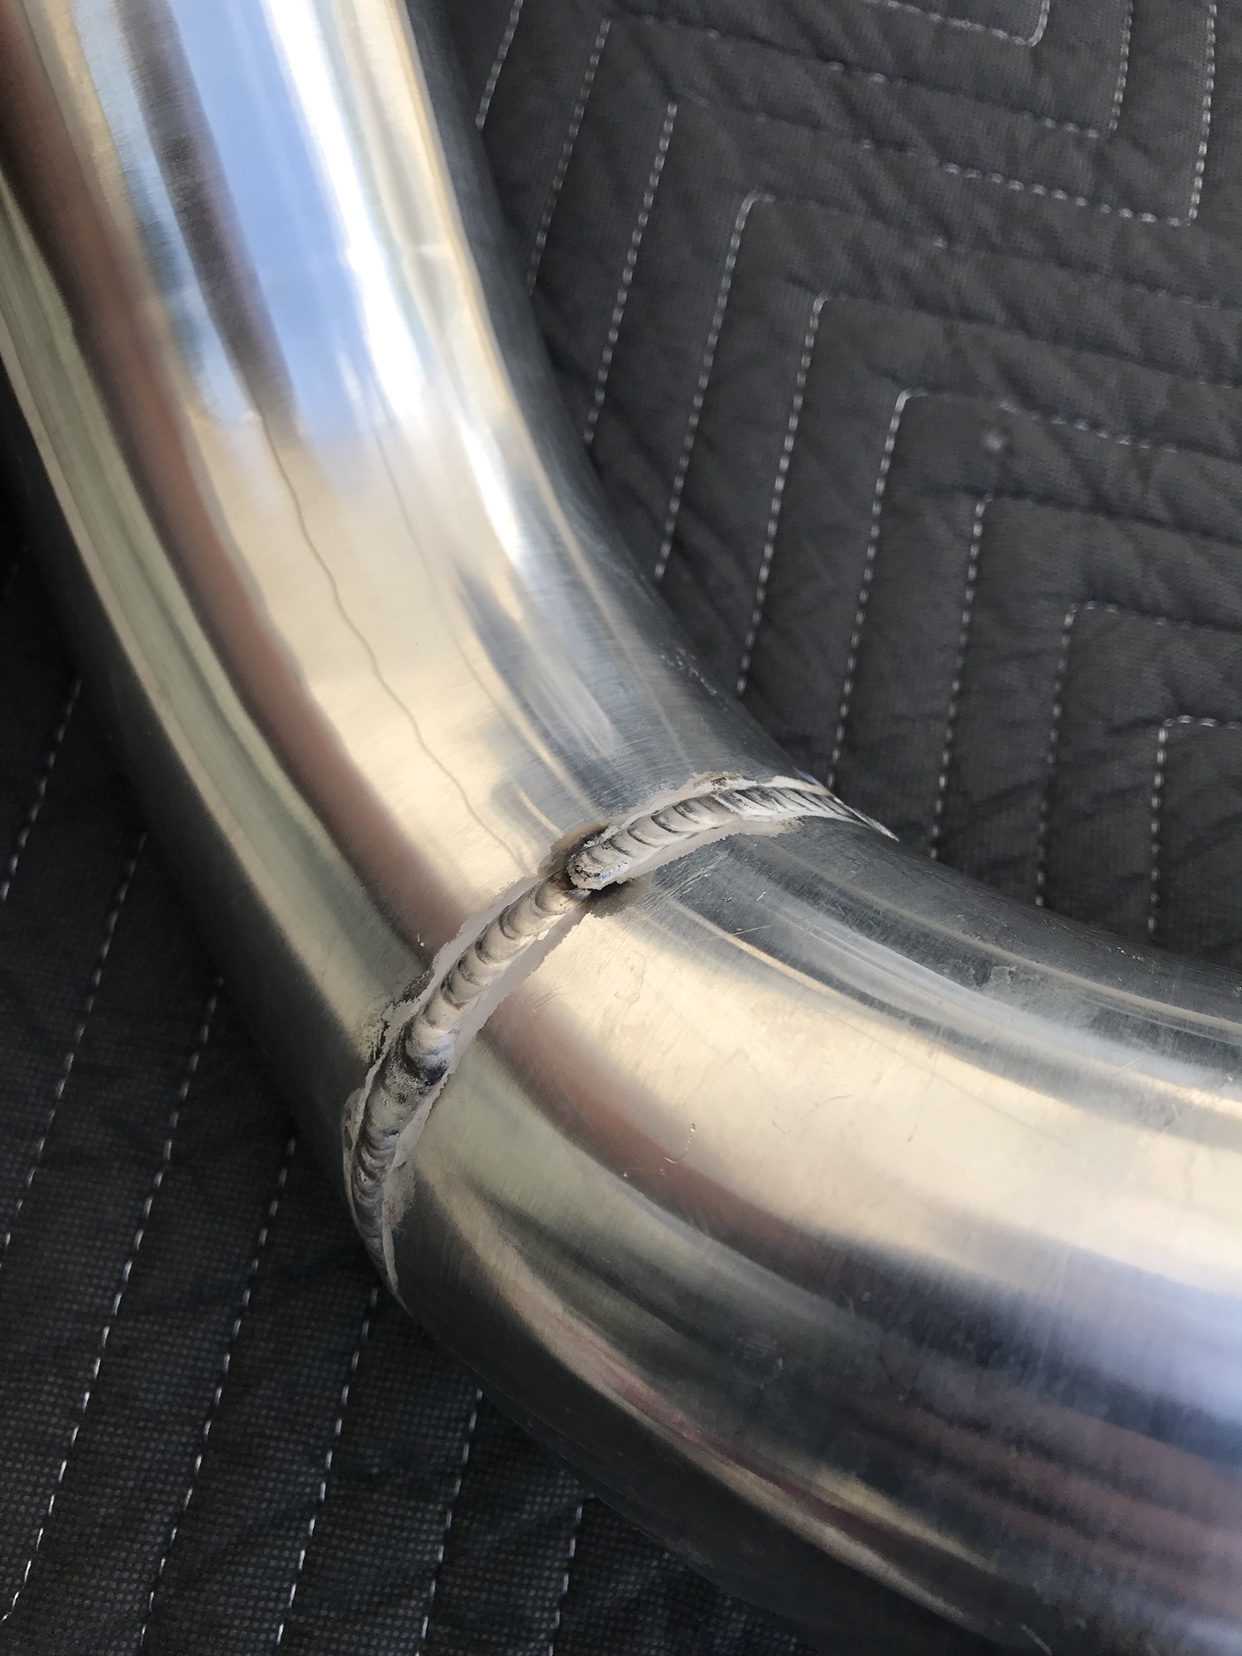 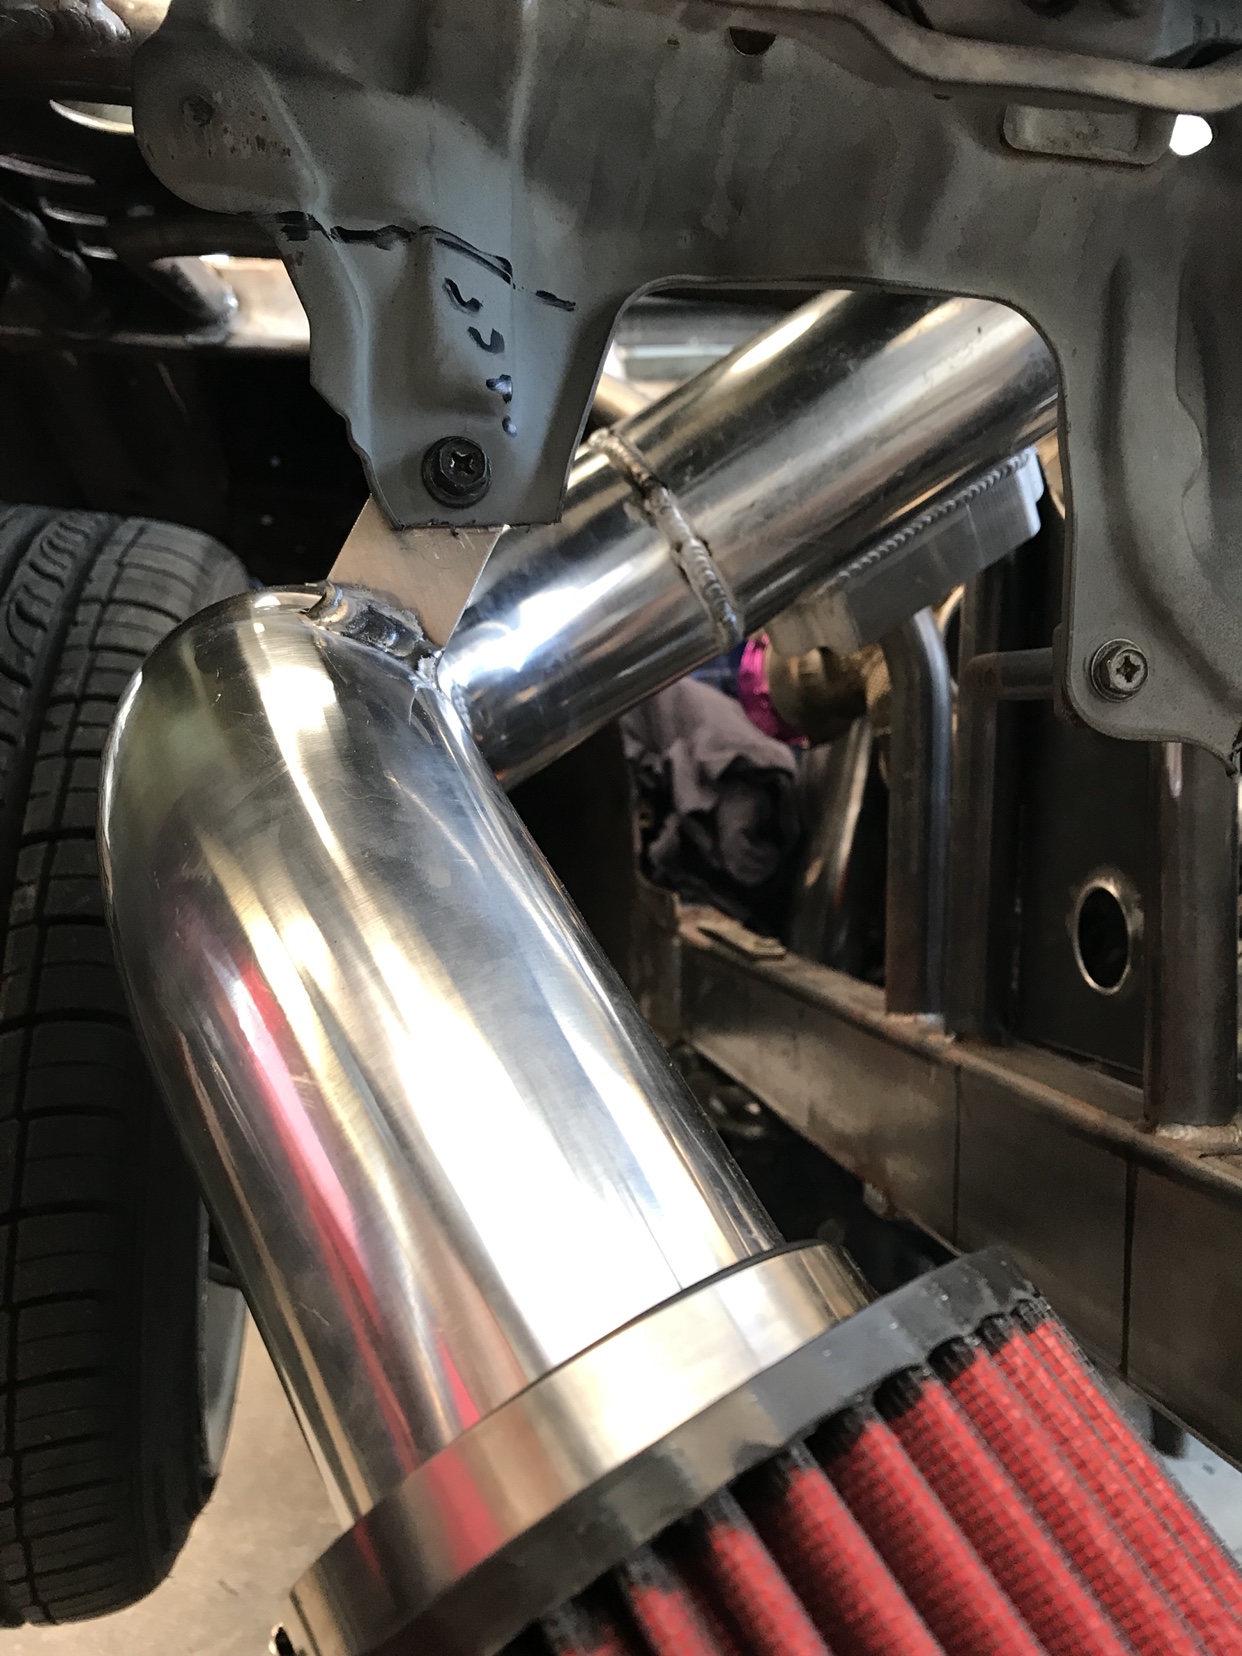 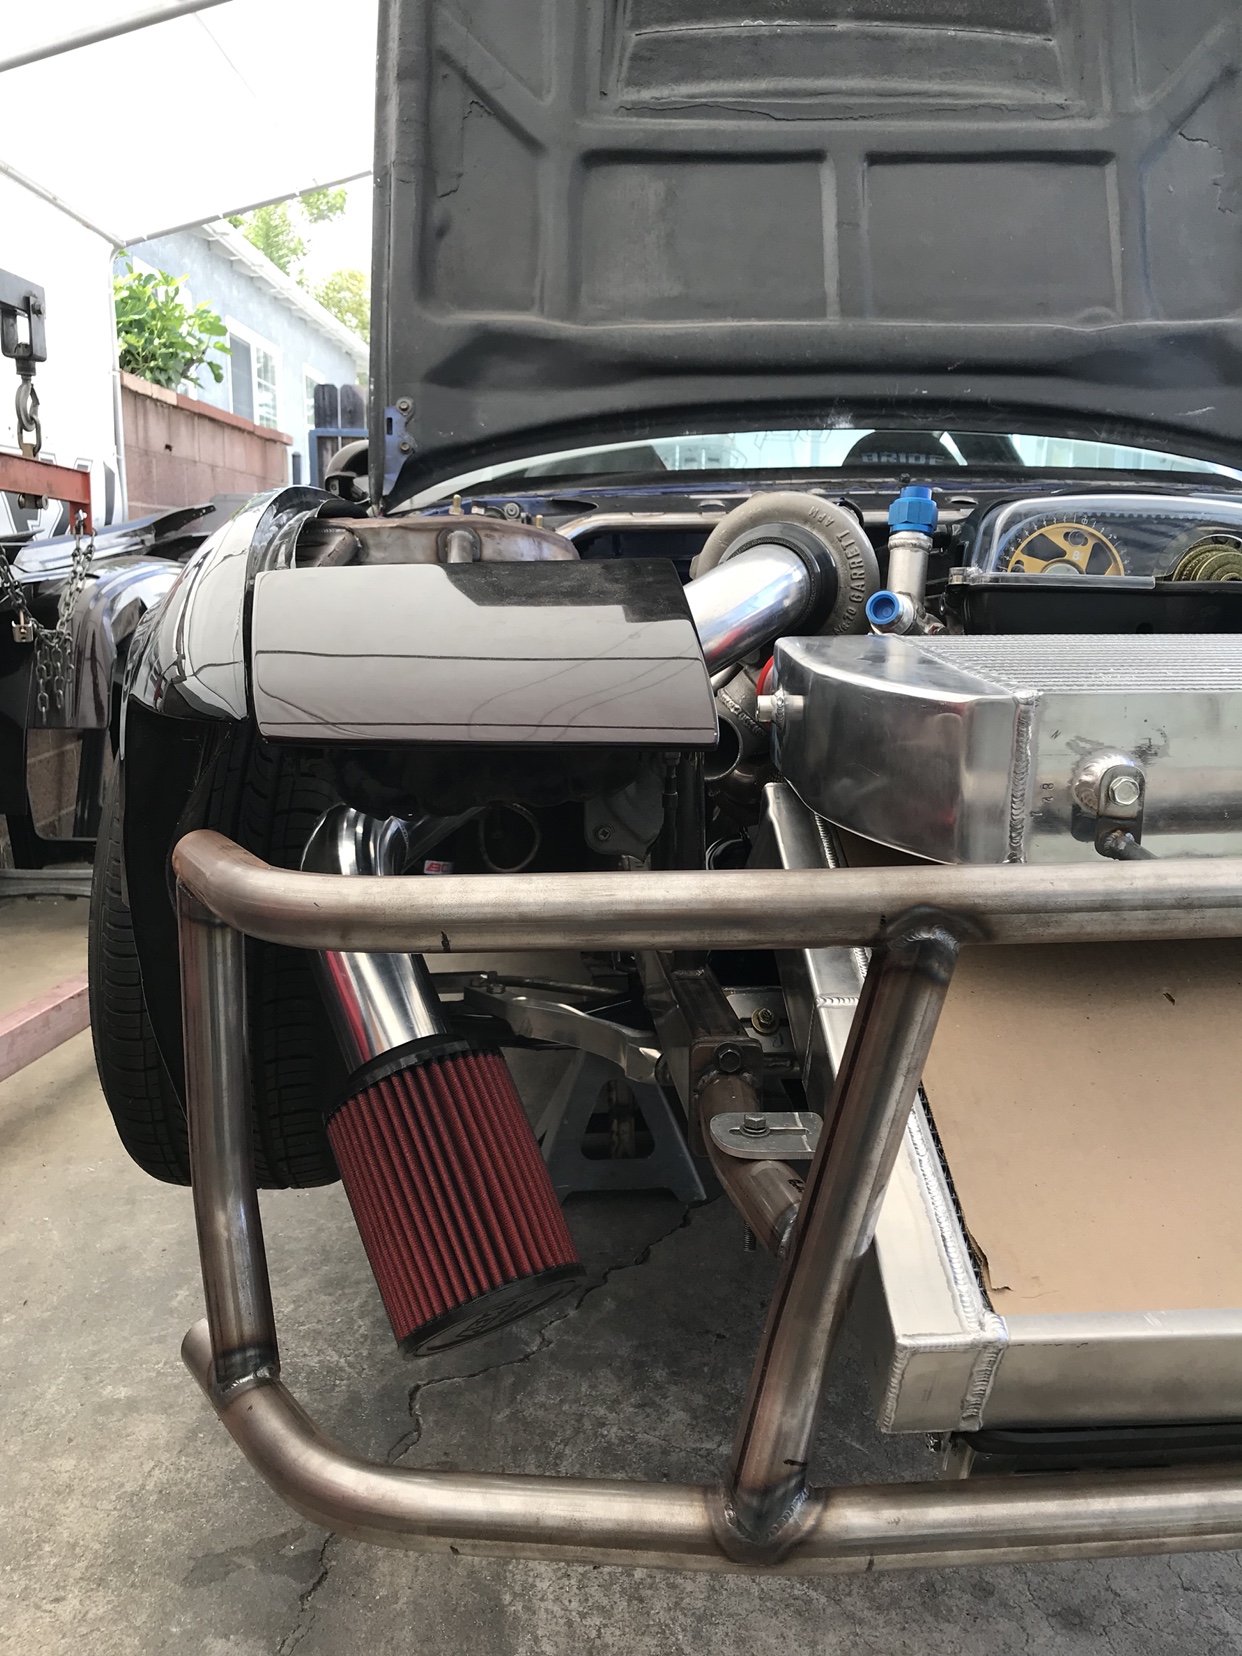 Here’s a few shots of how the radiator and intercooler are mounted 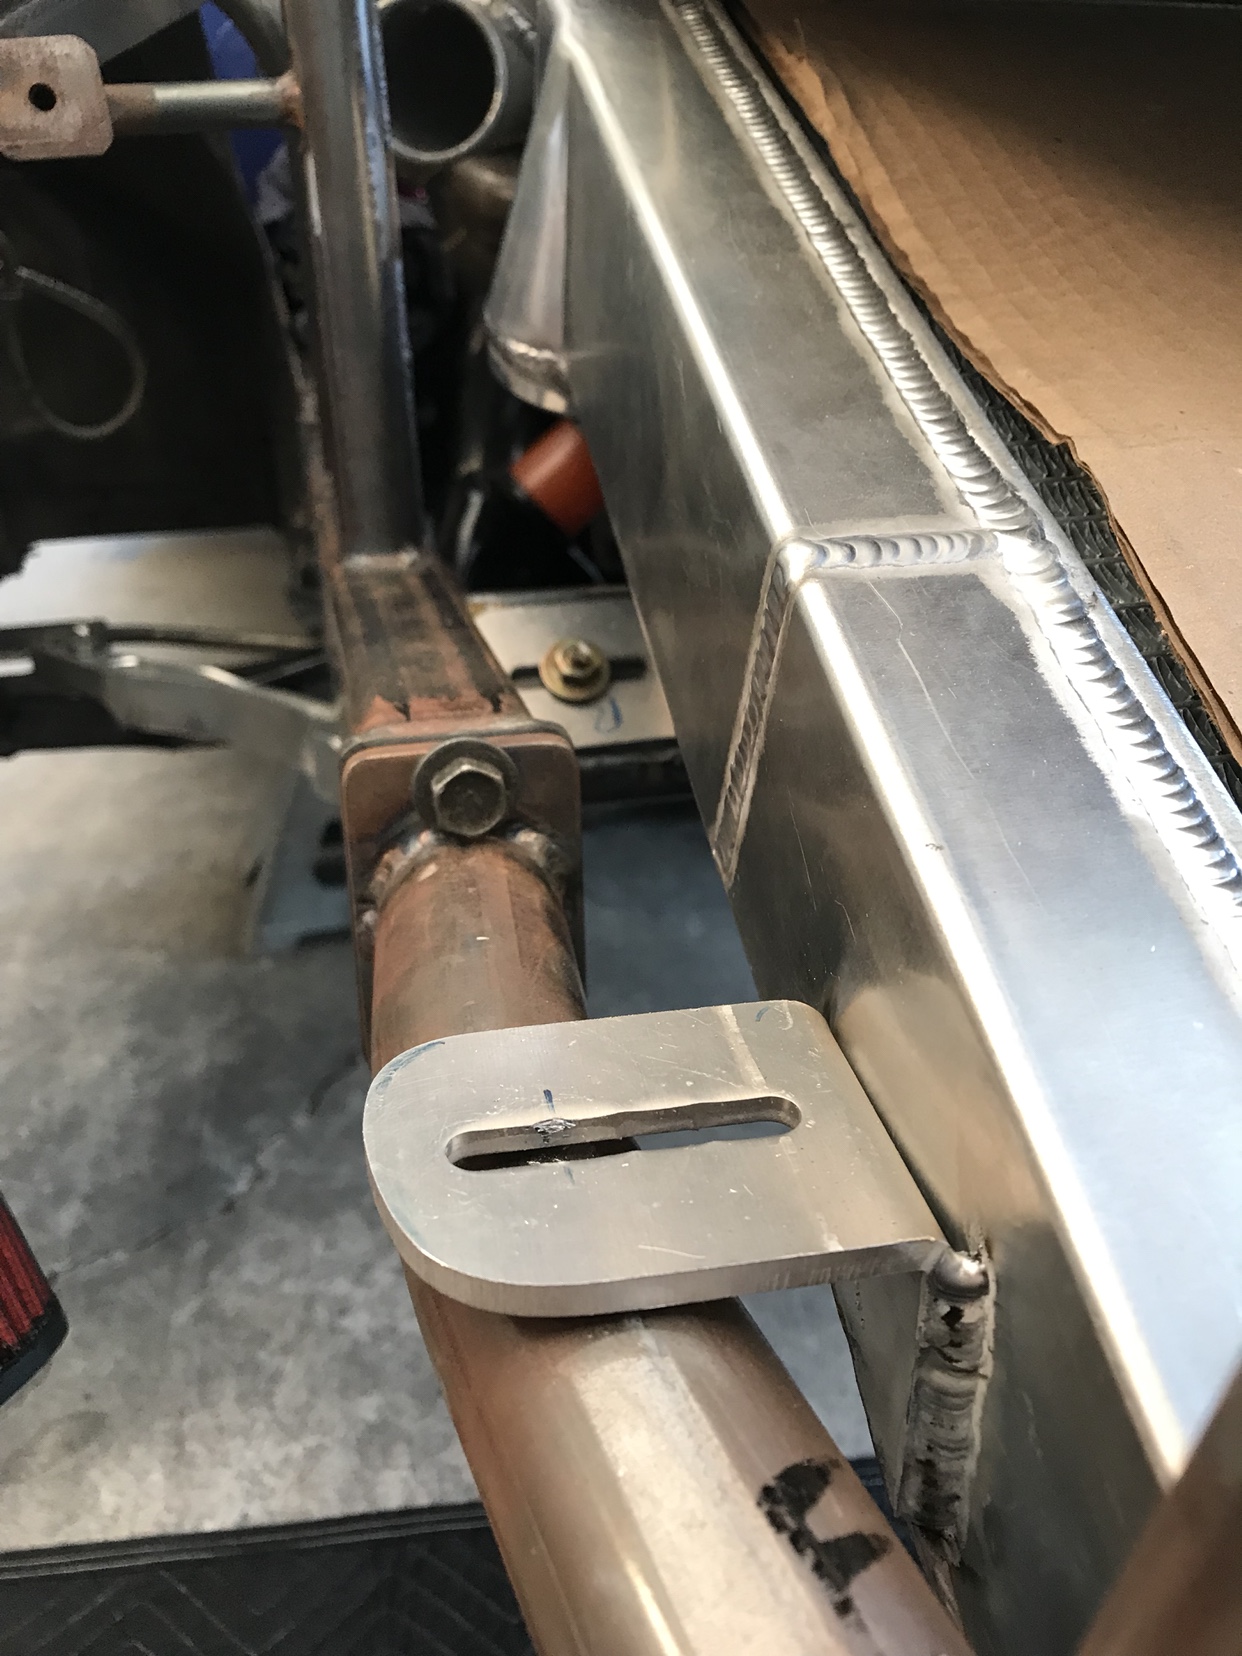 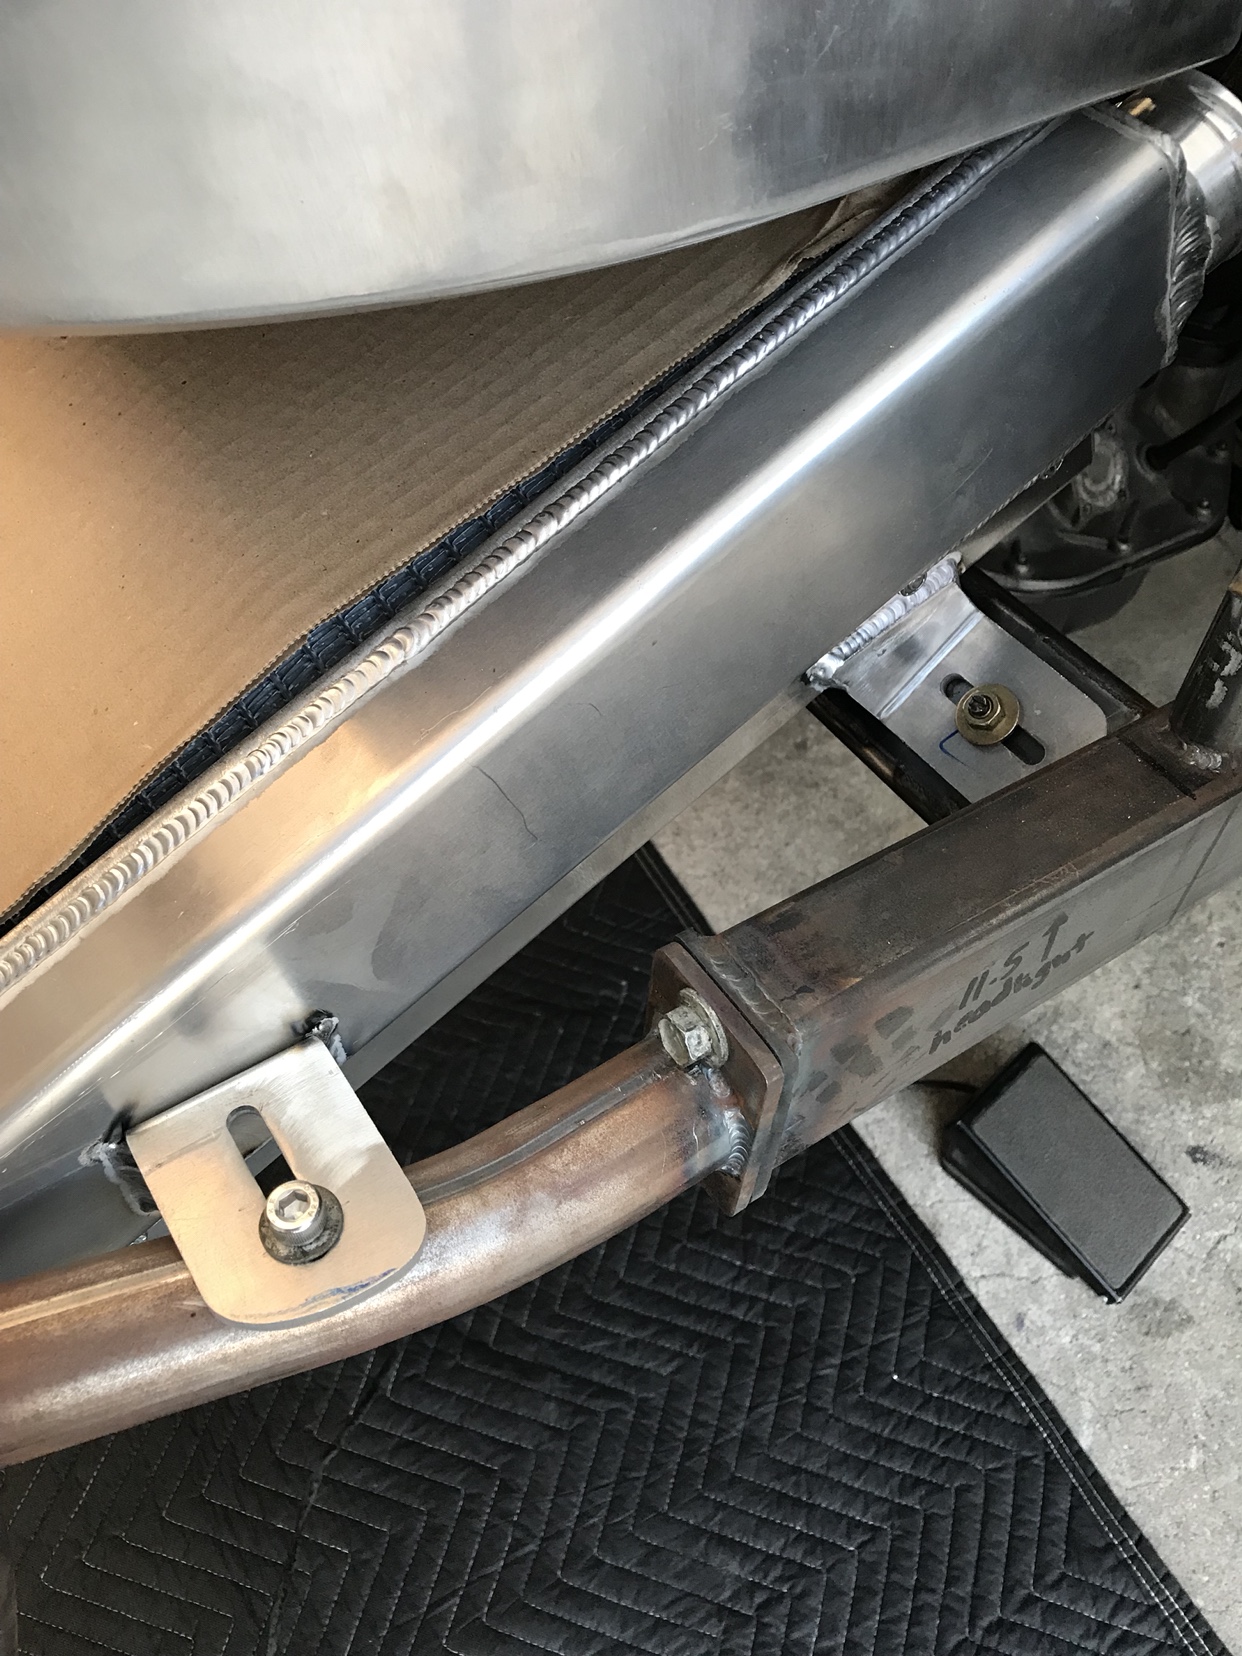 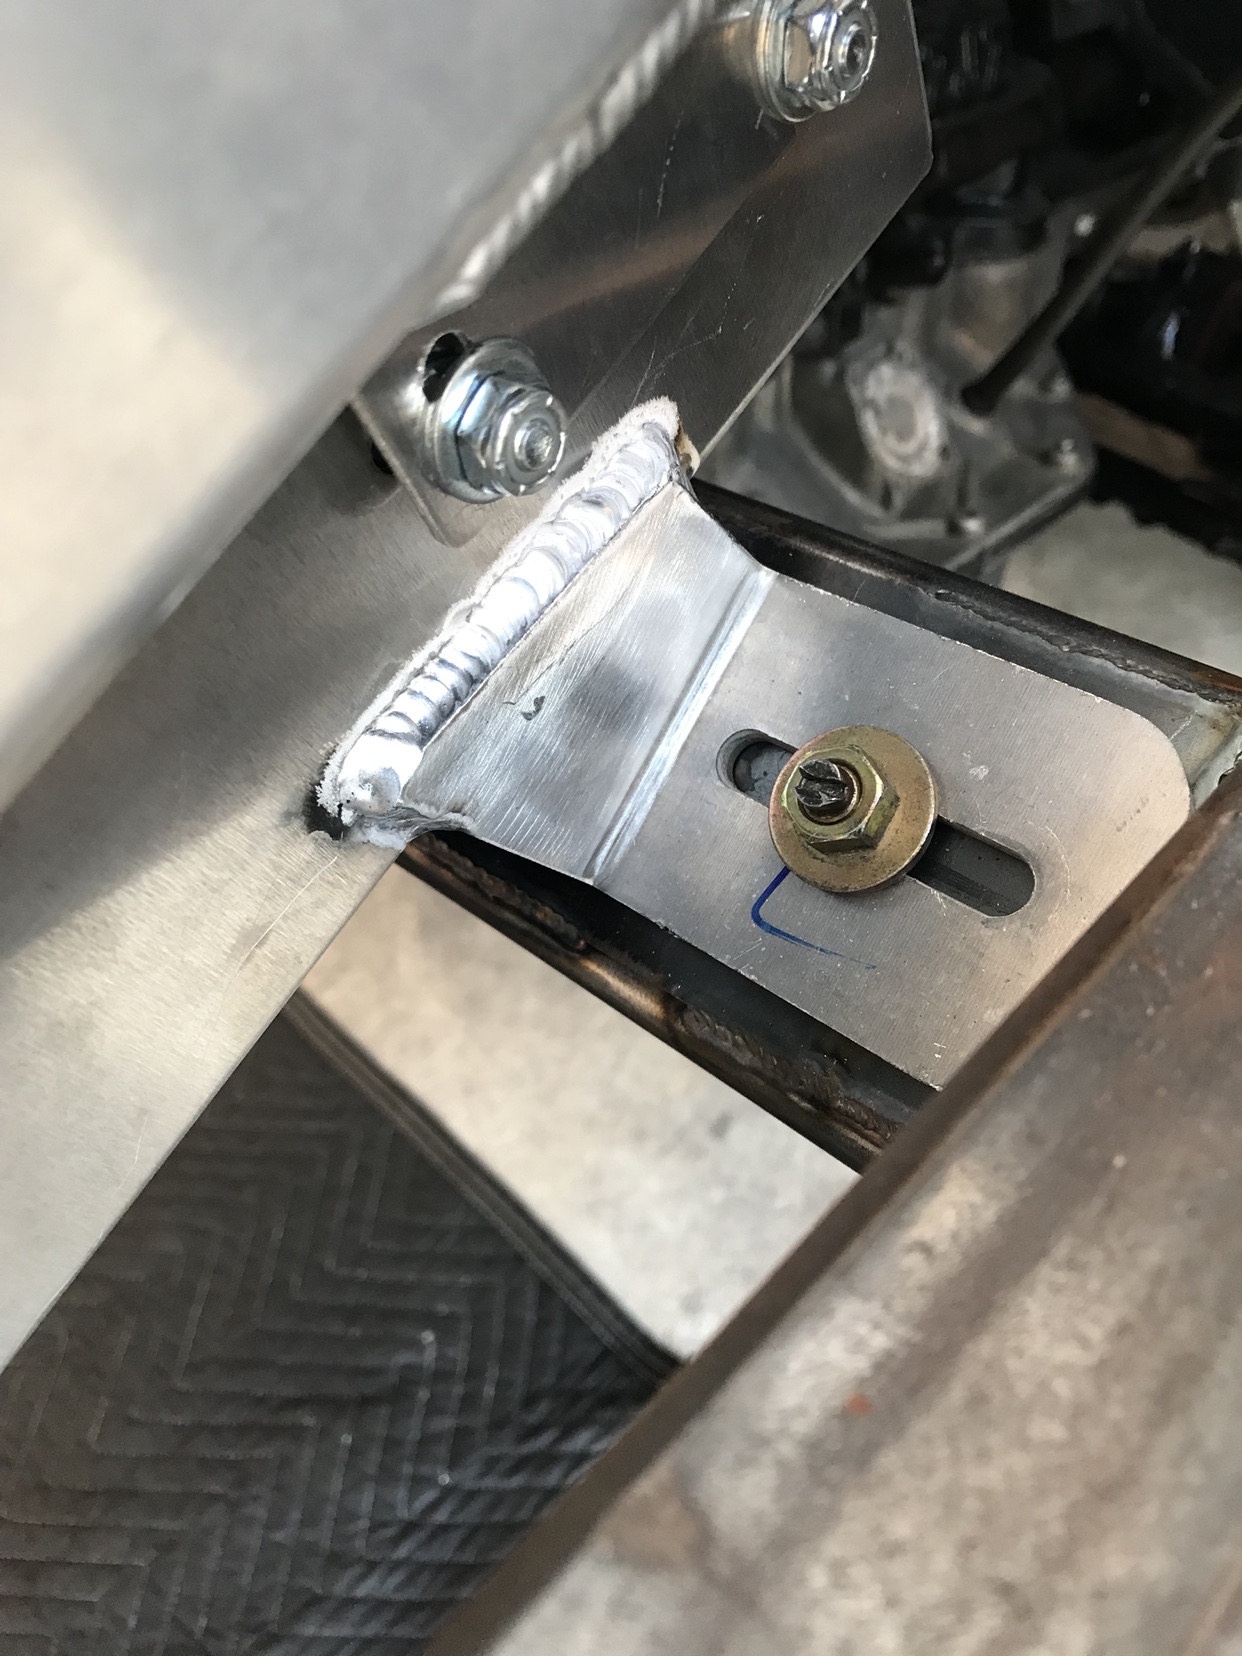 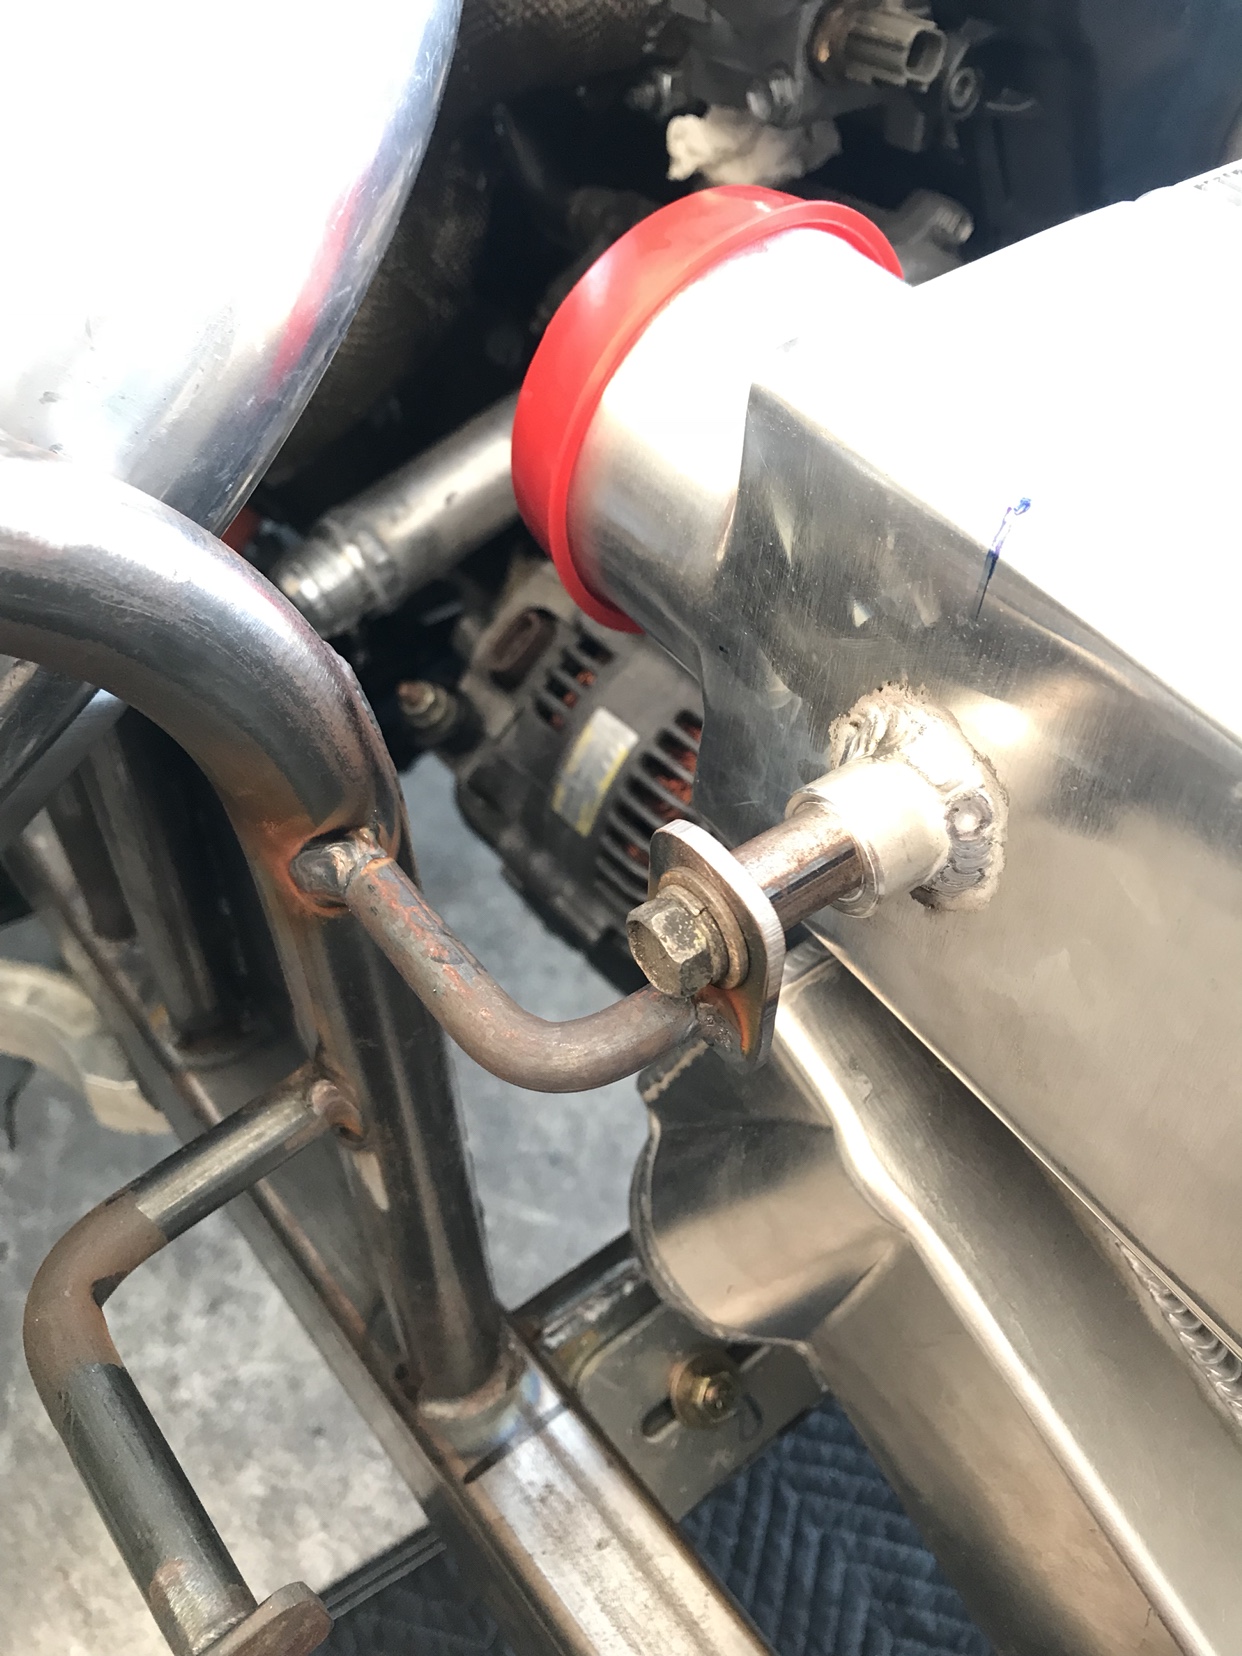 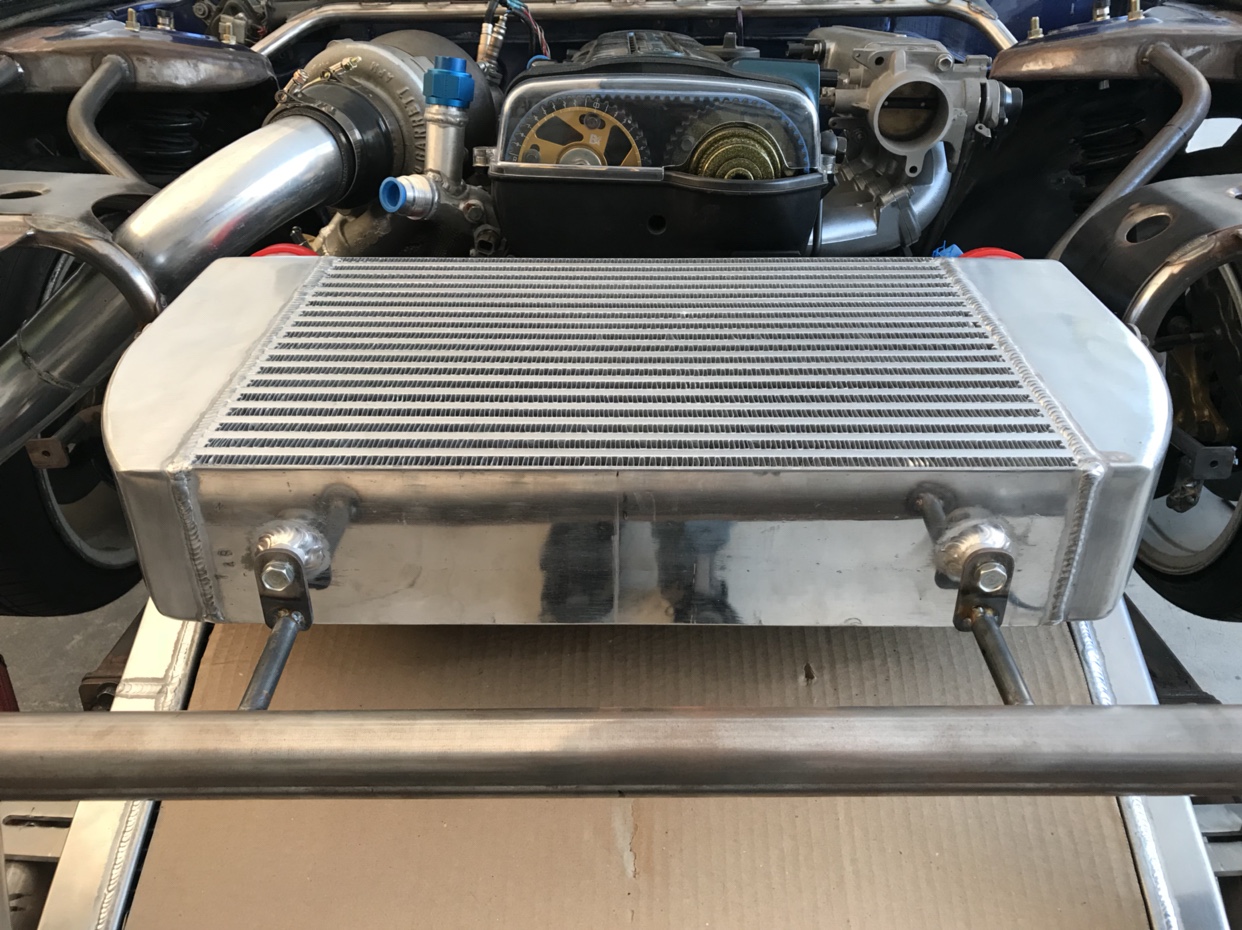 Sent from my iPhone using Tapatalk |
|
|

|
|
|
#80 |
|
Zilvia Junkie
 Join Date: Sep 2012
Location: LongBeach, CA
Age: 28
Posts: 371
Trader Rating: (4)
     Feedback Score: 4 reviews
|
Intercooler piping all finished up. I decided to use HDi locking clamps for both aesthetics and performance as they are rated for over the psi I will ever run while being WAY easier to disconnect than traditional couplers and clamps
I will be running a tial Bov directly off the throttle body location 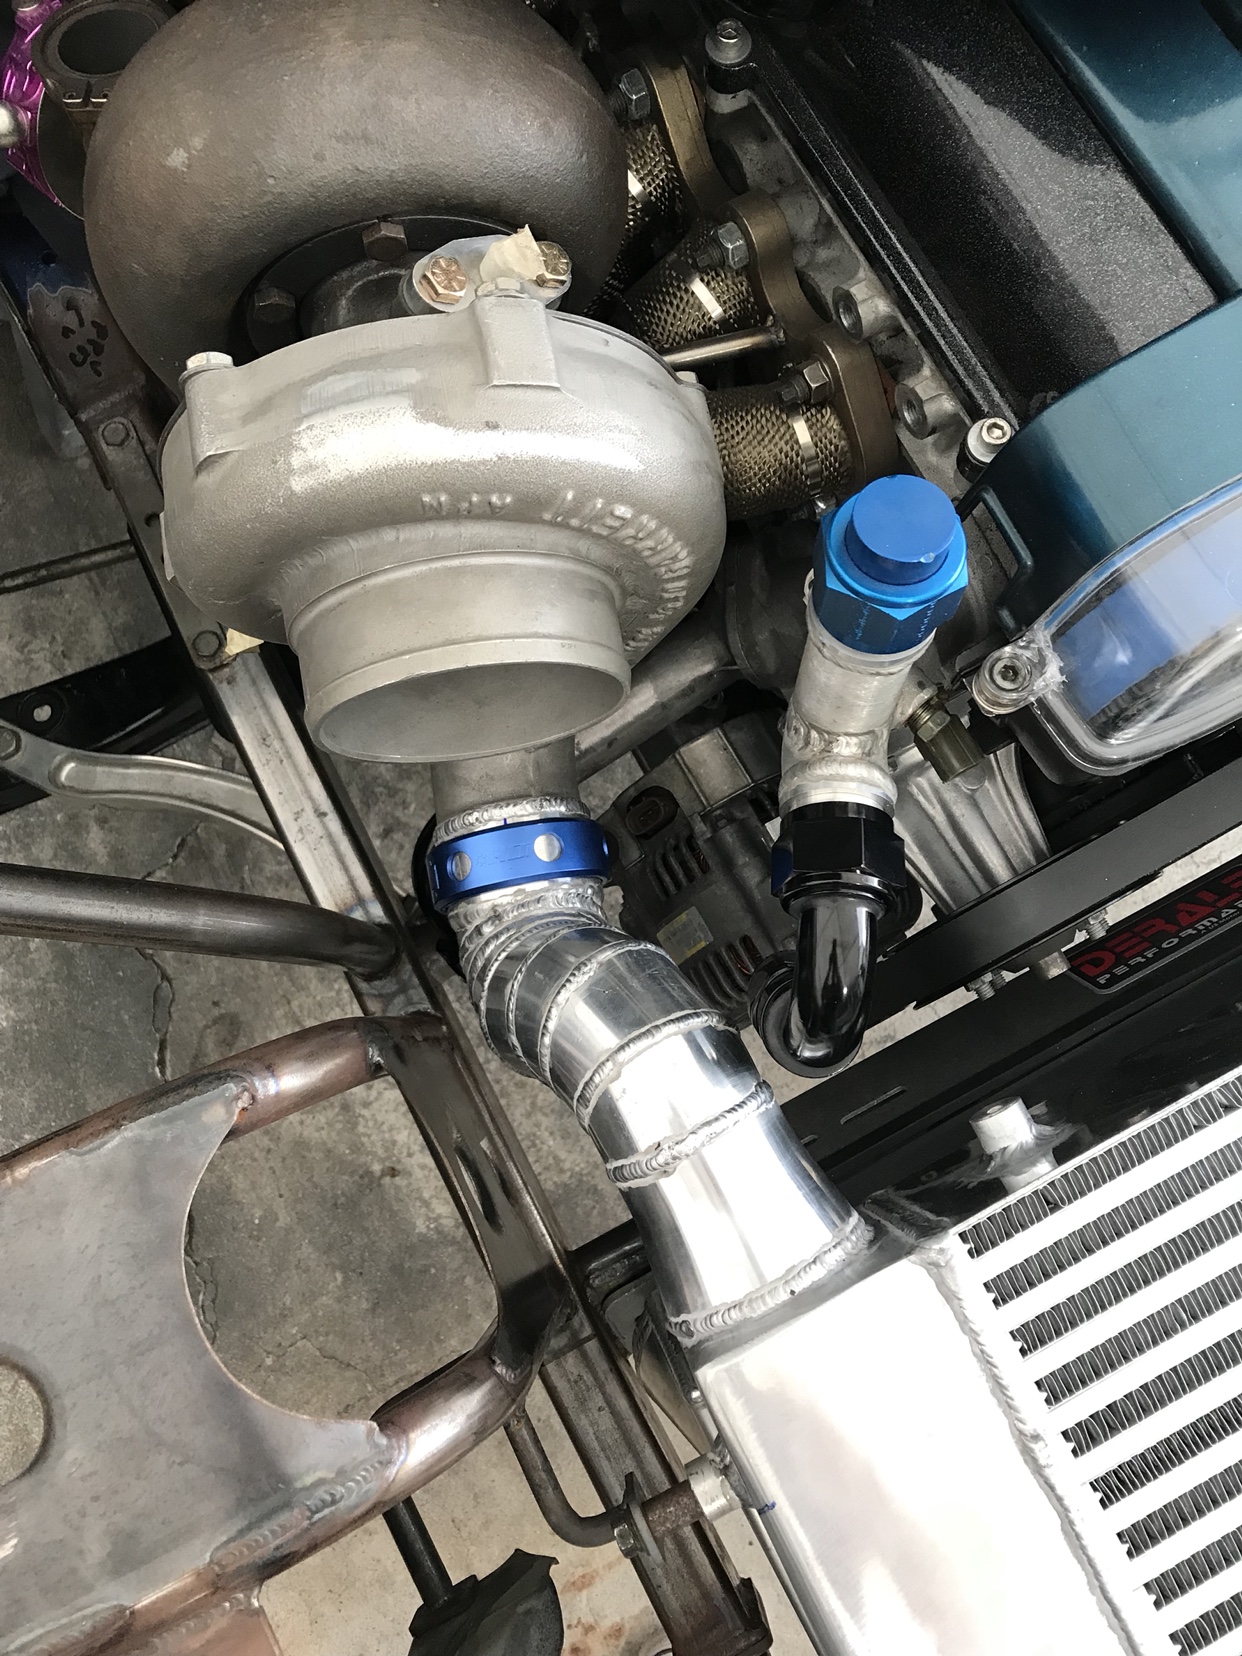 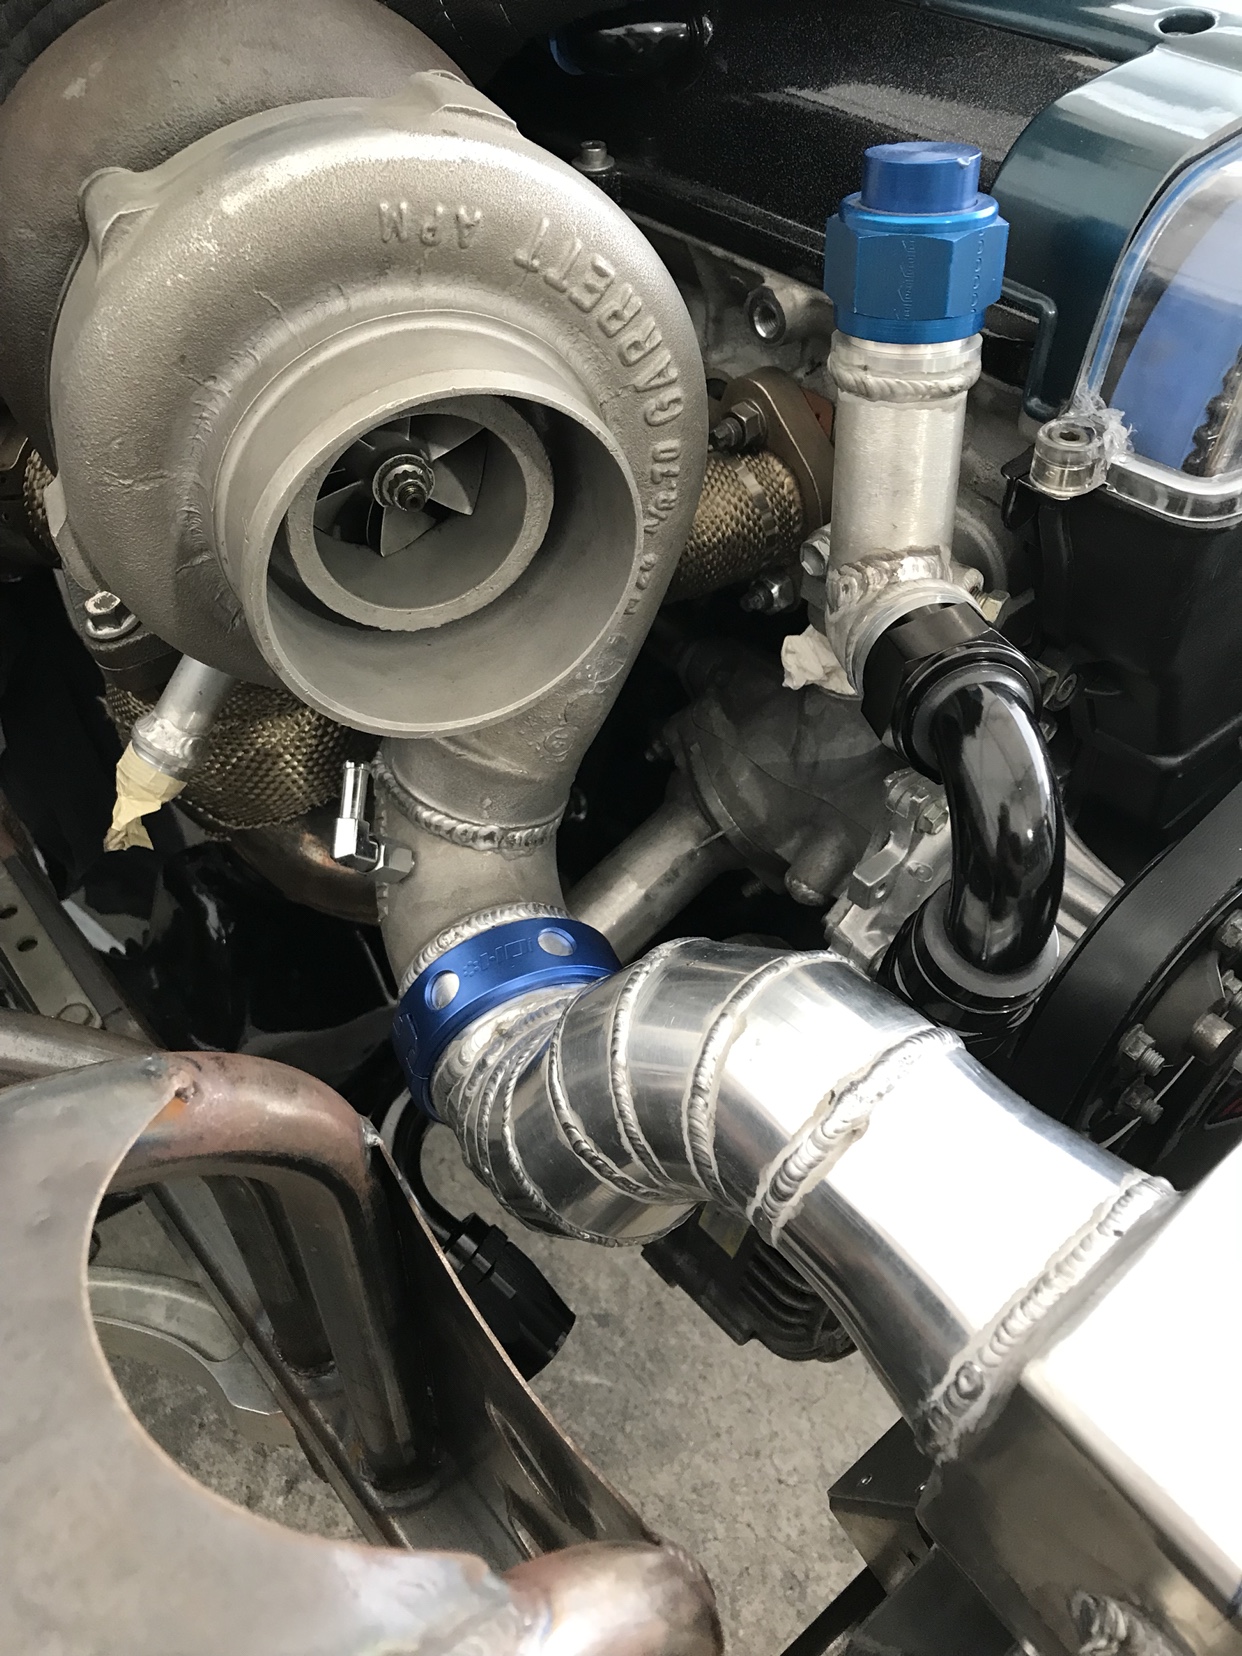 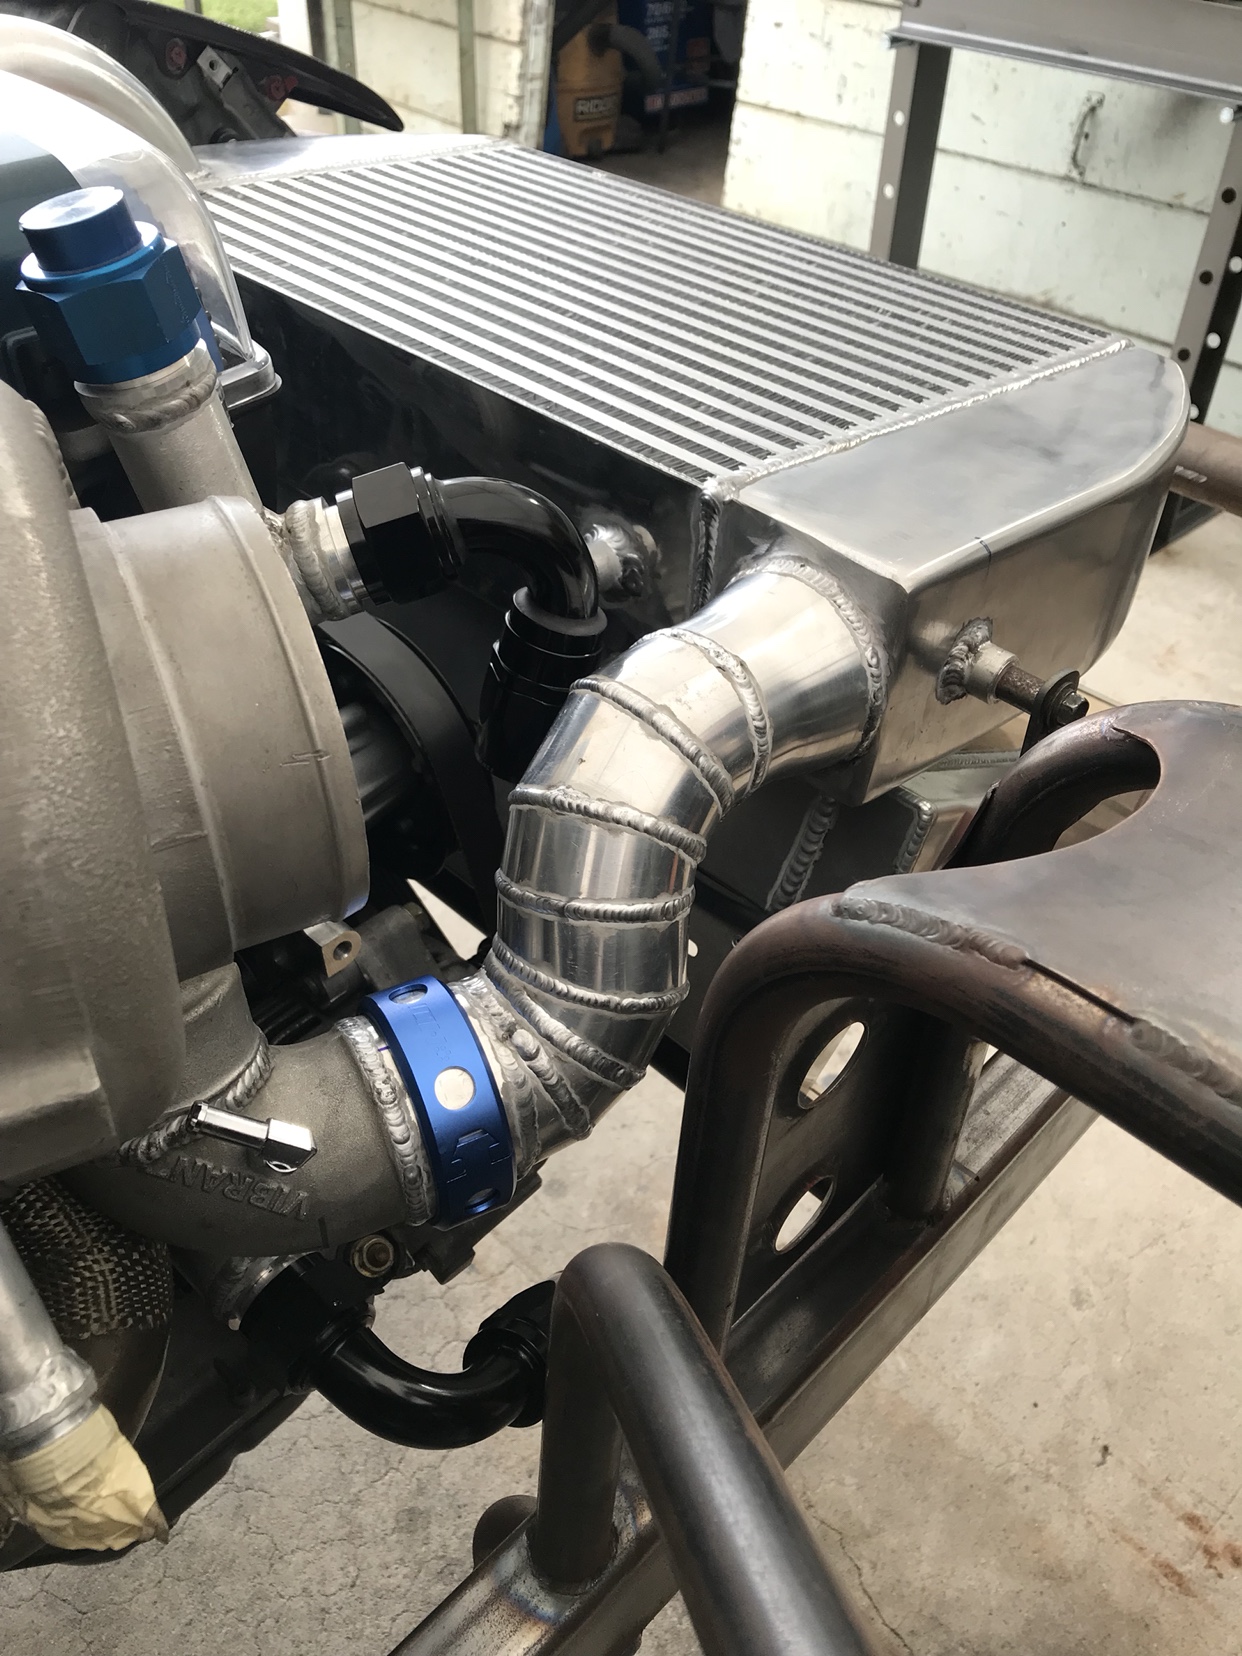 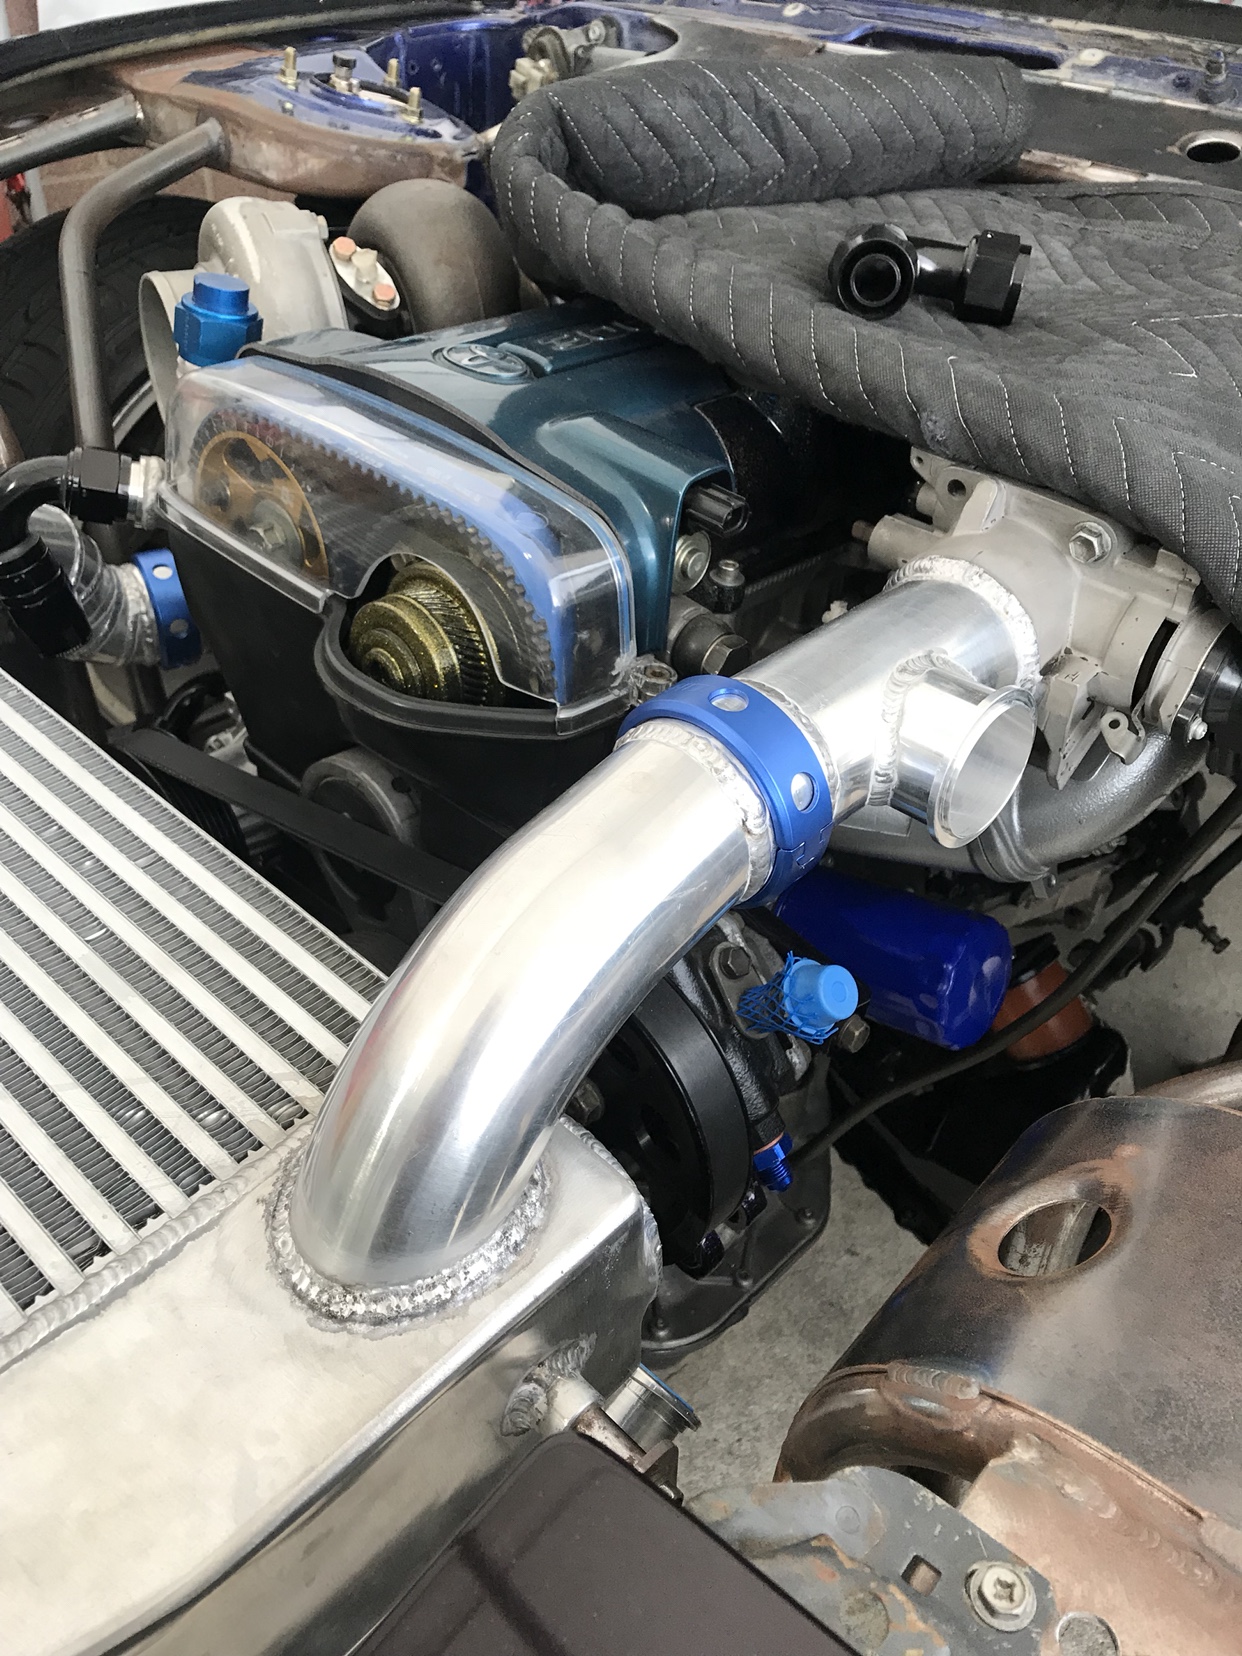 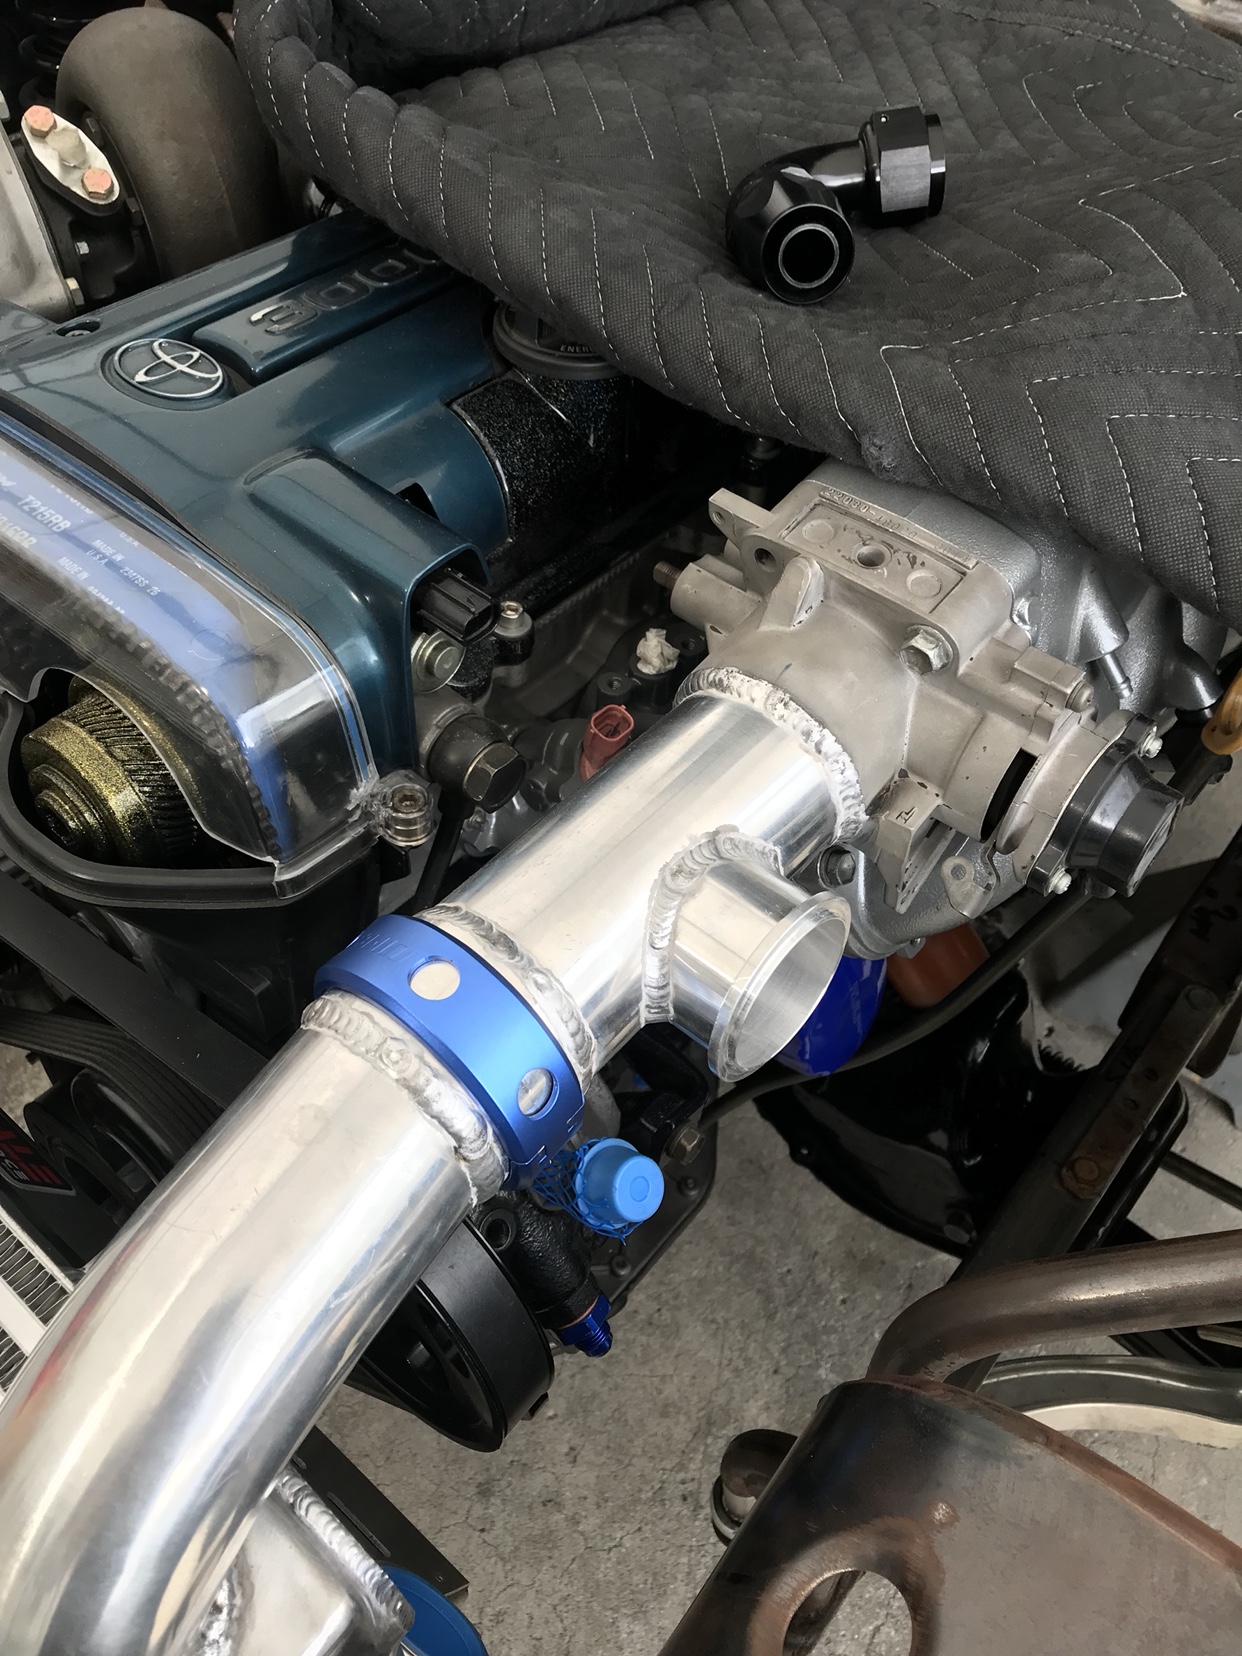 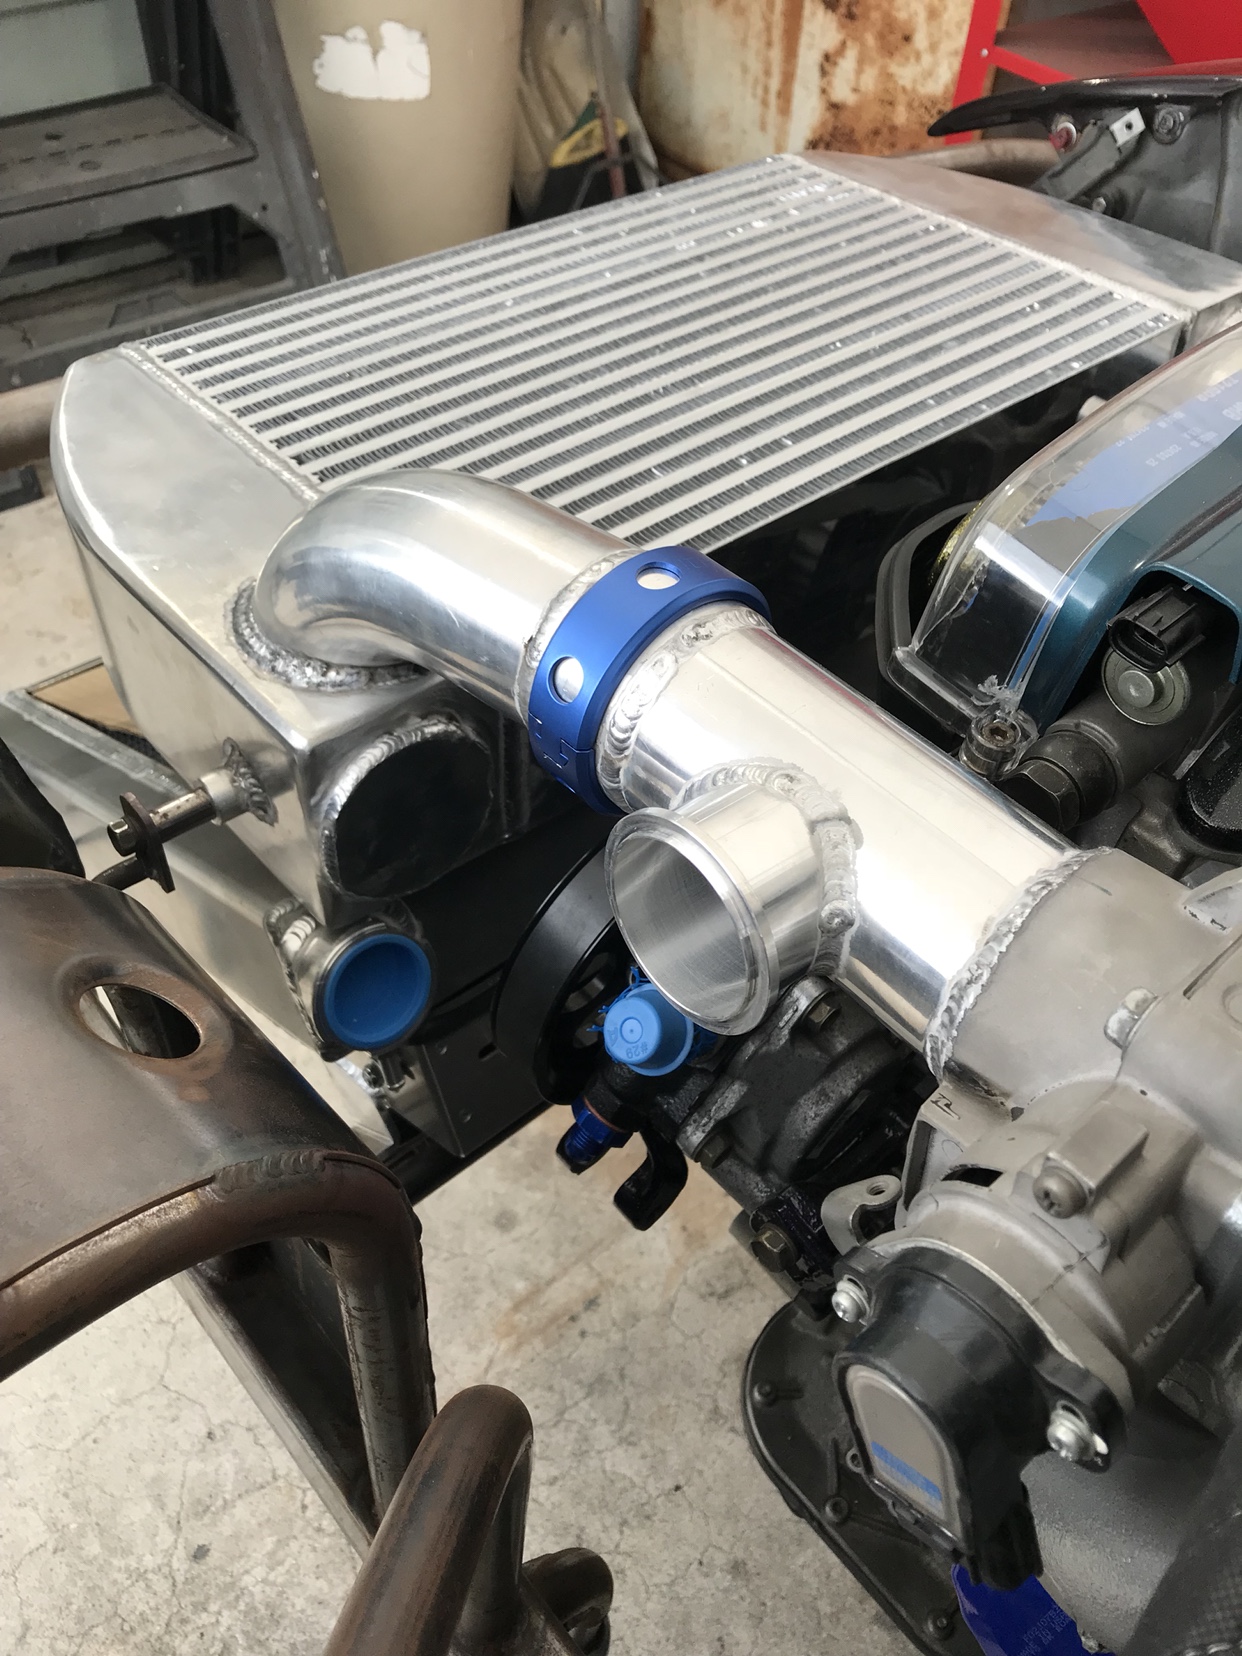 Radiator is also finished up. If you haven’t noticed I’m running all AN 16 for the radiator connections. My actual AN braided line will only be around 6-8” on each inlet and outlet so flow won’t be badly compromised with the smaller inner diameter the AN 16 is compared to the actual inlets and outlets on the radiator 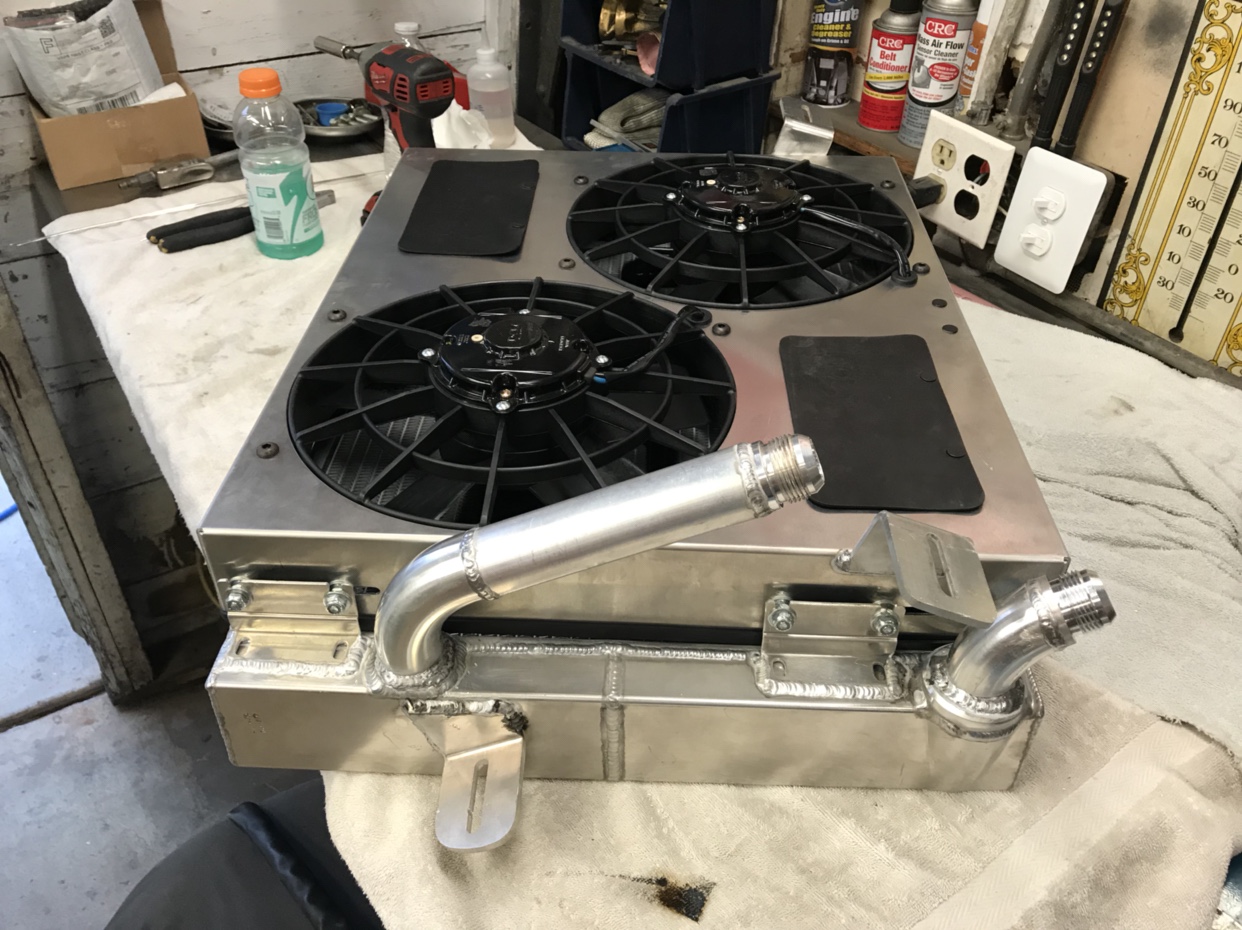 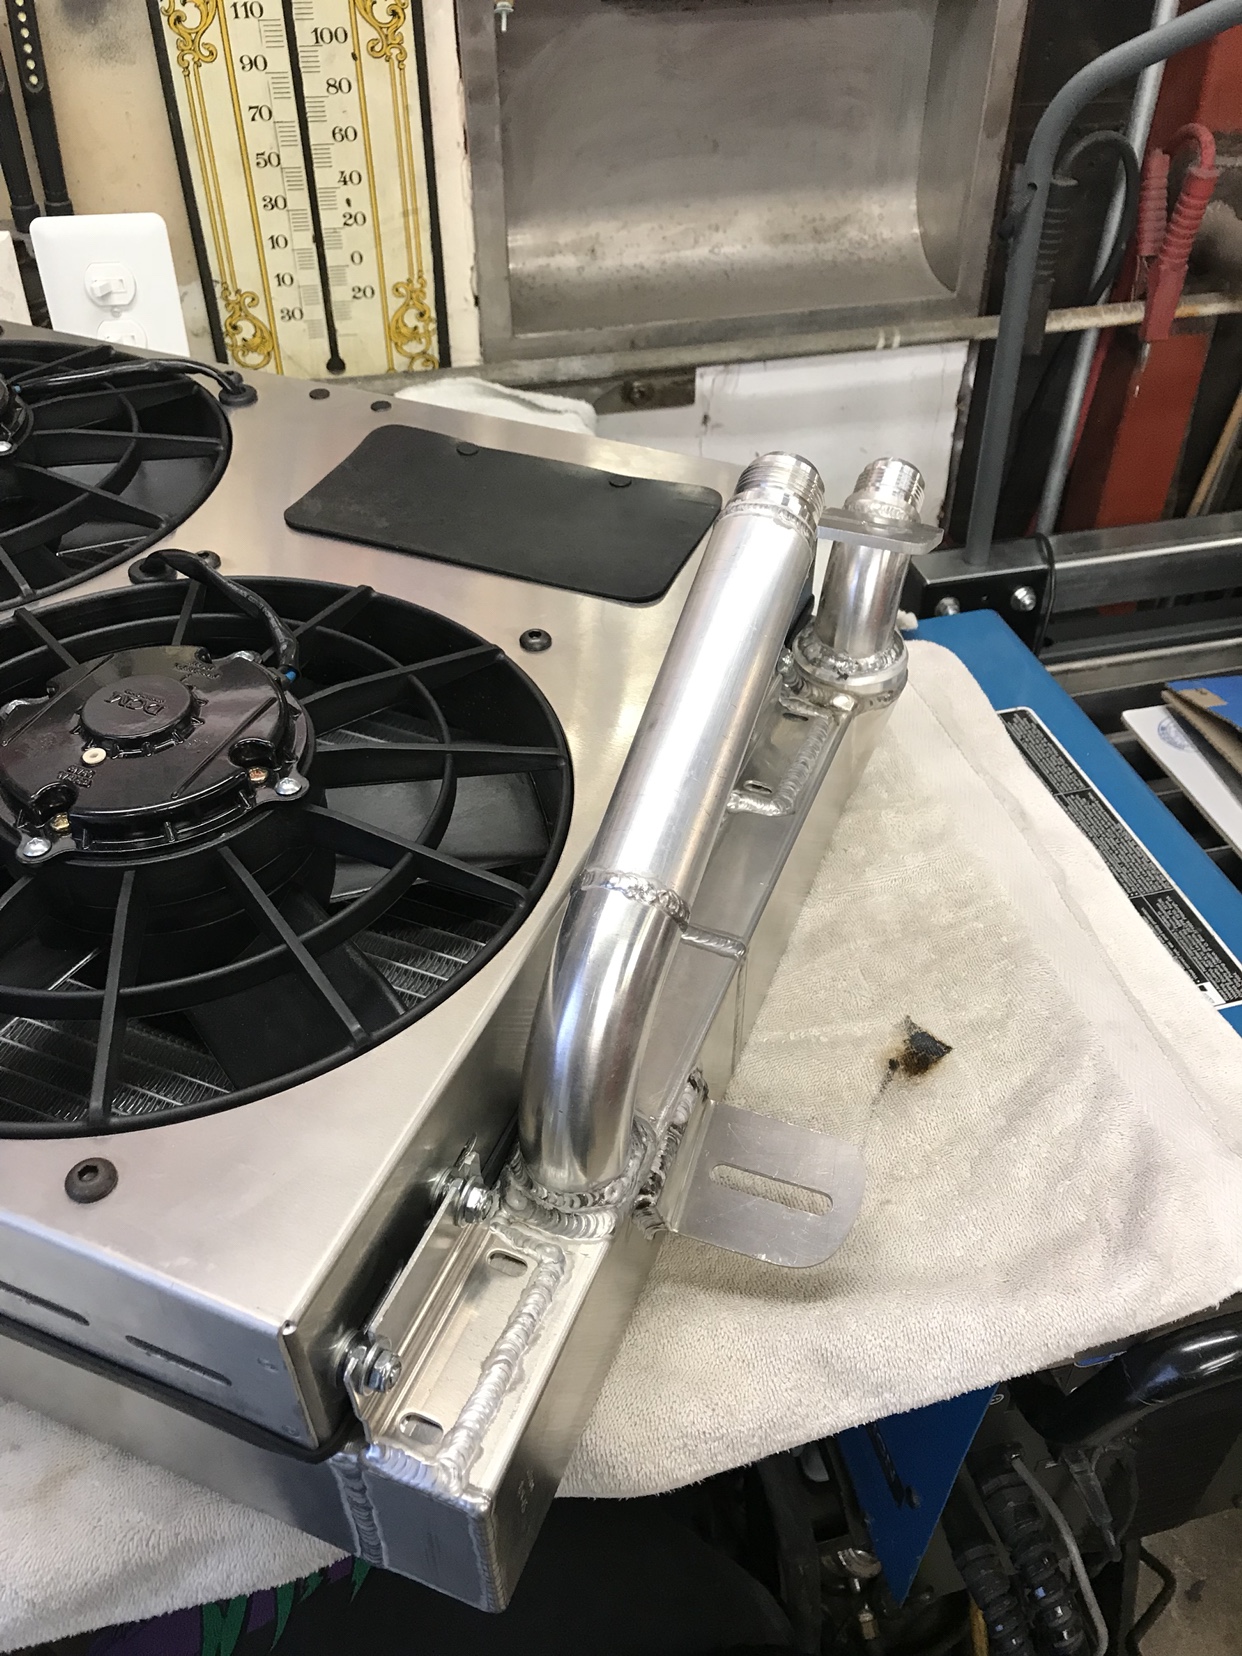 Sent from my iPhone using Tapatalk |
|
|

|
|
|
#82 | |
|
Zilvia Junkie
 Join Date: Sep 2012
Location: LongBeach, CA
Age: 28
Posts: 371
Trader Rating: (4)
     Feedback Score: 4 reviews
|
Quote:
I believe they are Australia based. Same function as vibrant but with a different design. In my opinion the HDi are a better fit because they allow -/+ 2 degrees of wiggle room and or flex and have a much easier unlocking and removing procedure Sent from my iPhone using Tapatalk |
|
|
|

|
|
|
#83 |
|
Zilvia Junkie
 Join Date: Sep 2012
Location: LongBeach, CA
Age: 28
Posts: 371
Trader Rating: (4)
     Feedback Score: 4 reviews
|
Wastegate is going out of the hood. I made that decision many many years ago while riding passenger in a similar set up ! Only since this car is on its way to being track only.
Later I will be making a garnish plate on the hood for it and likely have the actual tube flush mounted 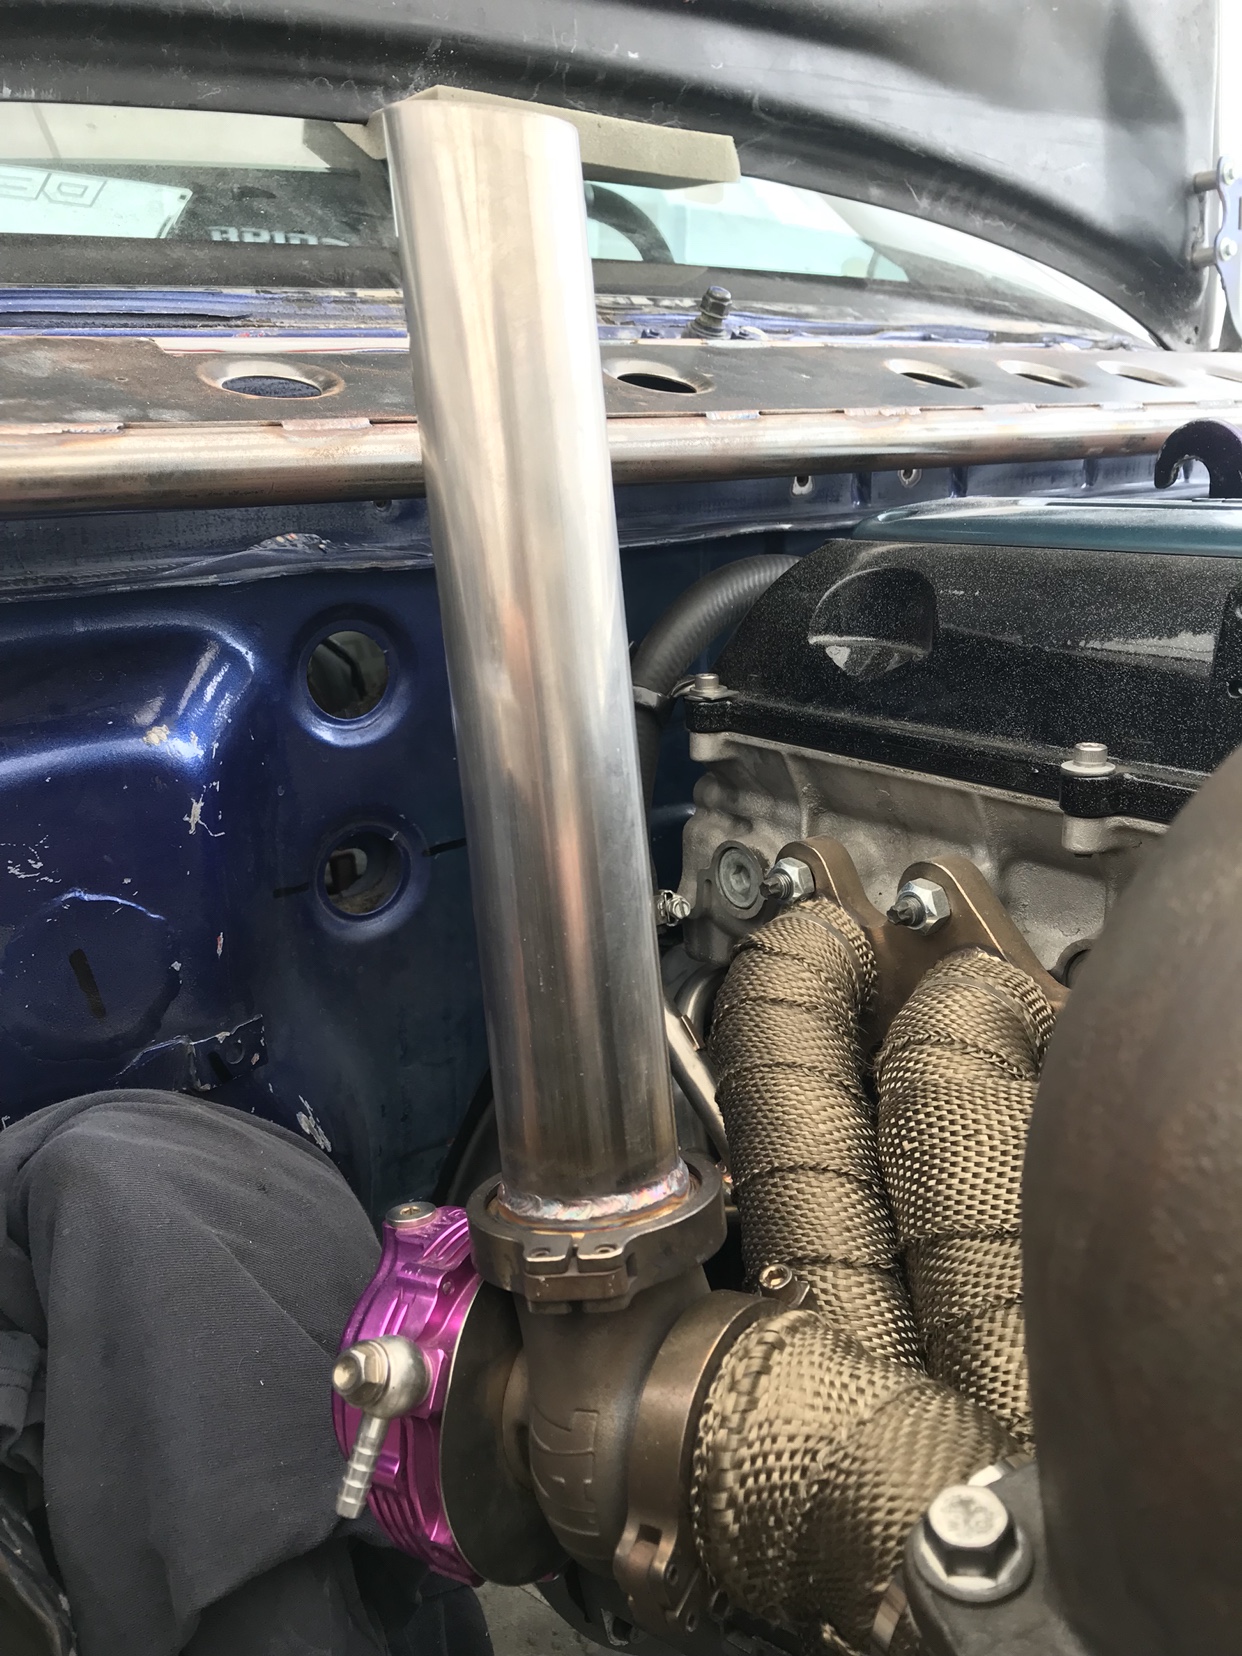 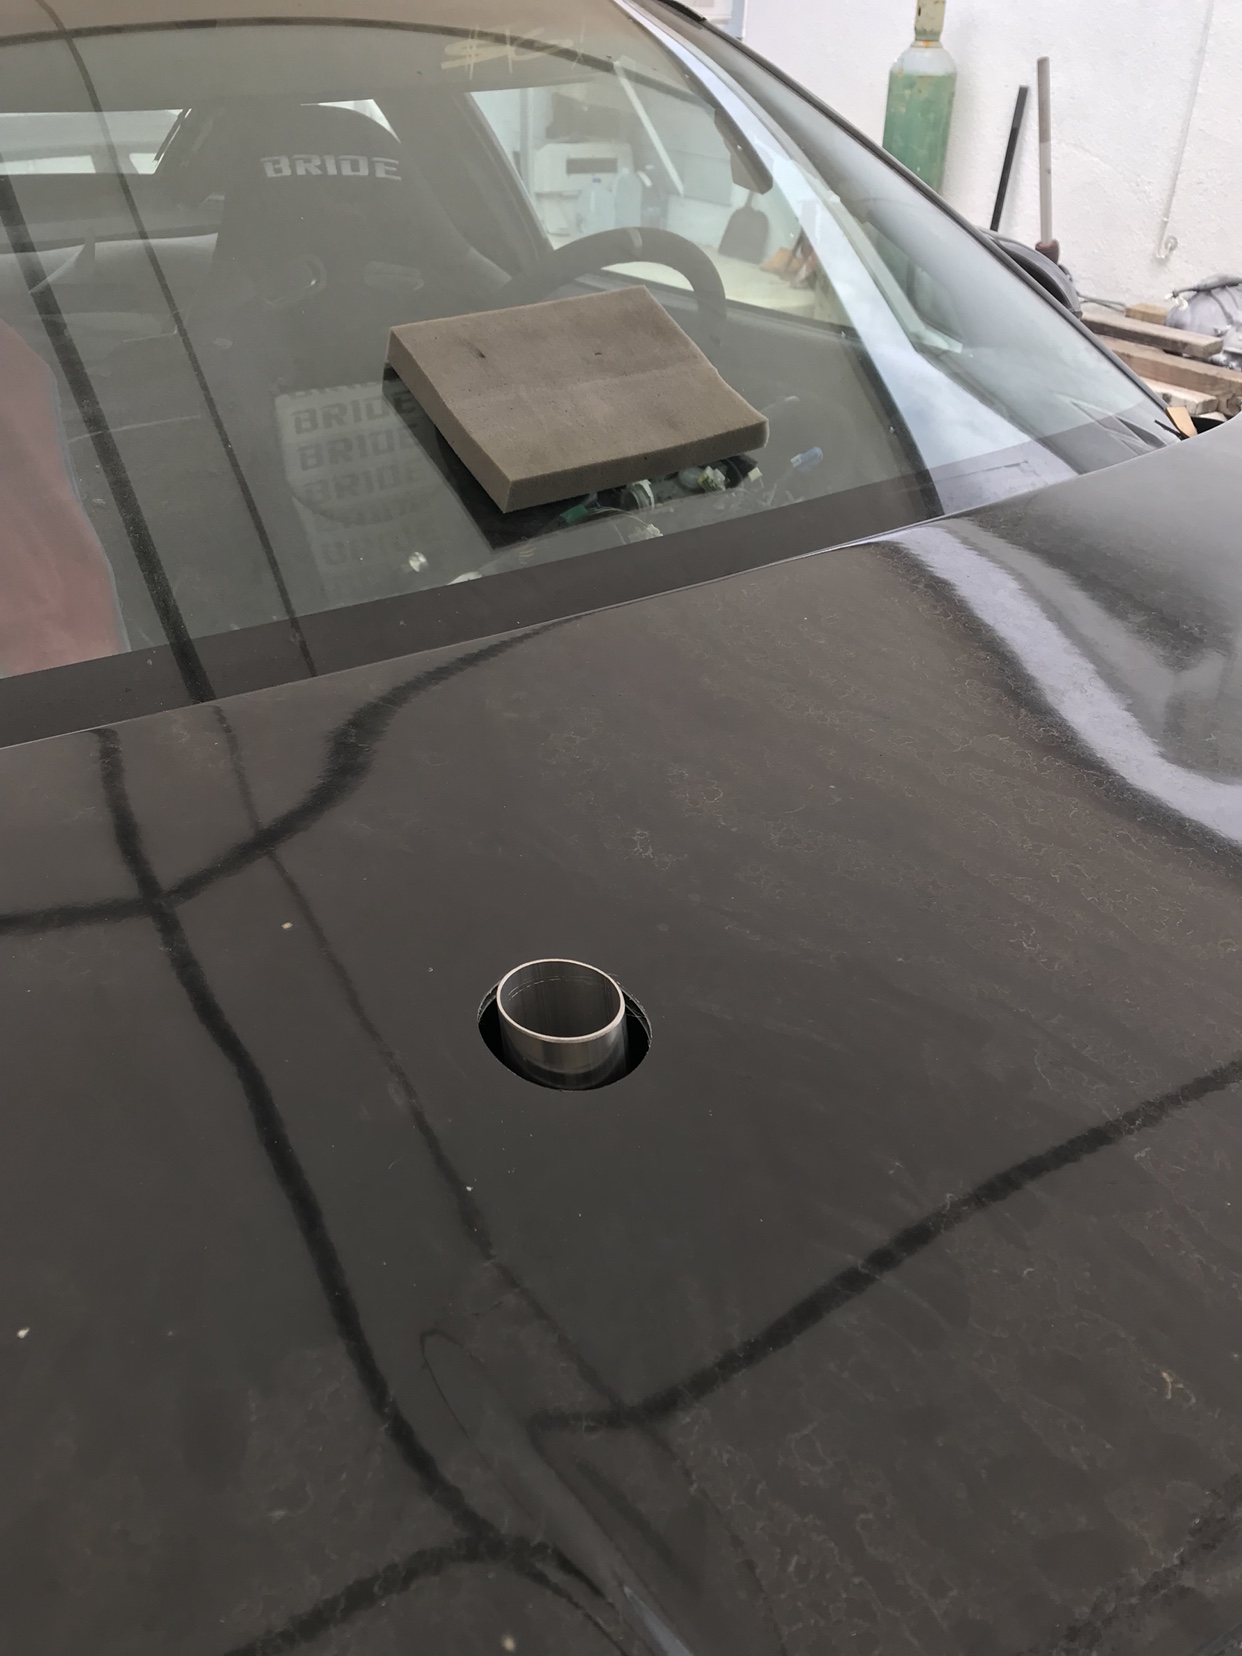 Oil cooler mounted. Power steering cooler with fan will be mounted on the backside of it 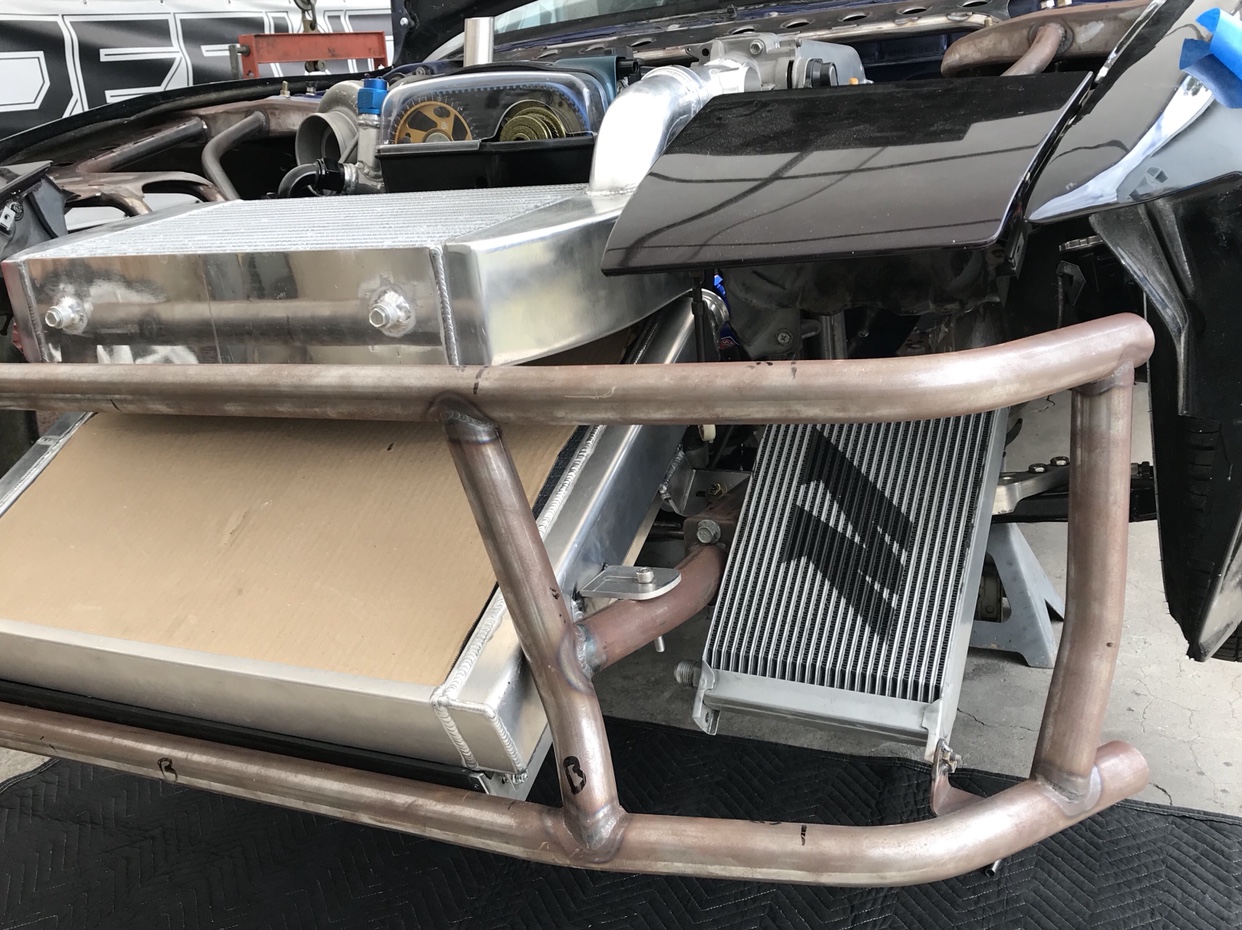 Trimmed up the bumper to fit this giant set up. Like I said before the placement of the radiator in the bumper scoop is not ideal but was my only option without buying another set up. This intercooler/fans/radiator set up is rated to cool 1000 HP. Eventually I want to be in the 600-700 range. 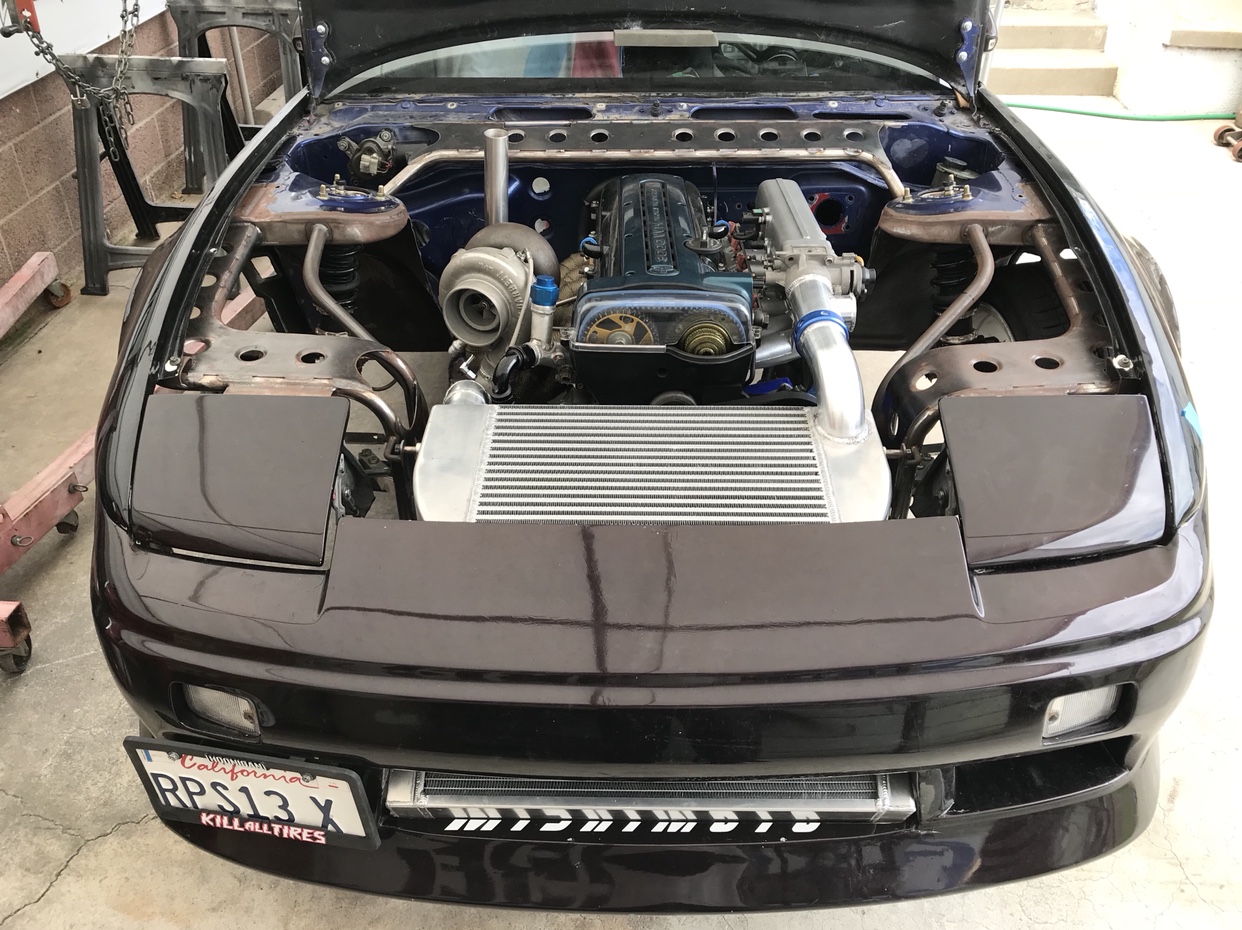 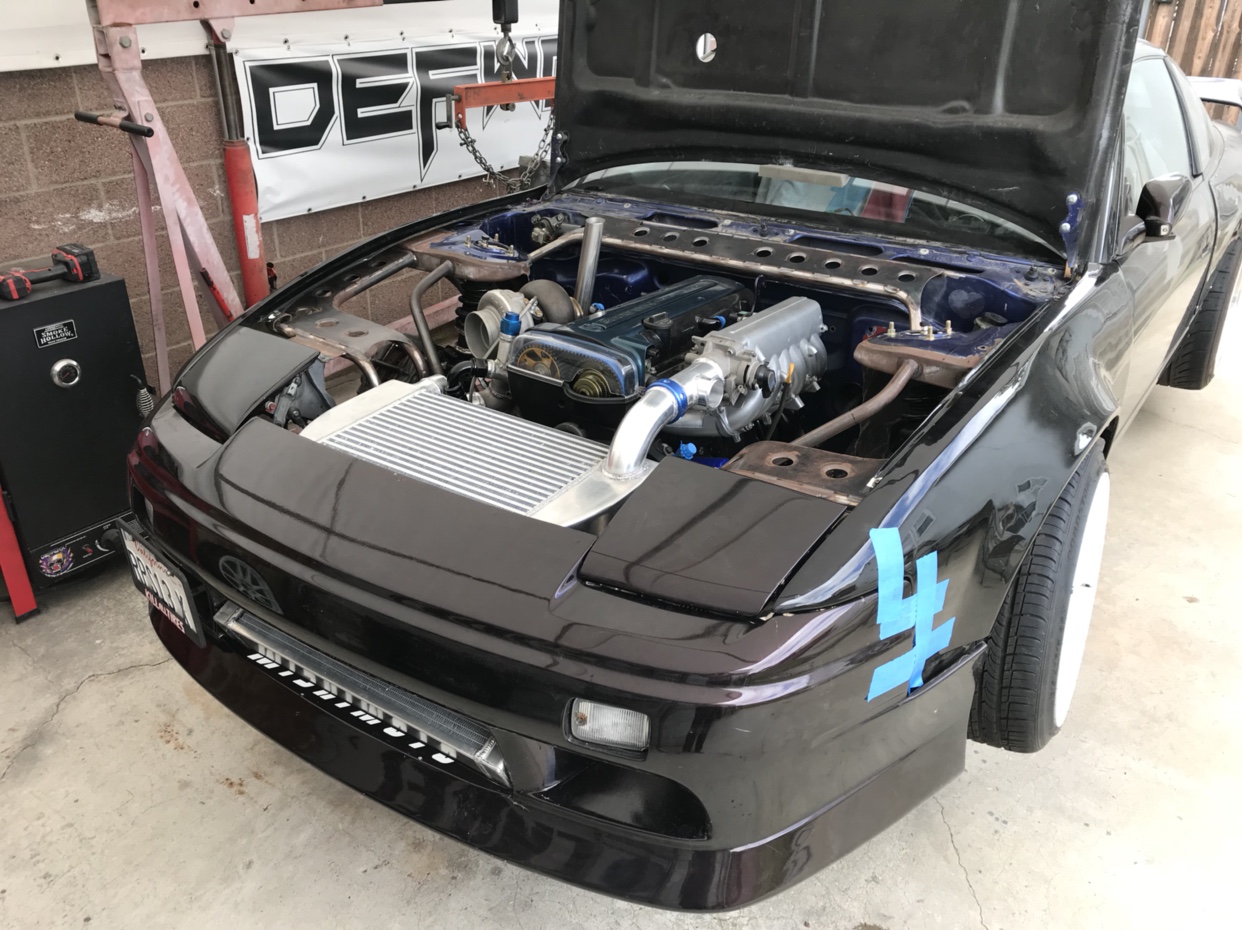 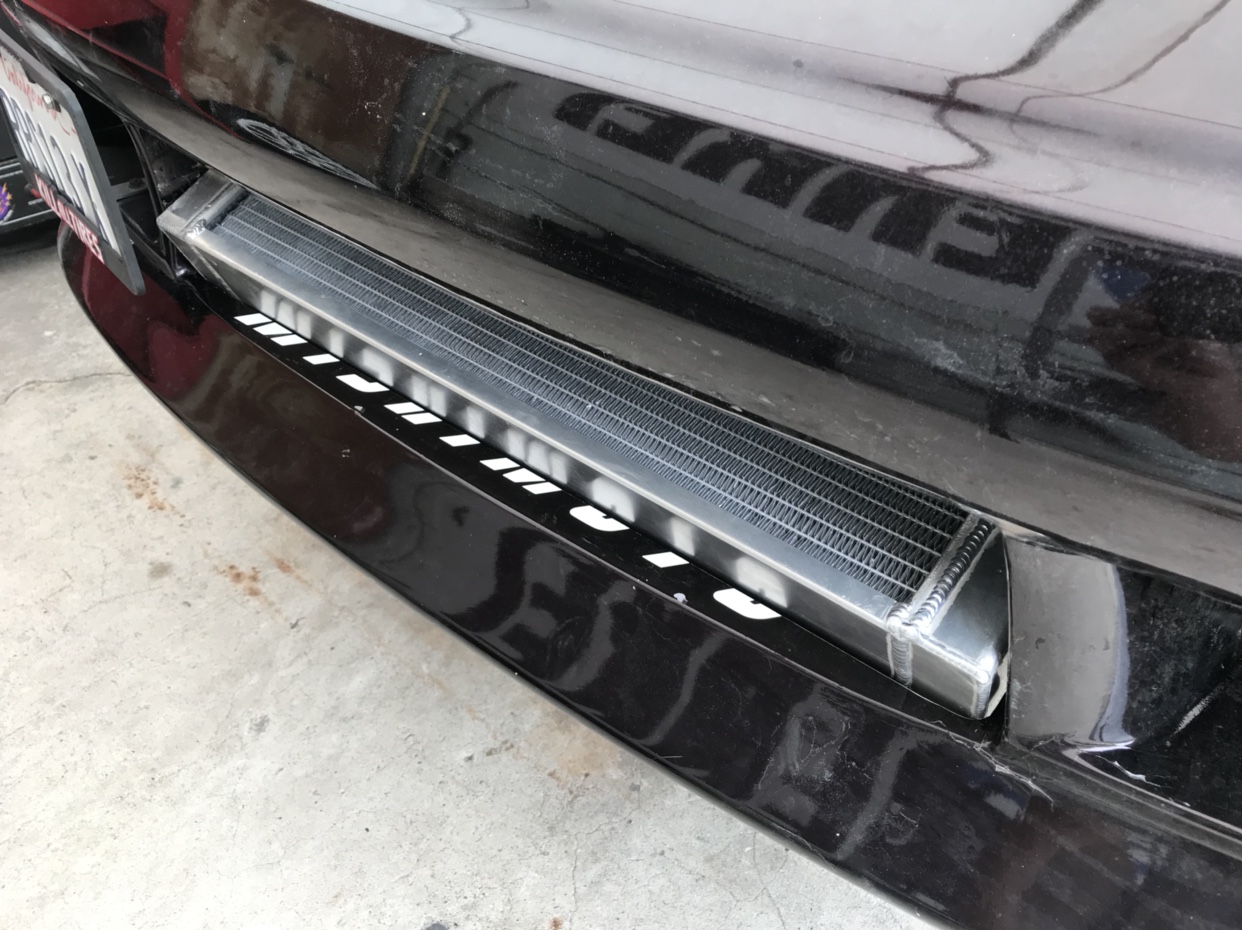 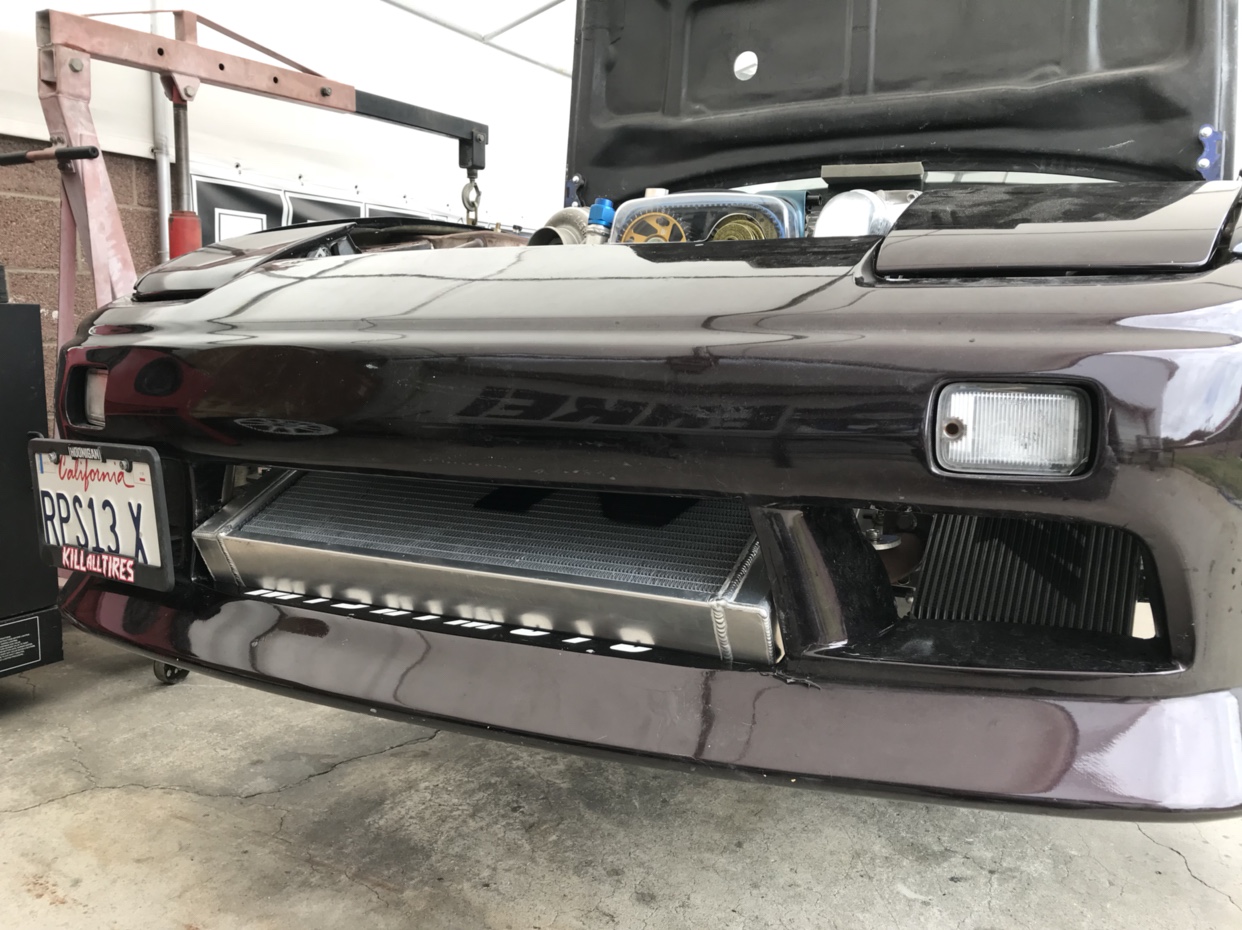 I may do more trimming in the top area of the scoop to let more air flow in. I normally run no bumper at the track though. All my measurements were correct and the intercooler sits just maxed out high enough to still fit the bumper on. You can see it’s actually trimmed perfect to rest on the intercooler and keep almost perfect gap to the hood 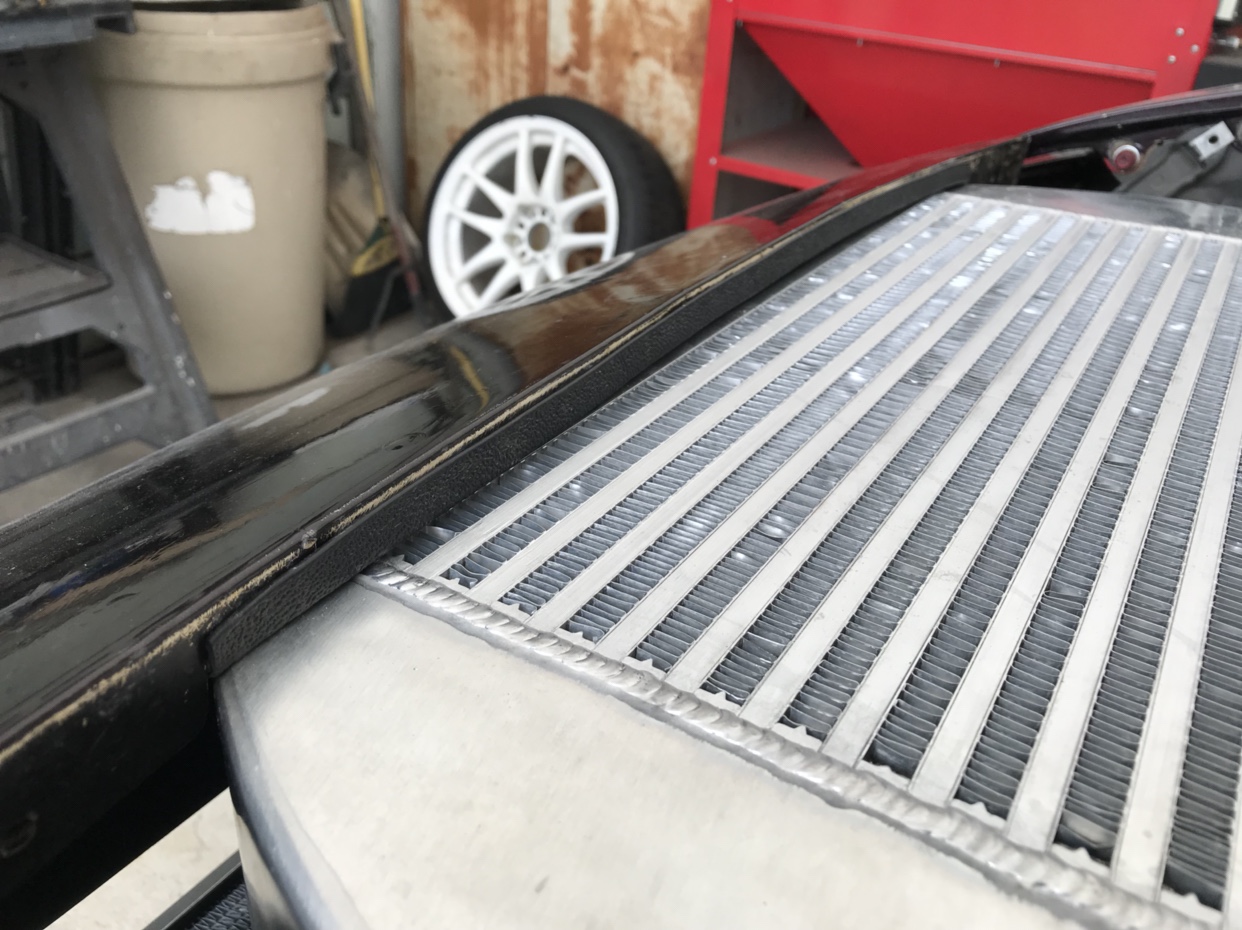 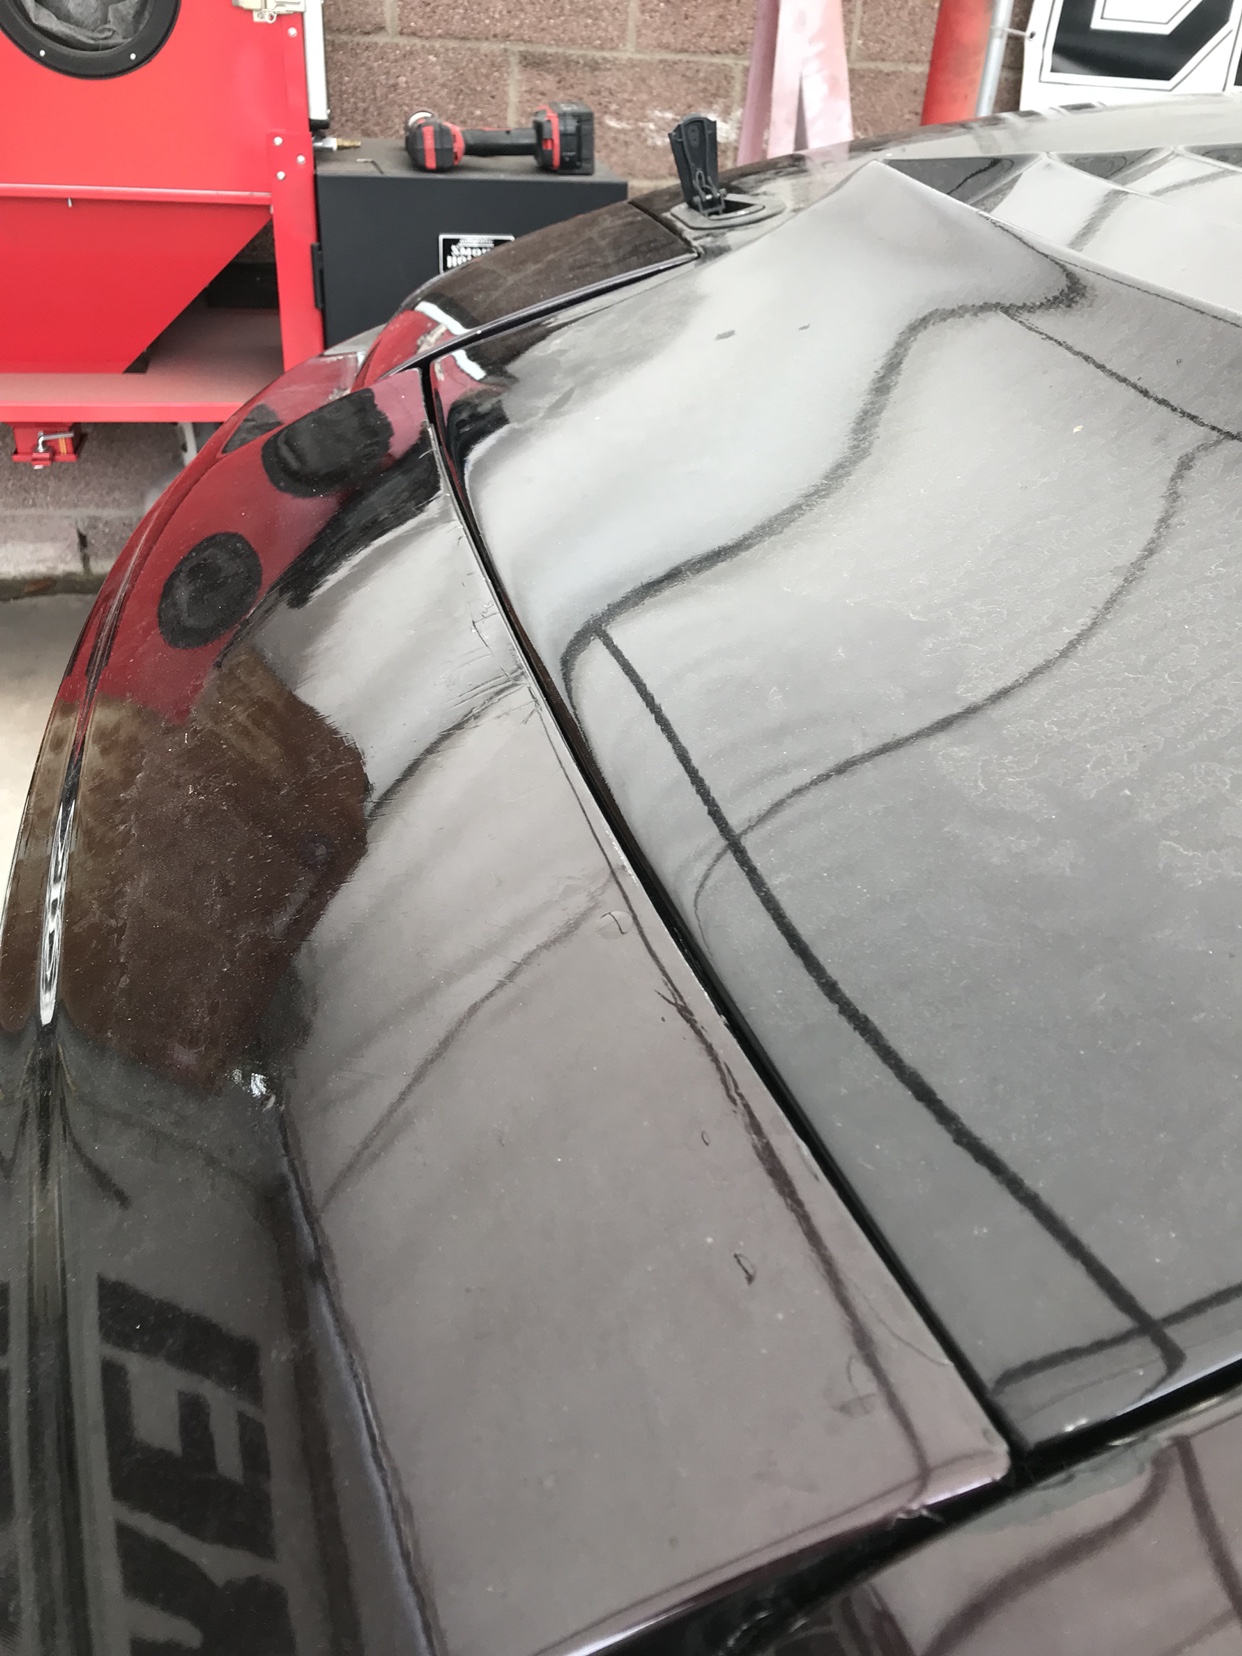 A tip to anyone who’s never built a car all the way thru before.... leave your body work & paint job LAST if you want to keep it nice. I’ve accidentally dinged, cracked, scratched or dropped so many things thru out the process the last month haha Sent from my iPhone using Tapatalk |
|
|

|
|
|
#84 |
|
Zilvia Junkie
 Join Date: Sep 2012
Location: LongBeach, CA
Age: 28
Posts: 371
Trader Rating: (4)
     Feedback Score: 4 reviews
|
Suprareal's S13 FB build (sr20det eventually)
Paint !
I went with a midnight blue pearl. The pictures don’t really show it’s true color. 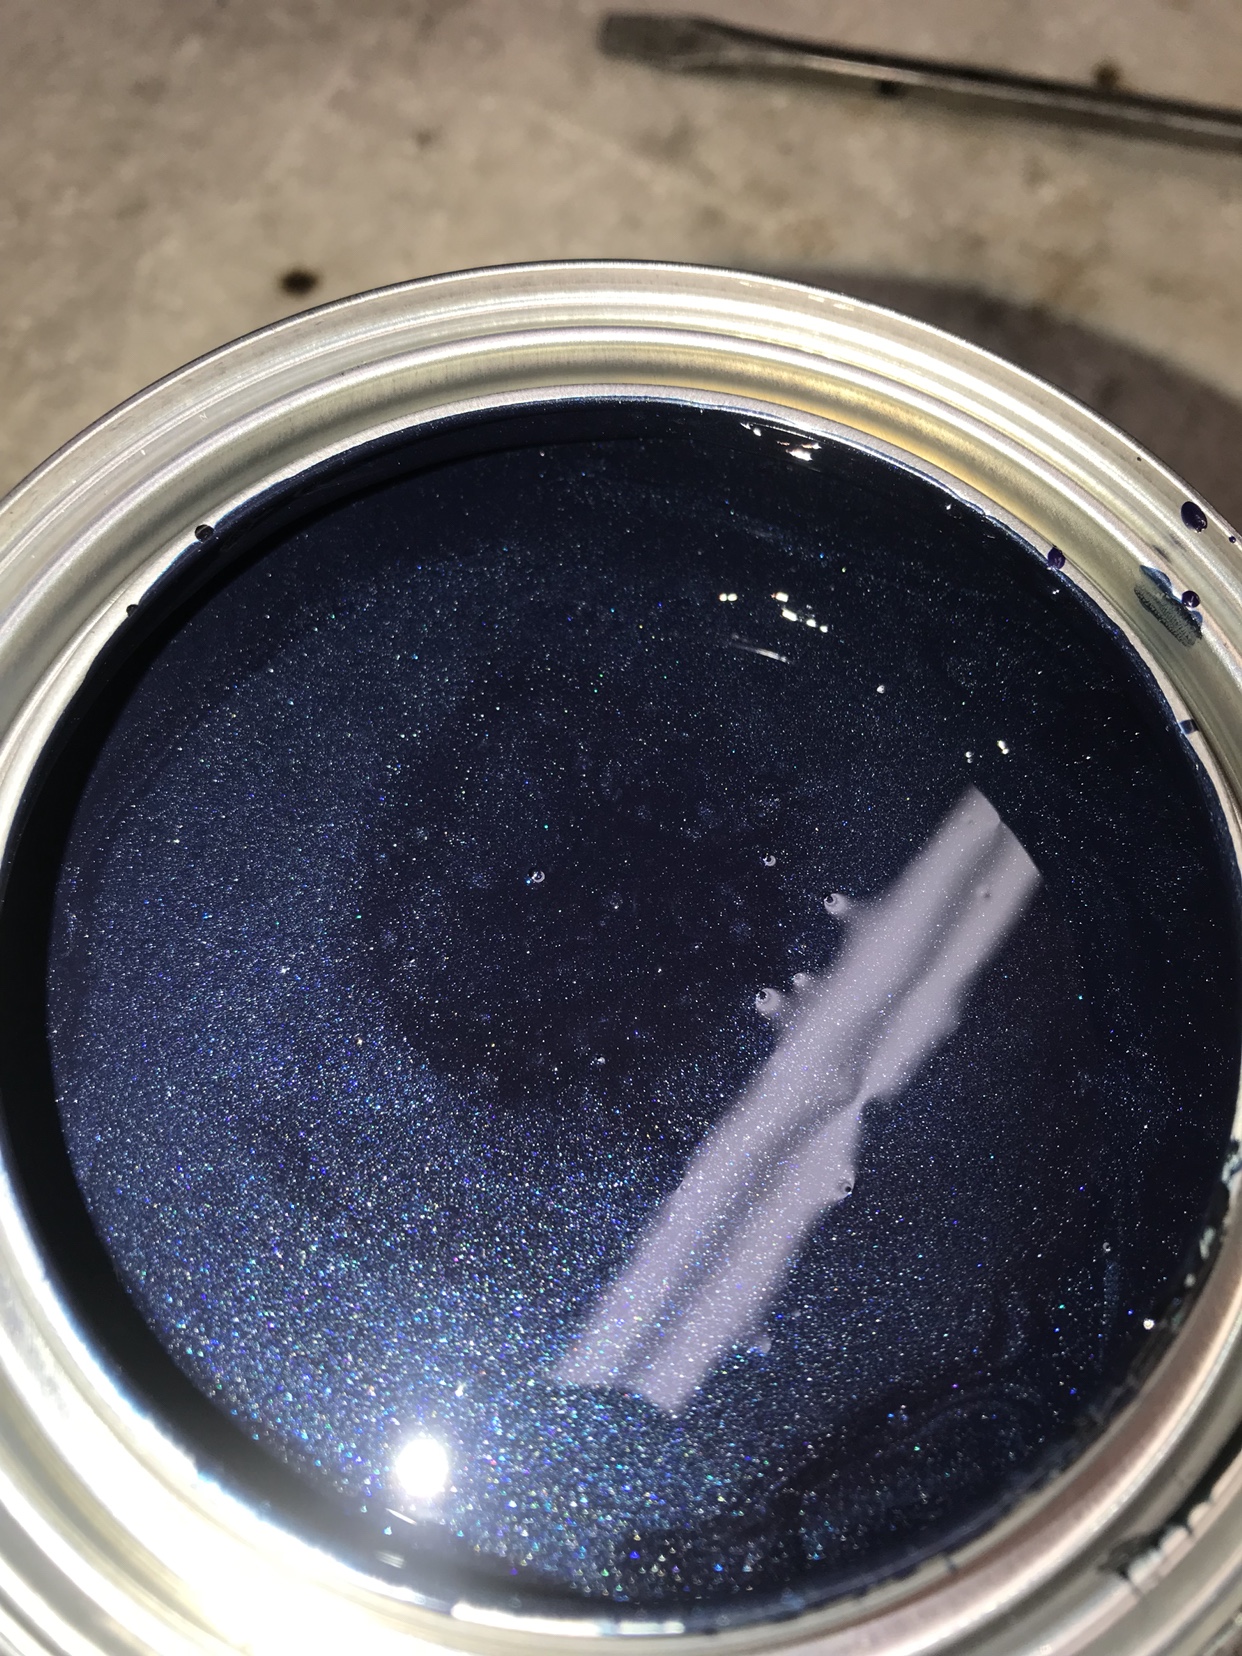 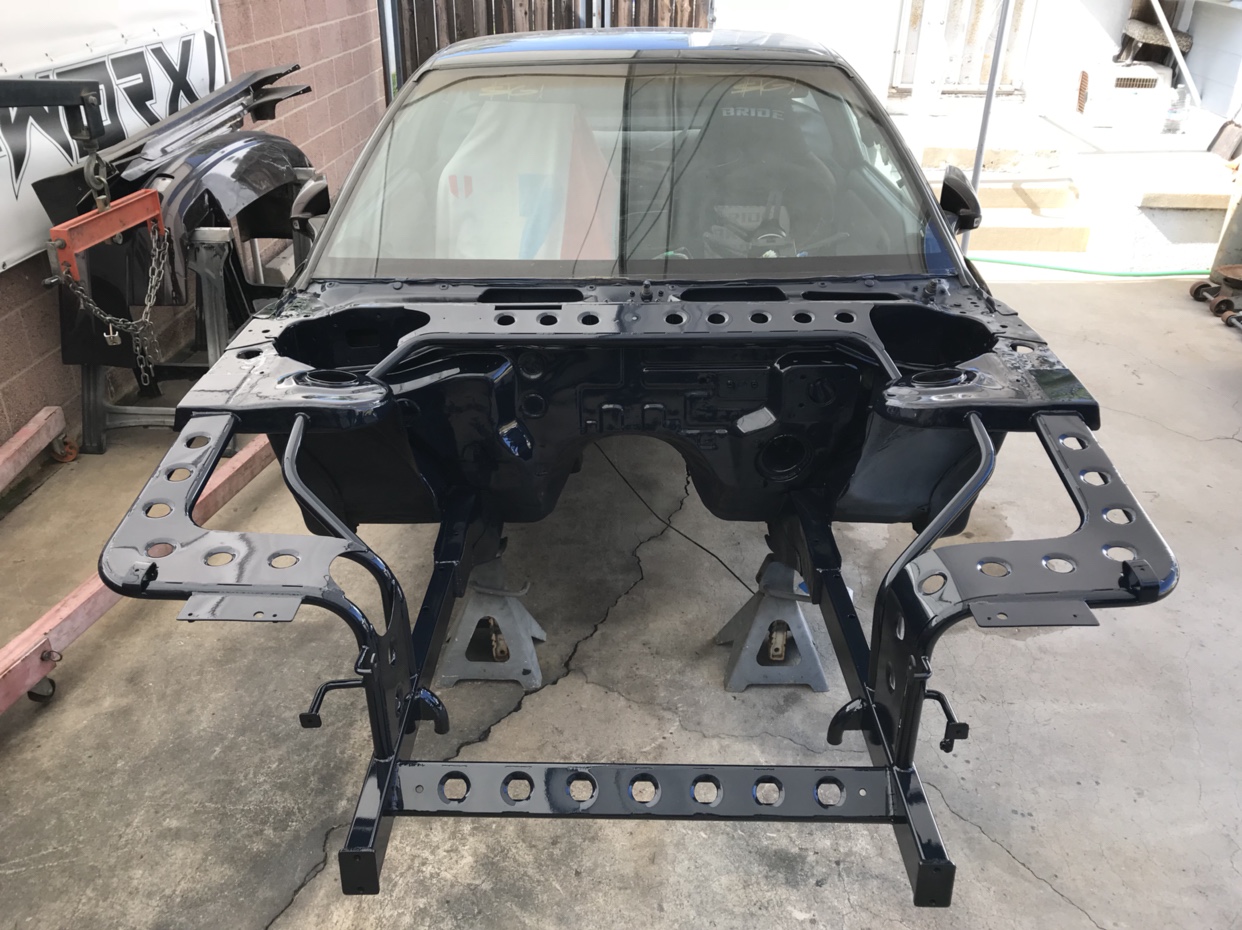 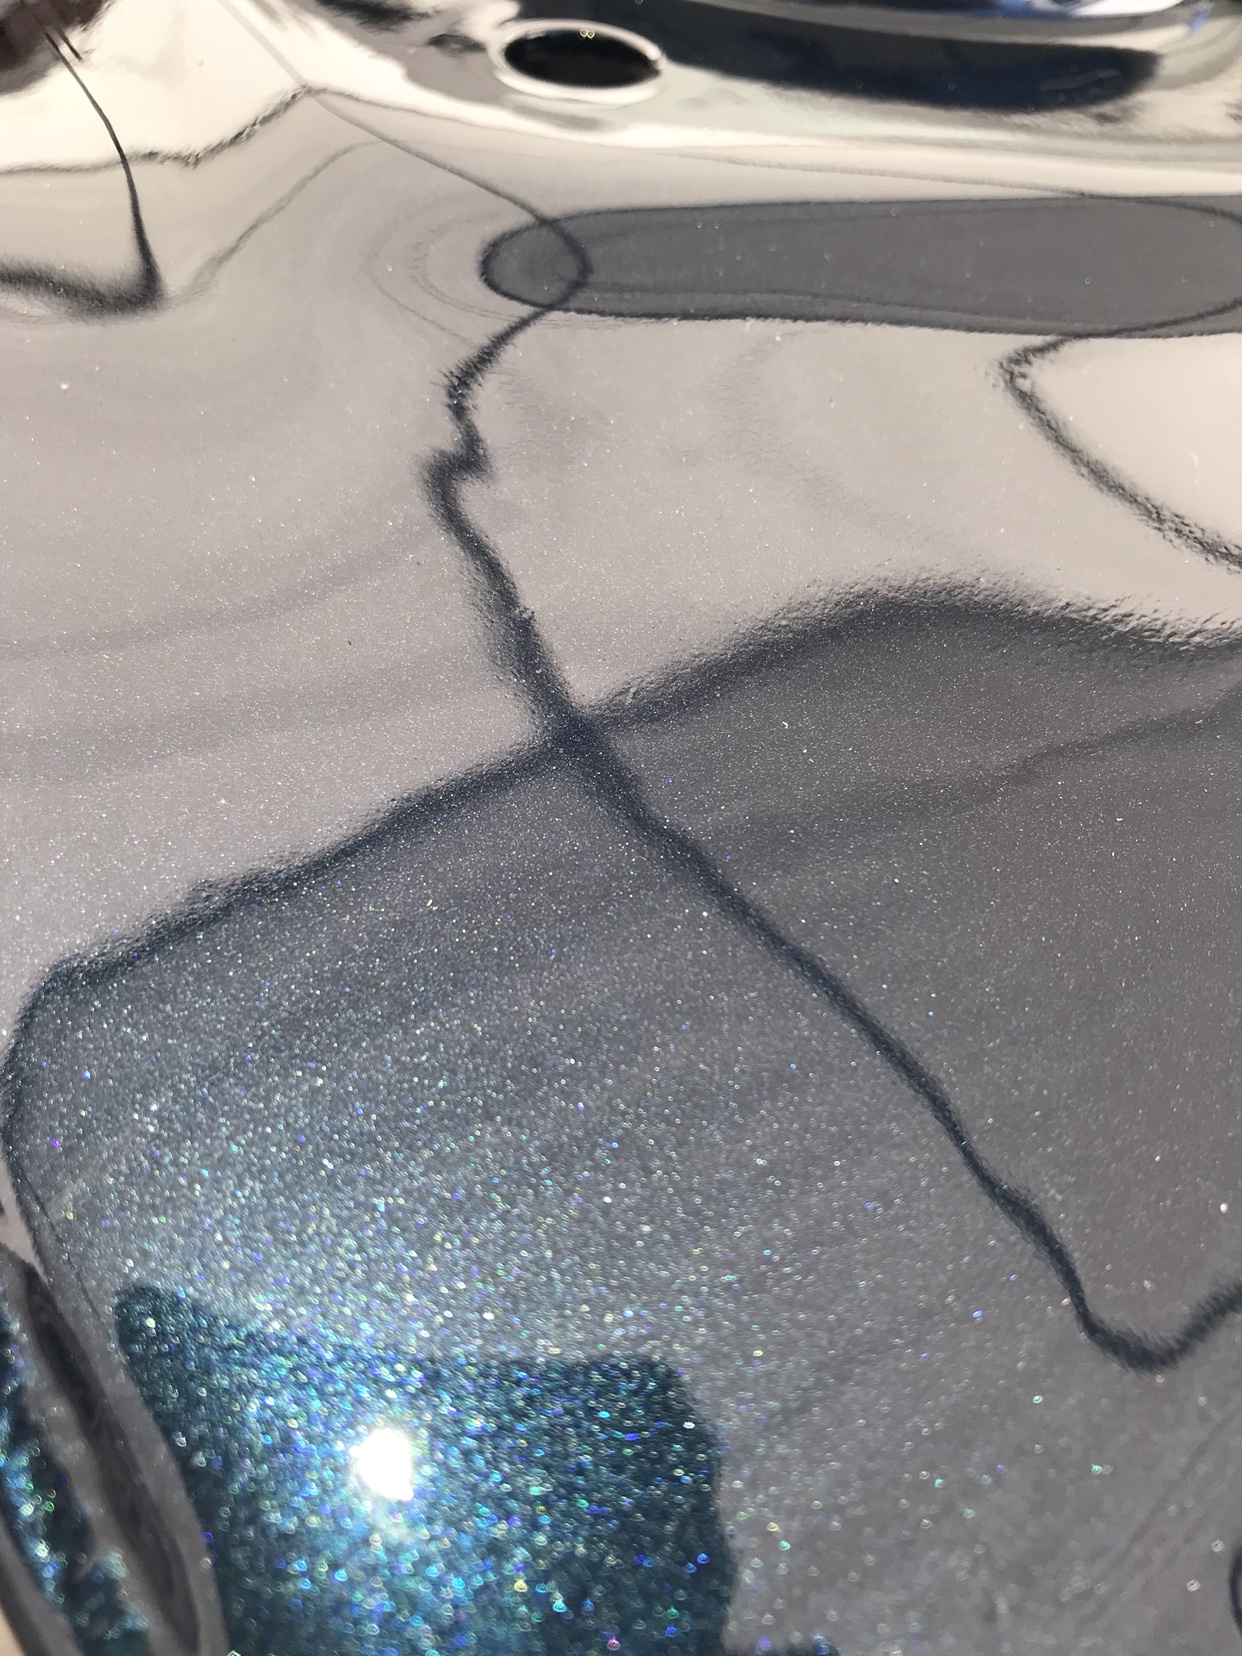 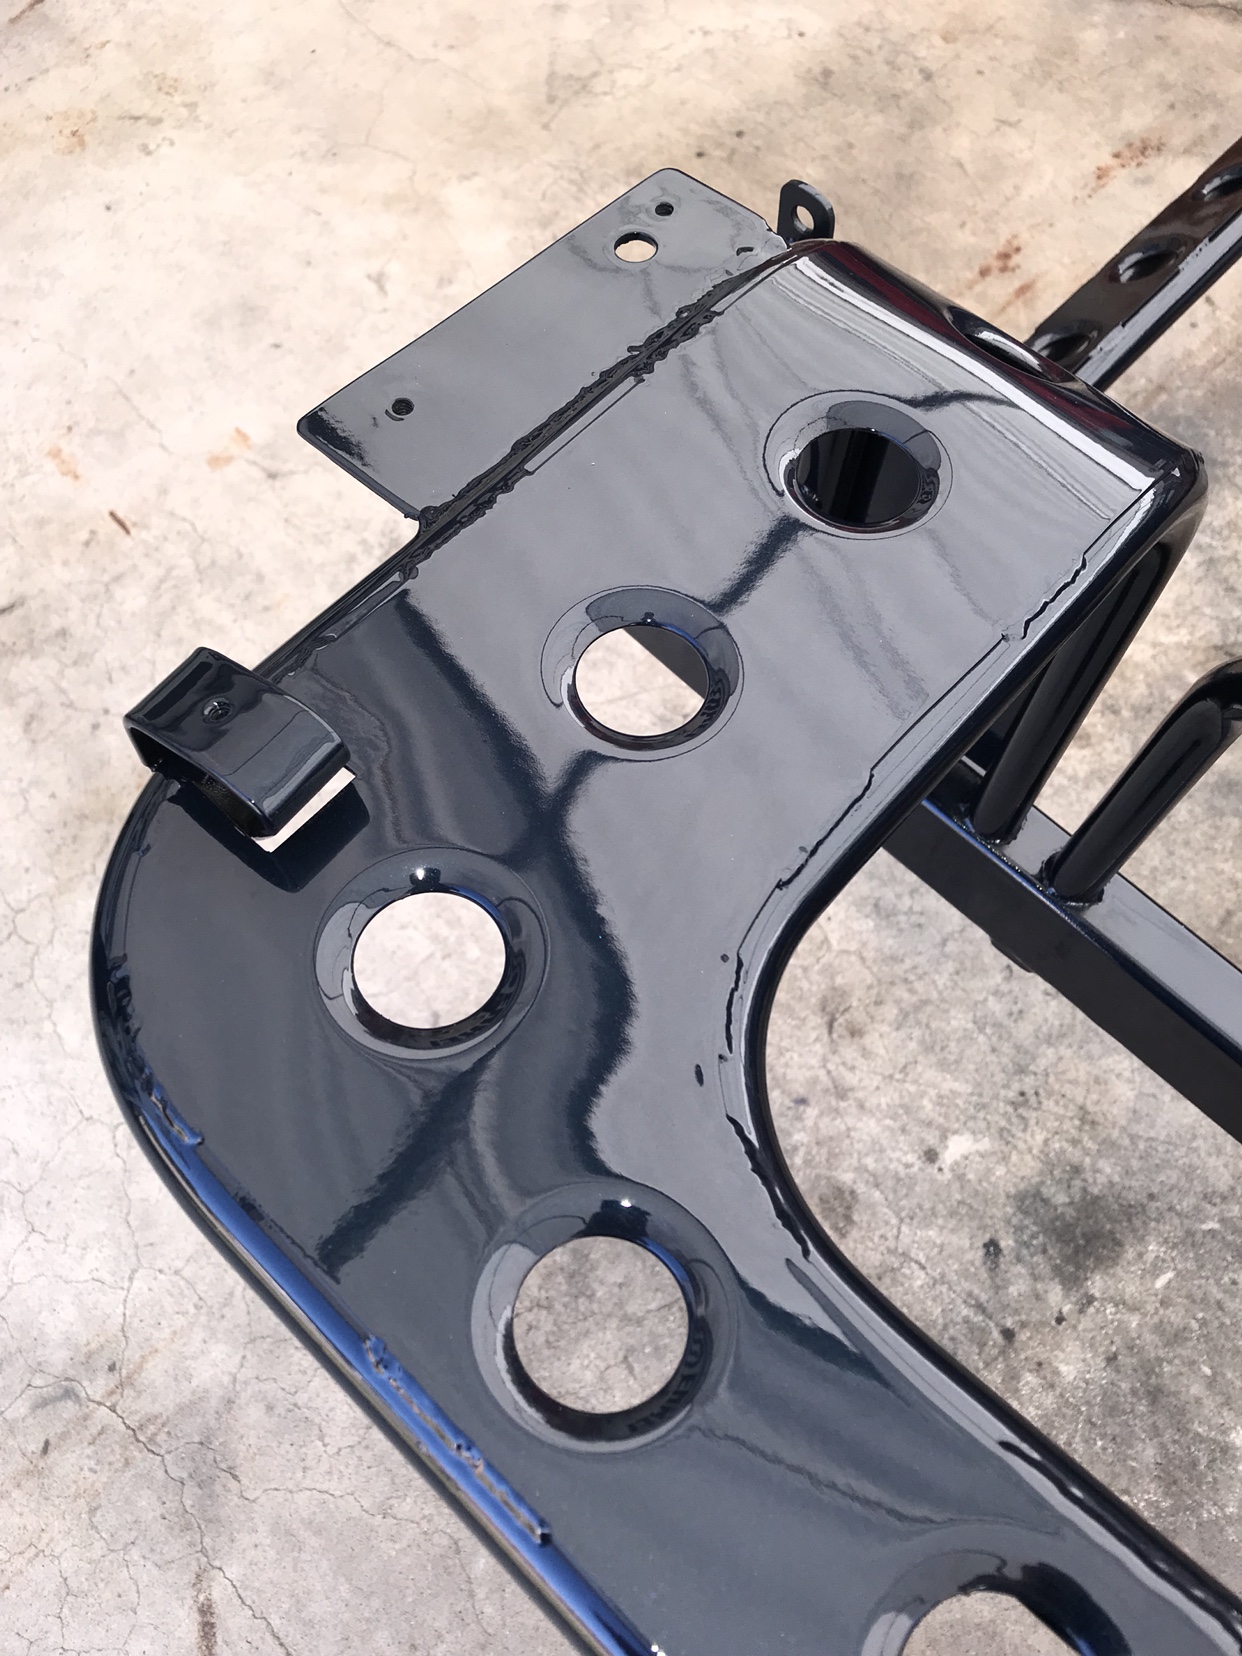 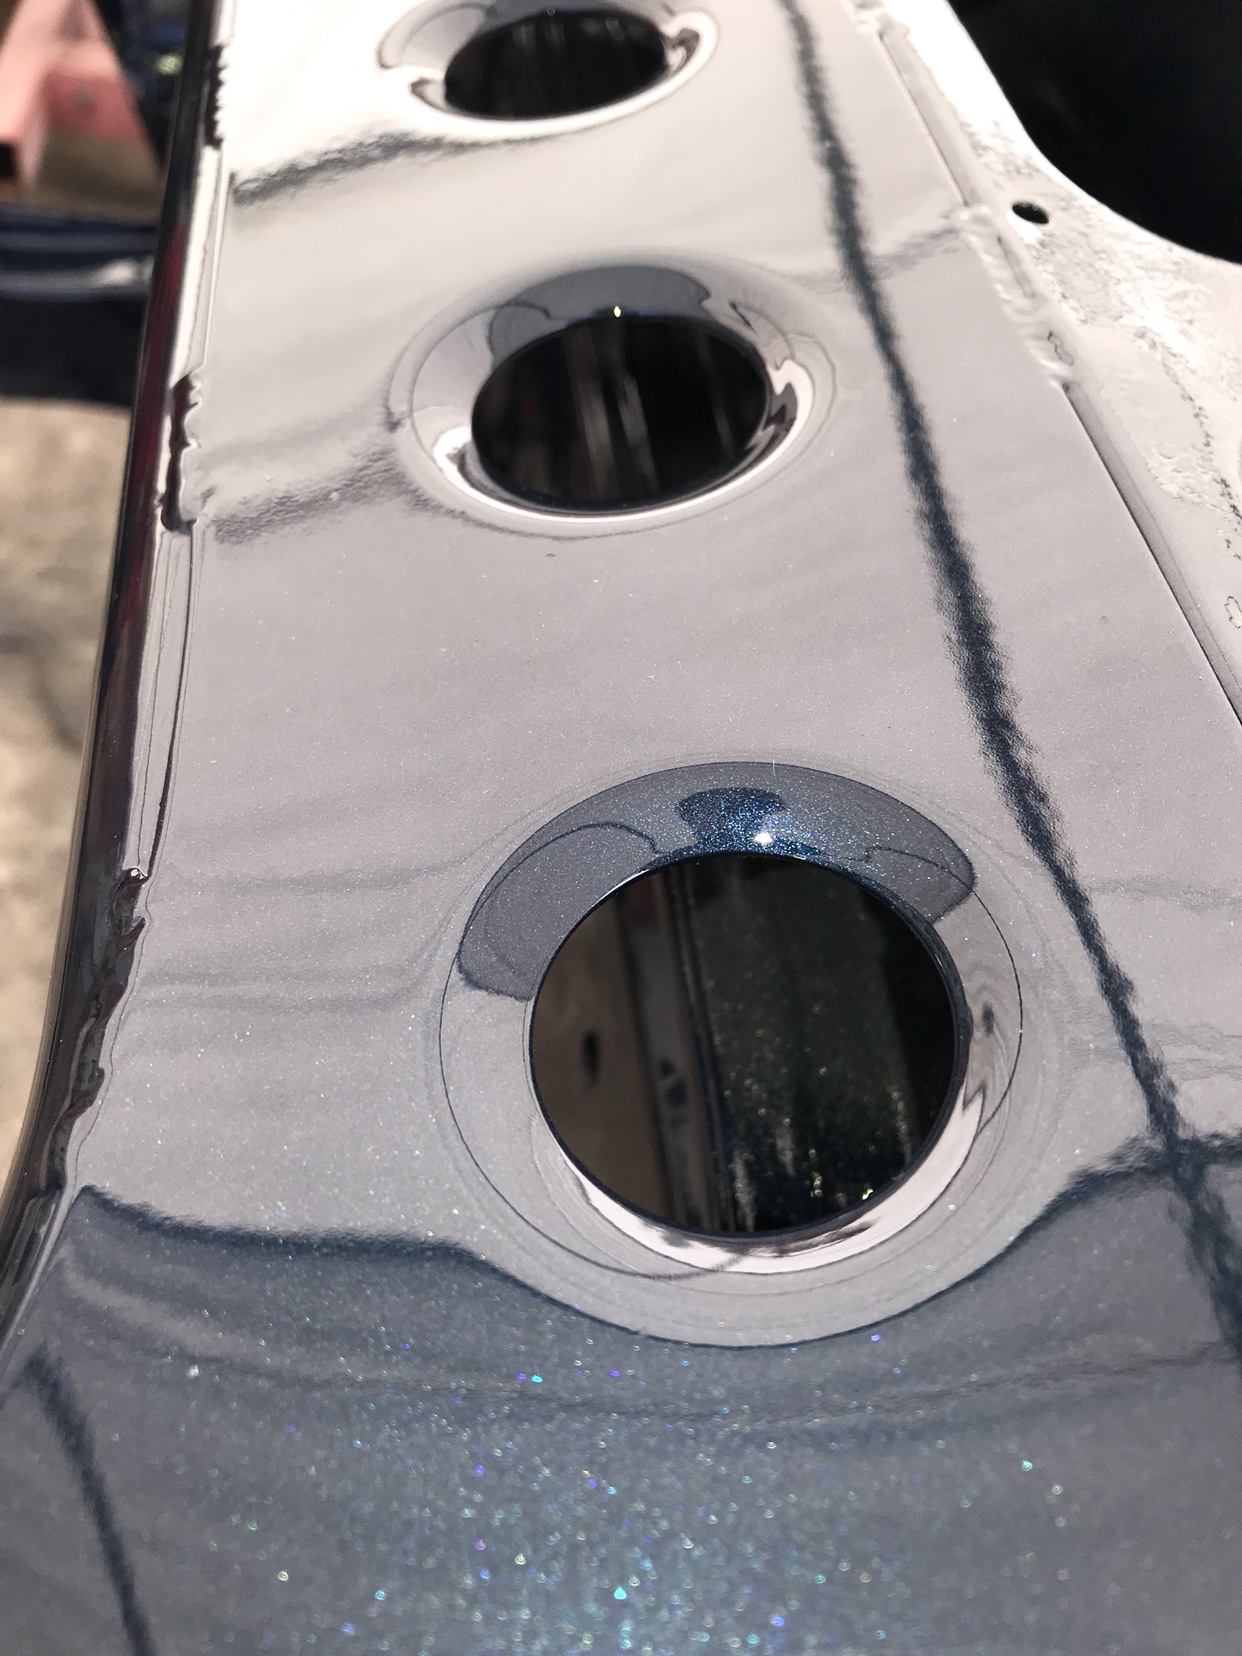 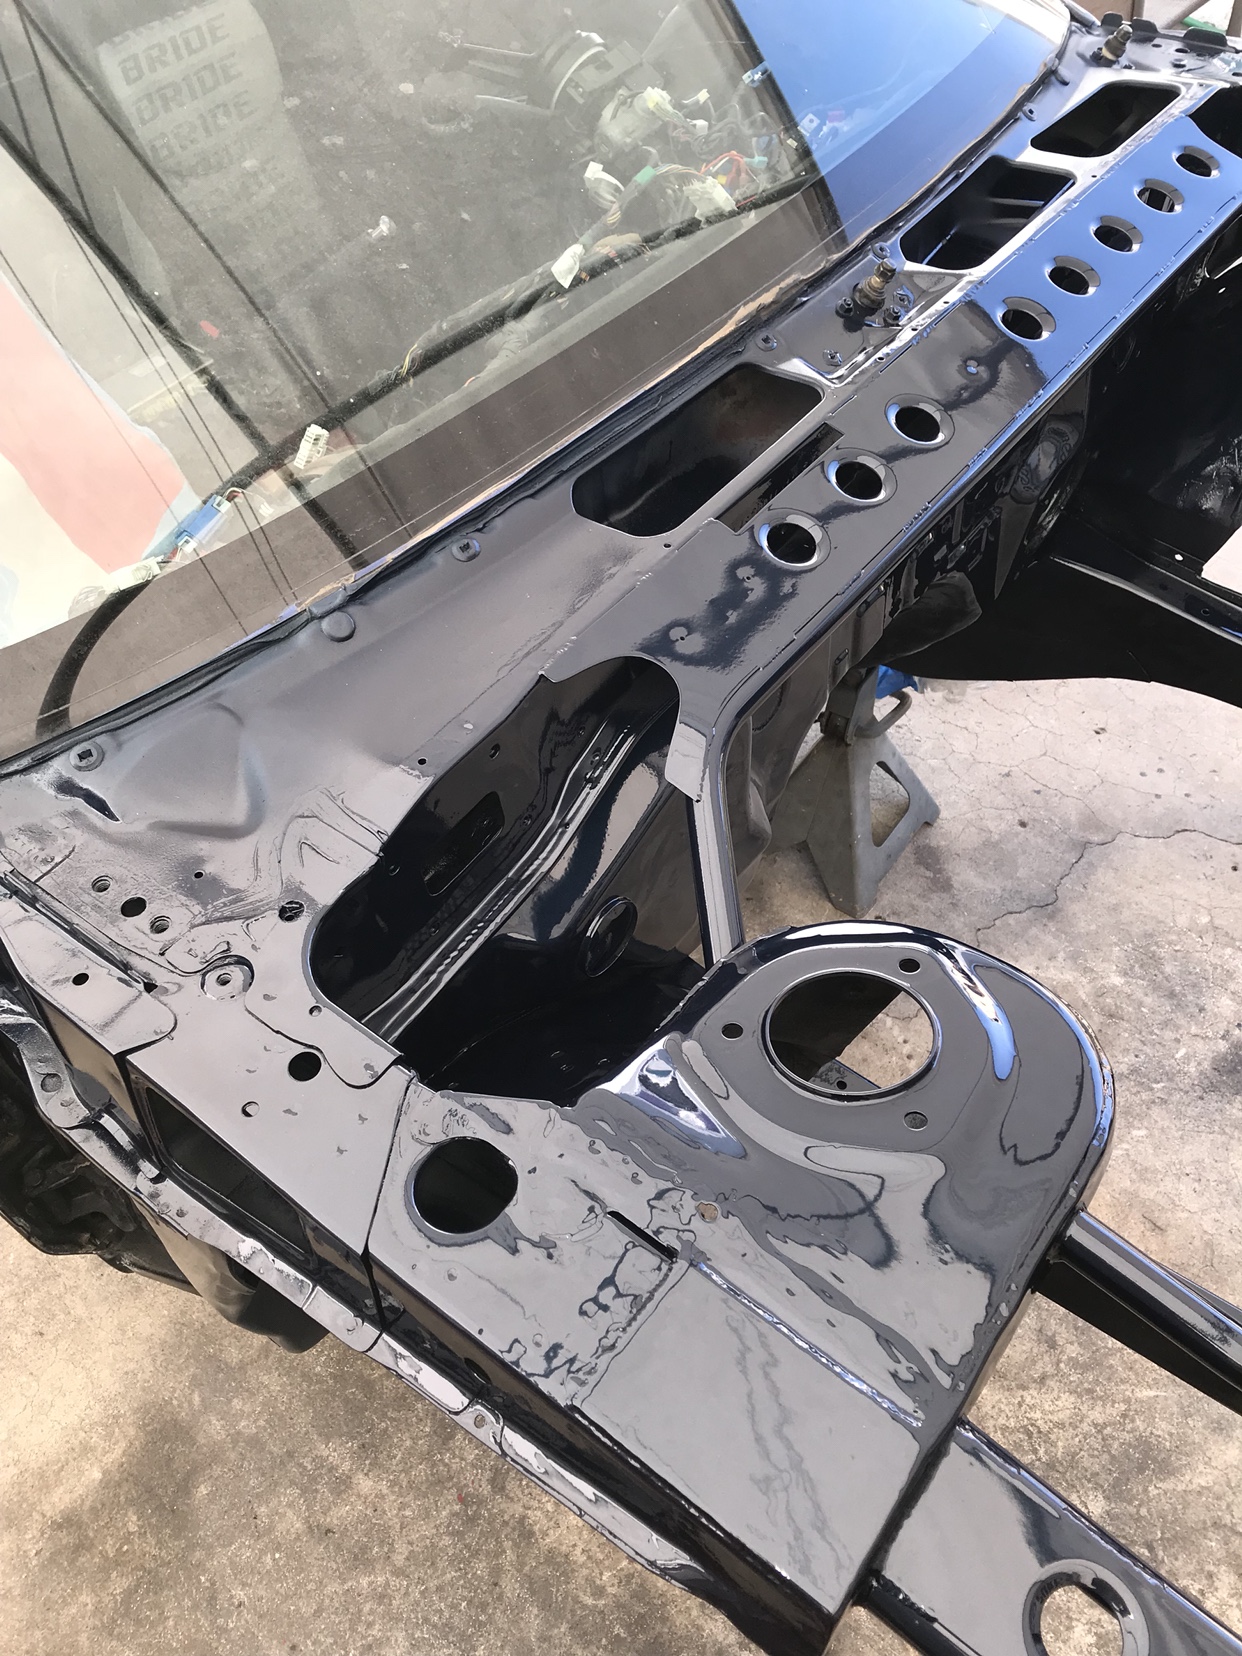 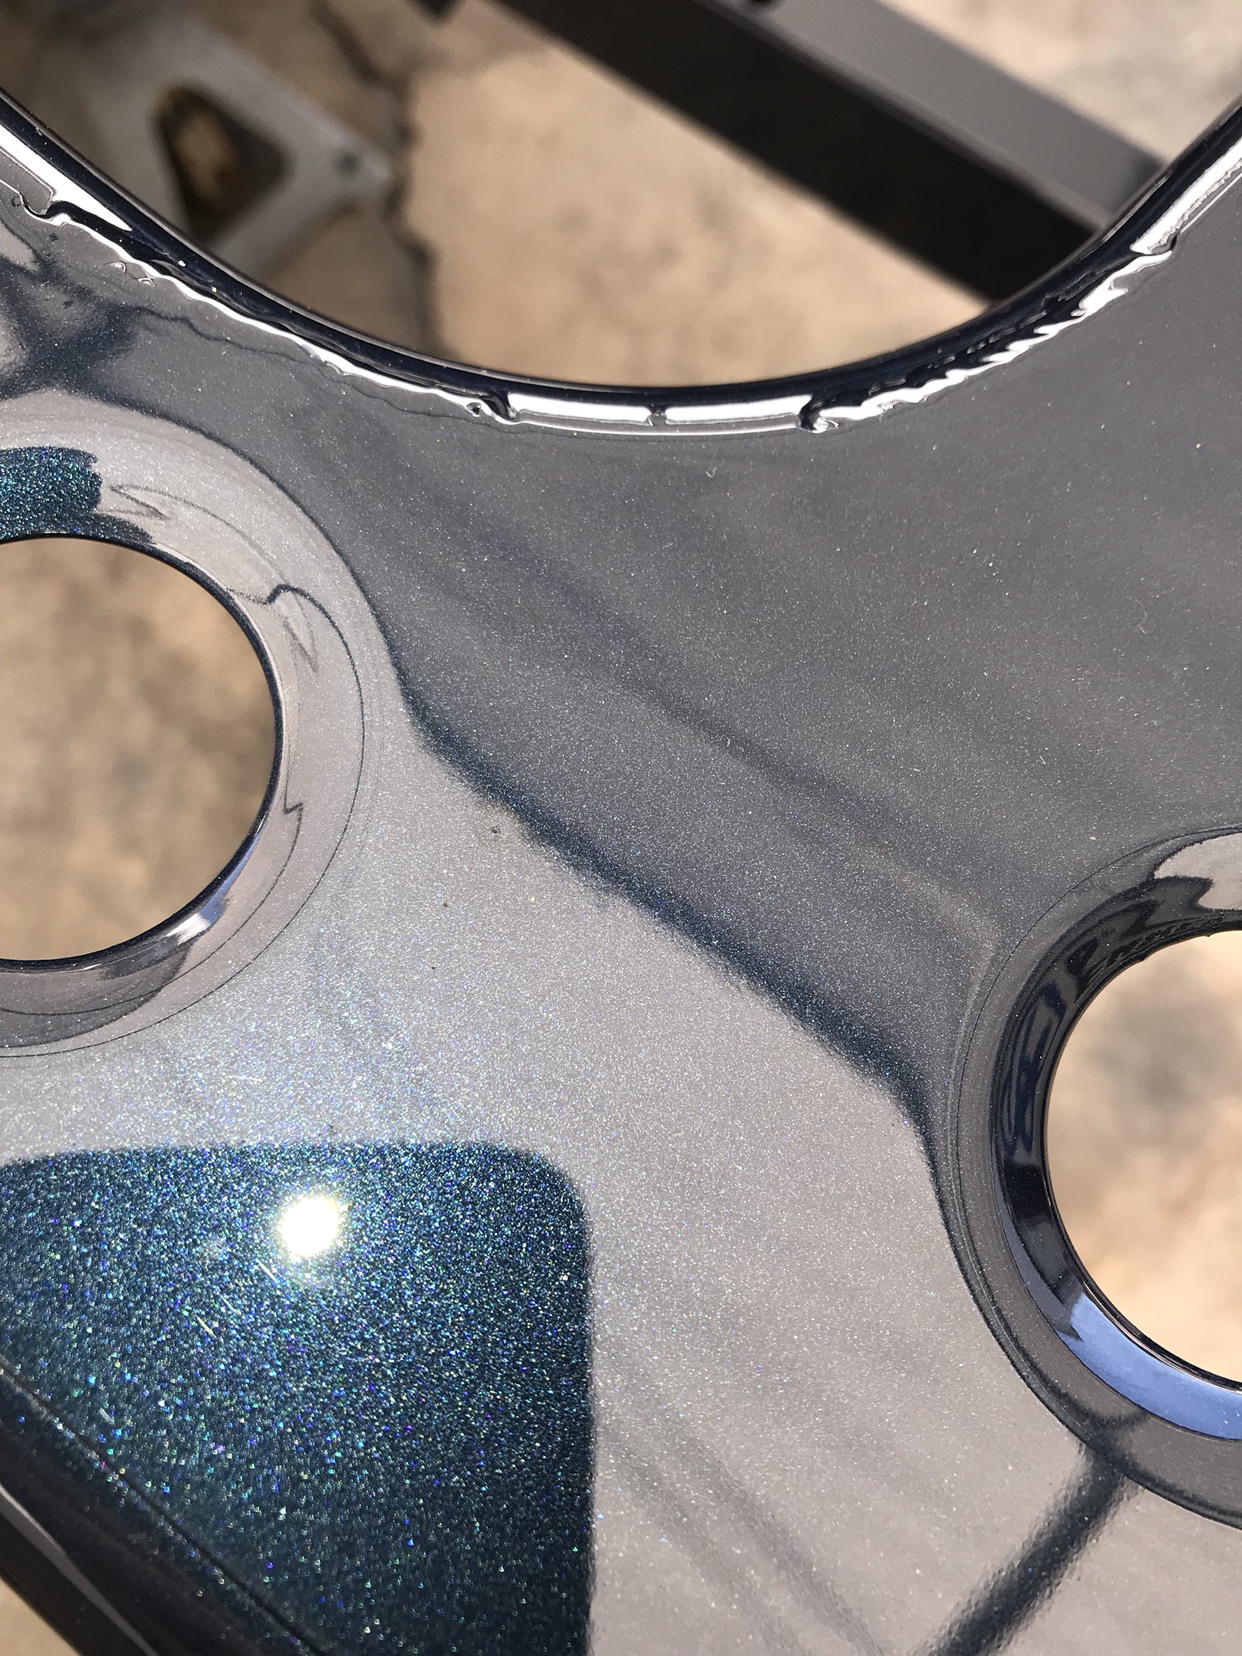 Re coated the subframe and booster the same black with purple blue flake Steering rack went out for a fresh rebuild 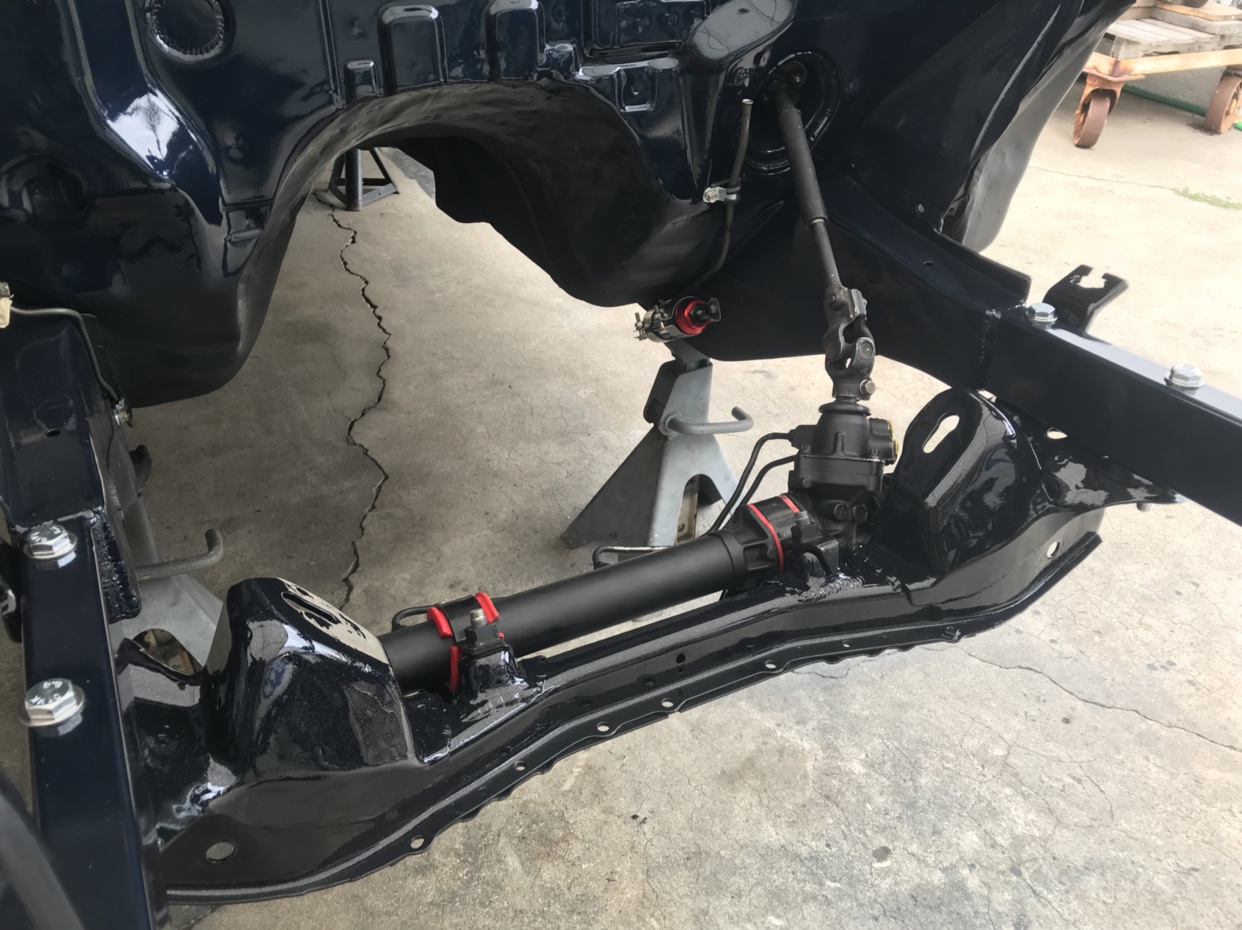 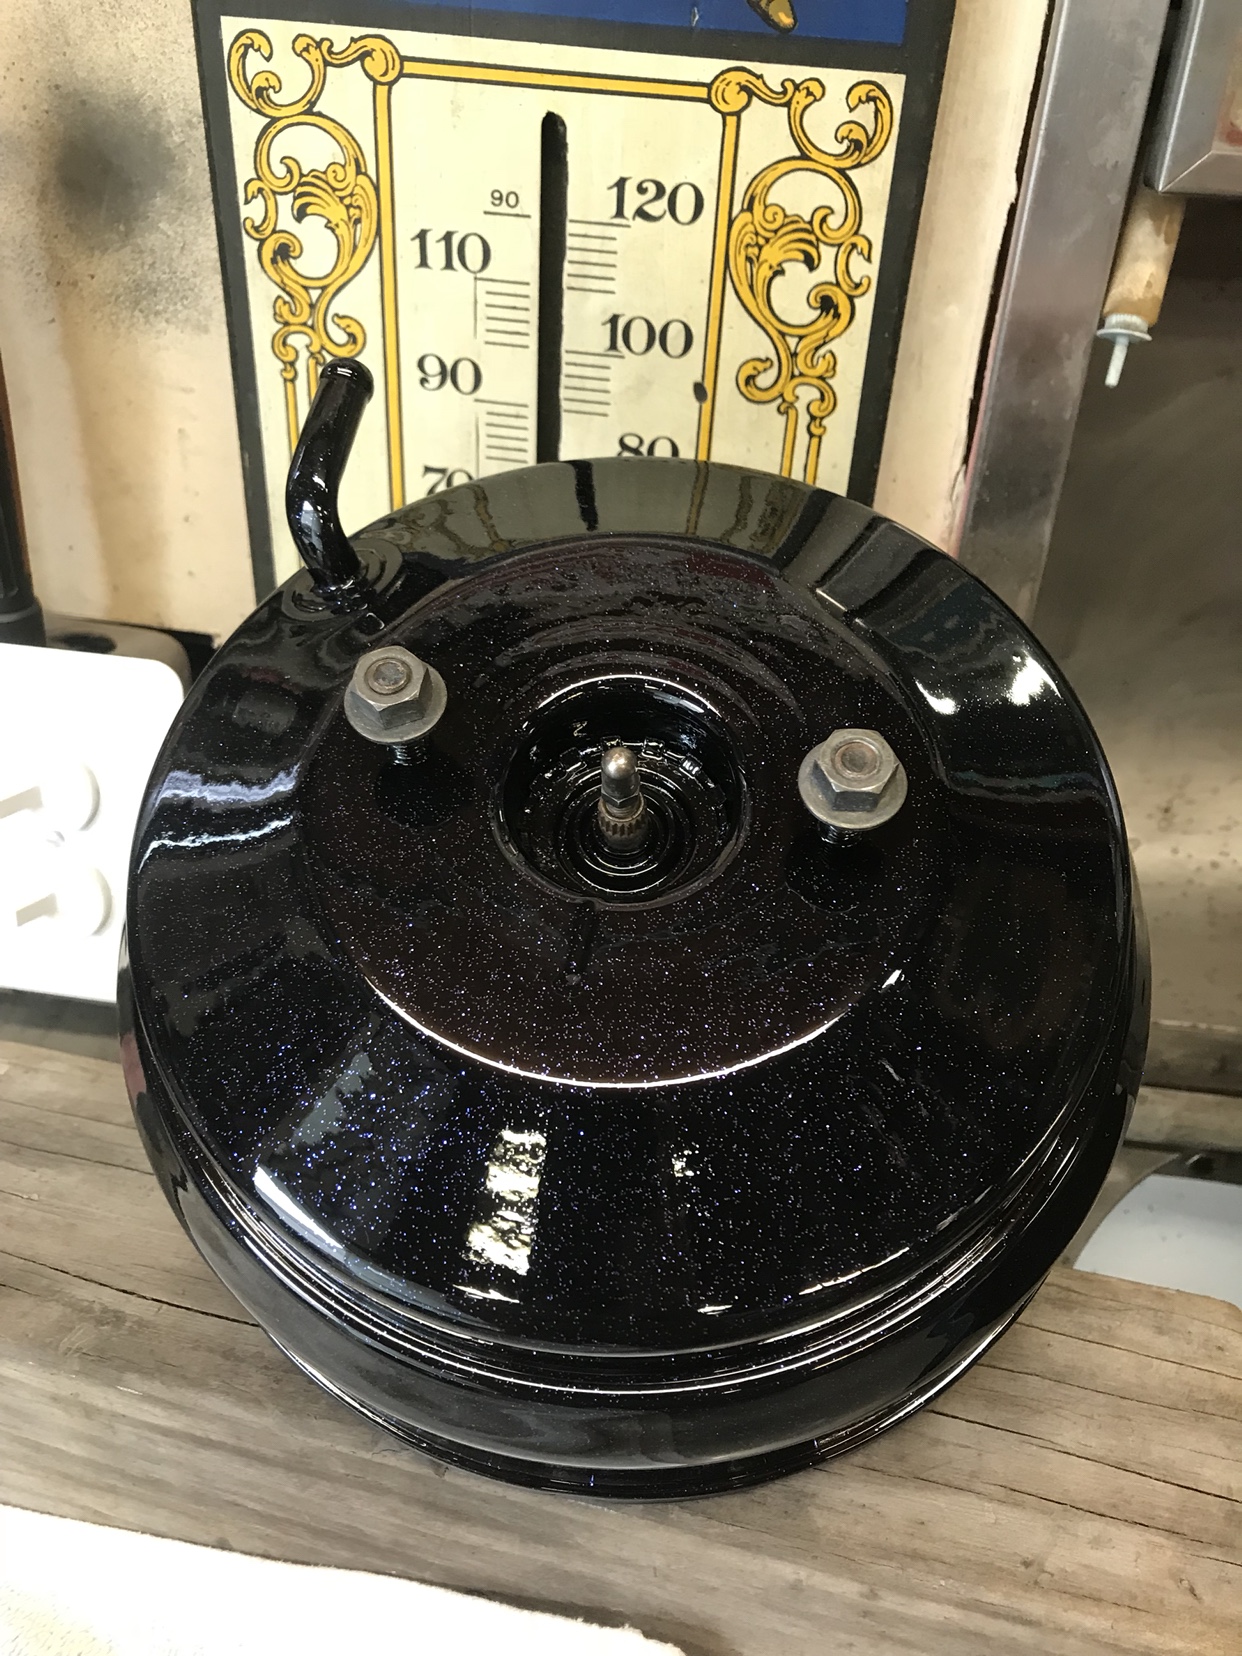 Powder coated a few bits The trans mount, shifter housing, and power steering reservoir match my valve covers with a black “rainbows end” subtle in shade and pops in sun 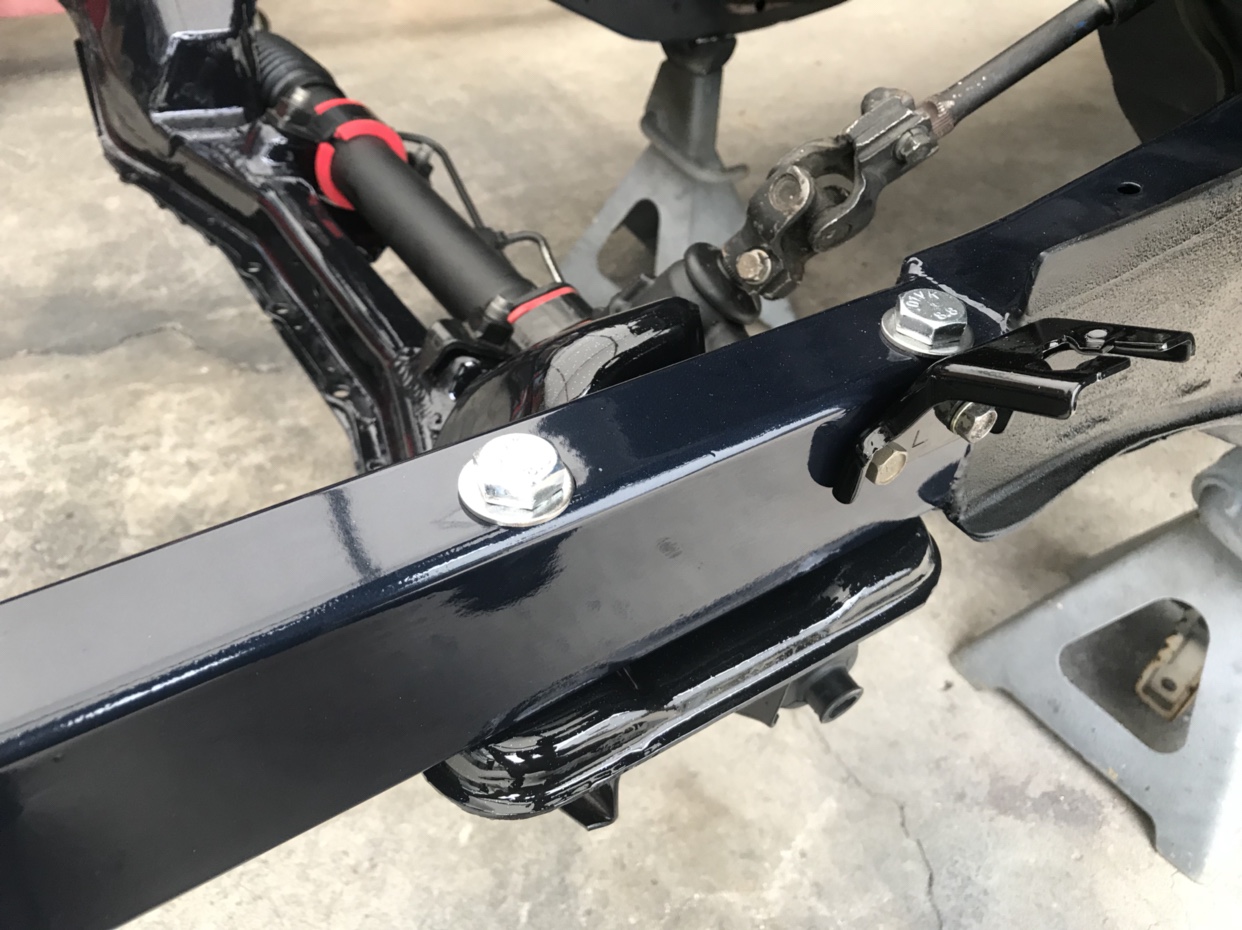 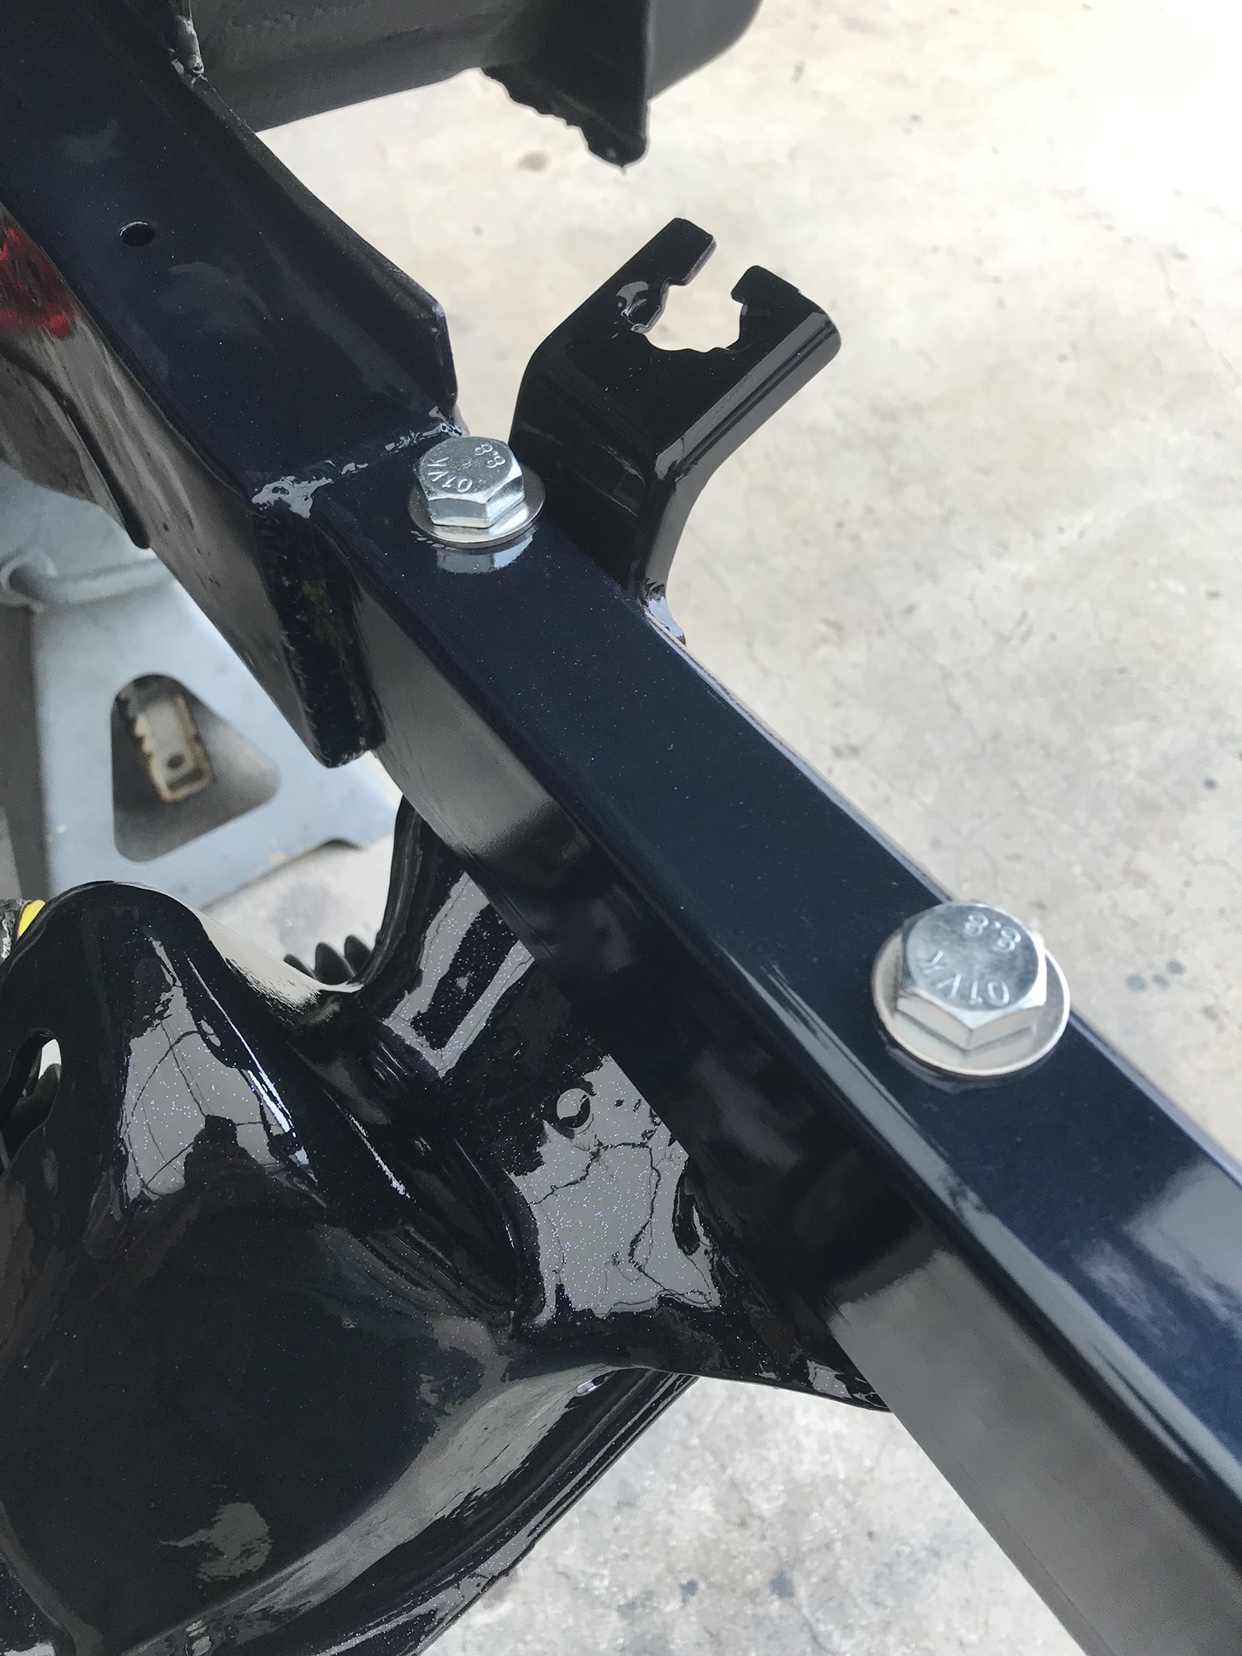 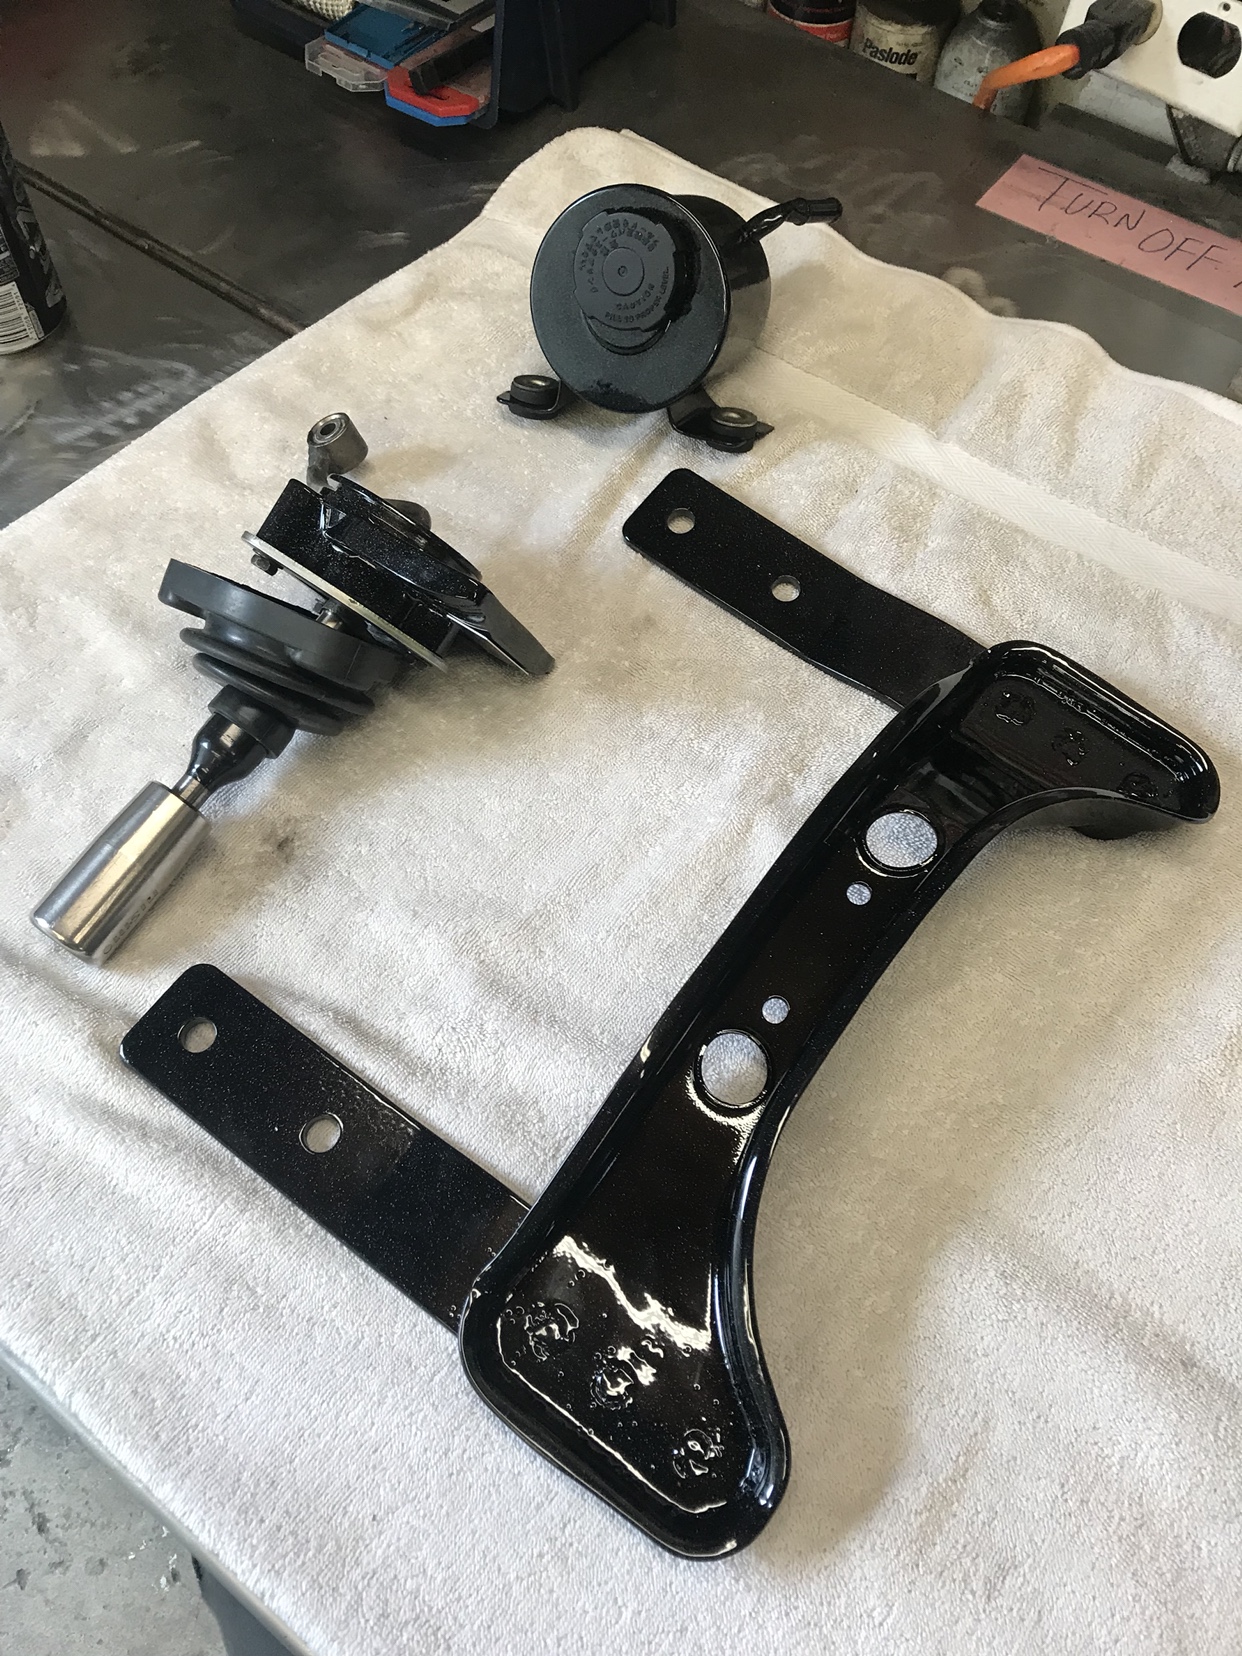 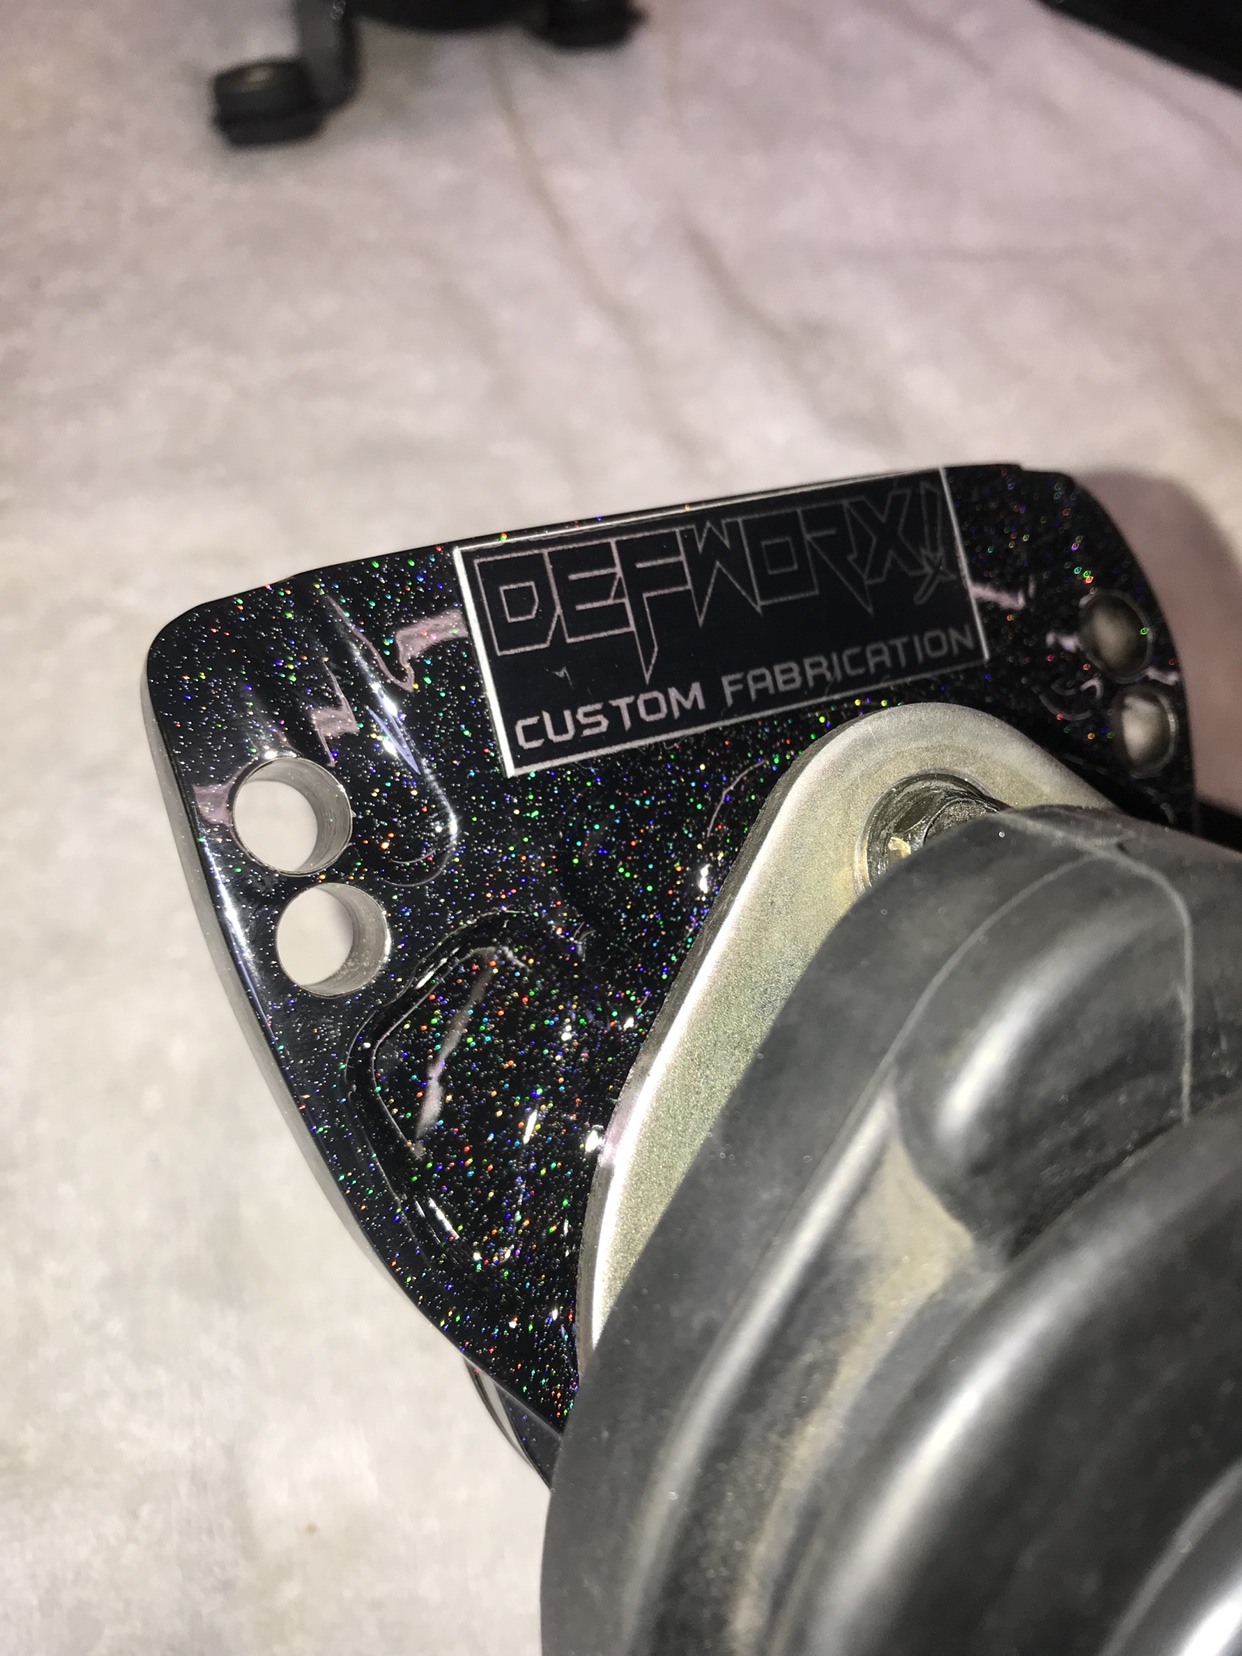 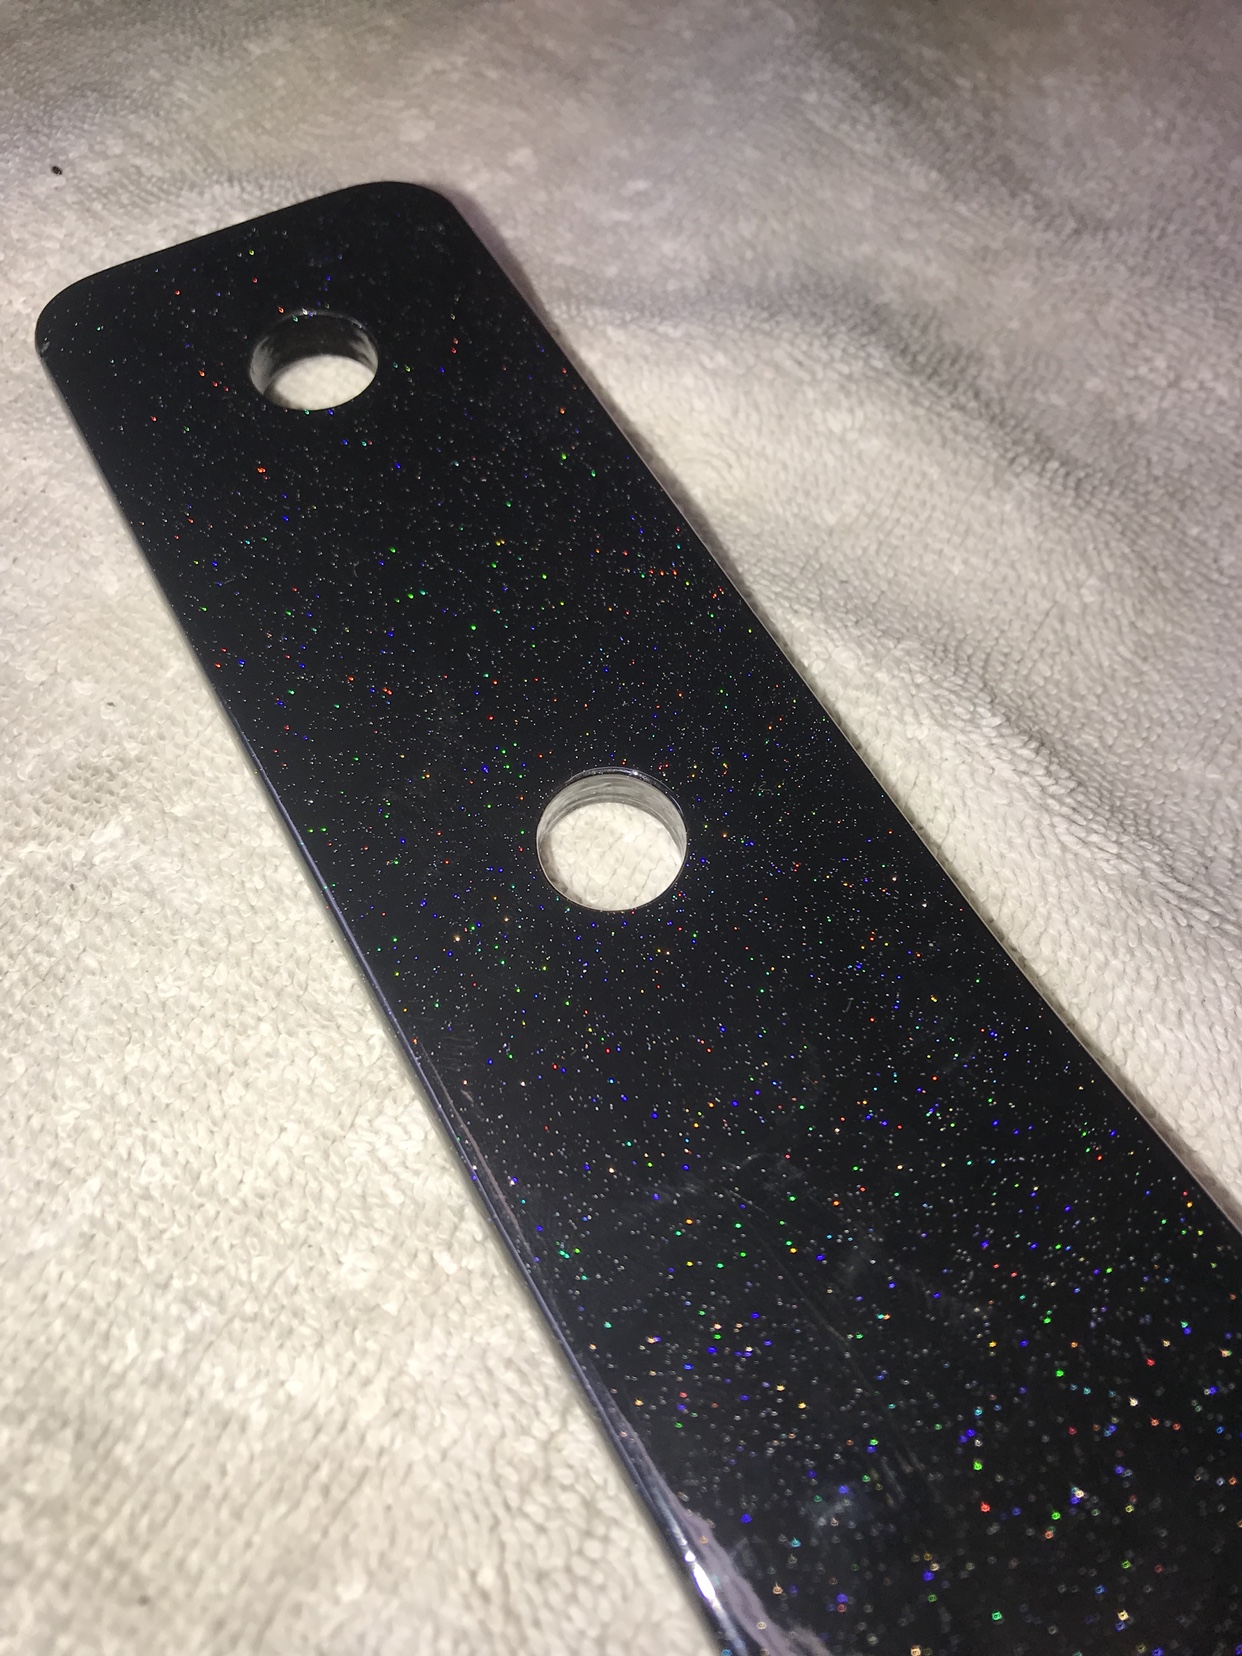 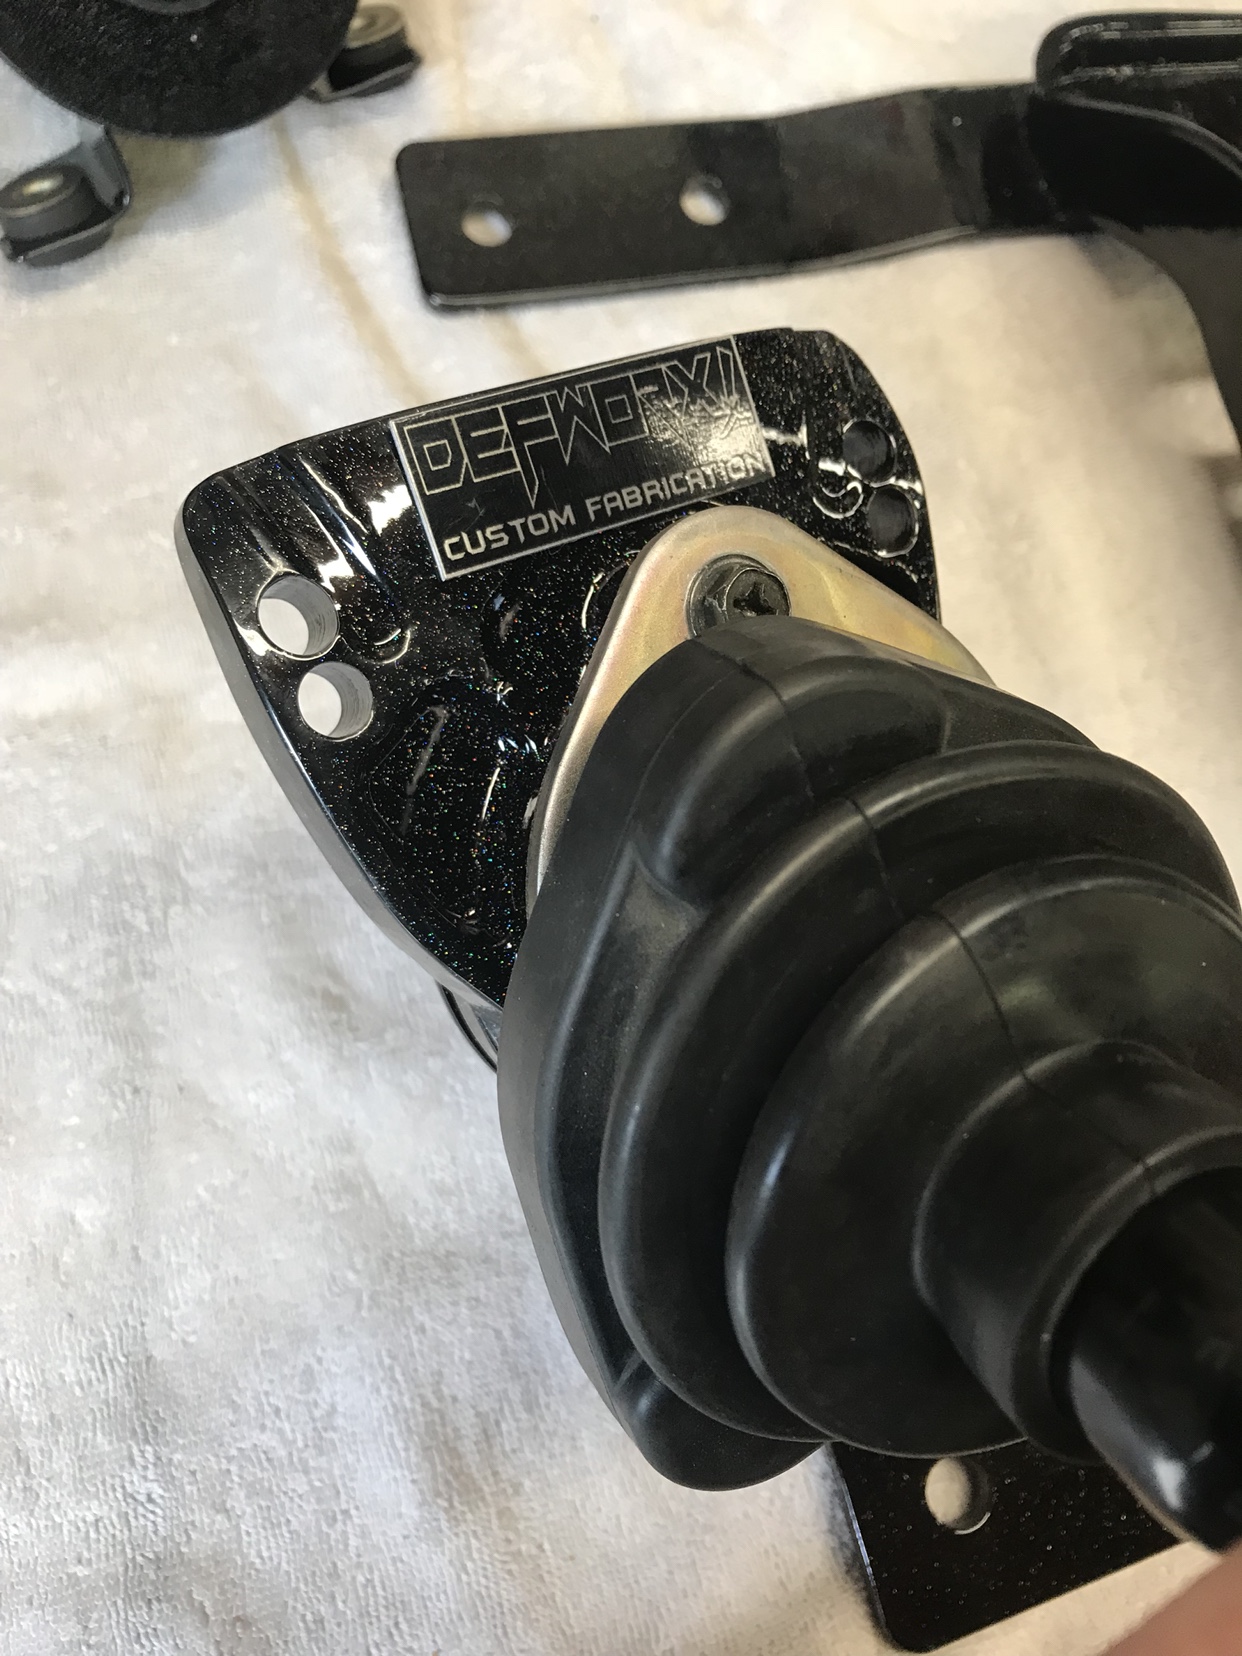 For those of you that don’t already know... you can swap your fuel lines from one side of the chassis to the other. Just unbolt the softlines from the tank and remove all the hardware holding them on the rails and wiggle them out. It’ll require slight bending to get them to fit right but for the most part they already match the other side. I’m running this filter with AN fittings for my feed and just rubber hose for return. This set up may change later with fuel upgrades. 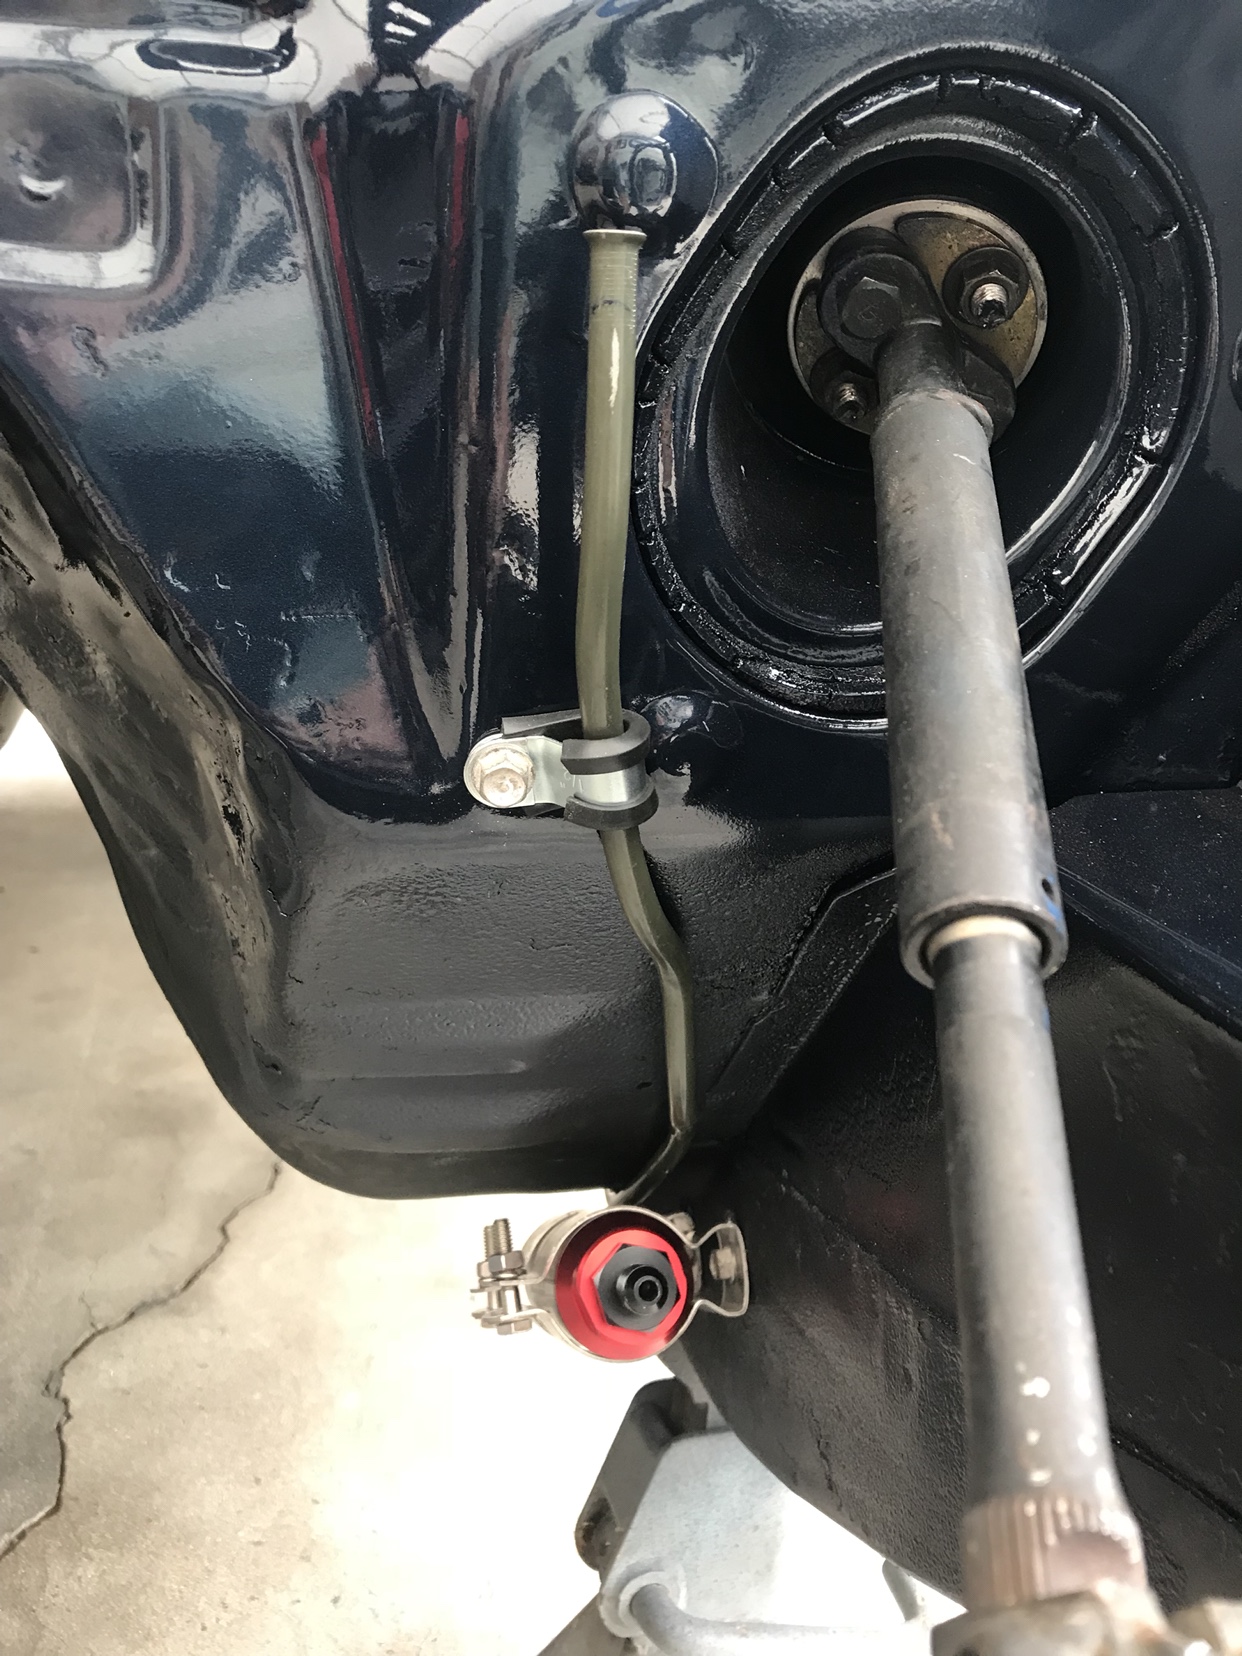 Flowed in a fresh coat of underbody spray again 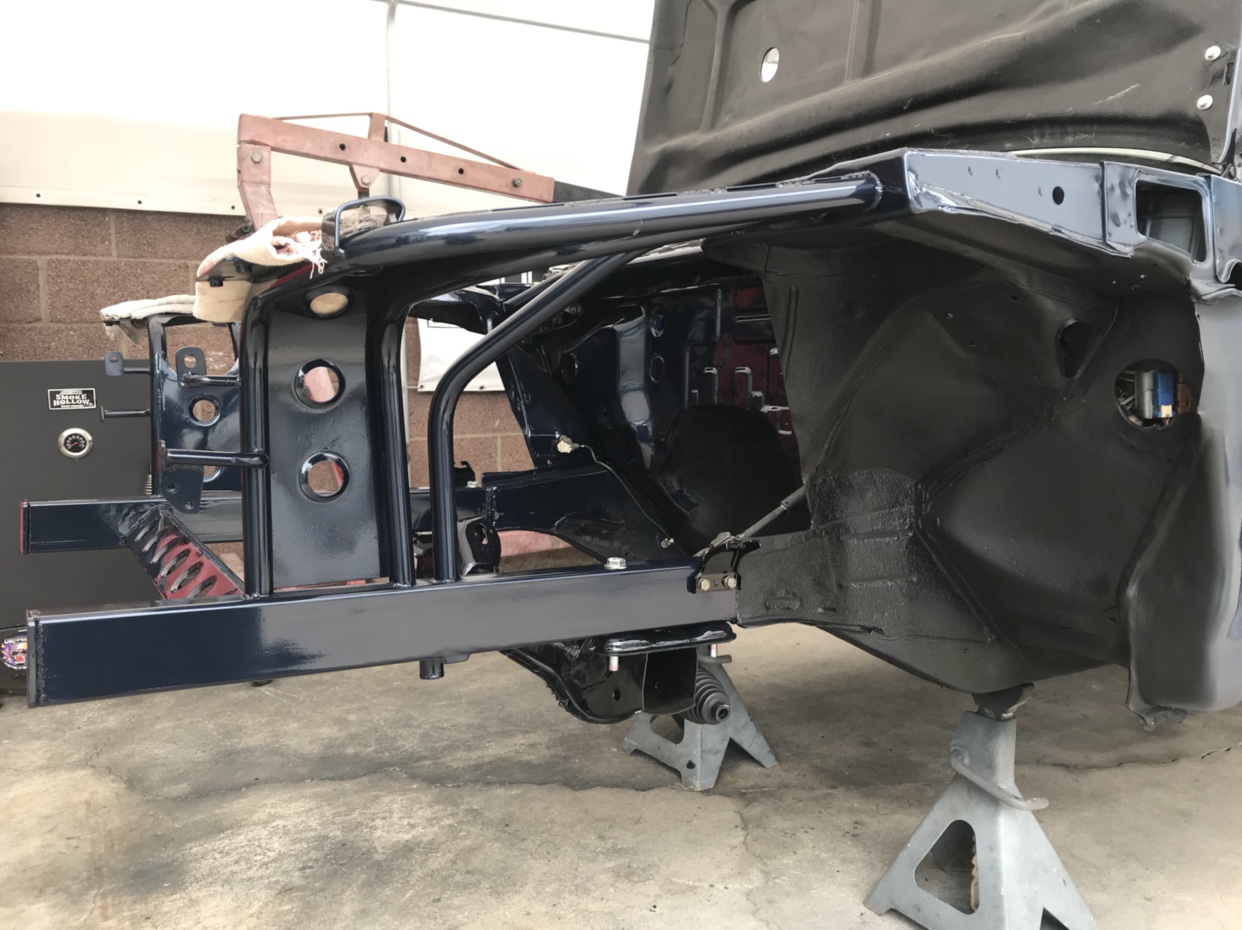 Sent from my iPhone using Tapatalk |
|
|

|
|
|
#85 |
|
Zilvia Junkie
 Join Date: Sep 2012
Location: LongBeach, CA
Age: 28
Posts: 371
Trader Rating: (4)
     Feedback Score: 4 reviews
|
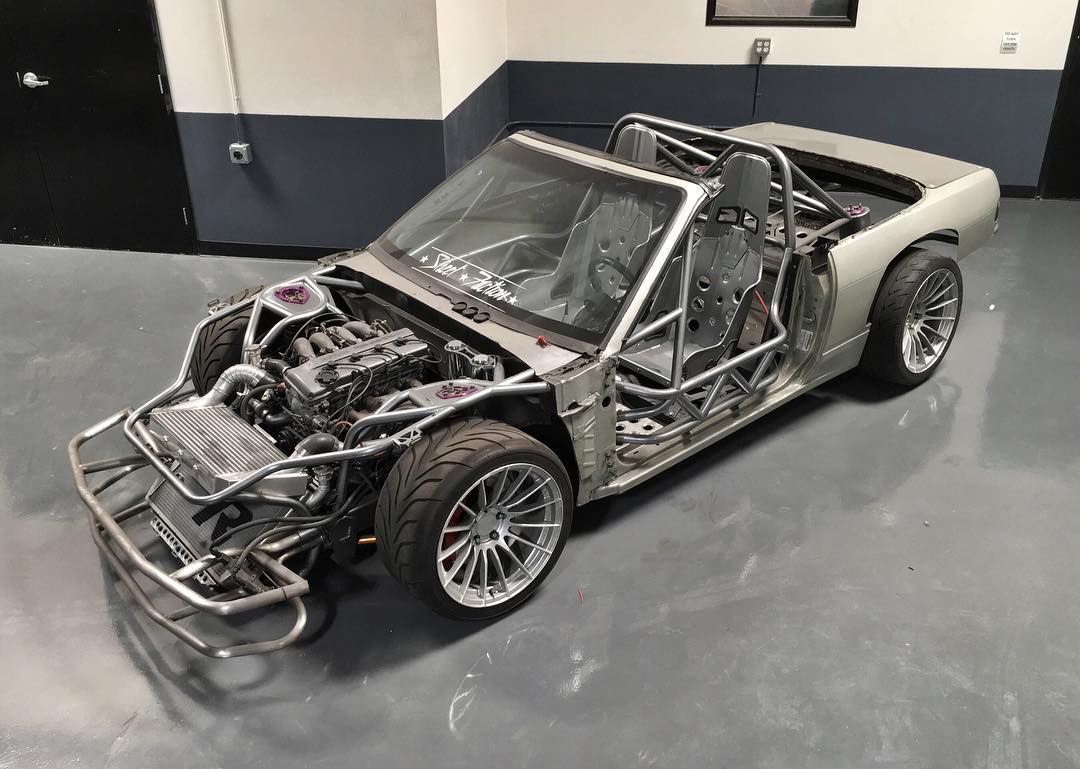
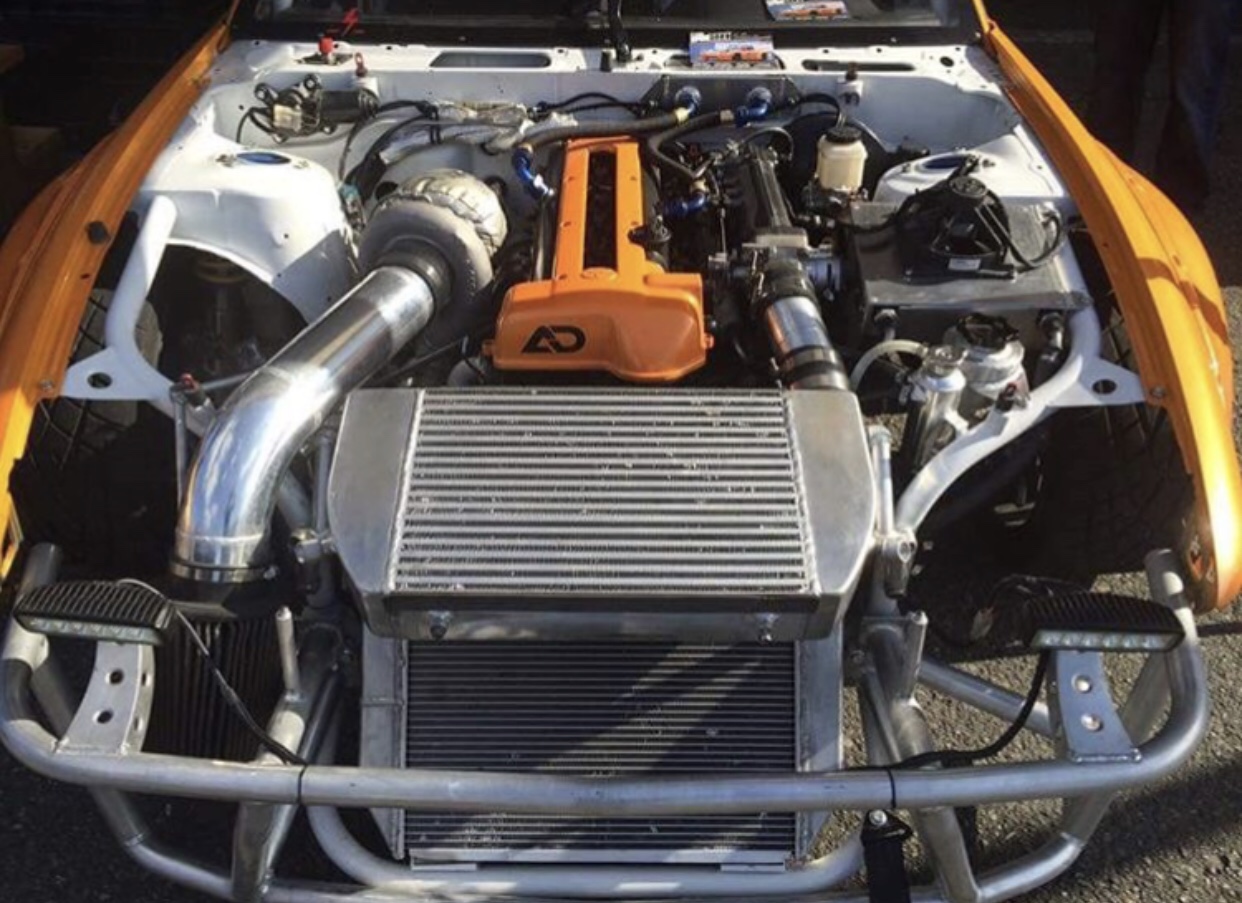
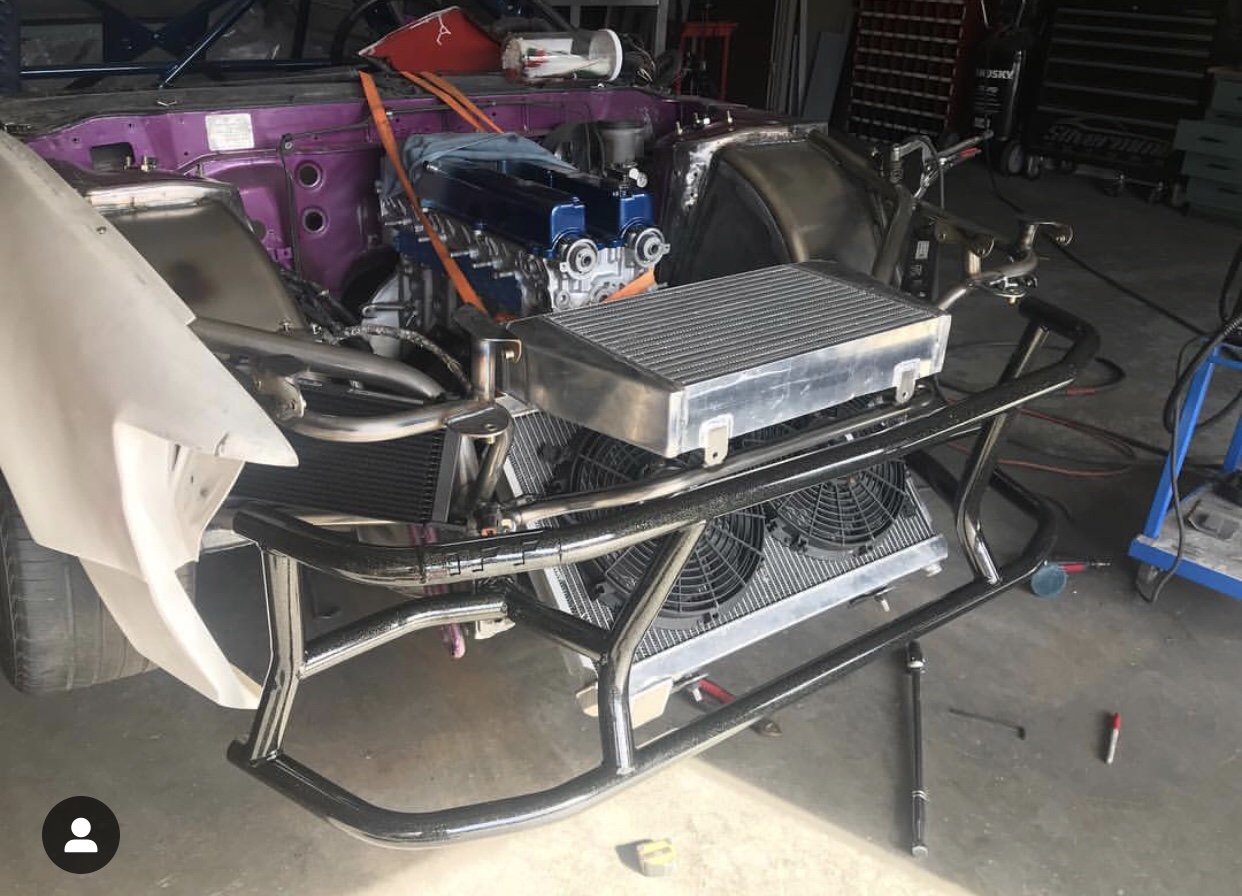
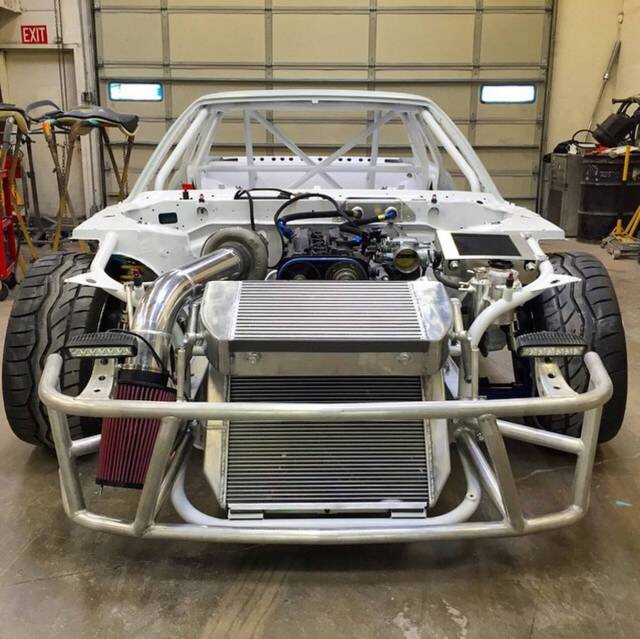
I want to give credit to a few builds that have been a inspiration during my build before I forget. Great for others who may be considering a v mount set up.
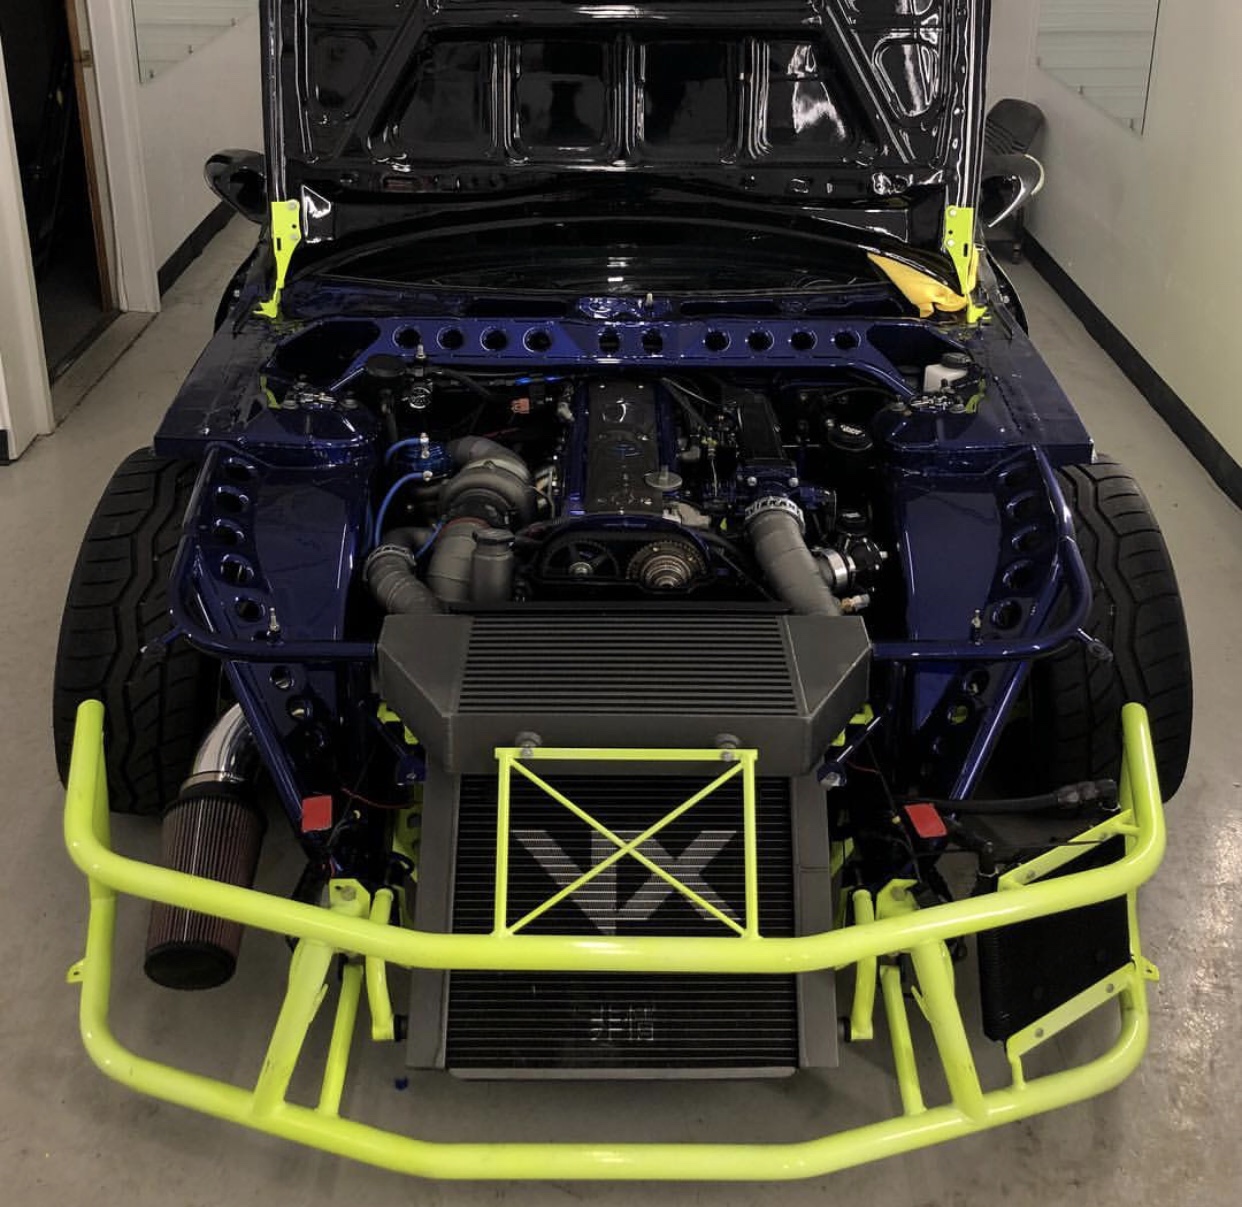 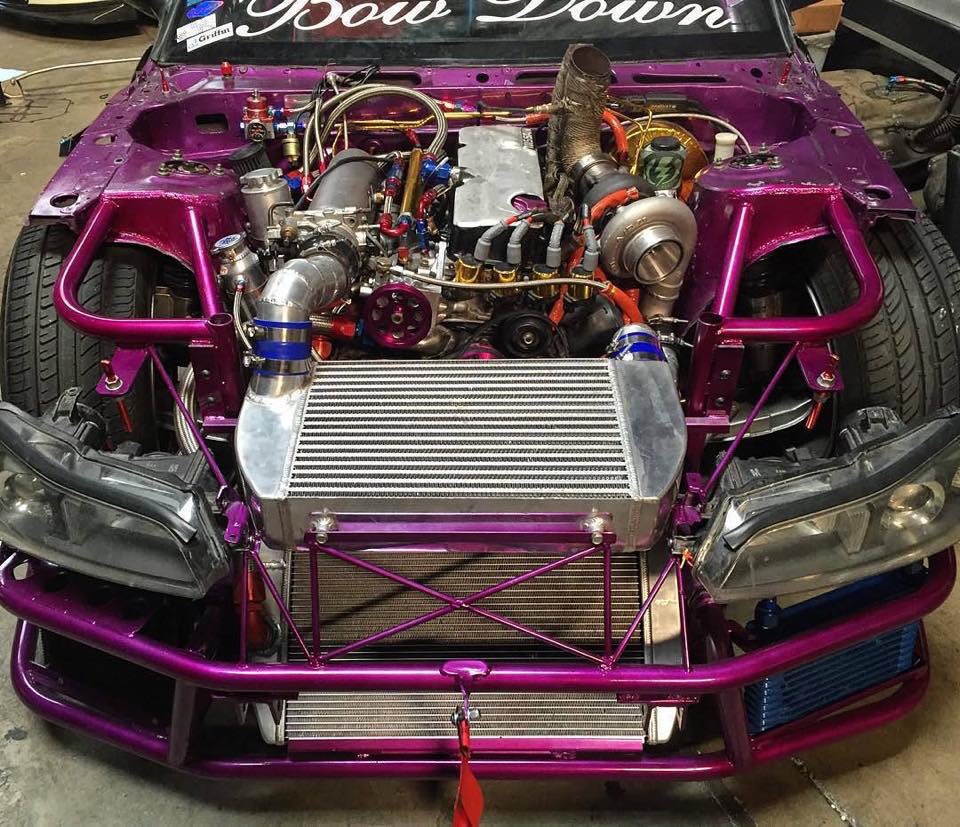     Sent from my iPhone using Tapatalk |
|
|

|
|
|
#86 |
|
Zilvia Junkie
 Join Date: Sep 2012
Location: LongBeach, CA
Age: 28
Posts: 371
Trader Rating: (4)
     Feedback Score: 4 reviews
|
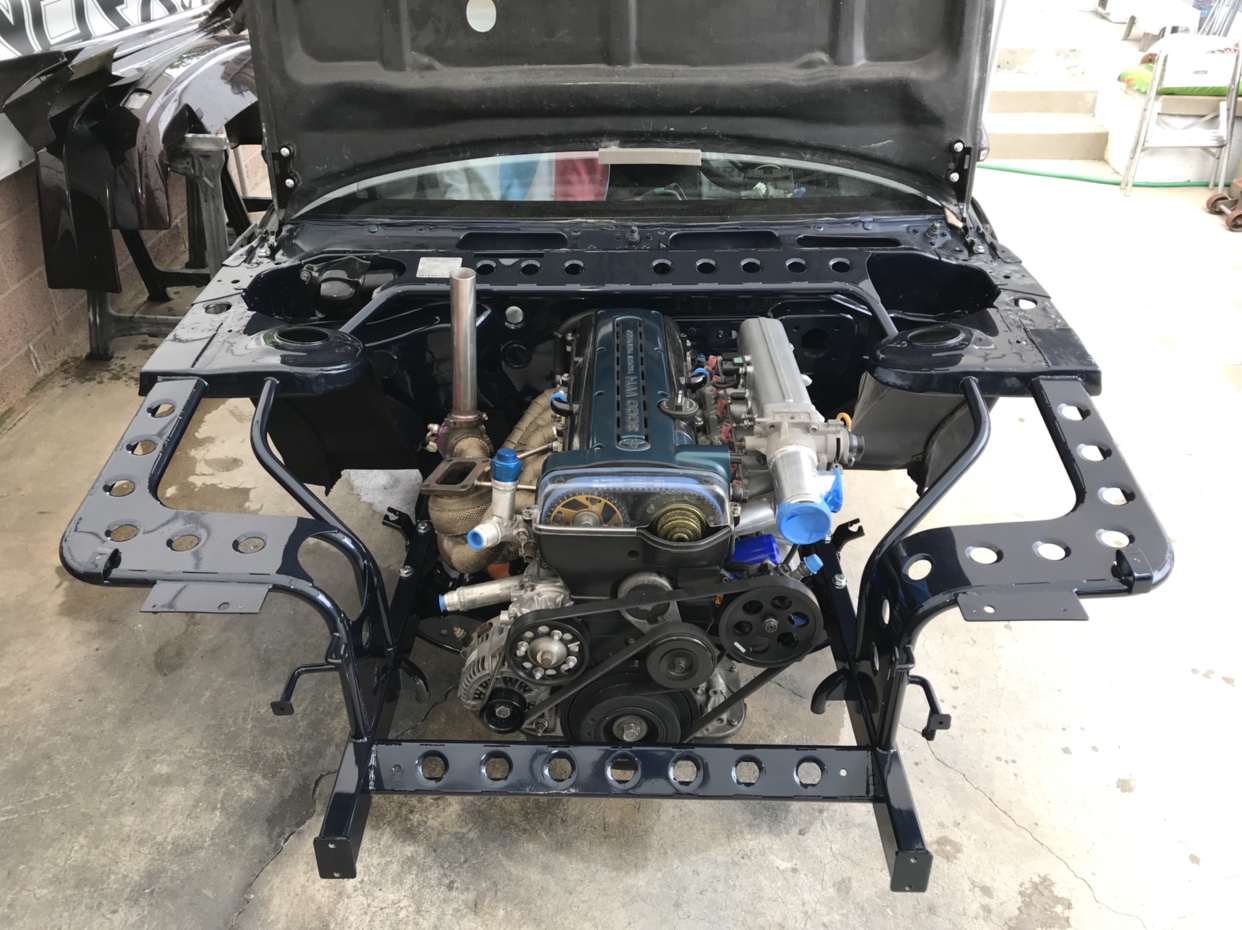
Motors back in and currently assembling things as I go
 Few shots of my shifter I made from the stock shifter parts 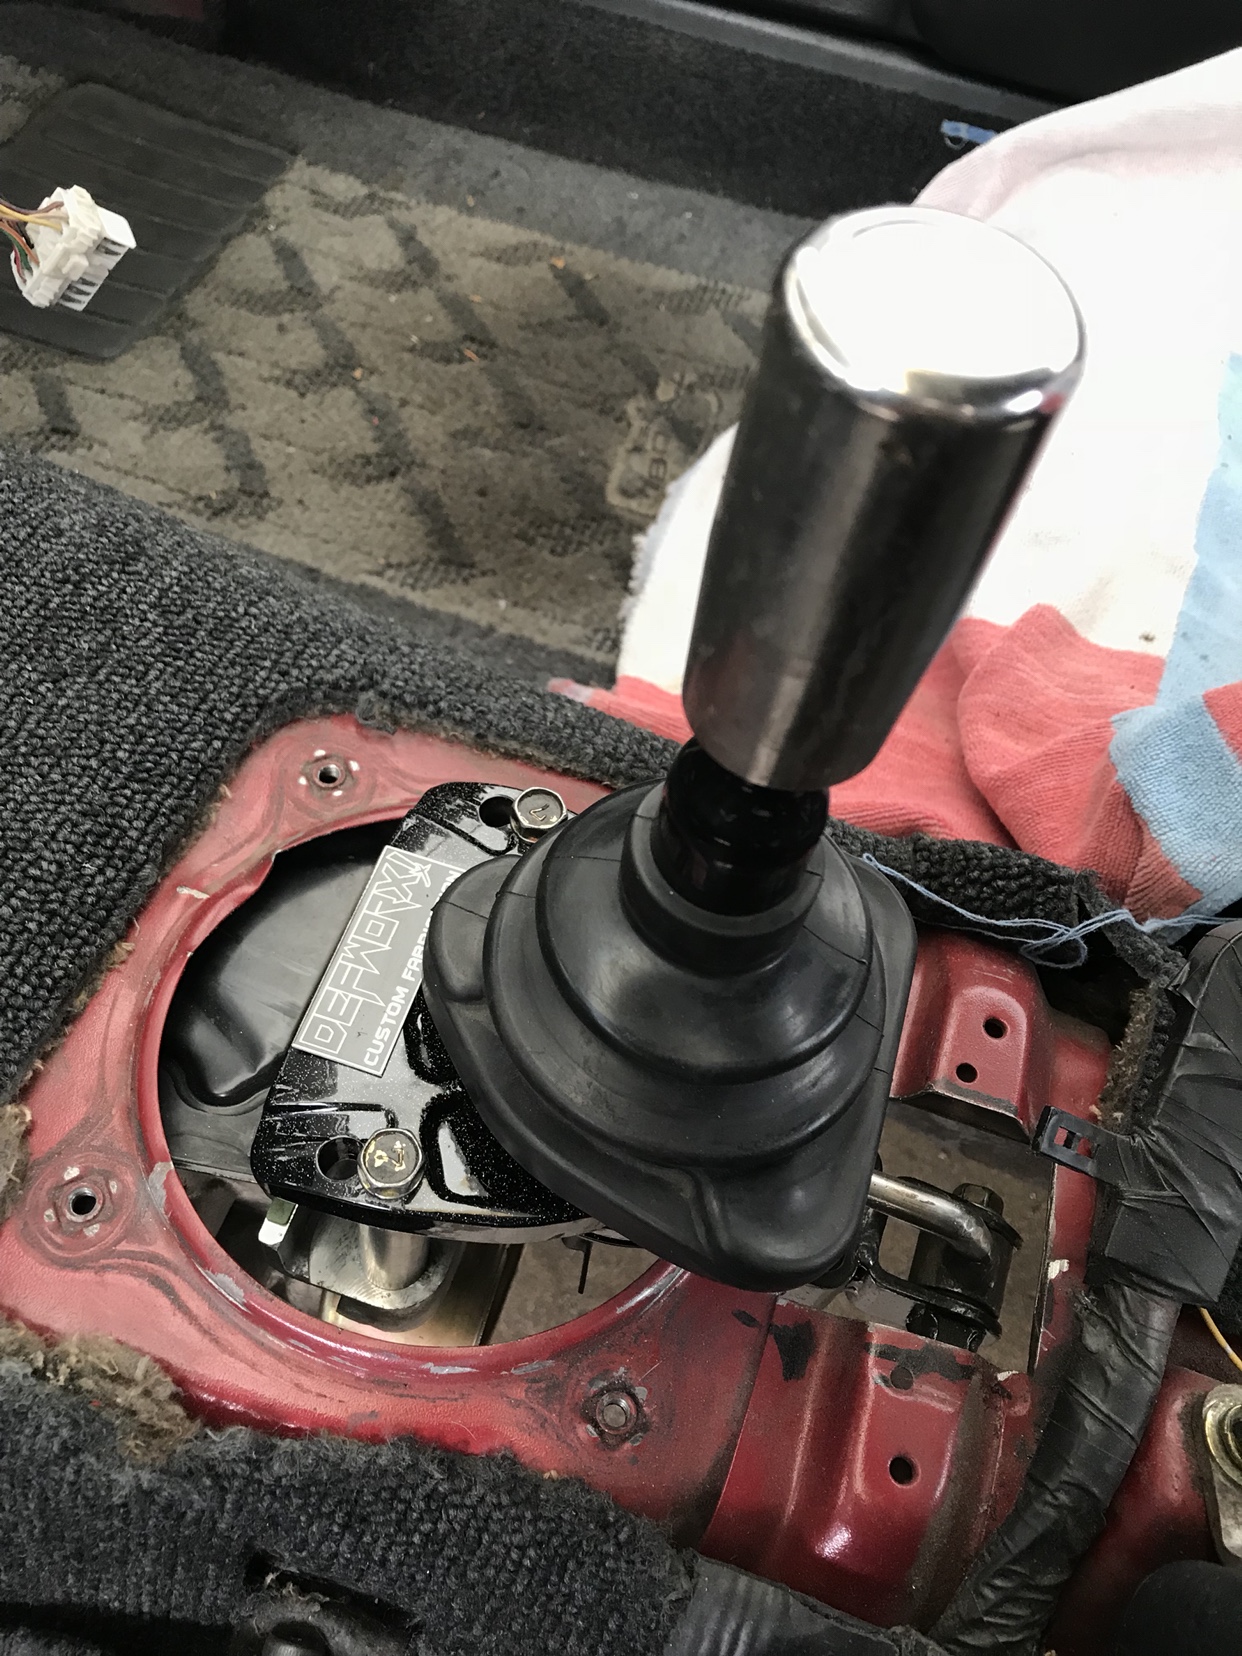 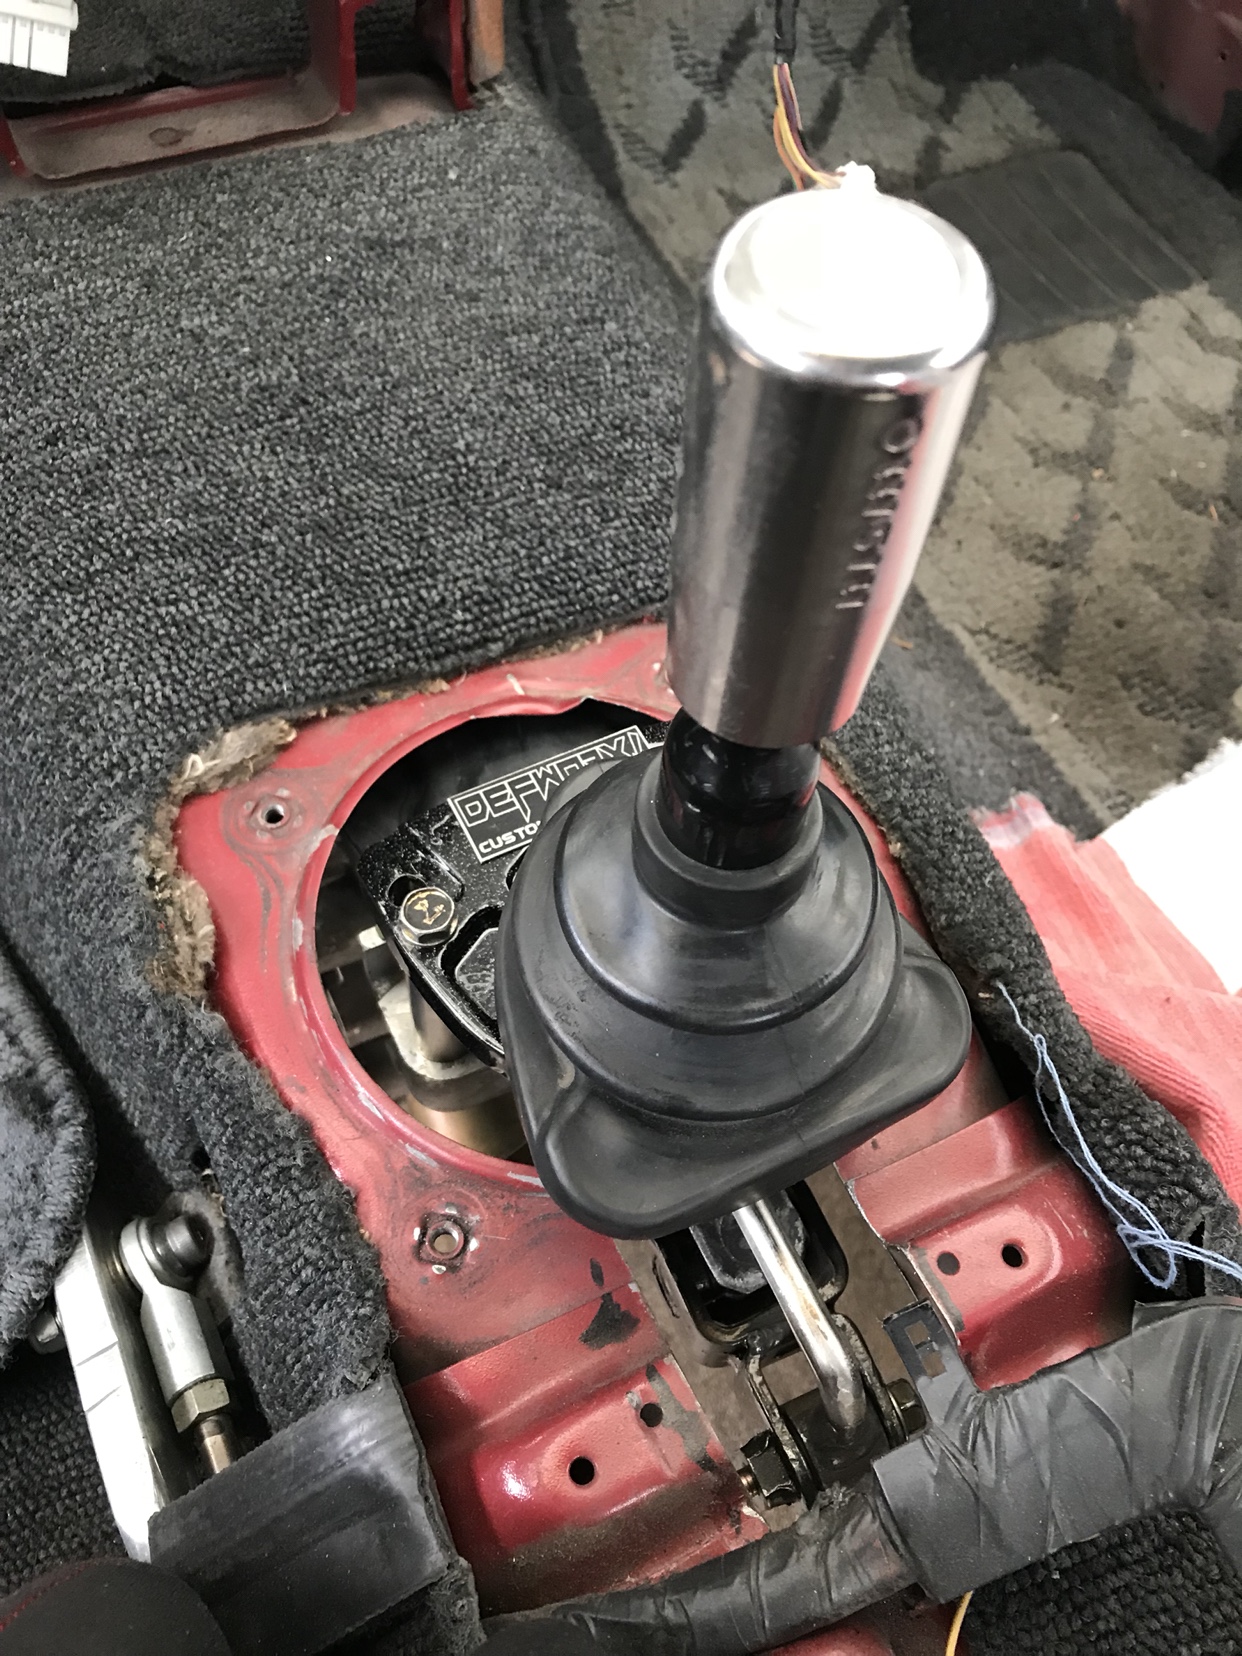 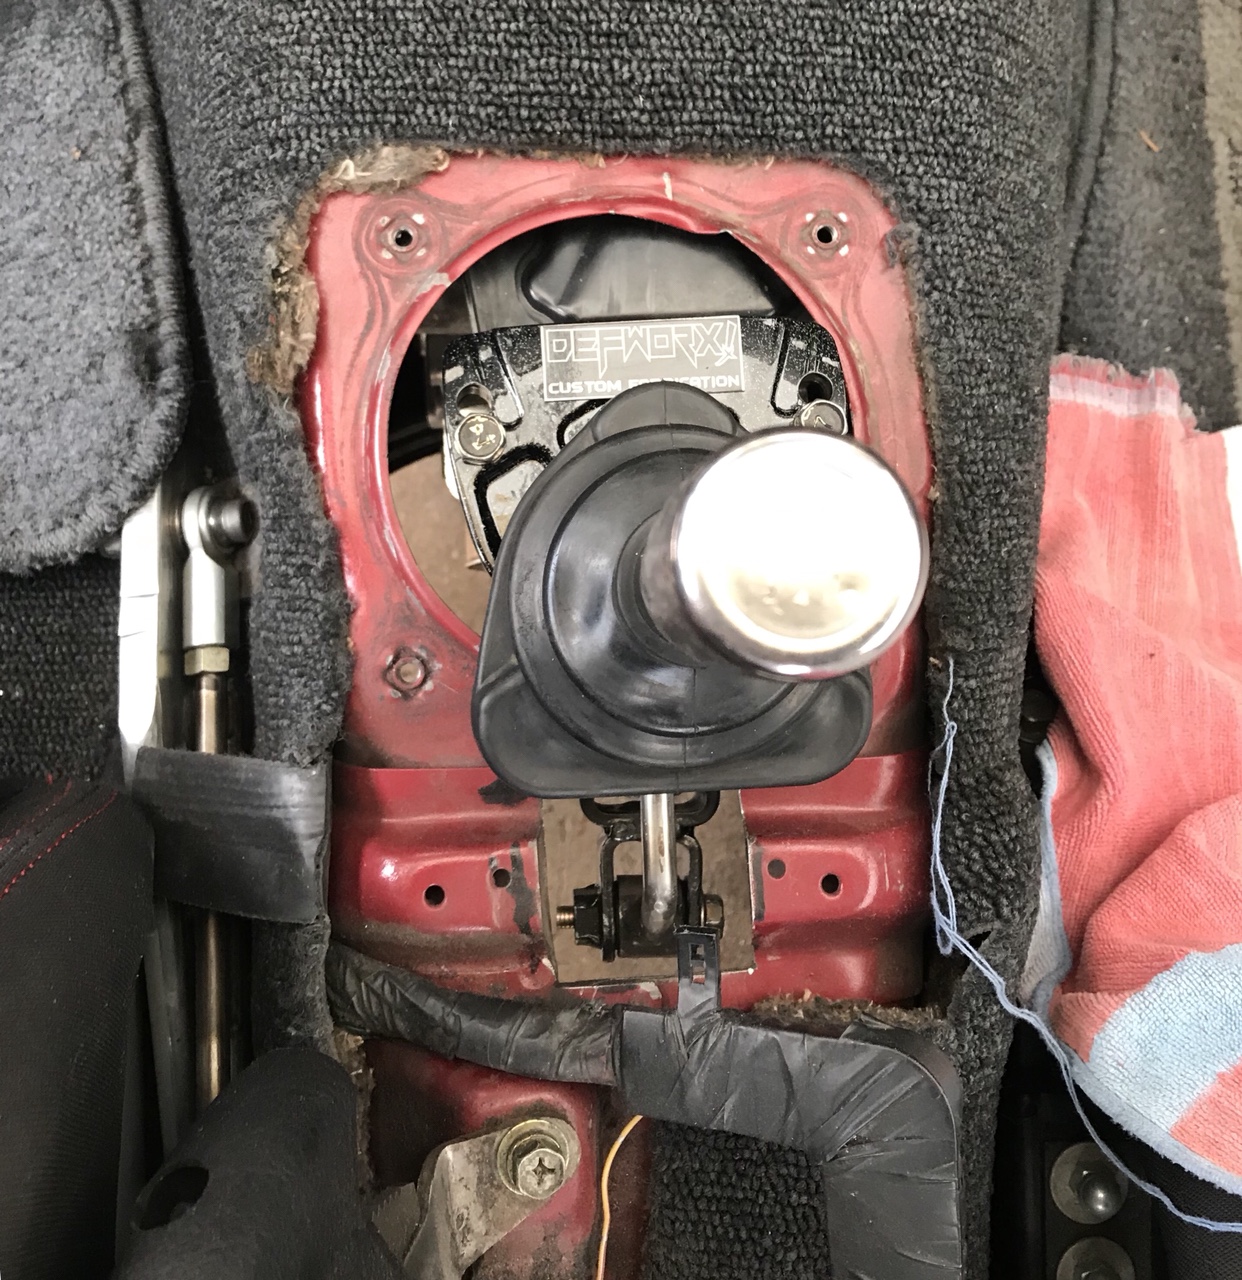 Bash bar powder coated a nice silver 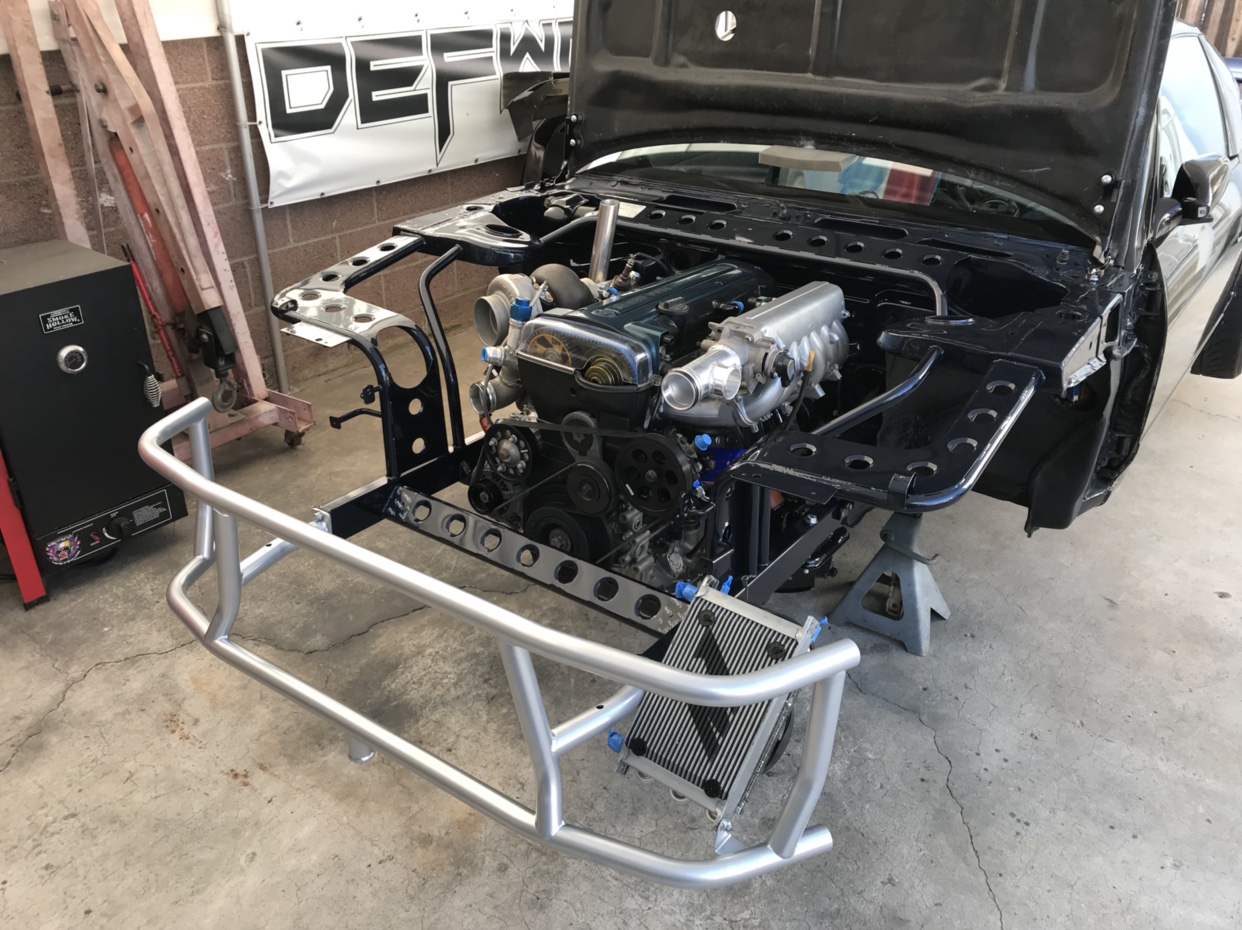 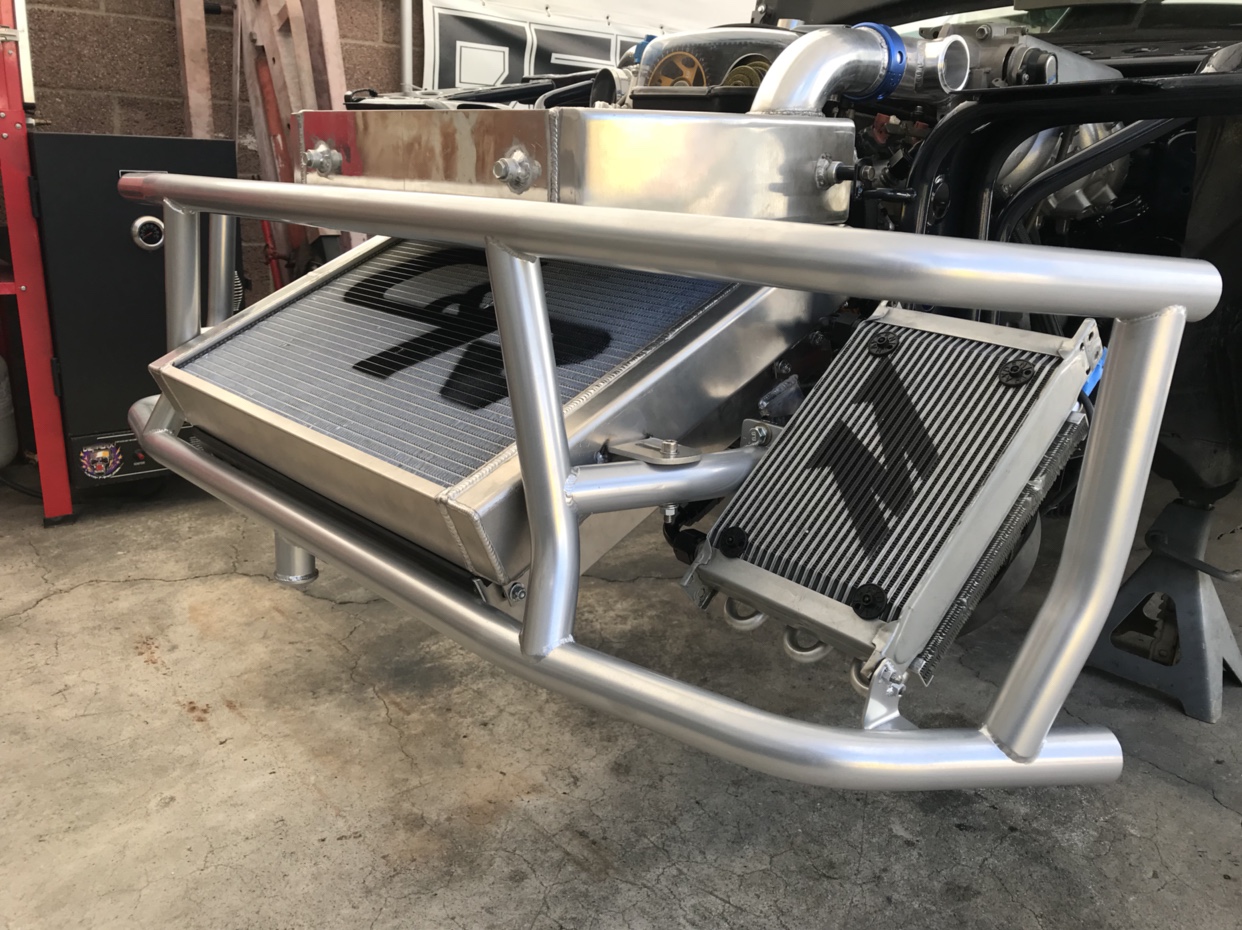 Custom skid plate I made was powder coated the same silver 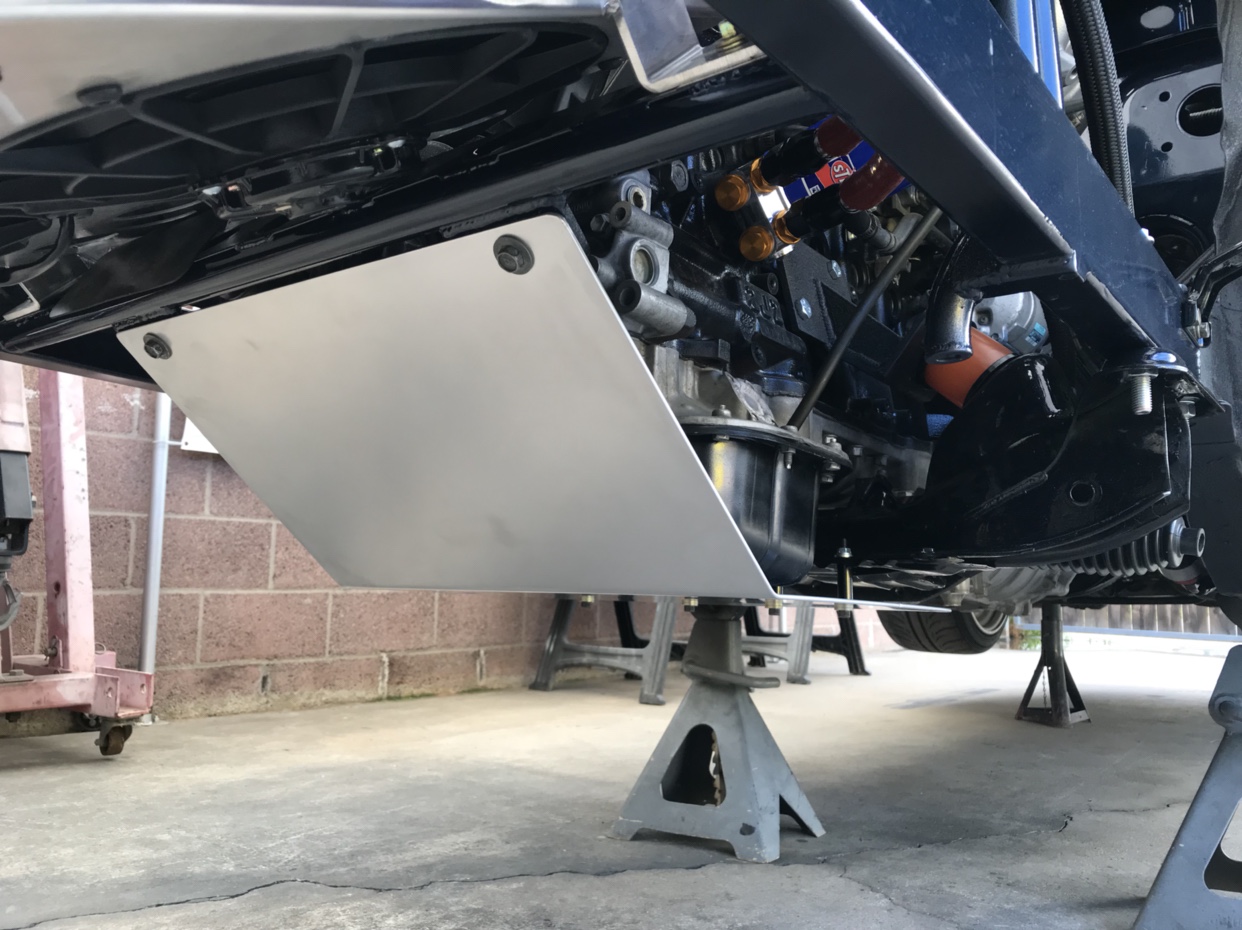 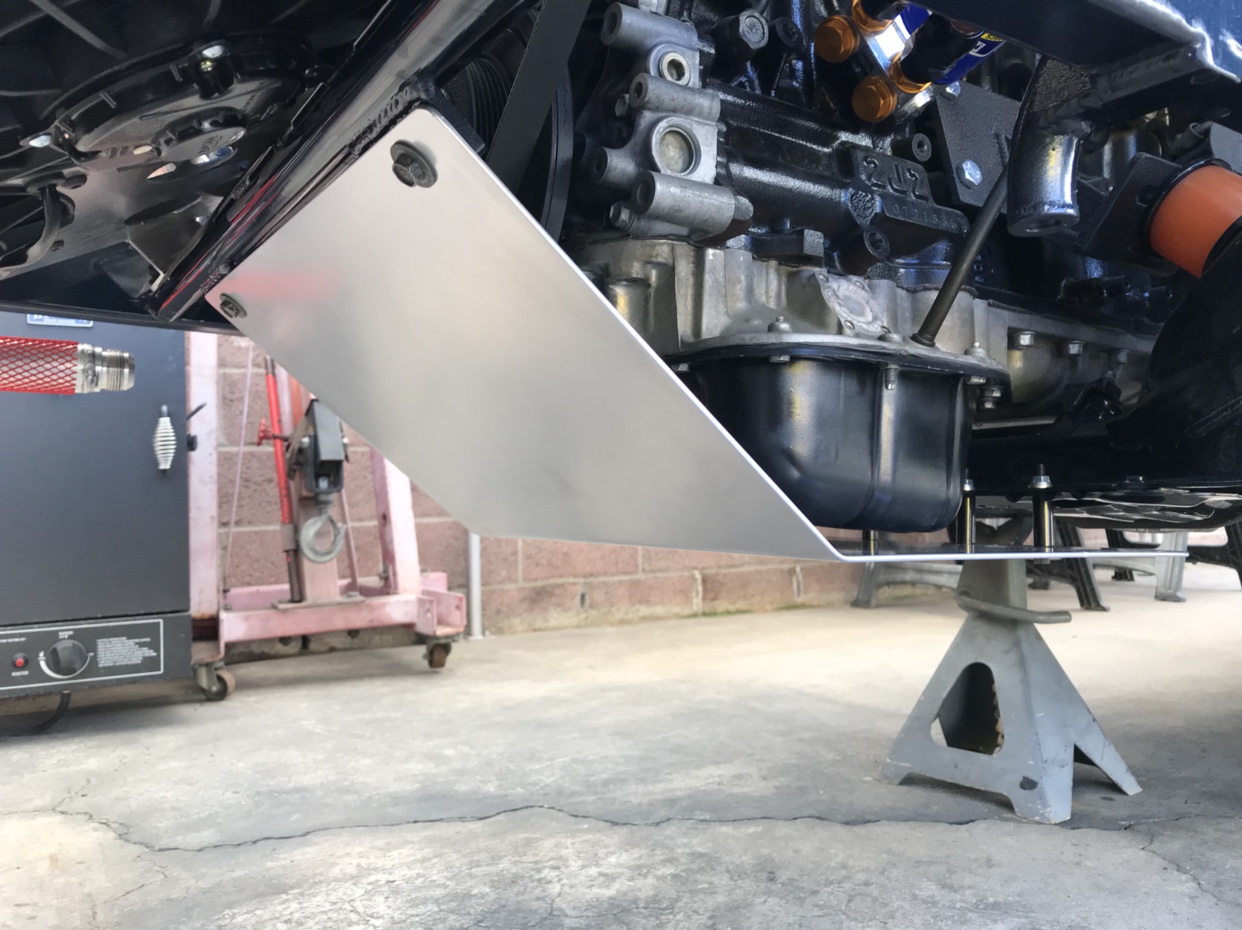 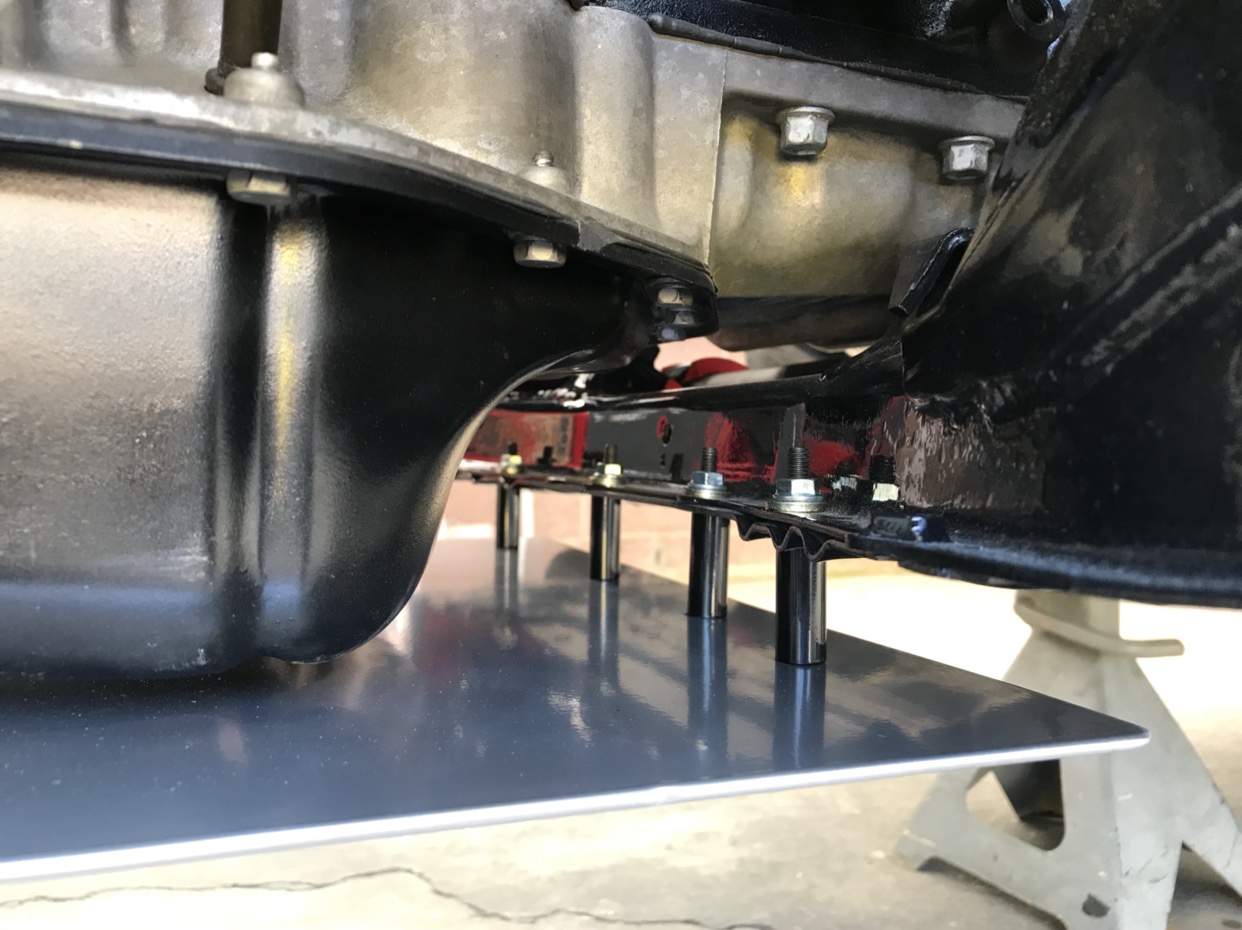 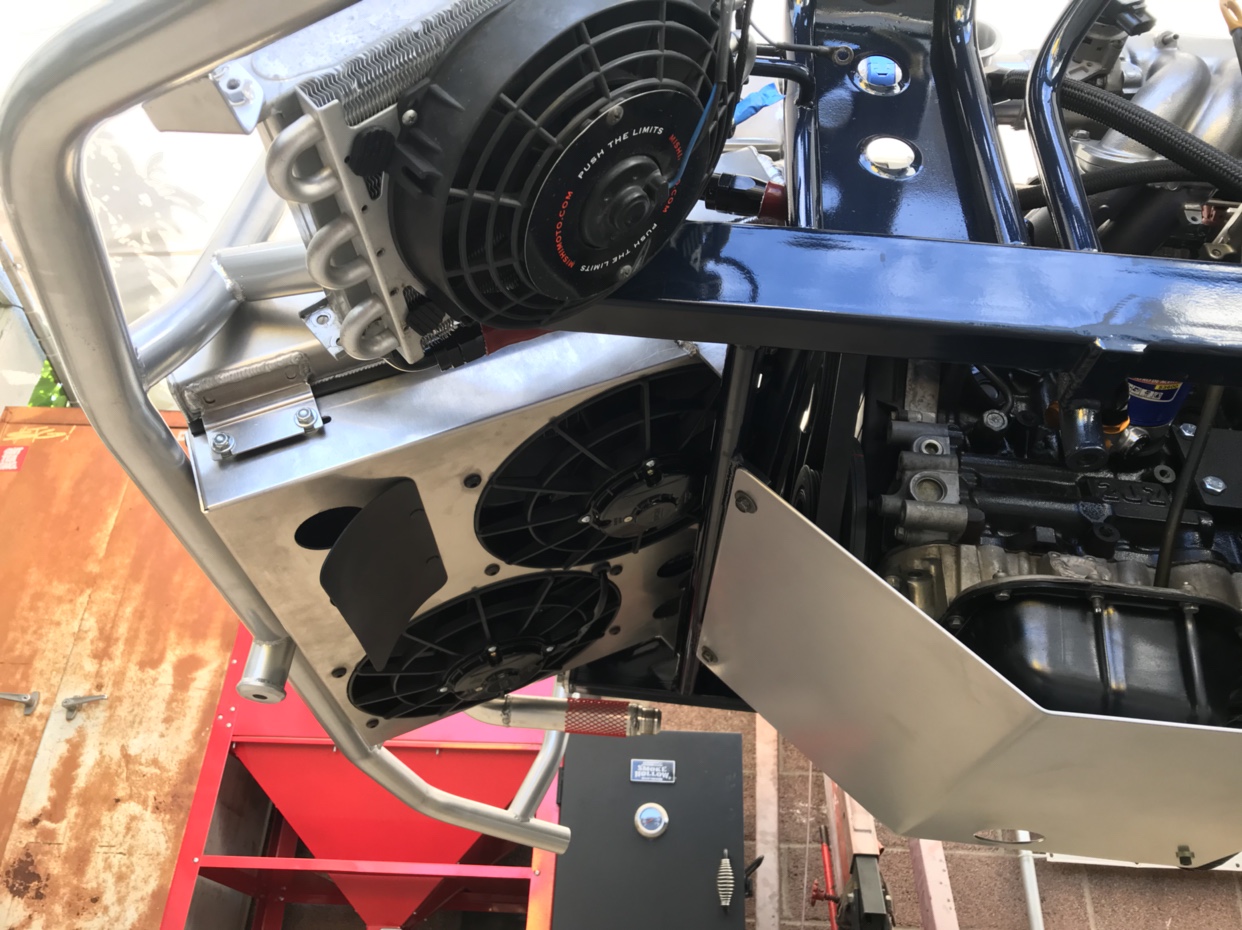 My set up needed a catch can so like everything else I decided to build my own. This is my first time making one so I kept it simple. It also needed to be small enough to fit in the corner spot. Stainless scrubbers for baffling work great. 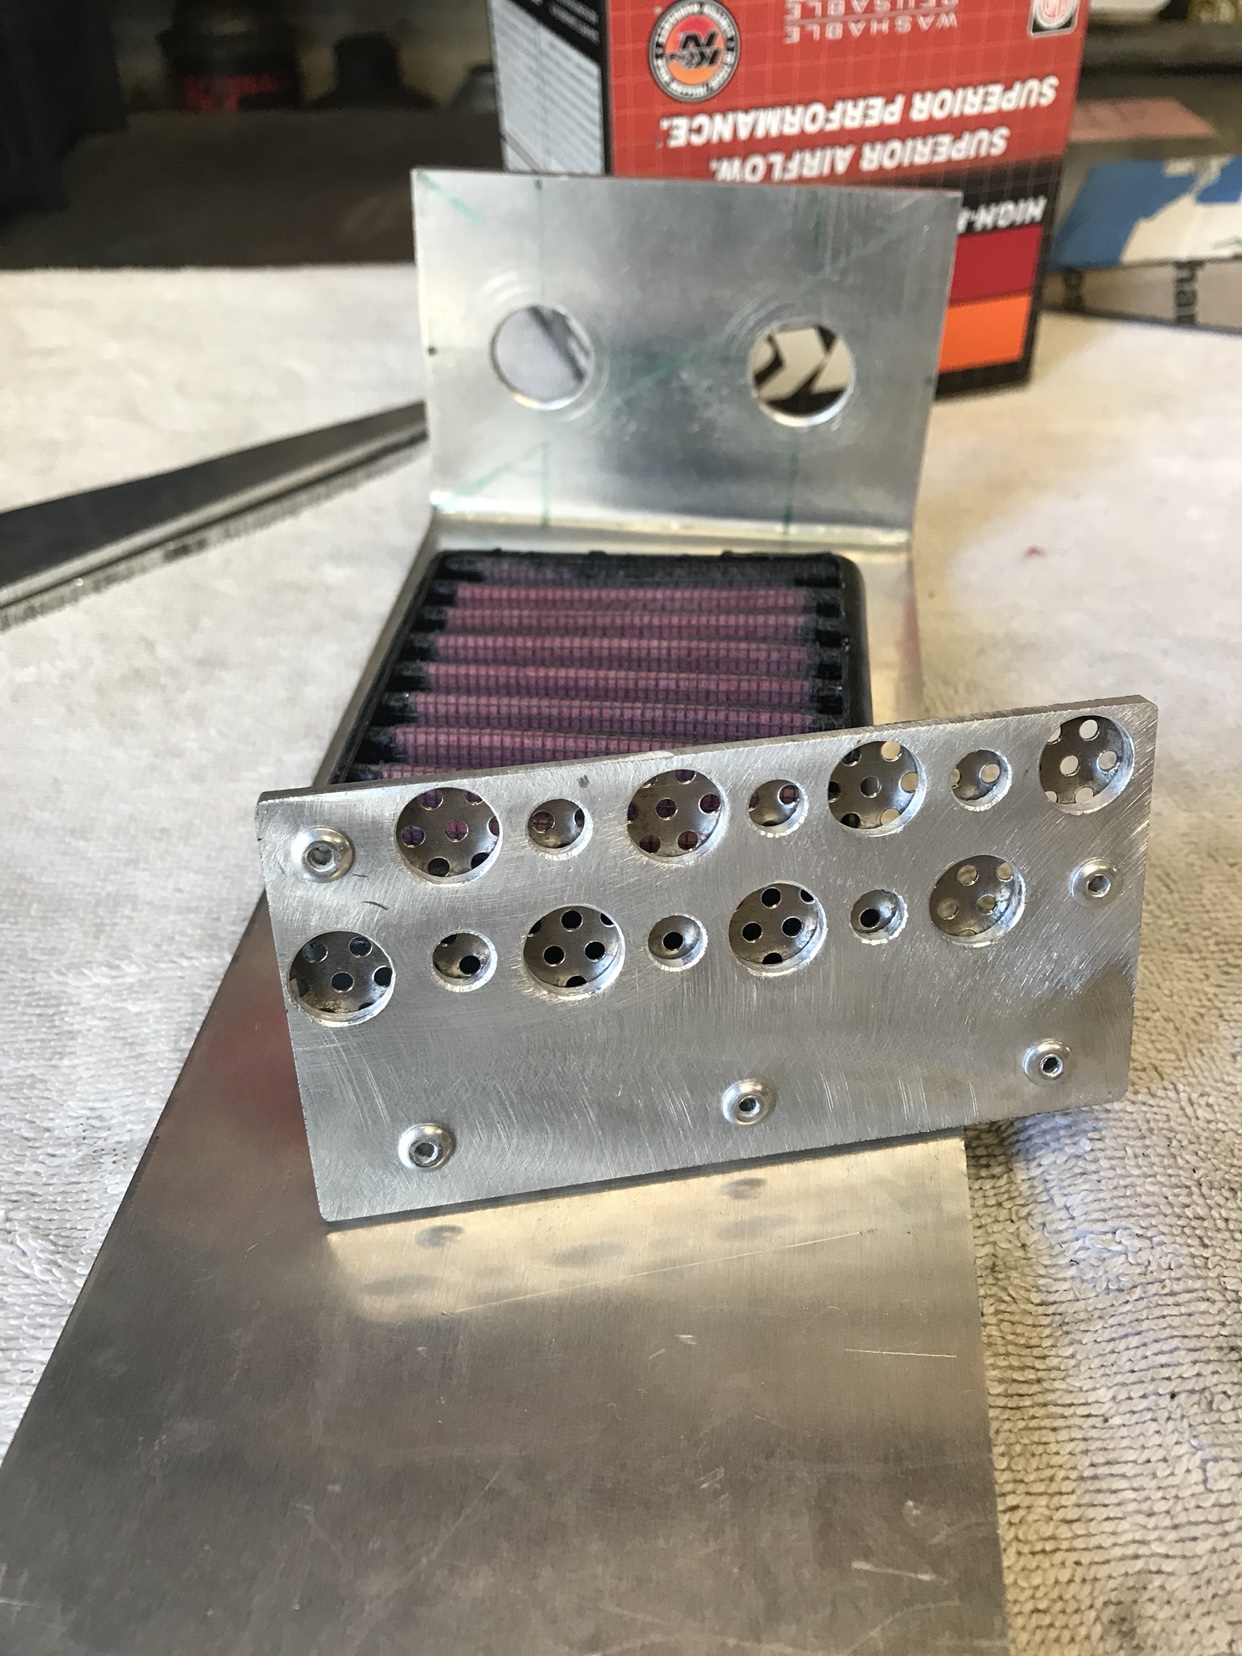 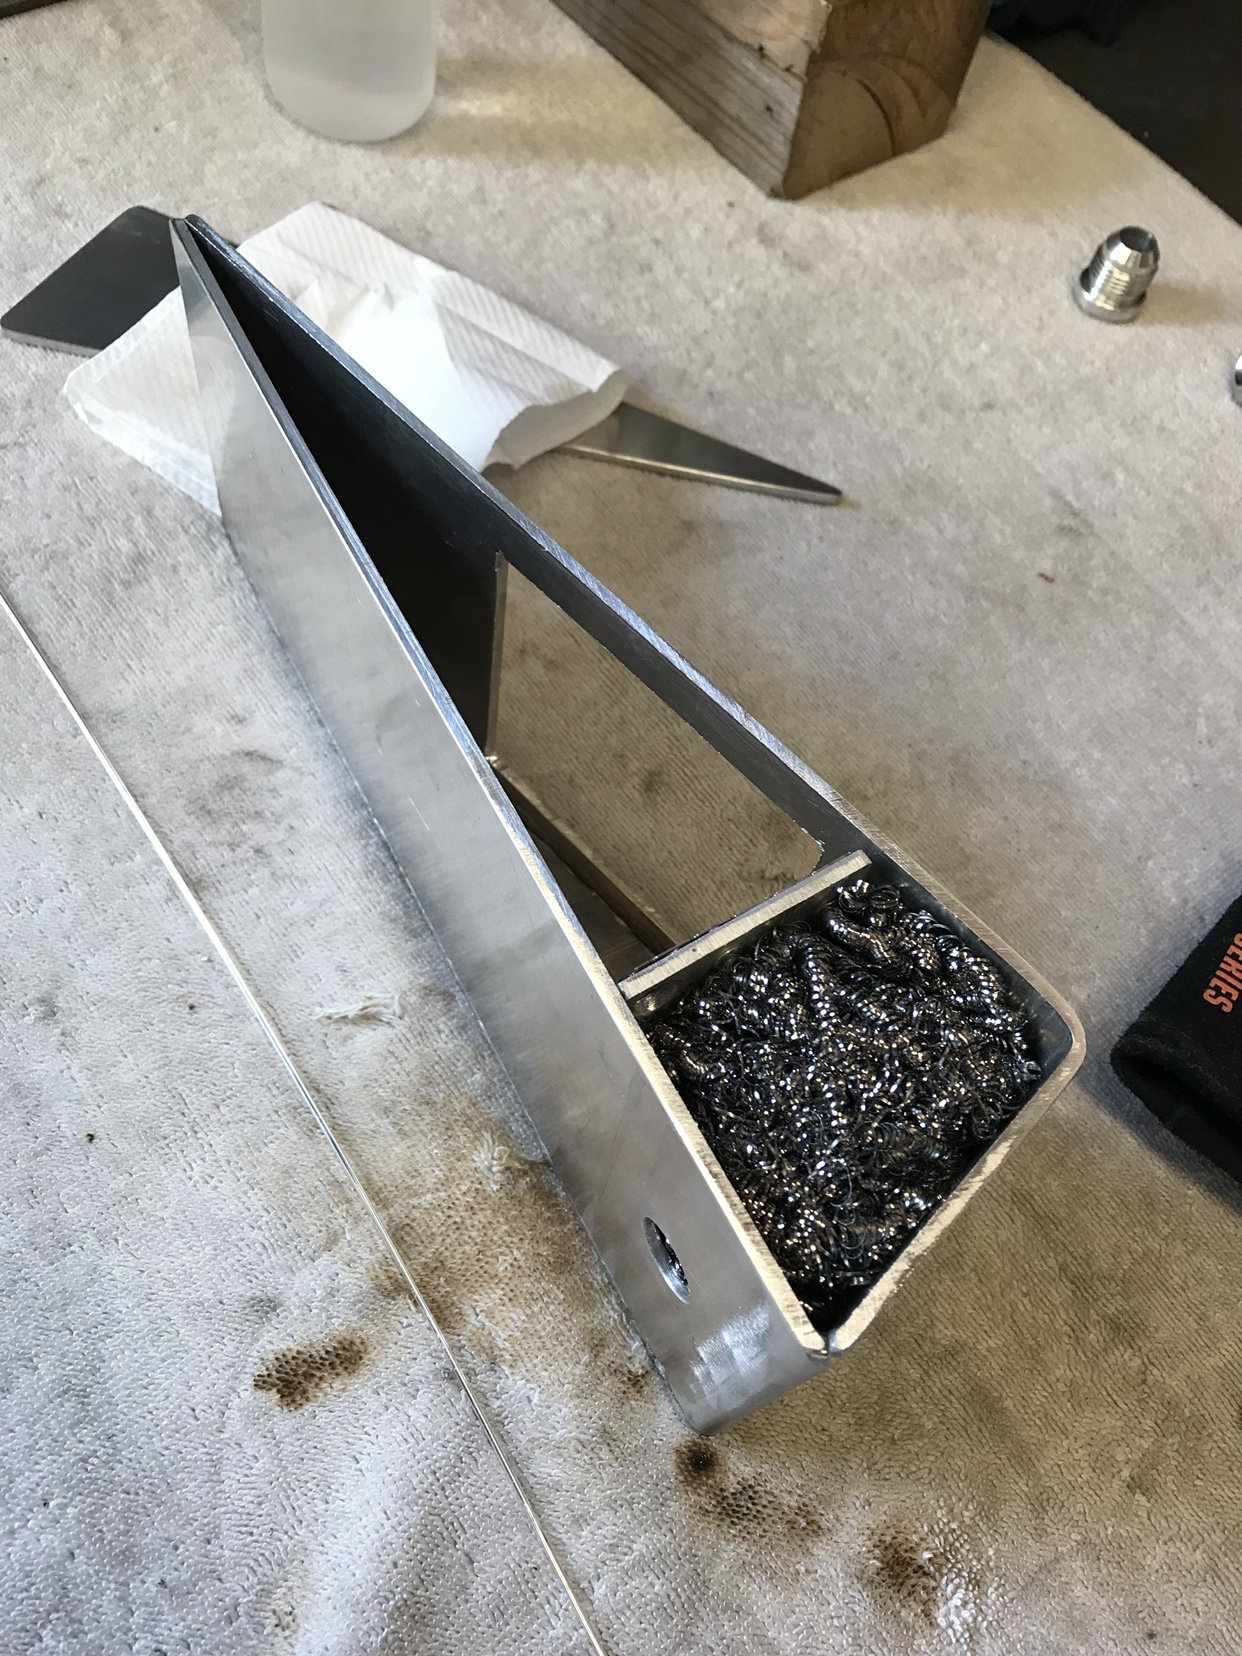 This shows the amount of fluid it holds before touching the filter. Plenty in my case as I’ll be draining it frequently. 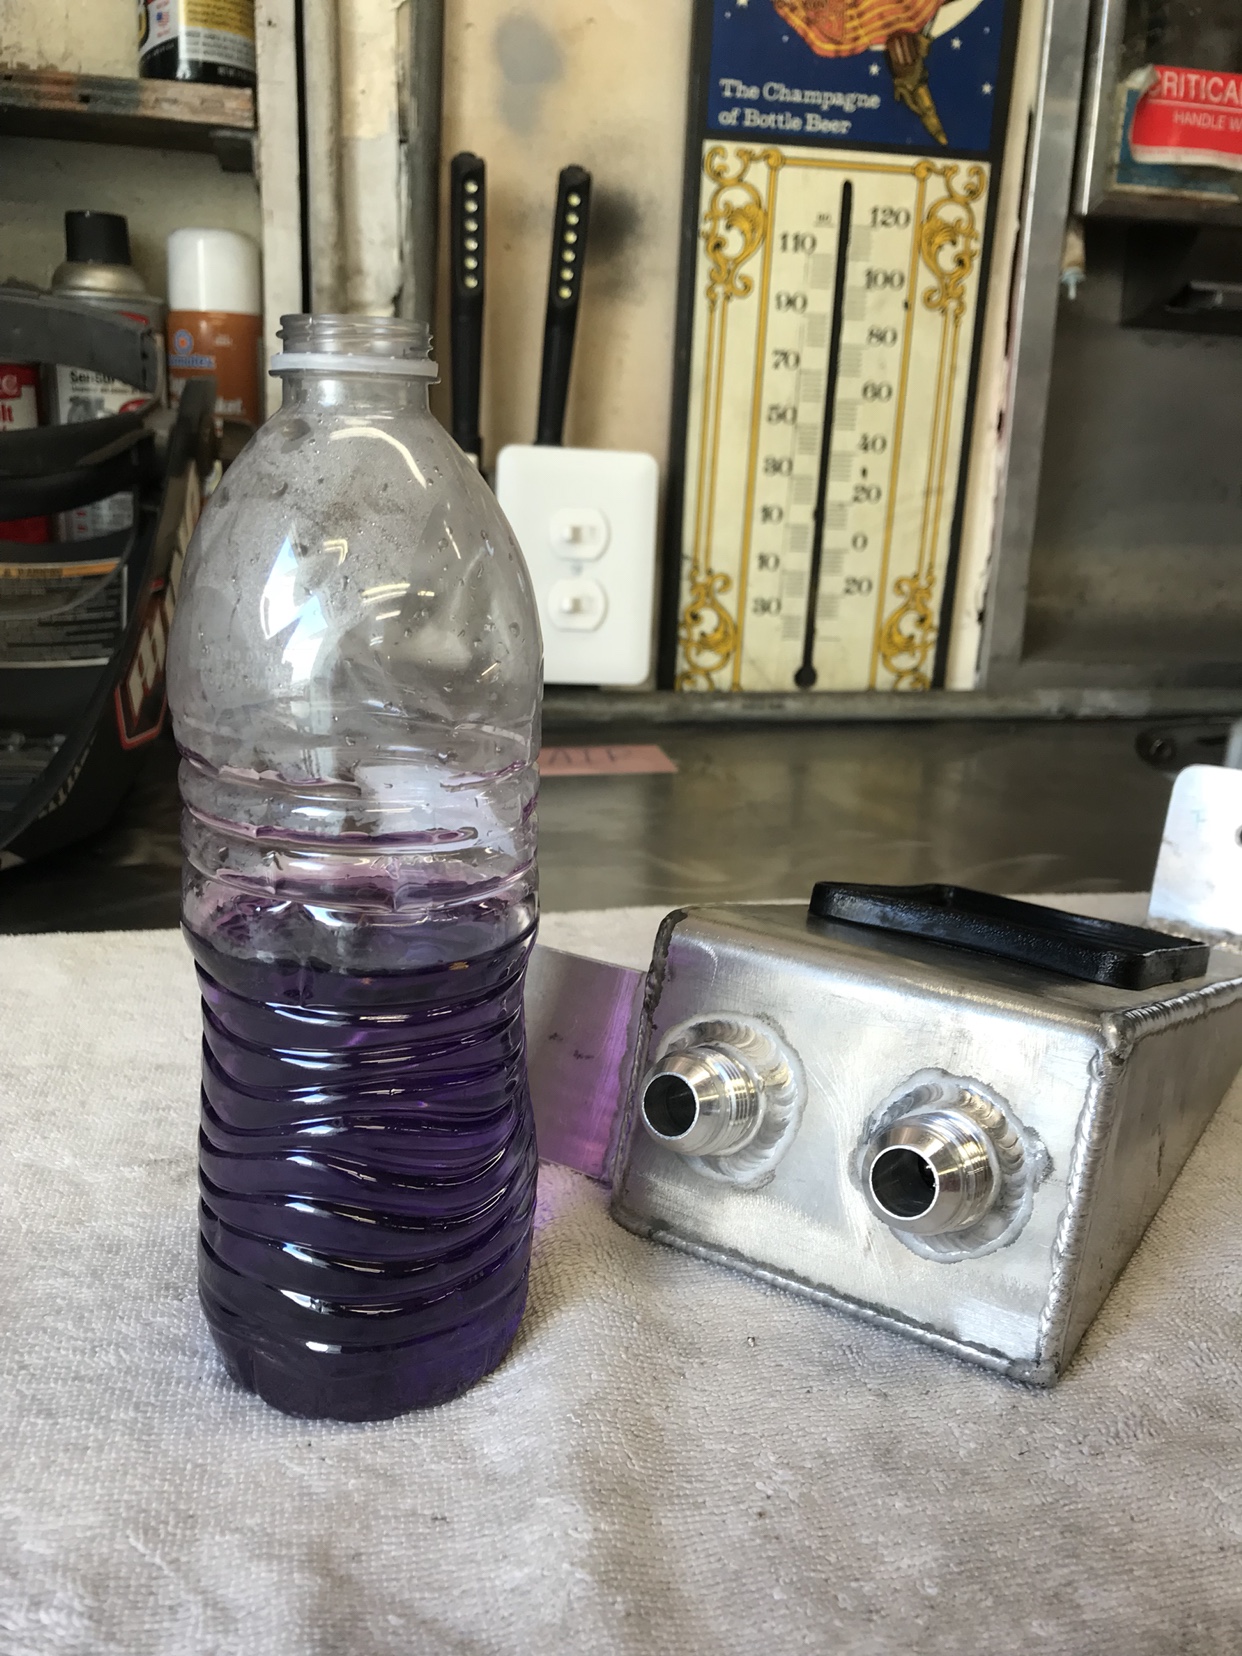 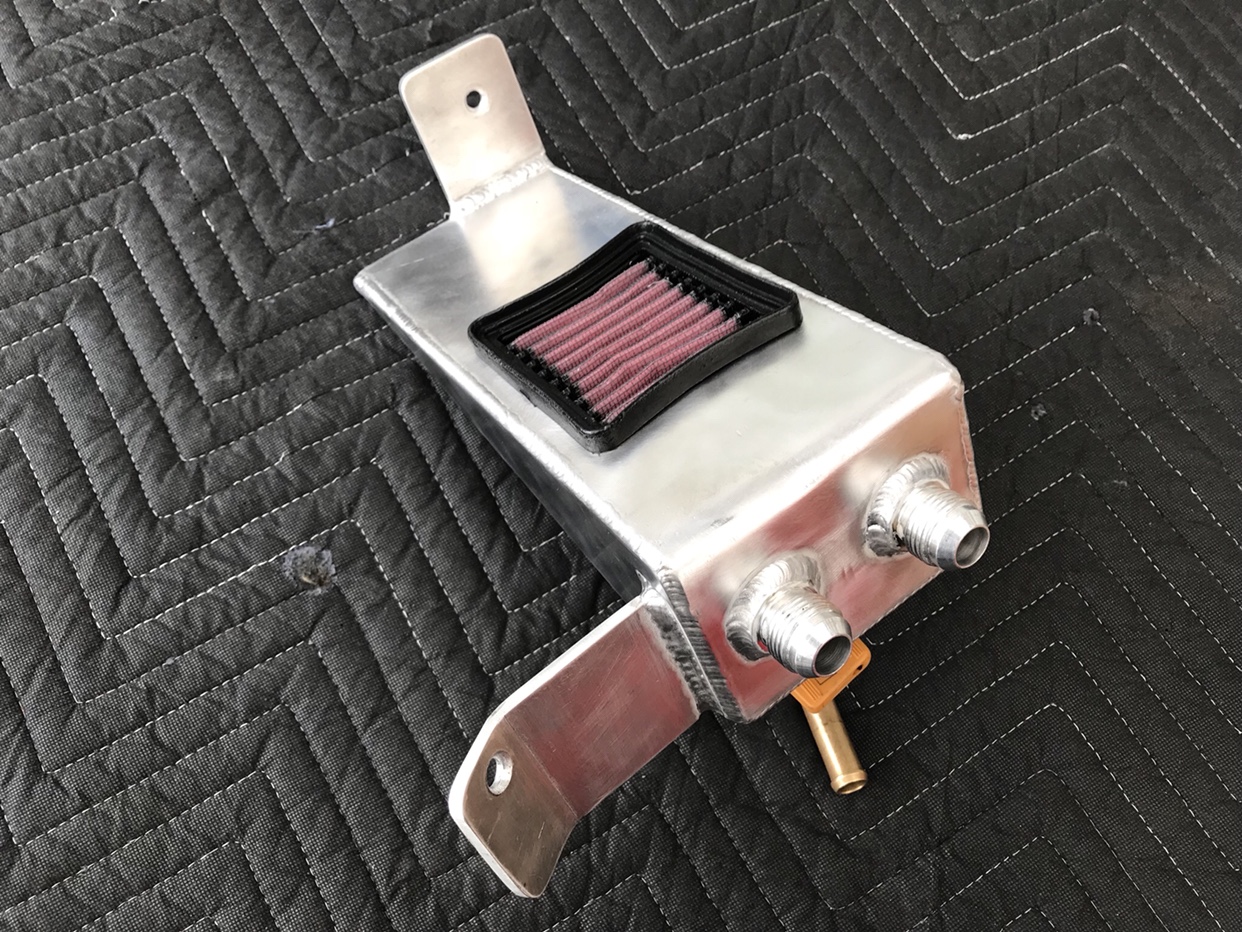 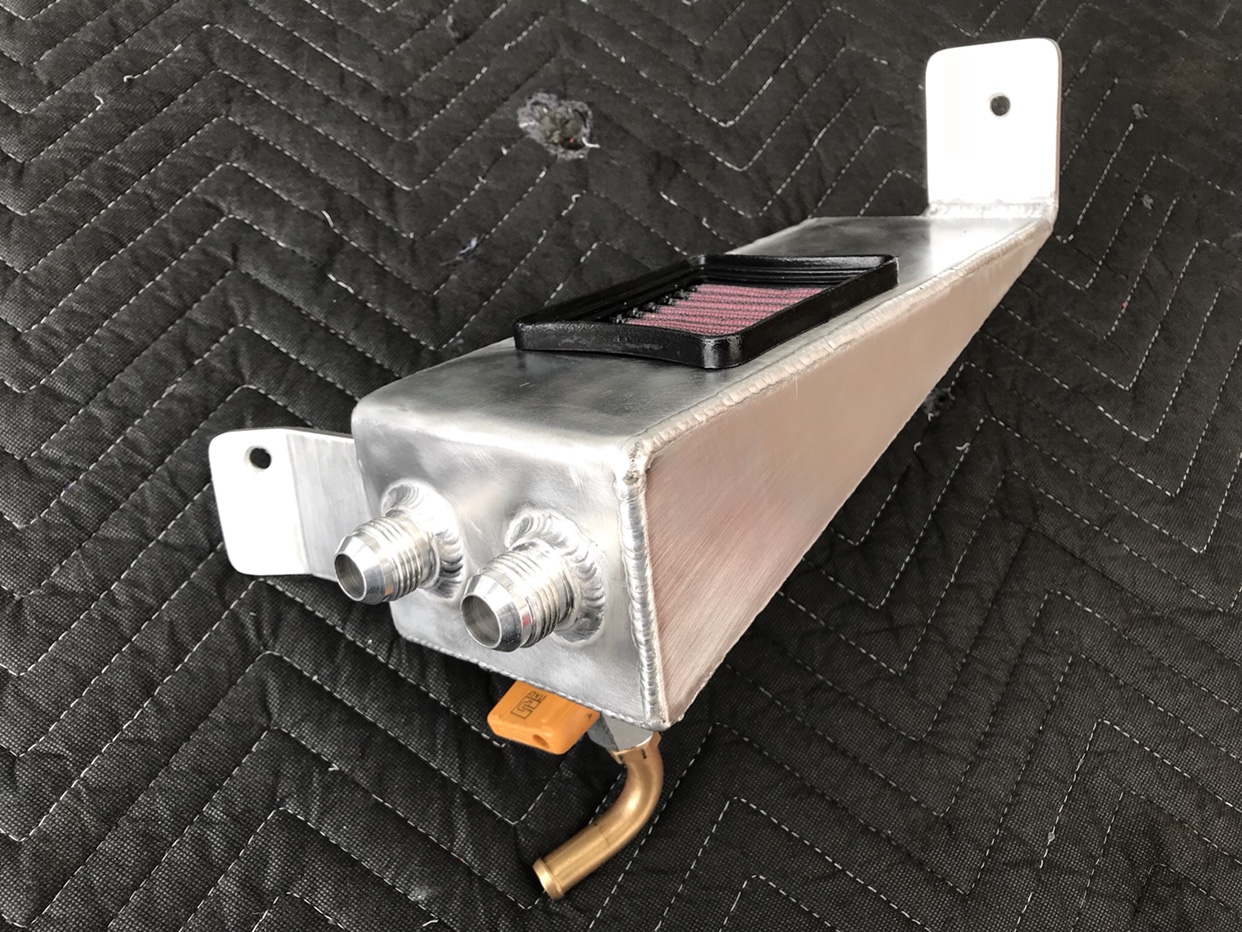 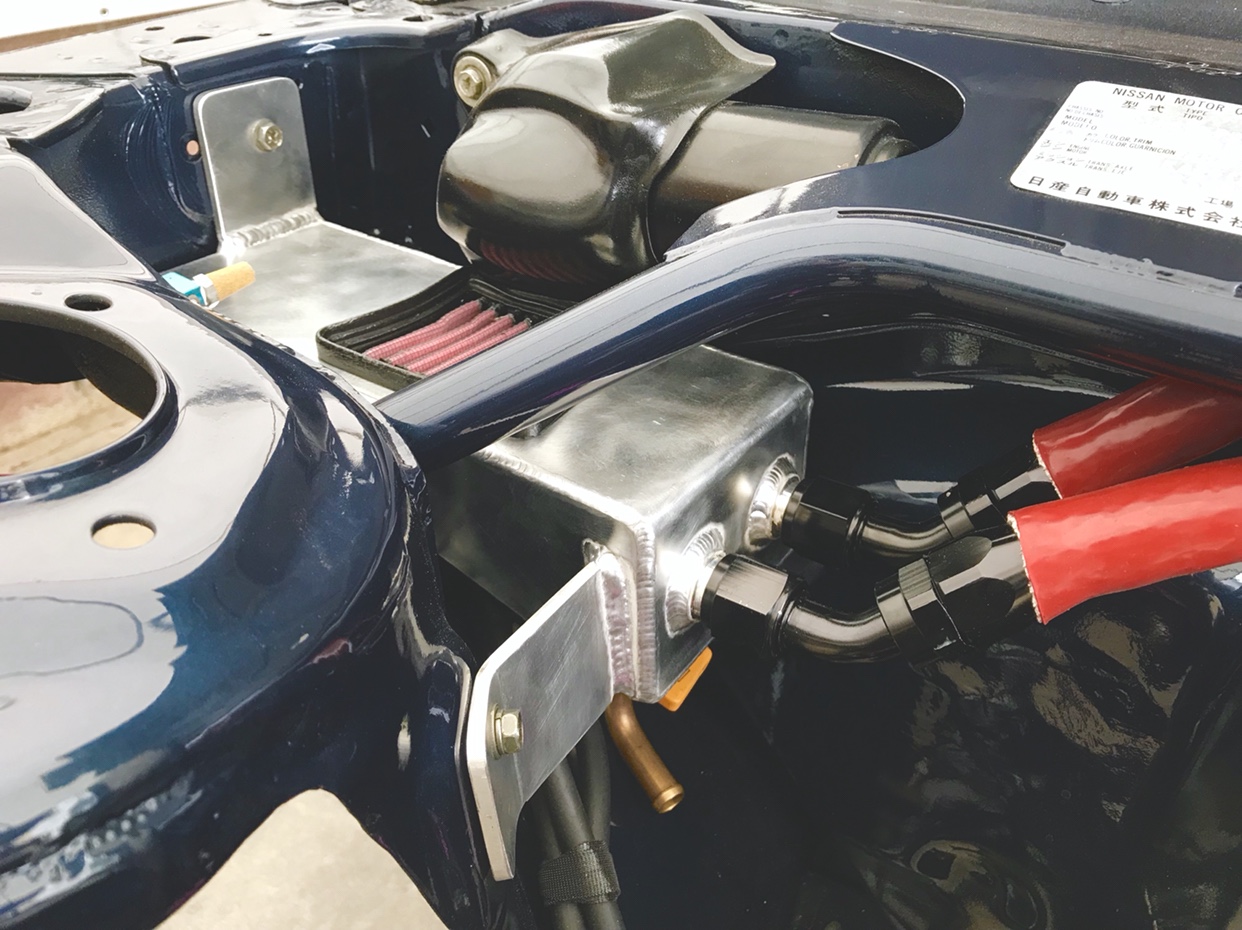 You can see here I’m also running a boost controller with the AEM tru boost gauge 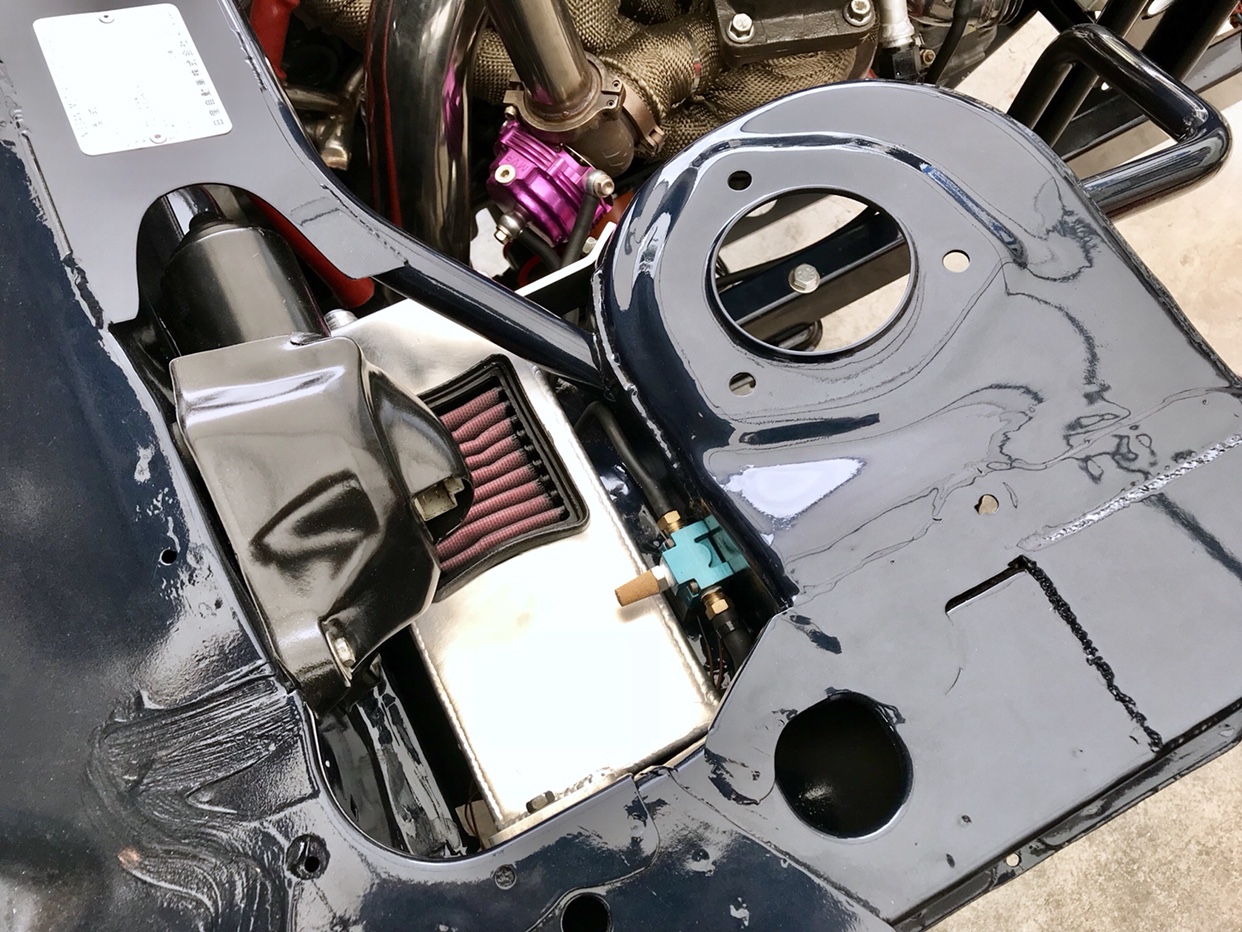 Lots of parts are getting powder coated as I put everything together. The turbo housing got chrome powder 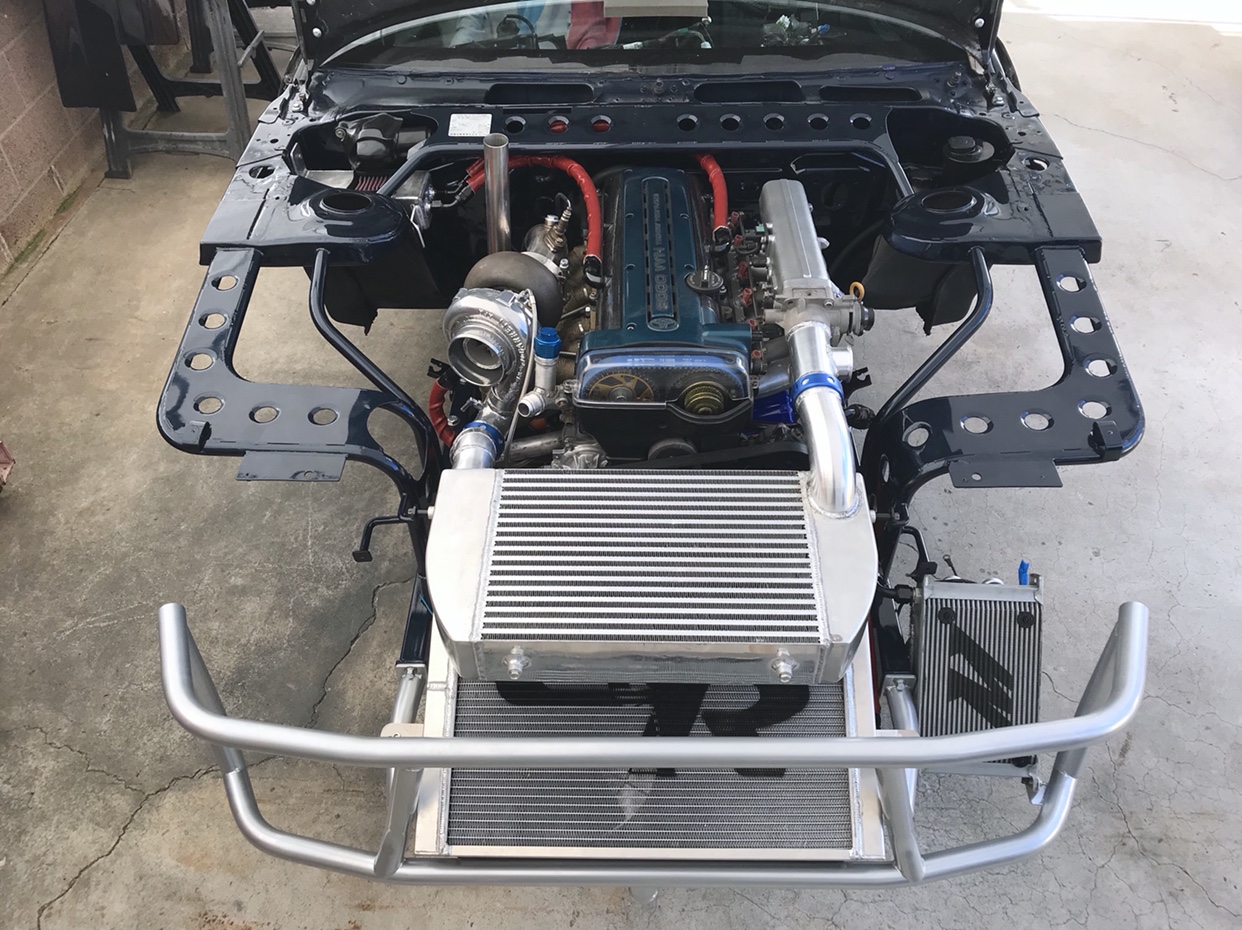 Custom throttle body finished up with tial bov. The details are finally starting to come together 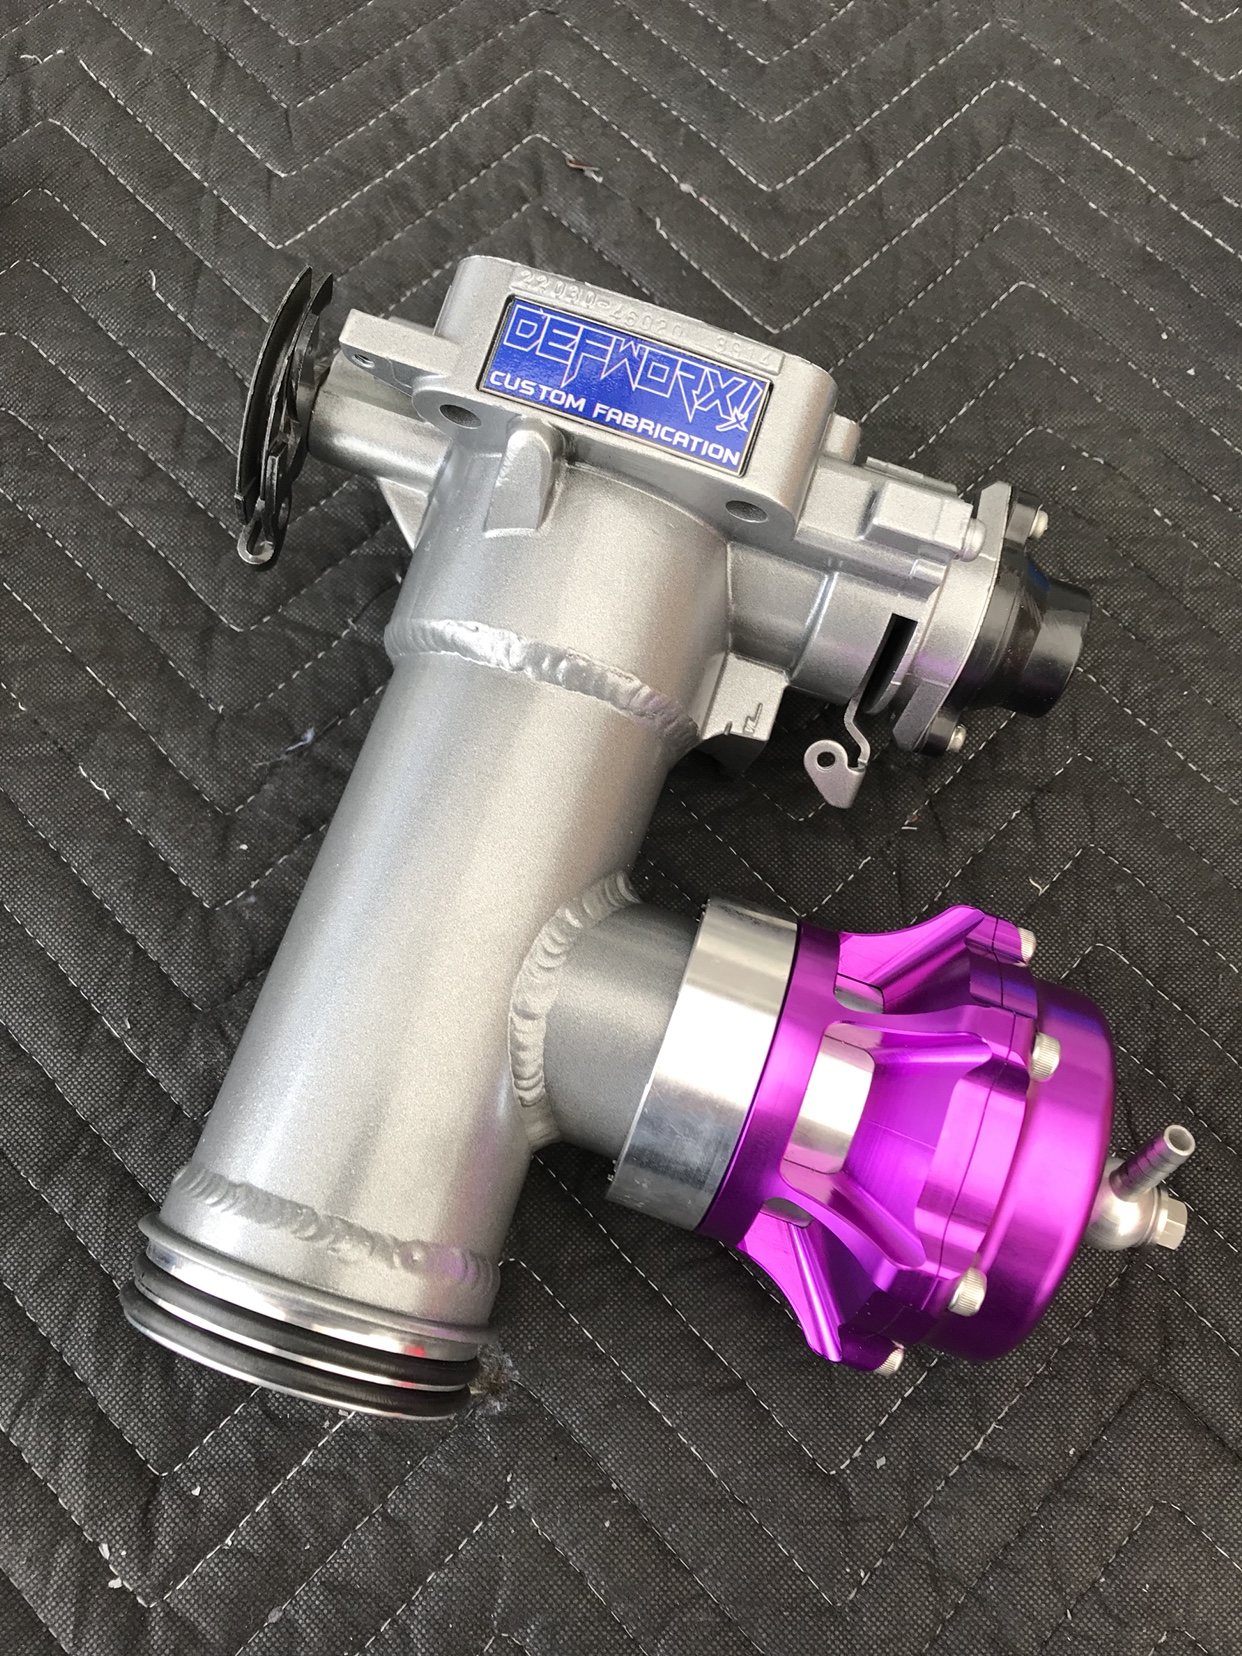 Sent from my iPhone using Tapatalk |
|
|

|
|
|
#88 |
|
Nissanaholic!
 |
Geez dude this is badddddd asssss keep it up!!!!!!
|
|
|

|
|
|
#89 |
|
Zilvia Junkie
 Join Date: Sep 2012
Location: LongBeach, CA
Age: 28
Posts: 371
Trader Rating: (4)
     Feedback Score: 4 reviews
|
I recently bought the Langmuir systems crossfire cnc plasma table to take Defworx to the next level. I’ve been making almost everything I usually do by hand with this now, it’s amazing.
Wishing I had it when doing the tube front sheet metal work 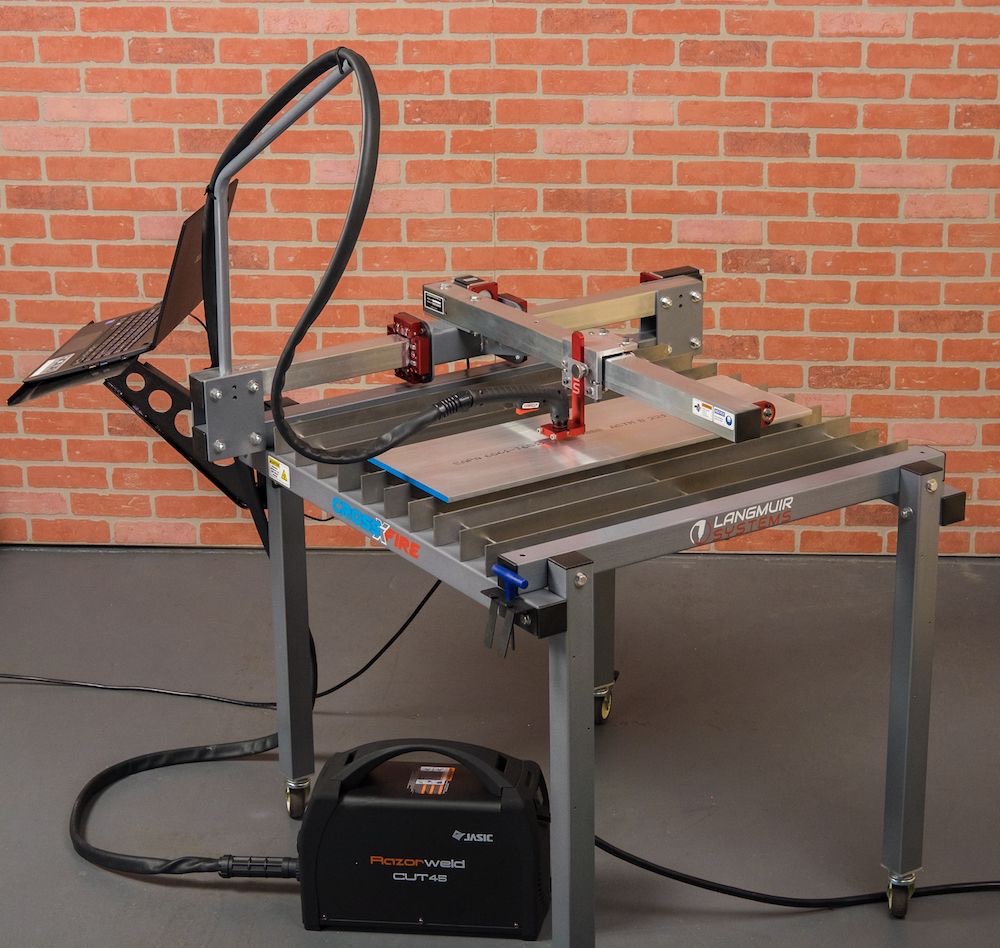 As I find something I need personally I’m also saving and making batches of these parts that’ll soon be offered on my website if anyone’s interested. Www.defworxshop.com First was the z32 e brake cable bracket ! I’ve had some ugly makeshift bracket until now. 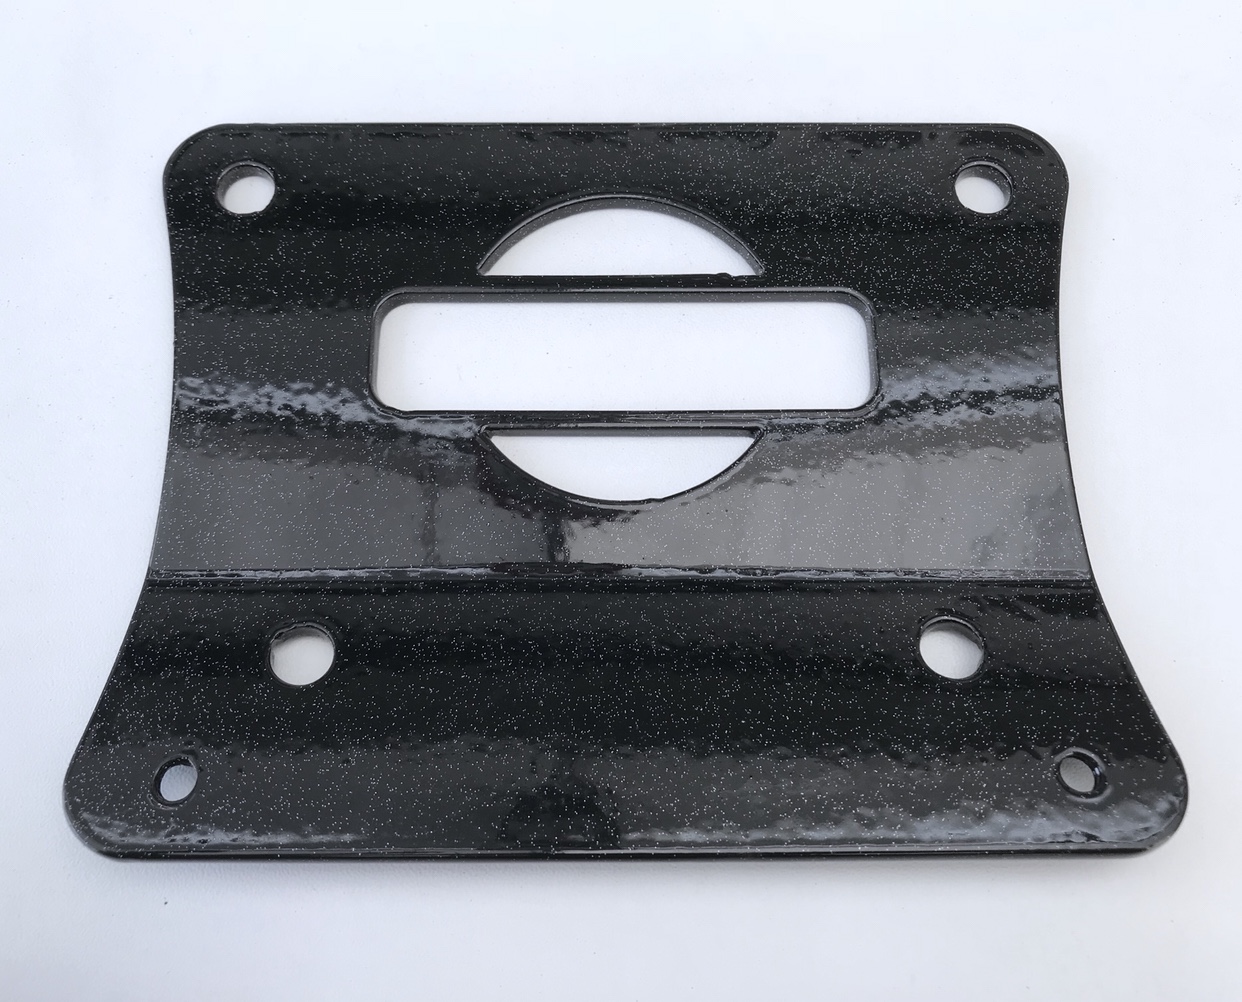 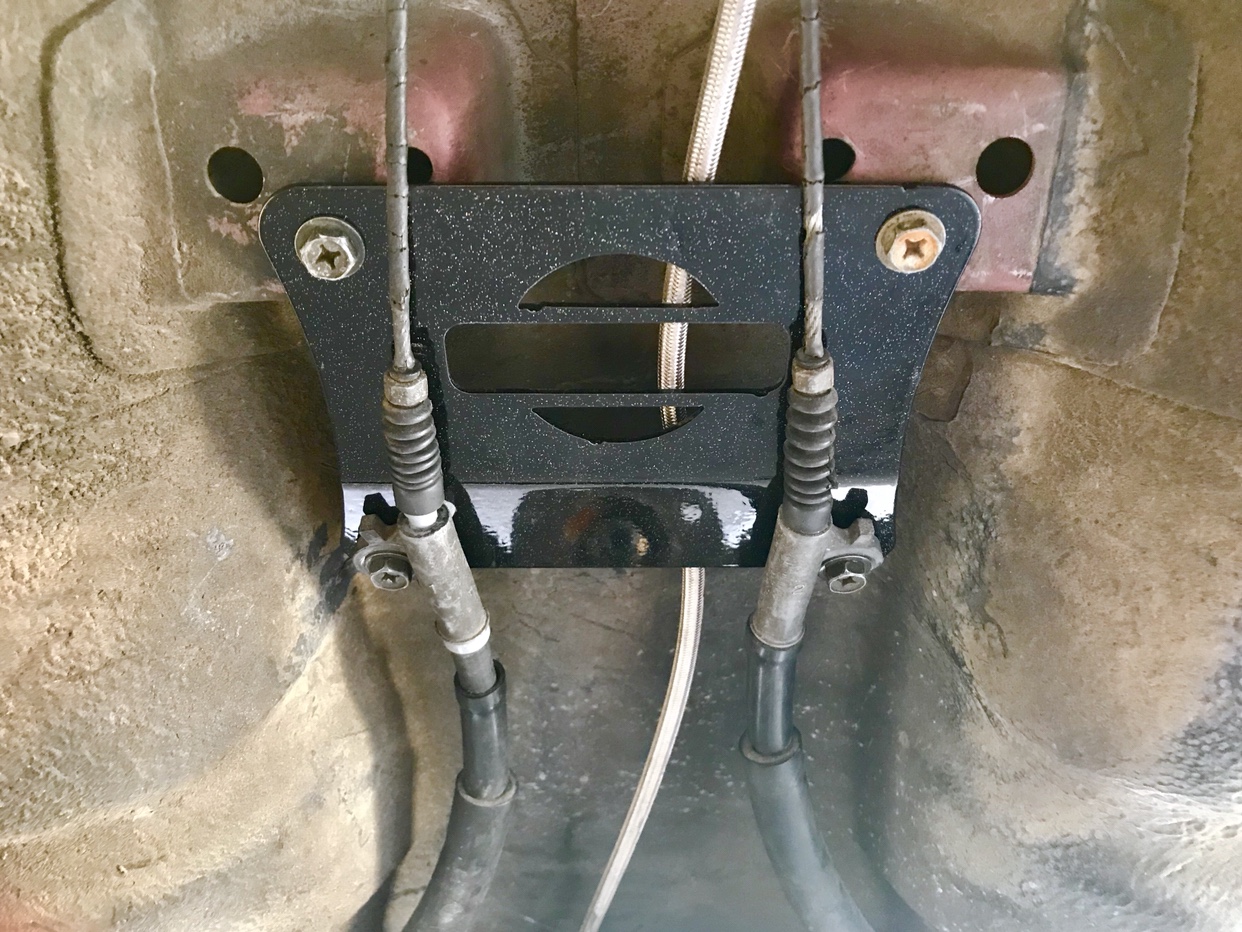 Throttle cable bracket 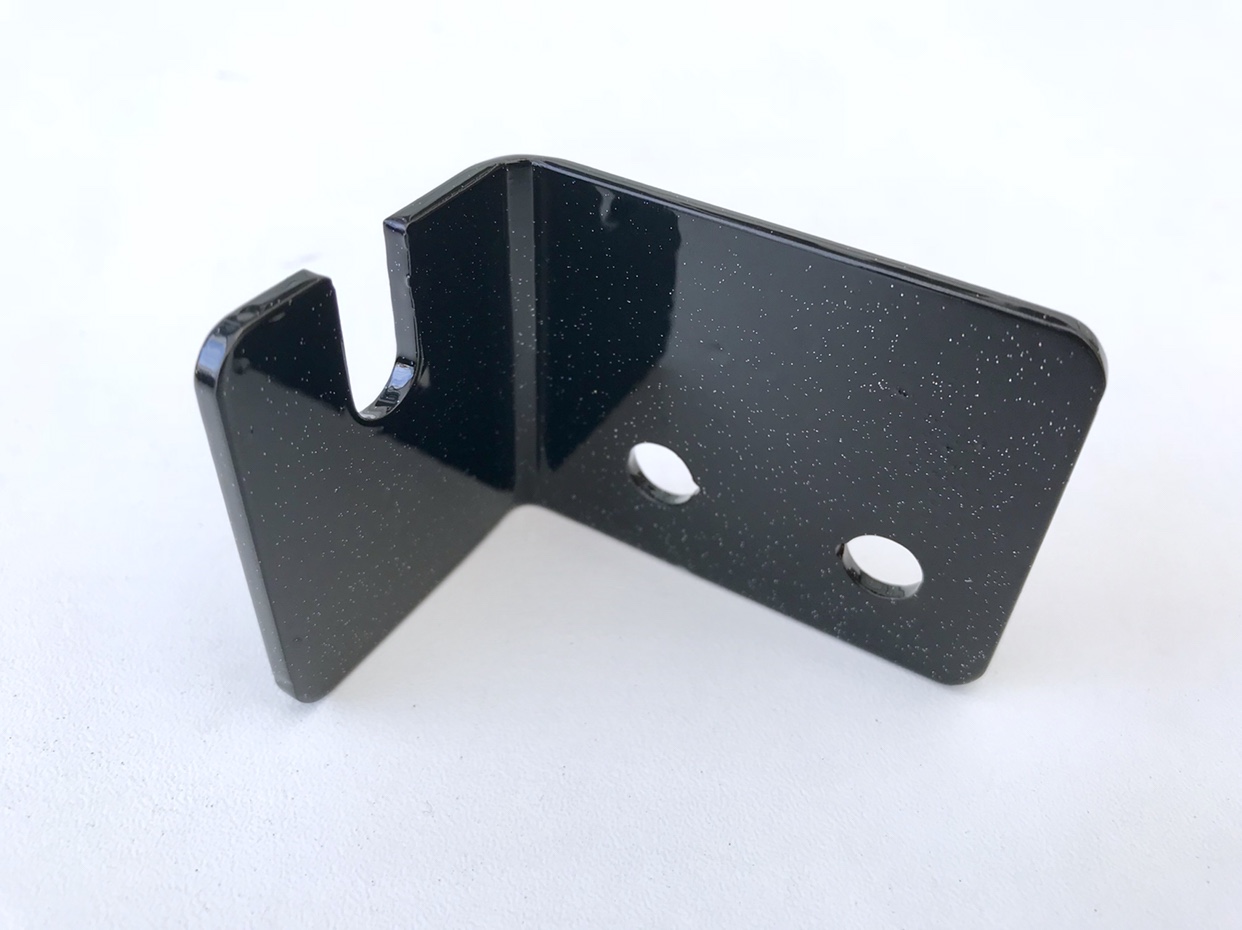 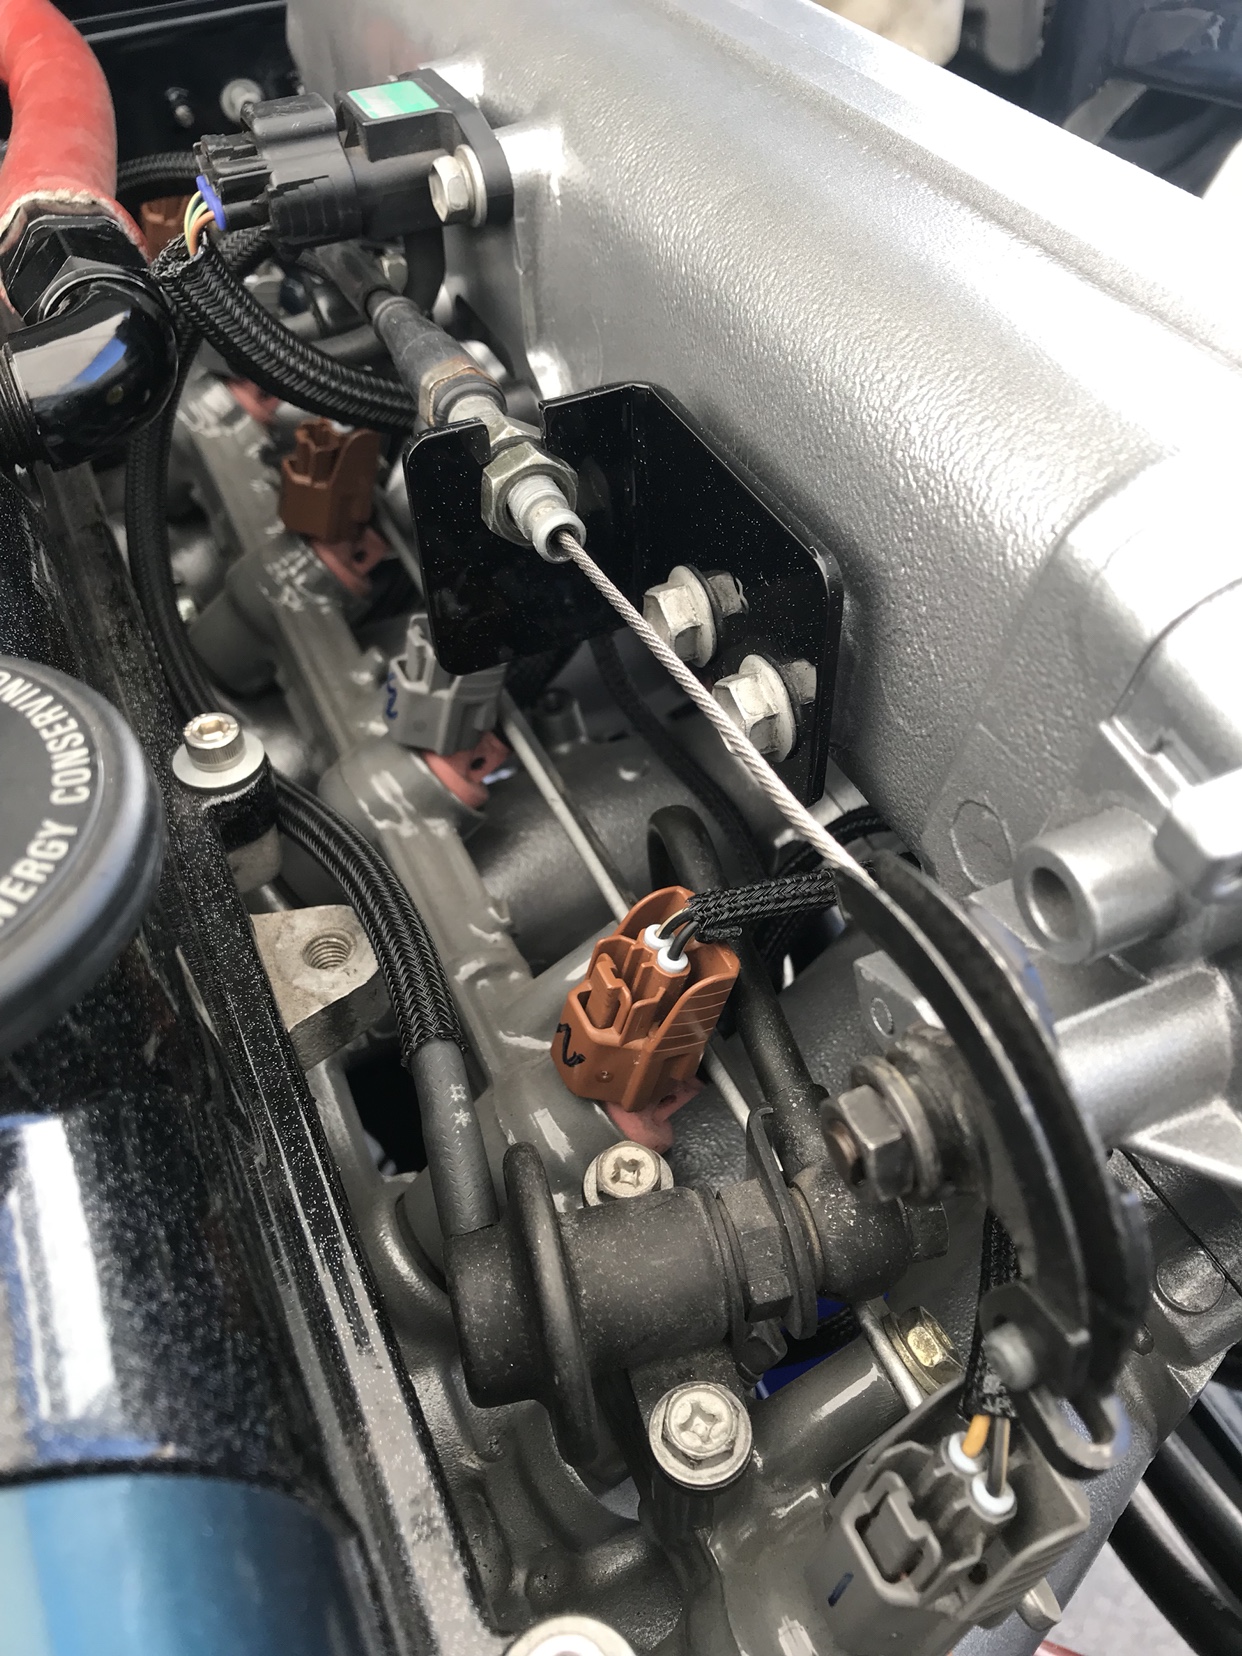 Wire tuck needed something to hold the fuse boxes up under the dash. Keep in mind I’m not running any heater/AC boxes under there. 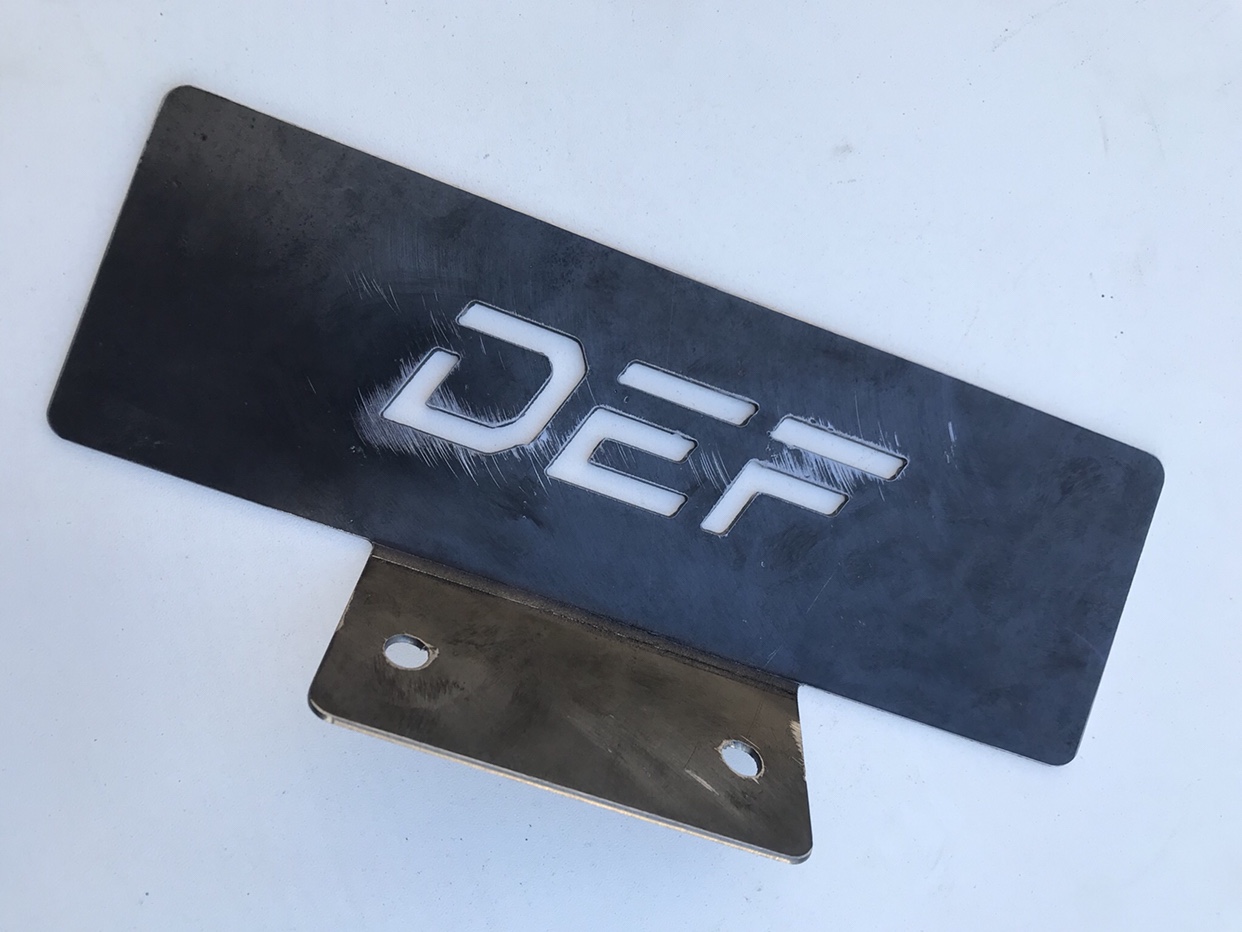 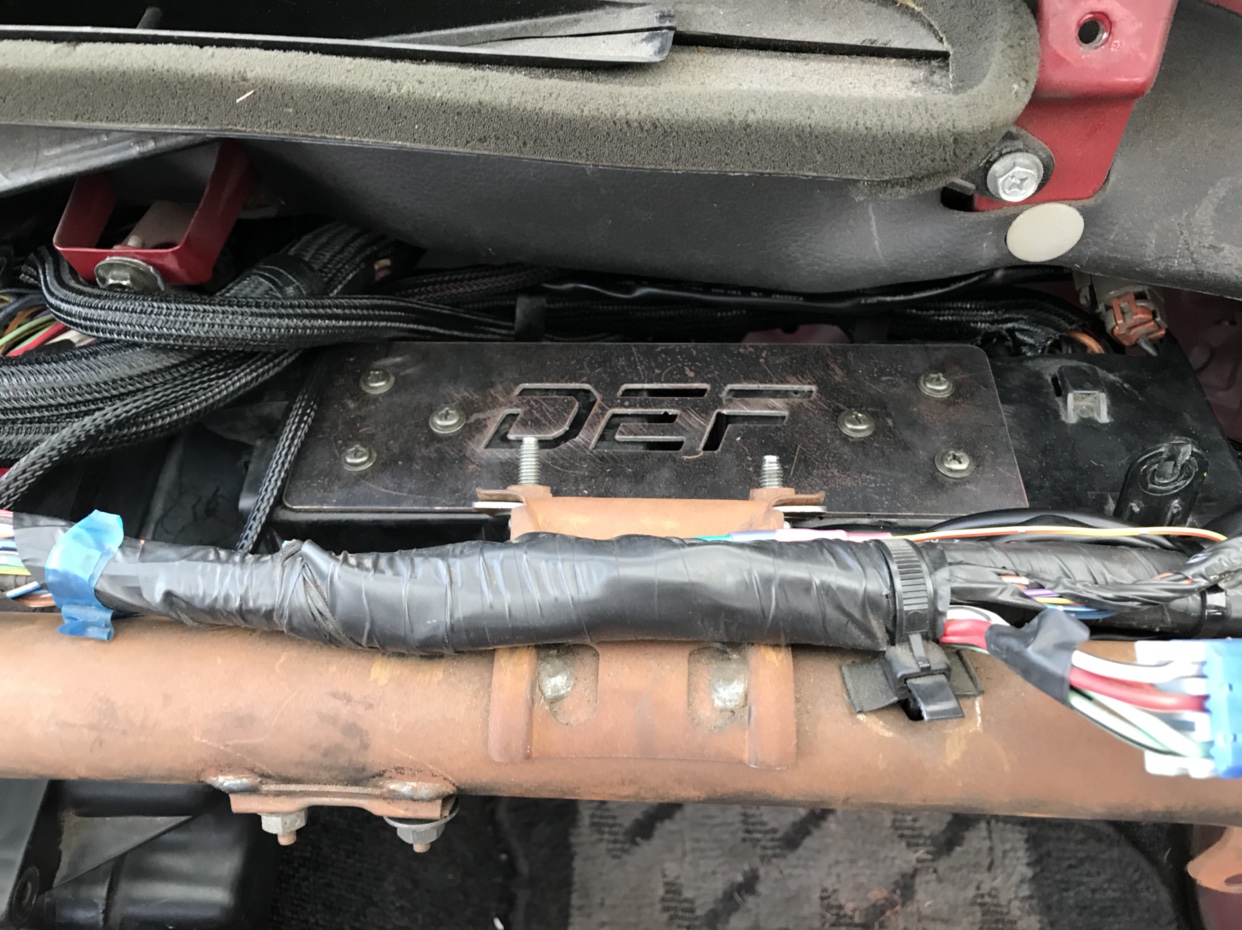 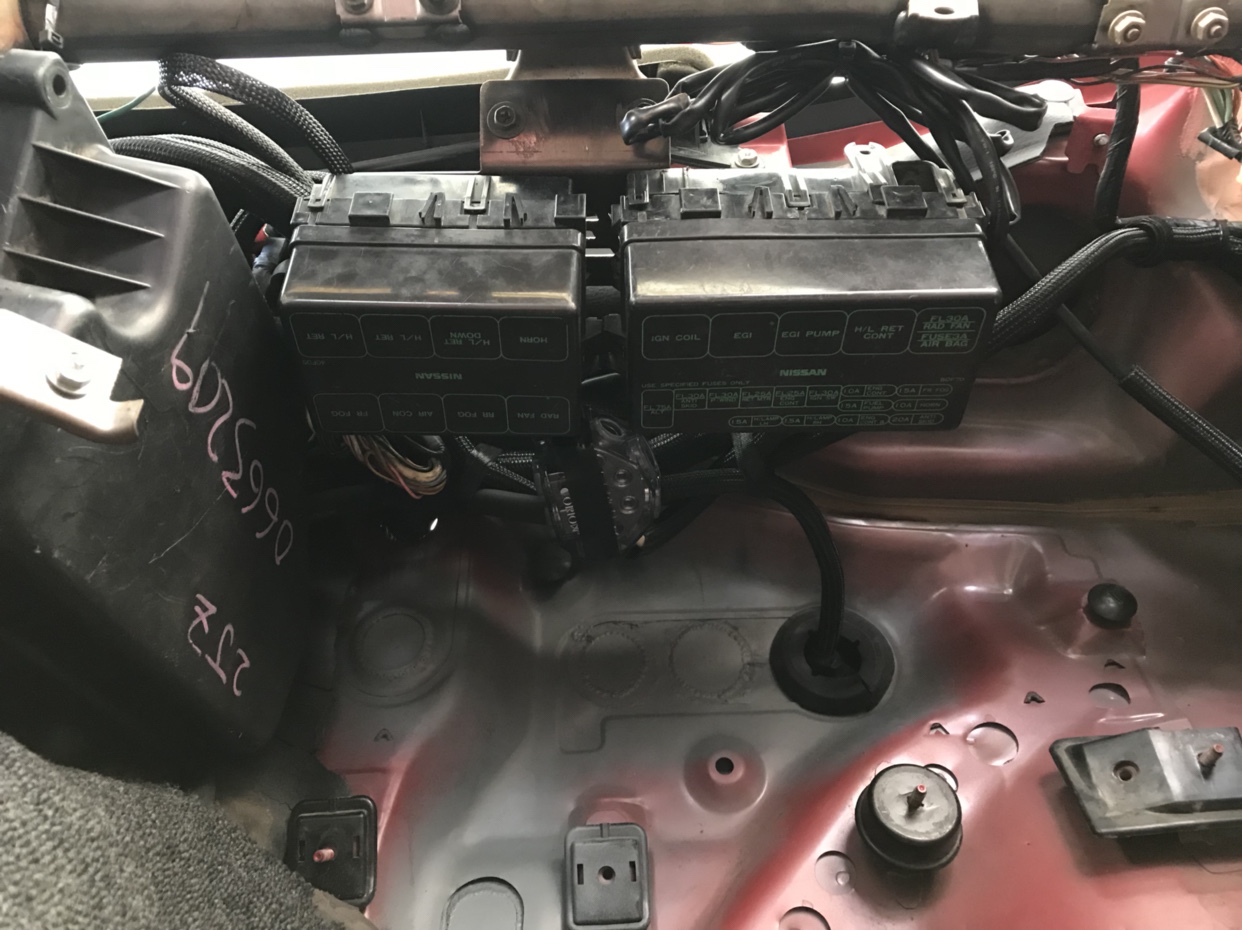 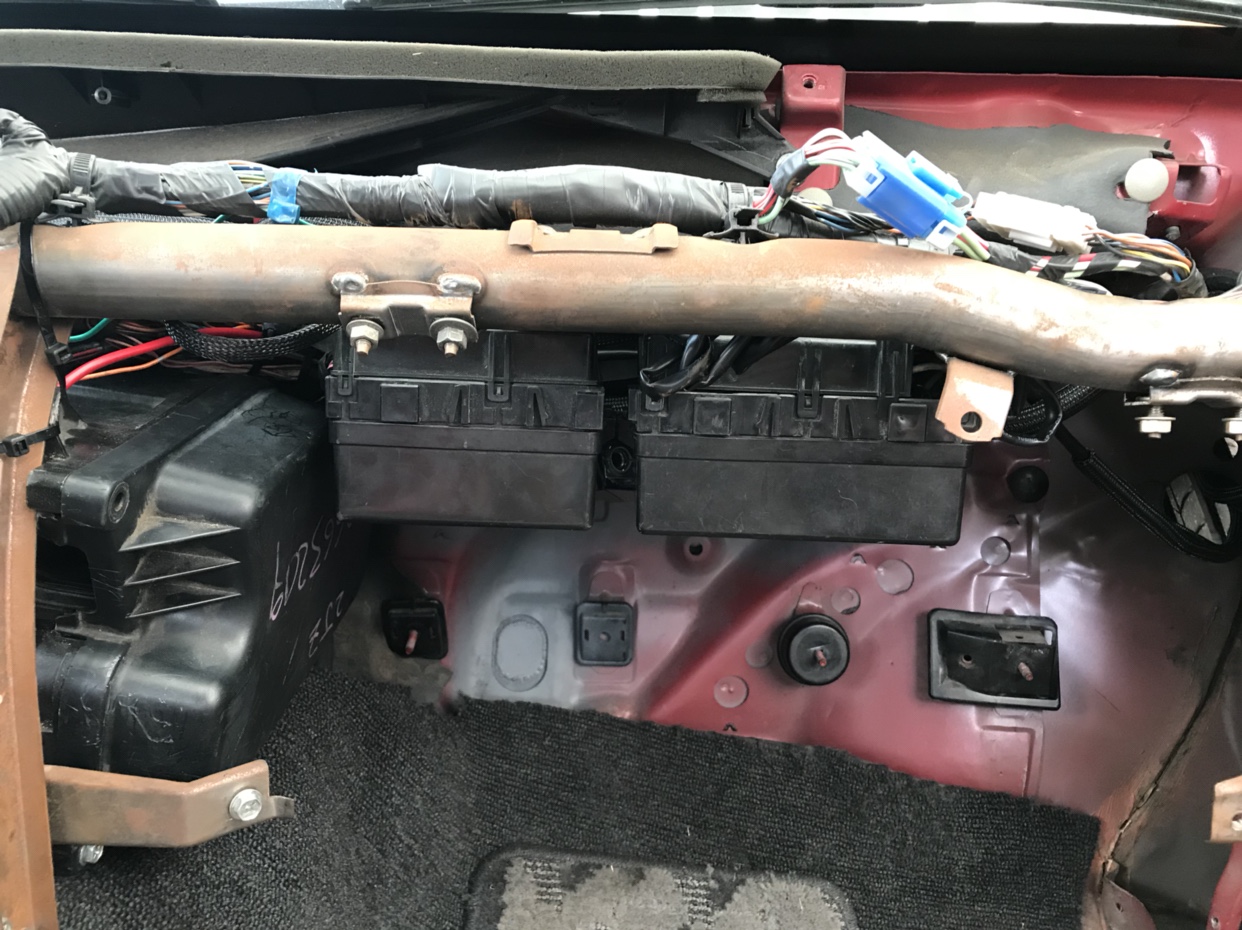 350Z bash bar gussets ! 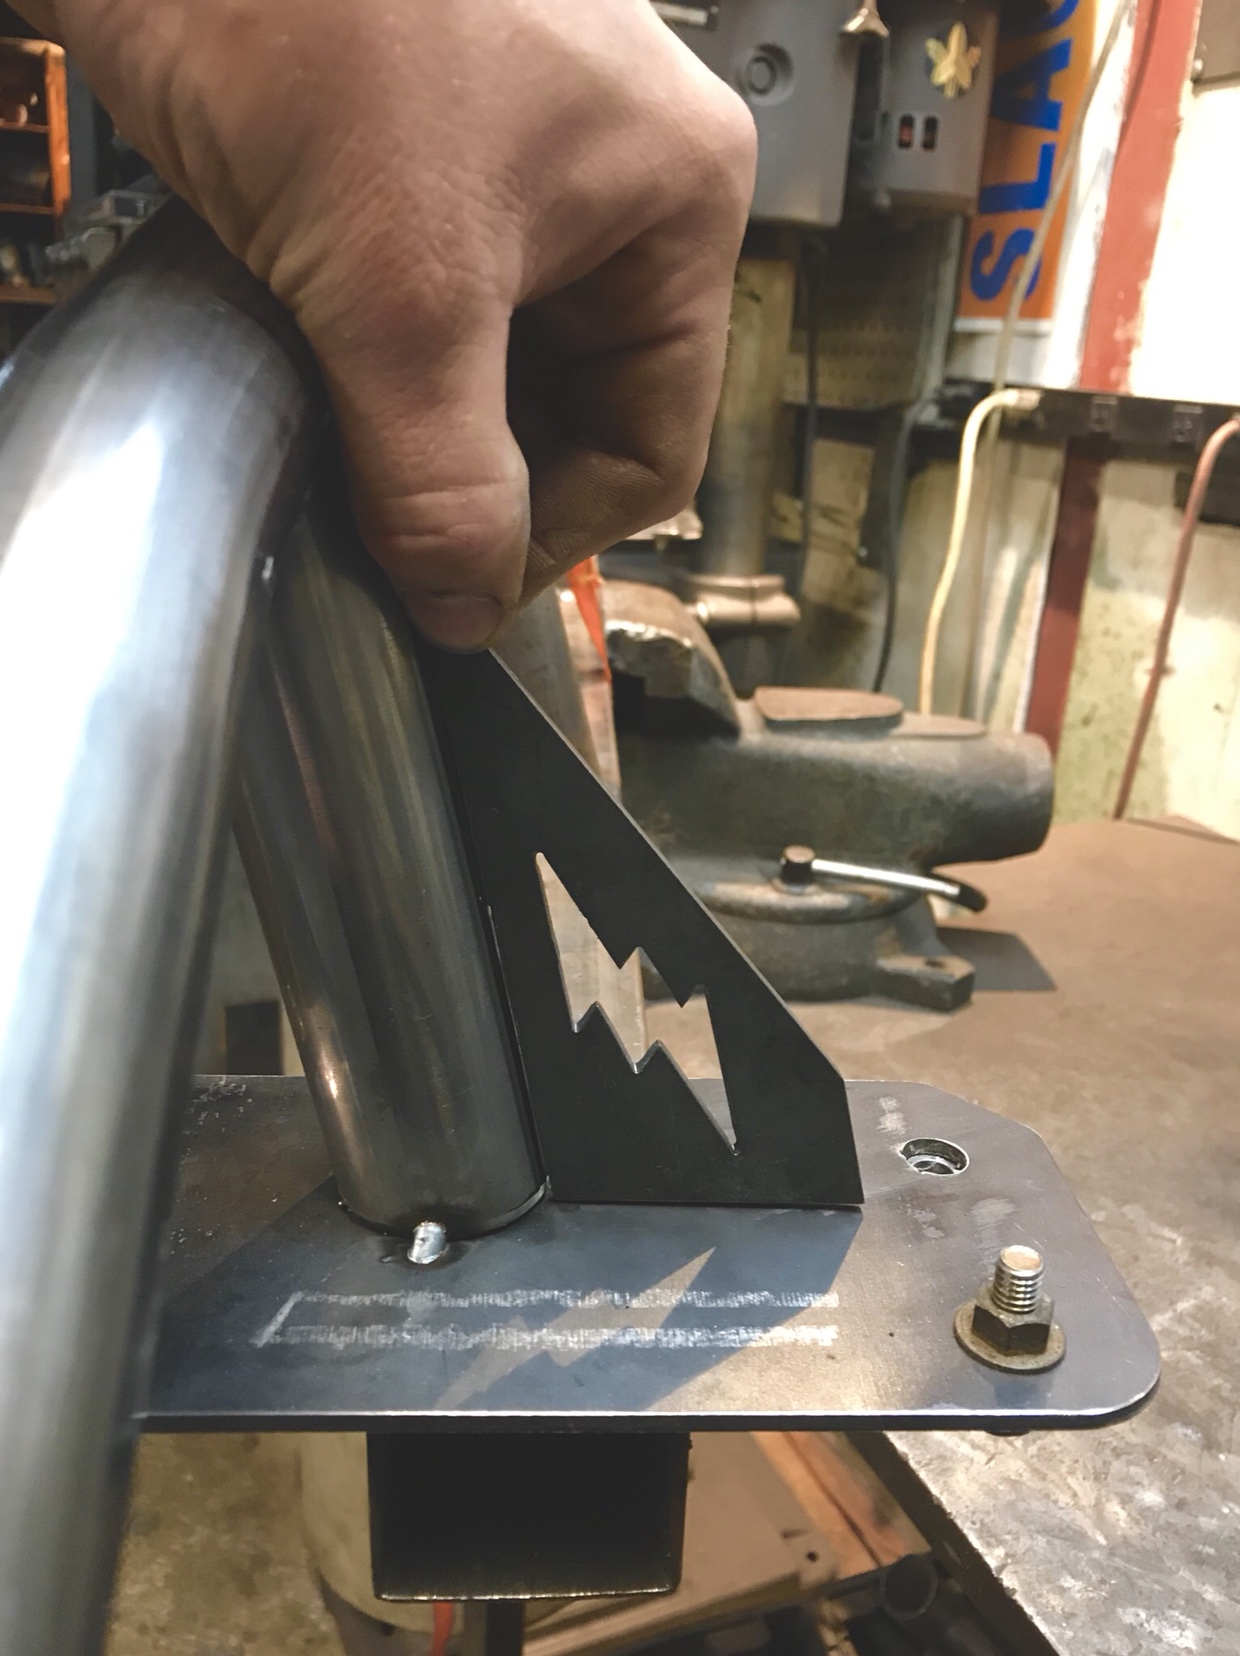 Of course I had to make the 3 pod holder for the vent slot. Went ahead and made the climate control delete for an additional gauge and switches. Later I’ll be making a custom cluster in the stock location 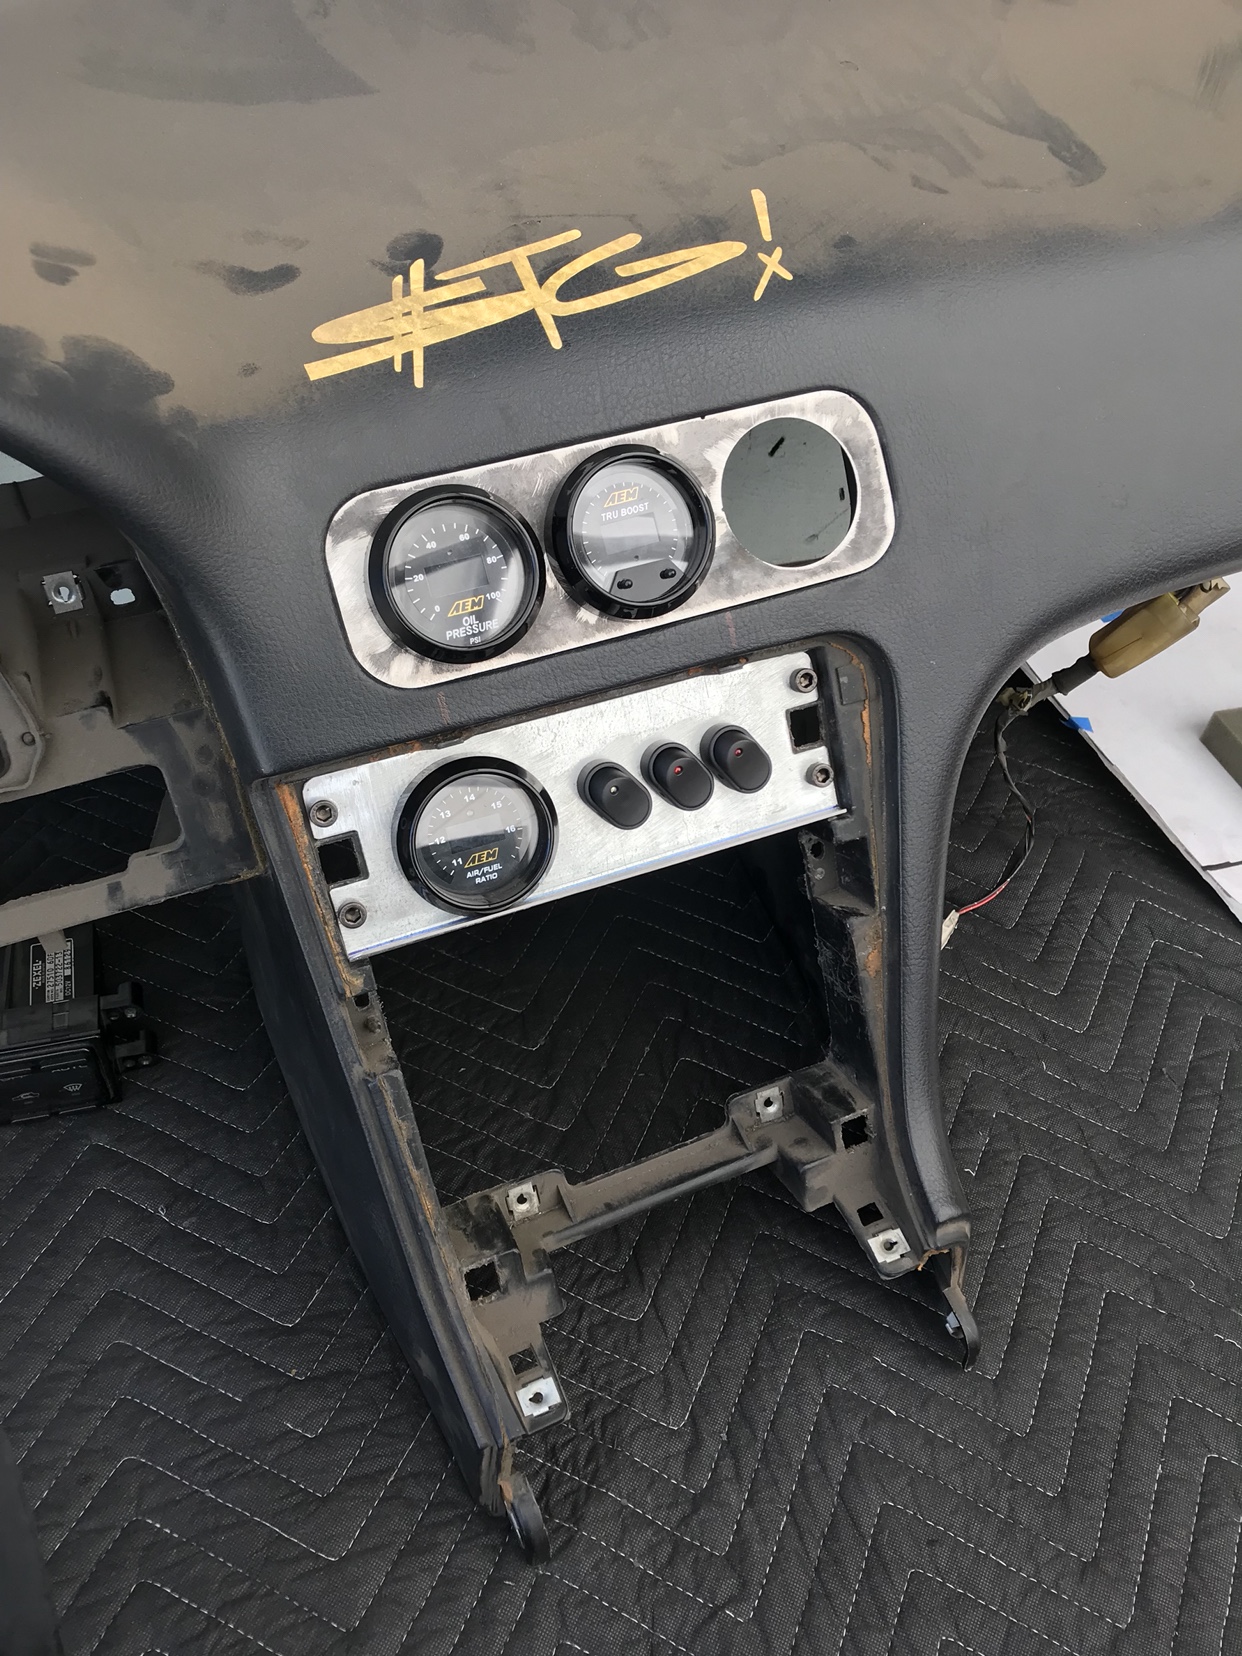 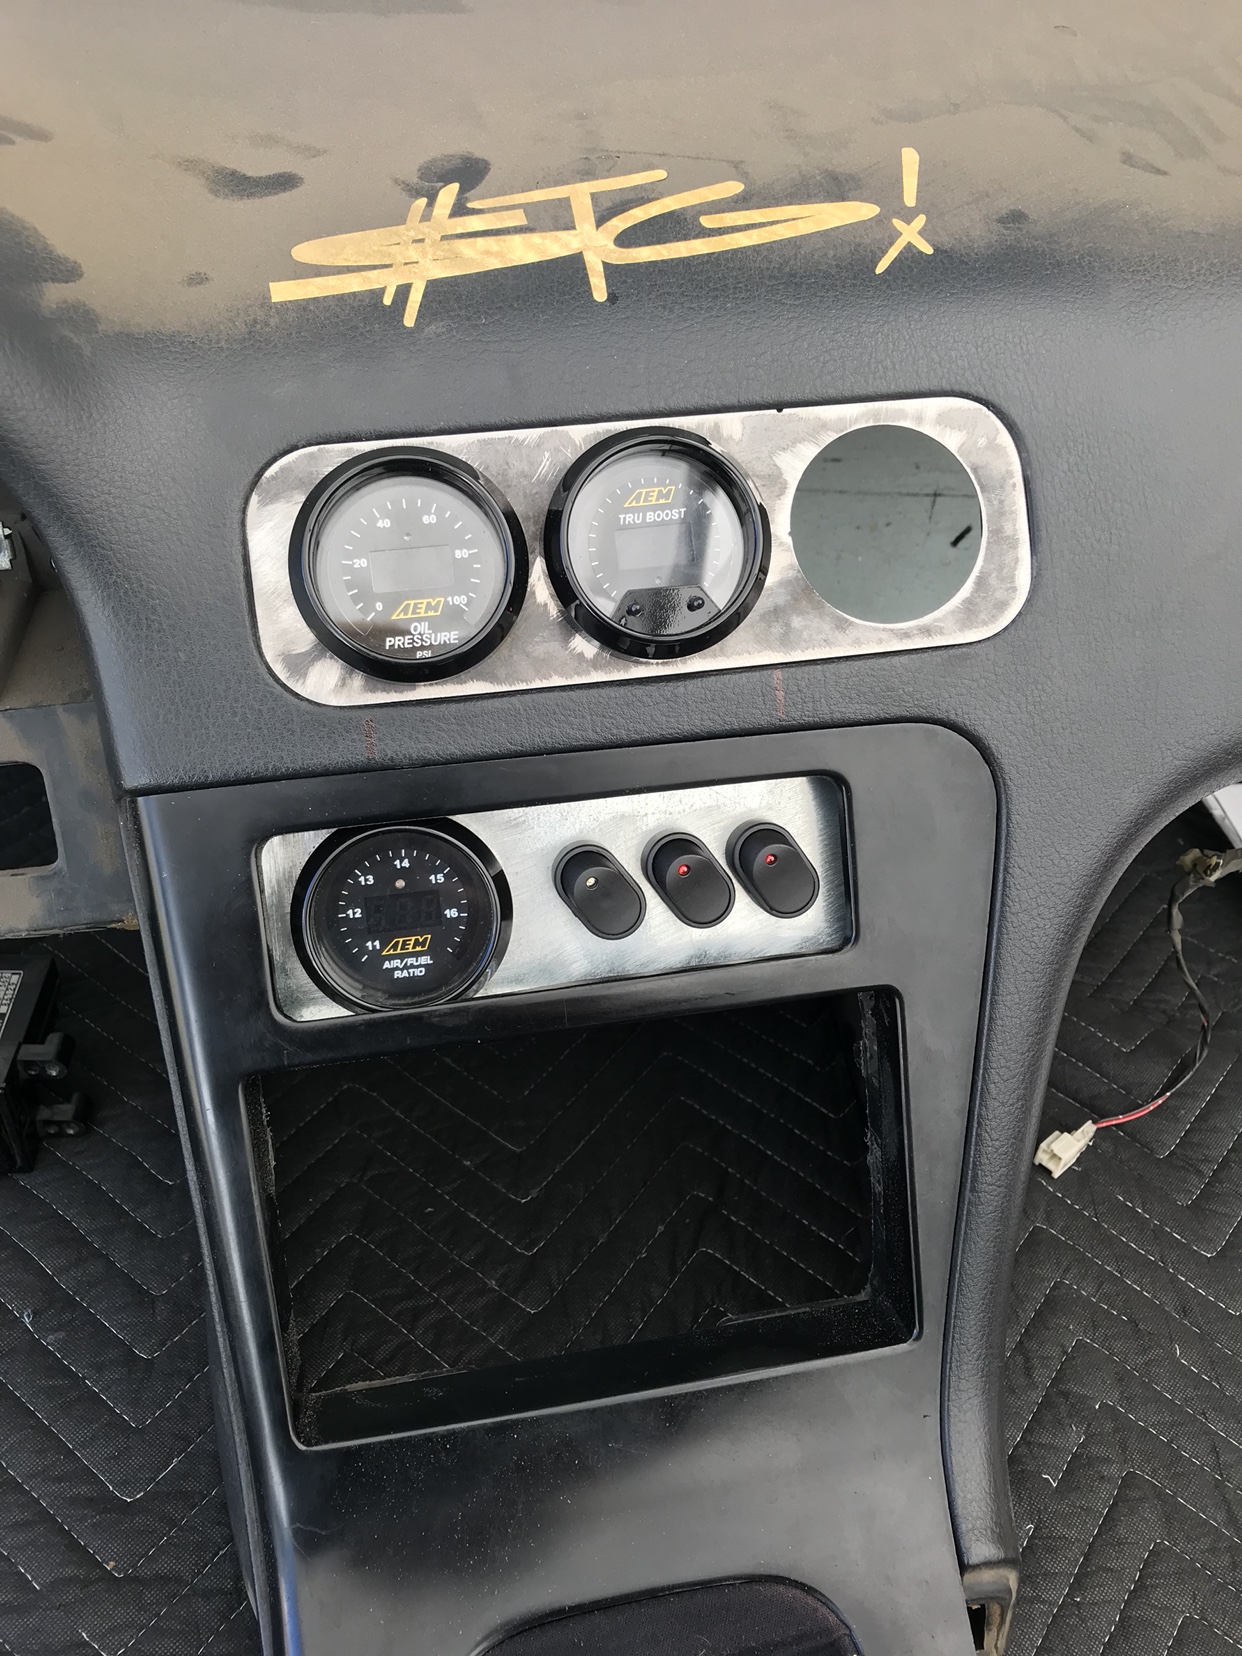 Got the booster and masters in. Tight fit but everything is still independently removable Running gktech brake lines 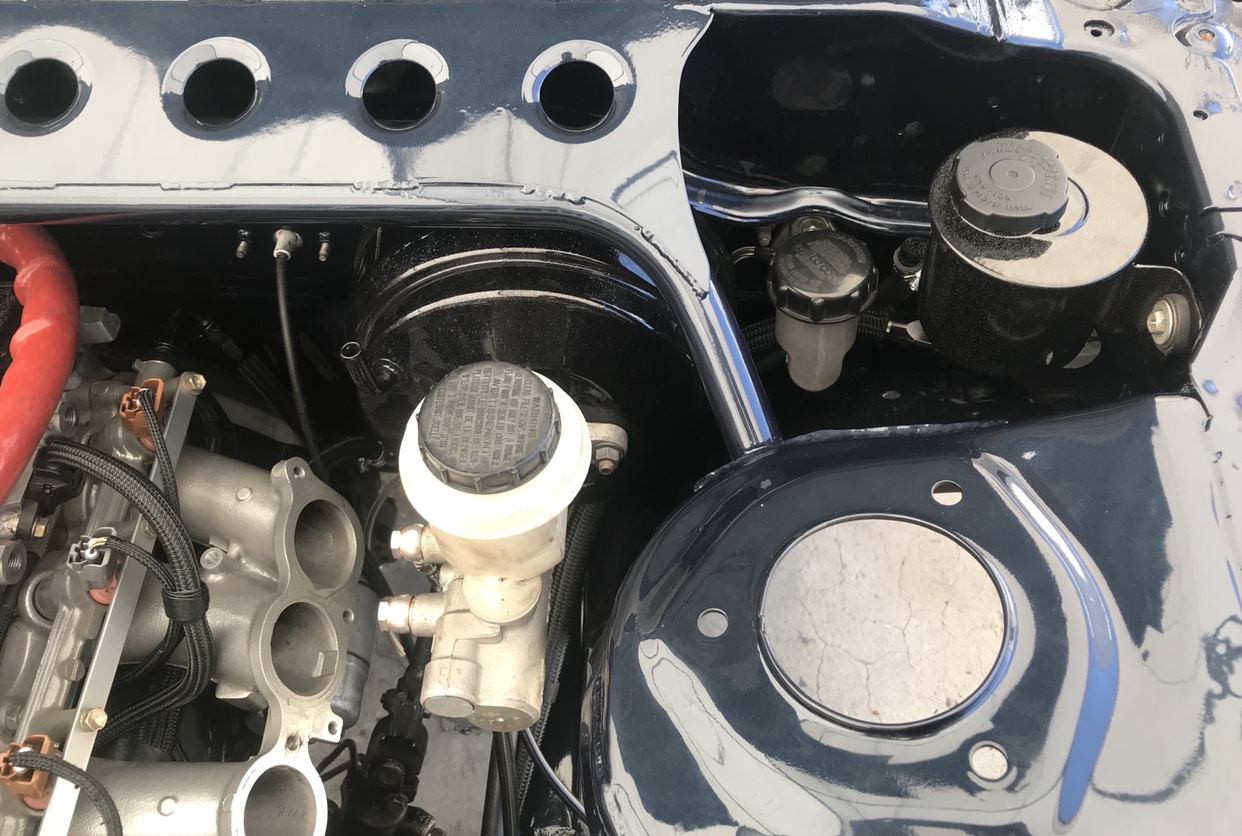 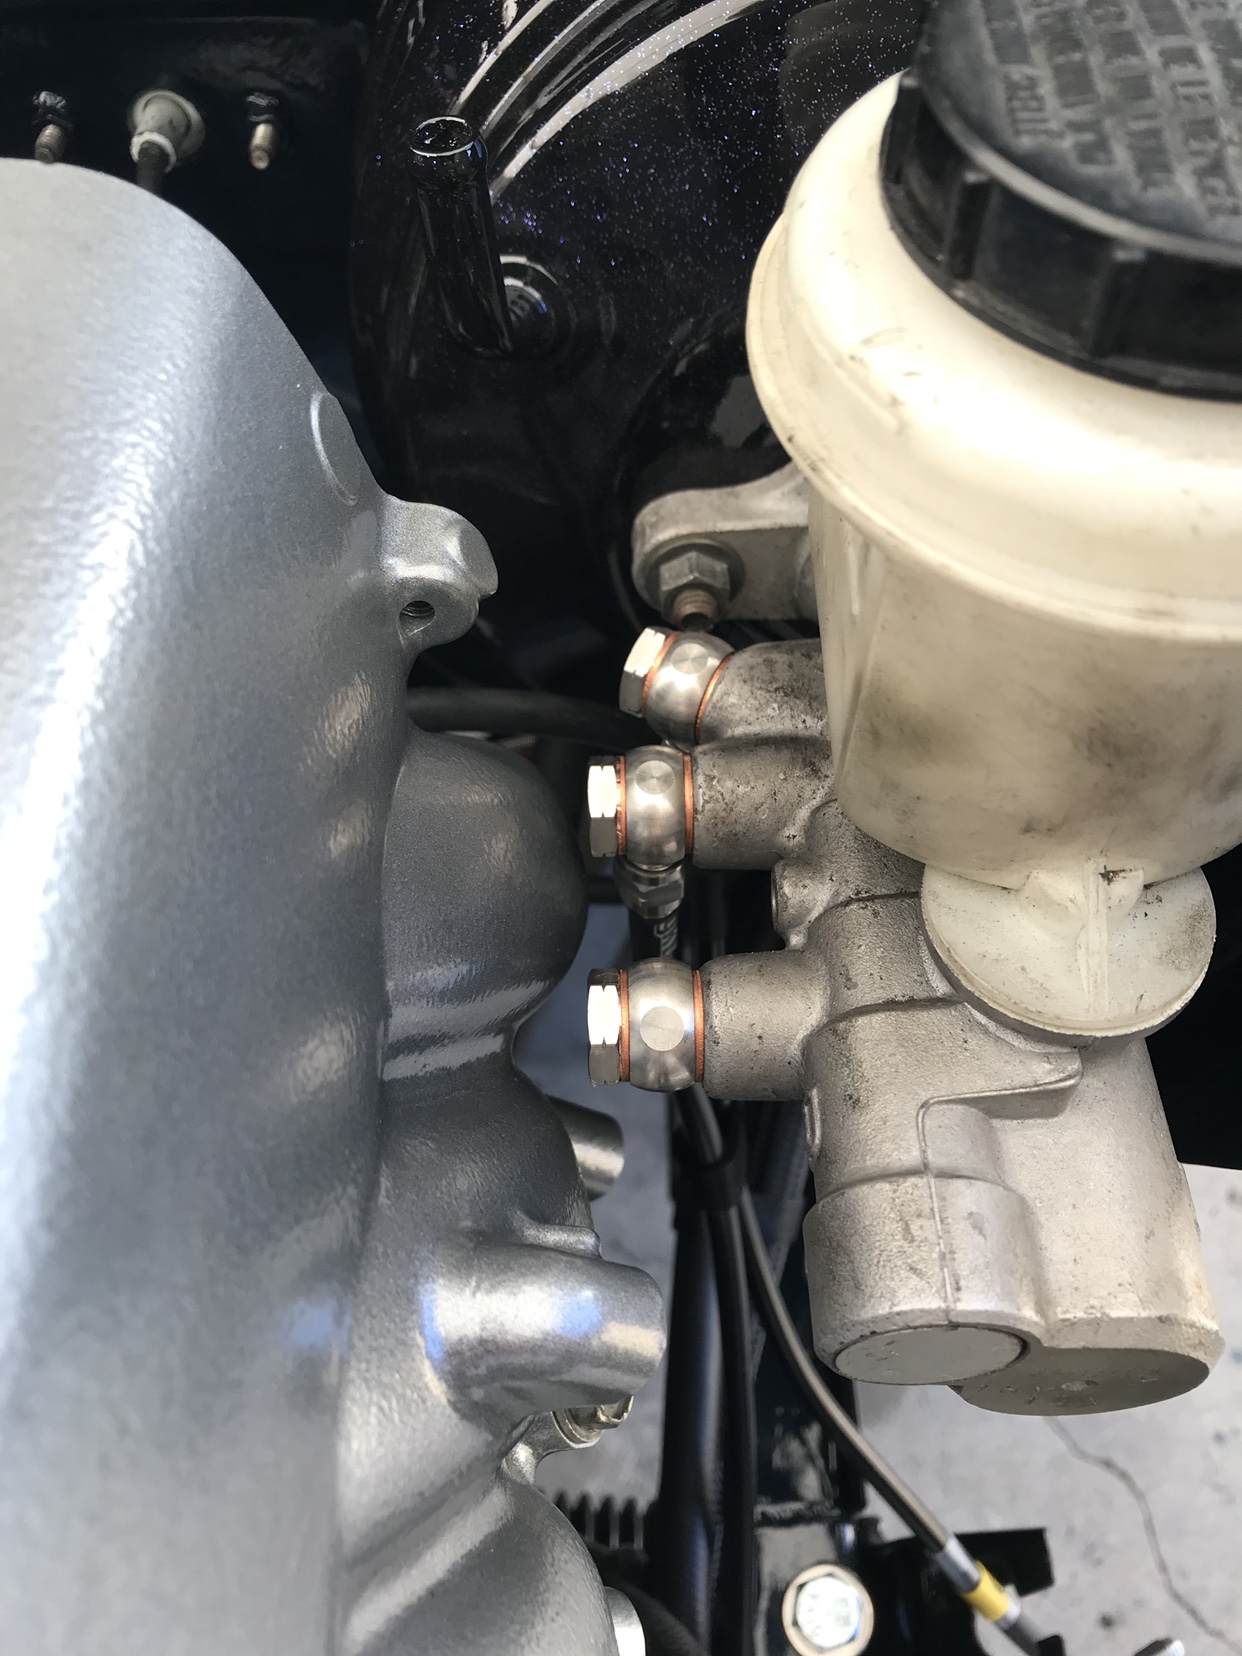 I’m running the stock JDM Aristo harness and ecu for now. I de pinned every wire I won’t be using from the harness and shrunk it down about half the normal size The Aristo has the ecu box in the engine bay so in order to route the ecu into the cabin you’ll need to extend all your wires. I chose to also run the ignite into the cabin. An over all 30” extension. 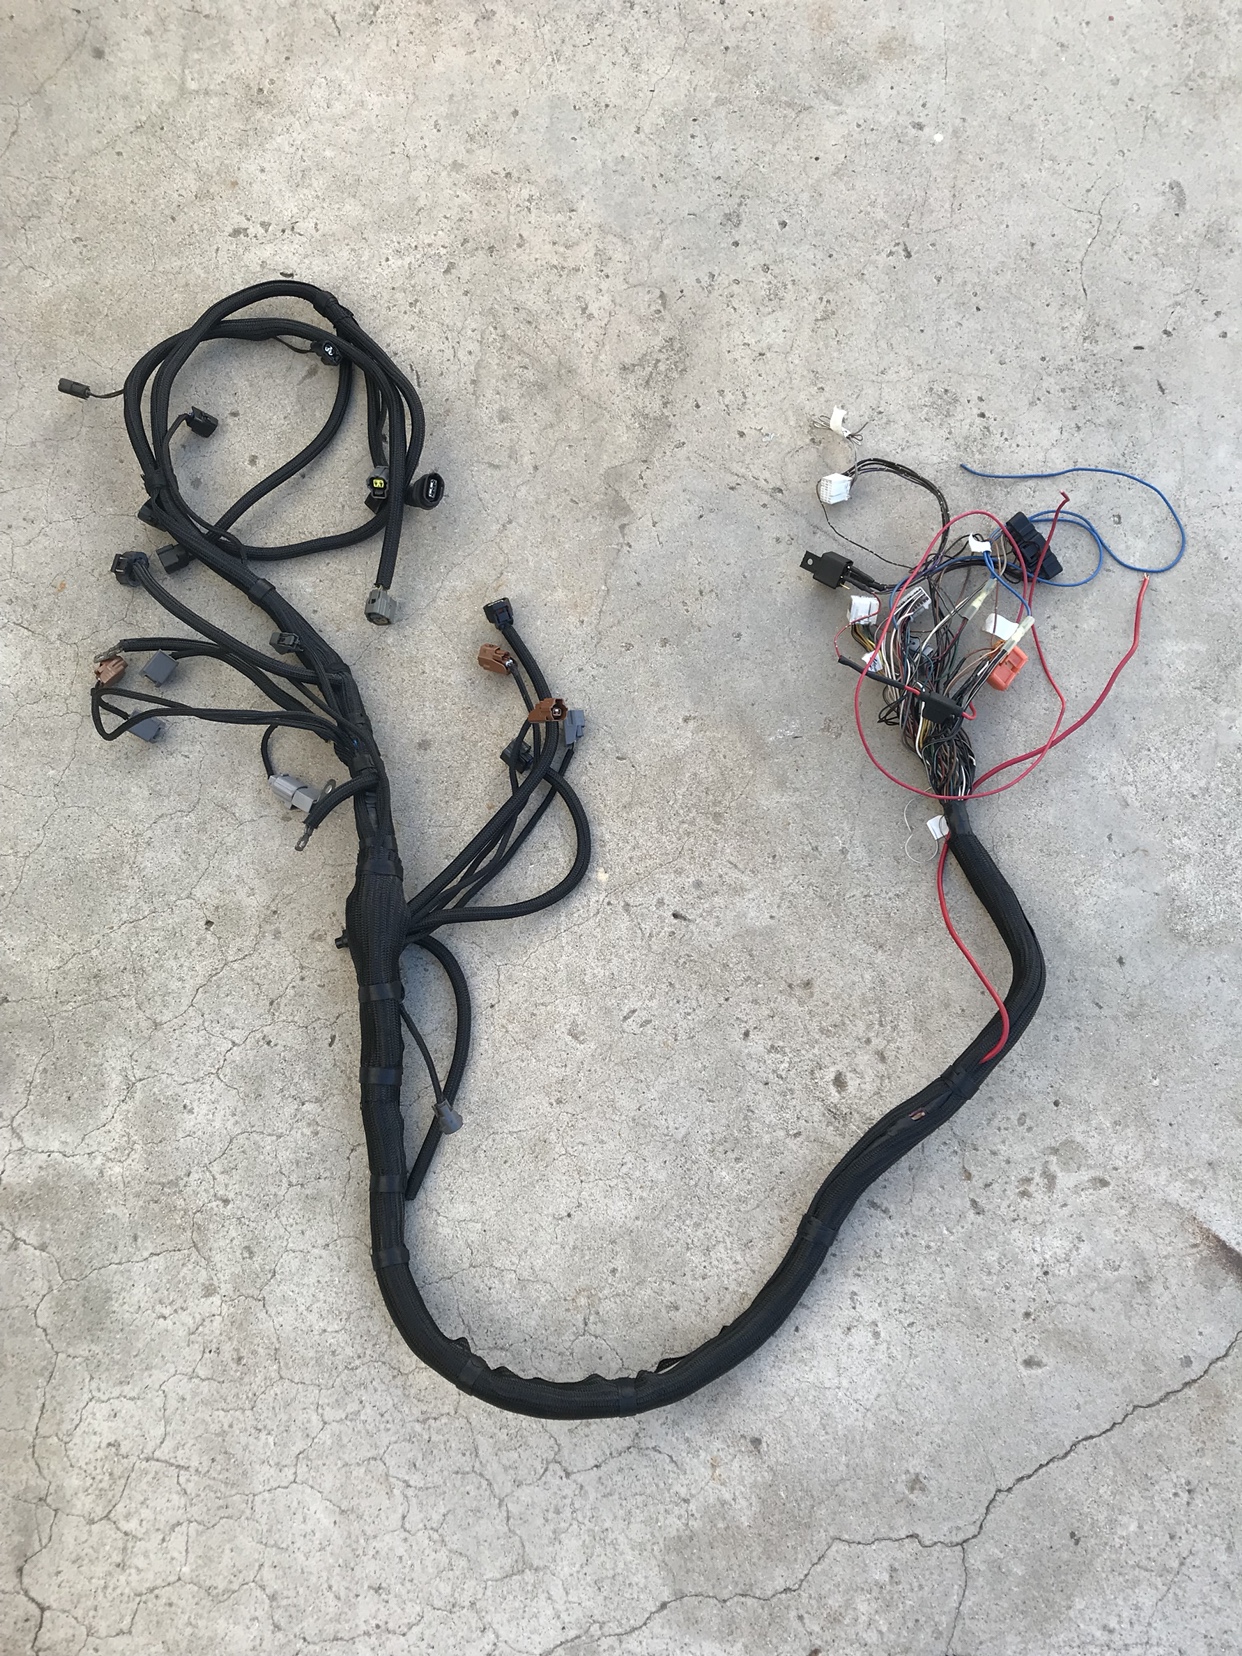 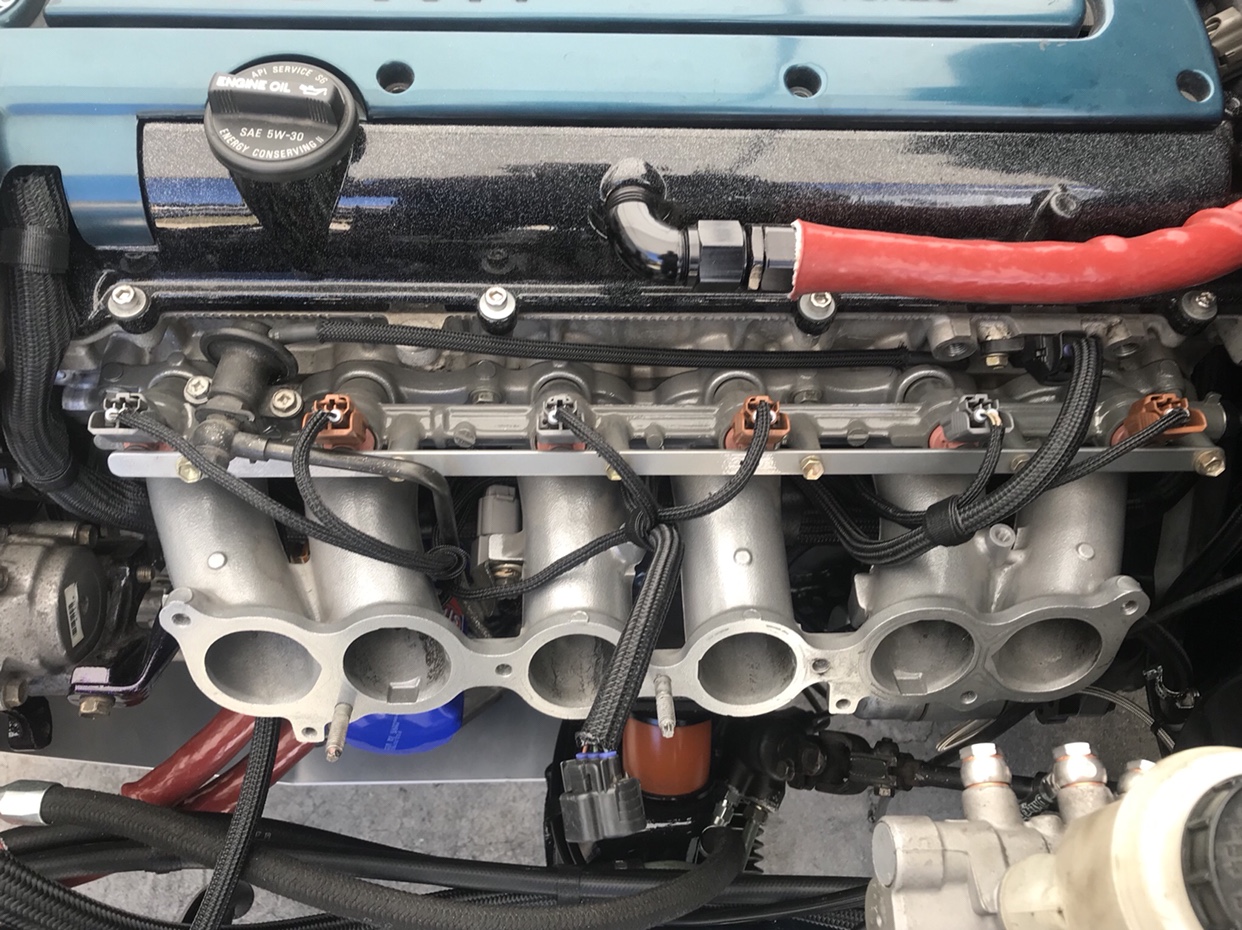 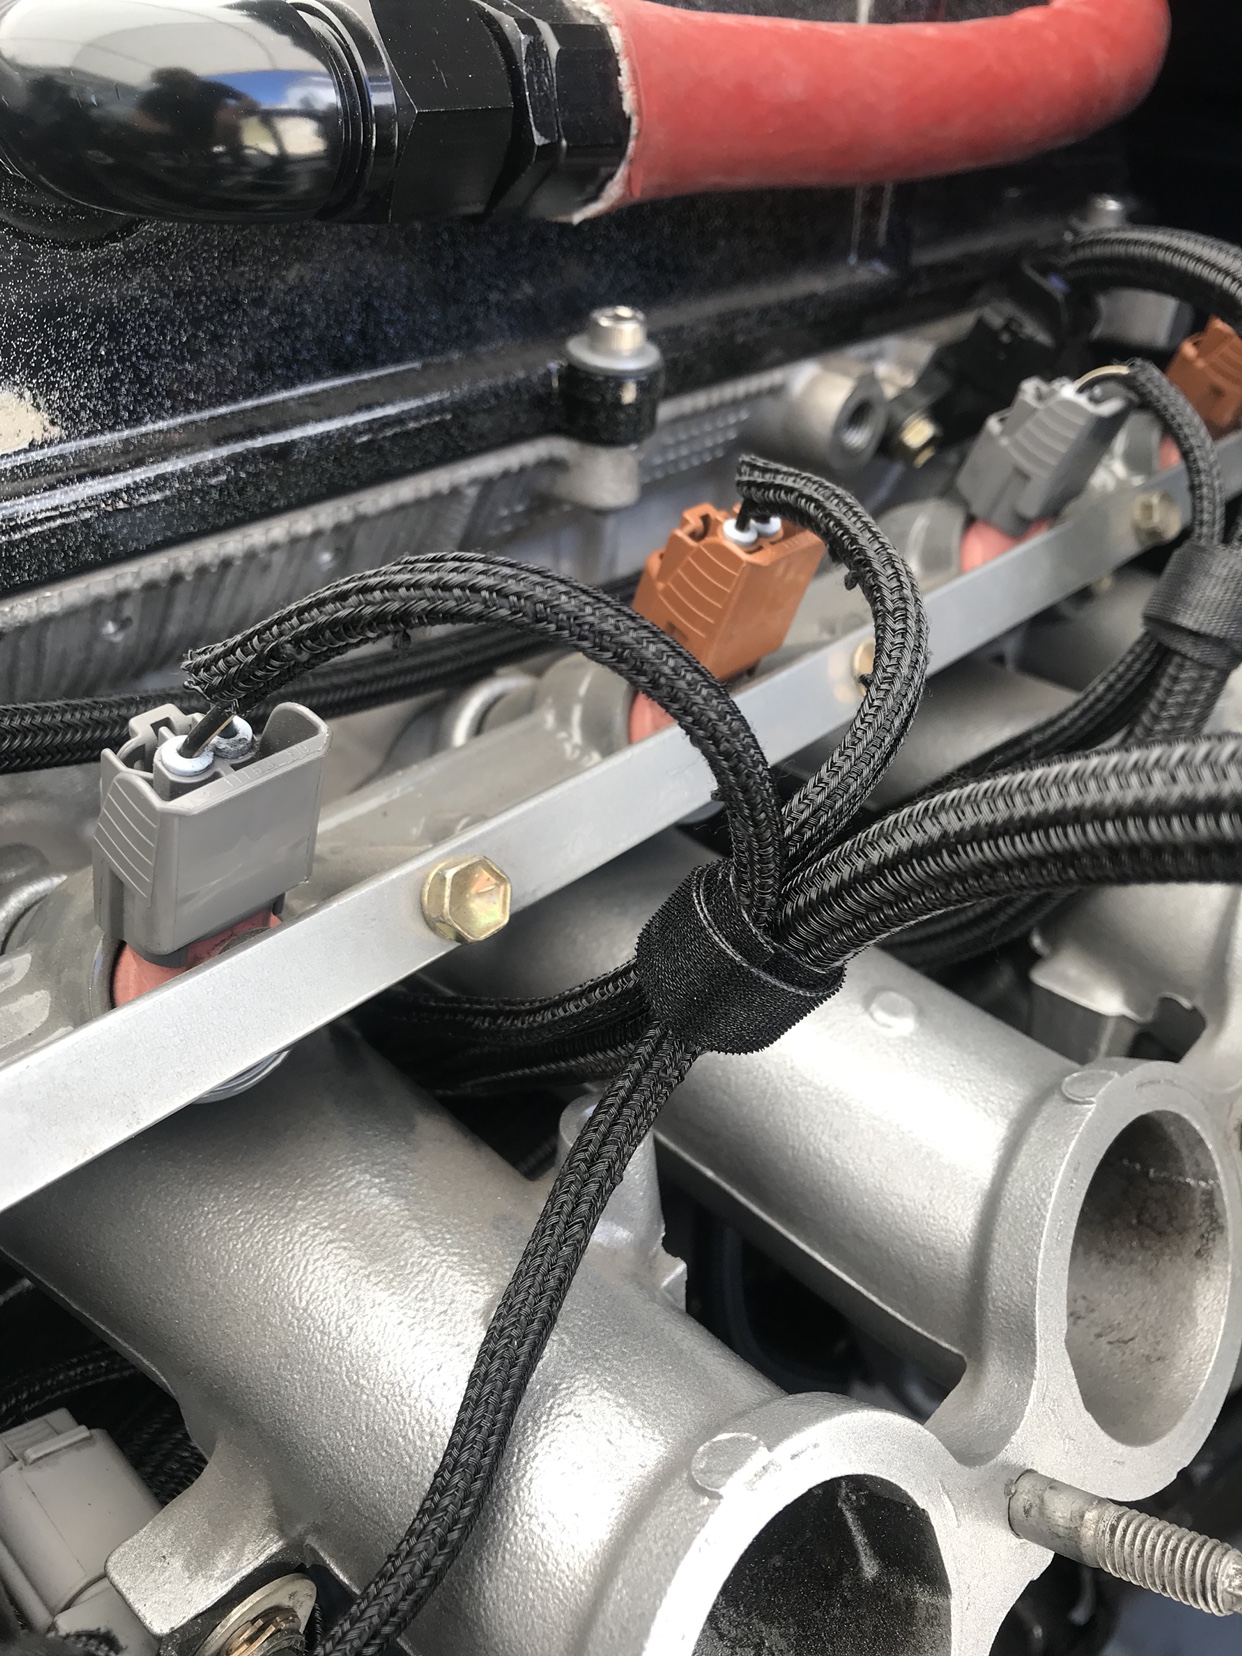 I’m choosing to use the stock Aristo ecu box shoved under the dash. Just zip tied for now since I’m not 100% sure I’ll be utilizing it when upgrading to standalone down the road 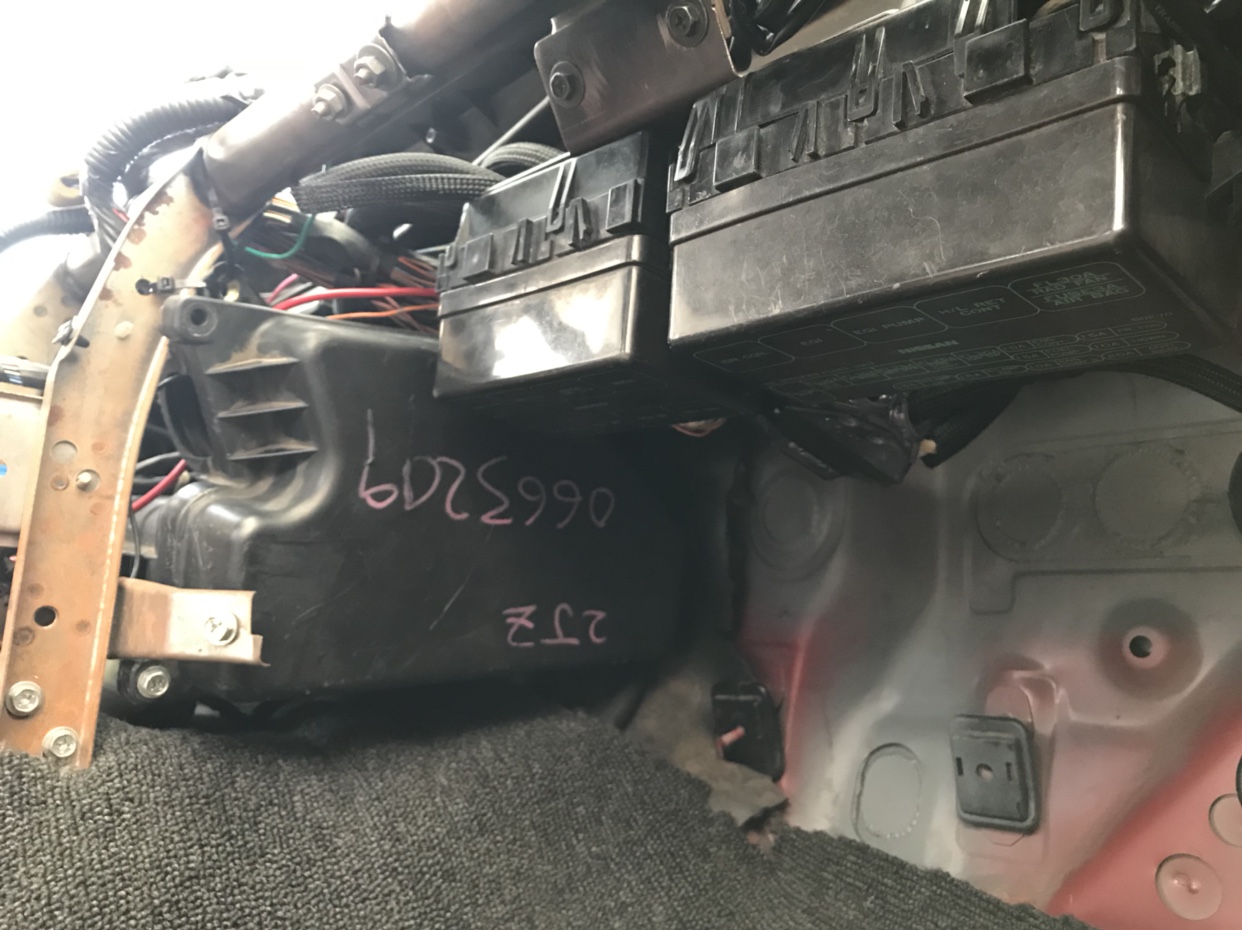 After finalizing all the small things it was ready to crank. Fired right up ! Got all my suspension back on and I’m stoked to see the car come back together and roll again 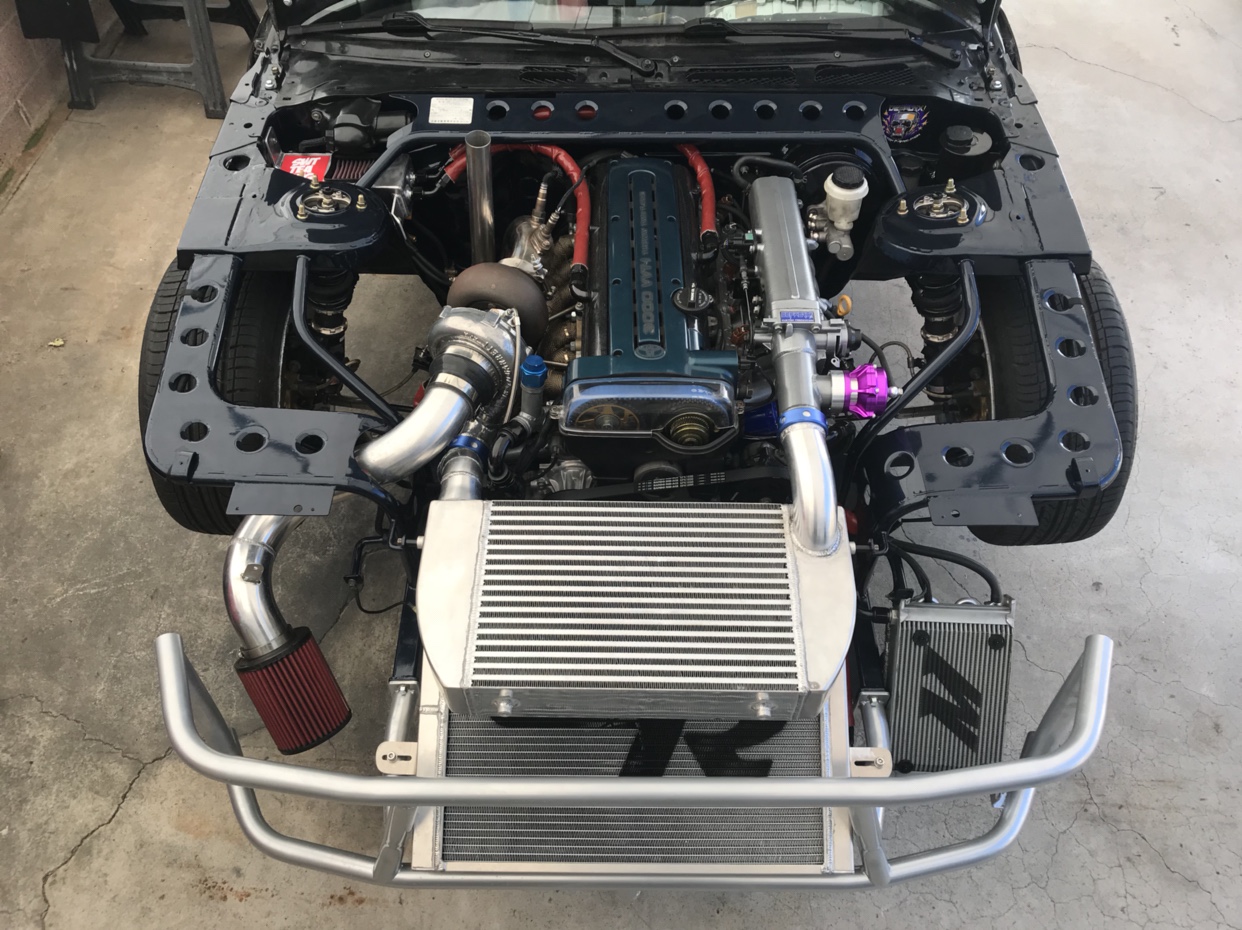 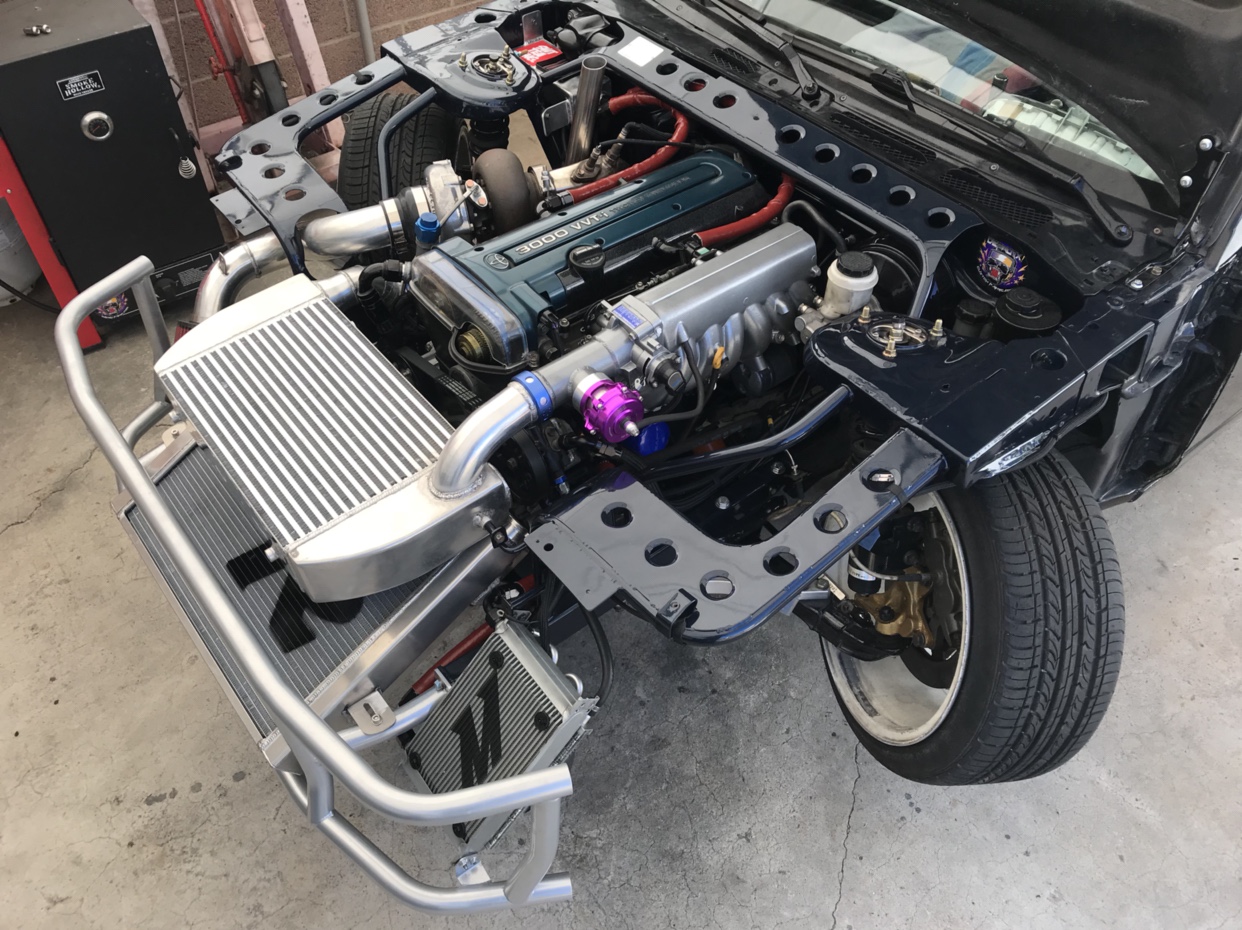 Fenders on and bumper mocked back up to check fitment 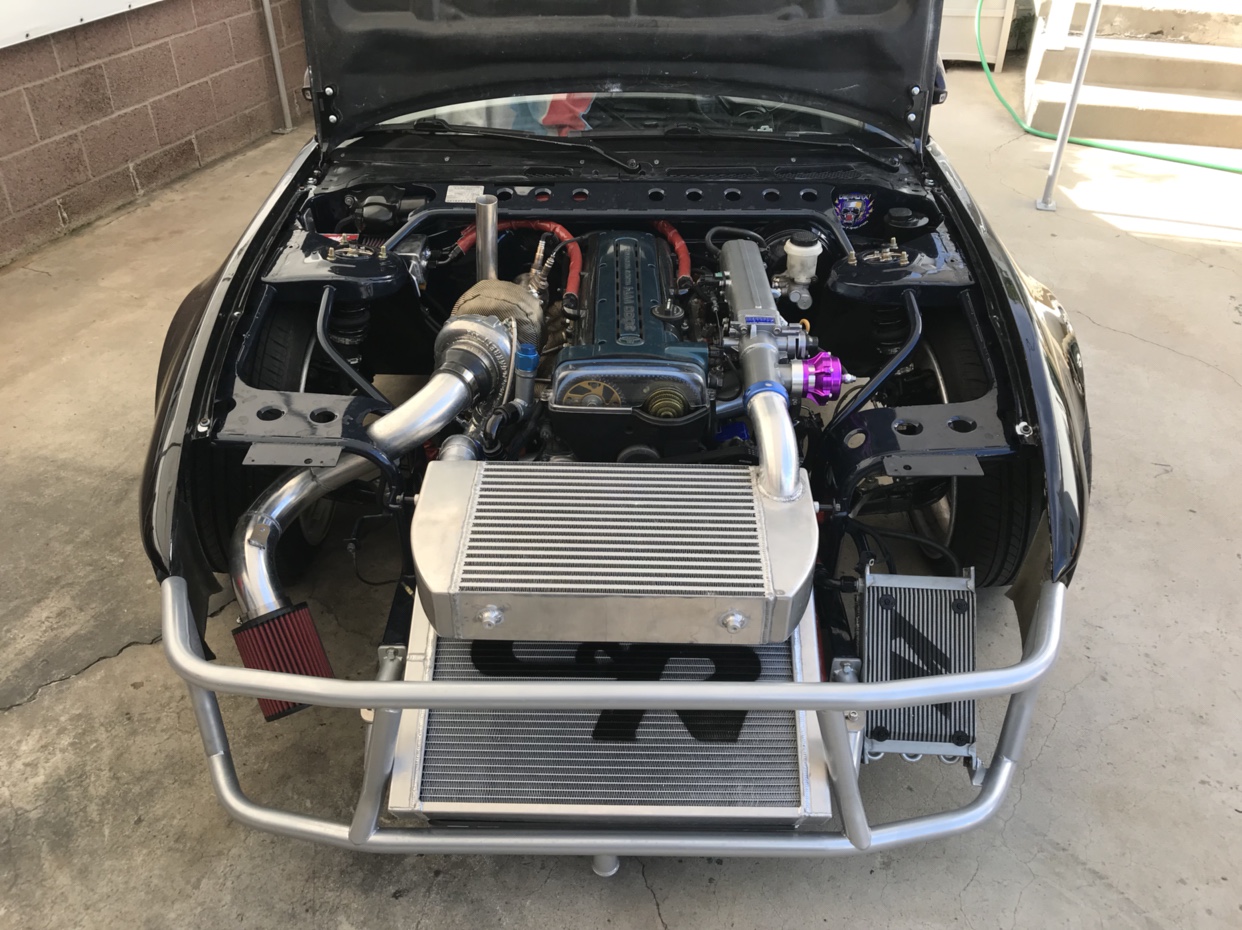 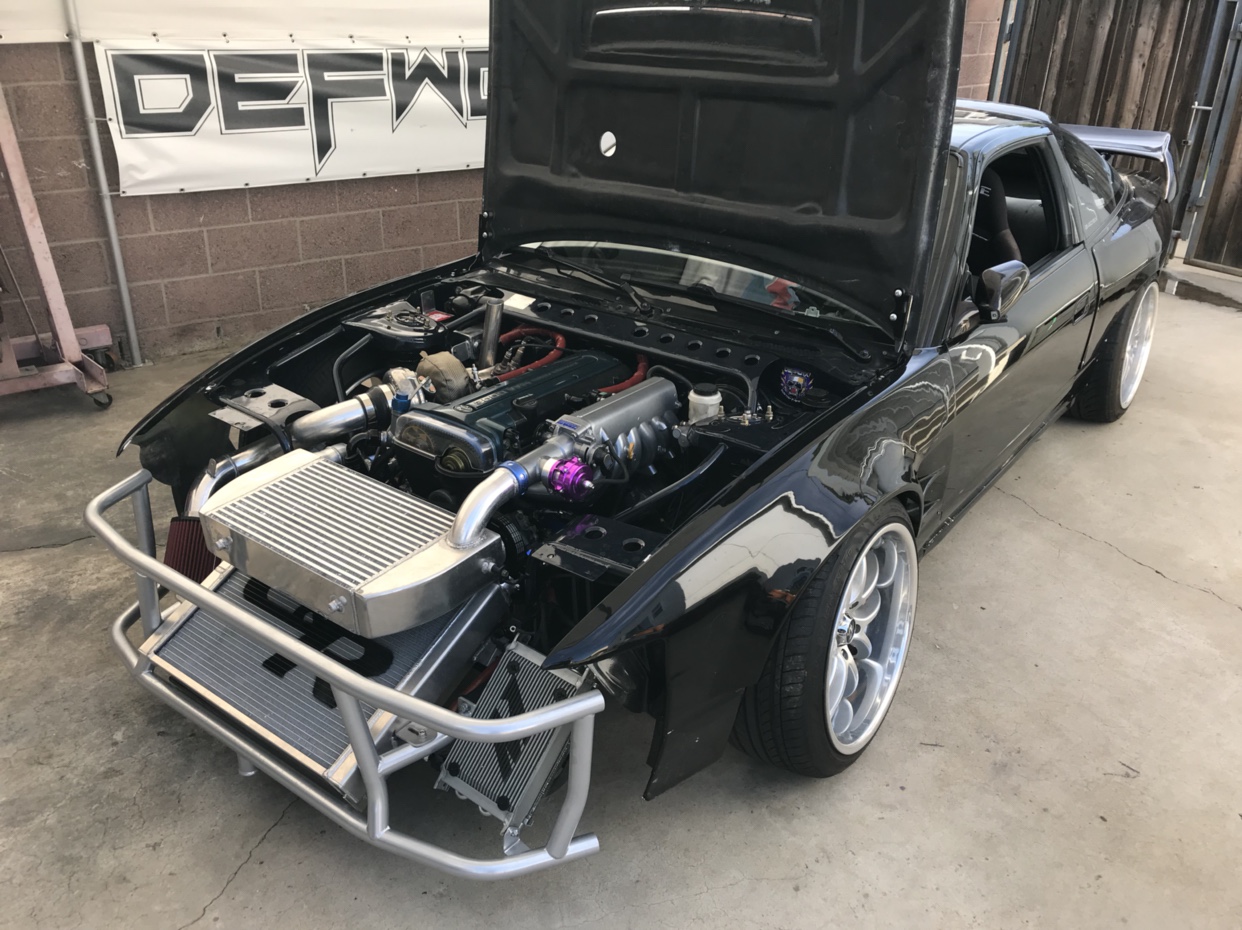 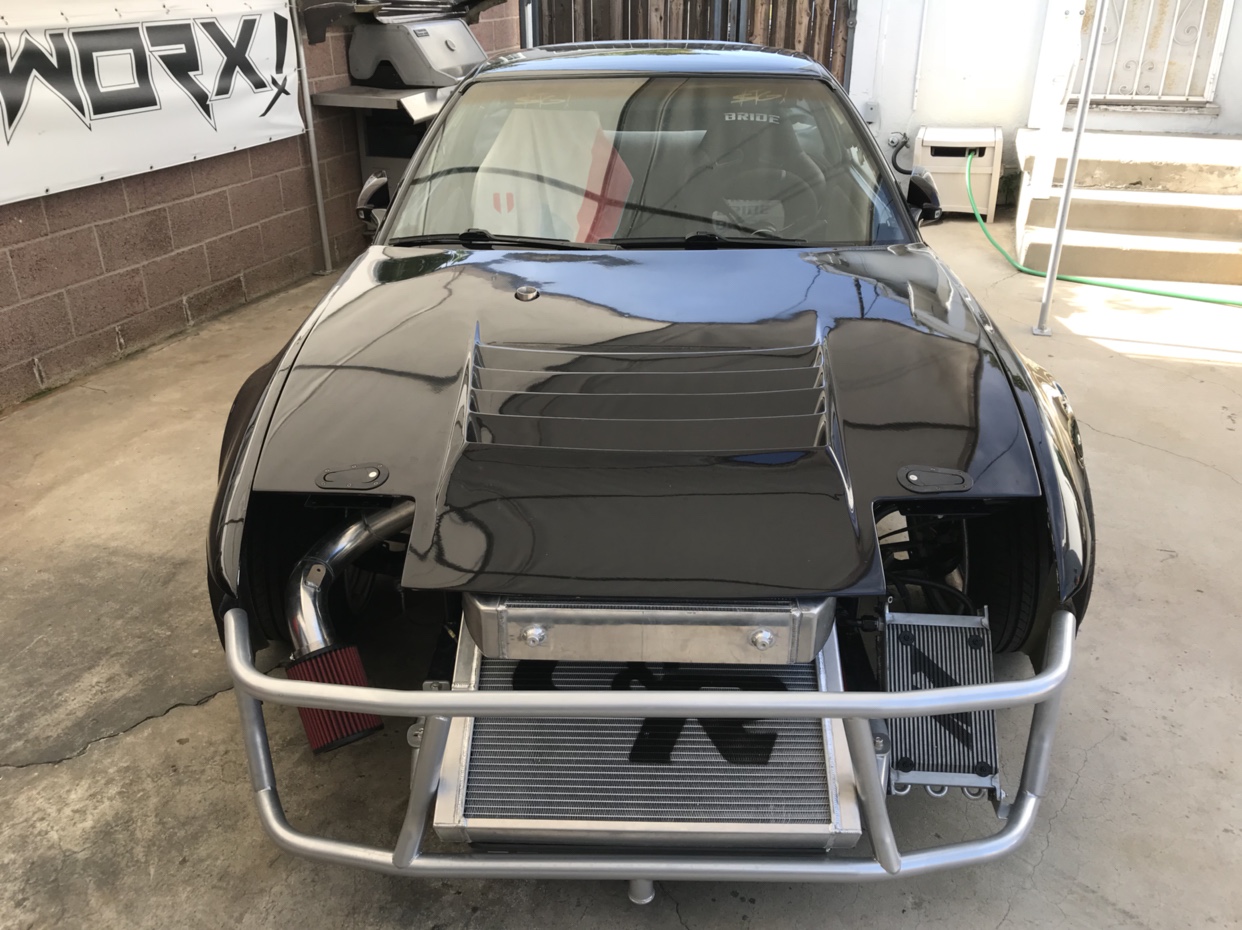 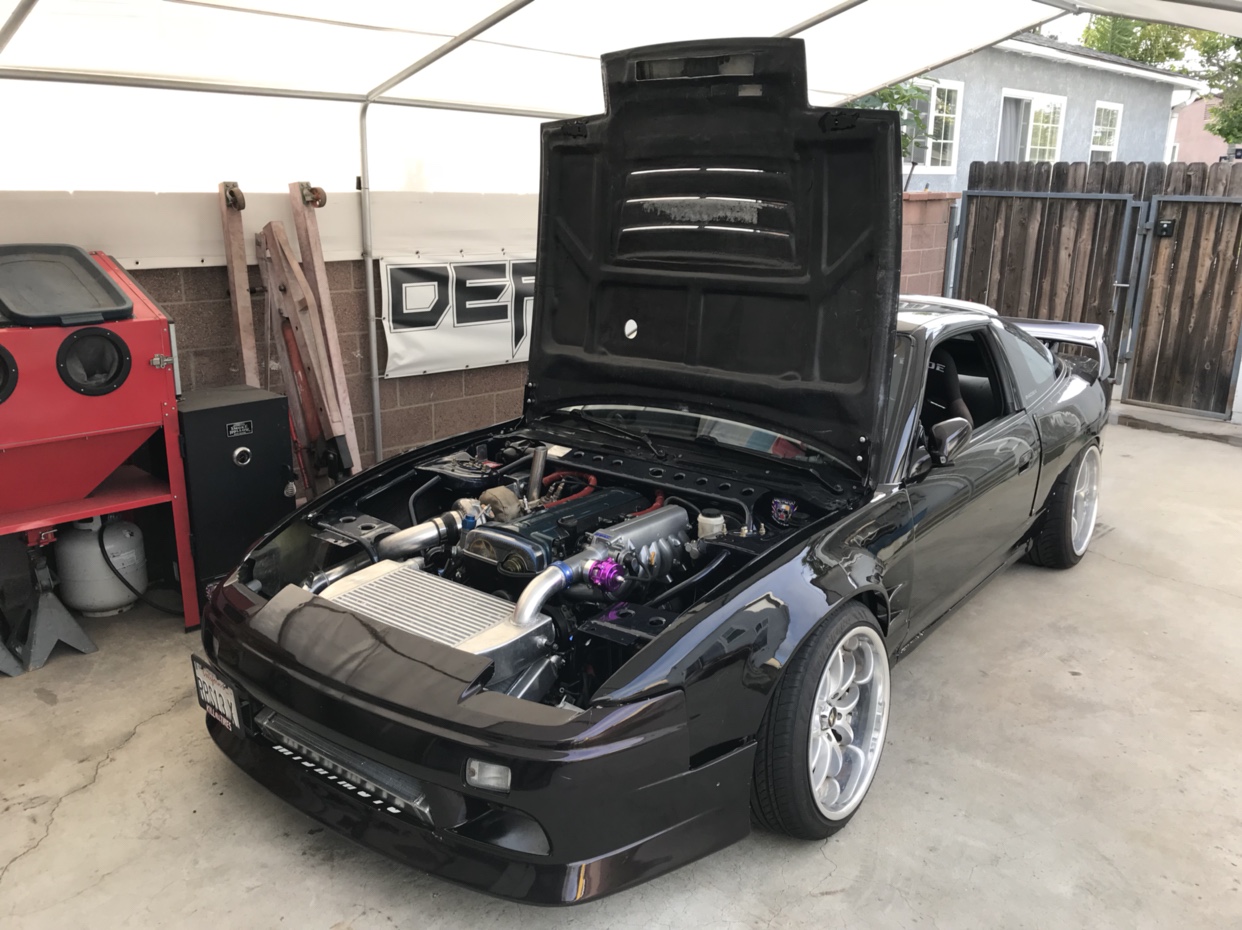 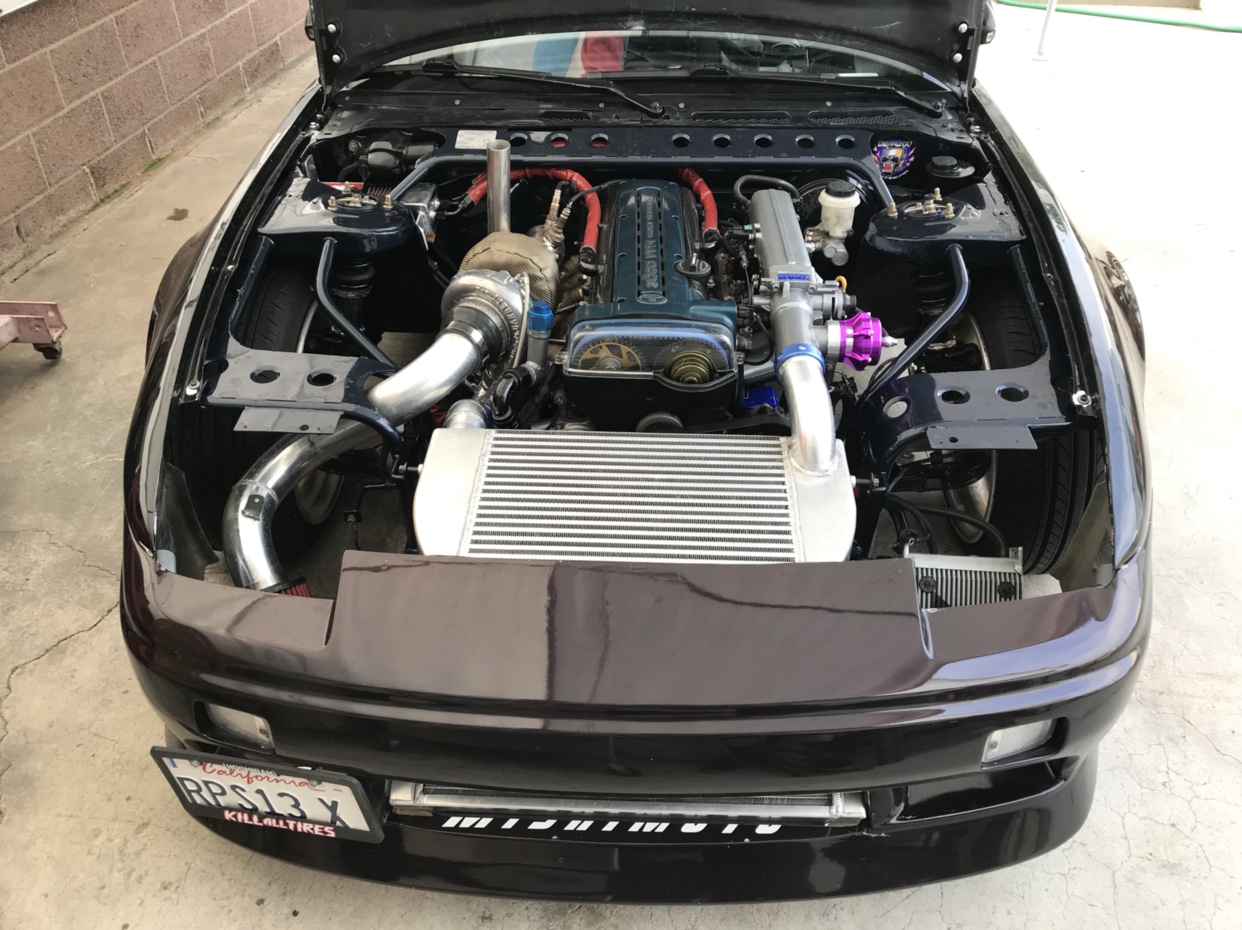 I still haven’t test driven it yet besides going forward and reverse in the driveway. Waiting on my water temp gauge to come in first while I finish wiring the rest of my gauges and clean things up Sent from my iPhone using Tapatalk |
|
|

|
 |
| Bookmarks |
| Thread Tools | |
| Display Modes | |
|
|