|
|||||||
| Home | Rules & Guidelines | Register | Member Rides | FAQ | Members List | Social Groups | Calendar | Mark Forums Read |
| Off Topic Chat All non related chat goes here. |
 |
|
|
Thread Tools | Display Modes |
 05-30-2012, 05:46 PM
|
#301 | |||
|
Zilvia.net Advertiser
 Join Date: Oct 2006
Location: Normal, IL
Age: 47
Posts: 2,946
Trader Rating: (163)
  Feedback Score: 163 reviews
|
Quote:
Quote:
Quote:
__________________
  Follow Along For My Latest Work Follow Along For My Latest Work My Portfolio My Portfolio Please Share Please Share Check Out My Builds Check Out My Builds
|
|||

|

|
| Sponsored Links |
|
05-30-2012, 08:43 PM
|
#302 | |
|
Nissanaholic!
 |
Quote:
|
|
|
|
|
|
05-30-2012, 08:52 PM
|
#303 | |
|
Zilvia.net Advertiser
Join Date: Oct 2006
Location: Normal, IL
Age: 47
Posts: 2,946
Trader Rating: (163)
Feedback Score: 163 reviews
|
Quote:
Stainless lines suck to assemble... no doubt about that. But braided nylon is pretty darn easy. You would use the XR-31 hose then any of the standard AN fittings in the four various colors. Please let me know if you have any other questions or need pricing on something to get a feel how much the stuff is. Note: all of XRP's hoses and fittings can be self assembled except for the HS-79 hose which requires the crimp sleeves to go along with the special fittings.
__________________
Follow Along For My Latest WorkMy PortfolioPlease ShareCheck Out My Builds
|
|
|
|
|
|
06-04-2012, 03:46 PM
|
#304 |
|
Nissanaholic!
|
Toby, what's your opinion on tack cloth?
Dont recall you mentioning it ever. As for my painting the bay project, do you recommend them for removing fine particles? I do have wax/grease remover already
__________________
@UpshiftEngineering |
|
|
|
|
06-04-2012, 05:13 PM
|
#305 | |
|
Zilvia.net Advertiser
Join Date: Oct 2006
Location: Normal, IL
Age: 47
Posts: 2,946
Trader Rating: (163)
Feedback Score: 163 reviews
|
Quote:
Before you start the project you want to degrease the entire bay. That way you are not rubbing in grease and what not as you are sanding. Before I spray etch primer or use filler, I use an air gun to blow off the entire bay REALLY well to get rid of any sanding dust. I really only wiped the bay down before the main primer. So basically after all of the etch primer was on and I sanded the entire bay to 320 grit. I then used Maxx Solv. Pour/spray it onto a clean lint free auto body cloth and wipe it on like you would sanding.... across the fingers. You will want to fold the cloth a couple times to form a little bit of a thicker wipe. You will then follow that up with another cloth to wipe it off. So essentially do small-ish areas at a time and do not let the Maxx Solv dry on there without wiping it off first. Otherwise if you do not wipe it off you are just smearing stuff around. Wipe on, wipe off!
__________________
Follow Along For My Latest WorkMy PortfolioPlease ShareCheck Out My Builds
|
|
|
|
|
|
06-04-2012, 06:28 PM
|
#306 |
|
Zilvia Junkie
 Join Date: Jul 2006
Location: Marietta, GA
Posts: 355
Trader Rating: (11)
Feedback Score: 11 reviews
|
Hey Broadfield,
I have a question about your bulk head design.  Where did you get that aluminum disc? Was it custom made? If so, If I give you the specs could you have something similar made for me? I'm looking to do this for my 2000 Celica I'm building. I hope you don't mind that I use your design as inspiration. Thanks!
__________________
|
|
|
|
|
06-04-2012, 09:24 PM
|
#307 | |
|
Nissanaholic!
|
okay, geeze. thank you once again for the amount of time and effort you take to inform me with real secrets. Response time is the best factor for me haha.
I did some reading a few nights ago on 'wax and grease remover', 'surface remover' and things of that sort, as basically I have concluded different companies make the same products with some different names. The product is to be applied liberally, while it is wet particles/contaminants 'float' to the surface so they can be wiped away. with a clean cloth of course. The attached image is how my car sits right this second. the plan is red scuff pad the whole thing, rattle can etch primer. and then drop motor in and finish fab stuff(ic piping, exhaust, rad...stuff) then pull motor and acutally primer and paint for real. (any flaws with my plan?) small areas, sounds like a good plan. I have a 20 gal compressor, and do use it to blow off dust and such regularly (it does not work REAL well, but does the job). and my original question, tack cloth before base coat. thank you as always sir! Quote:
__________________
@UpshiftEngineering |
|
|
|
|
|
06-04-2012, 10:46 PM
|
#308 | |
|
Zilvia.net Advertiser
Join Date: Oct 2006
Location: Normal, IL
Age: 47
Posts: 2,946
Trader Rating: (163)
Feedback Score: 163 reviews
|
Quote:
__________________
Follow Along For My Latest WorkMy PortfolioPlease ShareCheck Out My Builds
|
|
|
|
|
|
06-06-2012, 08:14 PM
|
#309 |
|
Zilvia Junkie
Join Date: Jul 2006
Location: Marietta, GA
Posts: 355
Trader Rating: (11)
Feedback Score: 11 reviews
|
I've got another one for ya.
Regarding your old SR set-up, I noticed that you converted all your valve cover outlets to AN fittings. What did you do about the PCV valve? 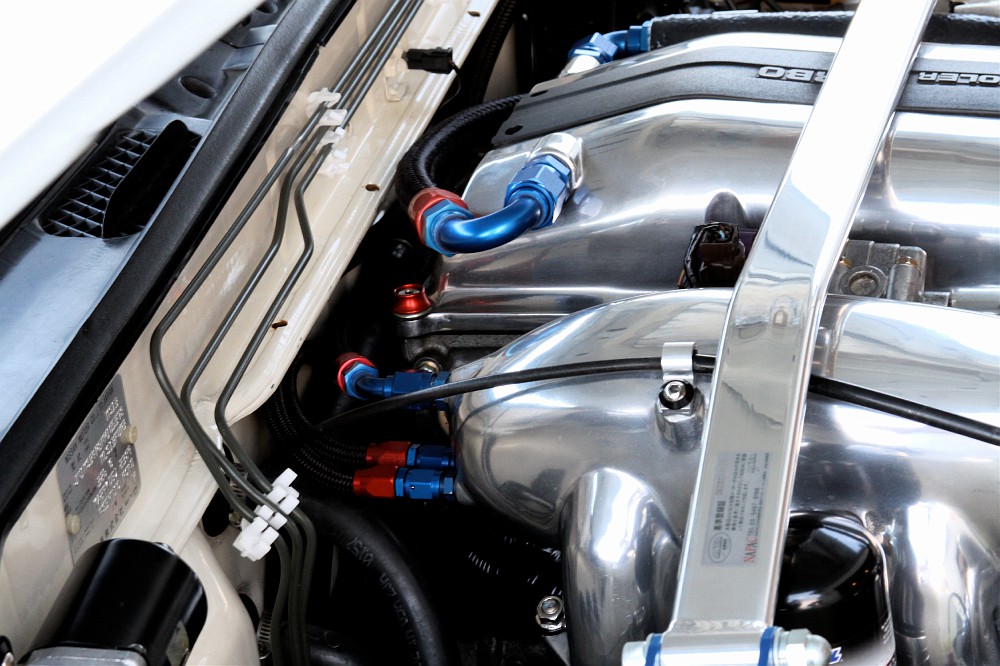 Thanks again!
__________________
|
|
|
|
|
06-08-2012, 03:22 PM
|
#310 |
|
Zilvia FREAK!
 Join Date: Apr 2009
Location: candy mountain
Age: 31
Posts: 1,543
Trader Rating: (11)
Feedback Score: 11 reviews
 |
toby i wanna run my 53mm water temp gauge in my s14 cluster
could i remove the stock temp gauge and hole saw the hole to 53mm for the gauge and still keep my working tach and speedo and gas gauge anything esle im not worried as long as those will work and light up still.
__________________
http://strictlycoolstuff.tumblr.com/ |
|
|
|
|
06-08-2012, 07:19 PM
|
#311 | ||
|
Zilvia.net Advertiser
Join Date: Oct 2006
Location: Normal, IL
Age: 47
Posts: 2,946
Trader Rating: (163)
Feedback Score: 163 reviews
|
Quote:
Quote:
__________________
Follow Along For My Latest WorkMy PortfolioPlease ShareCheck Out My Builds
|
||
|
|
|
|
06-08-2012, 08:52 PM
|
#312 | |
|
Zilvia FREAK!
Join Date: Apr 2009
Location: candy mountain
Age: 31
Posts: 1,543
Trader Rating: (11)
Feedback Score: 11 reviews
|
Quote:
__________________
http://strictlycoolstuff.tumblr.com/ |
|
|
|
|
|
06-08-2012, 10:09 PM
|
#313 |
|
Leaky Injector
 |
toby ,with regards to your sr20det valve cover ,how did you put fittings on it for the oil catch can
i believe you just drilled out the pipe that sticks out then you tapped the specific threading for your fittings , but how can you do it without scratching or damaging your valve cover mines already painted |

|
|
|
06-09-2012, 09:18 PM
|
#314 | |
|
Zilvia.net Advertiser
Join Date: Oct 2006
Location: Normal, IL
Age: 47
Posts: 2,946
Trader Rating: (163)
Feedback Score: 163 reviews
|
Quote:
__________________
Follow Along For My Latest WorkMy PortfolioPlease ShareCheck Out My Builds
|
|
|
|
|
|
06-14-2012, 03:58 AM
|
#315 |
|
Zilvia Addict
 |
Honestly i do not post that much online but you are the man when it comes to simple and clean!!!! You pay attention to details which makes a car look so fn amazing. Keep up the good work, you have inspired me to take my time on my build.
|
|
|
|
|
06-14-2012, 11:04 AM
|
#316 |
|
Post Whore!
 
Join Date: Dec 2007
Location: Henderson, NV
Posts: 7,666
Trader Rating: (63)
Feedback Score: 63 reviews
|
What would be the best way to put gauge holders on dashboard ?
FYI I have S14. Something like this  I tried Scotch indoor mounting tape but it's 2 years old tape so kinda lost stickiness.. |
|
|
|
|
06-14-2012, 07:11 PM
|
#317 | ||
|
Zilvia.net Advertiser
Join Date: Oct 2006
Location: Normal, IL
Age: 47
Posts: 2,946
Trader Rating: (163)
Feedback Score: 163 reviews
|
Quote:
Quote:
__________________
Follow Along For My Latest WorkMy PortfolioPlease ShareCheck Out My Builds
|
||
|
|
|
|
06-22-2012, 12:19 PM
|
#318 |
|
Post Whore!

Join Date: Apr 2006
Location: North Jersey
Posts: 5,481
Trader Rating: (55)
Feedback Score: 55 reviews
|
So I got around to integrating the 509U ultrasonic sensor i bought from you. It was a plug and play event with the Viper 5701 but I have something weird happening with it. To test it i rolled down the window and stuck my hand in the car. Worked perfectly but it will only trigger the alarm three consecutive times. So on the 4th attempt it will not trigger the alarm. I can see the LED on the sensor lighting up so it is detecting the movement, however, the alarm is not triggered. Once I disconnect the car battery and reconnect it, it will work again but for only three consecutive times. Is there a setting of some sorts or is this expected behavior?
Edit: Nevermind, guessing that the sensor will only allow 3 consecutive triggers in a certain time period in case there are too many false alarms, because i went back outside to test it after waiting 20 mins or so and it works again. |
|
|
|
|
06-23-2012, 07:39 AM
|
#319 | |
|
Zilvia.net Advertiser
Join Date: Oct 2006
Location: Normal, IL
Age: 47
Posts: 2,946
Trader Rating: (163)
Feedback Score: 163 reviews
|
Quote:
__________________
Follow Along For My Latest WorkMy PortfolioPlease ShareCheck Out My Builds
|
|
|
|
|
|
06-27-2012, 10:29 PM
|
#320 |
|
Zilvia Addict
Join Date: Sep 2008
Location: Ft. Wayne, IN
Posts: 939
Trader Rating: (14)
Feedback Score: 14 reviews
|
S13 Door Card Insert « Broadfield's Blog
I have re-read your Door Card Insert post a few times. One thing that I can not find is "quantity". How much fabric did you purchase? I'm wanting to do something like this: black on black so it's subtle but I'm still an attention whore.... Louis Vuitton Fabric No.10 (black on black with leather backing) - LV Louis Vuitton fabric,Gucci fabric,Coach fabric,Burberry fabric,Versace fabric,D&G farbic In terms of yards, what did you purchase to complete door cards, shift boot, and possibly glove box? |
|
|
|
|
06-27-2012, 11:21 PM
|
#321 | |
|
Zilvia.net Advertiser
Join Date: Oct 2006
Location: Normal, IL
Age: 47
Posts: 2,946
Trader Rating: (163)
Feedback Score: 163 reviews
|
Quote:
__________________
Follow Along For My Latest WorkMy PortfolioPlease ShareCheck Out My Builds
|
|
|
|
|
|
06-27-2012, 11:38 PM
|
#322 | |
|
Zilvia Addict

Join Date: Nov 2009
Location: so cal
Age: 37
Posts: 846
Trader Rating: (5)
Feedback Score: 5 reviews
|
im looking to run my DRLs while my headlights are on and found this diagram online. from what you see here would this be a proper way to do it? do you see me blowing any relays or fuses?
im am still learning the basics of automotive wiring and there isnt too much information on this type of modification. 1. One 4 prong relay 2. One 1.2 ohm resistor 3. One 30 amp max fuse holder 4. 7.5 amp fuse 5. and of course random wires, connections, etc. Thanks!! edit: they are 65w highs that drop down to 35w for DRL
__________________
Quote:

|
|
|
|
|
|
06-28-2012, 07:27 AM
|
#324 | |
|
Zilvia Addict
Join Date: Nov 2009
Location: so cal
Age: 37
Posts: 846
Trader Rating: (5)
Feedback Score: 5 reviews
|
2011 wrx and I will use the same setup for my 89 coupe fogs pending there is no issues. Overheating etc.
__________________
Quote:
Last edited by TougeLove; 06-28-2012 at 08:47 AM.. |
|
|
|
|
|
06-28-2012, 09:33 AM
|
#325 |
|
Post Whore!

Join Date: Apr 2007
Location: Wisconsin
Age: 34
Posts: 3,685
Trader Rating: (13)
Feedback Score: 13 reviews
|
With this Speedhut cluster you built, I believe i read the 2 big gauges were 3 3/8's Do you think you can fit 2 4" Speedhut gauges in a s13 cluster?
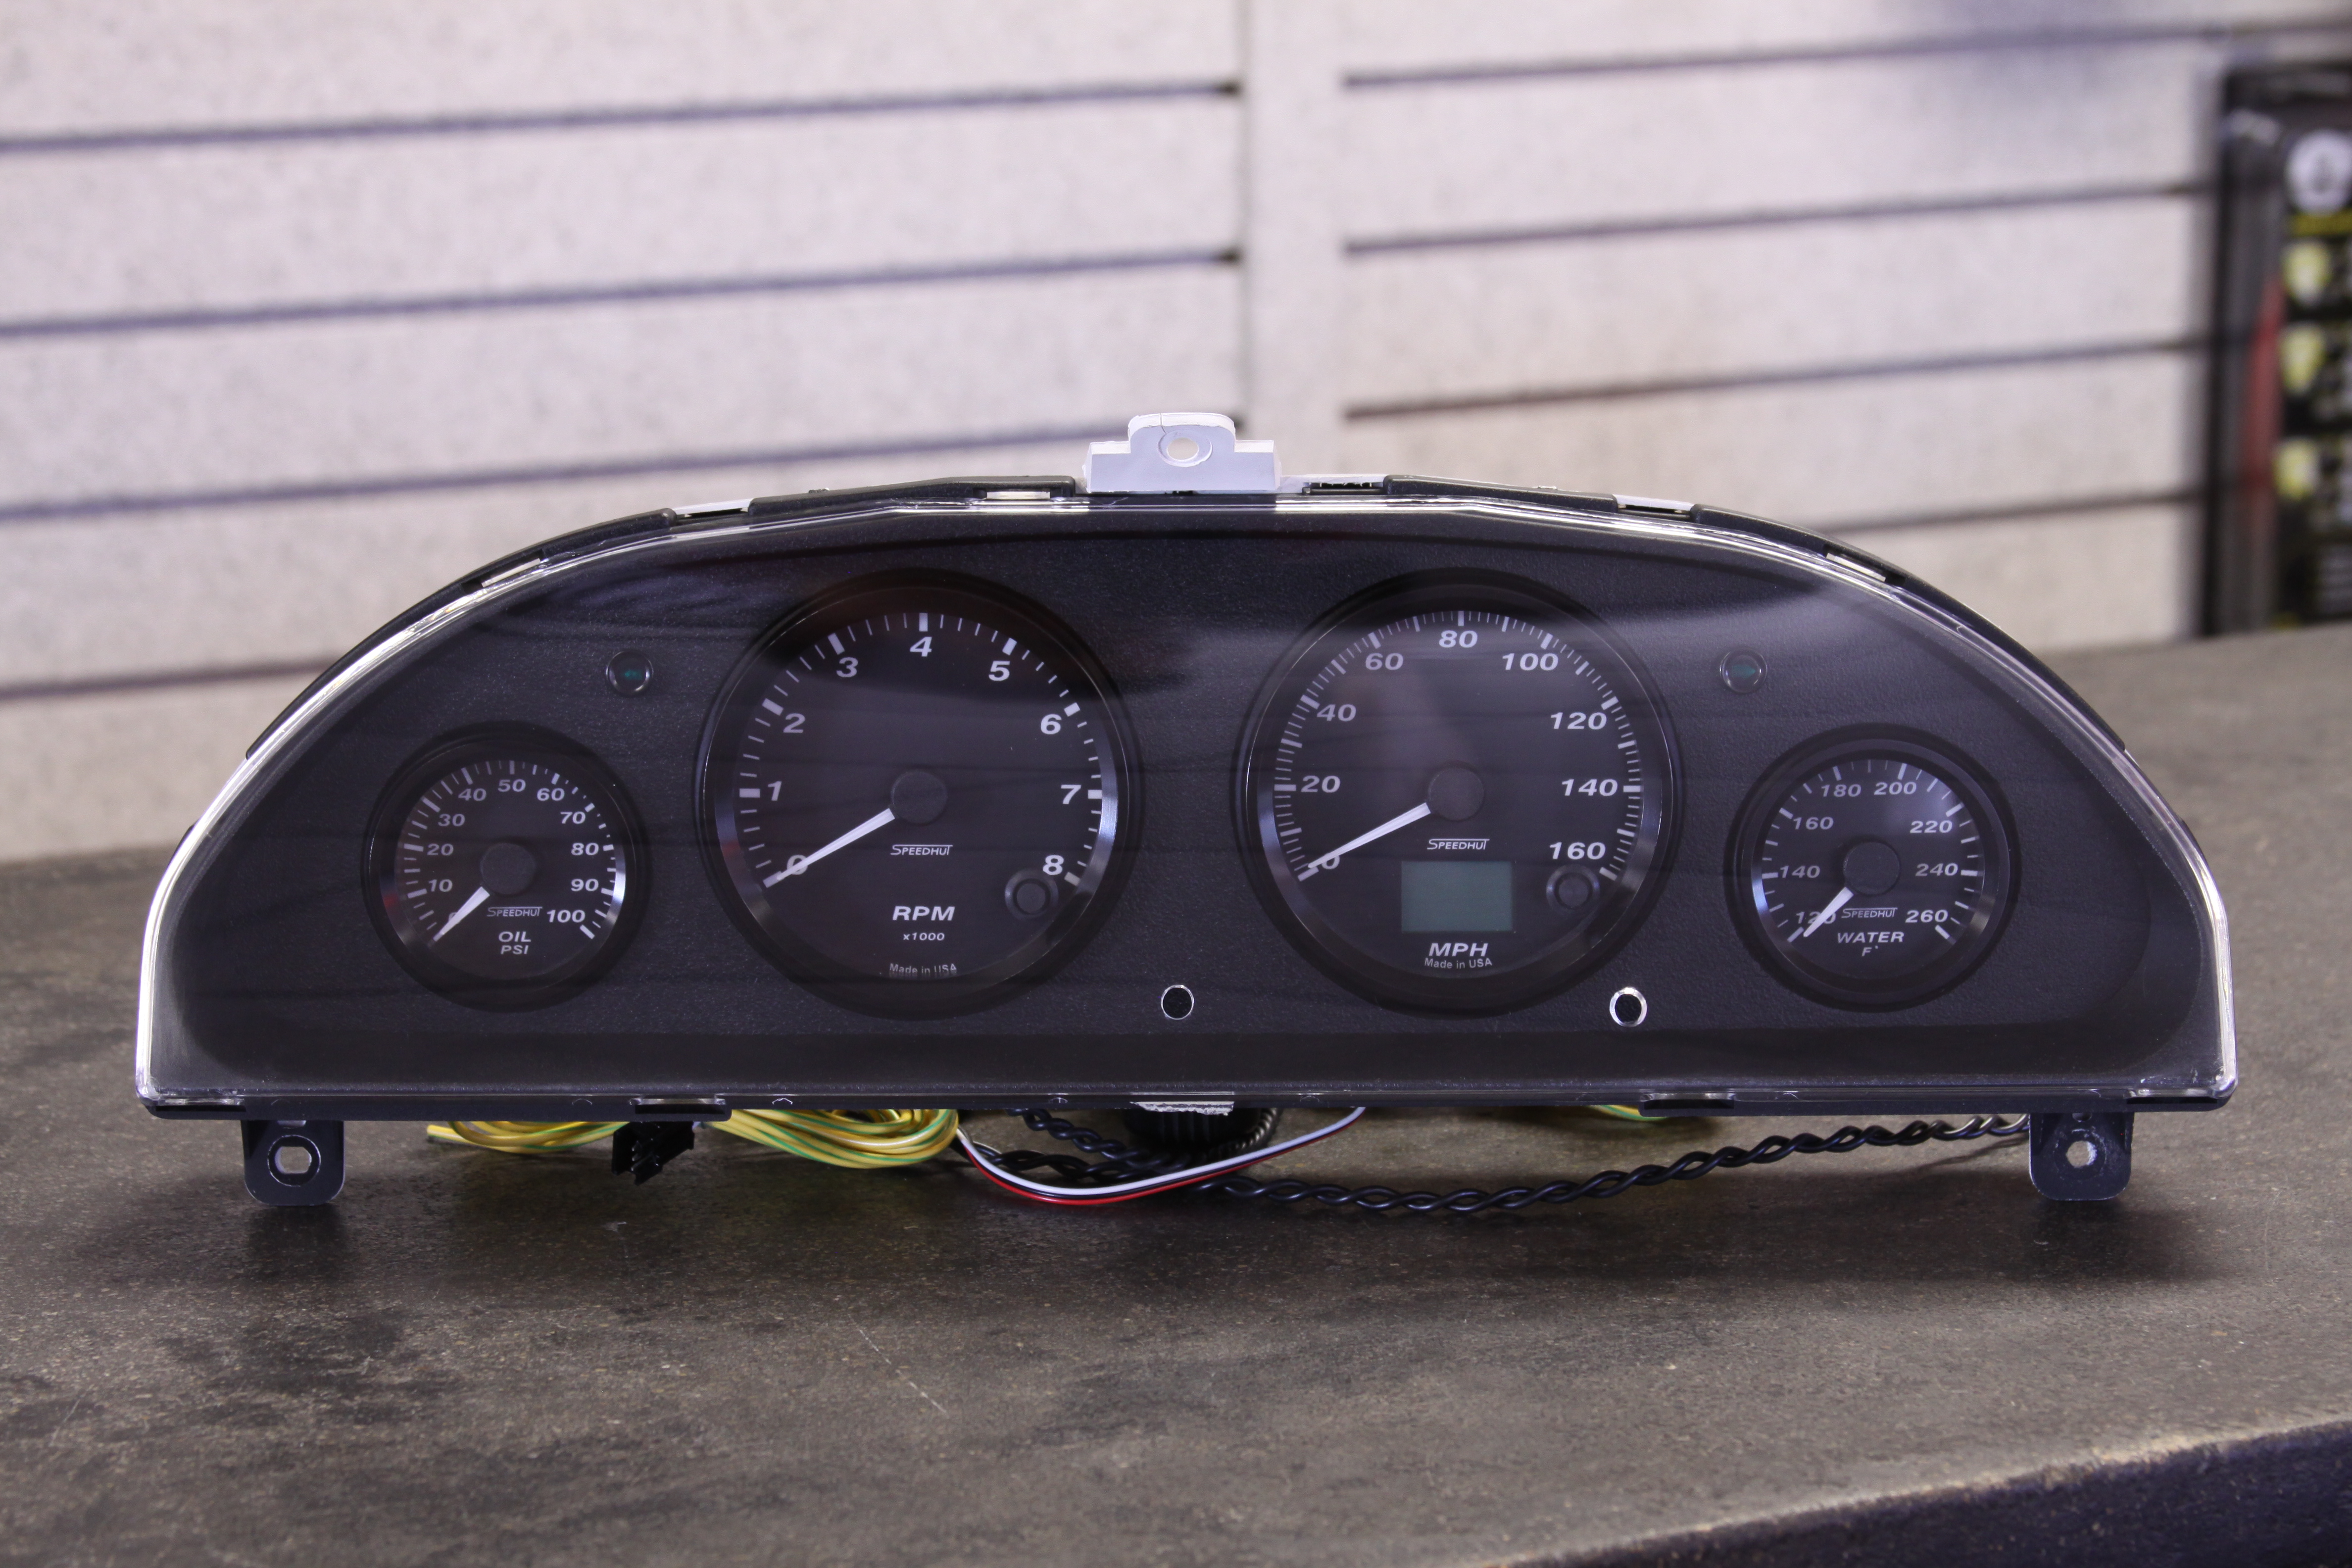 As i would REALLY love to use this gauge. Speedometer GPS Dual Gauge, Revolution Gauges Series by SpeedHut note: I don't have a spare s13 cluster near me to measure it myself, hence why i thought you might know.
__________________
2JZ-GTE Swapped S13 Coupe - 1994 Supra Turbo |
|
|
|
|
06-29-2012, 08:36 AM
|
#326 | ||
|
Zilvia.net Advertiser
Join Date: Oct 2006
Location: Normal, IL
Age: 47
Posts: 2,946
Trader Rating: (163)
Feedback Score: 163 reviews
|
Quote:
Quote:
__________________
Follow Along For My Latest WorkMy PortfolioPlease ShareCheck Out My Builds
|
||
|
|
|
|
06-29-2012, 02:12 PM
|
#327 |
|
Zilvia Member
|
Broadfield,
Which product do you recommend to insulate the interior of a interior from heat and sound? Also about how much of such product would you suggest to purchase to cover the floor pan (behind dash to rear passenger bench) a S13? |
|
|
|
|
06-29-2012, 02:33 PM
|
#328 | ||
|
Zilvia Addict
Join Date: Nov 2009
Location: so cal
Age: 37
Posts: 846
Trader Rating: (5)
Feedback Score: 5 reviews
|
Quote:
__________________
Quote:
|
||
|
|
|
|
06-29-2012, 07:00 PM
|
#329 | |
|
Zilvia.net Advertiser
Join Date: Oct 2006
Location: Normal, IL
Age: 47
Posts: 2,946
Trader Rating: (163)
Feedback Score: 163 reviews
|
Quote:
__________________
Follow Along For My Latest WorkMy PortfolioPlease ShareCheck Out My Builds
|
|
|
|
|
|
07-01-2012, 06:48 PM
|
#330 | |
|
Zilvia.net Advertiser
Join Date: Oct 2006
Location: Normal, IL
Age: 47
Posts: 2,946
Trader Rating: (163)
Feedback Score: 163 reviews
|
Quote:
Welcome to Second Skin | Second Skin Audio You can simply measure the area you want to cover and figure out how many square feet you need. A rough measurement of the S13 yields 52" across and 88" from the top of the firewall back to underneath the rear seat. So that comes out to 31.8sq. feet. So if you wanted to cover the whole area in Luxury Liner Pro, then you would need 4 sheets... as they are 9sq. feet per sheet. Luxury Liner or Luxury Liner Pro is what you would want for a noise barrier. Then whatever other materials beneath it... like any of the heat barriers and or Damplifier Pro. Please let me know if you have any other questions or need a price quote.
__________________
Follow Along For My Latest WorkMy PortfolioPlease ShareCheck Out My Builds
|
|
|
|
|
|
| Bookmarks |
| Tags |
| broadfield, toby |
| Thread Tools | |
| Display Modes | |
|
|


 Linear Mode

