 |
|
|||||||
| Home | Rules & Guidelines | Register | Member Rides | FAQ | Members List | Social Groups | Calendar | Mark Forums Read |
| Builds (and builds only) Got a build thread? It goes here, build threads anywhere else on the forum will be locked and never moved. |
 |
|
|
Thread Tools | Display Modes |
|
|
#365 |
|
Zilvia Junkie
 |
A few pictures. Not the latest but they'll give you an idea
     
__________________
My +700hp RS13 |
|
|

|
|
|
#366 |
|
Zilvia Junkie
 |
__________________
My +700hp RS13 |
|
|

|
|
|
#368 |
|
Zilvia Junkie
 |
I agree with you on that one pal. It will take some massive work to do it (find the original pictures and put them back in the correct order).
__________________
My +700hp RS13 |
|
|

|
|
|
#369 |
|
Zilvia Junkie
 |
It has seen the daylight
   
__________________
My +700hp RS13 |
|
|

|
|
|
#370 |
|
Zilvia Junkie
 |
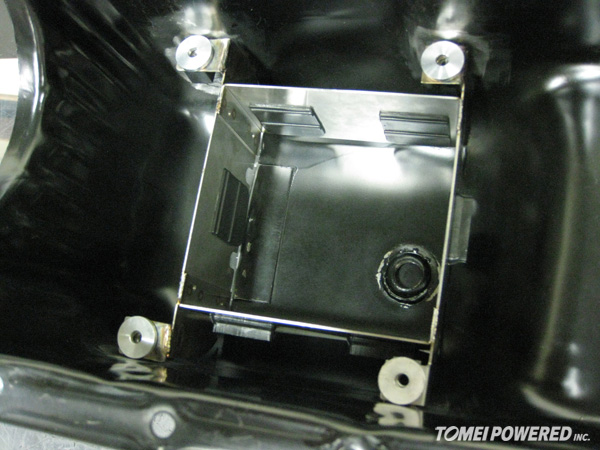
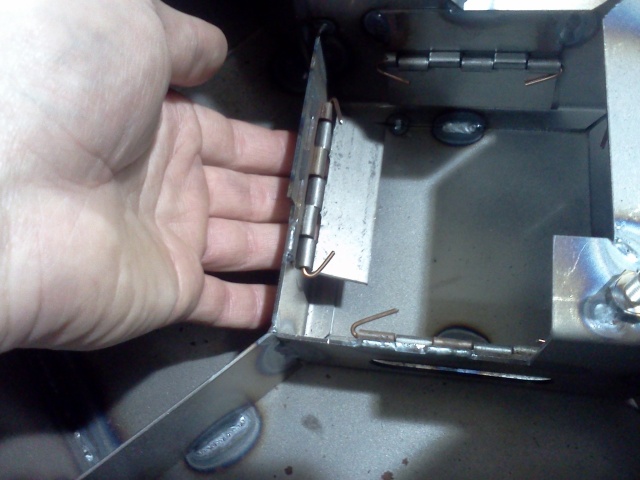
Remains hinged baffles, cleaning and painting
    
__________________
My +700hp RS13 Last edited by shogun!; 01-30-2014 at 10:31 PM.. |
|
|

|
|
|
#372 |
|
Zilvia Junkie
 |
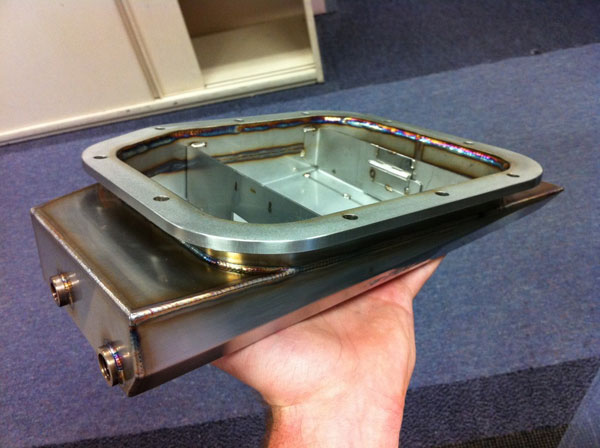
I am about to decide between a couple of lid designs. A simple version like the S14 or a more thought over dito.
  
__________________
My +700hp RS13 |
|
|

|
|
|
#373 |
|
Zilvia Junkie
 |
I have now decided to make it similar to the pictures. The hinged trap doors will be adapted to the extended side wings. The function as in the youtube video.
http://youtu.be/LHJUCLJzsa8 
__________________
My +700hp RS13 |
|
|

|
|
|
#376 |
|
Zilvia Junkie
 |
Good point. An extra magnetic drainage plug inside the baffled area will handle that.
__________________
My +700hp RS13 |
|
|

|
|
|
#377 |
|
Zilvia Junkie
 |
__________________
My +700hp RS13 |
|
|

|
|
|
#378 |
|
Zilvia Addict
 |
Theoretically, trash is heavy and will be going to the low point anyway, which is the drain plug. Safest bet is to not get trash in there in the first place.
__________________
* S14SR22 * 9.0 c/r * GT3071R * |
|
|

|
|
|
#380 |
|
Zilvia Addict
 Join Date: May 2009
Location: Houston, TX
Age: 32
Posts: 969
Trader Rating: (4)
 Feedback Score: 4 reviews
|
This is true but as he designed it the baffled section wasn't tied into the drain plug area. An additional drain plug, as he suggested, in the baffled area, will alleviate all concerns of picking up any sort of trash.
|
|
|

|
|
|
#382 |
|
Zilvia Junkie
 |
Thanks mate.
It is more or less what is possible to fit between the front subframe and the sway bar without going deeper (not an option due to ride height).
__________________
My +700hp RS13 |
|
|

|
|
|
#383 | |
|
Zilvia Junkie
 |
Quote:
One drain for the inside area and another for the outside area.
__________________
My +700hp RS13 |
|
|
|

|
|
|
#384 |
|
Zilvia Junkie
 |
We managed to rescue the pictures with the help of a backup of the picture host.
Almost all (ca 1600) pics are restored and this thread is alive again 
__________________
My +700hp RS13 |
|
|

|
|
|
#386 |
|
Zilvia Junkie
 |
__________________
My +700hp RS13 |
|
|

|
|
|
#387 |
|
Zilvia Junkie
 |
The garage is being overhauled. Good for the motivation
 
__________________
My +700hp RS13 |
|
|

|
|
|
#390 |
|
Zilvia Junkie
 |
A check valve is installed in the cylinder block of the ca18det. This valve is a part of the oil lubrication system and is easily neglected when the motor is refurbished.
 The Check valve is located in the block between the 3rd and 4th cylinder. You have to remove the cylinder head to access the valve. In the picture you spot a triangular/oval shaped cutout in the head gasket, slightly upwards to the left of no 4 head stud a small hole is located. This is the exit hole of the check valve. The purpose of the check valve is to maintain pressurised oil in the hydraulic valve lifter channels.  When cleaning my engine block I flushed it wit hot pressurised water and dried it with compressed air and an air gun. Extra care was taken to flush the oil channels from both directions. From oil pump towards head and vice versa. When flushing from the oil pump area, a thin powerful water spray came out of the hole in the check valve, In the other direction the valve blocked the water. A good sign of a fully operational check valve. The pictures show: 1. Engine block with check valve installed.  2. Check valve removed  3. Check valve (broken).  4. If it is not possible to flush the oil channels direction from the oil pump towards the check valve, you have to remove the valve. The valve is hard to remove without destroying it. Nissan no longer store these check valves (part no 11036-D4200). If needed you have to ask a mechanical work shop to make one for you. You will need to bring the old valve and the engine block for them to measure and make it right. 
__________________
My +700hp RS13 |
|
|

|
 |
| Bookmarks |
| Thread Tools | |
| Display Modes | |
|
|