 |
|
|||||||
| Home | Rules & Guidelines | Register | Member Rides | FAQ | Members List | Social Groups | Calendar | Mark Forums Read |
| S Chassis Technical discussion related to the S Chassis such as the S12, S13, S14, and S15. |
 |
|
|
Thread Tools | Display Modes |
|
|
#64 |
|
Zilvia FREAK!
 Join Date: Sep 2005
Location: Ashland, NE
Age: 35
Posts: 1,360
Trader Rating: (20)
    Feedback Score: 20 reviews
|
really cool. nicely done. thanks for sharing.
__________________
BRICKHOUSE PRODUCTS
IG @brickhouse_products |
|
|

|
|
|
#65 |
|
Zilvia Addict
 Join Date: Mar 2011
Location: Greensboro, NC
Posts: 950
Trader Rating: (7)
   Feedback Score: 7 reviews
|
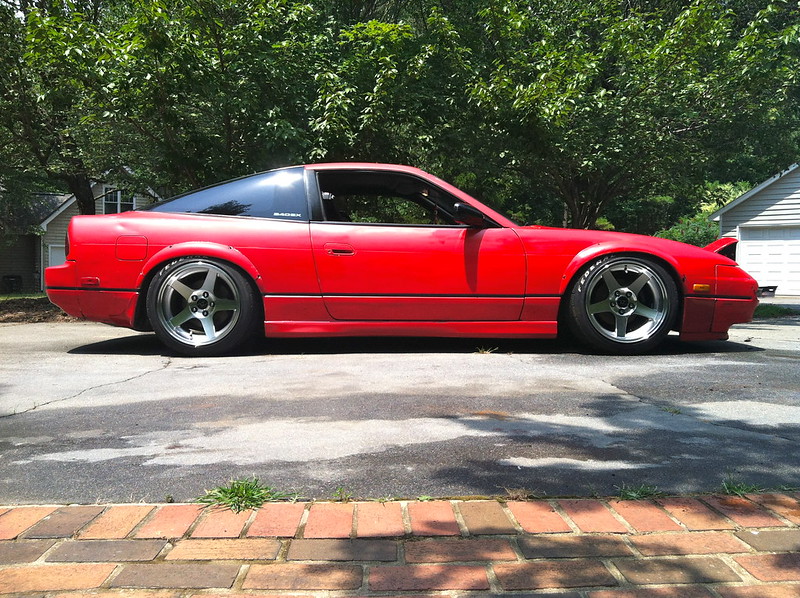
i'm actually painting the skirts and lip to match the body color right now. errr, sorta match. it'll be close enough. i'll post pics when i'm done and not lazy.
__________________

|
|
|

|
|
|
#66 |
|
Zilvia Addict
 Join Date: Mar 2011
Location: Greensboro, NC
Posts: 950
Trader Rating: (7)
   Feedback Score: 7 reviews
|
[email protected]@[email protected] b/c i finally graduated from flip phones.
 i need a new lip... that accord lip has seen better days. buuuuuuuuuut i'm too damn cheap and too damn lazy to cut/drill another one, so whatever. imo, it's good enough to look decent sideways, which is all i really give a shit about anyhow. 
__________________

|
|
|

|
|
|
#68 |
|
Zilvia Addict
 Join Date: Mar 2011
Location: Greensboro, NC
Posts: 950
Trader Rating: (7)
   Feedback Score: 7 reviews
|
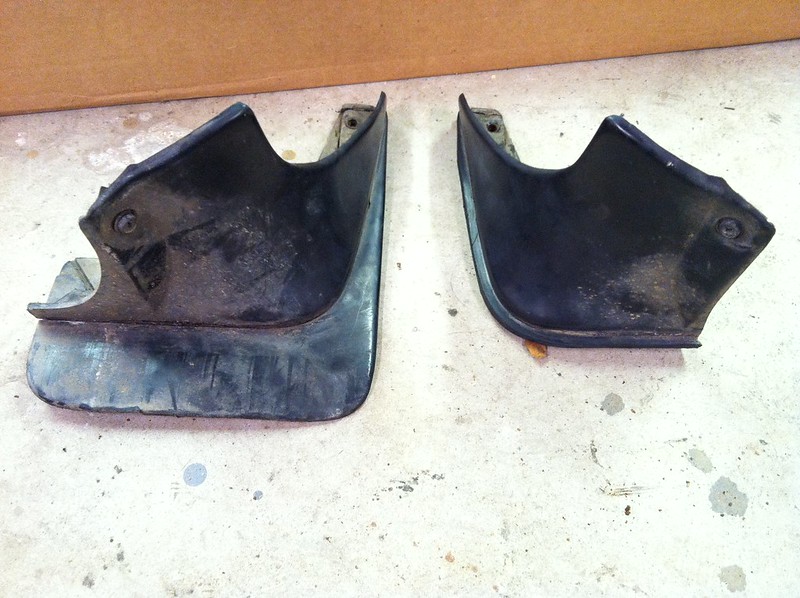
i'm probably gonna get some rear s13 mudflaps, cut/remove the "flap" part, and just paint the "valence" to give the skirts something to flow into. again, this is all on the dirty cheap. i'm not about to spring for nice shit when i can patiently wait for free mudflaps

__________________

|
|
|

|
|
|
#72 |
|
Zilvia Junkie
 Join Date: Nov 2006
Location: Virginia
Age: 30
Posts: 397
Trader Rating: (1)
 Feedback Score: 1 reviews
|
Bumping with my recent find. $30 at the local yard.
Though one needed some bodywork. Just a mock up before trimming, currently primered and waiting on paint. Only thing I'm having trouble understanding is how exactly it's attached at the front. I know you attached them along the pinch welds, but how would that make it sit flush along the body at the front? |
|
|

|
|
|
#73 |
|
Zilvia Member
 Join Date: Aug 2007
Location: Rehoboth, MA
Age: 34
Posts: 281
Trader Rating: (1)
 Feedback Score: 1 reviews
|
I was thinking the same thing, when I tried to attach them to my rockers it would pull the skirt away from the body up top. I just threw a couple screws in it since its just something to hold me over until I get type x or chuki sides
 Btw,mine were from a 99 legacy gt, which has skirts that are a little less aggresive
__________________
http://rehopless.tumblr.com |
|
|

|
|
|
#74 | |
|
Zilvia Addict
 Join Date: Mar 2011
Location: Greensboro, NC
Posts: 950
Trader Rating: (7)
   Feedback Score: 7 reviews
|
^^ hell yeah, guys! those are looking sweet!
Quote:
i figured out a clever way around it. i need to take a picture of it, but the gist is get a couple plastic self-adhesive wall hangers, paint them black, and stick one on the inside of each skirt. use a ziptie between the hanger and the factory mudflap mounting hole a few inches away to pull in that skirt flush with the fender. it works awesome. you can't even tell it's there unless you REALLY look for it... at which point you would find a million other things wrong with my car anyhow, soooo IDGAF 
__________________

|
|
|
|

|
|
|
#80 |
|
Zilvia Addict
 Join Date: Mar 2011
Location: Greensboro, NC
Posts: 950
Trader Rating: (7)
   Feedback Score: 7 reviews
|
wherever i felt like drilling holes. for a few, i reused the original lip mounting holes to serve as ziptie holes. there is no right answer here; just center the lip and drill holes where the lip needs to be pulled/curved into place.
__________________

|
|
|

|
|
|
#81 |
|
Zilvia Addict
 Join Date: Mar 2011
Location: Greensboro, NC
Posts: 950
Trader Rating: (7)
   Feedback Score: 7 reviews
|
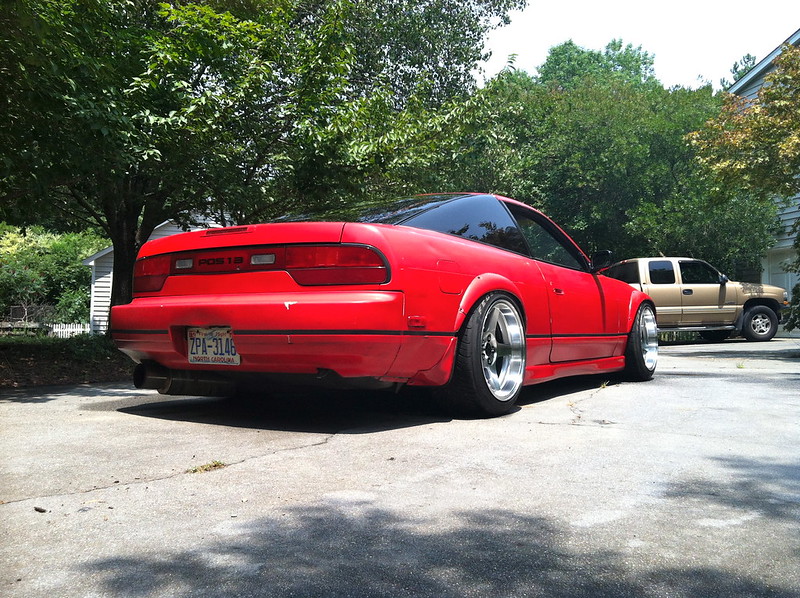
i made some rear "valences" the other day... aka carefully trimmed some factory mudflaps and painted them to match the body color. they really help fill in that naked rear wheel well area.
trimmed the flap with an air-powered cutoff wheel and smoothed/rounded the edges with a file. masked off the flap edge and sprayed the actual "valence" part. let dry, remove masking, and install. pretty easy stuff. before and after trim:  trimmed, cleaned, masked and sprayed:  installed:     
__________________

|
|
|

|
|
|
#83 |
|
Zilvia Addict
 Join Date: Mar 2011
Location: Greensboro, NC
Posts: 950
Trader Rating: (7)
   Feedback Score: 7 reviews
|
yes, v-cuts, exactly. i had the bumper off, laying upside down in my bedroom. centered the lip and drilled holes thru the lip/bumper and attached with zip ties. then went down each side and v-cut it where it need to curve in more or straighten out more, drilling holes here and there for more attachment points. i think i have 9 or 11 zip ties across.
__________________

|
|
|

|
|
|
#86 |
|
Zilvia Addict
 Join Date: Mar 2011
Location: Greensboro, NC
Posts: 950
Trader Rating: (7)
   Feedback Score: 7 reviews
|
^ i'm not quite understanding your question. that sounds like what i did...?
i painted the "valence" part because it lines up with the wheel well. the actual "flap" part rests on the inside edge of the wheel well, so if you painted any part of the flap it wouldn't flow correctly. there would've been a hunk of red in the wheel well, not lining up with anything. valence is body color, flap stays black. i didn't leave the flaps because they look dumb IMO, so i trimmed them down really thin.
__________________

|
|
|

|
|
|
#88 |
|
Zilvia Addict
 Join Date: Mar 2011
Location: Greensboro, NC
Posts: 950
Trader Rating: (7)
   Feedback Score: 7 reviews
|
^ yes, and thanks for the complements!
How To: DIY s13 hatch center garnish lettering ^ link to center garnish lettering
__________________

|
|
|

|
 |
| Bookmarks |
| Tags |
| diy, lip, s13, side skirts |
| Thread Tools | |
| Display Modes | |
|
|