
 |
|
|||||||
| Home | Rules & Guidelines | Register | Member Rides | FAQ | Members List | Social Groups | Calendar | Mark Forums Read |
| Builds (and builds only) Got a build thread? It goes here, build threads anywhere else on the forum will be locked and never moved. |
 |
|
|
Thread Tools | Display Modes |
|
|
#34 |
|
Zilvia Junkie
 Join Date: Aug 2012
Location: Arizona
Age: 25
Posts: 327
Trader Rating: (4)
        Feedback Score: 4 reviews
|
I really dig this build and am keen on the 90s styles you and the boys (Jodie / Martino) have done.
Keep the updates rolling! The TD06 is a badass turbo. My boy Sylas (TheRealSy90) is running the same turbo and went through a few setups and manifolds. He has a method of cutting the dump pipe off somewhere and routing it elsewhere. Ill have to find the photos on facebook. I fancy the rad build and different direction with the kit and mirrors! |
|
|

|
|
|
#35 | |
|
Zilvia Member
 Join Date: Oct 2009
Location: Toronto, Canada
Posts: 293
Trader Rating: (0)
      Feedback Score: 0 reviews
|
Quote:
Ahah funny enough I know Sylas, I've been talking to him for the past few months and he knows the current state of my car.
__________________
Instagram:https://instagram.com/jpacione/ |
|
|
|

|
|
|
#36 |
|
Zilvia Member
 Join Date: Oct 2009
Location: Toronto, Canada
Posts: 293
Trader Rating: (0)
      Feedback Score: 0 reviews
|
Time for a quick little update!
So we left off with grabbing the new motor and giving it a clean. The big problem with why the new motor was so dirty was that the timing chain cover was leaking from where it meets the head gasket. I wasn't about to put a motor in and get it all greasy again after cleaning. Also, I have heard bad things about cometic head gaskets so I decided to change it out for a new Tomei one since the motor was currently out on the ground. Never done this before so my buddy Liam came over and gave ma a hand disassembling the head and replacing the headgasket. While we had the head off we cleaned up the pistons so the CP forged pistons were nice and shinny again. 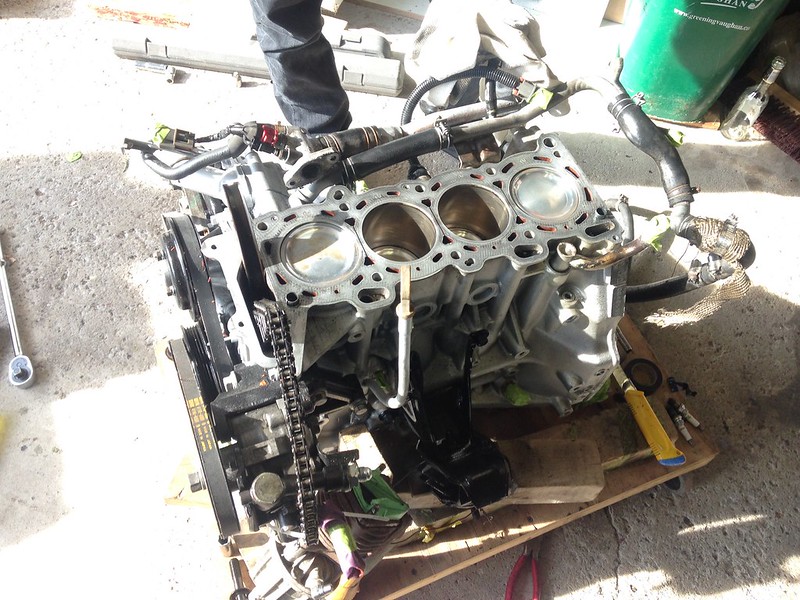 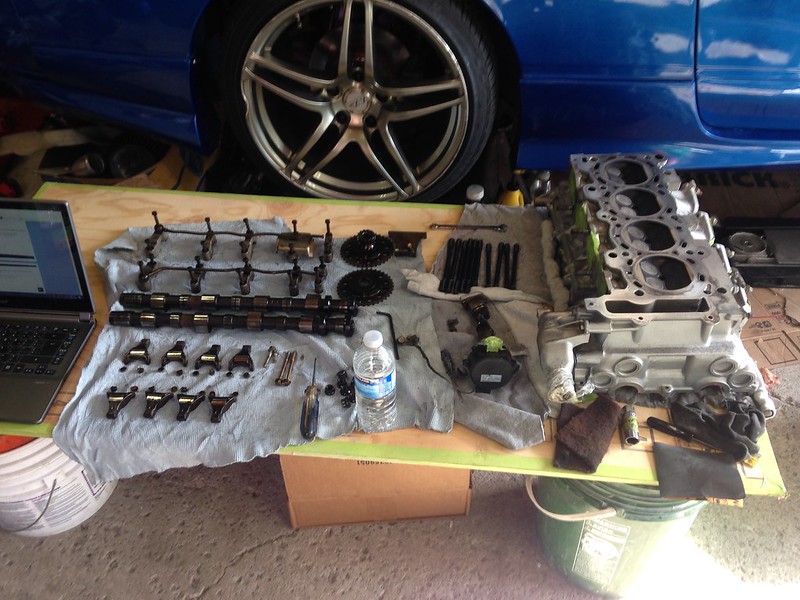 After that was all done I started to pull the blown motor out of the car to make way for the new heart.  Going back to the midmount manifold. Since the original position of the wastegate pipe is meant for RHD cars the steering shaft is directly in the way. I have seen other people reroute the pipe around the steering shaft but that would have to be done on the car and not while the manifold was being made in Australia.. Also the Greddy type R wastegate is absolutely MASSIVE and it would be a tight squeeze. I still wanted to use that gate either way. So I came up with the idea of placing the wastegate between the front crossmember and front sway bar (next to the oil pan), since there is quite a lot of room there. Having the extra motor on the side made mocking it up extra easy. I took my wastegate and placed it where i needed to to be and took a bunch of pictures with measurements that I sent to the manifold builder. 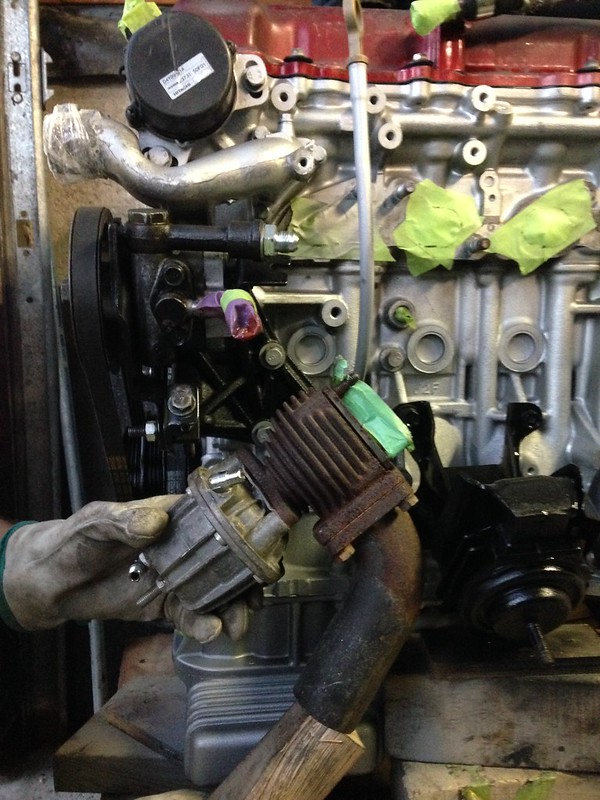 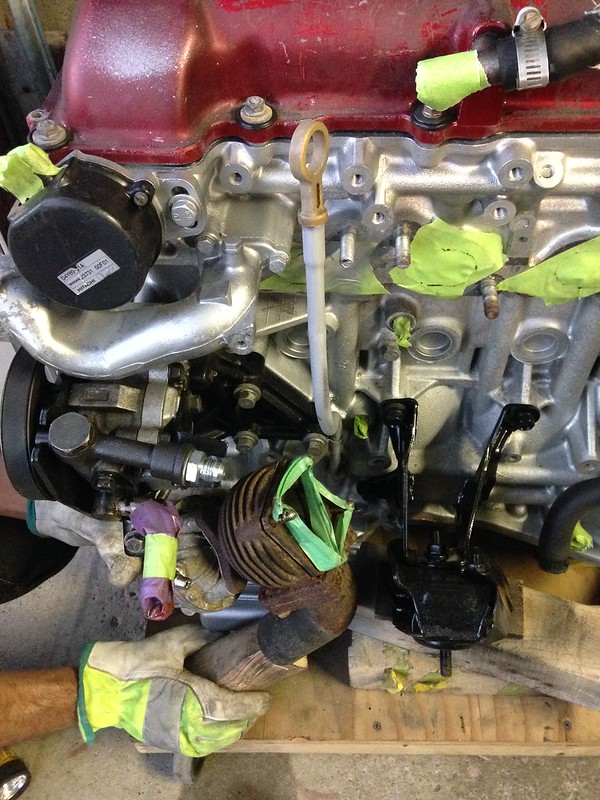 The manifold arrived shortly after. Turned out great! Very impressed with the quality. 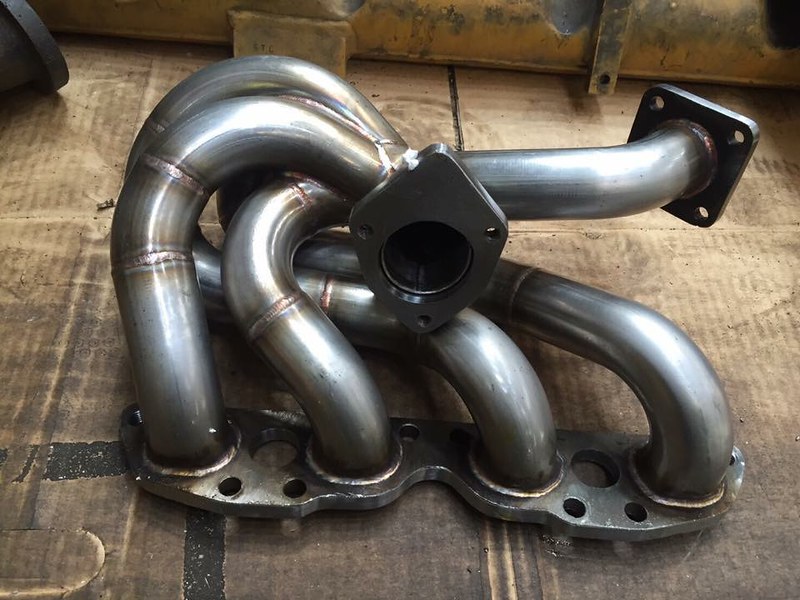 Sorry for the short post, I'll be catching up on the rest tomorrow. Thanks! Joe.
__________________
Instagram:https://instagram.com/jpacione/ |
|
|

|
|
|
#40 |
|
Leaky Injector
 |
Haven't posted in a while and was super stoked to see this thread. Definitely got me going again on my build and getting my SR back together! Glad you are keeping this going!
|
|
|

|
|
|
#41 | |
|
Zilvia Junkie
 Join Date: Aug 2012
Location: Arizona
Age: 25
Posts: 327
Trader Rating: (4)
        Feedback Score: 4 reviews
|
Quote:
I grew up with him. Dudes an elite when it comes to 240s |
|
|
|

|
|
|
#42 | |
|
Zilvia Member
 Join Date: Oct 2009
Location: Toronto, Canada
Posts: 293
Trader Rating: (0)
      Feedback Score: 0 reviews
|
Quote:

__________________
Instagram:https://instagram.com/jpacione/ |
|
|
|

|
|
|
#47 |
|
Zilvia Member
 Join Date: Oct 2009
Location: Toronto, Canada
Posts: 293
Trader Rating: (0)
      Feedback Score: 0 reviews
|
Thanks everyone! Hopefully this year means more driving and less working on it.
To pick up where I left off. While I waited for the manifold to arrive I had installed the new motor and began to hook up all the wiring and accessories. 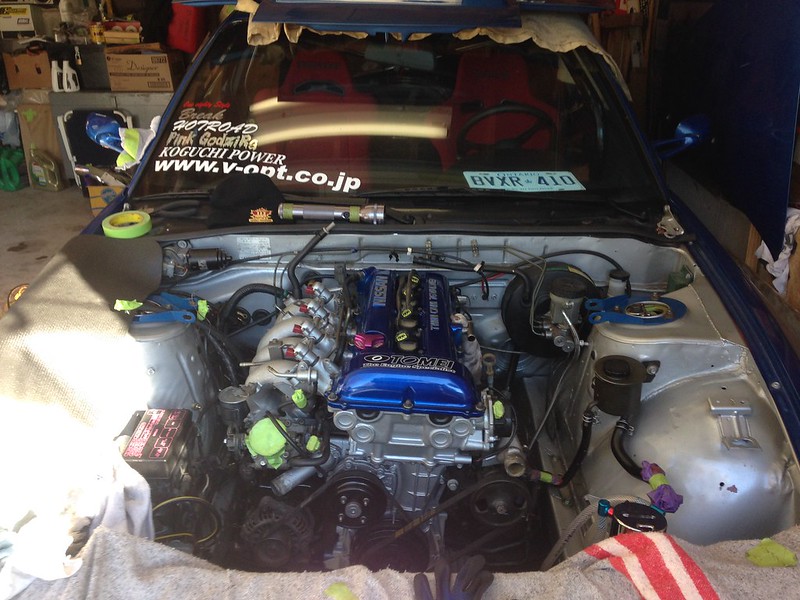 Obviously the first thing I did when the manifold arrived was test fit it! 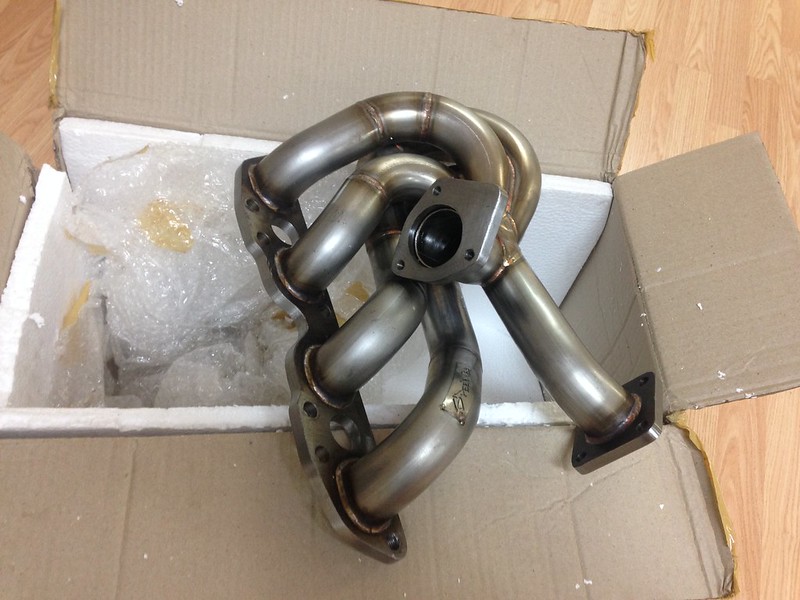 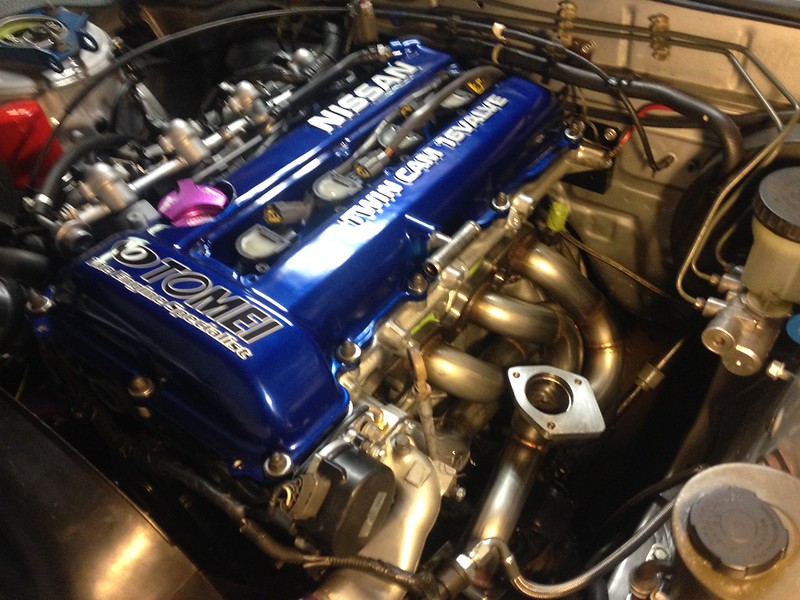 It fit extremely well. It cleared the steering shaft and the wastegate flange was in the perfect spot just how I wanted it. After inspecting, I wanted some extra room between the manifold and the steering shaft so I wedged the motor mount 1/4 inch on that side just to gain some extra clearance. I love the look of the top mounted turbo compared to my prior setup. Being that it is a midmount setup also adds a bit of extra excitement to me as a lot of people have never seen this setup before and seem to ask a lot about it. I cant wait to hear it! 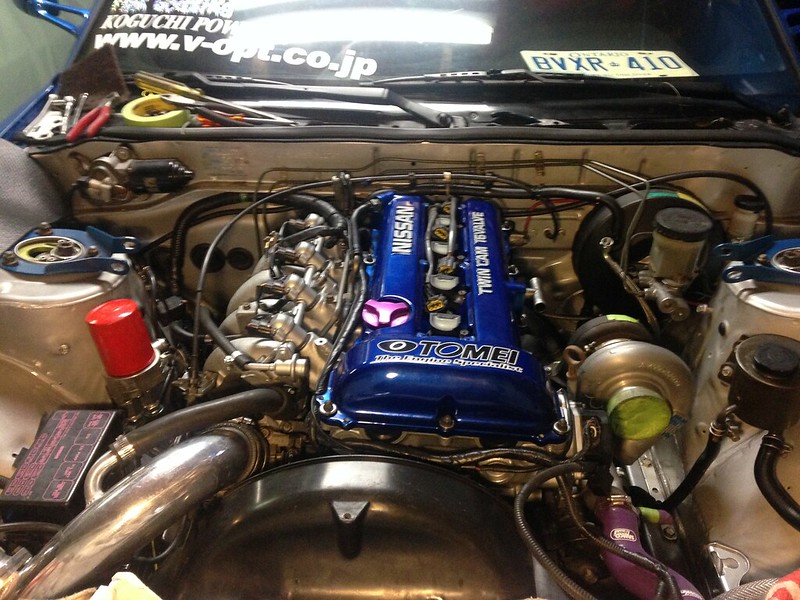 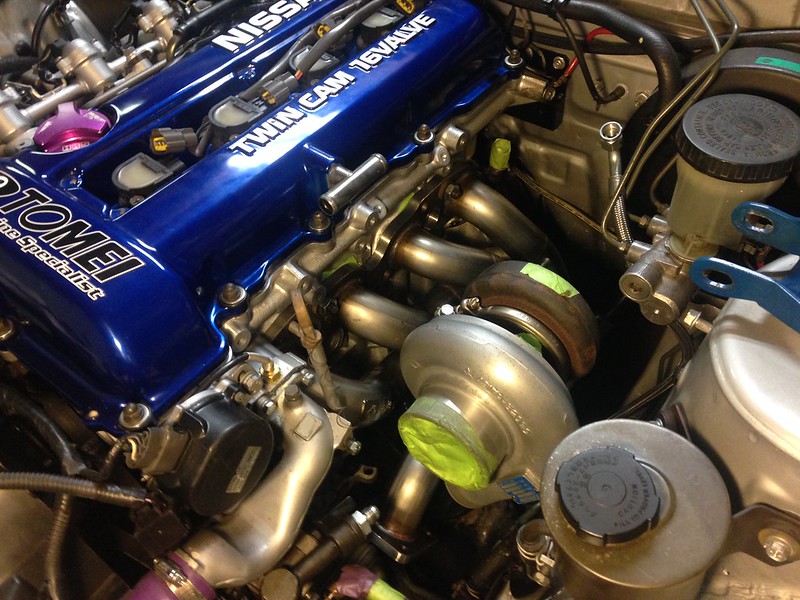 A few days later I put the car back on the ground and took some daylight pictures. 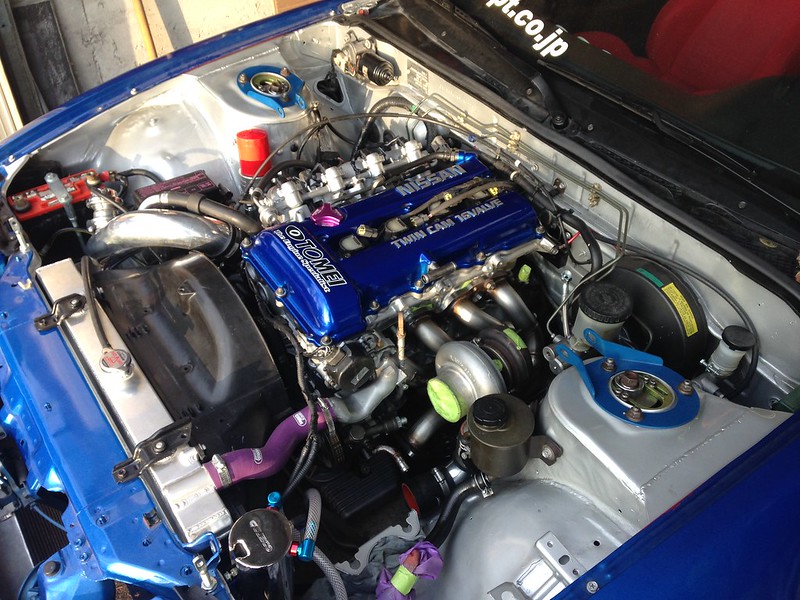 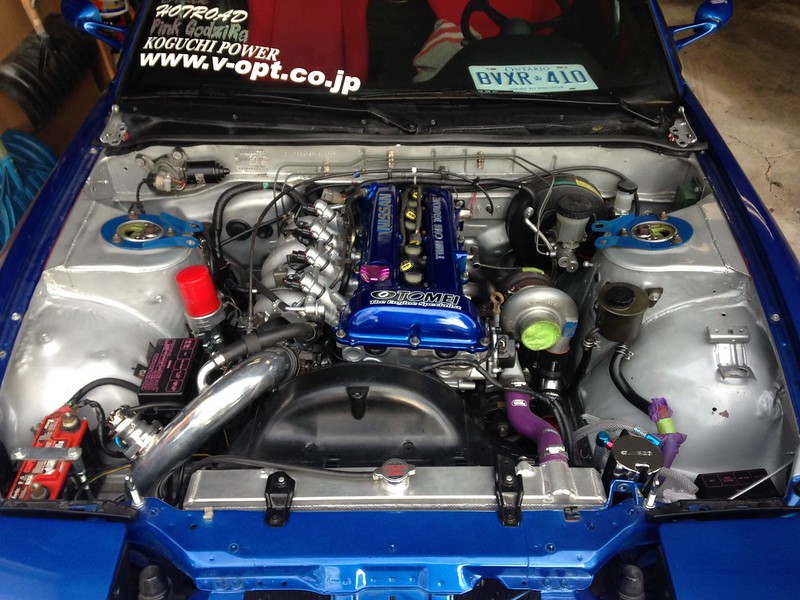 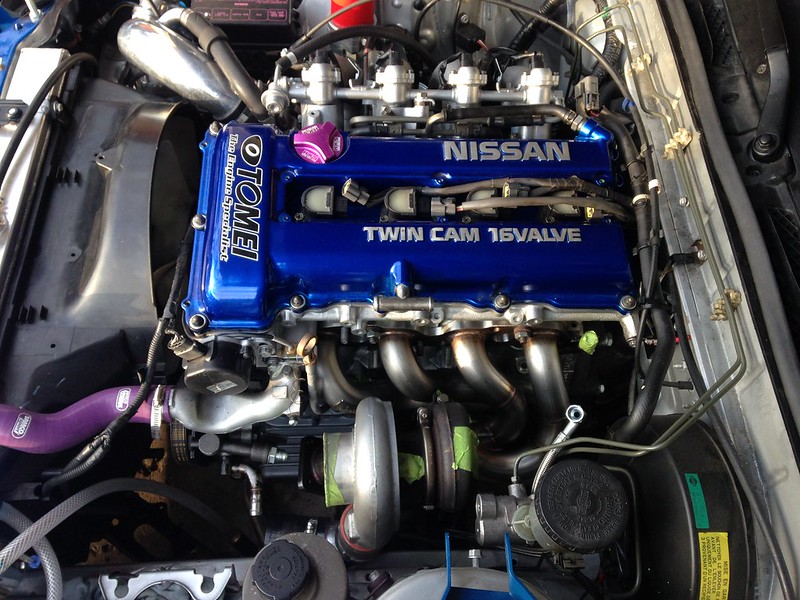 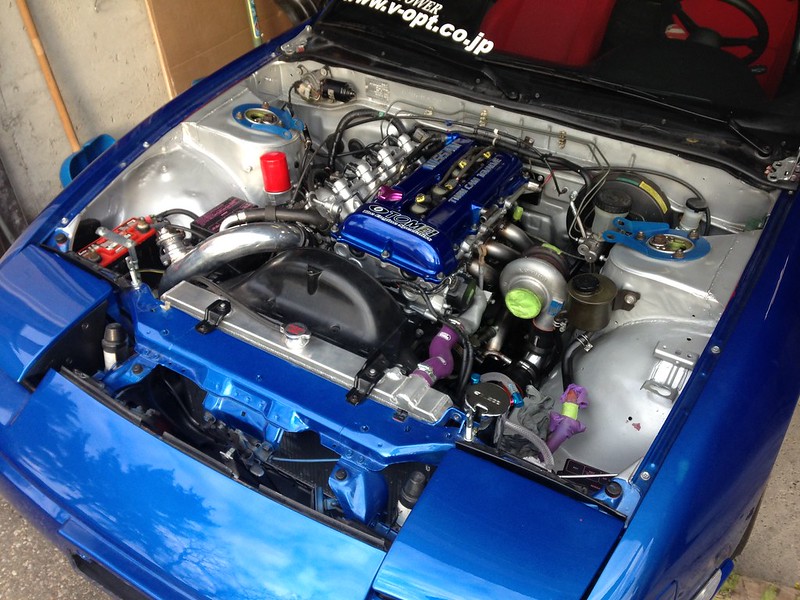 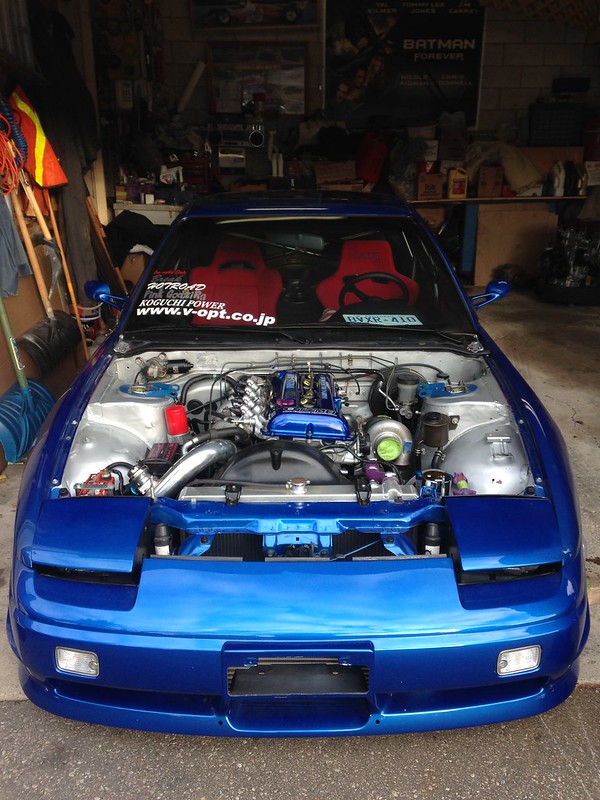 The car was now ready to get the downpipe and hot-side of the intercooler made. I don't have any welding skills so I towed the car over to my friends shop to get it fabed up for me. 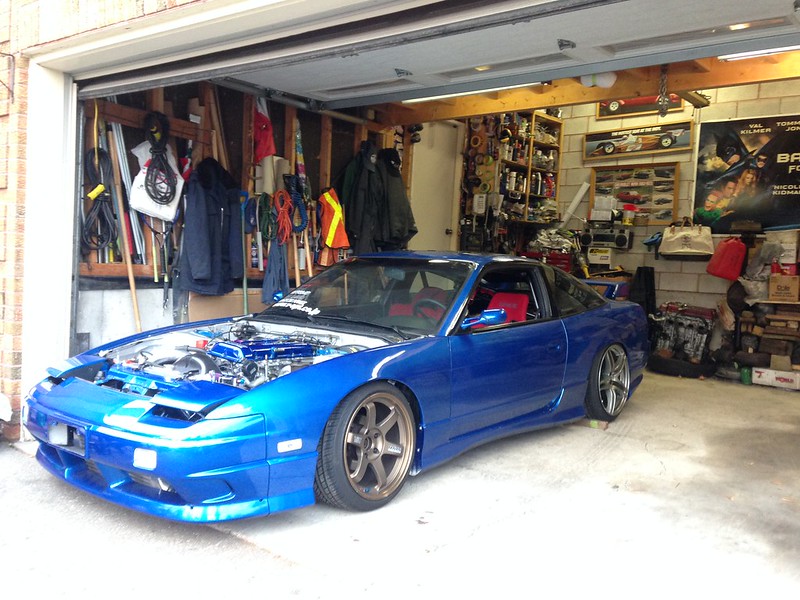 The day I brought the car over it had snowed lightly, this made for some cool pictures.This is probably the first time the car has seen snow since maybe the early 90's. 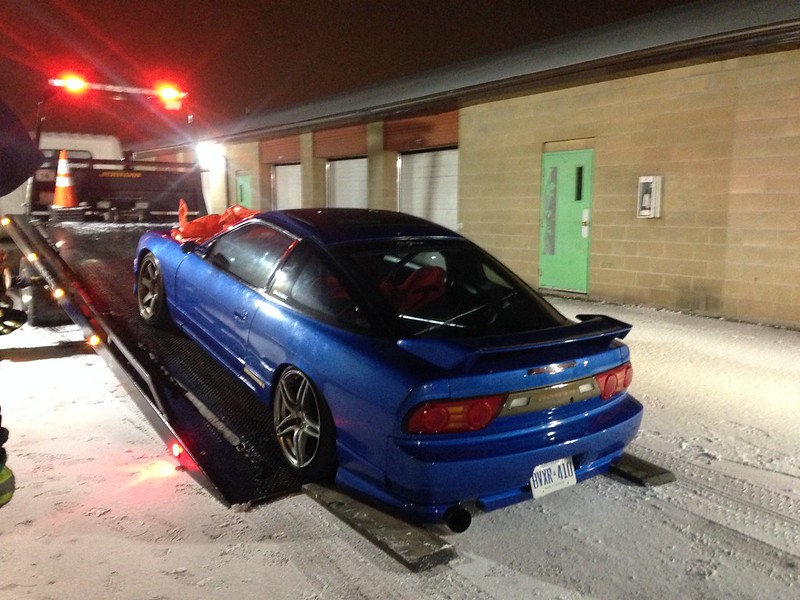 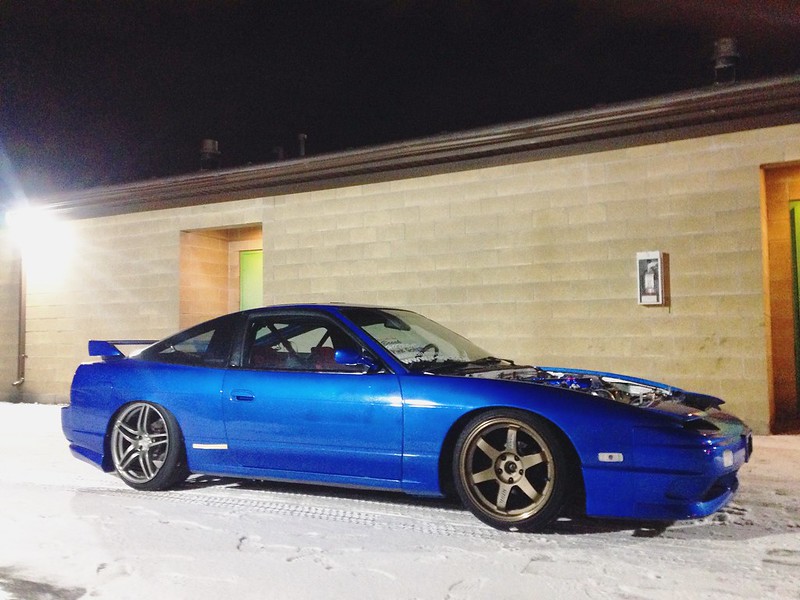 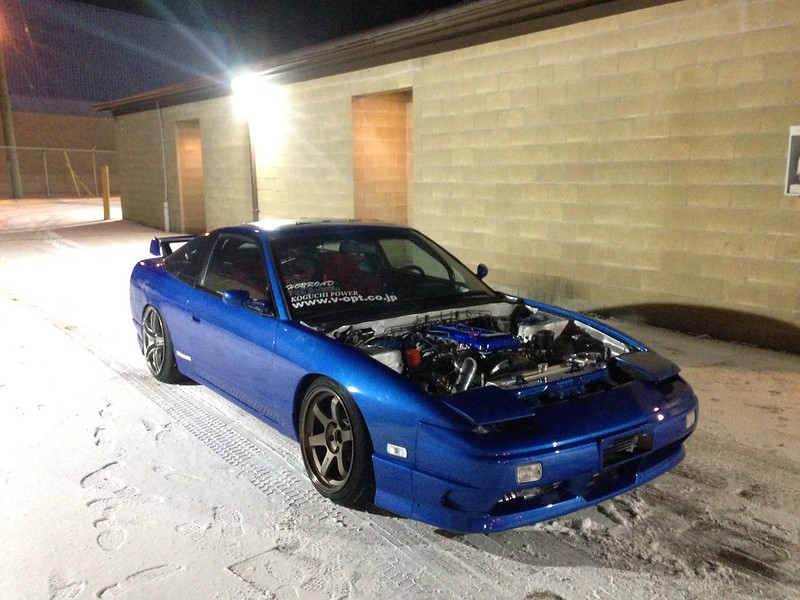 [img]https://c1.staticflickr.com/6/5603/31633830661_837b4fbf5b_c.jpg[/img It didnt take long for the piping to get all made up. We decided to weld the greddy cast aluminum elbow to the compressor housing to help gain some more room in the tight area. It turned out pretty well. Unfortunately, the day I had decided to pick up the car we had the worst snow storm of the year. To put it in perspective a 15 minute drive to my house from the shop took 8 hours to leave my house and get back home with the car. The car was covered in snow. 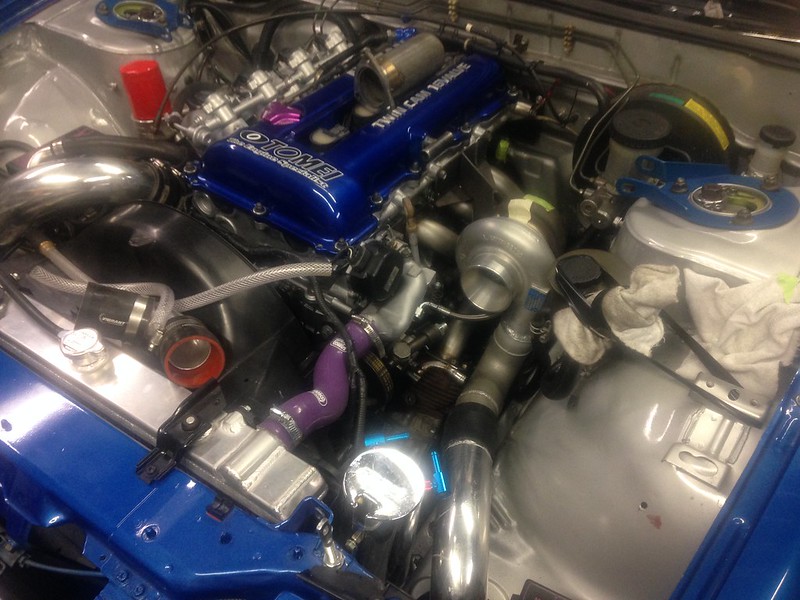 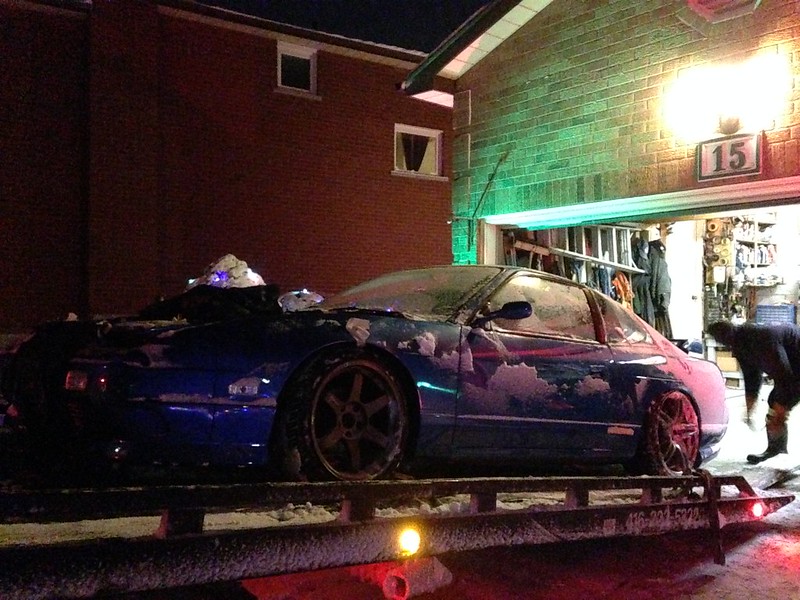 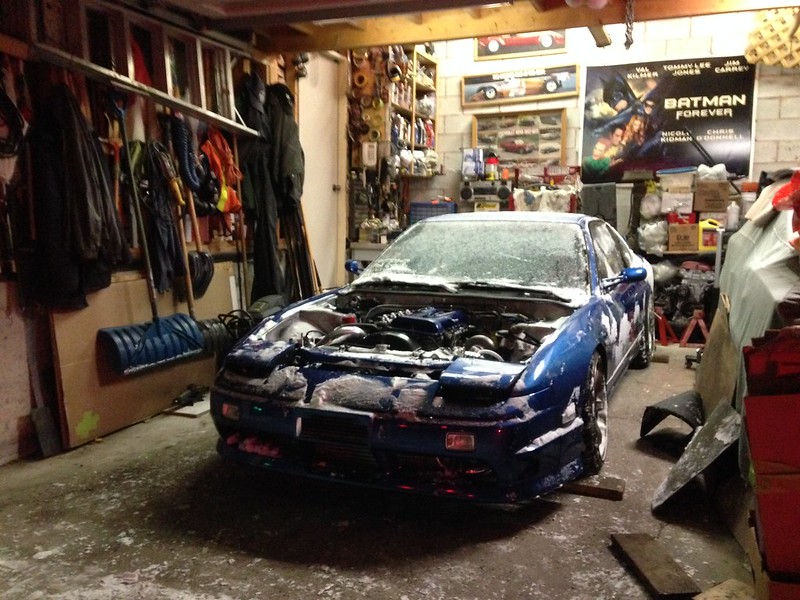 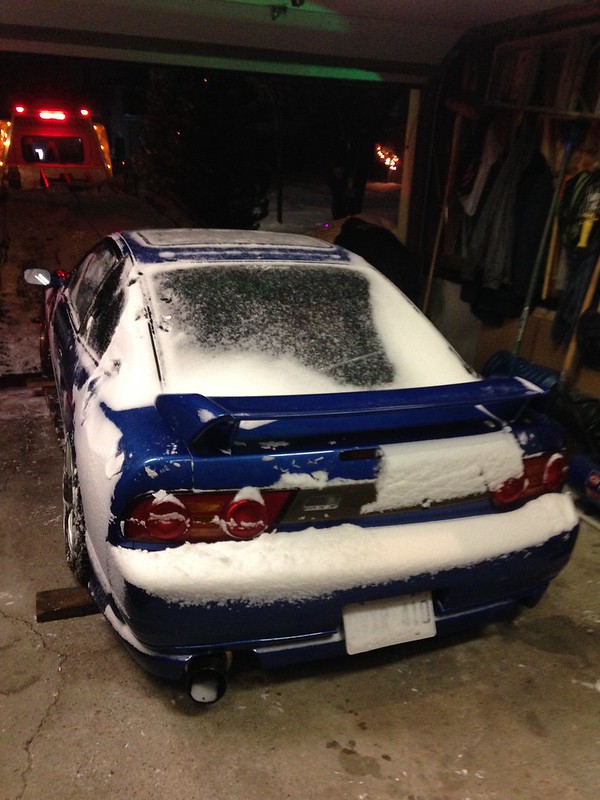 Since the TD06 is oil cooled and does not require water lines I capped the water inlet and outlet on the motor. I then ordered new Aeroquip fittings and braided line from Summit, to make up the new oil feed line to the turbo. I decided that I wanted to run a heat sleeve on the line as well as cover the surrounding power steering lines in the area around the manifold. Regrettably I ordered them through Ebay back on Nov 29th and I am still waiting for them to arrive... That's holding me back on finally bolting up the turbo side with all the gaskets and firing it up. I hope they arrive soon or I'll have to order from somewhere else. In the meantime I've found some other projects to do on the car but more on that later. Thanks again, Joe.
__________________
Instagram:https://instagram.com/jpacione/ |
|
|

|
|
|
#48 |
|
Zilvia Member
 Join Date: Aug 2006
Location: Ontario Canada
Age: 31
Posts: 260
Trader Rating: (4)
           Feedback Score: 4 reviews
|
looking GOOD man! Way to make me feel awful about how slow my progress has been since getting back to my car, lol.
You better slow down or you'll have nothing to do from Feb-May when the roads are actually salt free. |
|
|

|
|
|
#49 |
|
Zilvia Addict
 |
[QUOTE=Ka24Power;6157489]looking GOOD man! Way to make me feel awful about how slow my progress has been since getting back to my car, lol.
QUOTE] Great thread, I'm not sure if we met man. This thread though.... yeah definitely have potential to kick my ass and finish what I started with my s13. GTA scene seemed dead for at least year or so. Keep it going man. Great build! |
|
|

|
|
|
#51 | |
|
Post Whore!
 Join Date: Sep 2008
Location: It's dark, and hell is hot!
Posts: 9,413
Trader Rating: (23)
           Feedback Score: 23 reviews
|
Quote:
|
|
|
|

|
|
|
#52 |
|
Nissanaholic!
 |
Wow What a quality build, saw that flange on that manifold and i knew it was a Speedtek manifold i talk to Kantavorski all the time great guy (he is one of their drivers)...
Loving this Trust turbo vibe recently, i have TD06 25G going on a semi-built RB25 that ive been dying to put back together... All i get From friends is trust turbos are Dinosaur technology, gonna spool late, ETC. Keep up the good work that 20G is gonna be a animal on that setup! Perfect dose of style and performance!!!!!
__________________
Last edited by RB25GUY; 01-23-2017 at 04:03 AM.. |
|
|

|
|
|
#53 |
|
Zilvia Junkie
 Join Date: Nov 2006
Location: Vancouver BC
Age: 30
Posts: 402
Trader Rating: (1)
 Feedback Score: 1 reviews
|
love finally reading your build start to finish. always admired your guys east coast style and attention to detail!! my buddy James visited you guys over the summer and we were all drooling over the shots he took! haha
keep it up, hope to see it in person one day, and cant wait to hear that mid mount! |
|
|

|
|
|
#55 | ||
|
Zilvia Member
 Join Date: Oct 2009
Location: Toronto, Canada
Posts: 293
Trader Rating: (0)
      Feedback Score: 0 reviews
|
Quote:
 Quote:
__________________
Instagram:https://instagram.com/jpacione/ |
||
|
|

|
|
|
#56 |
|
Zilvia Member
 Join Date: Oct 2009
Location: Toronto, Canada
Posts: 293
Trader Rating: (0)
      Feedback Score: 0 reviews
|
Alright so time for another update.
So it was around Christmas now and I was still waiting for my heat sleeve to arrive. Having nothing to work on and waiting on parts to arrive, I always find myself strolling online temping myself at buying new items. One day when looking at our local 240 Facebook group I noticed a relatively cheap priced 2-way pop up for sale. I had borrowed Liam's welded last year to do the drift day (the one when my motor broke), and knew that I'd need something to replace it when I gave it back to him. I've always wanted to go with a two way rather than a welded and I wanted to change up my final drive ratio. My current VLSD has a 4.3 final drive. Although its great for acceleration, I hate driving it on the highway. Having a 2 hour drive to the track buzzing almost 4k just to keep up with traffic was not fun. This new diff has a stock ratio of 4.08 I believe. I picked that up and have to install it once it gets a bit warmer outside (currently -6 Celsius, 21* F for you Americans) so I can crawl under the car. 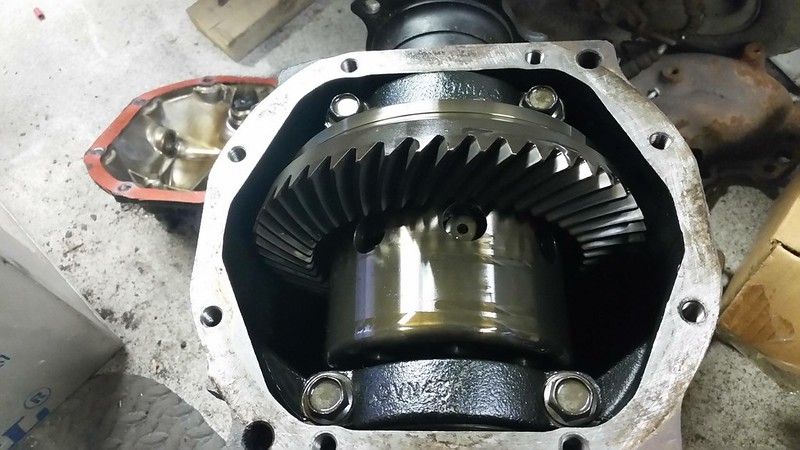 Telling myself not to buy more parts hasn't really worked. (I'm not very convincing lol) I always wanted R34/350z Brembos and that was the plan this winter before the motor went. Unfortunately, its unrealistic for me to spend that much on brakes so I decided to go with z32/R32 brakes instead. A friend of mine was changing his car setup for drag racing and his Z brakes didn't clear his whiles. However my 180sx ones did. So I bought his front brakes and he took mine. They're r32 GTS 30mm aluminum calipers. Same as z32. 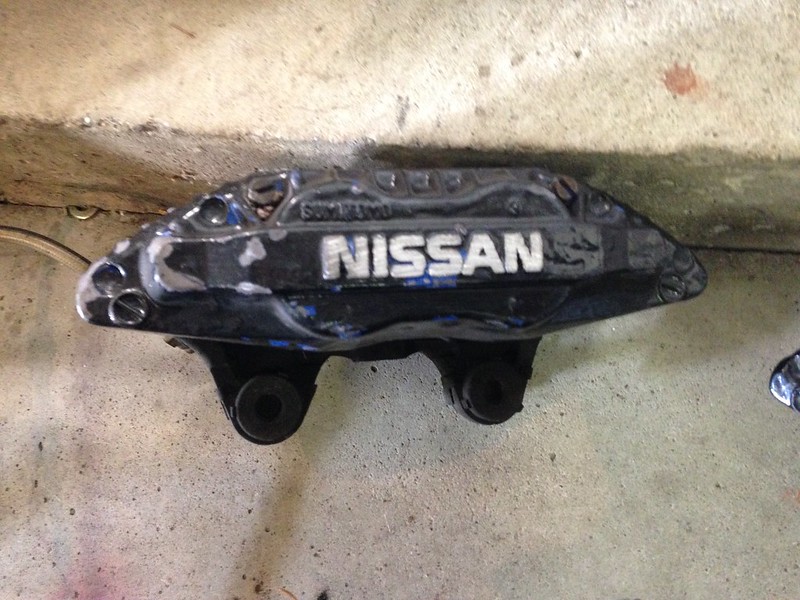 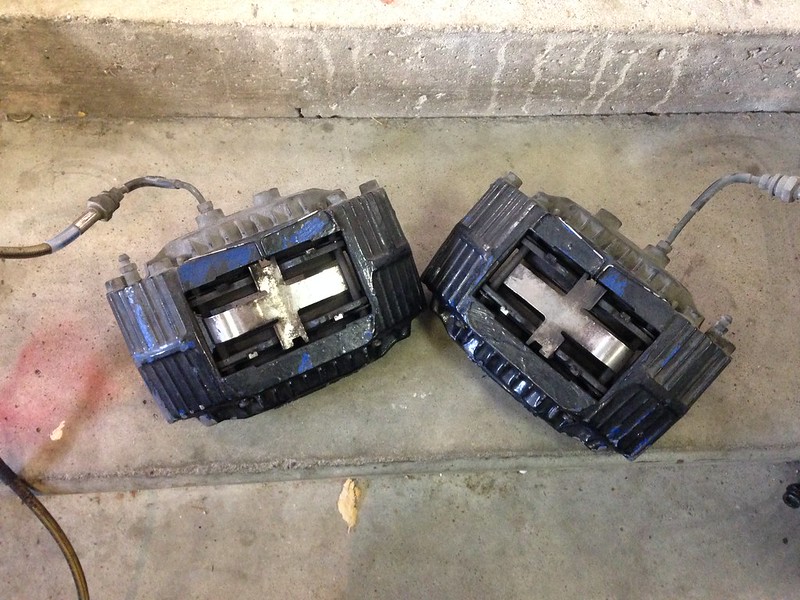 I knew I wouldn't be happy installing them on my car in the conition they were in so I decided to sand them and give them a shot of caliper paint. I opted to go with VHT Gold caliper paint after seeing it on a few cars on here... I know they're not Brembos  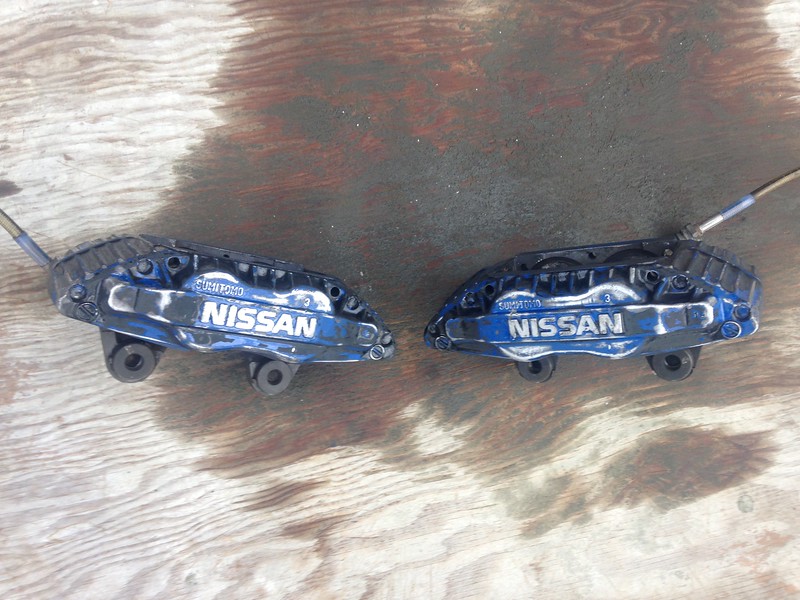 First Coat after primer 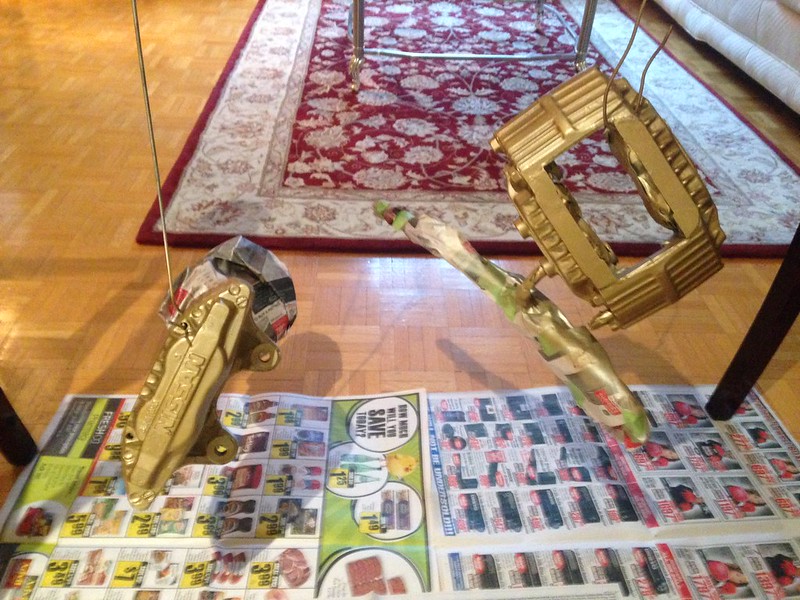 A few coats later, left to dry for a week before I could spray the clear coat (As per the can lol). 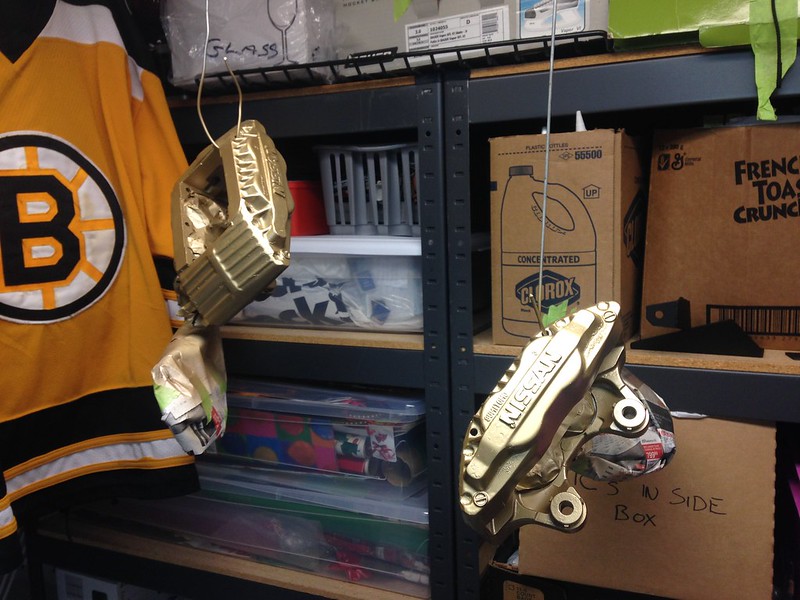 For some reason the Nissan logo on one of them was heavily scored. No idea why. I sanded off the paint on the lettering before spraying the clear so the letters can be nicely sealed. 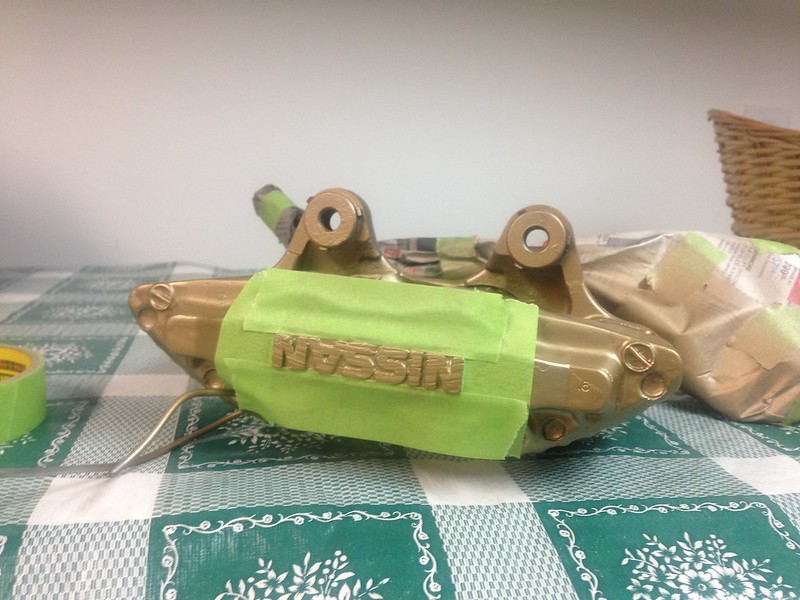 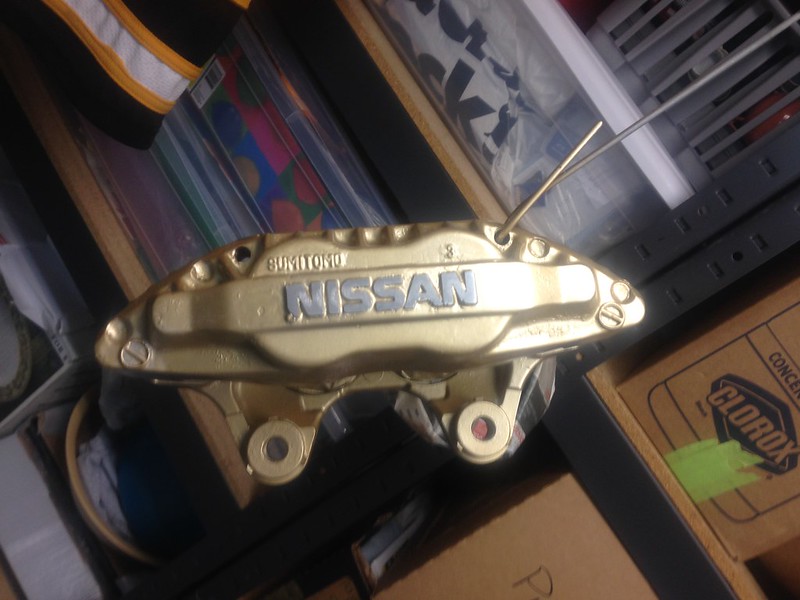 [/url] [/url]Cleared them a week later. They turned out pretty nice! 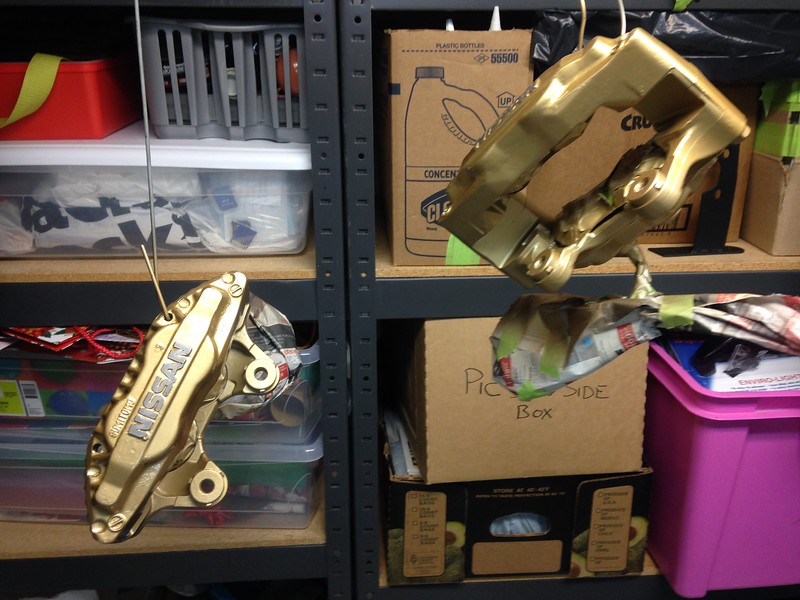 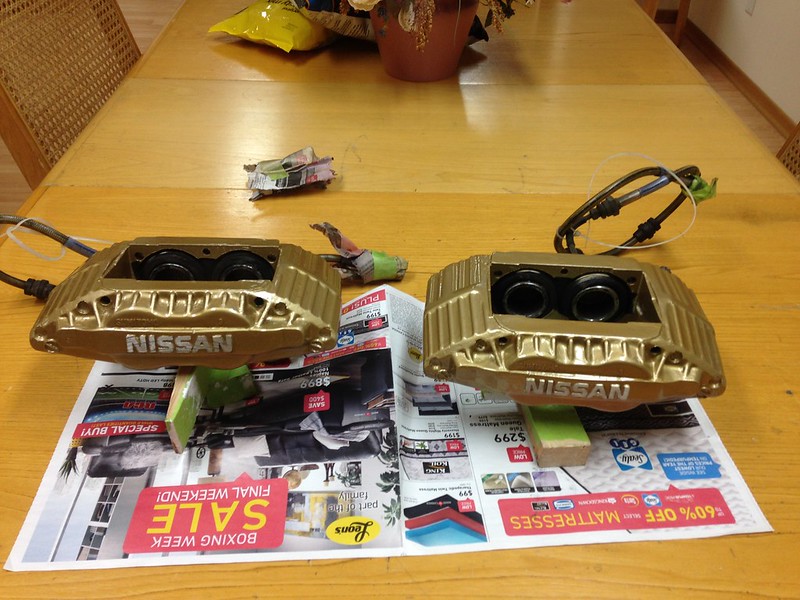 Now that the fronts were all ready I needed to figure out what to do with the rear. I always told myself that I didnt want to go through the hassle of changing the rear setup to z32 with the ebrake, but I also didn't like the idea of non matching brakes front to rear and the look of stock 240 rear brakes are awful. Lucky enough I found a guy parting out an R32 GTR and scored the rear setup pretty cheap. 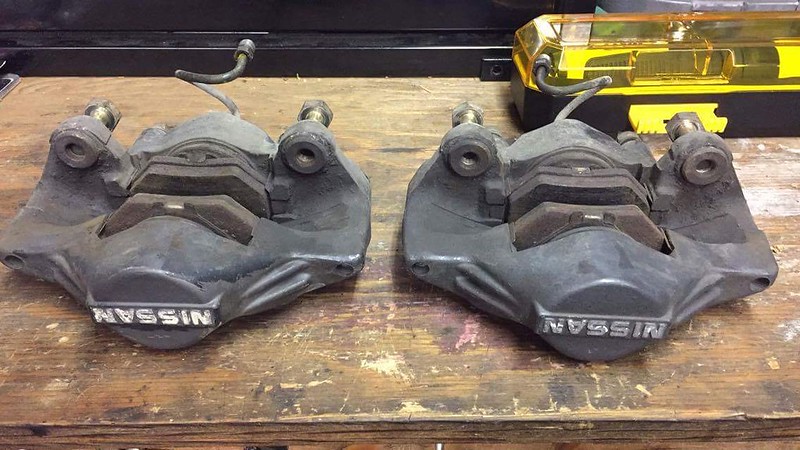 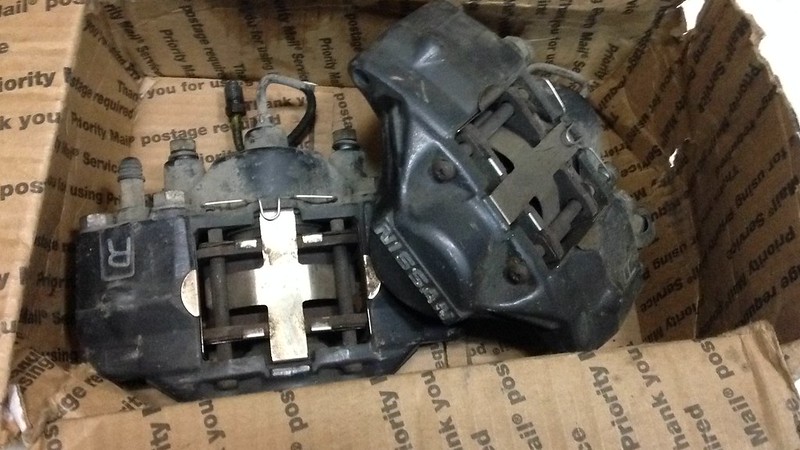 Those were painted gold to match the front as well. I cleaned the Nissan logo and clear coated over it all just like the fronts, but I don't have a pic of that for some reason. 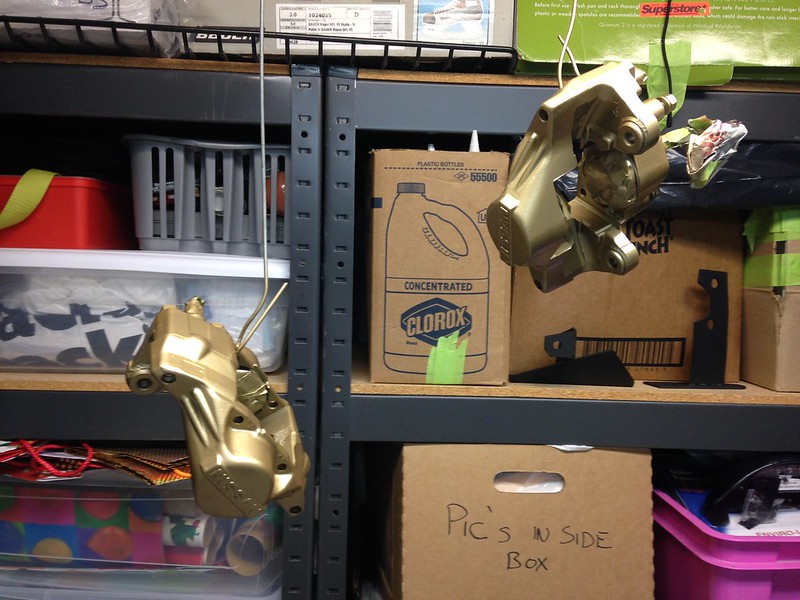 The only thing holding me back to install them was that I needed a drivers side front wheel bearing. I picked one up and had a friend of mine press it into my conversion hub. I also picked up some new slotted rotors and pads since a local shop had them on sale. I opted for the zink coated rotors that were electromagnetically coated black. (The special offered them at 2$ more so I said why not!) The rotors look weird to me all black but the black will be scrubbed off the first time the pads squeeze them. It will leave the hub section black and thats the part that I like. Old 180sx vs new z32 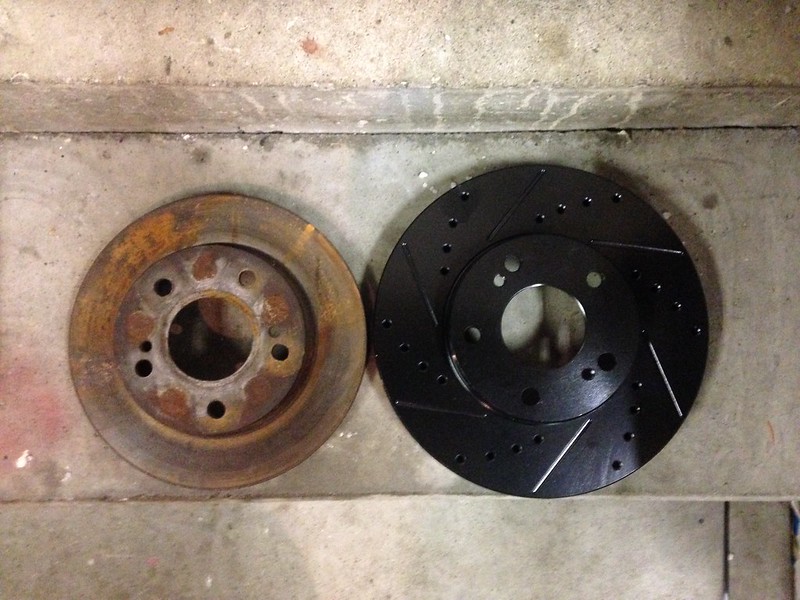 I installed them along with my new bearing this past weekend. 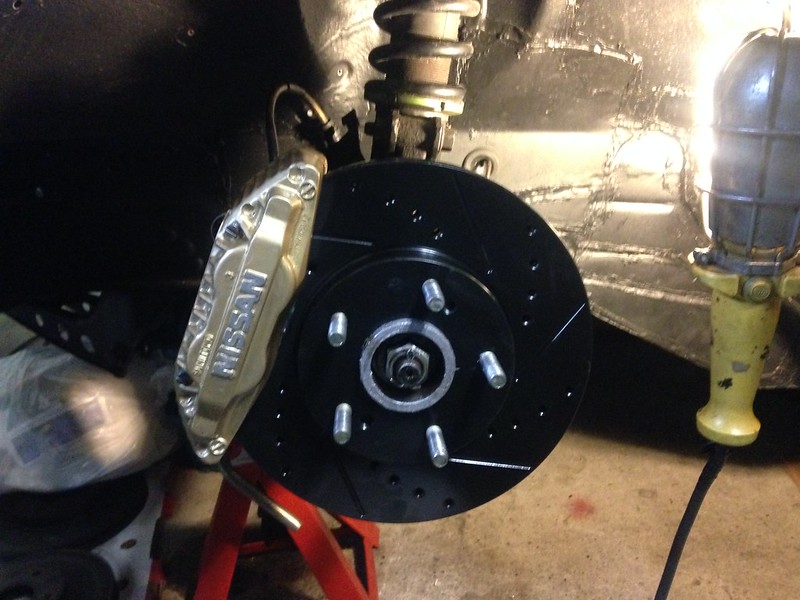 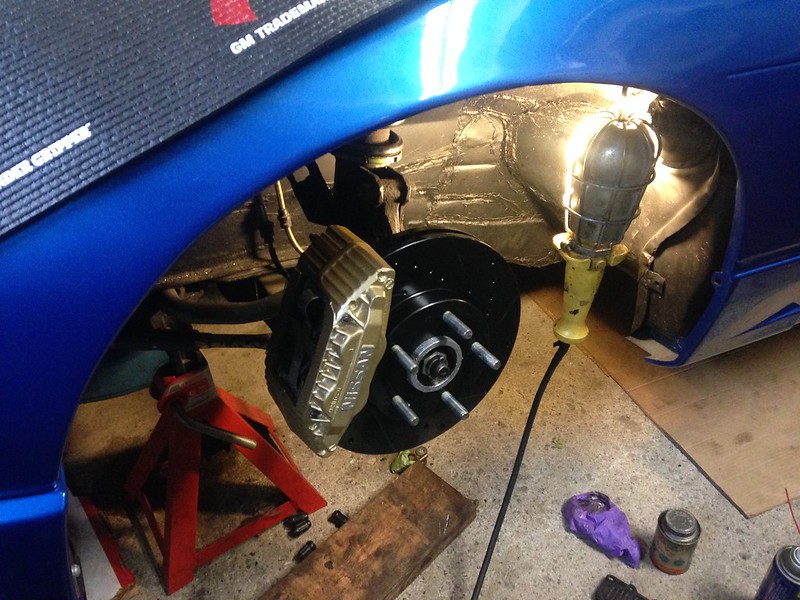 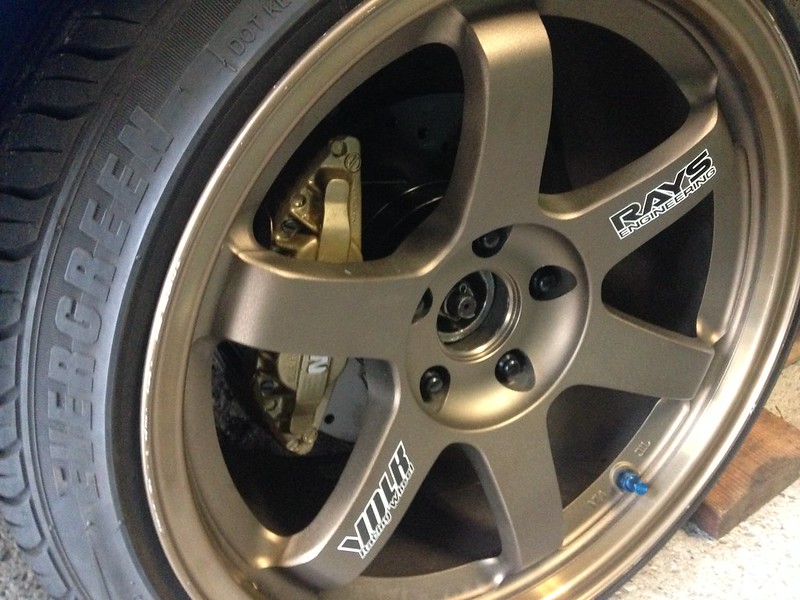 The fronts looked pretty cool on the car. It'll look much better once the rotor is clean silver tho. Like I mentioned earlier the rears will be installed once the weather warms up. At the same time I will swap the 2 way in with the car being in the air. Major update coming next stay tuned! Thanks, Joe.
__________________
Instagram:https://instagram.com/jpacione/ |
|
|

|
|
|
#57 |
|
Zilvia Member
 Join Date: Oct 2009
Location: Toronto, Canada
Posts: 293
Trader Rating: (0)
      Feedback Score: 0 reviews
|
Let's continue this,
In the mist of doing the brakes, i decided to clean up that nasty looking wastegate. I took it apart and the insides looked brand new so that was a relief. I don't have any good before pics, but you can see how it looked in some of the early engine pics I posted. Here's the after: 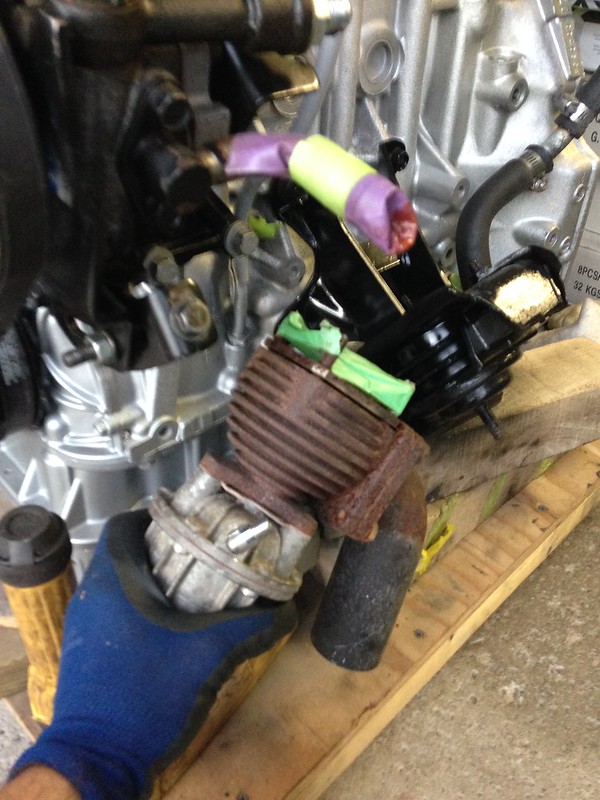 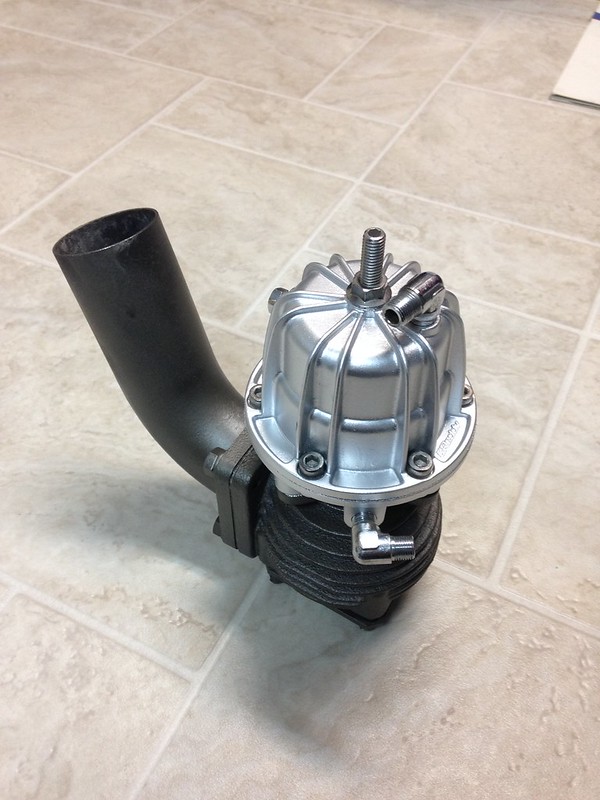 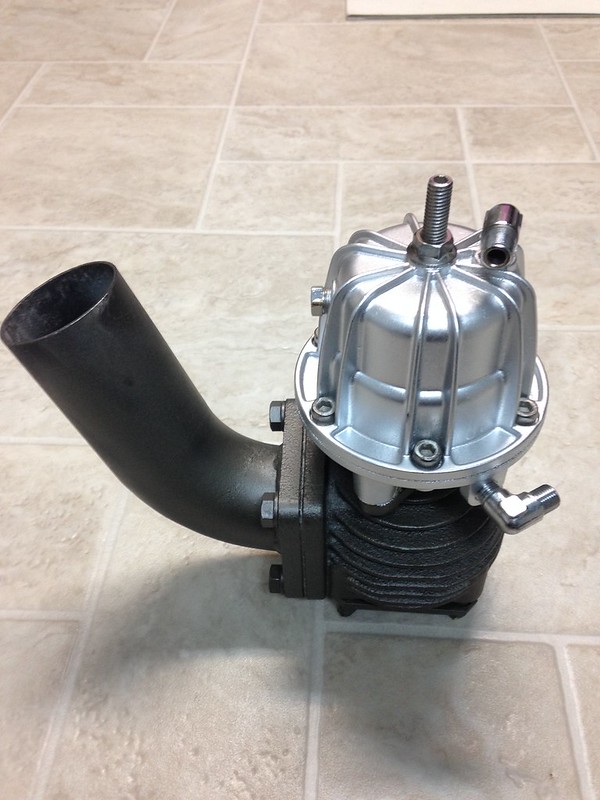 I'm very happy how it turned out. After that I got really annoyed waiting for my heat sleeve to arrive as it was almost 3 months. I requested a refund from the seller and got it the next day. To my surprise I was able to source out heat sleeve from a local hydraulics shop near my house. It actually was cheaper than ebay, but unfortunately only came in orange. At the time I didn't really care as I just wanted to get the car running. (I originally ordered black on ebay). I spent that week in the cold garage mounting up the turbo side of the motor. Here is the turbo oil feel line I made with the Aeroquip fittings and braided line. 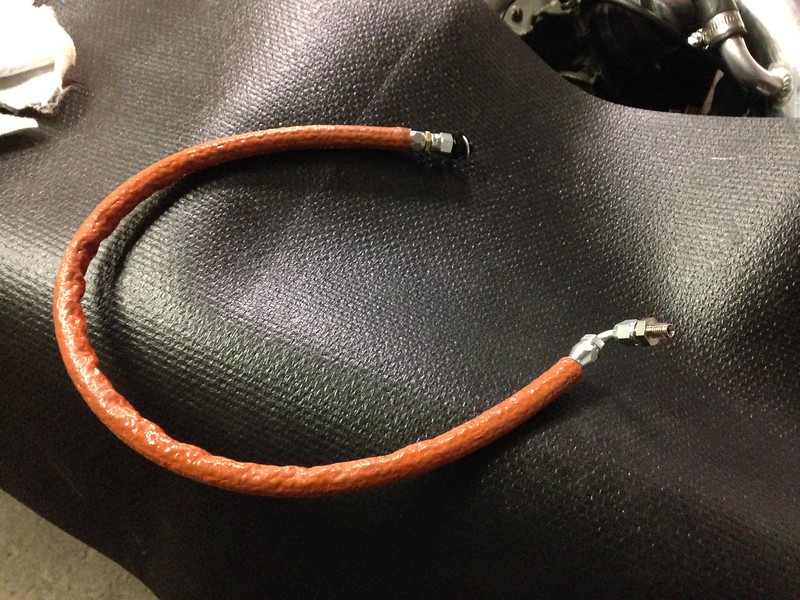 I then continued to cover everything with heat sleeve. My goal was to cover any line close to the manifold. This included; oil feed, power steering lines, clutch line, oil drain etc. 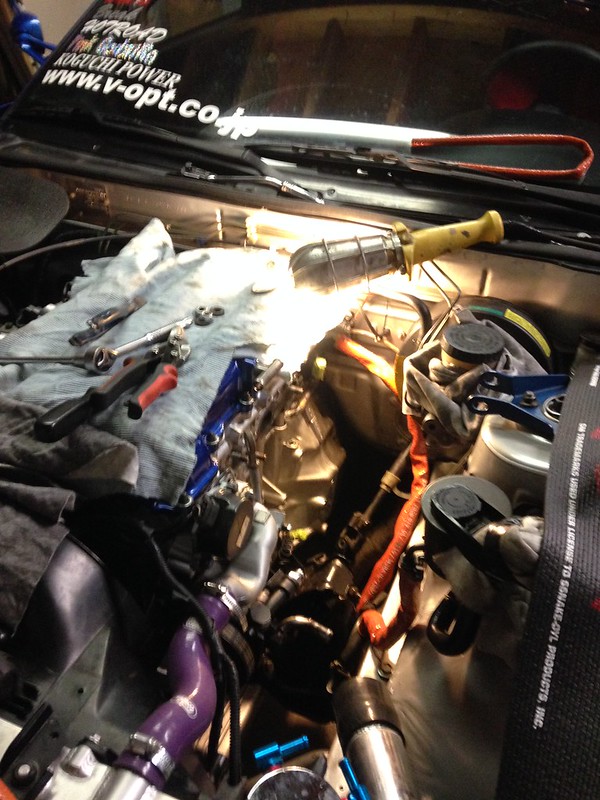 OEM Nissan s15 multilayer gasket fitted. 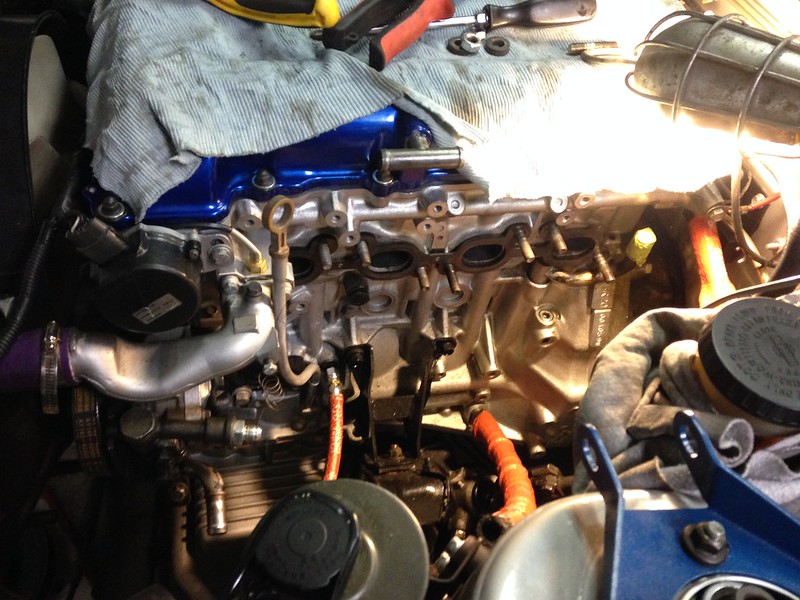 Manifold bolted. 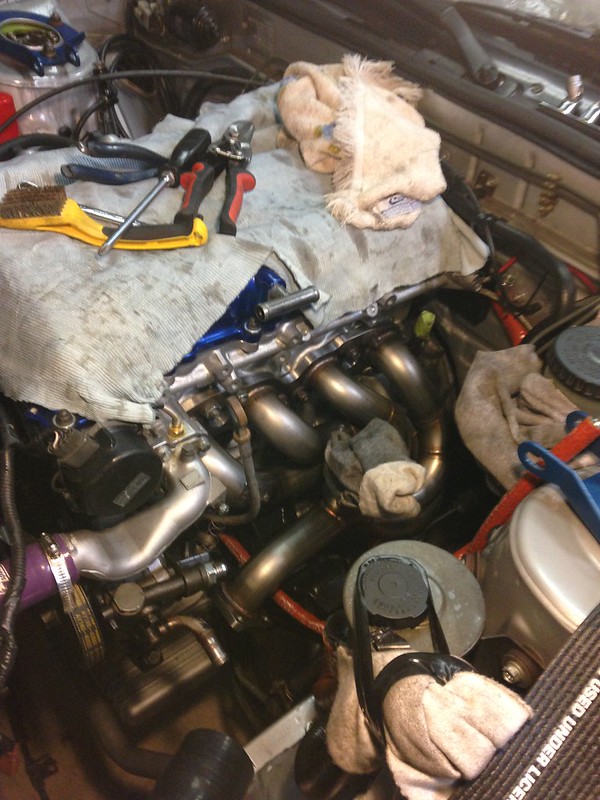 Greddy wastegate bolted. I also made a custom bracket that bolts to block to help support the wastegate so it doesn't crack the runner. 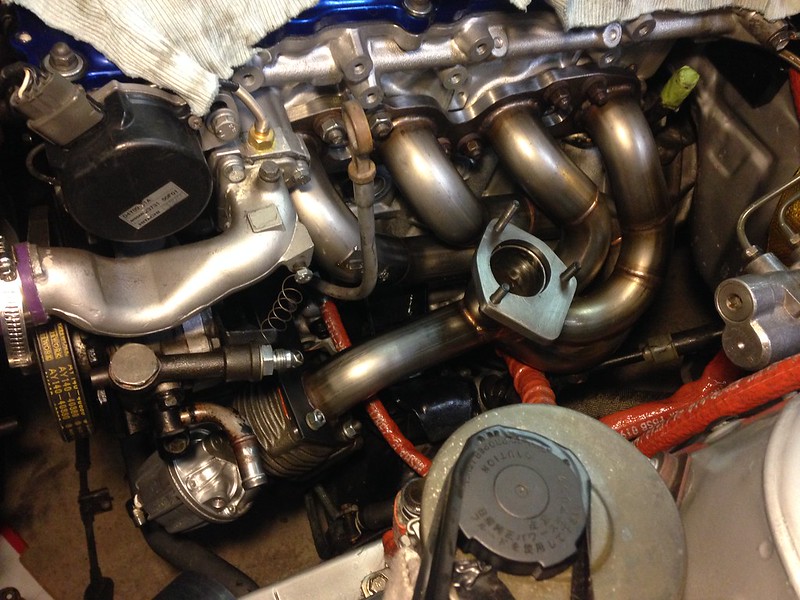 [/url] [/url]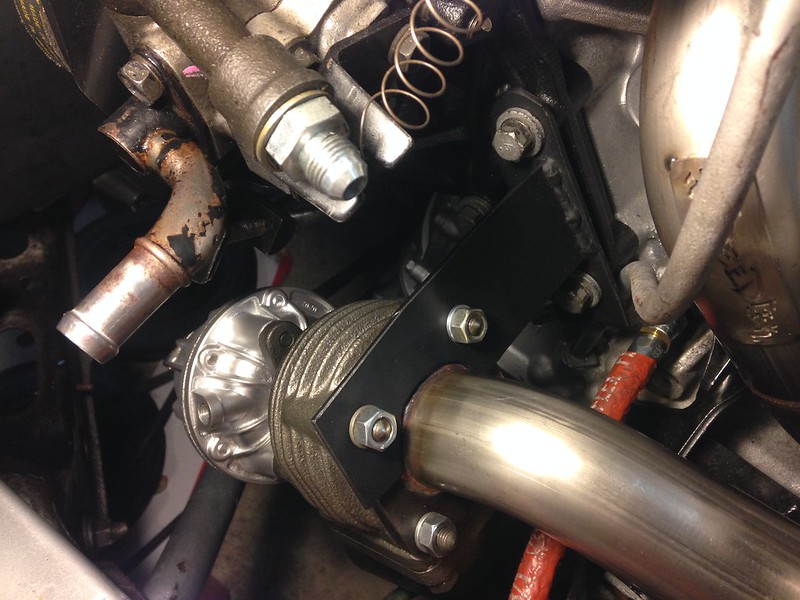 Turbo ready to go. 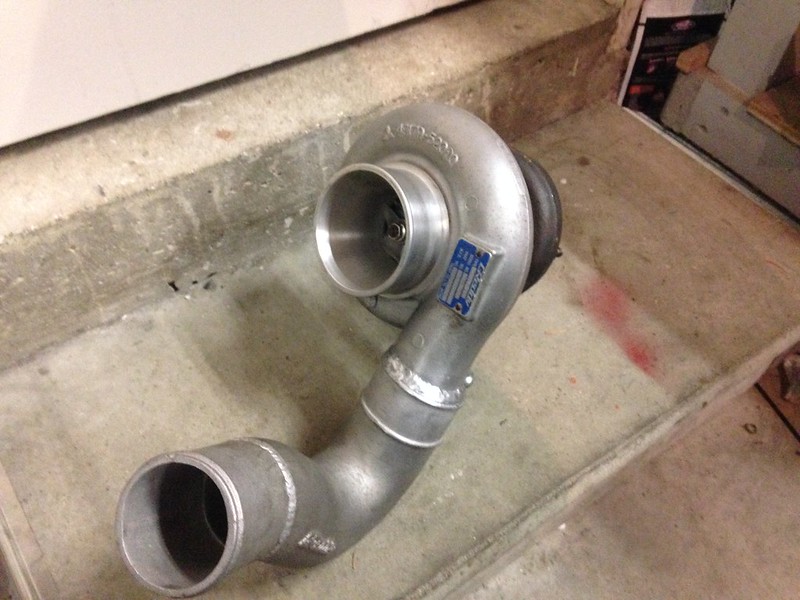 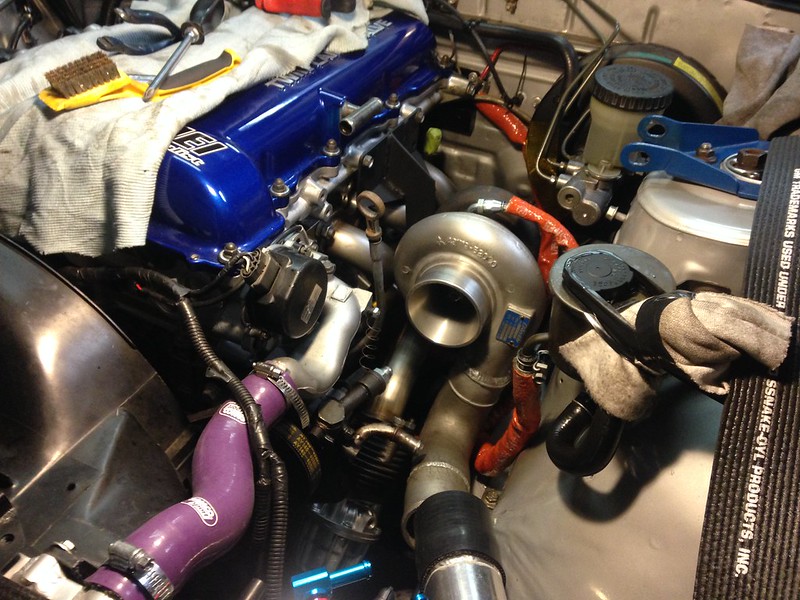 I also made a turbo support bracket out of the old Greddy bracket that came with the top mount manifold. 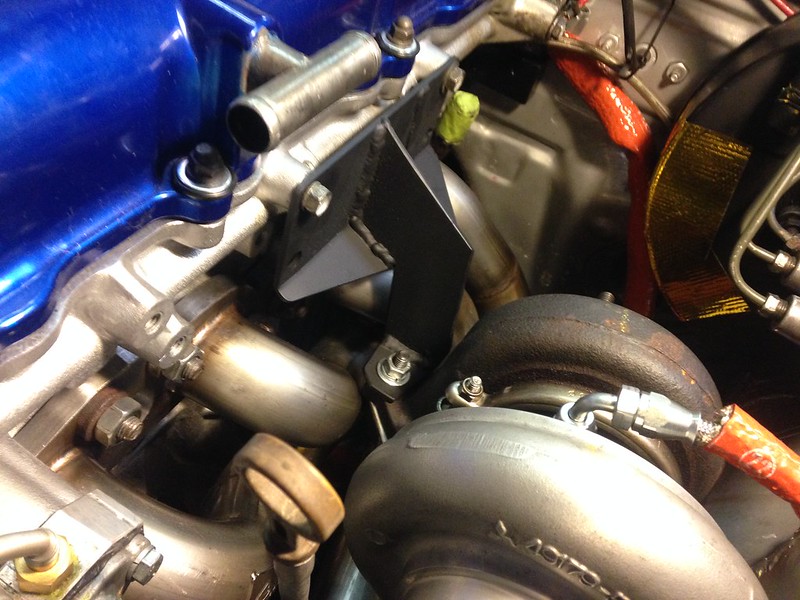 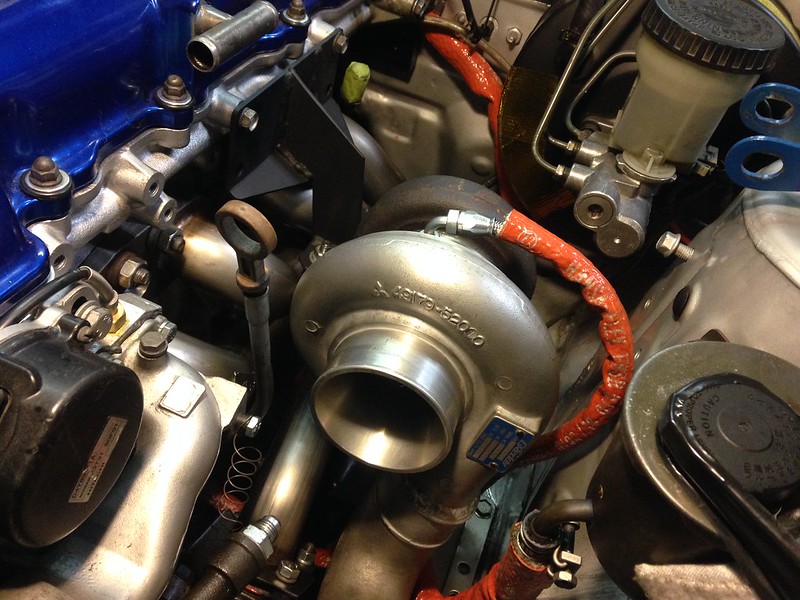 Intake bolted, and downpipe wrapped with titanium heat wrap in hopes to not boil my BMC lol. More heat prevention on that later. 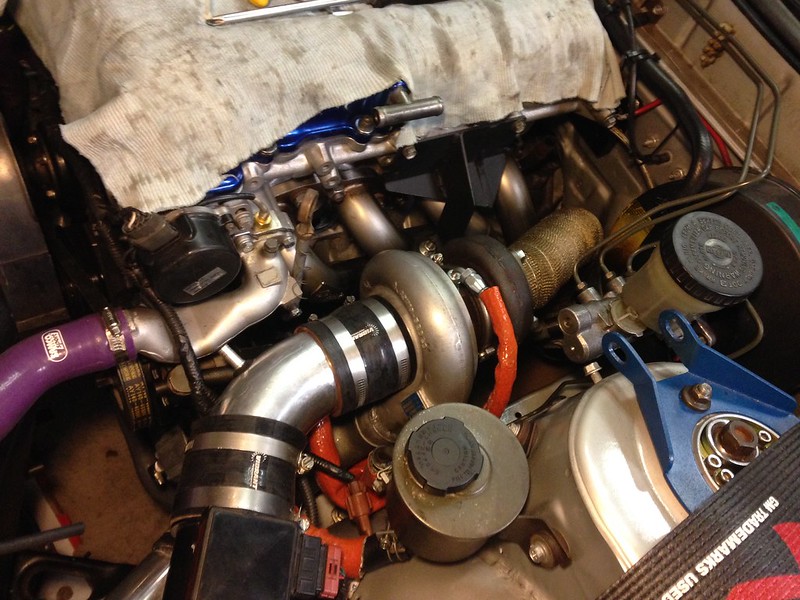 All done! All the lines were hooked up and fluids filled. Dont mind the vacuum line going across the motor. My old wastegate was located near the firewall so now it wasn't long enough to reach the new Greddy position. I'll be getting a proper one soon and tucked away nicely. 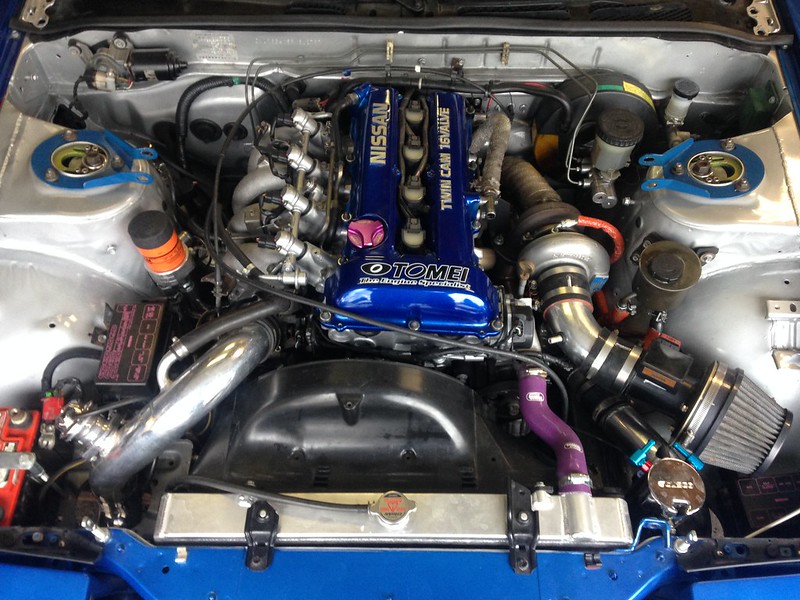 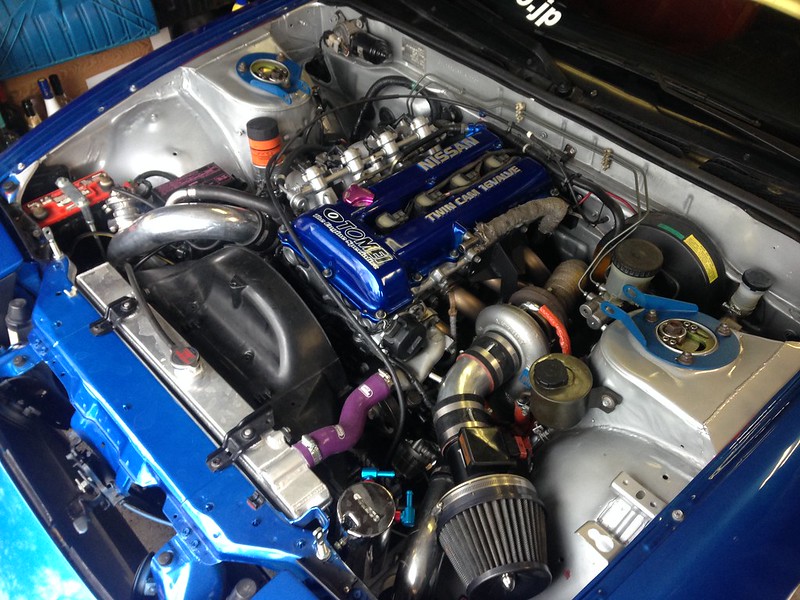 You get a good idea of how the turbo is mid-mounted in this pic. Its not fully a top mount style setup. I think it looks pretty neat. 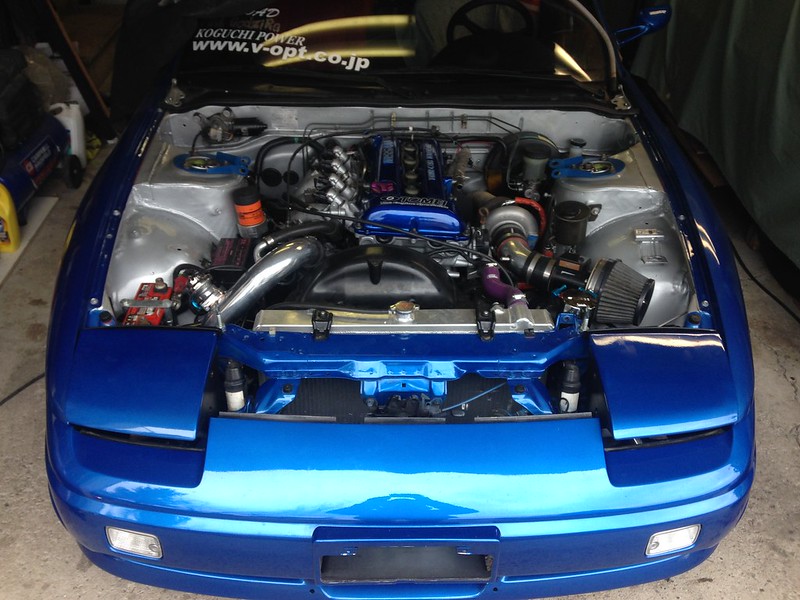 To conclude, the engine fired up right away! I primed the motor before firing and let it run for a good 30 minutes or so afterward. It seems to run pretty well. The timing is way off with the PFC not in sync with the mechanical timing of the engine. I've been playing with that a bit but have struggled to find a balance. (There's a vid of the startup on my instagram) It has been pretty cold here so I'm waiting for the roads to clean up and weather to get warmer so I can get it tuned. In the meantime I drove the car out to the street yesterday to flip it the other way around in the garage. It was the first time under its own power. Also the first time since August that I've drove it wooo! ahah Now I'll have more accessible room to swap the diff and start working on the rear caliper and E brake conversion. That's all for now, thanks, Joe.
__________________
Instagram:https://instagram.com/jpacione/ |
|
|

|
|
|
#58 |
|
Post Whore!
 Join Date: Sep 2008
Location: It's dark, and hell is hot!
Posts: 9,413
Trader Rating: (23)
           Feedback Score: 23 reviews
|
Putting in that work I see! Nice to see the new turbo setup buttoned up as well. I might just have to check this thing out when you're getting your tune on the heartbreaker.
|
|
|

|
 |
| Bookmarks |
| Thread Tools | |
| Display Modes | |
|
|