Zilvia.net Forums | Nissan 240SX (Silvia) and Z (Fairlady) Car Forum

Go Back   Zilvia.net Forums | Nissan 240SX (Silvia) and Z (Fairlady) Car Forum > General > Tech Talk

Tech Talk Technical Discussion About The Nissan 240SX and Nissan Z Cars


Reply
 
Thread Tools Display Modes
Old 09-01-2010, 08:18 PM   #1
doyle4281
Premium Member
 
doyle4281's Avatar
 
Join Date: Jun 2006
Location: New Jersey
Age: 35
Posts: 584
Trader Rating: (20)
doyle4281 is on a distinguished road
Feedback Score: 20 reviews
S14 Suspension build thread.....Pic Intensive

I would first like to thank Donovan of Yamato Garage and Ryan from BallerBolts for the fantastic products. They unknowingly, motivated me to go into greater detail with the build to compliment their products. This thread will focus primarily on the process from beginning to end of the restoration and upgrade of the suspension, brakes, and chassis on my S14 240sx. Feel free to ask questions and post comments, positive or negative are fun too.

The car started off as a completely stock S14 SE from New Jersey, which is why the suspension is such a rusty horrible mess. Every square inch was covered with rust and was extremely difficult to disassemble for that reason.


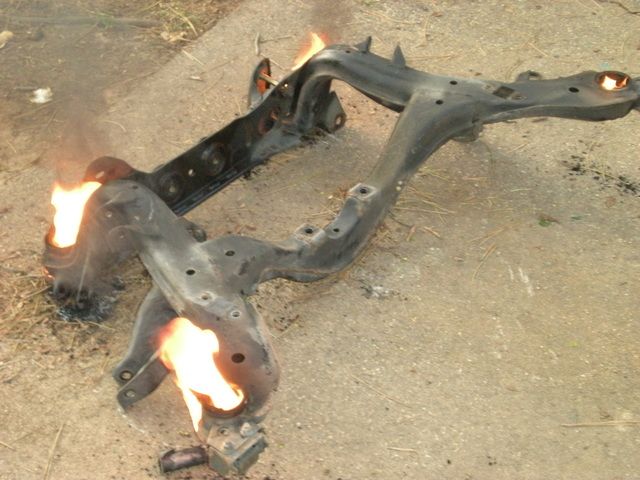
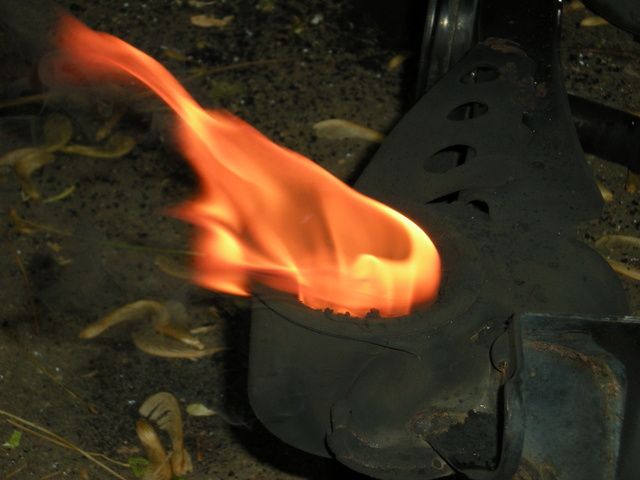
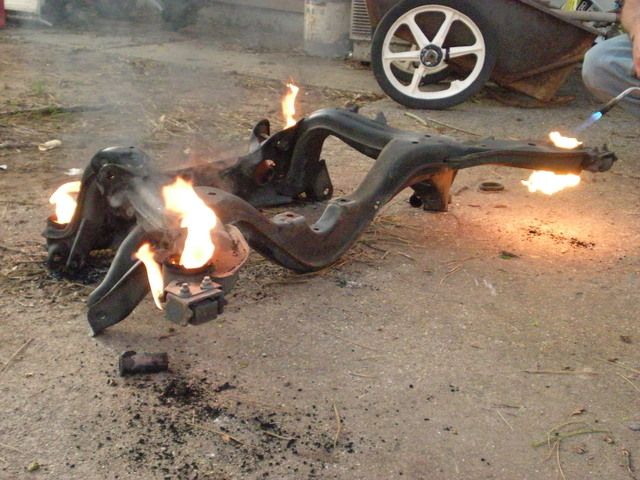
Every bushing was torn and rotted, which was the first order of business. Started by burning out the old subframe bushings, which is pretty easily done with a small torch and a hammer.


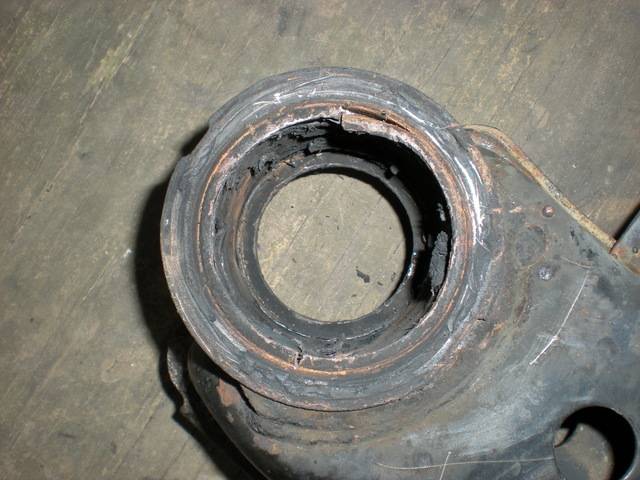
After the inserts are have been removed, you must burn and chisel away as much of the rubber as possible. The result will be something like this.....

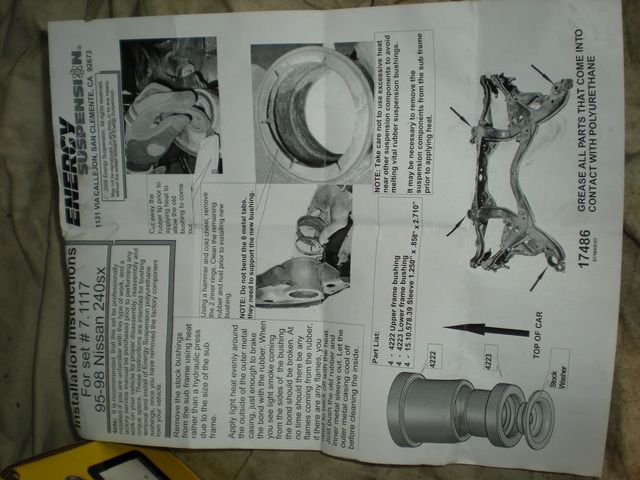
At this point the sleeves are ready to be removed according to the instructions provided by the manufacture of bushings you are using. I opted to use Energy Suspension bushings, which include reasonably clear instructions on how to remove the sleeves. The bushings ended up fitting perfectly.
http://www.energysuspension.com/asse.../pdf/17486.PDF

To remove the inner cage, you will need to make relief cuts around the inside and bend the cage inward. A mini pneumatic reciprocating saw will make this task much easier. Two cuts 180 degrees apart will allow the metal the fold in towards the middle. Be careful not to cut through the sill on the bottom of the hole. It can then be hammered out through the bottom with a chisel.
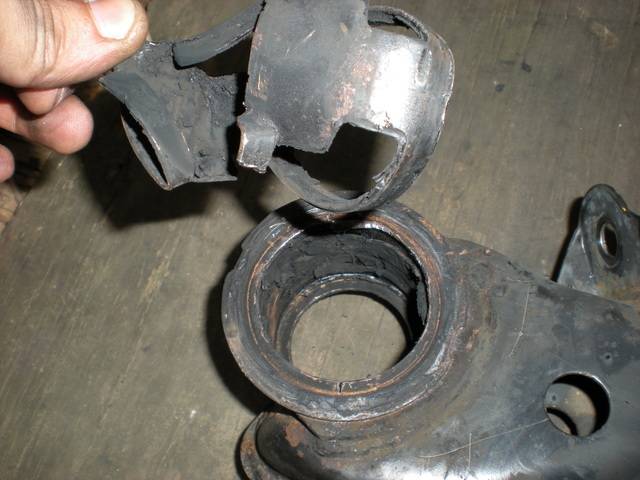

The inner sleeve it a little more difficult to remove, as the metal is a thicker and you must be very careful not to cut through to the subframe. I accomplished this by carefully making relief cuts about an inch apart, and bending the sleeve inward. You will then be able to hammer the whole sleeve through from the bottom.
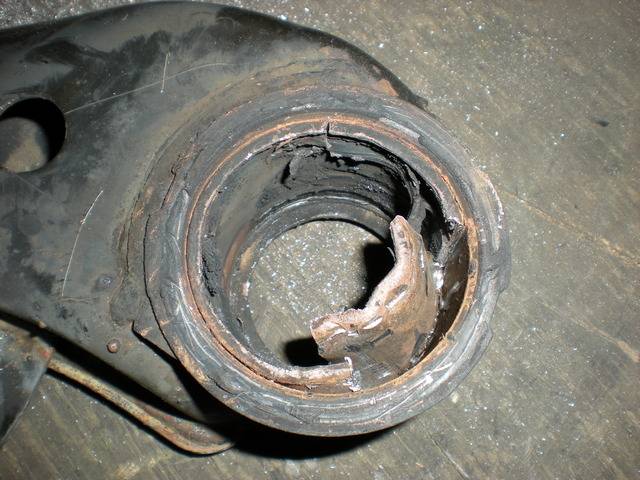

Starting come out.....
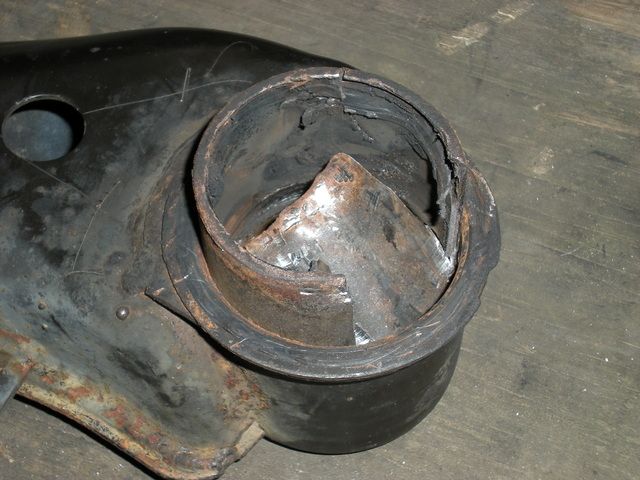

All the way out.....
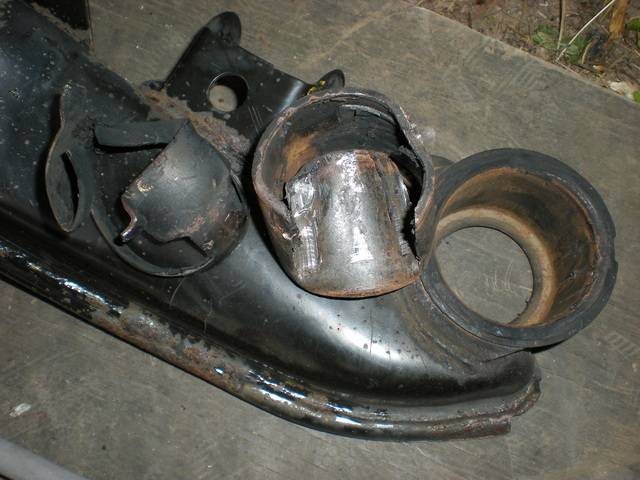

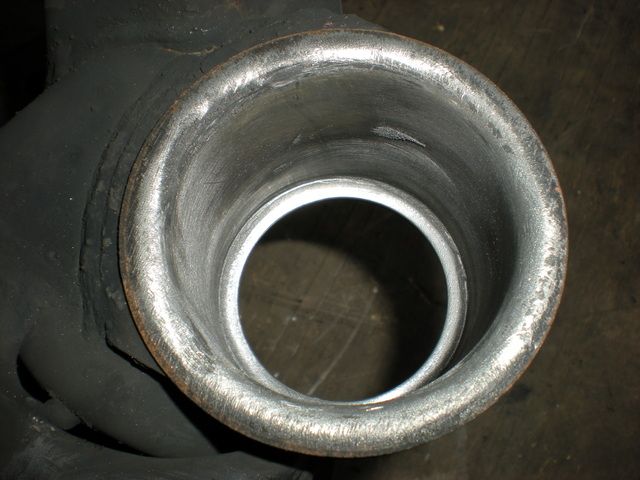
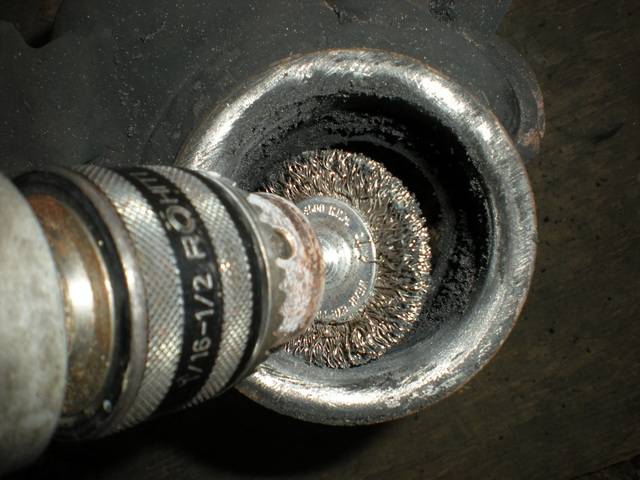
After they are out wire wheel everything clean, and you should end up with something like this....


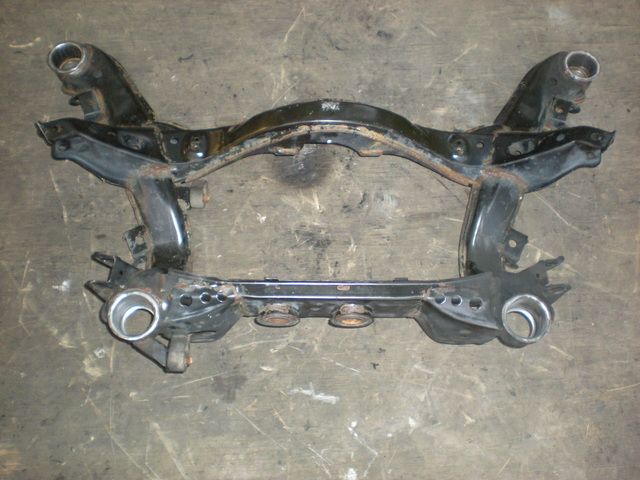
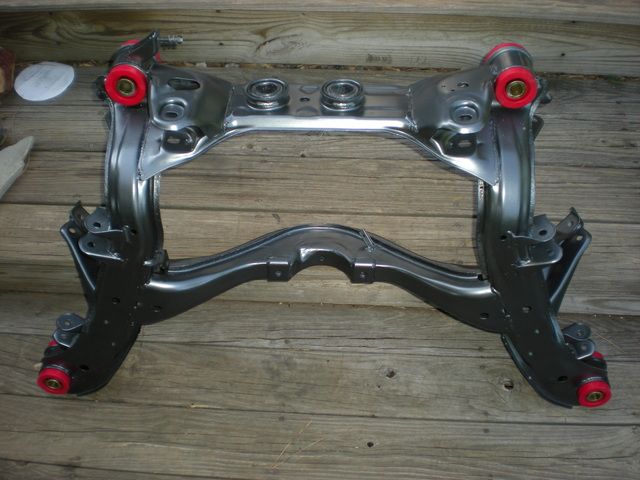
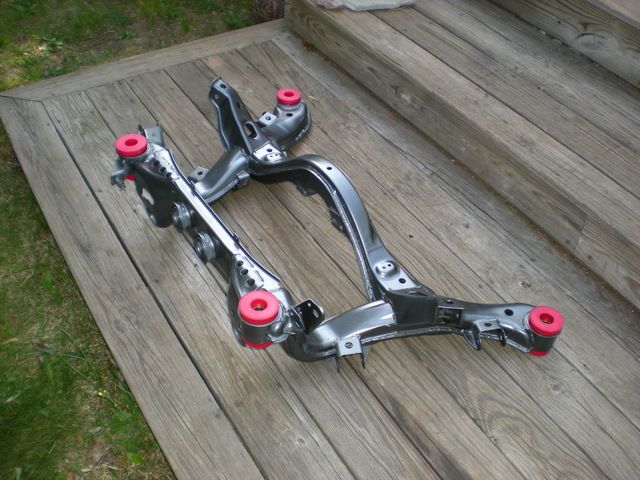
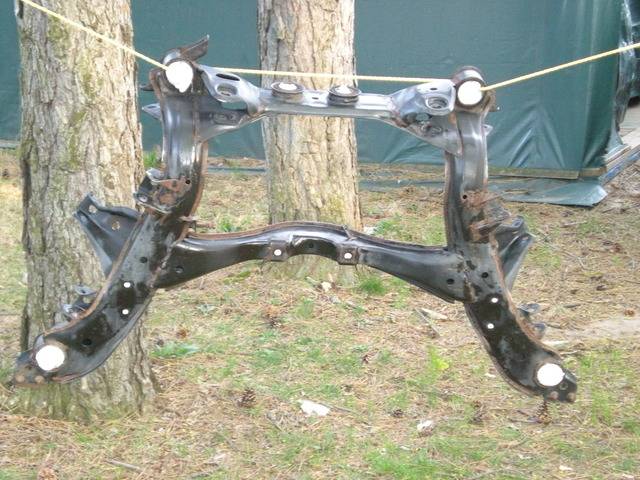
The subframe was then washed, sanded, primed and painted Graphite Gray


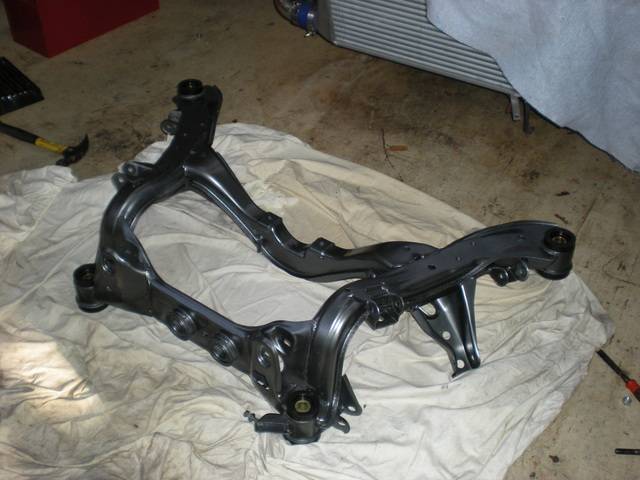
The bushings are then simply pushed in (ended up switching to black bushings, for cosmetic reasons only)

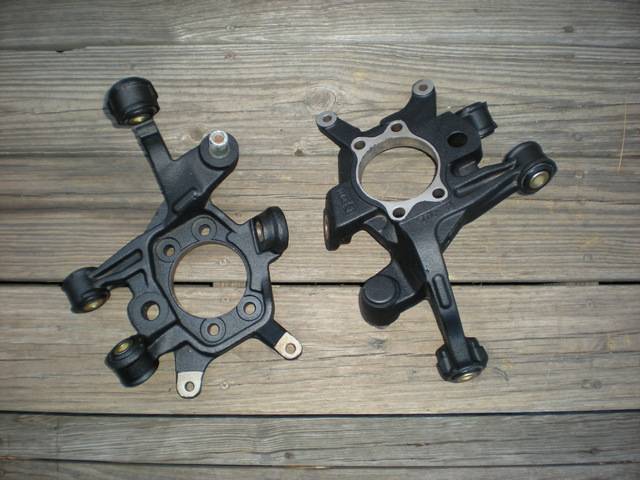
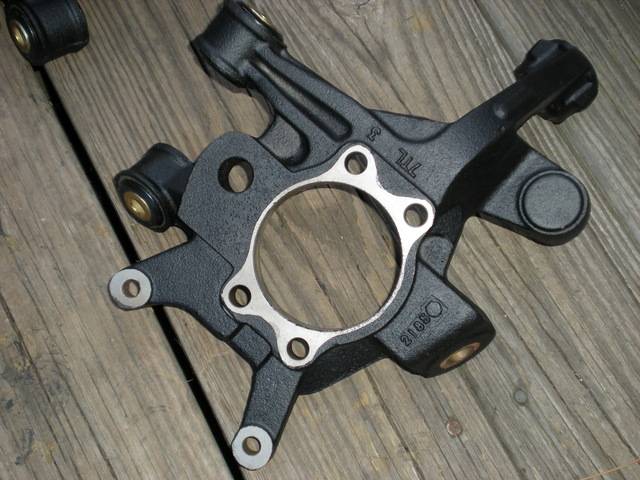
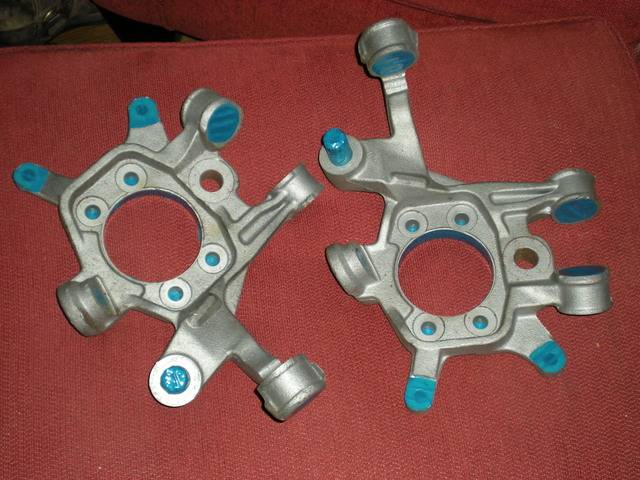
I next moved on to the rear spindles, which were especially difficult to separate from the hubs. If you come across this problem, partially thread the 4 bolts into the hub and evenly hit the bolts until the hub separates from the spindle. I then burned out the bushings,and cut out the metal sleeves in a similar fashion as the subframe sleeves. They were then bead blasted, taped, and powder coated matte black. I then installed the Energy Suspension bushing set using a lot of lubrication and a vice.


Last edited by doyle4281; 11-06-2011 at 10:01 AM..
doyle4281 is offline   Reply With Quote
Sponsored Links
Old 09-01-2010, 08:30 PM   #2
gunluvS14
Zilvia Member
 
gunluvS14's Avatar
 
Join Date: May 2006
Location: ga
Posts: 206
Trader Rating: (0)
gunluvS14 has a spectacular aura aboutgunluvS14 has a spectacular aura aboutgunluvS14 has a spectacular aura aboutgunluvS14 has a spectacular aura aboutgunluvS14 has a spectacular aura aboutgunluvS14 has a spectacular aura about
Feedback Score: 0 reviews
nice work so far!
__________________
http://www.zilvia.net/f/image.php?type=sigpic&userid=45706&dateline=118722  3315
gunluvS14 is offline   Reply With Quote
Old 09-01-2010, 08:32 PM   #3
victorw210
Zilvia Member
 
Join Date: Jun 2007
Location: st.charles
Age: 31
Posts: 226
Trader Rating: (1)
victorw210 has made poor choicesvictorw210 has made poor choicesvictorw210 has made poor choicesvictorw210 has made poor choicesvictorw210 has made poor choicesvictorw210 has made poor choices
Feedback Score: 1 reviews
nice lookin clean
victorw210 is offline   Reply With Quote
Old 09-01-2010, 08:54 PM   #4
Om1kron
Post Whore!
 
Om1kron's Avatar
 
Join Date: Sep 2004
Location: Simi Valley, CA
Age: 40
Posts: 6,879
Trader Rating: (15)
Om1kron has a brilliant futureOm1kron has a brilliant futureOm1kron has a brilliant futureOm1kron has a brilliant futureOm1kron has a brilliant futureOm1kron has a brilliant futureOm1kron has a brilliant futureOm1kron has a brilliant futureOm1kron has a brilliant futureOm1kron has a brilliant futureOm1kron has a brilliant future
Feedback Score: 15 reviews
rad I can dig this.
__________________
Wayne
Om1kron is offline   Reply With Quote
Old 09-01-2010, 09:18 PM   #5
az_240
Post Whore!
 
az_240's Avatar
 
Join Date: Jan 2006
Location: Phx
Posts: 3,097
Trader Rating: (41)
az_240 is just really niceaz_240 is just really niceaz_240 is just really niceaz_240 is just really niceaz_240 is just really niceaz_240 is just really niceaz_240 is just really niceaz_240 is just really niceaz_240 is just really nice
Feedback Score: 41 reviews
Send a message via AIM to az_240
Should have installed zerk fittings on those uprights... those will be making noise and binding in no time.
az_240 is offline   Reply With Quote
Old 09-01-2010, 09:25 PM   #6
ManoNegra
Guild of Skullduggerous Intent
 
ManoNegra's Avatar
 
Join Date: Jan 2004
Location: Socal
Posts: 7,841
Trader Rating: (48)
ManoNegra is close to perfectionManoNegra is close to perfectionManoNegra is close to perfectionManoNegra is close to perfectionManoNegra is close to perfectionManoNegra is close to perfectionManoNegra is close to perfectionManoNegra is close to perfectionManoNegra is close to perfectionManoNegra is close to perfectionManoNegra is close to perfection
Feedback Score: 48 reviews
Send a message via Yahoo to ManoNegra
so baller bolts ----> suspension work???? lol
work looks top notch
poly bushings in the upright on the other hand....
ManoNegra is offline   Reply With Quote
Old 09-01-2010, 09:26 PM   #7
endlessboost
Zilvia Junkie
 
Join Date: Jul 2008
Location: central jerz
Posts: 316
Trader Rating: (13)
endlessboost is an unknown quantity at this point
Feedback Score: 13 reviews
Looks awesome so far!
endlessboost is offline   Reply With Quote
Old 09-01-2010, 09:26 PM   #8
blueshark123
Post Whore!
 
blueshark123's Avatar
 
Join Date: Apr 2006
Location: North Jersey
Posts: 5,481
Trader Rating: (55)
blueshark123 has a brilliant futureblueshark123 has a brilliant futureblueshark123 has a brilliant futureblueshark123 has a brilliant futureblueshark123 has a brilliant futureblueshark123 has a brilliant futureblueshark123 has a brilliant futureblueshark123 has a brilliant futureblueshark123 has a brilliant futureblueshark123 has a brilliant futureblueshark123 has a brilliant future
Feedback Score: 55 reviews
i found a cheap powdercoater in jersey if u ever needed anything done
blueshark123 is offline   Reply With Quote
Old 09-01-2010, 09:28 PM   #9
NightSlider
Leaky Injector
 
Join Date: Aug 2003
Location: NV
Age: 38
Posts: 93
Trader Rating: (2)
NightSlider is an unknown quantity at this point
Feedback Score: 2 reviews
damn thats nice.
__________________
Shift_Chirp
NightSlider is offline   Reply With Quote
Old 09-01-2010, 09:42 PM   #10
blueshark123
Post Whore!
 
blueshark123's Avatar
 
Join Date: Apr 2006
Location: North Jersey
Posts: 5,481
Trader Rating: (55)
blueshark123 has a brilliant futureblueshark123 has a brilliant futureblueshark123 has a brilliant futureblueshark123 has a brilliant futureblueshark123 has a brilliant futureblueshark123 has a brilliant futureblueshark123 has a brilliant futureblueshark123 has a brilliant futureblueshark123 has a brilliant futureblueshark123 has a brilliant futureblueshark123 has a brilliant future
Feedback Score: 55 reviews
Quote:
Originally Posted by az_240 View Post
Should have installed zerk fittings on those uprights... those will be making noise and binding in no time.
can someone inform me about zerk fittings a little more please
blueshark123 is offline   Reply With Quote
Old 09-01-2010, 10:41 PM   #11
ManoNegra
Guild of Skullduggerous Intent
 
ManoNegra's Avatar
 
Join Date: Jan 2004
Location: Socal
Posts: 7,841
Trader Rating: (48)
ManoNegra is close to perfectionManoNegra is close to perfectionManoNegra is close to perfectionManoNegra is close to perfectionManoNegra is close to perfectionManoNegra is close to perfectionManoNegra is close to perfectionManoNegra is close to perfectionManoNegra is close to perfectionManoNegra is close to perfectionManoNegra is close to perfection
Feedback Score: 48 reviews
Send a message via Yahoo to ManoNegra
Quote:
Originally Posted by blueshark123 View Post
can someone inform me about zerk fittings a little more please
cut grooves into the poly bushings with a dremel or compatible tool
drill a hole on each upright location to the ID where each bushing is installed
tap the holes and install zerk fittings that you can use a grease gun on
these will allow you to service the bushings for grease periodically as needed
and keep them from squeaking and/or binding

do a little bit of searching as a few people have done and written about this
ManoNegra is offline   Reply With Quote
Old 09-02-2010, 11:30 AM   #12
eklips3
Zilvia Addict
 
eklips3's Avatar
 
Join Date: Apr 2008
Location: Calgary Canada
Age: 31
Posts: 626
Trader Rating: (3)
eklips3 is an unknown quantity at this point
Feedback Score: 3 reviews
very nice , keep up the good work dude , everything looks clean.

i am learning from this
__________________

1992 240sx (RB20. [email protected])
eklips3 is offline   Reply With Quote
Old 09-02-2010, 11:37 AM   #13
thefro526
Nissanaholic!
 
thefro526's Avatar
 
Join Date: Feb 2008
Location: New Jersey
Posts: 1,813
Trader Rating: (8)
thefro526 is a glorious beacon of lightthefro526 is a glorious beacon of lightthefro526 is a glorious beacon of lightthefro526 is a glorious beacon of lightthefro526 is a glorious beacon of lightthefro526 is a glorious beacon of lightthefro526 is a glorious beacon of lightthefro526 is a glorious beacon of lightthefro526 is a glorious beacon of lightthefro526 is a glorious beacon of lightthefro526 is a glorious beacon of light
Feedback Score: 8 reviews
I like this thread.

Where in Jersey are you from?

Do you drive CL at all?
thefro526 is offline   Reply With Quote
Old 09-02-2010, 12:25 PM   #14
dopplganger1
Zilvia Member
 
Join Date: Jan 2008
Location: portland
Posts: 235
Trader Rating: (1)
dopplganger1 is an unknown quantity at this point
Feedback Score: 1 reviews
Polyurethane bushing grease fitting install - Nissan Road Racing Forums there is a thread talking about the zerk fittings he got the idea from a friends mustang bushings that came like that, Im in the process of doing this myself
dopplganger1 is offline   Reply With Quote
Old 09-02-2010, 12:39 PM   #15
Wabash9000
Zilvia Member
 
Join Date: Oct 2006
Location: Kansas
Age: 33
Posts: 217
Trader Rating: (0)
Wabash9000 has a little shameless behavior in the past
Feedback Score: 0 reviews
nice. I just did this exact thing to my s14.

bought an extra subframe and took the time to build it with mostly new parts, cleaned up and painted the subframe, replaced the bushings, ballerbolts kit. I didn't take apart the spindles and paint them, but I did everything else. nice work man.
Wabash9000 is offline   Reply With Quote
Old 09-02-2010, 01:19 PM   #16
blueshark123
Post Whore!
 
blueshark123's Avatar
 
Join Date: Apr 2006
Location: North Jersey
Posts: 5,481
Trader Rating: (55)
blueshark123 has a brilliant futureblueshark123 has a brilliant futureblueshark123 has a brilliant futureblueshark123 has a brilliant futureblueshark123 has a brilliant futureblueshark123 has a brilliant futureblueshark123 has a brilliant futureblueshark123 has a brilliant futureblueshark123 has a brilliant futureblueshark123 has a brilliant futureblueshark123 has a brilliant future
Feedback Score: 55 reviews
Quote:
Originally Posted by dopplganger1 View Post
Polyurethane bushing grease fitting install - Nissan Road Racing Forums there is a thread talking about the zerk fittings he got the idea from a friends mustang bushings that came like that, Im in the process of doing this myself

thanks alot i was up all night looking for something like this. I guess i can go to town now with my extra spindle set haha
blueshark123 is offline   Reply With Quote
Old 09-02-2010, 09:33 PM   #17
doyle4281
Premium Member
 
doyle4281's Avatar
 
Join Date: Jun 2006
Location: New Jersey
Age: 35
Posts: 584
Trader Rating: (20)
doyle4281 is on a distinguished road
Feedback Score: 20 reviews
Update

Thank you for the kind words. If anyone has any questions, please feel free to ask.


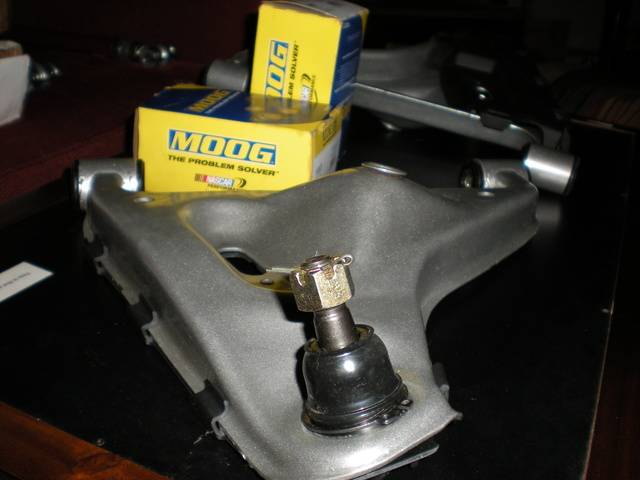
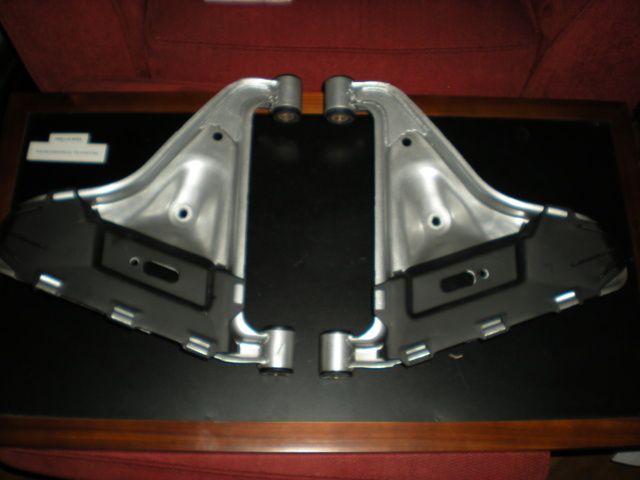
The rear lower control arms were up next, which were in desperate need of refreshment. The ball joints were worn, the bushings were rotted, and covered in rust. I started by burning out the old bushings, and removing the sleeves, again using the same technique as the subframe. The arms were then taken to the press and the ball joints were pushed out. After a good cleaning, I stripped the factory paint off, bead blasted, and powder coated "Mirror Silver". The bushings were then lubed up and pushed in with the vice, and ball joints were carefully pushed in on the press.
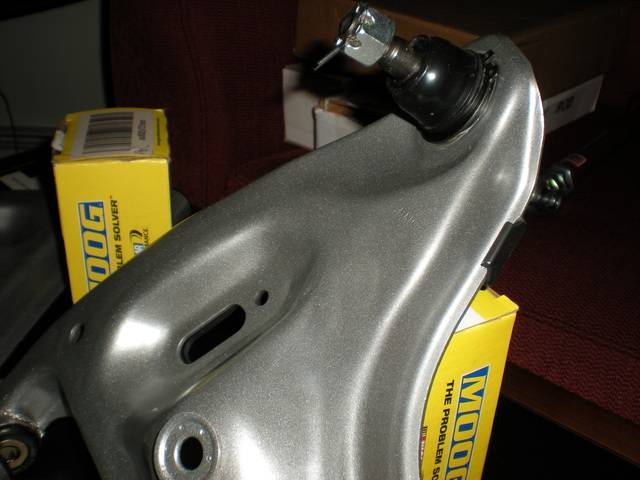


Since there is no part number for an S14 rear ball joint, an alternative needed to be sourced. After some research, I saw quite a few different possibilities, however very few concrete answers. I used a dial indicator to compare the front and rear S14 ball joints, and they were nearly identical. They went in without a problem, and the snap ring fit in the proper place.


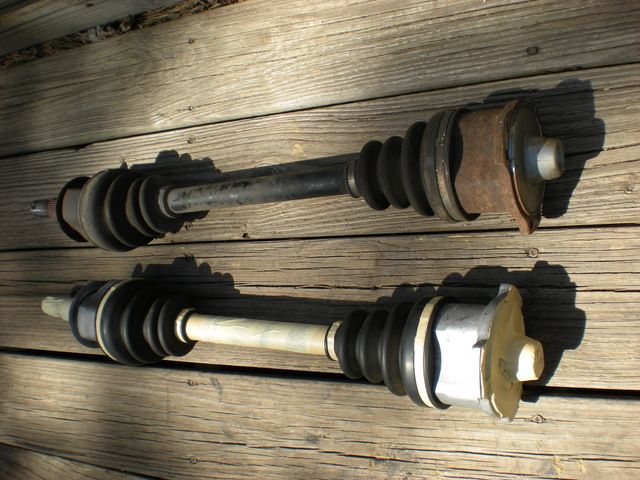
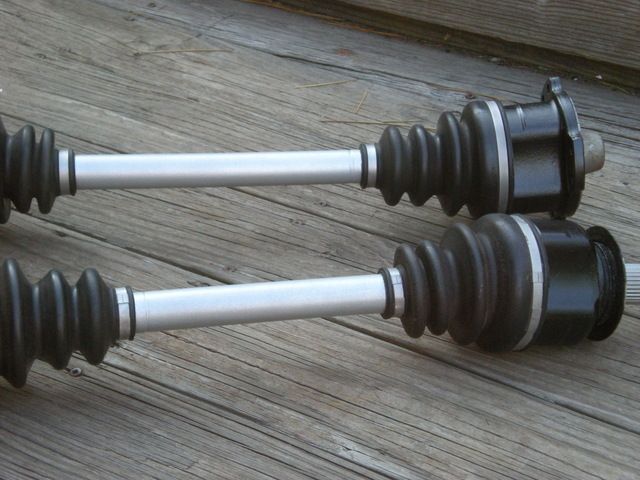
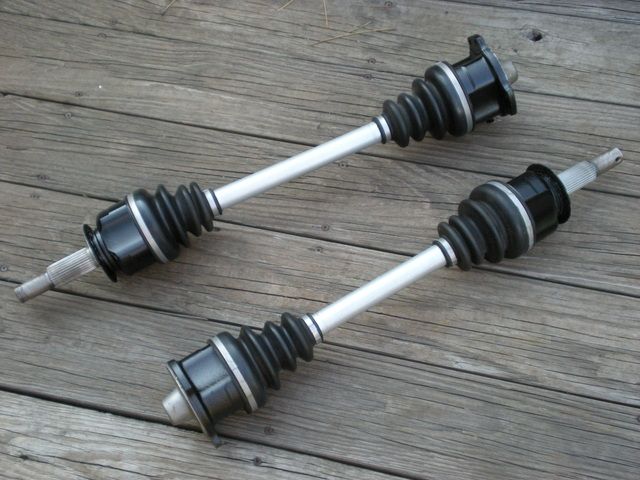
Like everything else, the axles had seen better days. Although they showed no signs of mechanical problems, they were cosmetically deceased.
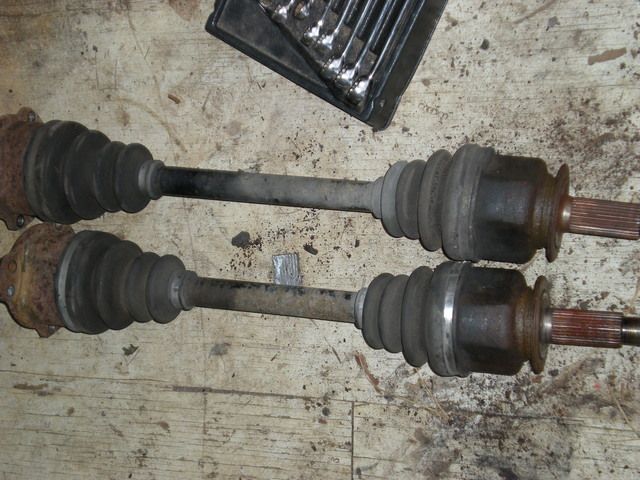

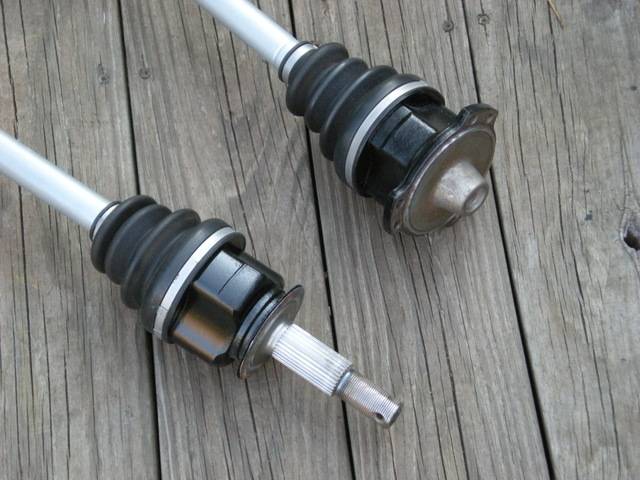
I started by Glass beading them clean, and taping them off for paint. I had considered powder coat, but I was unsure how they would handle the oven.
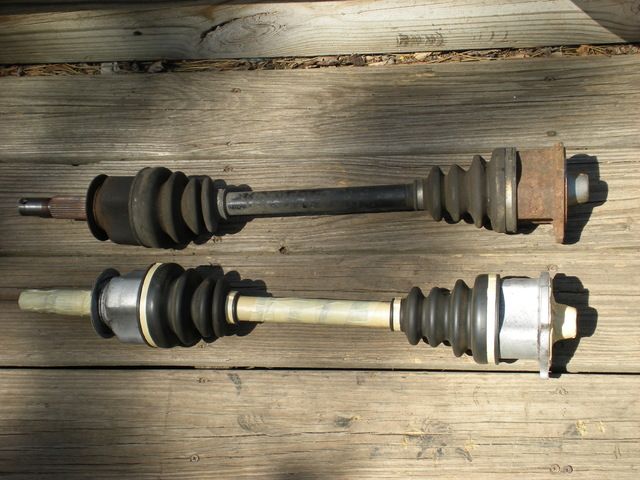


VHT paint was the applied, which appears to be strong enough to take some abuse.


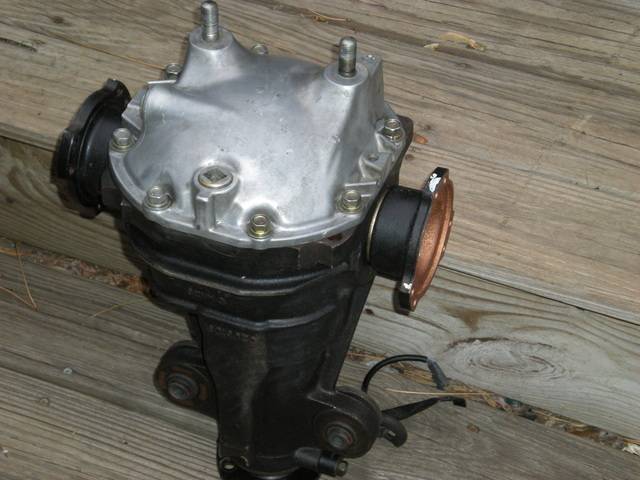
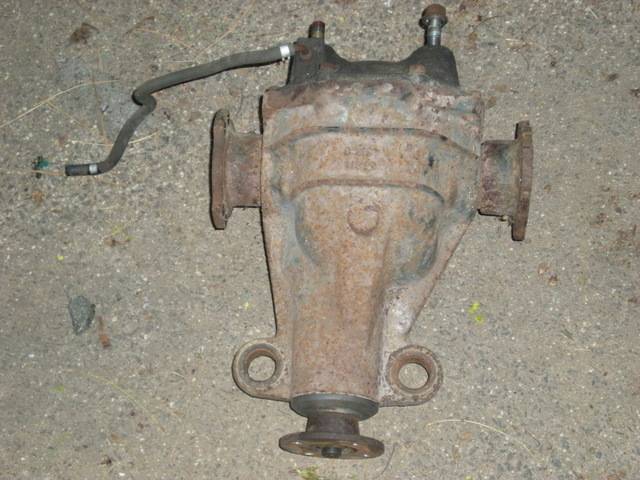
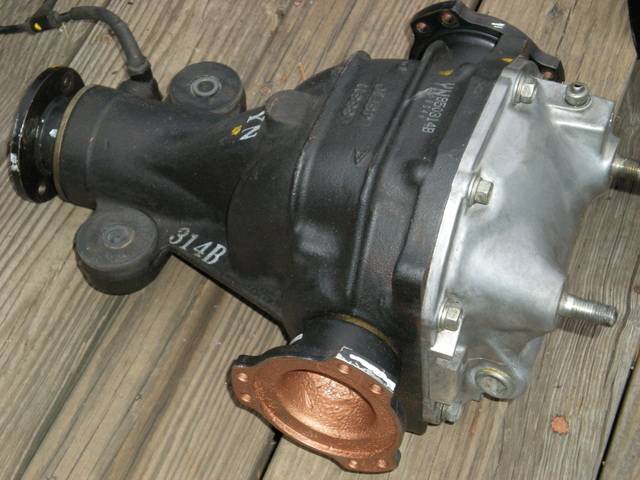
Aside from looking like I pulled it from the bottom of a lake, the open-diff had to go.


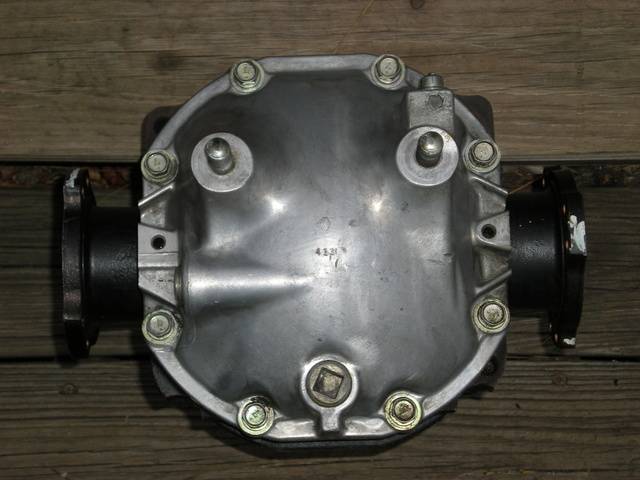
I opted to go with a J30 VLSD, as it was compatible with my 6-bolt axles. It was in excellent condition, and only required minor cleaning. I applied copper anti-seize to the flanges to prevent corrosion.


doyle4281 is offline   Reply With Quote
Old 09-02-2010, 10:12 PM   #18
heavenboundkevin
Zilvia Addict
 
heavenboundkevin's Avatar
 
Join Date: Jul 2007
Location: Las vegas
Age: 33
Posts: 673
Trader Rating: (8)
heavenboundkevin is an unknown quantity at this point
Feedback Score: 8 reviews
if you can answer this for me that would be great.

Why didnt you use a dremel to make the notches and install zerk fittings to make greasing them easier?

is it not necessary? from what i know, people that dont do it just remove the parts to grease them.
__________________
Quote:
Originally Posted by rat240 View Post
sick bro .... hella jdm foshow i love haters
heavenboundkevin is offline   Reply With Quote
Old 09-02-2010, 10:20 PM   #19
doyle4281
Premium Member
 
doyle4281's Avatar
 
Join Date: Jun 2006
Location: New Jersey
Age: 35
Posts: 584
Trader Rating: (20)
doyle4281 is on a distinguished road
Feedback Score: 20 reviews
Quote:
Originally Posted by heavenboundkevin View Post
if you can answer this for me that would be great.

Why didnt you use a dremel to make the notches and install zerk fittings to make greasing them easier?

is it not necessary? from what i know, people that dont do it just remove the parts to grease them.
The installation of zirc fittings is new to me, however seems like an efficient means of lubricating the bushings. I may decide to install them down the road, as it seems to be pretty simple, however it is too late now. The old fashion way will have to do until then.
doyle4281 is offline   Reply With Quote
Old 09-02-2010, 10:45 PM   #20
codyace
Post Whore!
 
codyace's Avatar
 
Join Date: Dec 2004
Location: Poconos, PA
Age: 36
Posts: 8,030
Trader Rating: (58)
codyace is close to perfectioncodyace is close to perfectioncodyace is close to perfectioncodyace is close to perfectioncodyace is close to perfectioncodyace is close to perfectioncodyace is close to perfectioncodyace is close to perfectioncodyace is close to perfectioncodyace is close to perfectioncodyace is close to perfection
Feedback Score: 58 reviews
Send a message via AIM to codyace
Your work is great, and effort even better

But if I had to suggest anything, it would really behoove you to look into the Roll Center Thread on Zilvia, as well as checking out NissanRoadRacing for some tips/suggestions/better ideas in regard to parts for your rear subframe...some of the work you're performing on stock parts could easily be spent on upgraded ones, which would really benefit your car.

Again, great stuff, but do some real suspension modification searching and you'll thank all of us for getting at it while the subframe is off the car, rather than on.
__________________

Want Air Conditioning in your SR20 Swapped car? Check out www.sr20acbrackets.com for more information!

Quest Alternator Conversions for SR20! Check my Group Buy!

Tired of lousy internal gates? Go external wastegate with one of my manifolds, Check out my group buy
codyace is offline   Reply With Quote
Old 09-02-2010, 11:36 PM   #21
upsdude
Post Whore!
 
upsdude's Avatar
 
Join Date: Apr 2009
Location: Fontana (the good part)
Posts: 2,721
Trader Rating: (46)
upsdude is an unknown quantity at this point
Feedback Score: 46 reviews
cool write up, where did you get the copper flanges for your diff?

any particular reason why you went with poly subframe bushings over solid?
upsdude is offline   Reply With Quote
Old 09-03-2010, 01:44 AM   #22
az_240
Post Whore!
 
az_240's Avatar
 
Join Date: Jan 2006
Location: Phx
Posts: 3,097
Trader Rating: (41)
az_240 is just really niceaz_240 is just really niceaz_240 is just really niceaz_240 is just really niceaz_240 is just really niceaz_240 is just really niceaz_240 is just really niceaz_240 is just really niceaz_240 is just really nice
Feedback Score: 41 reviews
Send a message via AIM to az_240
Watch out for those rear lower control arm ES bushings too... those binded the worst when I had them on my car. Same deal as the uprights... trim or washers so the poly does not get sandwiched and bind against the brackets. I trimmed mine down with the side of a stone grinder (keeps the trim flat)... just don't trim them too much or the arms will move around as the suspension travels. It's best if the inner sleeves are flush or barely sticking out from the poly bushing.

You could chop those ES subframe bushings down a little on the top to raise the subframe and correct the geometry some if your car is lowered.

Not sure what else he could upgrade for about the same amount of money.... every quality adjustable part costs a good amount. Looks like a good "stockish" build.
az_240 is offline   Reply With Quote
Old 09-03-2010, 09:36 AM   #23
projectRDM
Post Whore!
 
projectRDM's Avatar
 
Join Date: Dec 2002
Location: Atlanta
Age: 47
Posts: 13,812
Trader Rating: (12)
projectRDM is close to perfectionprojectRDM is close to perfectionprojectRDM is close to perfectionprojectRDM is close to perfectionprojectRDM is close to perfectionprojectRDM is close to perfectionprojectRDM is close to perfectionprojectRDM is close to perfectionprojectRDM is close to perfectionprojectRDM is close to perfectionprojectRDM is close to perfection
Feedback Score: 12 reviews
While the subframe was out I would have replaced the rear differential bushings too.

Otherwise good work.
__________________
FORMERLY R240NA

Learn what's really going on and protect your assets now before they're gone forever: www.paypalsucks.com
projectRDM is offline   Reply With Quote
Old 09-03-2010, 12:19 PM   #24
codyace
Post Whore!
 
codyace's Avatar
 
Join Date: Dec 2004
Location: Poconos, PA
Age: 36
Posts: 8,030
Trader Rating: (58)
codyace is close to perfectioncodyace is close to perfectioncodyace is close to perfectioncodyace is close to perfectioncodyace is close to perfectioncodyace is close to perfectioncodyace is close to perfectioncodyace is close to perfectioncodyace is close to perfectioncodyace is close to perfectioncodyace is close to perfection
Feedback Score: 58 reviews
Send a message via AIM to codyace
Quote:
Originally Posted by upsdude View Post
any particular reason why you went with poly subframe bushings over solid?
While not speaking for him, I know I personally went with them to keep noise down, while performance there. To be quite honest, the durameter of the ES stuff is very hard, and I can't particularly see a huge advantage of the aluminum, at least in my lifetime.


Quote:
Originally Posted by az_240 View Post
Not sure what else he could upgrade for about the same amount of money.... every quality adjustable part costs a good amount. Looks like a good "stockish" build.
My comment was directed at trimming the top of the subframe bushings down (and the metal sleeve), possibly filling the subframe with foam while it's out (great cheap modification), maybe welding some gussets on the OE lower control arms to replicate 'nismo' ones, etc etc...small things. It wasn't meant as a 'you're doing it wrong' but more of a 'while it's out, maybe address these issues' kinda thing.
__________________

Want Air Conditioning in your SR20 Swapped car? Check out www.sr20acbrackets.com for more information!

Quest Alternator Conversions for SR20! Check my Group Buy!

Tired of lousy internal gates? Go external wastegate with one of my manifolds, Check out my group buy
codyace is offline   Reply With Quote
Old 09-03-2010, 03:08 PM   #25
doyle4281
Premium Member
 
doyle4281's Avatar
 
Join Date: Jun 2006
Location: New Jersey
Age: 35
Posts: 584
Trader Rating: (20)
doyle4281 is on a distinguished road
Feedback Score: 20 reviews
Quote:
Originally Posted by upsdude View Post
cool write up, where did you get the copper flanges for your diff?

any particular reason why you went with poly subframe bushings over solid?
Thanks man

The flanges were only coated with a copper anti-seize compound to prevent corrosion. After dealing with that rusted disaster, I wanted to be sure I would not have problems like that in the future. Anything that is susceptible to rust, I apply anti-seize to.

I opted to install polyurethane bushings as opposed to solid because the car is not going to see enough track time to merit their benefits. For that very same reason, I did not fill the subframe with foam, weld supports, or other track preparations. I knew realistically that the benefits of those type of upgrades would were not going to be utilized.

Thank you for the comments, and I will keep the updates coming.....
doyle4281 is offline   Reply With Quote
Old 09-05-2010, 11:34 PM   #26
doyle4281
Premium Member
 
doyle4281's Avatar
 
Join Date: Jun 2006
Location: New Jersey
Age: 35
Posts: 584
Trader Rating: (20)
doyle4281 is on a distinguished road
Feedback Score: 20 reviews
Update

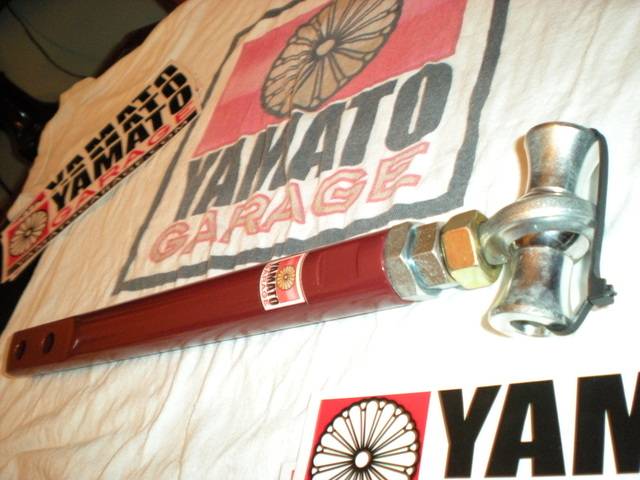
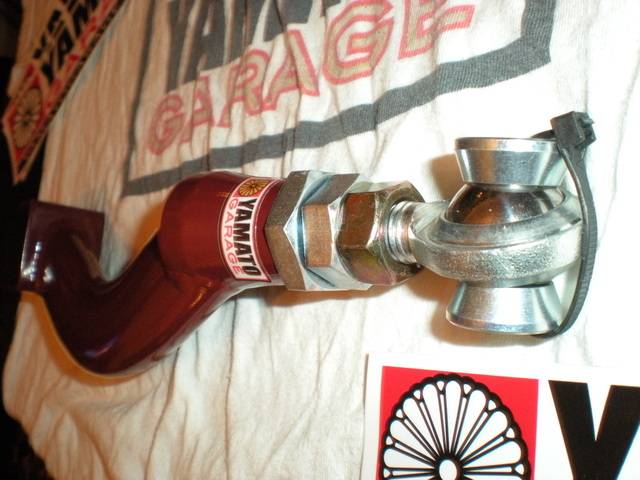
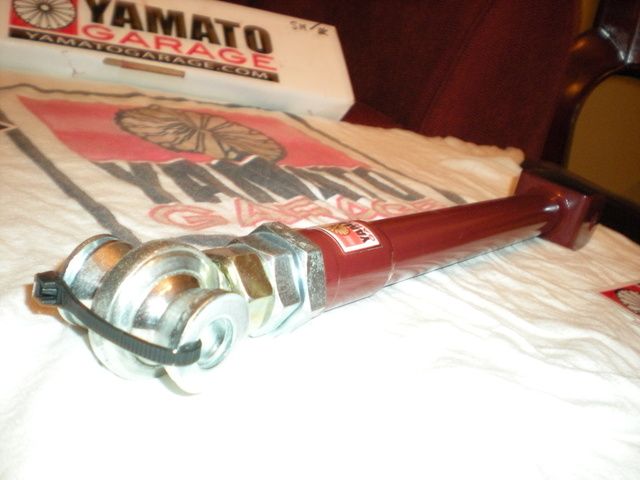
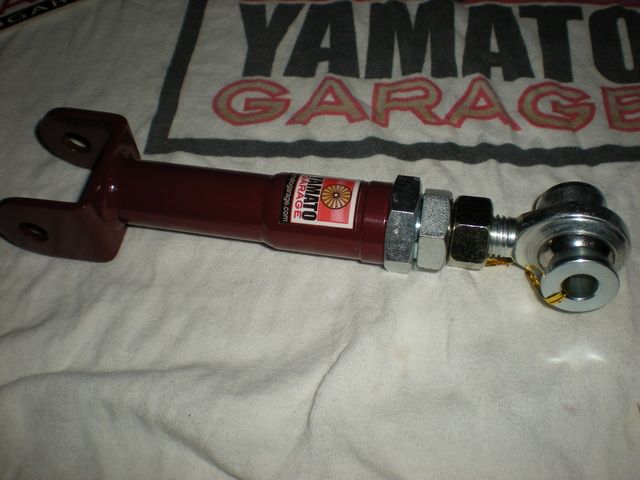
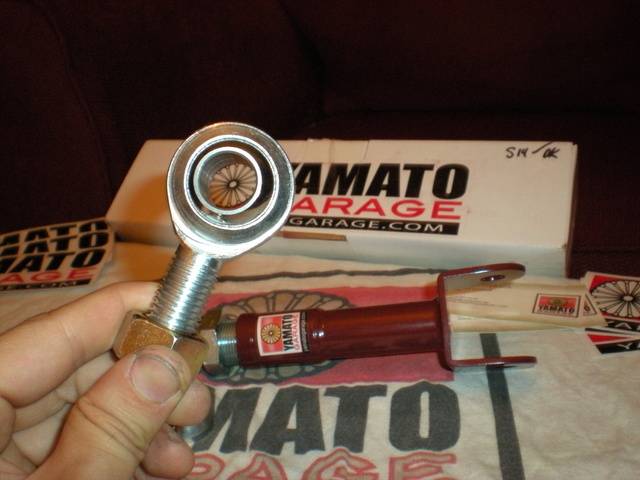
I want to thank Donovan of Yamato Garage for all of his help and patience. The quality and fit of these products are amazing, and for the price you can't get better. They use QA1 rod ends, stainless steel tubing, heat treated hardware, and a powder coated finish. I cannot say enough good things about this company, and the people who run it. Contact Donovan, make mention of the thread, and I am sure he will help with anything you need.

home-yamato garage

I purchased the full set, and for an extra fee, they were powder coated the color of my choice.


QA1 2-piece rod ends, chrome plated ball
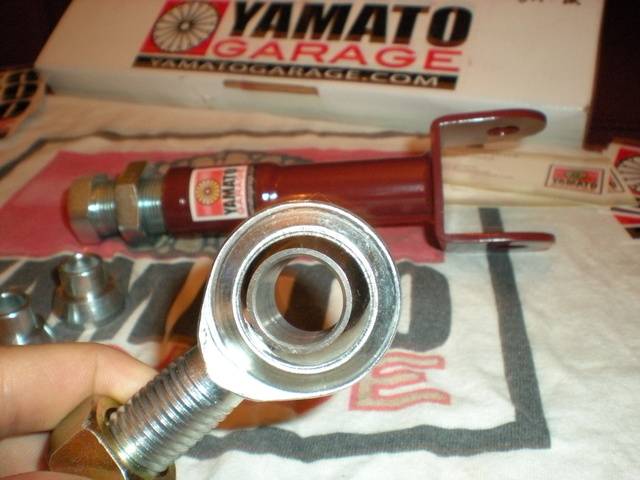

Monobeam T-6061 aluminium tension rod
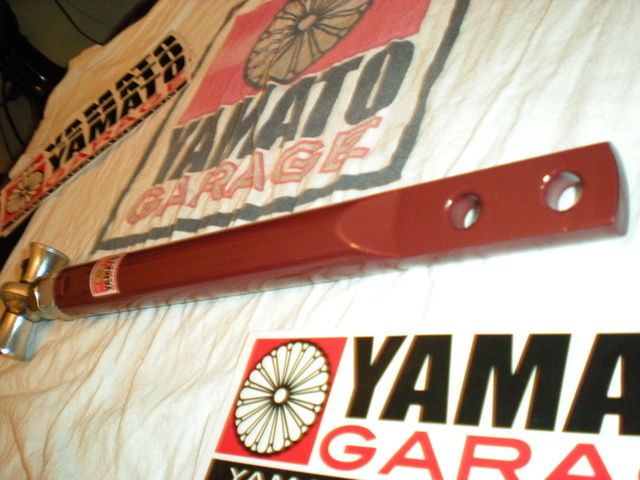


Stainless steel ball-head design RUCA
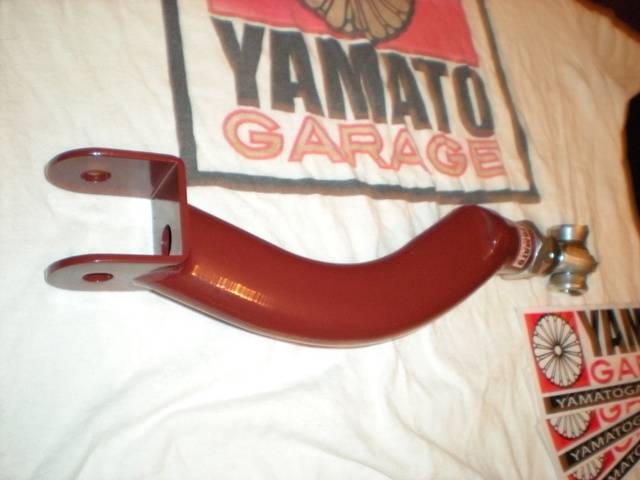


Stainless steel monobeam toe control rod
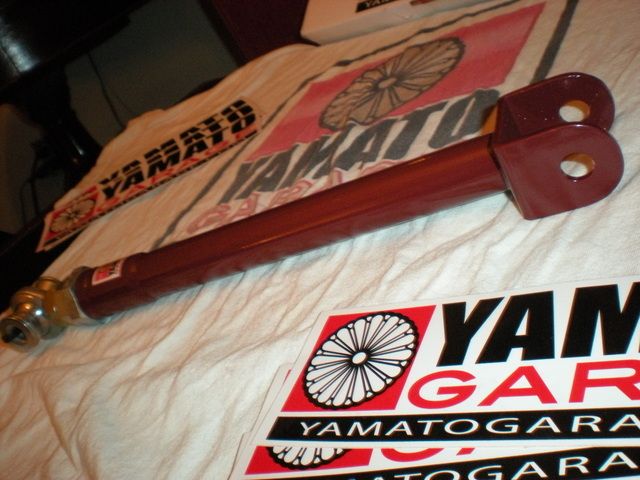


Stainless steel traction rod
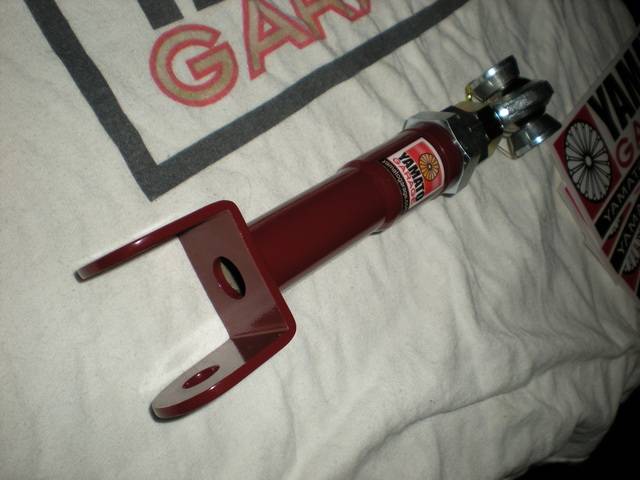


doyle4281 is offline   Reply With Quote
Old 09-06-2010, 12:26 AM   #27
HEI240
Leaky Injector
 
Join Date: Feb 2010
Location: soCAL
Age: 36
Posts: 104
Trader Rating: (8)
HEI240 is an unknown quantity at this point
Feedback Score: 8 reviews
awesome thread makes me wanna look for a spare subframe lol
HEI240 is offline   Reply With Quote
Old 09-06-2010, 09:37 AM   #28
YamatoGarage
Zilvia Junkie
 
YamatoGarage's Avatar
 
Join Date: Jun 2009
Location: st.louis
Posts: 390
Trader Rating: (16)
YamatoGarage is an unknown quantity at this point
Feedback Score: 16 reviews
awsome glad to see you are happy with the parts, and kudos for the build i am glad to see such attention to datail and build quality. keep the pics and info coming i cant wait to see where this is going , great job !

donovan
__________________
www.yamatogarage.com
YamatoGarage is offline   Reply With Quote
Old 09-06-2010, 08:55 PM   #29
godrifttoday
Post Whore!
 
godrifttoday's Avatar
 
Join Date: Jan 2004
Location: los angeles
Age: 37
Posts: 3,120
Trader Rating: (82)
godrifttoday is an unknown quantity at this point
Feedback Score: 82 reviews
Quote:
Originally Posted by codyace View Post


My comment was directed at trimming the top of the subframe bushings down (and the metal sleeve), possibly filling the subframe with foam while it's out (great cheap modification), maybe welding some gussets on the OE lower control arms to replicate 'nismo' ones, etc etc...small things. It wasn't meant as a 'you're doing it wrong' but more of a 'while it's out, maybe address these issues' kinda thing.
Hey u mention to fill the subframe with foam , are u referring to the foam they sell on homedepot? And u also mention bracing the lower control arm brackets like nismo, do u have a pix of what u are refeering to? Since I am also working in my rear subframe but it's an s13. From what I notice my diff doesn't have a bushing where it's mounted to is this only for s14 which have bushings on the diff? Thanks!
godrifttoday is offline   Reply With Quote
Old 09-07-2010, 05:27 PM   #30
doyle4281
Premium Member
 
doyle4281's Avatar
 
Join Date: Jun 2006
Location: New Jersey
Age: 35
Posts: 584
Trader Rating: (20)
doyle4281 is on a distinguished road
Feedback Score: 20 reviews
Update

I did a test fit of all the suspension arms, and everything fit great.


doyle4281 is offline   Reply With Quote
Reply

Bookmarks


Thread Tools
Display Modes

Posting Rules
You may not post new threads
You may not post replies
You may not post attachments
You may not edit your posts

BB code is On
Smilies are On
[IMG] code is On
HTML code is Off

Forum Jump


All times are GMT -6. The time now is 05:55 AM.


Powered by vBulletin® Version 3.8.11
Copyright ©2000 - 2021, vBulletin Solutions Inc.
vB.Sponsors
Copyright © 1998 - 2019, Zilvia.net™