
 |
|
|||||||
| Home | Rules & Guidelines | Register | Member Rides | FAQ | Members List | Social Groups | Calendar | Mark Forums Read |
| Builds (and builds only) Got a build thread? It goes here, build threads anywhere else on the forum will be locked and never moved. |
 |
|
|
Thread Tools | Display Modes |
|
|
#61 |
|
Zilvia Junkie
 |
I started to make cooling panels too, to try and direct air through the radiator. that fan i have does work tho. temps shoot right down whether im driving or stationary with that thing on.
|
|
|

|
| Sponsored Links |
|
|
#62 |
|
Leaky Injector
Join Date: Feb 2008
Location: In a van down by the river
Posts: 69
Trader Rating: (3)
 Feedback Score: 3 reviews
|
Honestly, the best thing I ever did for my RB25det swapped S13 was cutting the core support moving the radiator forward an inch or two and running a Taurus fan. I'm pretty sure that is GODS gift to the electric fan world.
|
|
|

|
|
|
#63 |
|
Zilvia Junkie
 Join Date: Jun 2010
Location: Arizona/LA, California
Posts: 476
Trader Rating: (3)
 Feedback Score: 3 reviews
|
I would recommend putting in vents / air tubes to go around the radiator. Basically just like how you can have tubes for the track car that go from the front bumper to the brake rotors, do the same but have them go to the engine if you are going to keep the electric fans.
Common issue out here is air flow. A lot of people will go with aftermarket radiators and dual fan setups which work great when not moving but the fans normally have very little room to allow air to pass through when on the freeway or moving. Often recommended keeping the clutch fan on most engines due to this. In our state at least (Hell). We would put the vent tubes in some cars that were dailied and it would work great because it would provide the air needed and they didnt have to get rid of the fans for when they arent moving. Solved many heating issues. Recommended to try. Shouldnt cost more than about $20 for the Tubes from Home Depot if that. Love the build. I love verts and want one someday to do a removable hard time too. Something I have been wanting to do for a long time but never have the money or time to do. Thank you for sharing your build.
__________________
S14 KA NA two cylinders, 75whp limper |
|
|

|
|
|
#64 | ||
|
Zilvia Junkie
 |
Quote:
Quote:
Oh and I'd love to do a hard top project soon, maybe next year....BUT my kit, wheels and paint are coming along for this year. Most of my parts have started arriving and prep for install is planned for August. I've recently bought some 18s Riverside/SSR Altstadts from VRWheels. 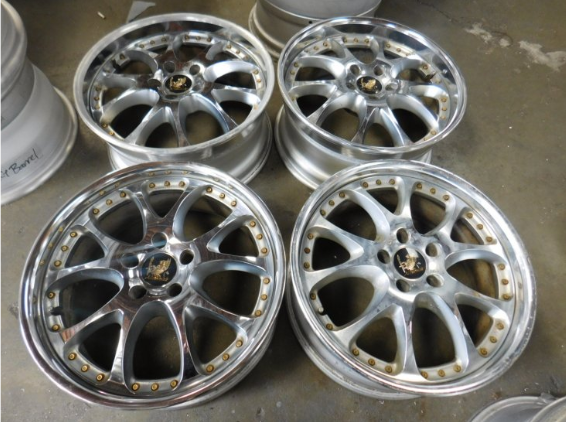 I've had them relipped as shown below, I use willtheyfit.com for those trying to find good sites to help pick a size. 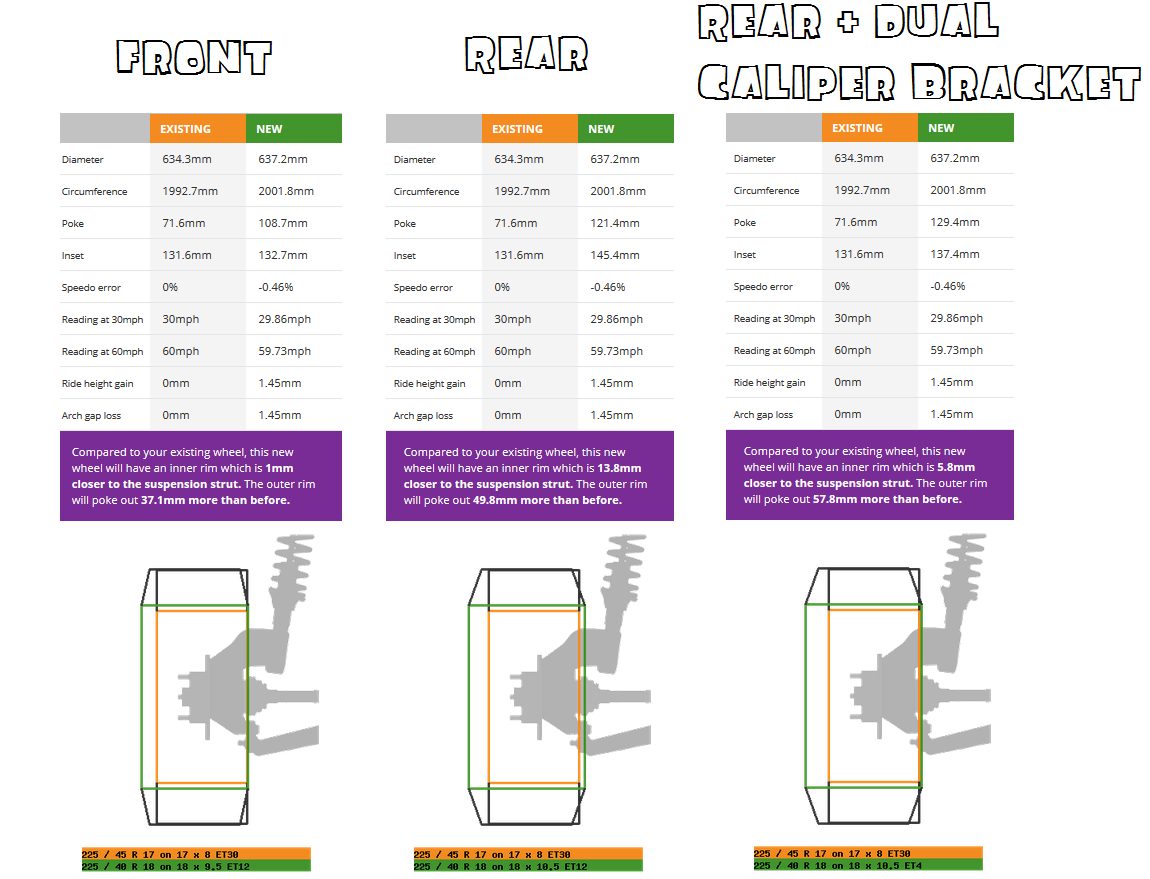 I'll get a picture of them relipped and polished once tires arrive this week. |
||
|
|

|
|
|
#65 |
|
Zilvia Junkie
 |
Started installing my Koyo SR N-Flow last night. You know when I cut the stock water elbow for the KA radiator, I had a feeling I'd regret cutting it. Interestingly enough, I did notice the Koyo radiator to be slightly thinner than the ISIS KA one, maybe 1/8" or so.
 Didn't finish last night, gonna stop by Jspec and pull off their water elbow off of a spare 1J they have there. It pays to buy local! The bottom of the radiator is also touching parts of the rad support that need to be clearanced and I have to find a way to deal with that harness under there. Gonna try and reroute under the fans. Maybe this winter I'll finally pull both the fuse boxes into the cabin but it looks like such a pain. I also cleaned up my wheels, lightly polished on the left and "raw" from VR wheels on the right.  |
|
|

|
|
|
#66 |
|
Leaky Injector
 |
Good call getting rid of that radiator. I had two of them fail on me when I had an rb, the tubes swelled up and pinched off all the airflow both times. Worst radiators ever. Outperformed by the stock unit.
|
|
|

|
|
|
#67 |
|
Zilvia Addict
 |
I've been messing with ways to run the harness beneath all that shit too. When I get back to the car I'll take some pics, maybe you can get some ideas from what I end up doing or vice versa
|
|
|

|
|
|
#68 |
|
Zilvia Junkie
 |
I've stock piled quite a few parts over this year and looking to do the last major installs for this car. I'm pretty excited as this car has never been much of a looker and been neglected in that respect.
Below are my wheels, 5lug swap, Maverick motorsports dual caliper, PBM HMIC, and Z32 brakes. Unfortunately 4 of my Z32 calipers need rebuilds so they wont be going on now but the legwork to install them will be done (maverick+5lug)  As mentioned, I'm only installing the rear Z32 calipers now to have functioning brakes. Hydro and fronts are to be installed at a later time once rebuilt. For maverick you have to cut the stock caliper brackets off.  I decided to make things more complicated and started redoing my carpet. I've always hated the gray but couldn't justify the cost of new carpet in a mostly track/weekend car. I used the Duplicolor carpet paint and it turned out great! Slightly stiffer feeling but not clumpy or flaky like I thought it would turn out. 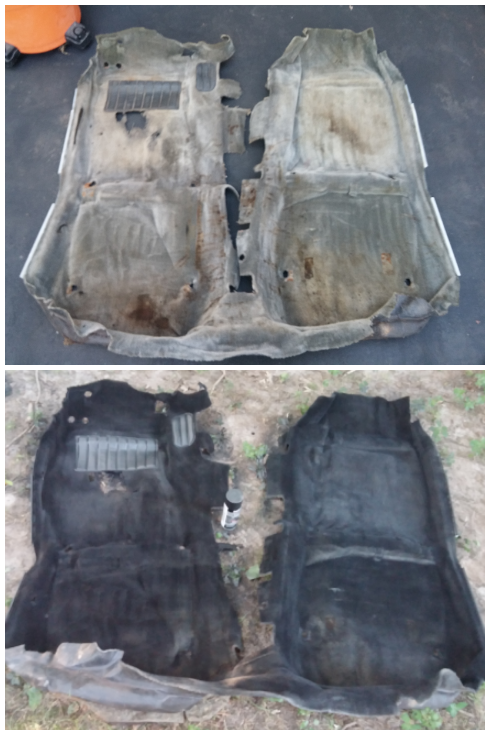 Here's my HMIC install in progress. Minimal cutting but it definitely required you to be willing to cut away at everything. Unfortunately with my radiator tilted forward, it made the install a little tight and I'll have to get creative to reinstall my bumper support bracket.  I also began fitting the wheels with a fender roller and torch. Turned out great but tight. These are 18x10.5 +12 wheels but with the maverick bracket have an effective offset of +4. This made fitting my 245/40/18 tires tough so I'm going down to a 235/40 and selling my 245s to a friend. Really trying to avoid overfenders to keep the cost slightly down.  Definitely have some work to do still but things are going well. I'll get some better pictures of everything together once it's back on the ground and driving again. Last edited by bmaddock; 09-02-2016 at 08:05 AM.. |
|
|

|
|
|
#70 |
|
Zilvia Junkie
 |
Aiming to drive the September 10th event at Shenandoah Speedway with some friends.
Tried fixing my shifter flop. I have a tripod style R154 from either a JZX100 Chaser or a Soarer. Removed the weak rubber bushings and put in solid ones. Also waiting on a Marlin Crawler upgraded socket bushing (see top right) 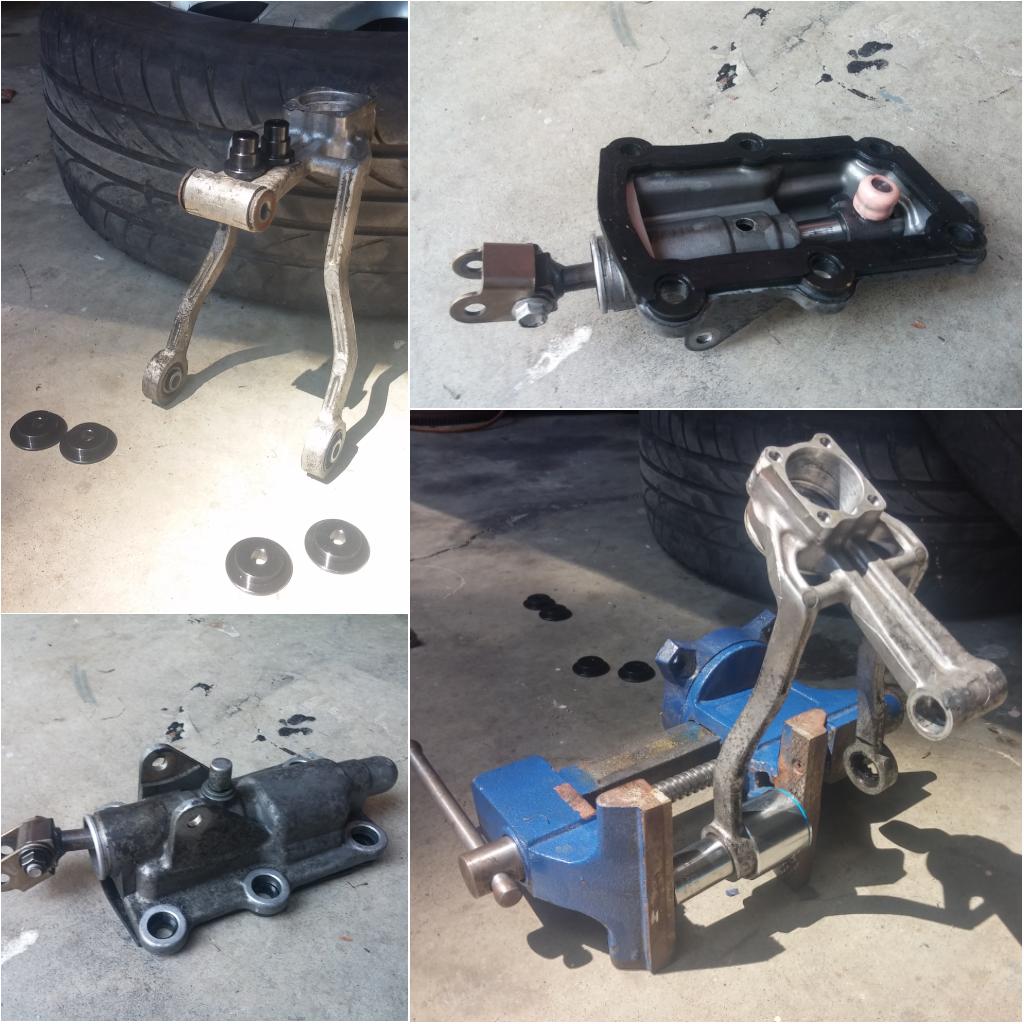 Pretty easy to take apart with trans still in the car. I need to get a new hot pipe welded up for the HMIC and modify the flipup headlight motor to work in its new position and extend the rod. Might try and get unpainted kit and hood vent on before then too. |
|
|

|
|
|
#71 |
|
Zilvia Member
 |
Your car keeps getting better and better man. Keep it up!
__________________
'95 240 | @SleepySteve72 |
|
|

|
|
|
#74 |
|
Zilvia Junkie
 |
I haven't updated in a while, just been doing other things. Been driving the car recently to get ready for 100 DoD at Summit Point. Cooling issues have been resolved with the HMIC install and the car is running great. Still shoots massive flames even without the VTA BOV hahah. The shifter bushings have made an amazing difference in trans feel, I now have a nice and crisp shifting R154.
Here's some pics of the kit and last weekend fun. Drifty pics after Dec 4th. Paint got pushed to early 2017 due to shop availability.  Got my headlight motors to work with the HMIC. Relocated the motor and bent/welded these extension rods.   Went cruising with friends, all with six cylinders. (VQ, RB, 1J, RB 1J). Andy's mark II was the fastest that night.   And put my wheels on hokie240's car. He's waiting on lips so we laid his faces on mine. Sil80s don't suck, no matter what zilvia says hahaha.  I also picked up some RPF1 rep spare wheels that look kinda cool.  |
|
|

|
|
|
#75 |
|
Zilvia Junkie
 |
I drove 100 DoD and had a blast, ripped off parts of my body kit throughout the day but it was a great event. I've really only drifted an oval track and a gokart track at this point so full fledged track experience was really new to me and I'm hooked. Hoping to get a truck so I can start towing to tracks that are a little further out for me.
Rolled in hard on the triple car trailer, thanks Andy & Japanese Classics for the ride!  Big Bend on Bridge Course was too fun. I was sloppy learning it but will have revenge next event.  Ended up just taking it all off so I could focus on driving as opposed to keeping my kit on hahah. 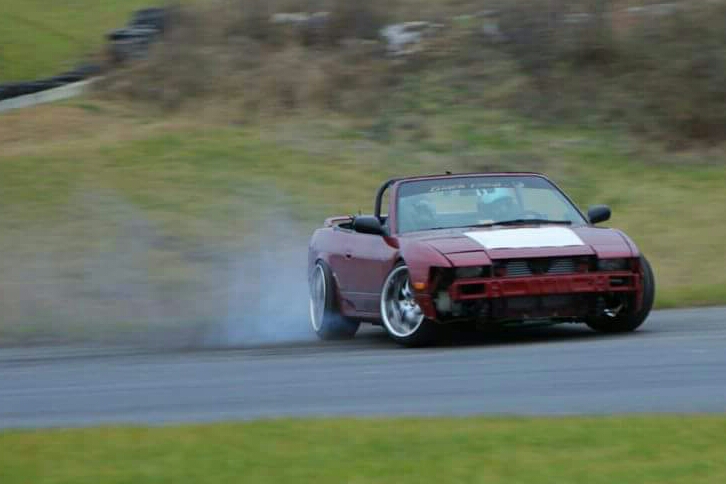 Bought some fiberglass fenders and started the small amounts of repair needed for the kit. FINALLY getting paint over the winter.  Winter builds have started, rebuilding a set of Z32 calipers to upgrade my brakes. I had Q45s that worked but decided to try these out.  Winter Build includes: -Body work -PAINT -Sheet metal wing -Z32 brakes -Hydraulic handbrake -4.3 Ring & Pinion |
|
|

|
|
|
#77 |
|
Zilvia Junkie
 |
Thanks dude. My buddy's JZX81 *was sweet, he literally sold it this week and picked up a silvia. He wasn't a fan of how it felt drifting, not as nimble as schassis.
|
|
|

|
|
|
#78 |
|
Zilvia Junkie
 |
Body work and sheet metal wing in progress. First time really using body filler....less is more hahah. Endless sanding but it's going well thanks to good friends telling me what I'm doing wrong haha.
First up was fenders. I bought some +25mm fiberglass fenders locally and they fit terribly as well as weren't wide enough for my application. Ended up going back to the metal fenders, banging them out as far as I could and then applying body filler to smooth it out. 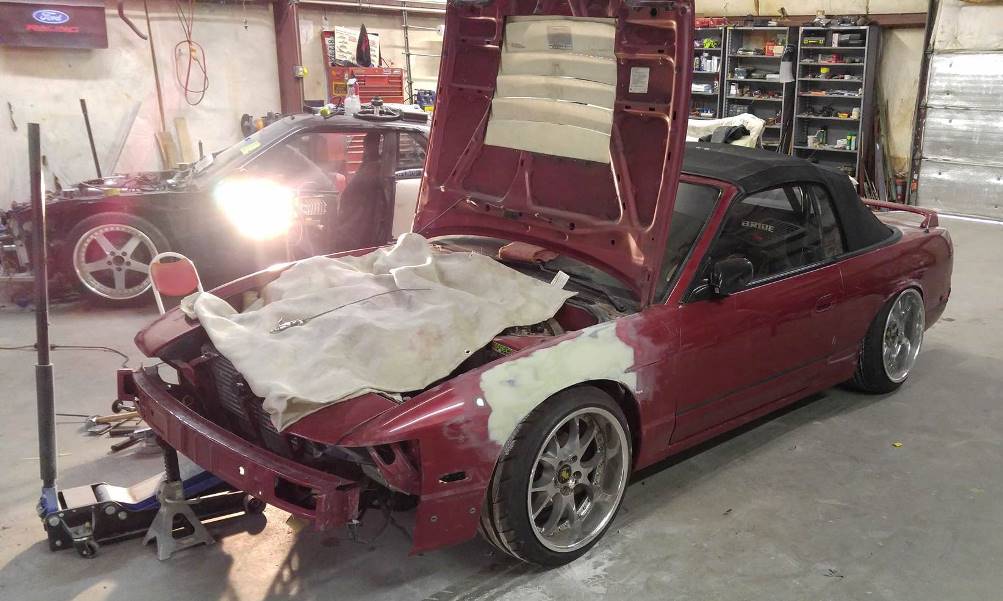 Kit repair is easier than I thought but time consuming. 1. Apply fiberglass cloth and resin. 2. Fill large cracks and repairs with fiberglass reinforced filler. 3. Fill small pin holes and smooth any inconsistencies with regular body filler. 4. Rough patches can be smoothed with 80 grit 5. Smooth whole bumper with 180 so the primer has something to bite into 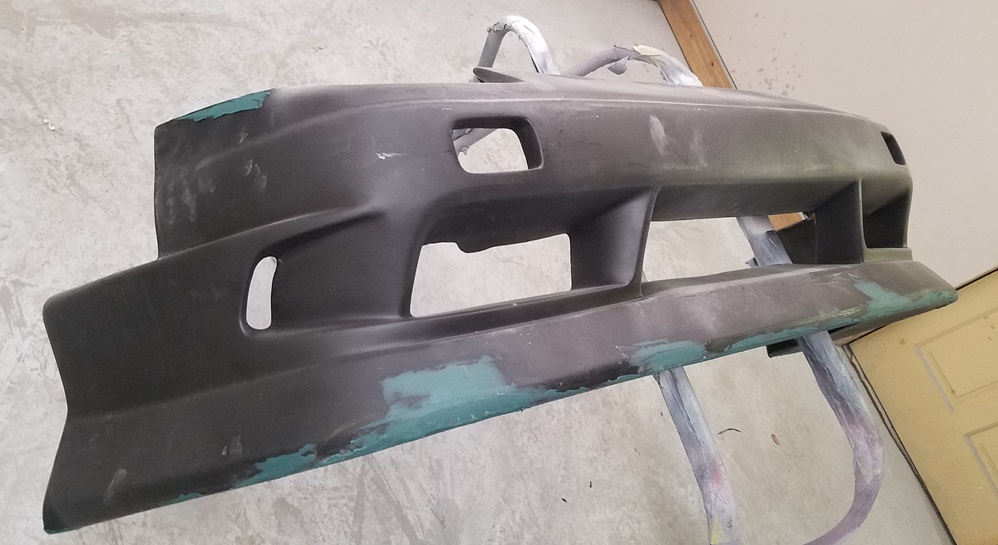 Fooled around with cardboard tubs haha. After I relocate my engine harness I plan on doing tubs. These 18s are huge and I like the way tubs look. Probably won't happen until much later this year. 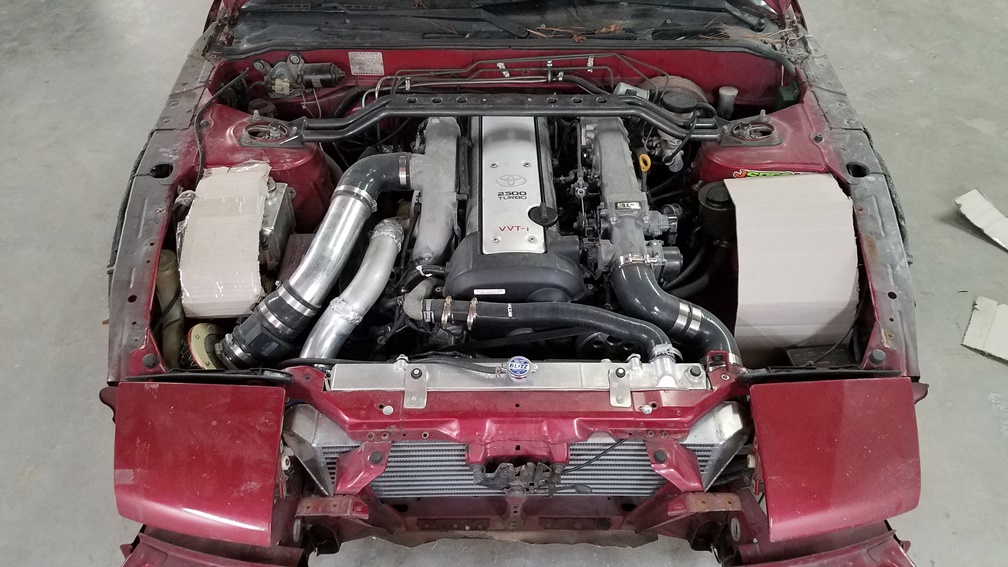 Sheet metal wing went well. I like the idea of adding my own personal touch to the looks of the car so wanted at least one part that I made myself. Was super easy to do and came out nice looking. Better pictures soon. 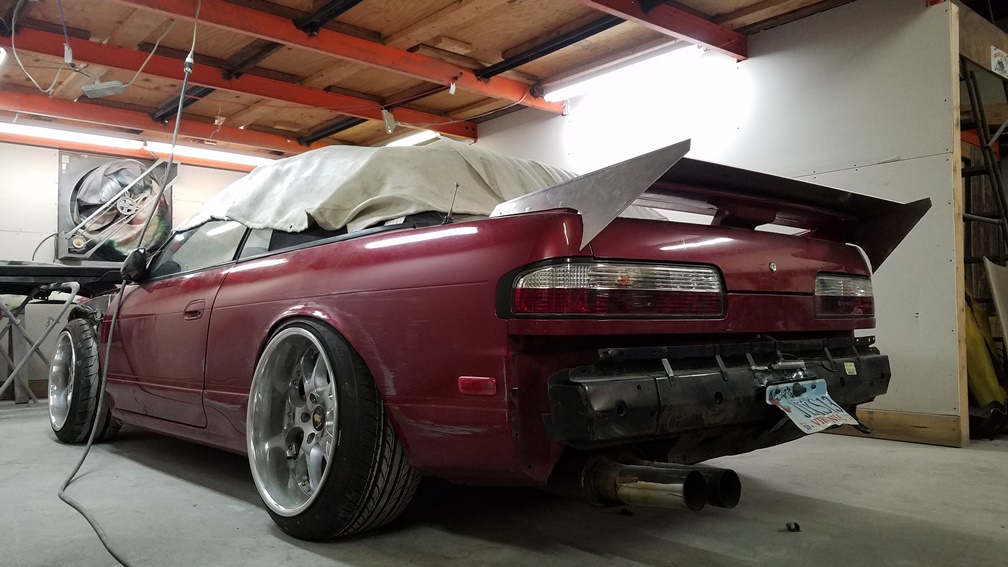 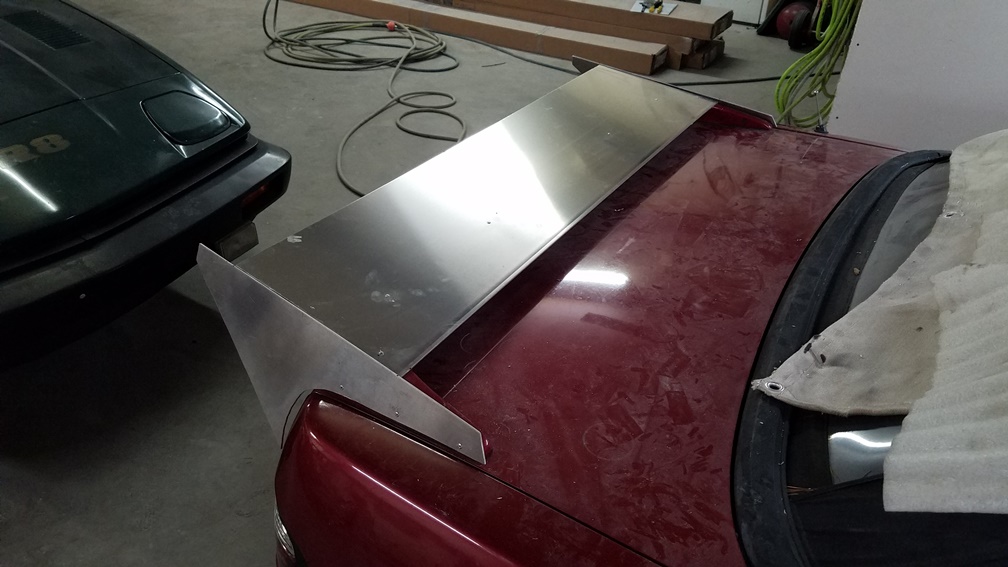 I might close off the sections you can see the stock wing but for now I'm happy with it. |
|
|

|
|
|
#79 |
|
Zilvia Junkie
 |
Paint is taking me forever. I'm doing it myself at a friend's shop who has patiently guided me. A little bit of everything from filling dents, fiberglass repair and rust removal. This is my first time doing a lot of this so it's been a fun challenge. Feel free to ask if you want to know how.
Dents filled and ready for primer  S13 vert's came over from Japan as coupes and were chopped up in CA. They didn't seal them well and are prone to rust. Ground out most of it, applied POR15, and then filled to smooth.  You can see I had two spots of fresh filler I needed to smooth out still.  I then primed the car last weekend. Primer is only needed on areas you repaired but I did do the entire body kit.  Rest of the stock paint has been roughed. I'm letting the primer dry a few days before I sand it smooth. Then I'm going to using a sealer and topcoating this next weekend. |
|
|

|
|
|
#81 |
|
Zilvia Junkie
 |
It’s painted! Awesome experience, years of puff bombing bike frames and small stuff has paid off. I decided on single stage paint (Delfleet Essentials) since its worked well on friends’ cars and is cheap. It laid well and can’t wait to reassemble and see how it really came out.
Before wiping and masking. The damage areas aren't that large but primer is sprayed on areas we repaired, easier to connect them all and block smooth.  I started with the small stuff. Honestly these were more challenging than the car itself and had to have my mentor go over a few where my skill was running out haha. 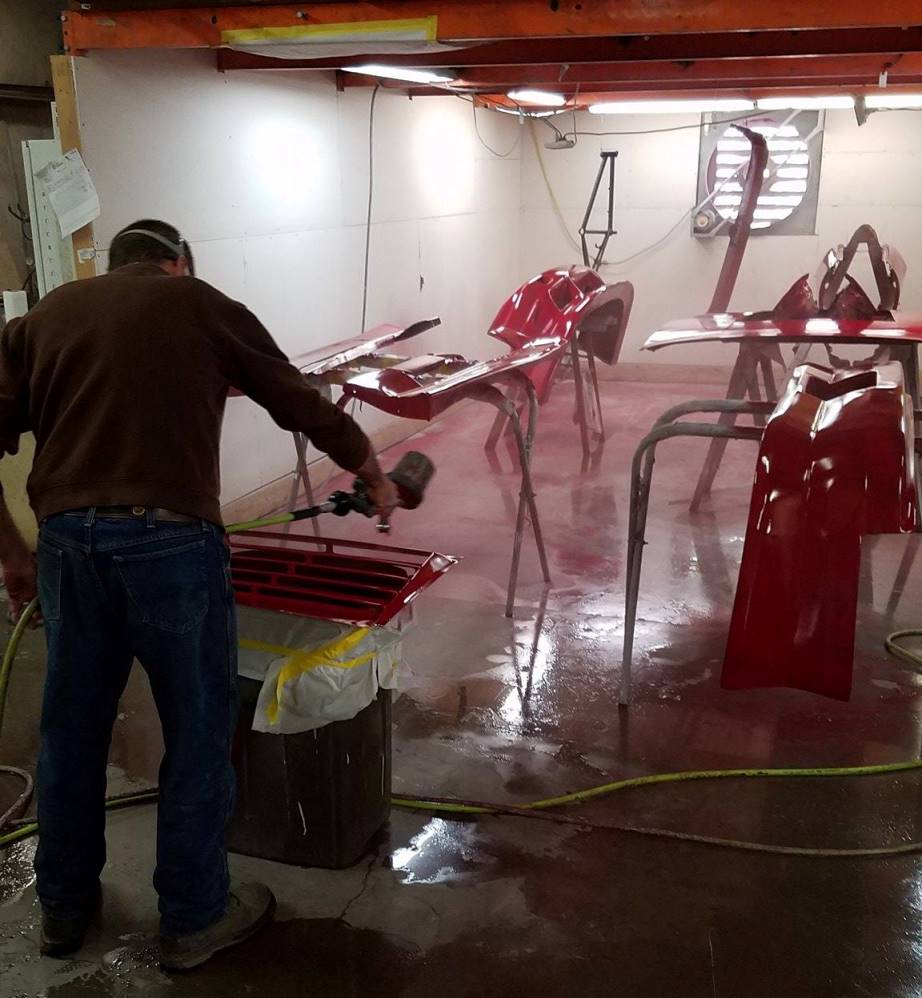 On to the car. Everything is sprayed with a sealer before so that’s why it appears gray. Started with the jams and then work to full coverage. Poor photo quality. 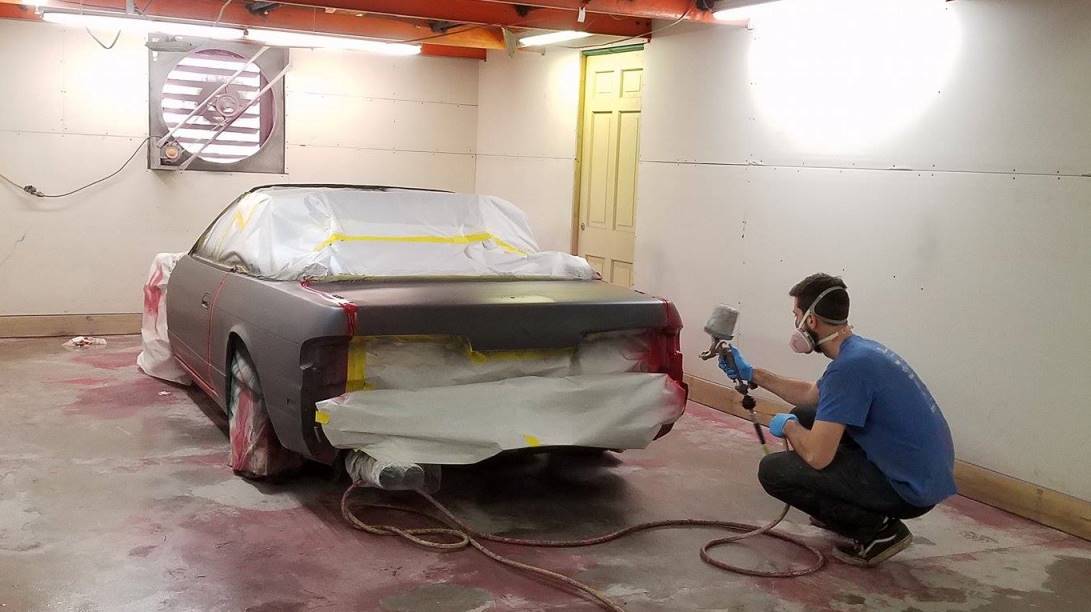 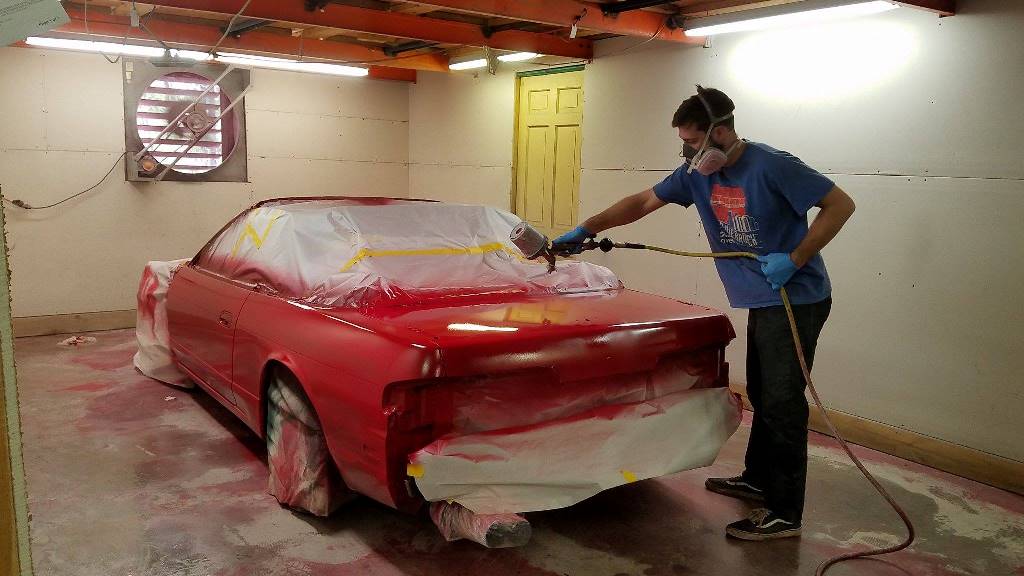 I won’t lie I’m a little nervous about the color but will hold off on judgement until it’s all back together. I took the small pieces outside and really liked how they came out but the body looks like a firetruck or toy car haha. |
|
|

|
|
|
#83 |
|
Zilvia Junkie
 |
The car is mostly done and it's taking some time to finish the last bits of the car. Kit is just thrown on in most pics so ignore some of the body gaps. Came out exactly like I wanted it to. A few small runs I can color sand out but pretty happy for my first time spraying a car. This single stage paint covered pretty well for being a red.
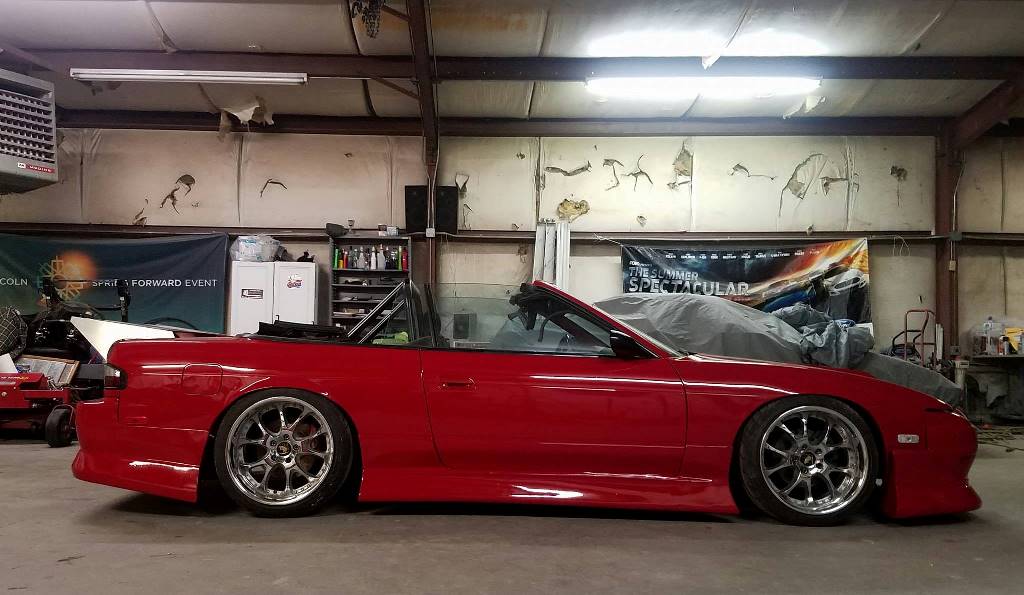 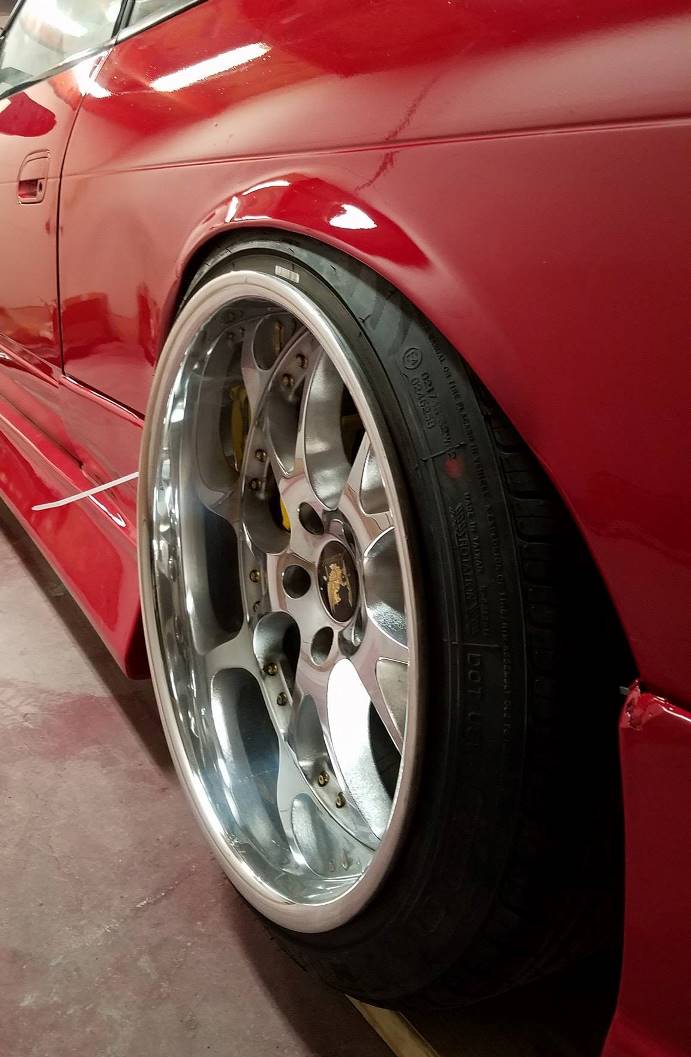 Not much left to be done before spring is here. General maintenance, skid plate, and hopefully hydro ebrake. I also have a 4.36 R&P ready to go in but not sure when I'll tackle that job. Windshield molding was an absolute pain but the rust is gone there now....or at least repaired haha. TBD if i got a water tight seal. 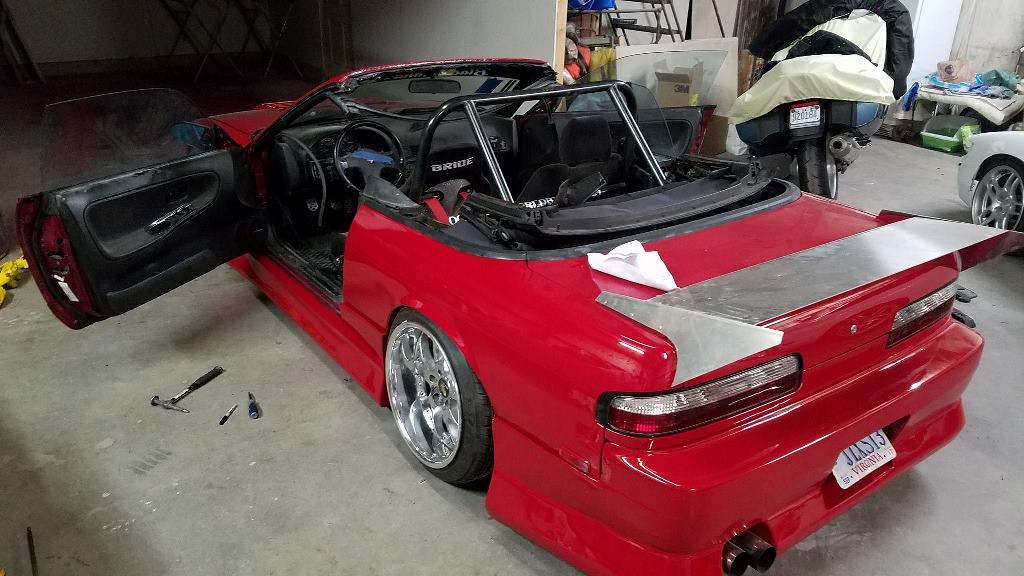 Now my friends and I are prepping his 2J S13 for paint (same color).  |
|
|

|
 |
| Bookmarks |
| Thread Tools | |
| Display Modes | |
|
|