
 |
|
|||||||
| Home | Rules & Guidelines | Register | Member Rides | FAQ | Members List | Social Groups | Calendar | Mark Forums Read |
| Builds (and builds only) Got a build thread? It goes here, build threads anywhere else on the forum will be locked and never moved. |
 |
|
|
Thread Tools | Display Modes |
|
|
#121 |
|
Post Whore!
 |
There's a guy up in Norcal that sells rebuilt T56's for $1800, he's got a few left. His name is Mark, very cool dude, goes by GNX7 online. PM me if you need his number/etc.
__________________
Jordan Innovations has a new web site! www.JordanInnovations.com -- All your favorite FD Pro Drifters love it, trust me -- www.JordanInnovations.com |
|
|

|
| Sponsored Links |
|
|
#122 |
|
Zilvia Junkie
 Join Date: Nov 2004
Location: LA,CA & Windsor, ON
Posts: 443
Trader Rating: (4)
       Feedback Score: 4 reviews
|
My engine has finally arrived. I just havent had time to post any photos of everything. SOON!!
The problem is there's really no other solution out there. I was a bit harsh on the carpet since Im on a deadline and cutting carpet to fit for 6 hours wasnt my idea of fun but if time is on your side then this really shouldnt be an issue. |
|
|

|
|
|
#123 |
|
Zilvia Junkie
 Join Date: Jun 2010
Location: Birmingham, AL
Posts: 359
Trader Rating: (1)
 Feedback Score: 1 reviews
|
If you need any other swap parts like power steering or harness let us know.
-Logan [email protected] 205-623-2188 ext.1 Add us on Facebook Welcome to Facebook - Log In, Sign Up or Learn More
__________________
 IMPROVING PERFORMANCE AND AESTHETICS WHILE SAVING WEIGHT AND SPACE www.ChaseBays.com | [email protected] | (205)623-2188 |
|
|

|
|
|
#124 |
|
Zilvia Junkie
 Join Date: Nov 2004
Location: LA,CA & Windsor, ON
Posts: 443
Trader Rating: (4)
       Feedback Score: 4 reviews
|
Logan - Thanks for the offer. Right now I need to use the factory harness with the setup but I'd love to do a harness in the future. As for power steering I have a line from Sikky that Ill be using.
JaredP - Call RPM and ask them. Every application is different and I got a great deal on mine. |
|
|

|
|
|
#125 |
|
Zilvia Junkie
 Join Date: Nov 2004
Location: LA,CA & Windsor, ON
Posts: 443
Trader Rating: (4)
       Feedback Score: 4 reviews
|
Alright time for a big update.
Motor finally arrived. This is what it looks like and it's shipped freight so having an actual fork lift helps a lot. 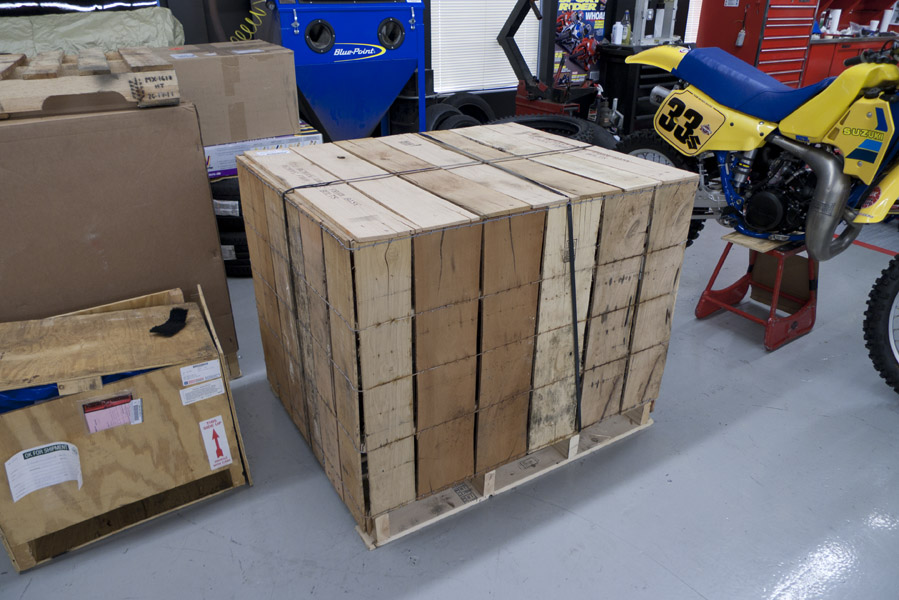 After cracking open the box, Im glad to see everything is unharmed and in one piece. 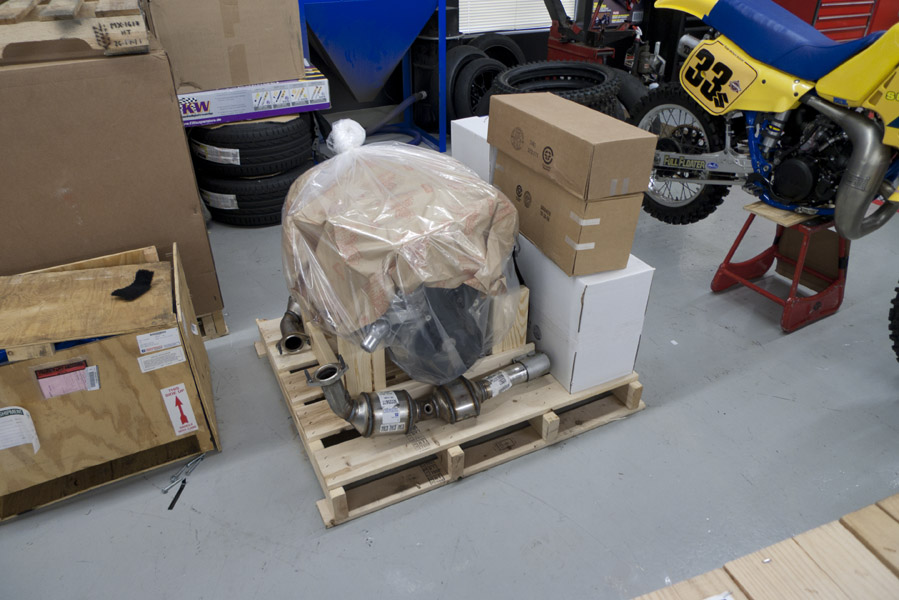 I proceed to yank out the old (but new) LS3 that has resided in my engine bay and put everything back to stock. 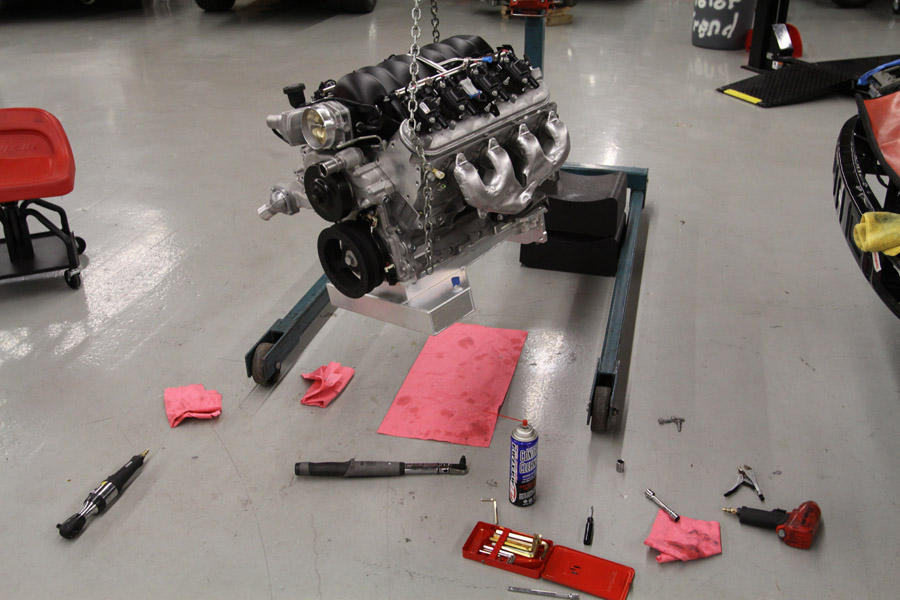 You dont see something like this everyday. Makes me want to take the other one home for a different project but I dont own it so away it goes into storage. 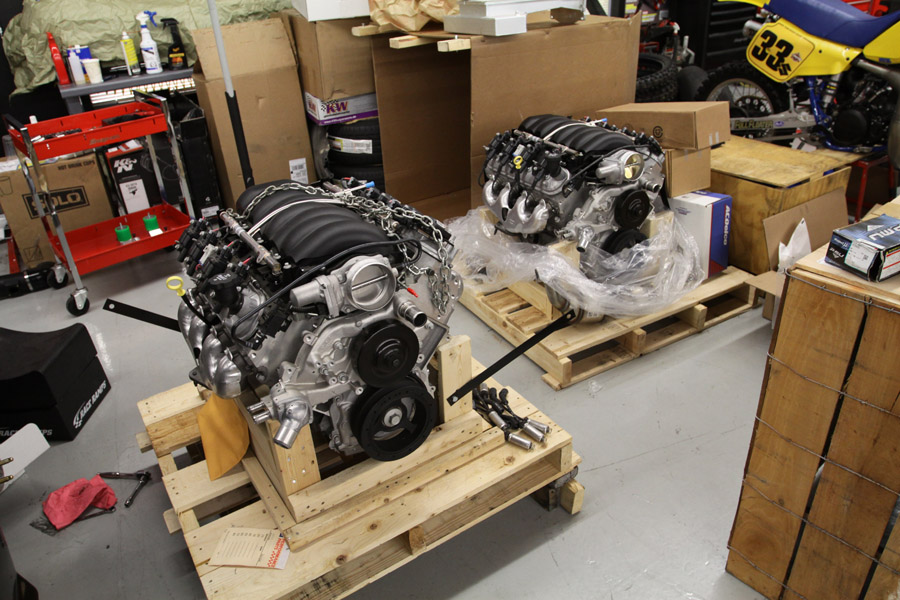 I proceed to install my Sikky oil pan onto the engine. 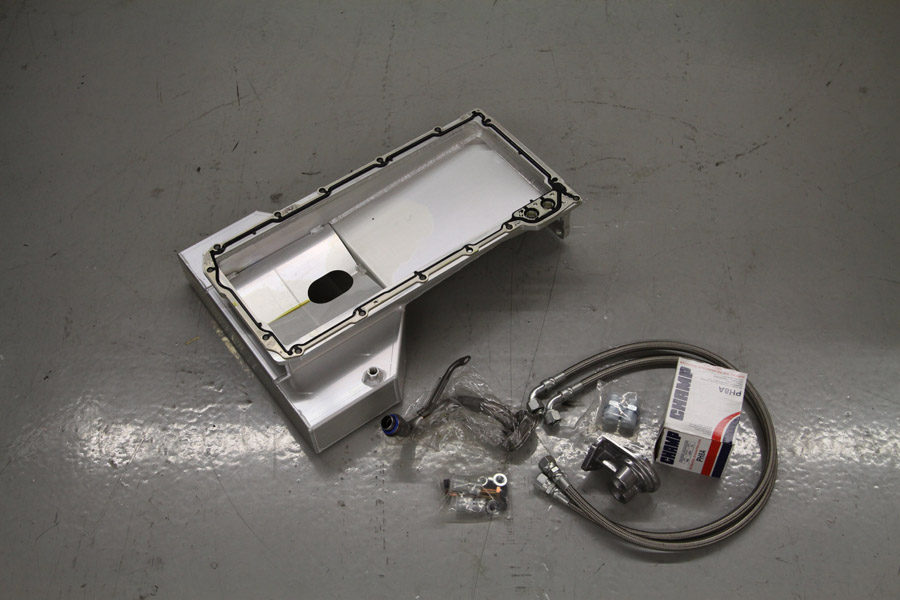 But make the proper modifications needed to the windage tray. 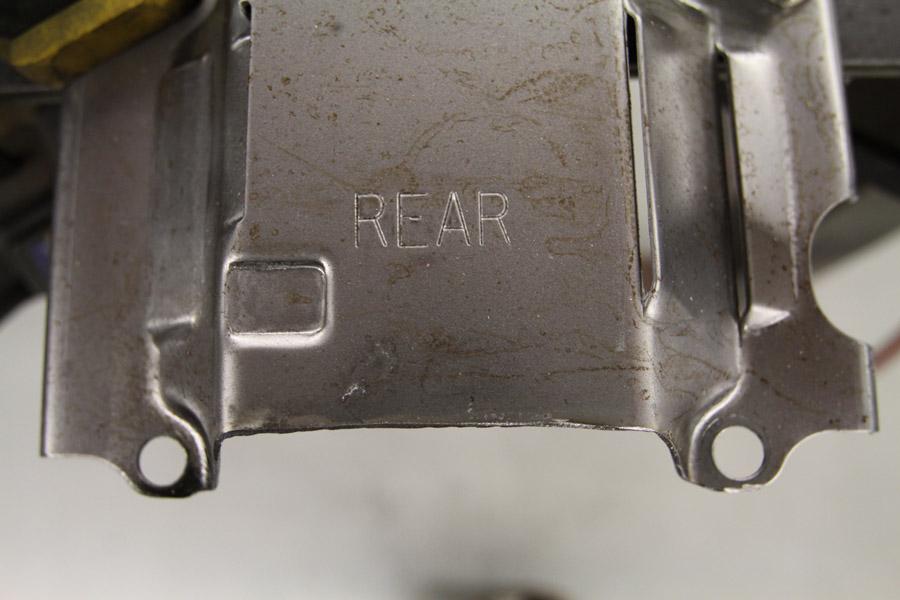 Then I plug the factory dipstick hole. 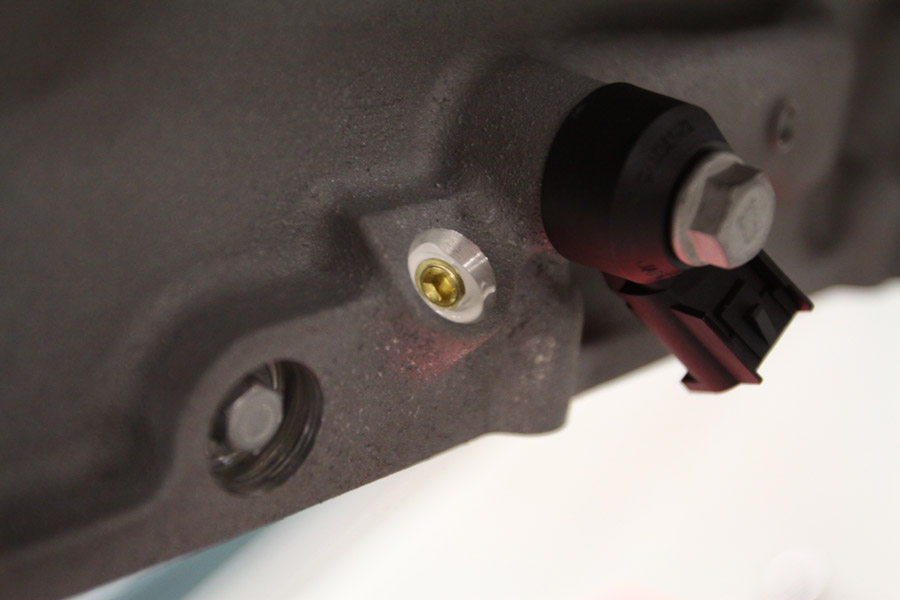 Installed and ready to rock, or lubricate? 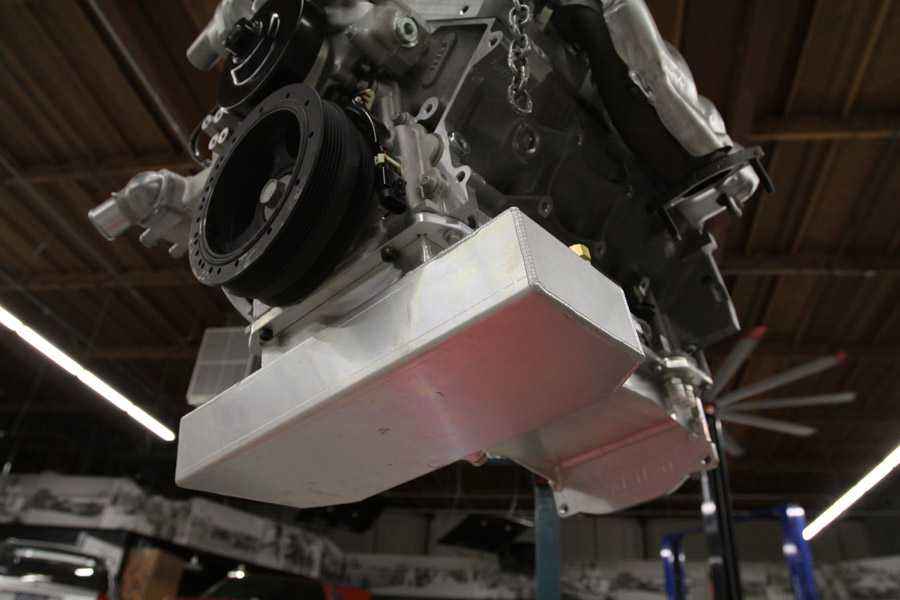 Then I throw both Sikky engine mounts onto the motor. 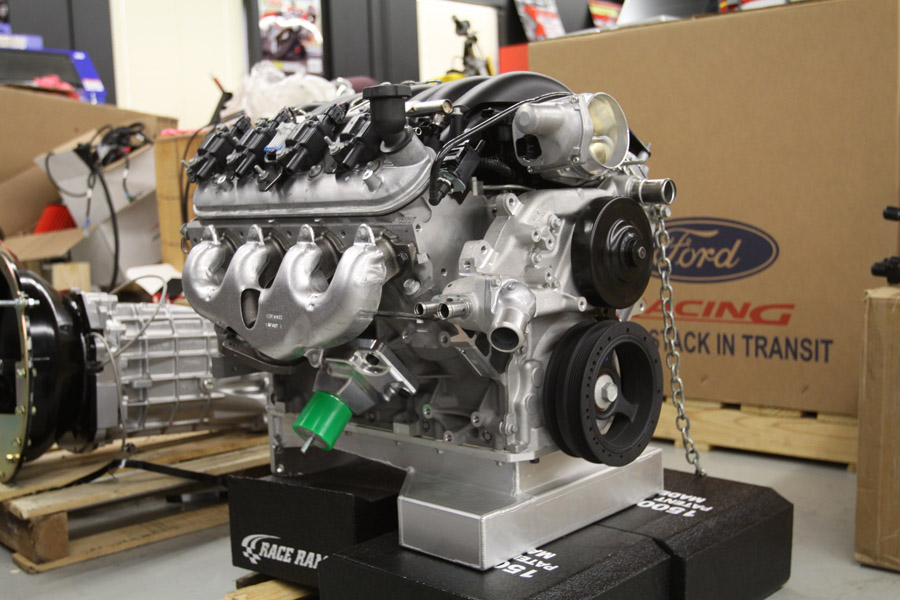 I went with a SPEC stage 2 clutch setup as it's supposed to feel like the stock unit. 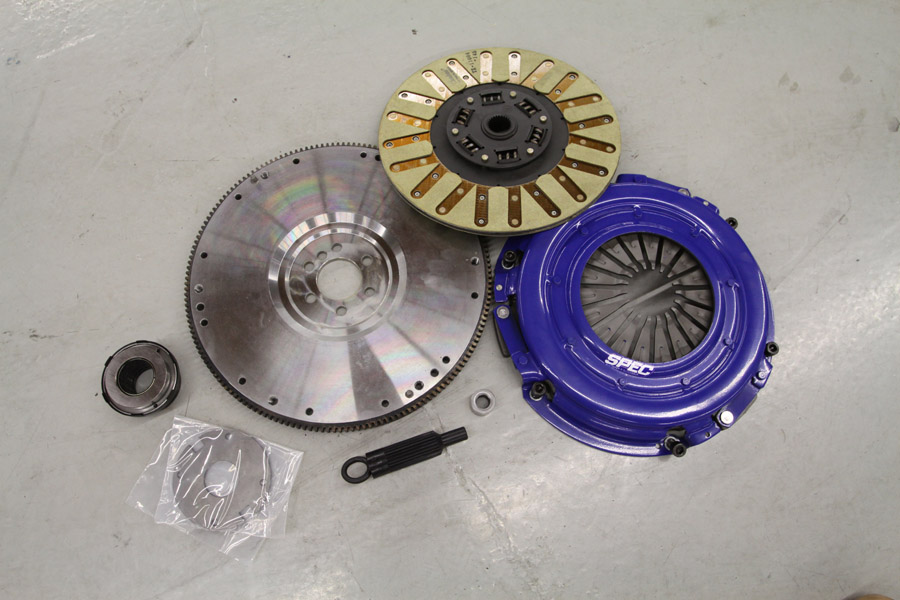 I install it and realize... 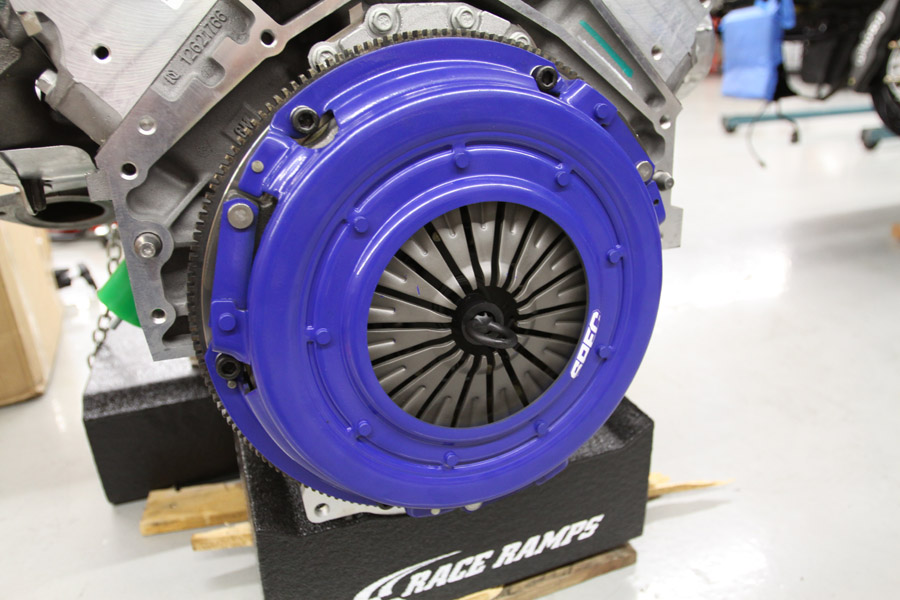 SHIT, I forgot to put the trans mounting plate on. Everything comes off and gets put back on again, I curse many times for my error. 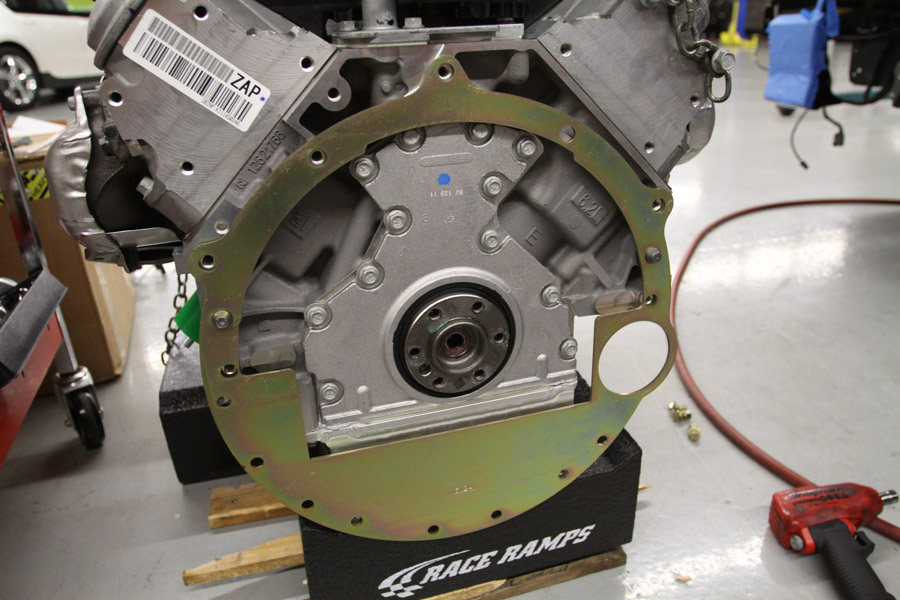 I sourced a brand new stock GM slave cylinder as I heard its the best to run. Sikky once again makes a bolt-on kit that mates to the slave with little fuss. 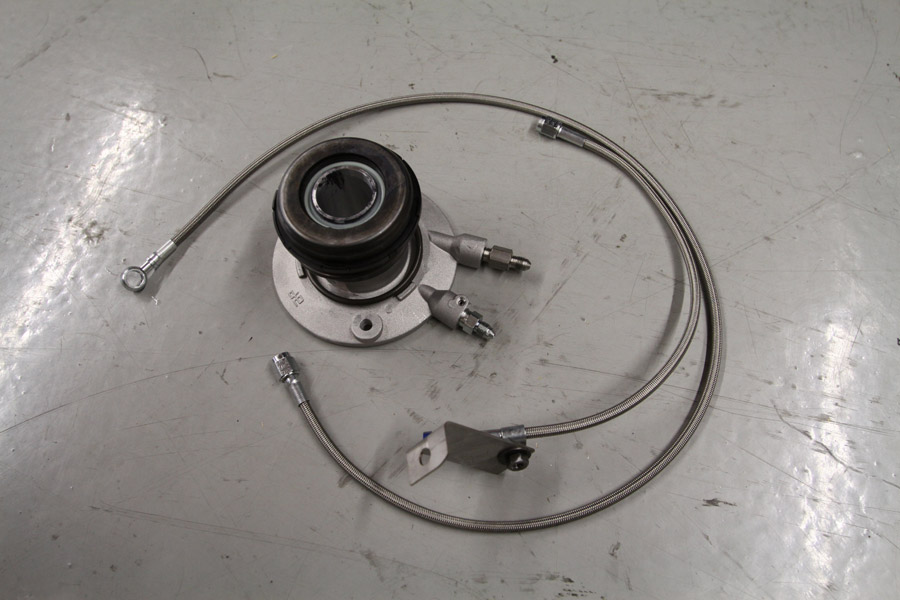 Working solo, I spend the next 45 minutes breaking my back to mate the transmission to the engine. I stop and stare at my minty looking RPM transmission. 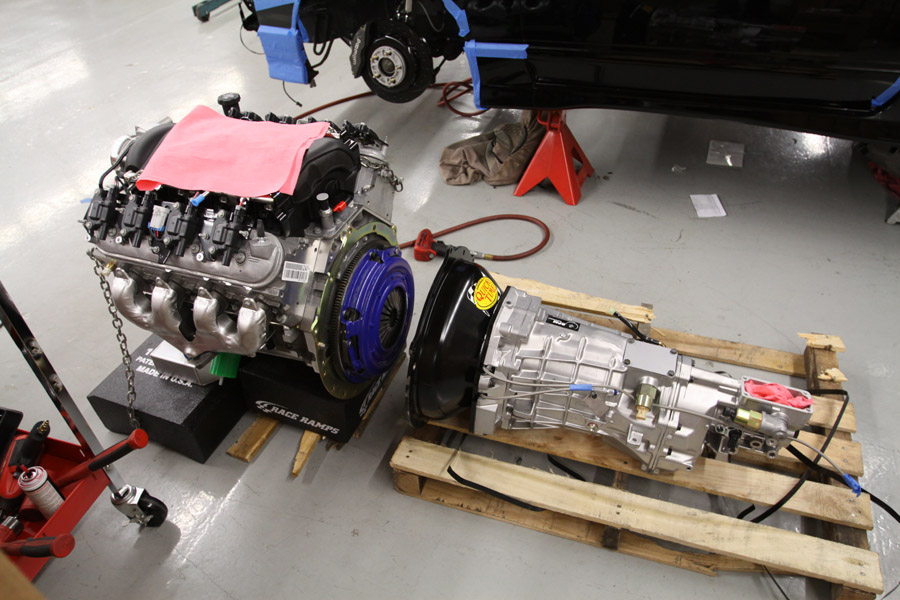 I finally figure out that the slave cylinder is touching the pressure plate and without an extra body I can't compress it to slide in completely. I thread some bolts and slowly tighten it all down until its proper. 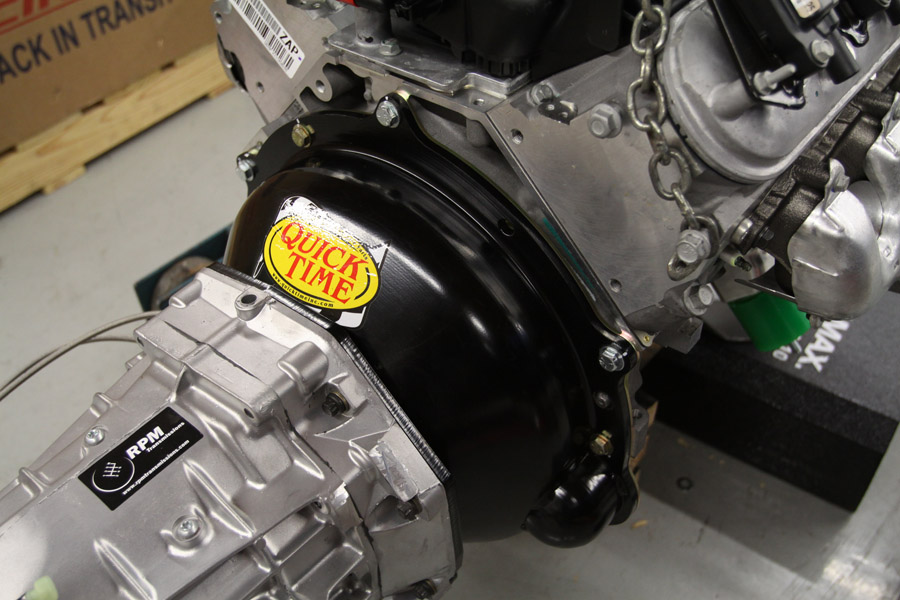 MSD hooked me up with one of their smaller but stronger starters. 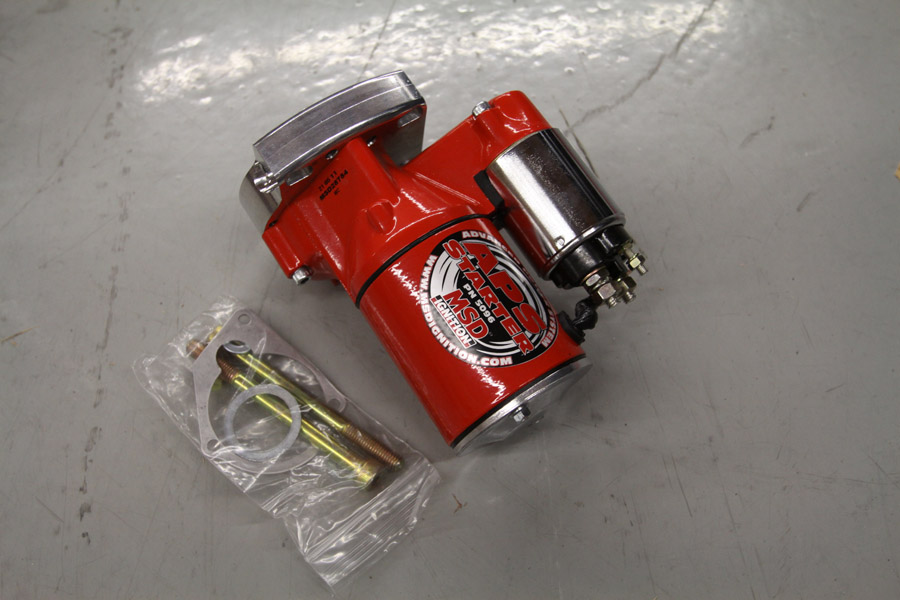 The engine is starting to look quite colorful between the red starter and lime green mounts. 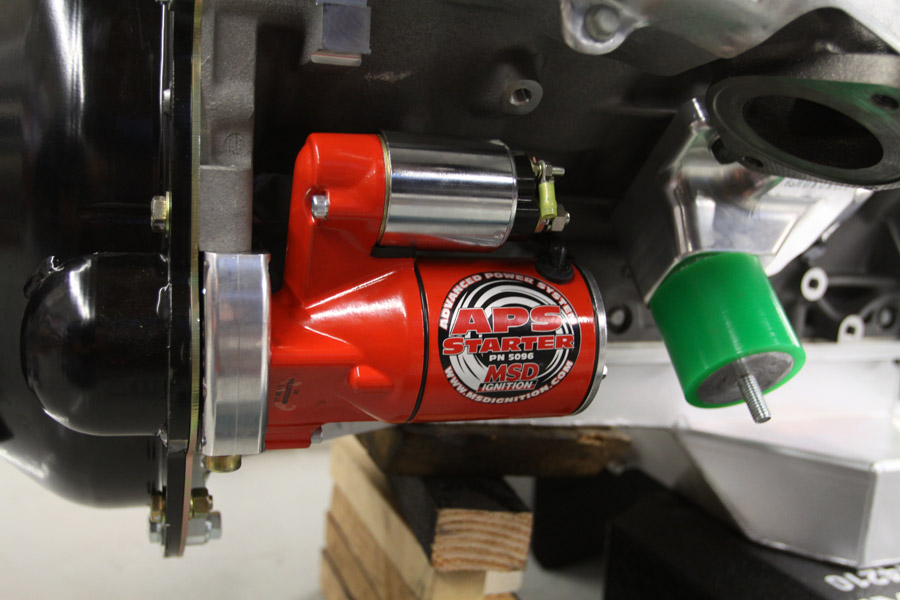 |
|
|

|
|
|
#126 |
|
Zilvia Junkie
 Join Date: Nov 2004
Location: LA,CA & Windsor, ON
Posts: 443
Trader Rating: (4)
       Feedback Score: 4 reviews
|
This is the GM e-rod kit. Comes with all the necessary parts to have a turn key engine setup. MAF, ECU, pedal, harness, o2's, etc.
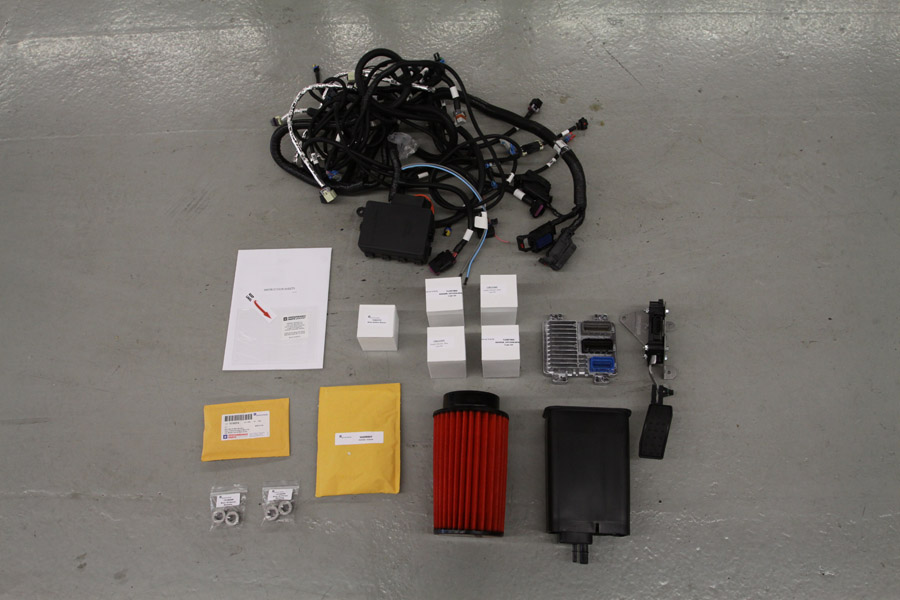 And the key to making this car CARB legal, the OE cats. These will have to be placed as close to the engine as possible. Ill be cutting them up to fit of course. 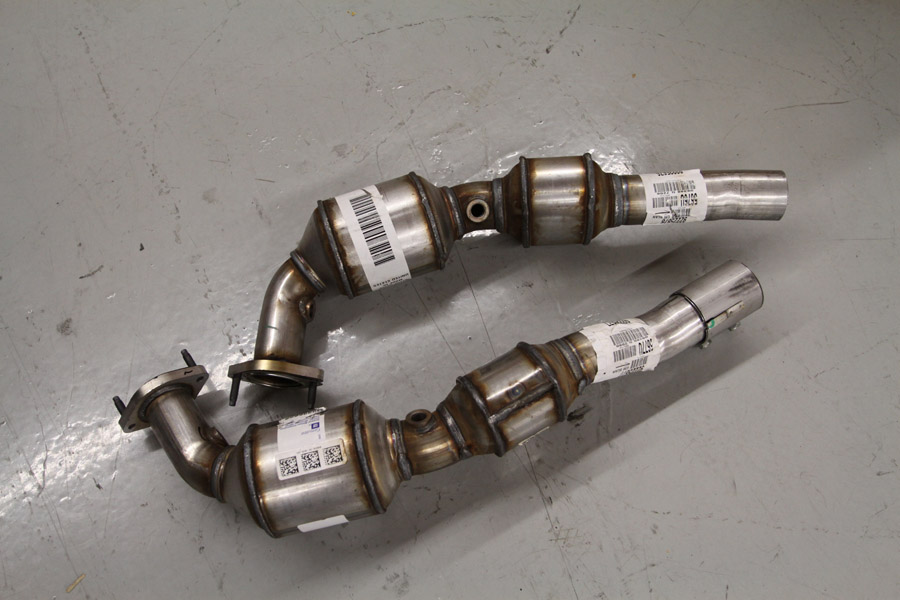 I had heard that the factory power steering on the LS setup is too light when mated to the 240 rack so I called turn one steering for a restrictor pill and instead they sent me an entire power steering pump assembly that is beefier and made to handle the abuse of drifting and tracking the car. 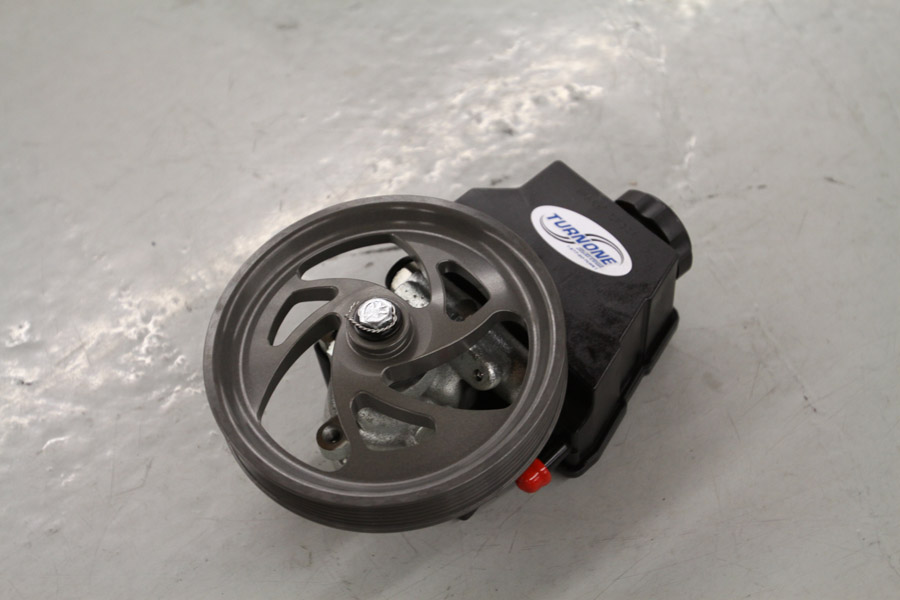 Problem is my LS3 PS pump is different and at this point I can't make the LS1 style pump work on this setup. Ive been trying to source an LS1 power steering bracket but they are damn near impossible to find. 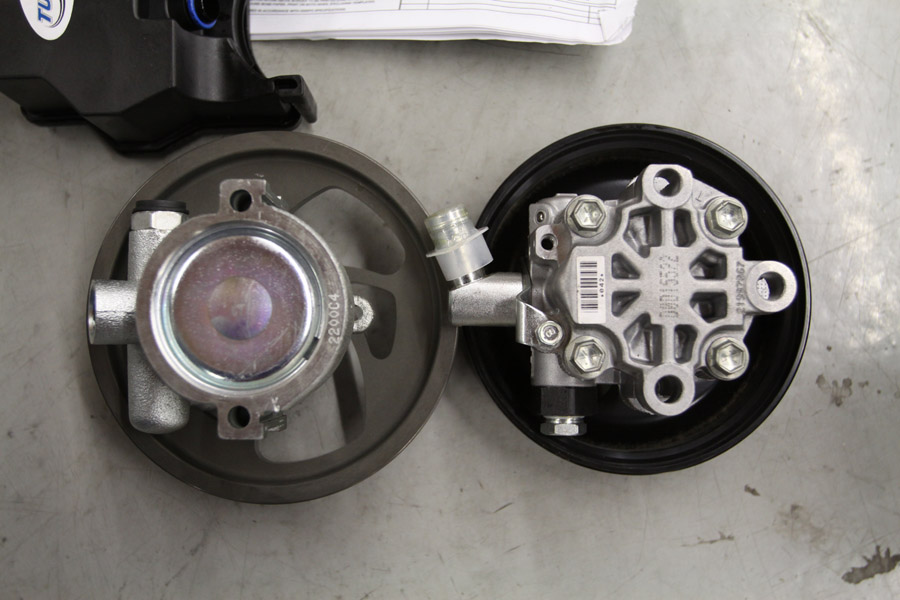 This is my CTS-V accessories kit that is needed for the LS3 engine. It includes the PS pump, alternator, AC, and all the brackets. 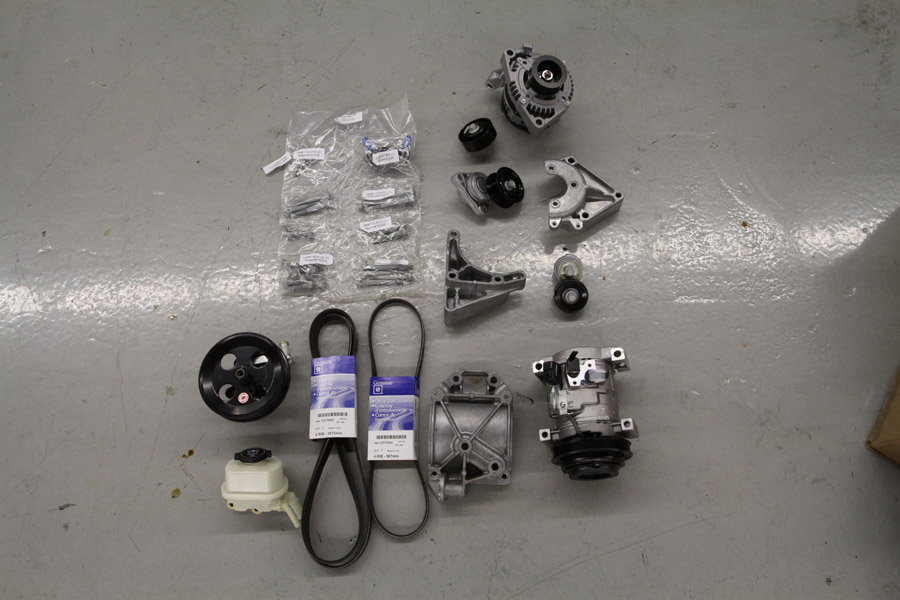 This is how the engine now sits. Waiting for the PS pump and then its ready to drop in. 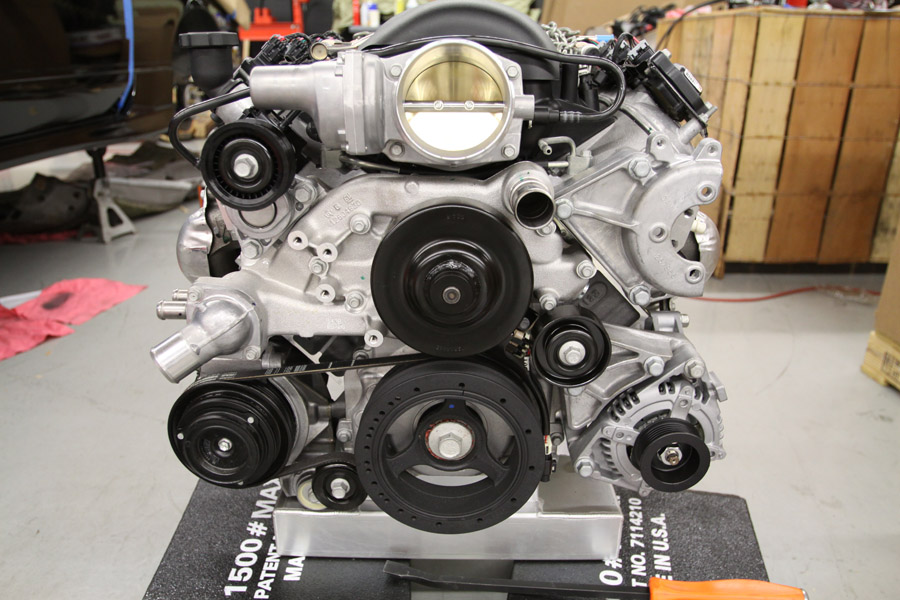 For my drive by wire pedal setup. I needed to build a bracket that I could attach to the factory mounting holes and still keep the pedal in the stock location. This is the bracket I started with. 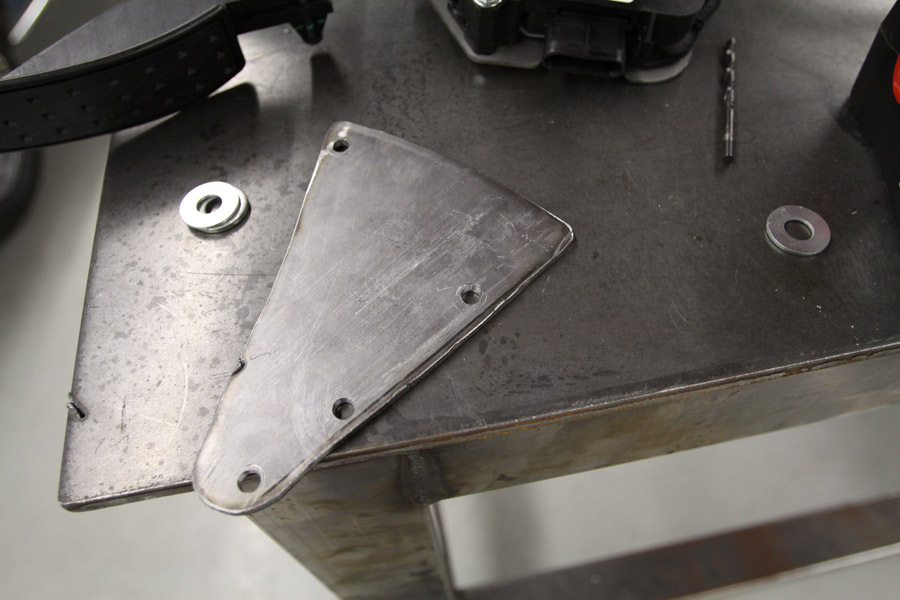 Here is the pedal mounted to the bracket. 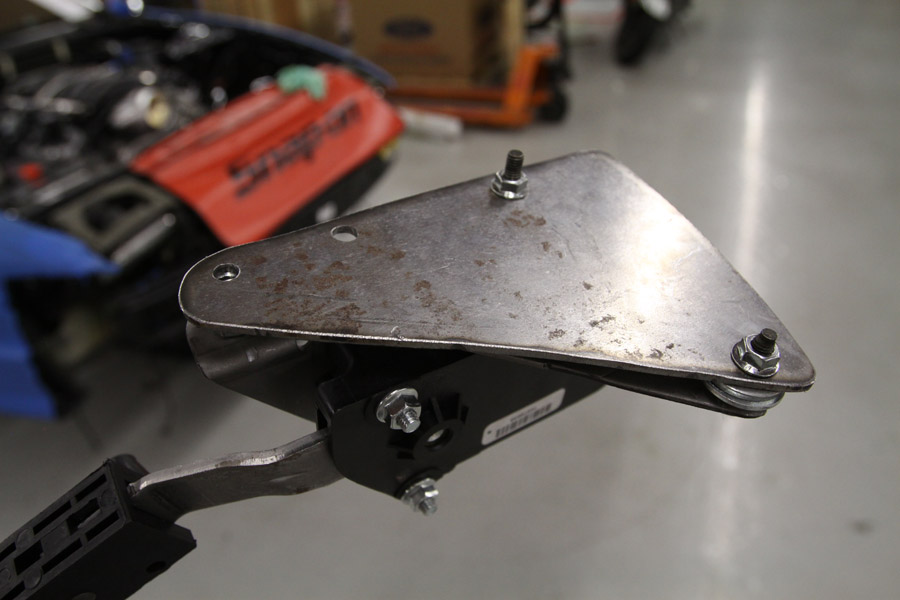 Not the prettiest deal but I'm short on time and its under the dash so I left it unpainted. 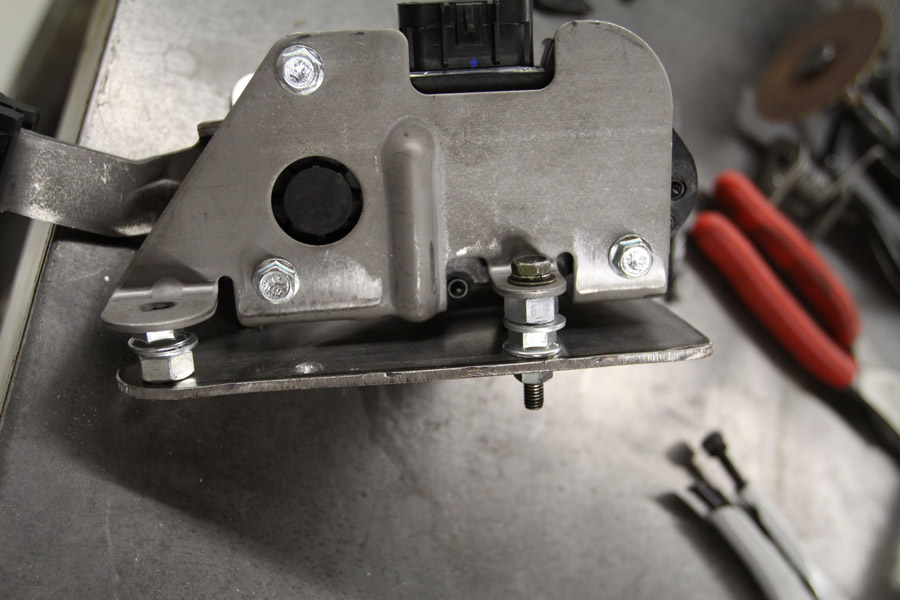 This is what it looks like mounted up. It sits just about where the stock pedal was. 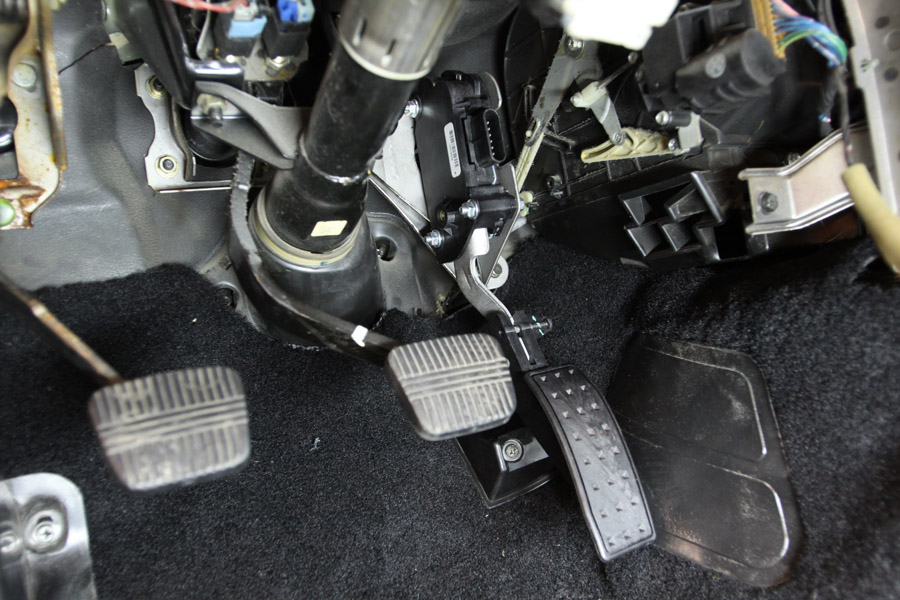 I had to shave the pedal stopper down just a tad to ensure it would depress 100% and hit the stopper. 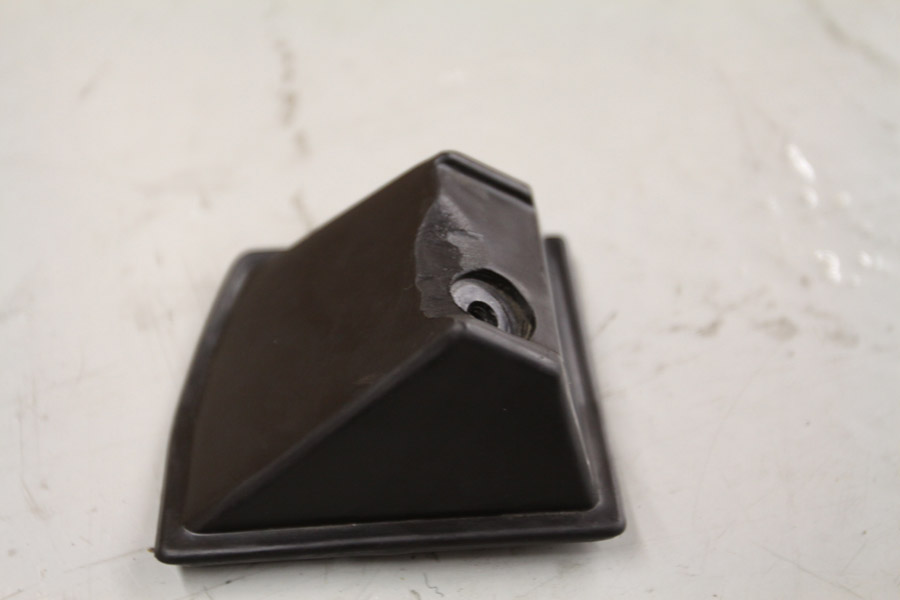 Good to go! 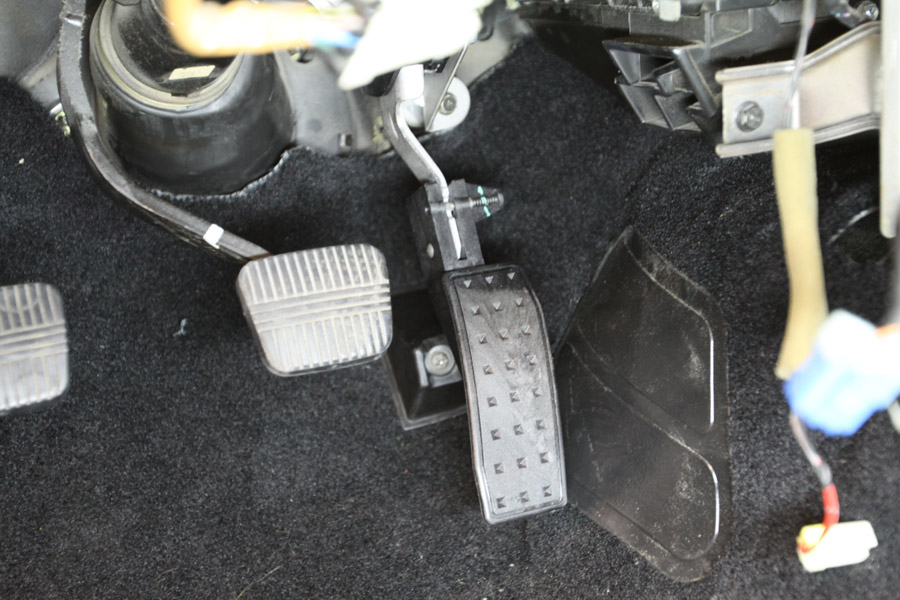 Thats it for now. Next step is to do the fuel line and drop the motor in and then the fun stuff begins. |
|
|

|
|
|
#128 |
|
Post Whore!
 |
Wow, finally got it! Ready for the wiring party?
__________________
Jordan Innovations has a new web site! www.JordanInnovations.com -- All your favorite FD Pro Drifters love it, trust me -- www.JordanInnovations.com |
|
|

|
|
|
#133 |
|
Zilvia Junkie
 Join Date: Jun 2010
Location: Birmingham, AL
Posts: 359
Trader Rating: (1)
 Feedback Score: 1 reviews
|
Our harnesses are plug and play just like the stock one that you are using. And it uses your chassis plugs to get power for all the correct things like fuel pump, starter signal ect. so no splicing and cutting for you to do. The are also 100% brand new, connectors, plugs and wires just like the one you have.
Thanks, -Logan [email protected]
__________________
 IMPROVING PERFORMANCE AND AESTHETICS WHILE SAVING WEIGHT AND SPACE www.ChaseBays.com | [email protected] | (205)623-2188 |
|
|

|
|
|
#136 |
|
Zilvia Junkie
 Join Date: Nov 2004
Location: LA,CA & Windsor, ON
Posts: 443
Trader Rating: (4)
       Feedback Score: 4 reviews
|
Time for another update.
I got the fuel system done and used all Earls fittings to mate it all up. The saving grace was the tiny fuel filter, without it I would have had to mount something bigger and just didnt have the room in the engine bay since Im keeping ABS. 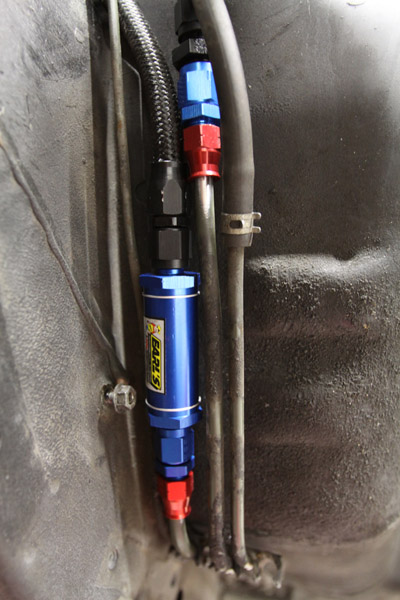 Got a nice Fuelab FPR and mounted it on the firewall. As you can see there's a TON going on in that area but it was the only sensible place to put it. 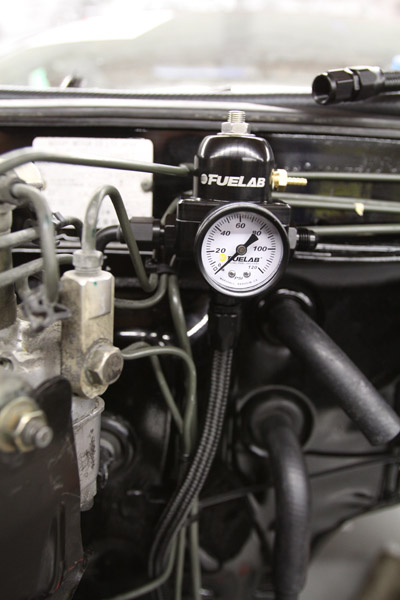 Then came the moment of truth. 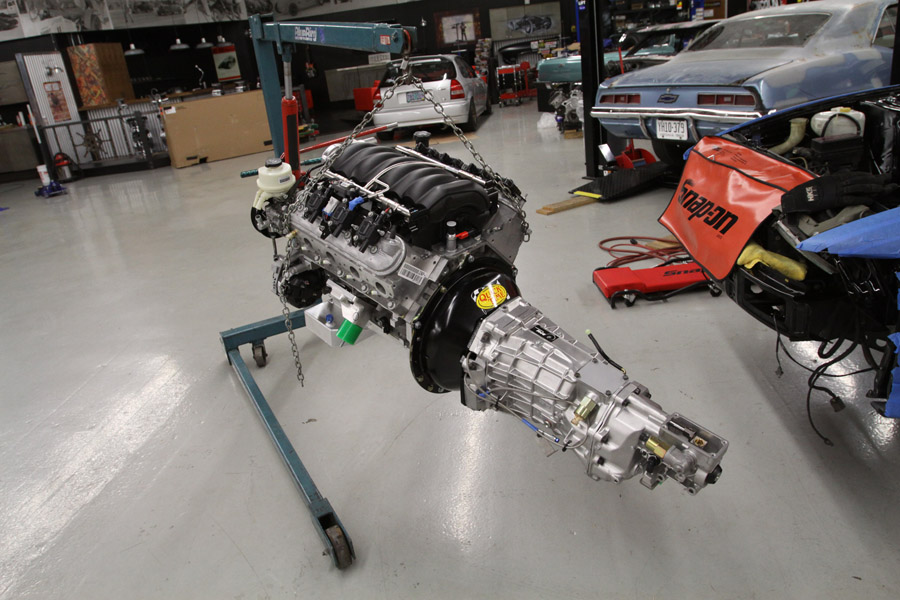 Dropping in the engine through the top proved very cumbersome and painstaking but it's very doable. 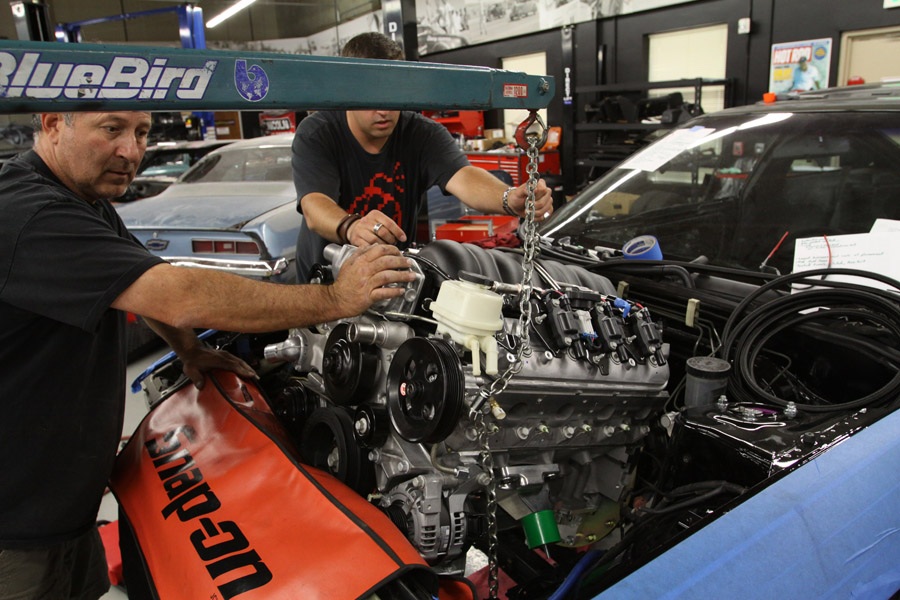 Unfortunately, I didn't bang out the firewall enough that meant I had to pull the motor again. This time I said screw it and dropped the subframe which proved to be a MUCH better idea. If you're doing this swap then remember to REALLY bang the hell out of the firewall to avoid having to do what I did. 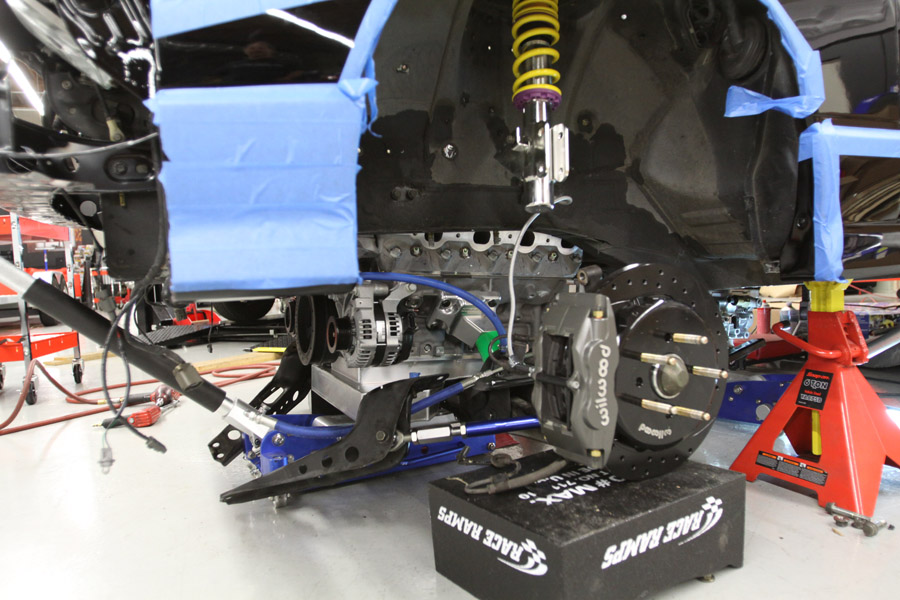 I have to once again say that the Sikky mounts both engine and trans lined up exceptionally well and the engine sits in a great spot. 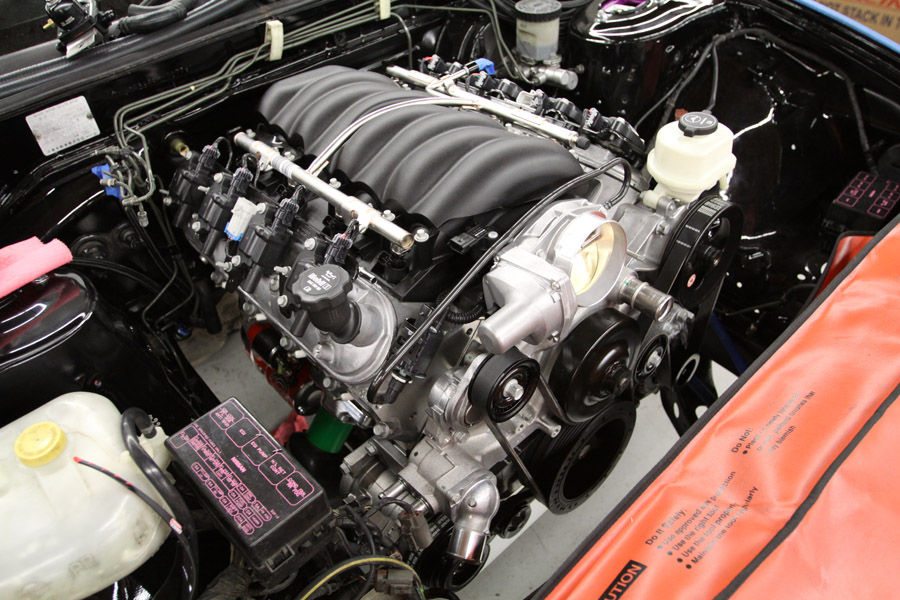 Hooked up my fuel feed line to the engine, despite being a tight fit on the exhaust side it looks like my custom fuel lines should work without issue. 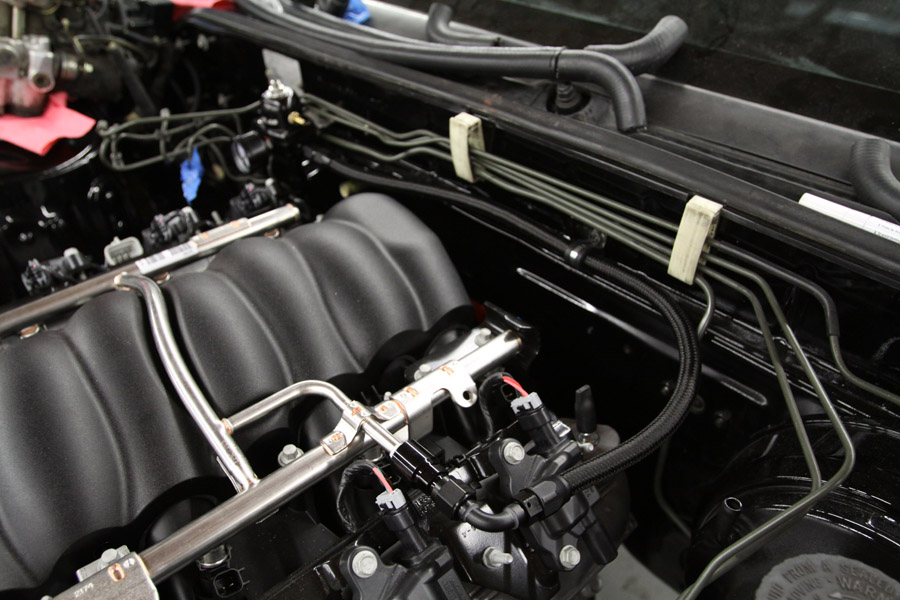 Jeff Jordan came by and gave me a hand with wiring the harness into the car and some other stuff. At first we were a bit worried that the harness would have to be extended to get it to fit but surprisingly enough almost all the lengths were perfect. 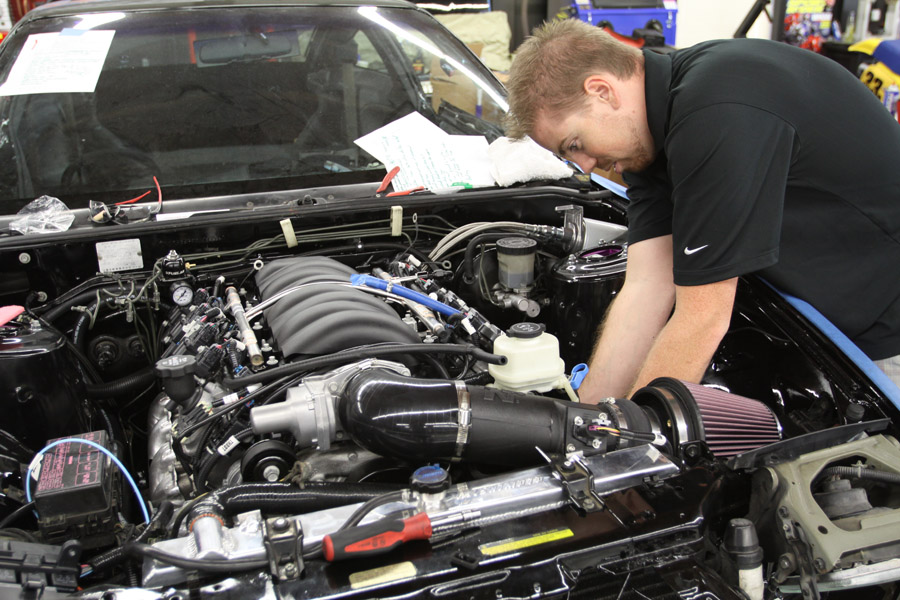 Jeff shortened some wires for aesthetic's sake, I was really impressed with the time and care he took into all the connections. Thanks again Jeff. I hate wiring and thankfully Jeff took care of it. It took the better part of a day and we still have some minor odds and ends to finish up but Im just happy I had someone who knew the S-chassis really well, it would have taken me days to do what we did in 8 hours. 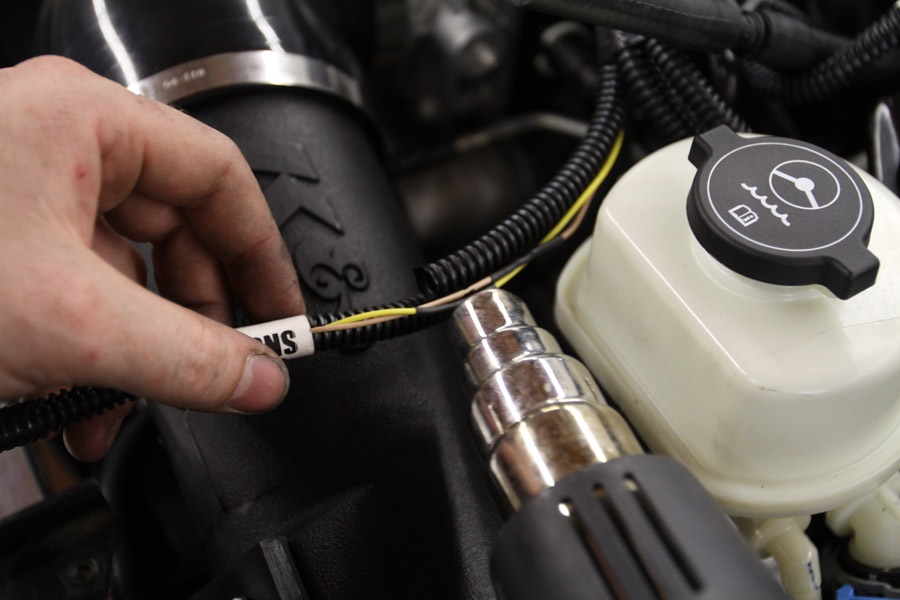 My MGW Shifter. A few people recommended this shifter for the swap and now I know why. Great piece and clocks the handle to the 6-oclock position aligning it like a stock shifter. 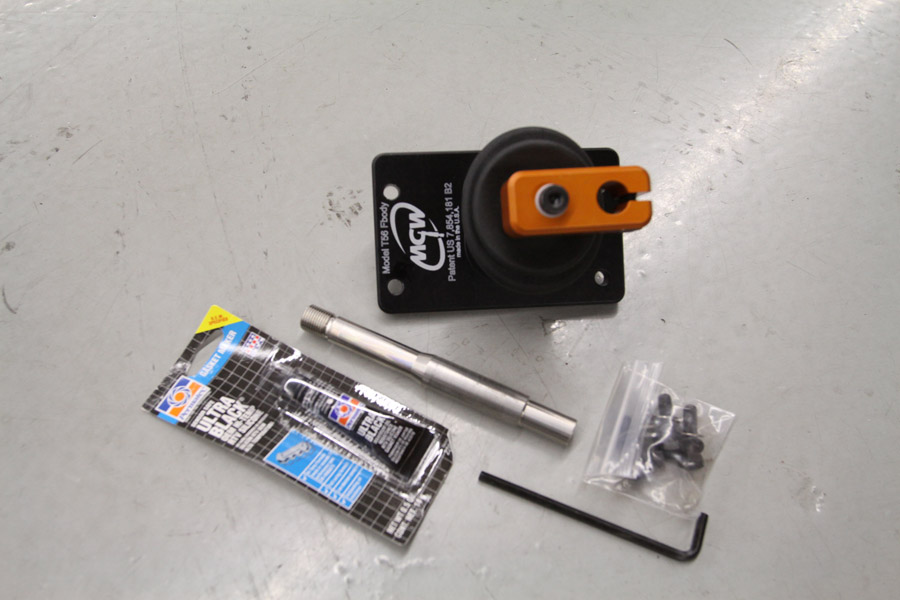 Wham, bam, thank you ma'am. Spot on fitment. 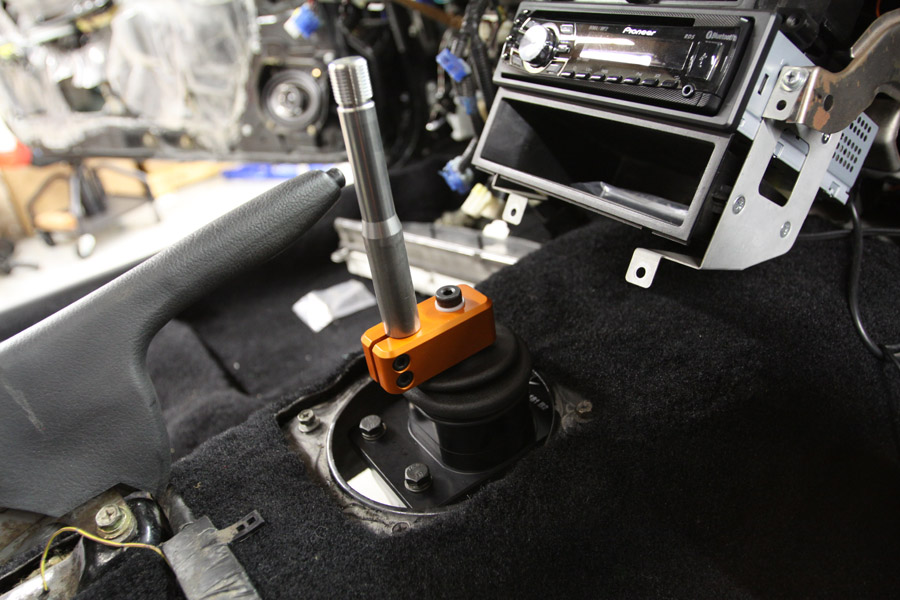 I even got the rubber boot to work with it. 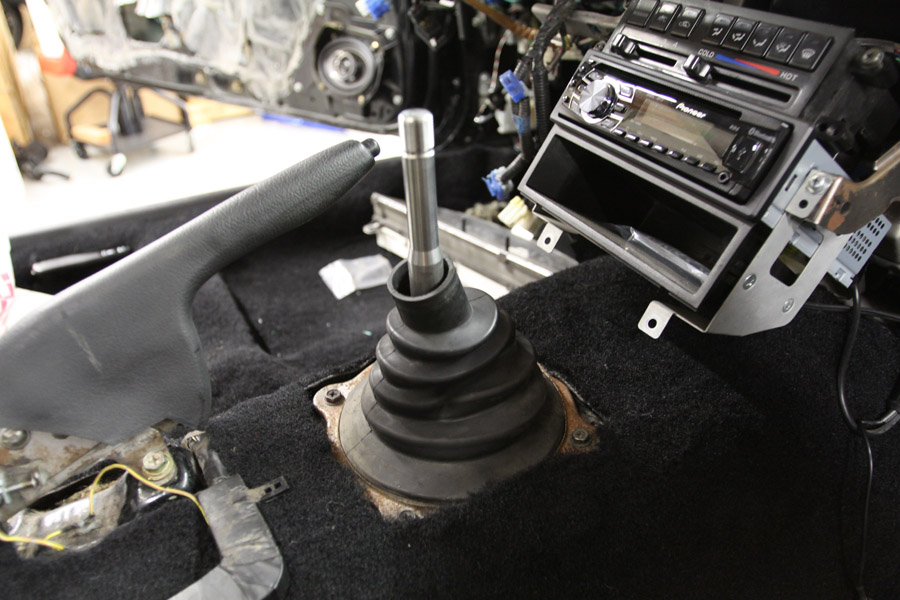 To get my OEM gauge to read engine temp, I needed to buy an adapter fitting and drill it open to fit the OE Nissan temp sensor. Much more work than I anticipated but thanks to my buddy Gary, it was easy work since he did it for me! 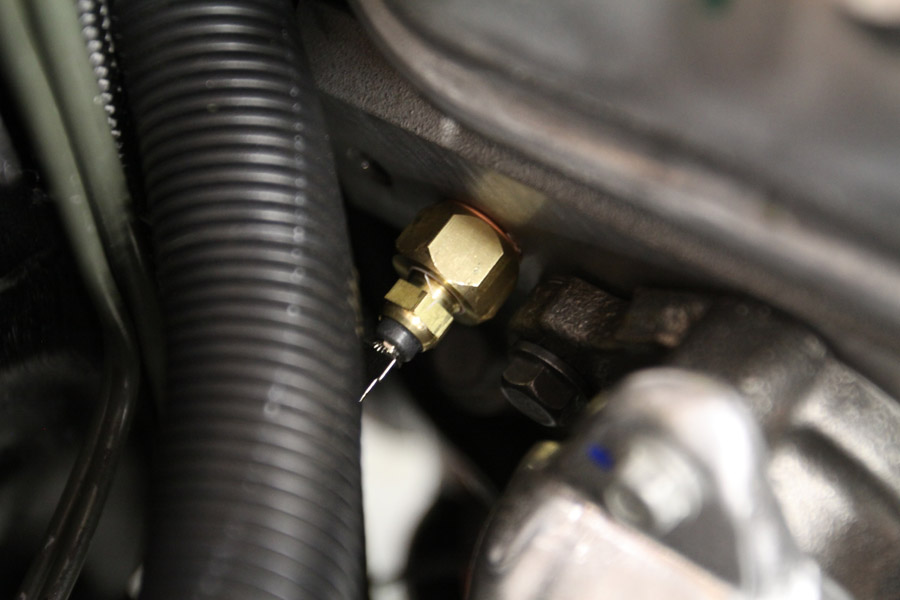 Drilling the adapter so that the OE sensor will fit. I drill press came in really handy here. 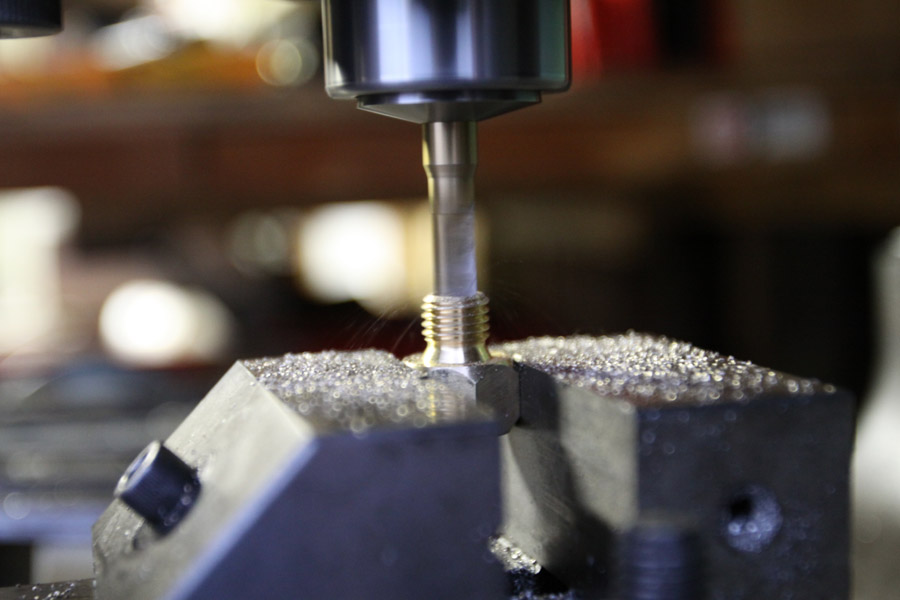 Then threading it to fit the sensor. 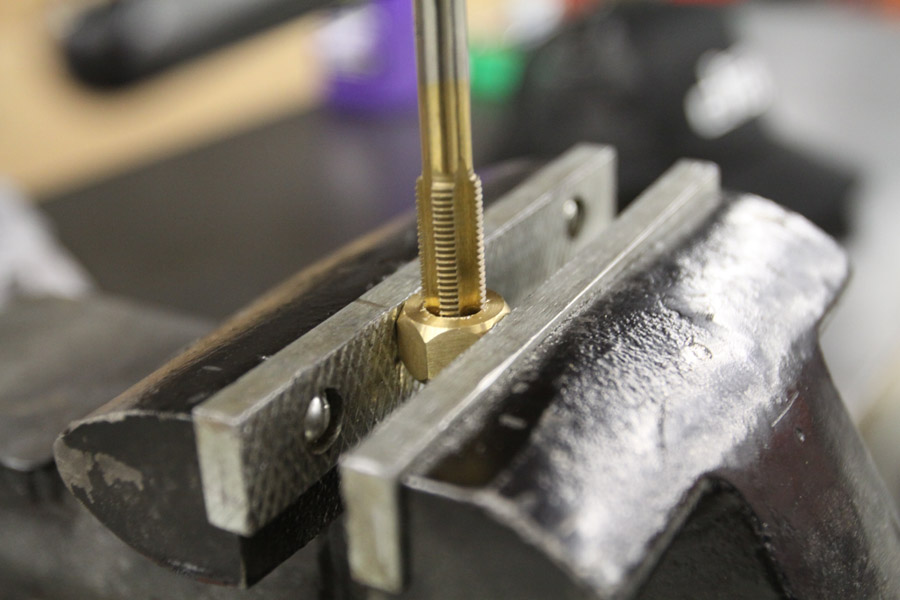 I also had to add a provision onto my Mishimoto radiator to run a line for the LS3 steam ports. The prevent the top of the heads from heat pockets that create hot spots. 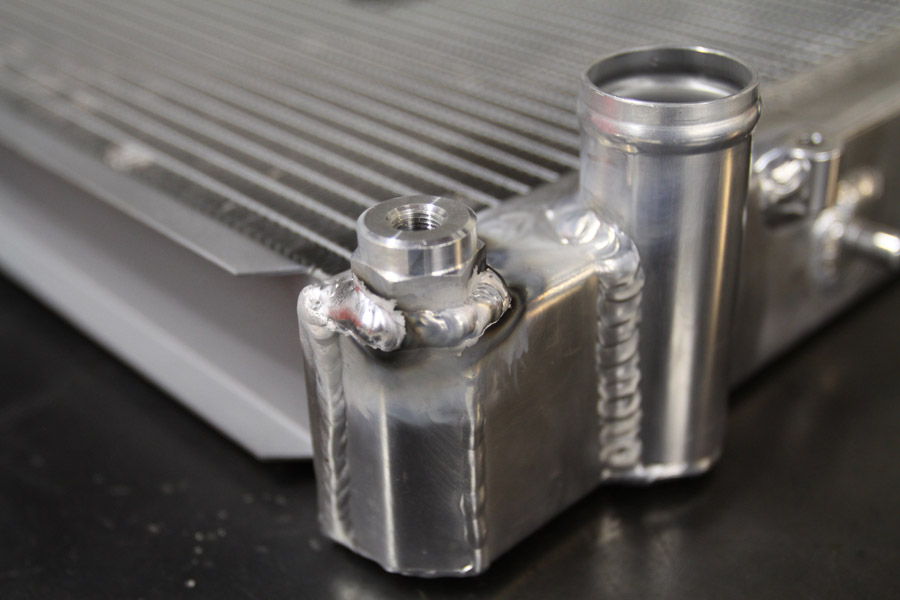 Here it the finished product with the barbed fitting in place. 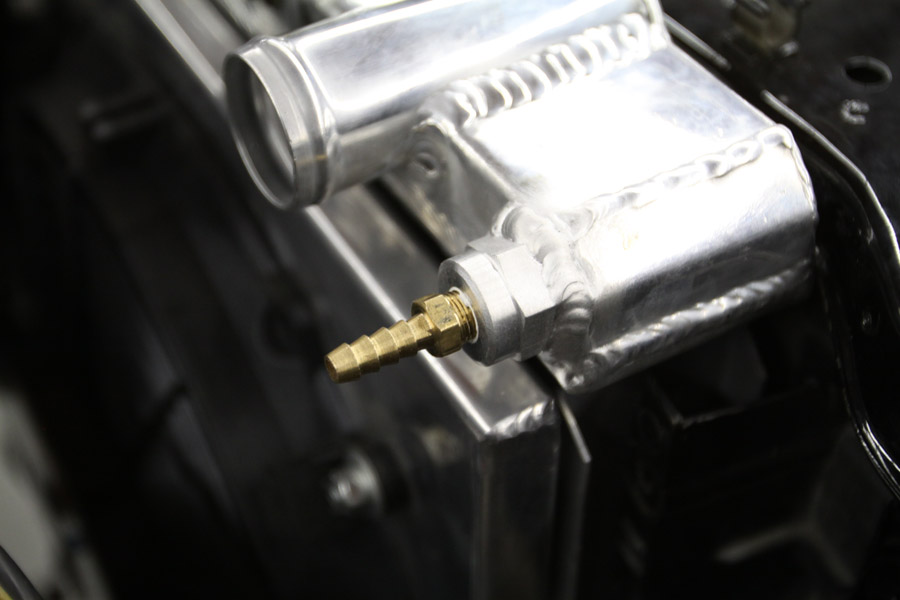 At this point I decided to test fit the hood because I was worried the PS pump reservoir wouldnt fit and sure enough the cap was resting on the hood before it would even latch. I had two options here. Cut the hood's inner skeleton or relocate the PS reservoir. I really didnt want to mess up the hood so I went ahead and moved the reservoir. I had to fab up a bracket so that it would mount on the shock tower. My TIG welding isnt the best but Im slowly learning. 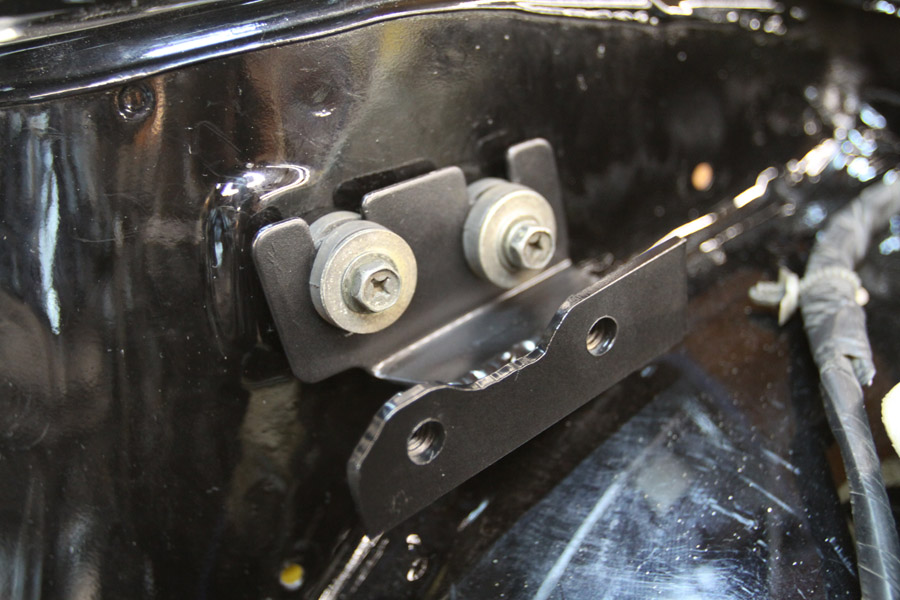 Here it is fitted. I made sure to position it higher than the pump so it would draw fluid without fuss. Found some hose at Pep Boys and it was good to go. 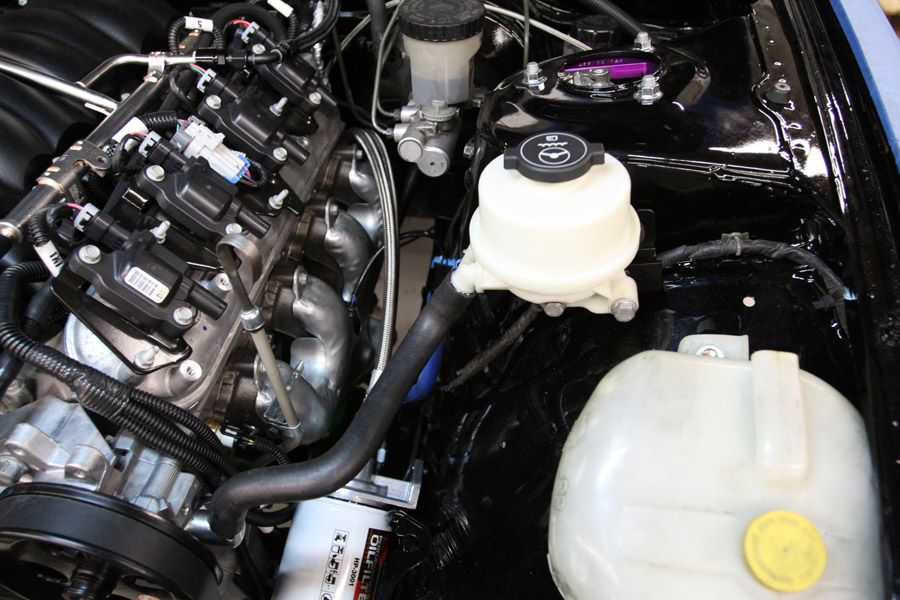 I also hard mounting my filter relocation kit just below the PS reservoir. 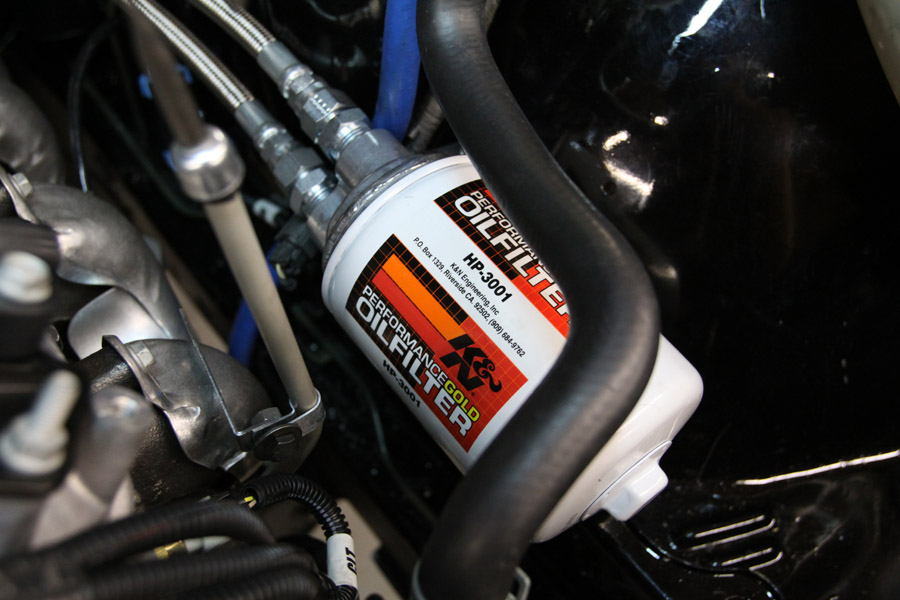 I had to fiddle with the K&N intake some more but I got it to clear the PS pump pulley so it's good to go. 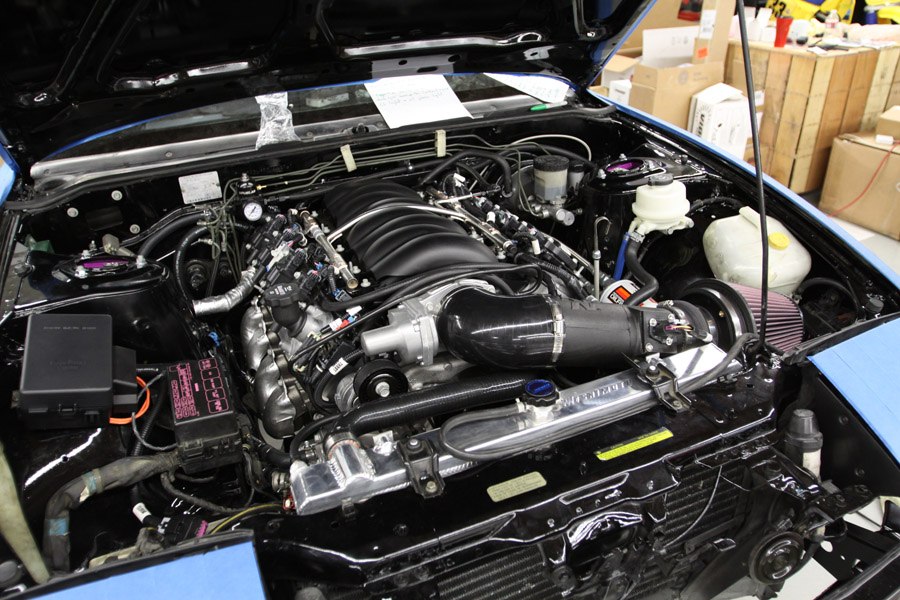 This is how it sits now. There are a couple small things to finish up but it's starting to look like a real engine bay now. 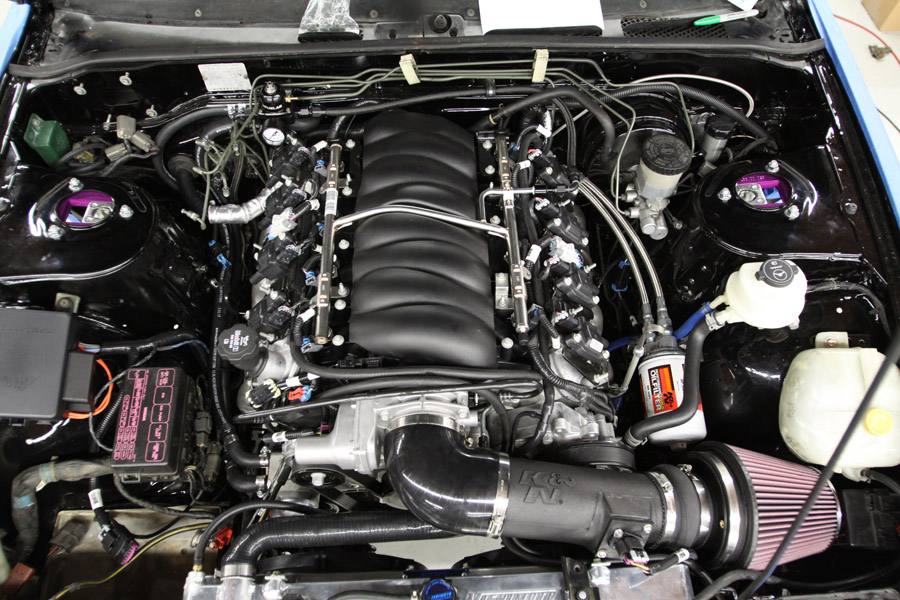 I dropped the car to see where the suspension would sit and the front wheels have a bit too much poke for my liking and I'm maxed out on camber. unfortunately I have to run a 10mm spacer so the 18x9.5 wheels clear the coilovers. Otherwise, they'd be almost perfect. The car is also too low for me (probably not low enough for most of you). I want to drive this thing daily without worrying about ripping off my front bumper of hitting the transmission (the lowest part under the car) so Ill be raising it a bit. I also wish I really got a front lip but that can always come later. 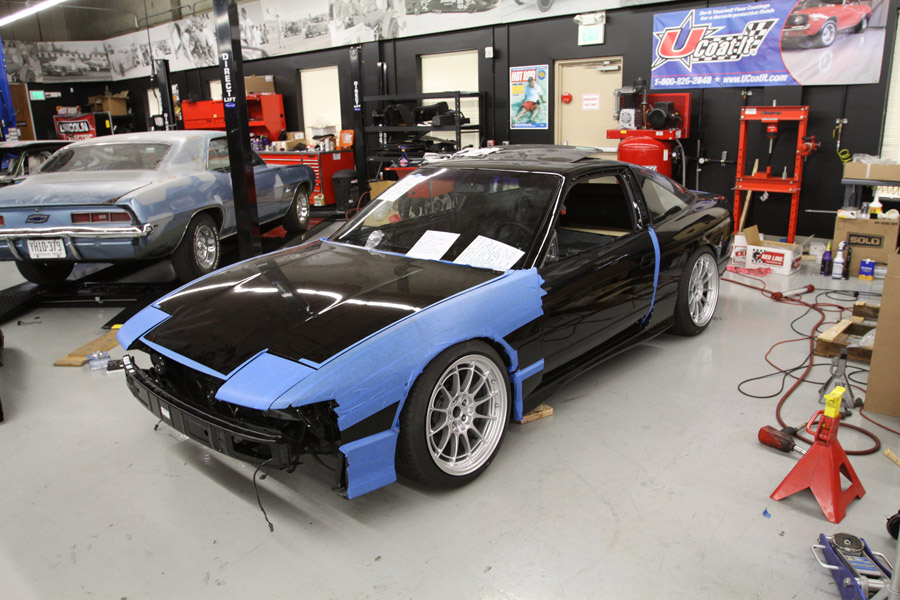 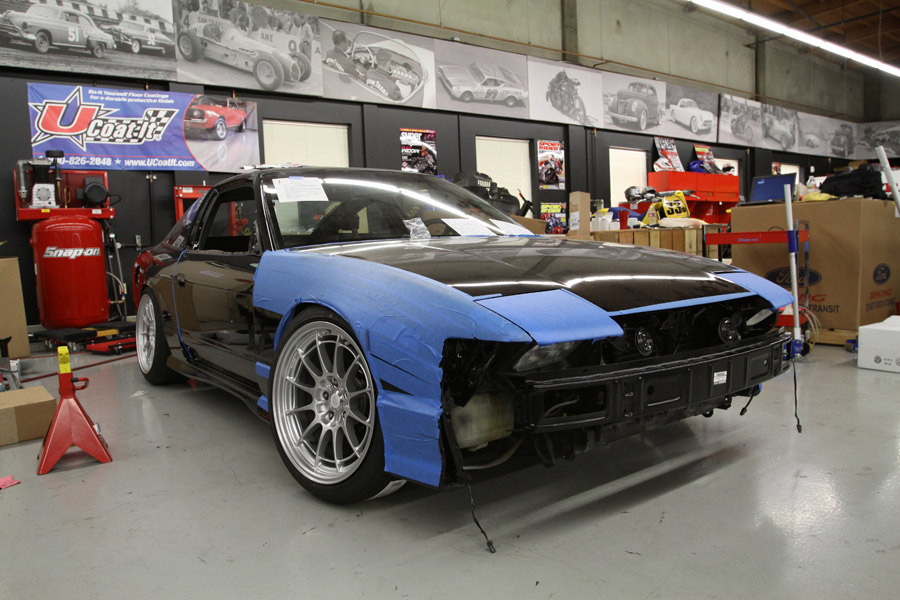 The car is off to the body shop this week to get it all assembled and hopefully he can massage my front fenders a bit to address the poke. Then Ill be welding up the exhaust and heading to the SMOG ref to see if all this time and effort was worth it. |
|
|

|
|
|
#139 |
|
Post Whore!
 Join Date: Dec 2004
Location: Poconos, PA
Age: 36
Posts: 8,030
Trader Rating: (58)
           Feedback Score: 58 reviews
|
I hate this build, as it makes me want to sell my SR
 Good stuff Nice to see someone with taste modding a 240 again, as most kids are more focused on battleship dropping their cars on orange wheels.
__________________
 Want Air Conditioning in your SR20 Swapped car? Check out www.sr20acbrackets.com for more information! Quest Alternator Conversions for SR20! Check my Group Buy! Tired of lousy internal gates? Go external wastegate with one of my manifolds, Check out my group buy |
|
|

|
|
|
#140 | |
|
Zilvia Junkie
 Join Date: Nov 2004
Location: LA,CA & Windsor, ON
Posts: 443
Trader Rating: (4)
       Feedback Score: 4 reviews
|
Quote:
However, you get a nice structured story in the mag as opposed to small tid bits here. Anyways, I'm glad you still buy the mag to read the stories though. |
|
|
|

|
|
|
#141 |
|
Post Whore!
 Join Date: Dec 2010
Location: SoCal 909
Age: 28
Posts: 4,737
Trader Rating: (42)
           Feedback Score: 42 reviews
|
I've had a subscription to modified since day one lol, hook it up with a cheaper renewal for being a loyal member (: haha. Either way I love your work. I wish my ls swap couple even be half as good. I'd love to get a chance to see it in person since your in socal
Great update |
|
|

|
|
|
#142 |
|
Post Whore!
 Join Date: Oct 2008
Location: MI
Age: 35
Posts: 3,913
Trader Rating: (131)
           Feedback Score: 131 reviews
|
Crazy progress, Peter- looks like things are moving right along! Is that the Hassler-man hiding behind the cherry picker? lol...
I actually really like those wheels on there a lot. I think it looks pretty tough... |
|
|

|
|
|
#149 |
|
Post Whore!
 |
Wow you've made some solid progress in the past week or so! Once we finish up your dash I think we can start it, I'll bring some pins for that connector off the fusebox.
Looks GREAT on the ground!
__________________
Jordan Innovations has a new web site! www.JordanInnovations.com -- All your favorite FD Pro Drifters love it, trust me -- www.JordanInnovations.com |
|
|

|
 |
| Bookmarks |
| Thread Tools | |
| Display Modes | |
|
|