
 |
|
|||||||
| Home | Rules & Guidelines | Register | Member Rides | FAQ | Members List | Social Groups | Calendar | Mark Forums Read |
| Builds (and builds only) Got a build thread? It goes here, build threads anywhere else on the forum will be locked and never moved. |
 |
|
|
Thread Tools | Display Modes |
|
|
#31 | |
|
Zilvia Member
 Join Date: Oct 2016
Location: South Carolina
Age: 23
Posts: 150
Trader Rating: (3)
          Feedback Score: 3 reviews
|
Quote:
That's so wild man. Was a bad day for kouki builds haha. I'll get a little use out of the cool box for the time being, but a few days ago I realized I played myself lol. Since the cage is a dash dodger, I won't be able to open the glovebox enough to use the cool box once the cage goes in :/ oh well
__________________
Garage Abstract IG: @teddylesshq |
|
|
|

|
| Sponsored Links |
|
|
#32 |
|
Post Whore!
 Join Date: Oct 2008
Location: MI
Age: 35
Posts: 3,913
Trader Rating: (131)
           Feedback Score: 131 reviews
|
Man, so bummed to see this car get damaged. I wish you luck with the repairs (or the repairs to the repairs I guess, haha.) You're on the golden path with this thing!
|
|
|

|
|
|
#35 |
|
Post Whore!
 |
This is pretty rad. I love the part where it says you brought yourself up to speed on the ‘hero’ 180SX cars. Most people new to this just throw on Type X aero and then like to be spoon fed when it comes to everything else. I see a lot of guys getting hyped over dudes that seem to have substance but in reality are just ‘culture vultures.’ Glad to see you doing things like I (and many others) did when we first got into it!
I think this was the bump I needed to stop lagging on my car. Thanks for the breath of fresh air.
__________________
The mark of a true sucka: 'RARE JDM' & 'OLD LOGO NISMO'
|
|
|

|
|
|
#36 |
|
Zilvia FREAK!
 |
ARC Titanium Cooling Panel
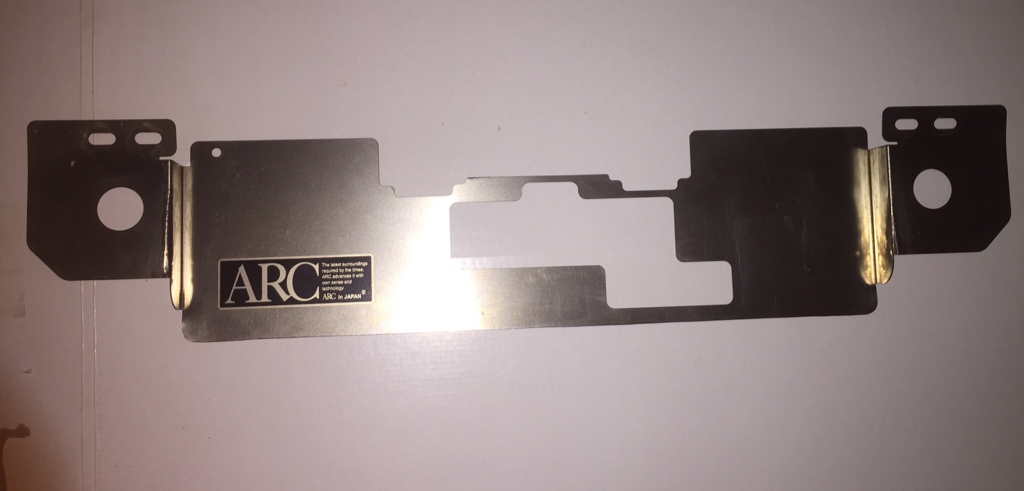 I'll make another update when my car is back from the bodyshop and all the parts are installed on my car. Until then, peace! [/QUOTE] hurry up and install that shit
__________________
 IG Holy_khal Last edited by deadghost; 08-18-2019 at 02:45 AM.. |
|
|

|
|
|
#37 |
|
Zilvia Member
 Join Date: Oct 2016
Location: South Carolina
Age: 23
Posts: 150
Trader Rating: (3)
          Feedback Score: 3 reviews
|
Teddy's Southeast 180SX Build
Man, I feel like it's been forever since I've updated this thing. I had to go back and look where I left off haha. I picked the car back up, installed the bumper, yadda yadda. I'll eventually need new kouki bumper brackets and lip to have the front of the car looking good.
I should have my Cusco cage and Kakimoto exhaust both here next week, and I'm super excited about it. I'll be sure to update this thread as soon as they come in. Speaking of parts, I've picked up a few more things recently. With the help of Damon, I located a Next Miracle bar. It was listed without the bolts and washers, so I contacted Next Nippon, they were very helpful and sent me all the hardware I needed. I also had to find the rear seatbelt brackets from a 91-93 USDM hatch to mount the bar to the pillars. I then took a dremel and modified my plastic covers to accept the brackets, and was happy with the result. 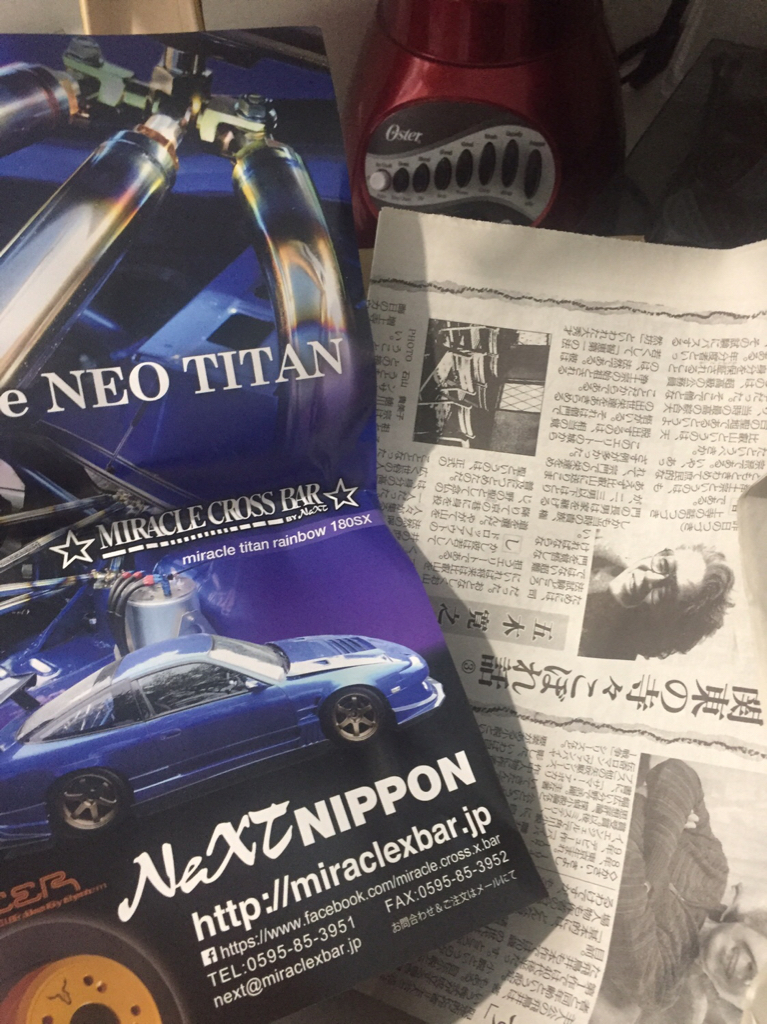 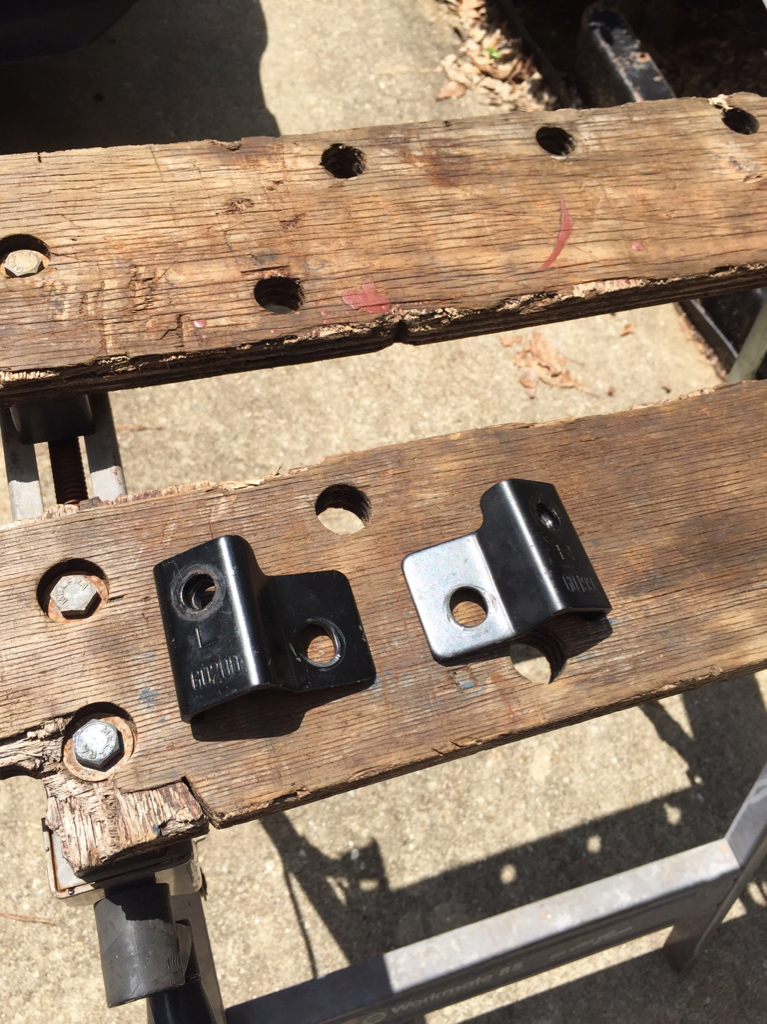 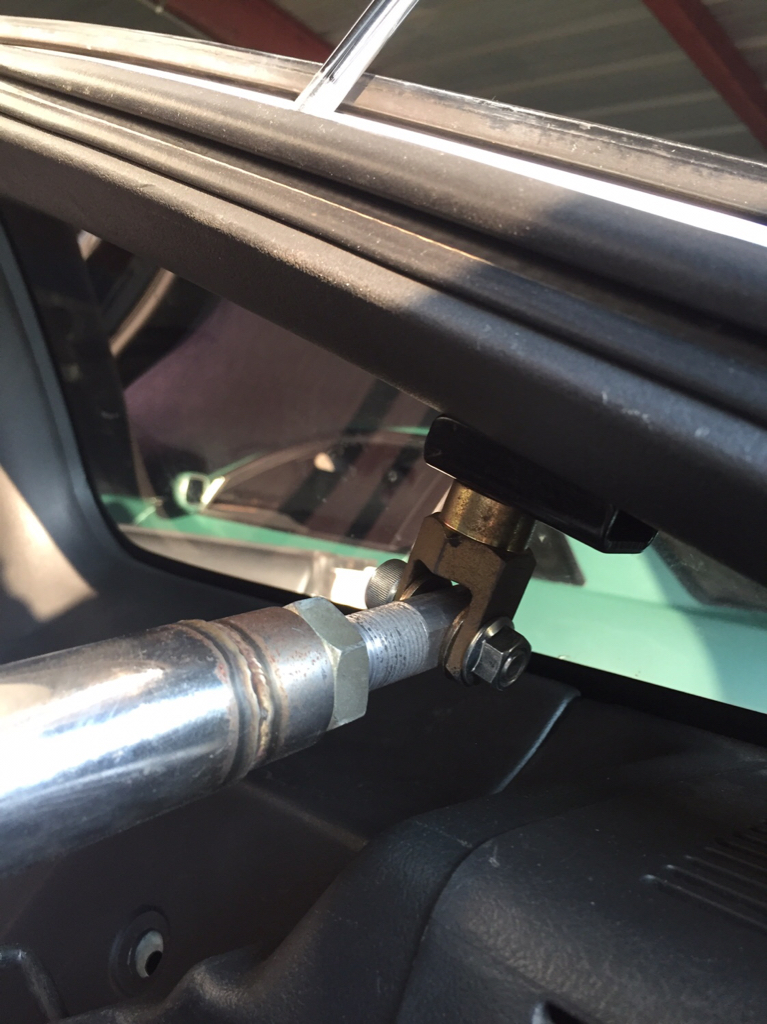 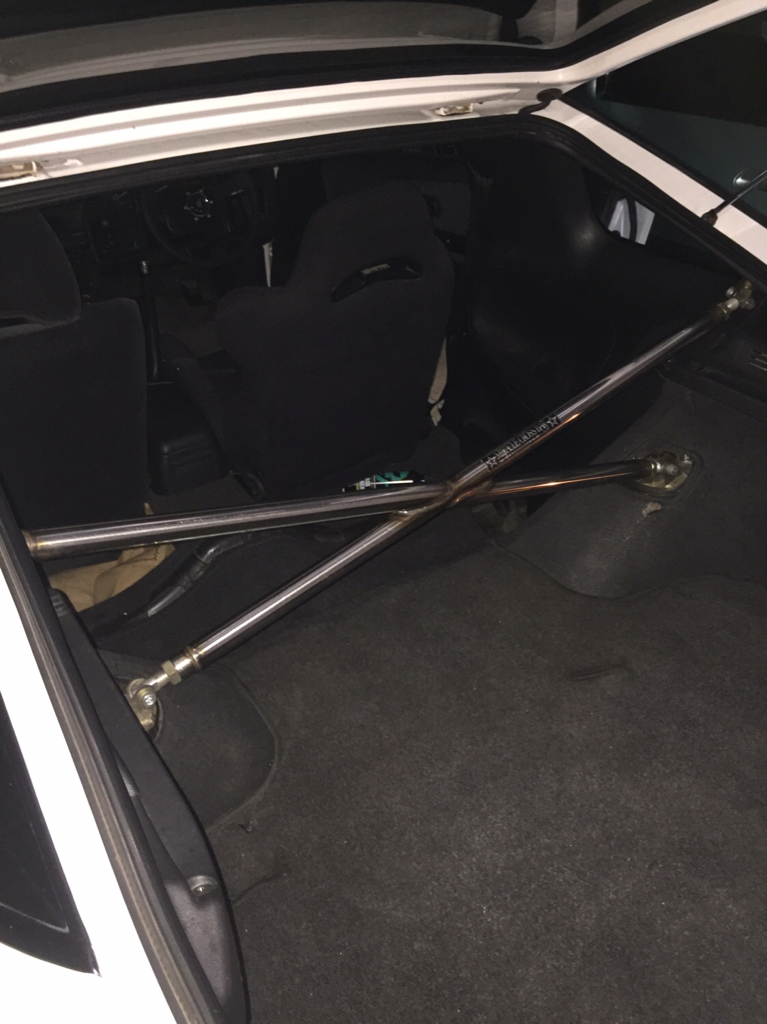 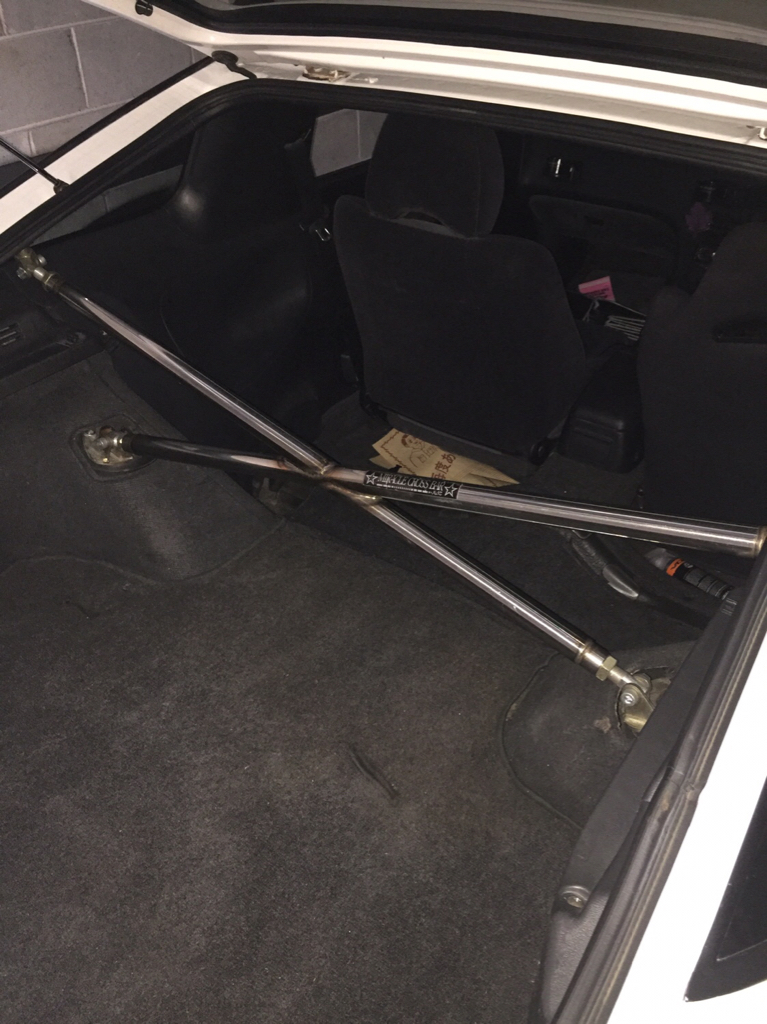 As you can see from the pictures above, I also got my hands on a nice Bride Brix 1.5 from a local friend of mine at NSPerformance. It's clean, with no rips/tears/burns and only some slight fading (as expected). It also came with the rail, so I couldn't pass it up lol. I'll eventually get a gradient center Brix, which was my original plan, but this will do for now. 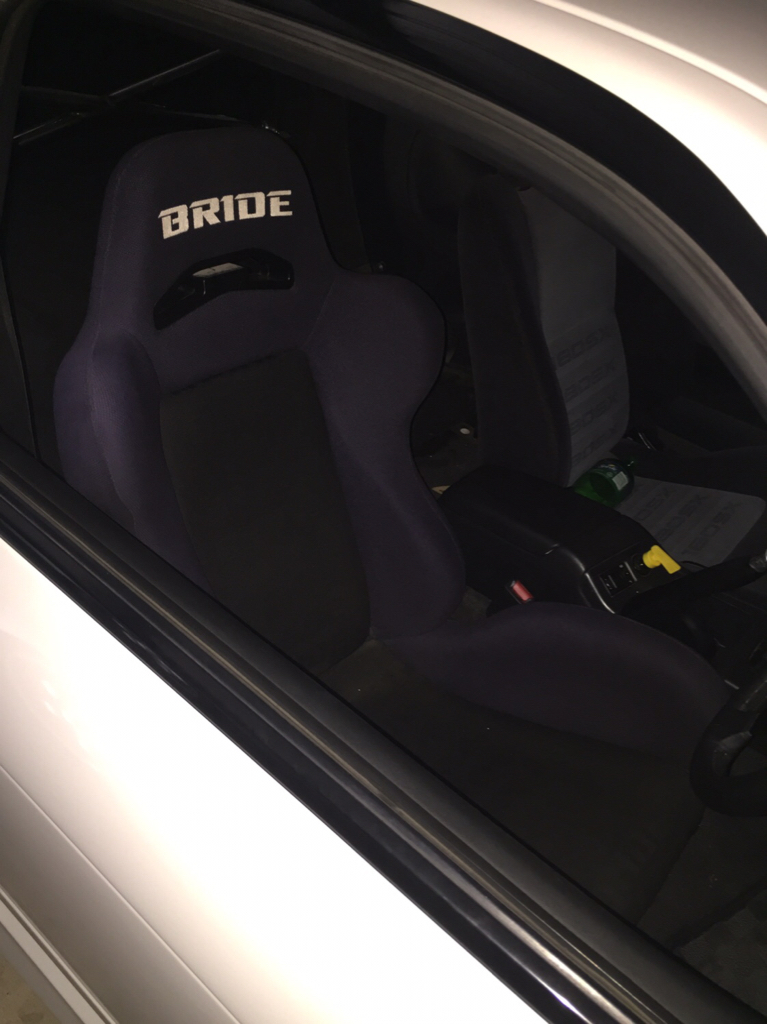 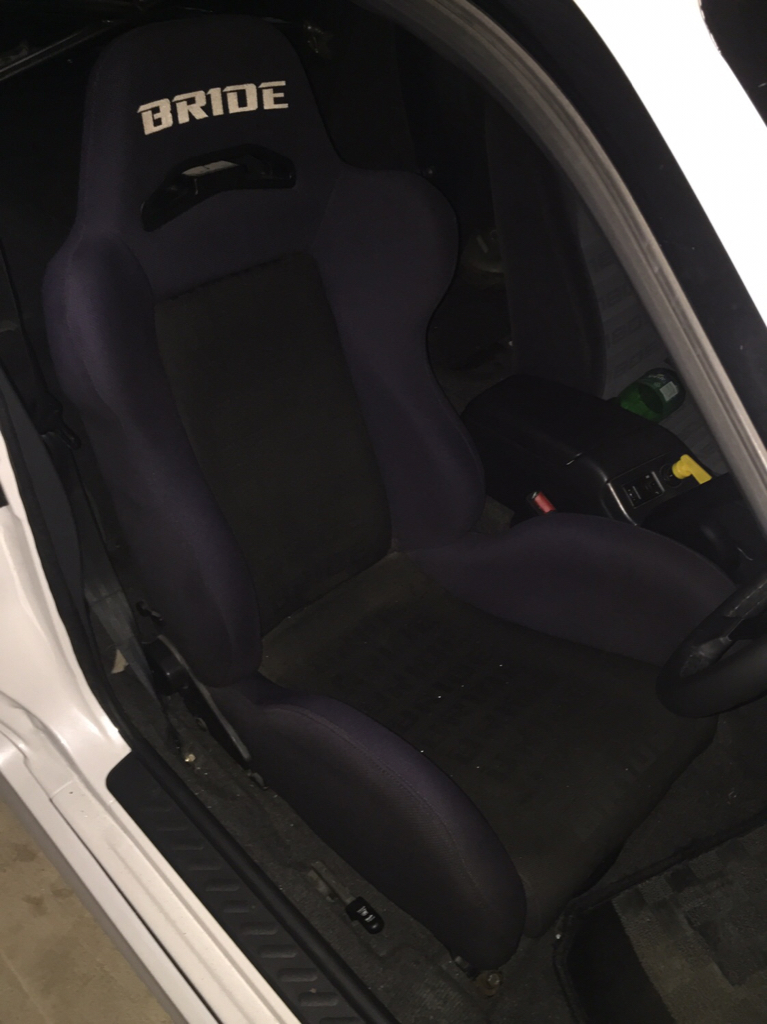 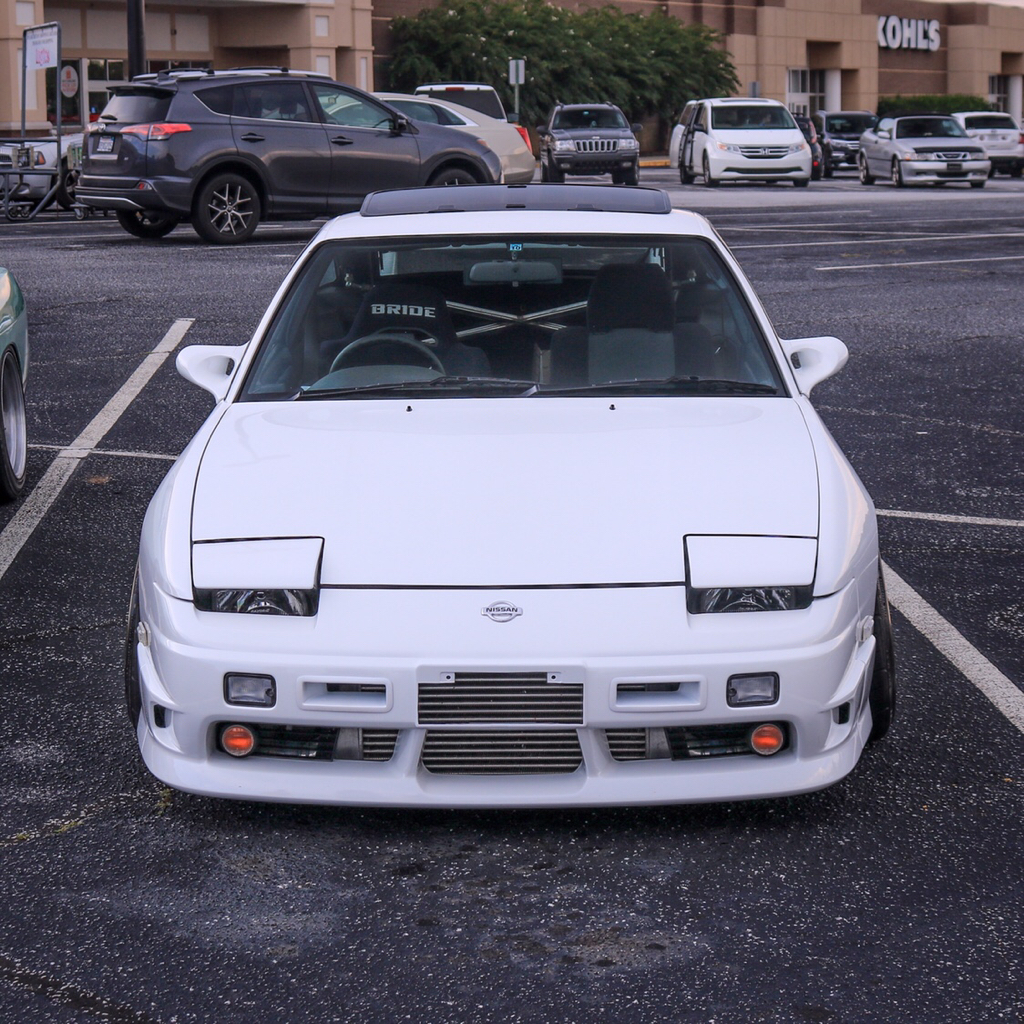 I also got my hands on some Defi Link Meter gauges that I'll be installing with the cage over the winter 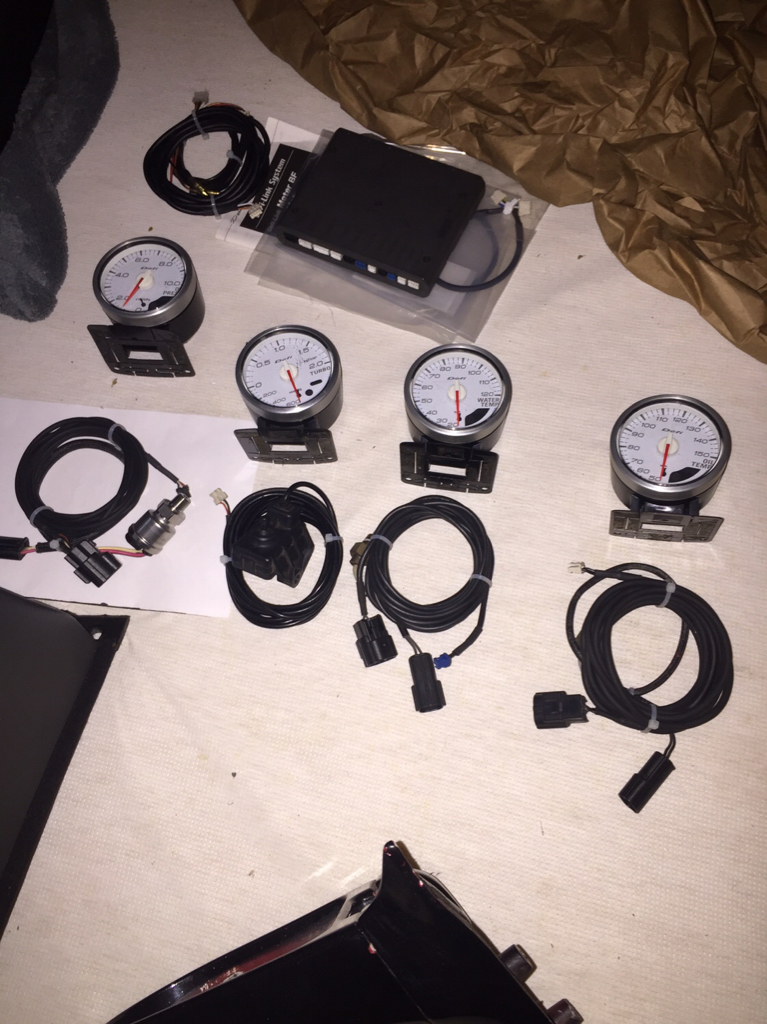 Picked up a Pivot RHU-M that I'll be wiring up over the winter as well 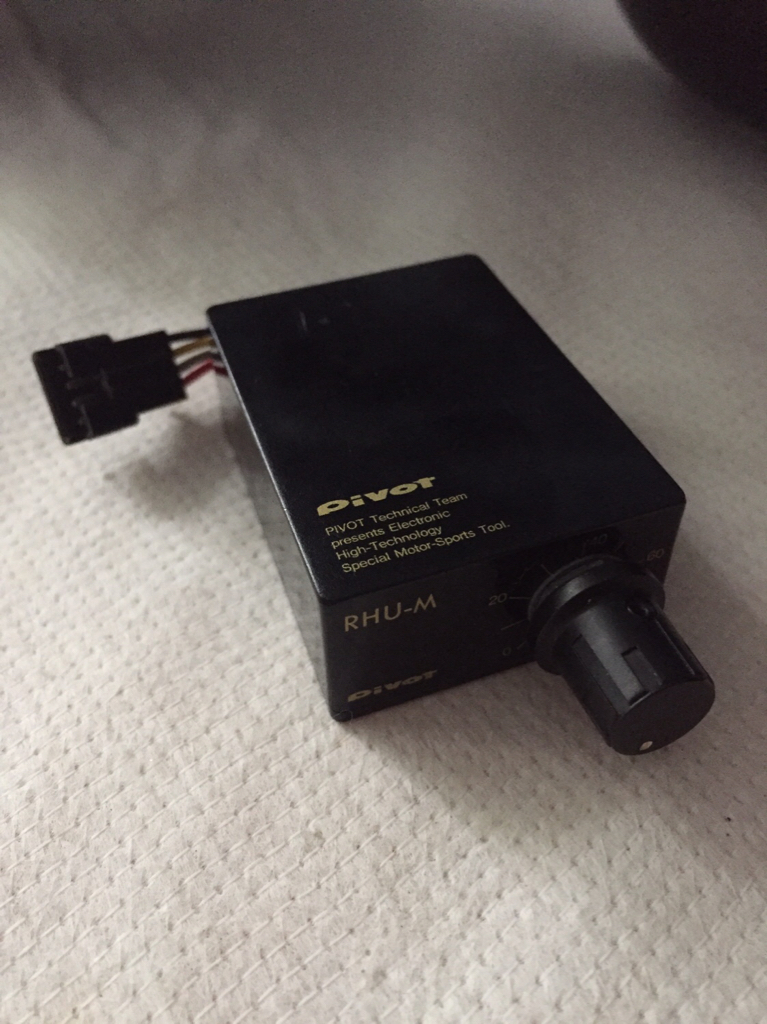 Well that's all I have for now. Thanks!
__________________
Garage Abstract IG: @teddylesshq Last edited by Teddyless; 09-15-2018 at 07:16 PM.. |
|
|

|
|
|
#42 |
|
Zilvia Member
 Join Date: Oct 2016
Location: South Carolina
Age: 23
Posts: 150
Trader Rating: (3)
          Feedback Score: 3 reviews
|
Teddy's Southeast 180SX Build
Woah it’s been 7 months since my last update. I couldn’t even remember where I left off at and had to go back and look. Well, quite a few things have changed over the months, and I planned on making an update at the beginning of the year. However, my phone broke and I lost all of my research and pictures of my car, along with the documentation for the next few updates. So. Here we are.
My car recently got rear ended, so I’m writing all this out since I have a little more free time right now. The damage wasn’t as bad as it could’ve been, but is still about $3500 worth. So I’m fighting with insurance (again) to cover the costs. Over the winter I pulled the dash back out and tore most of the interior apart to make a few changes. The first one being a Defi Link Meter II setup with gauges placed in the dash. I measured out the four gauges and drilled through my uncracked dash (yikes). The outcome was very nice, and I always wanted an Itai inspired gauge setup. The sensors were routed through the firewall and the link meter mounted on the dash. While I had the dash out, I went ahead and wired up my Pivot headlight controller, and cut out the cluster bezel to mount it beside the headlight button. It’s a pretty neat device that works correctly every time about 40% of the time haha. Next was the Cusco Safety21 seven point cage. I was brainstorming how I was going to cleanly cut through the rear seat side plastics so that the rear bars could be mounted to the wheel wells. I ended up first mounting the bars in place without the plastics and drilling the holes in the wheel well to mount it. Once that was done, I made a cardboard template of the base of the bar and measured where the center of the diameter of the bar came down on the template and made a dot. I then bolted that template to the wheel well using the mounting holes I drilled earlier. Then, I rigged a laser pointer to the top of the main hoop where the top of the rear bar was mounted. I aimed the laser at the center dot on the template, so technically, the path of the laser is the same path of the rear bar. I then snapped the side plastic into place and marked where the laser landed on the plastic. I pulled the plastic back off and made sure the laser was still on the template dot, and began drilling through the plastic. I did that for each side. It worked out pretty well, the right side was a bit tricky because it had the cross bar meeting it at the bottom, so I had to dremel out some more material. I don’t know if there is an easier way out there, but I’m happy with the results. (Again, I’m sorry there’s no pictures. If I can recover everything from my old phone, I will update this post to make this easier to comprehend haha) While I’m talking about interior, I decided to switch to a silver Nardi classic to better suite the gauges. I also added a period correct cell phone holder to the center vent (need to paint it black) and a cellstar assura. I decided to give the red interior a go with some Bride Brix 1.5’s and G-Corporation floor mats. I also bought some genuine red Bride fabric I plan on wrapping the door panels and glovebox with. On to the outside, I finally installed my old style Kakimoto catback (although now I want a trust dd or perhaps a works9). I have a D-MAX roof wing, Koguchi Power hood, and Hot Road front lip mocked up and prepping for paint. I decided to dress up my SR a little bit over the winter. I bought a Yashio Factory 3 layer S14 radiator that unfortunately had the upper tank damaged in shipping, so now it’s a nice wall decoration. For now I added an aluminum S14 radiator and dual fan setup. I also got a Yashio Factory water pump pulley, and Greddy power steering and alternator pulleys. I had the valve cover powder coated, added an HKS oil cap, and installed some purple Samco hoses. About halfway through doing everything I came across a forged bottom end red top for a good price, and snatched it up. I changed out the T28 it had for a TD06 20G 8cm housing. It came with an extremely cracked and repaired mid mount manifold that I’ll be swapping for a top mount. I’ll also be adding new staggered HKS cams and valvetrain along with an entire refresh. But that’s a future project. I’m not really sure where I want to go next with the car. I’ve been dealing with so many other expenses lately, it hasn’t really been a priority. Feel free to give me feedback or ask me questions haha. I’m trying to get motivated to work on it again!! Here are all the current pictures of the car. Enjoy~ 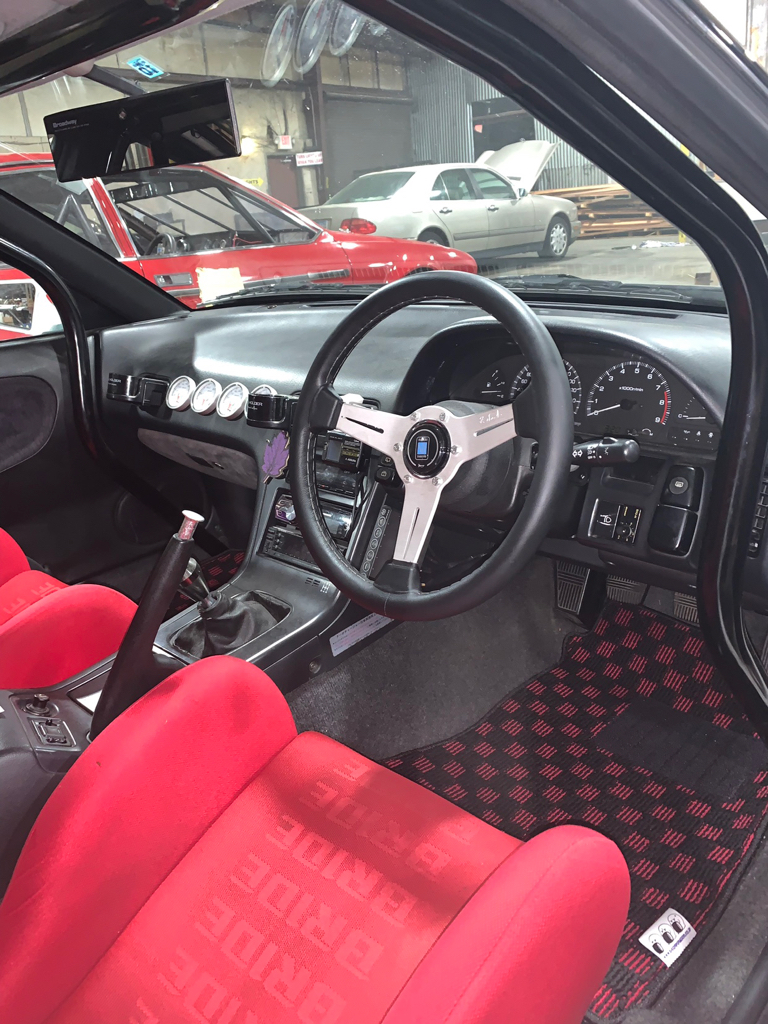 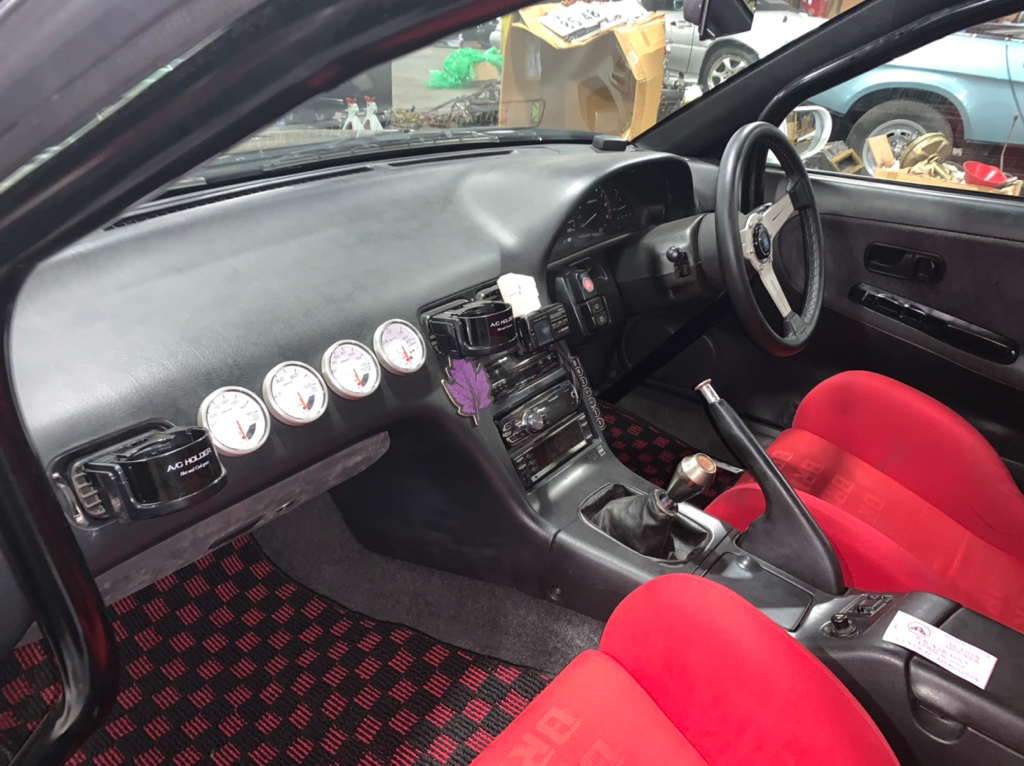 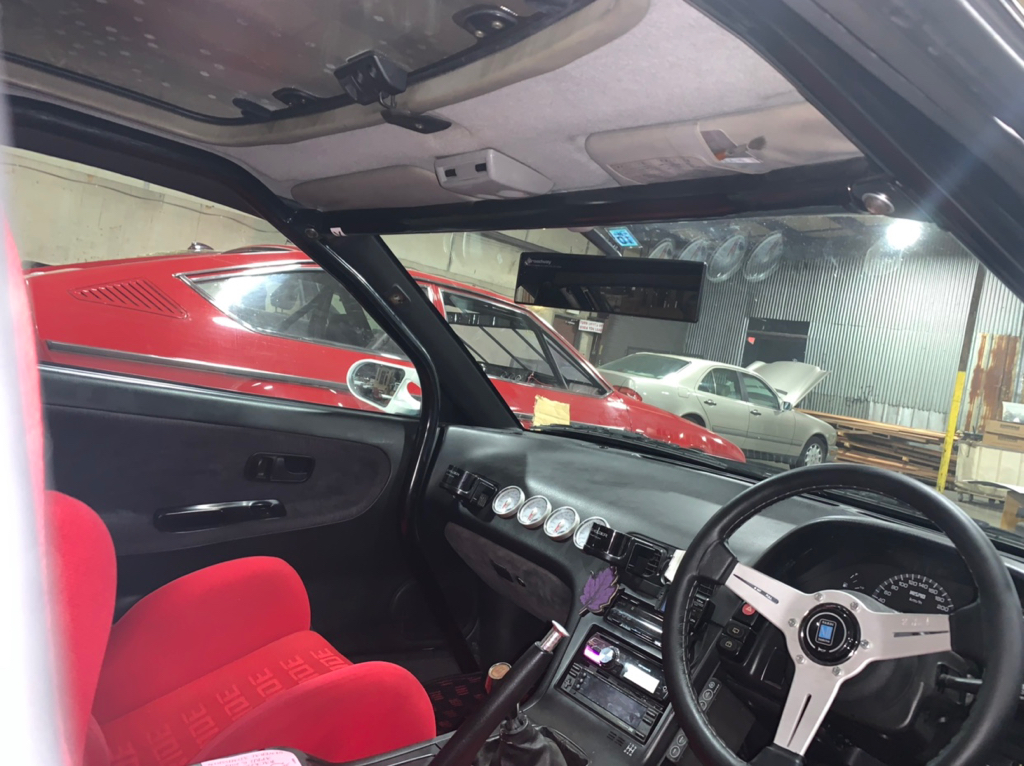 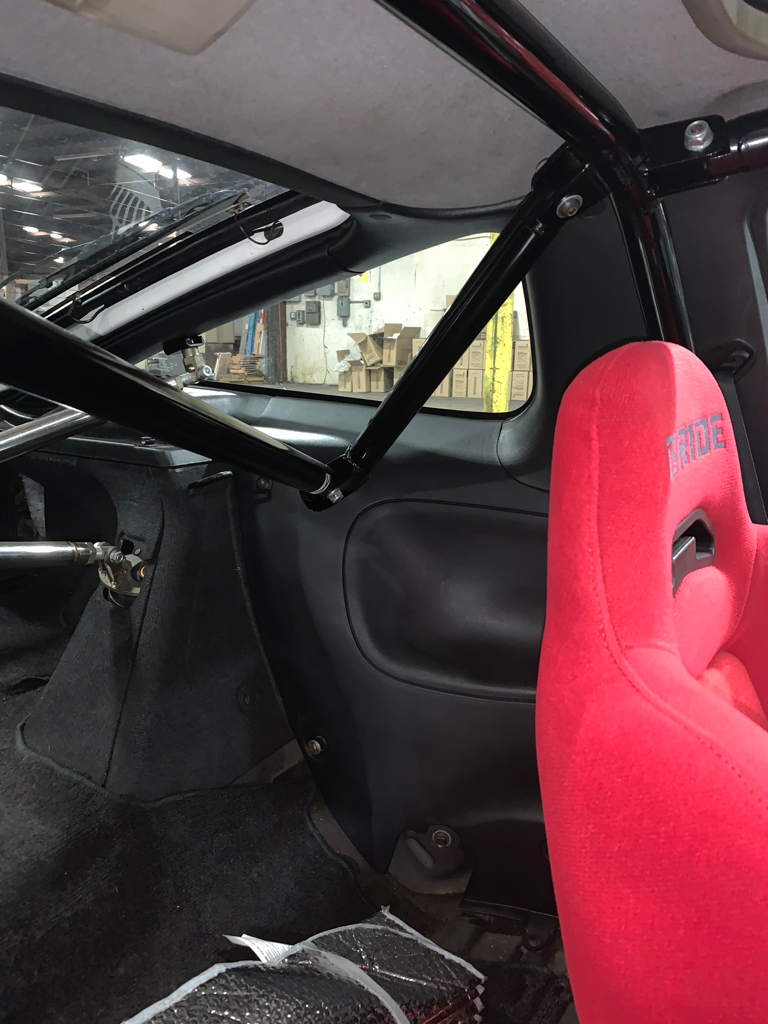 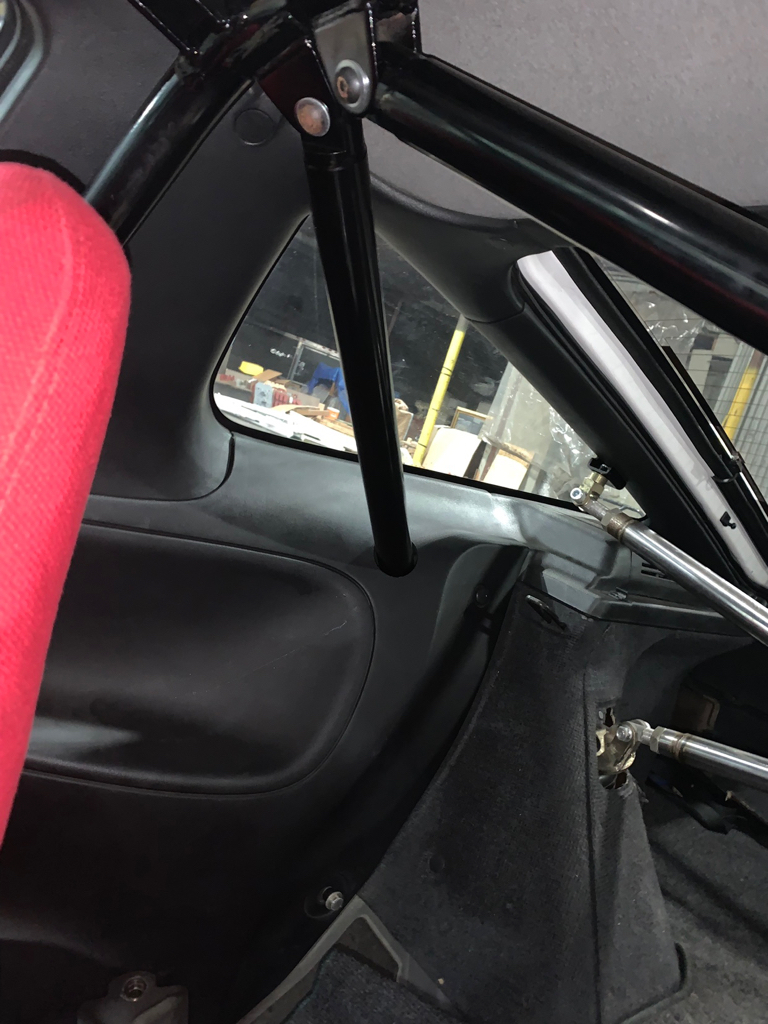 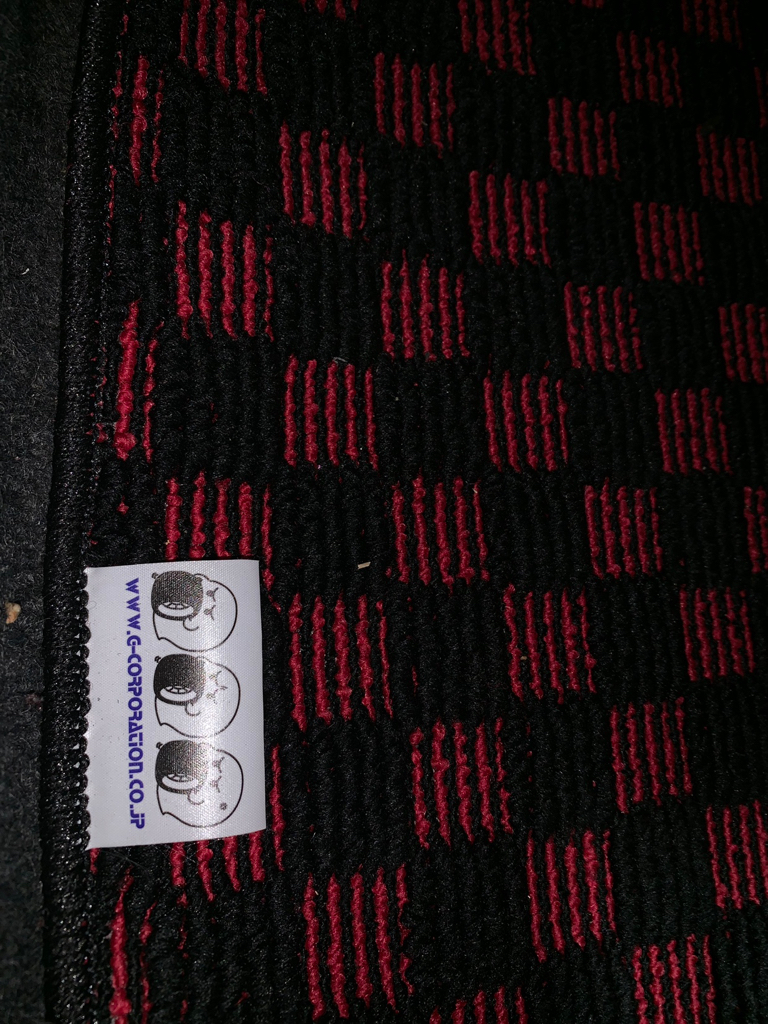 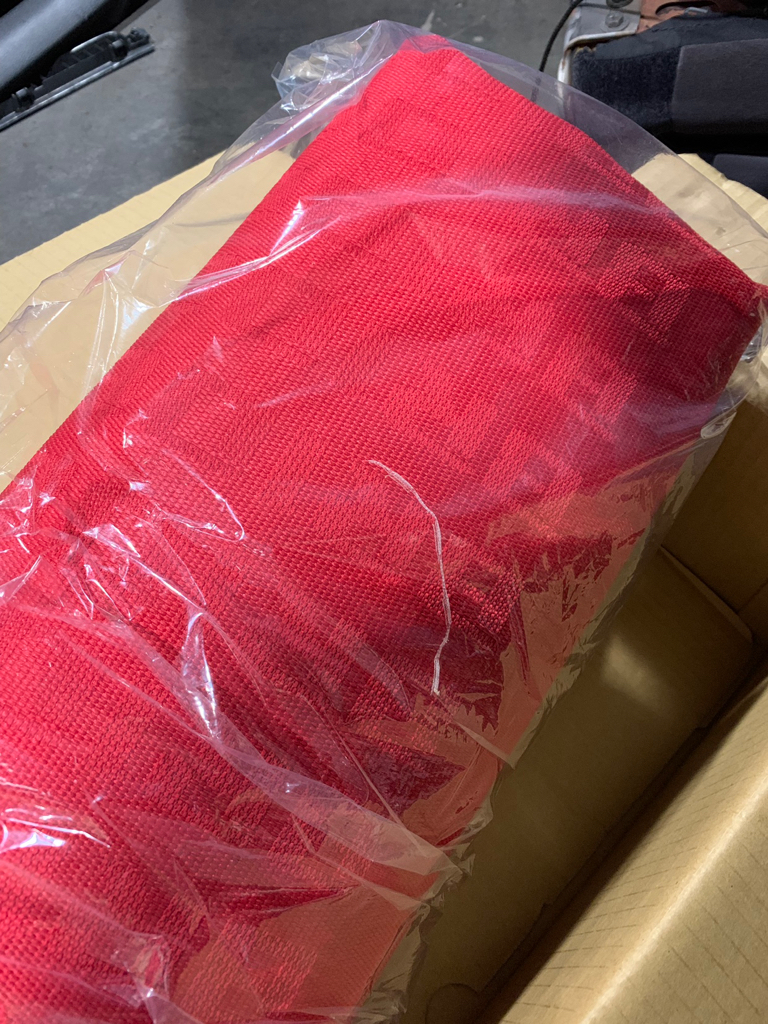 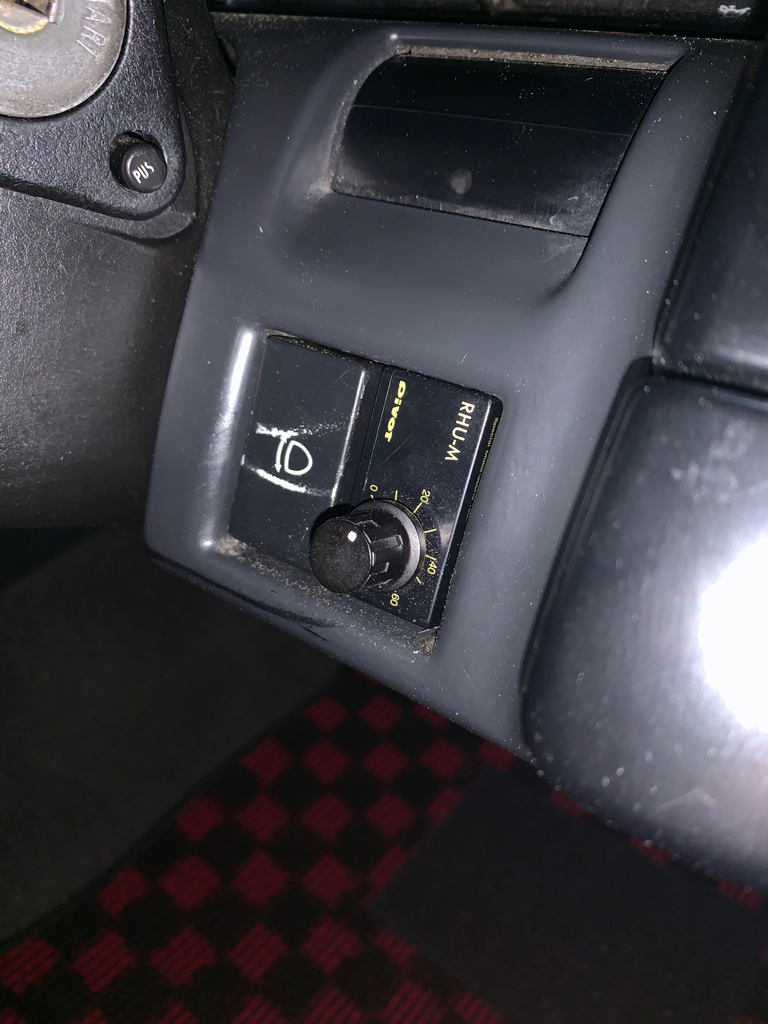 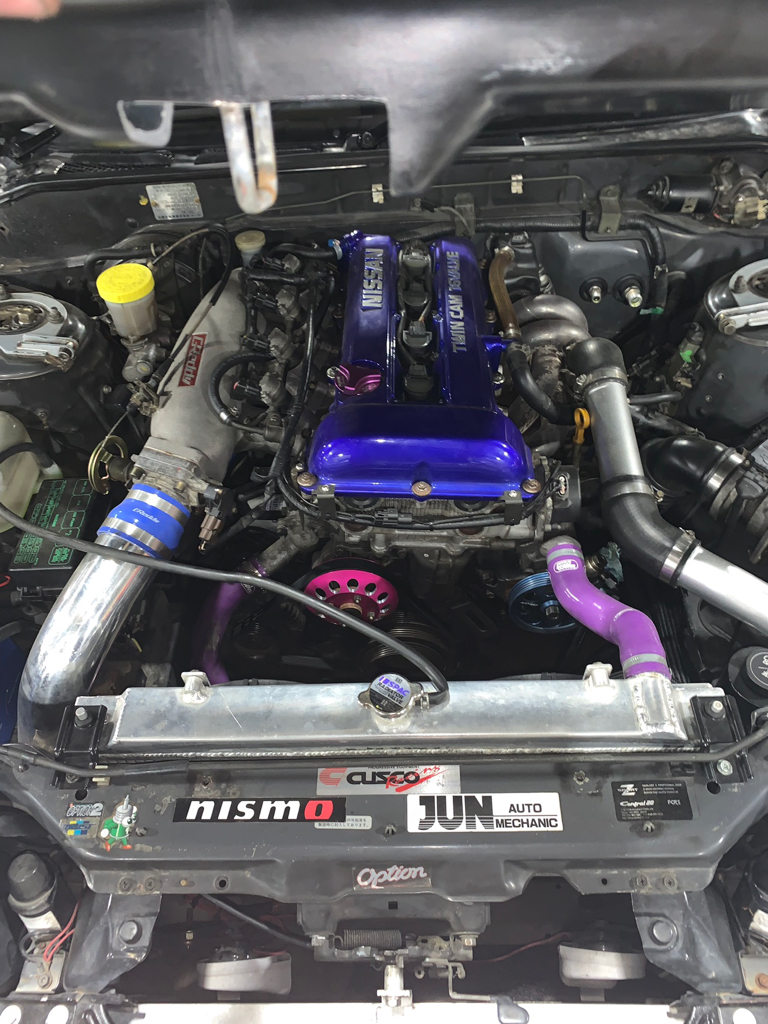 (Overflow hose just temporary lol) 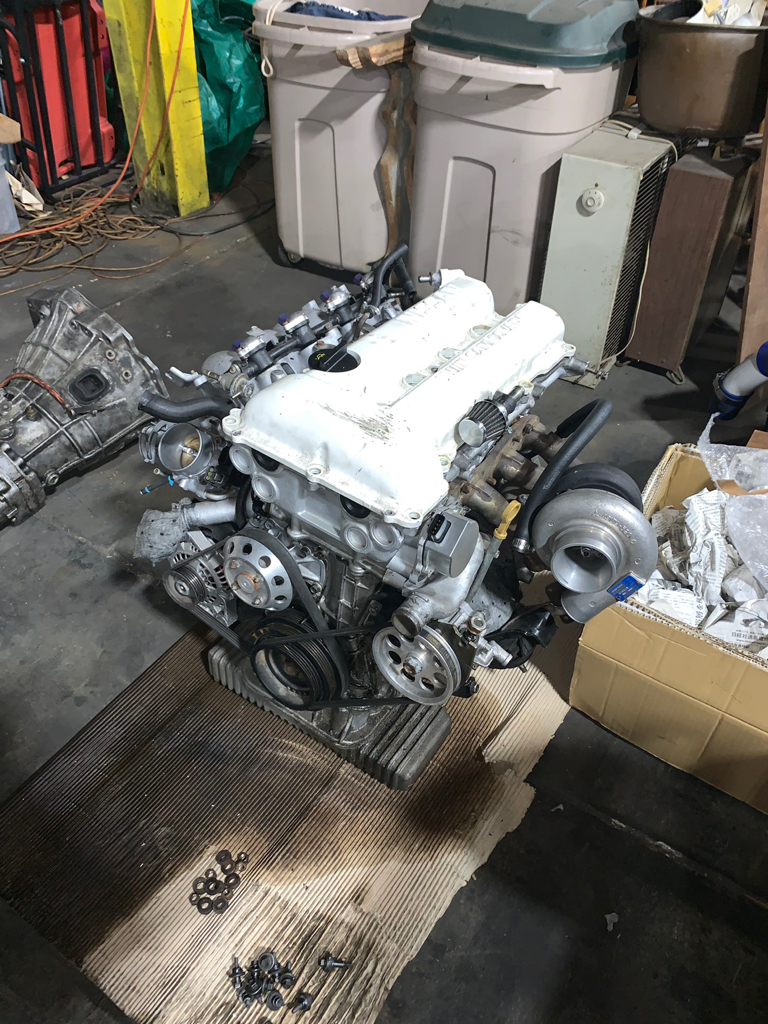 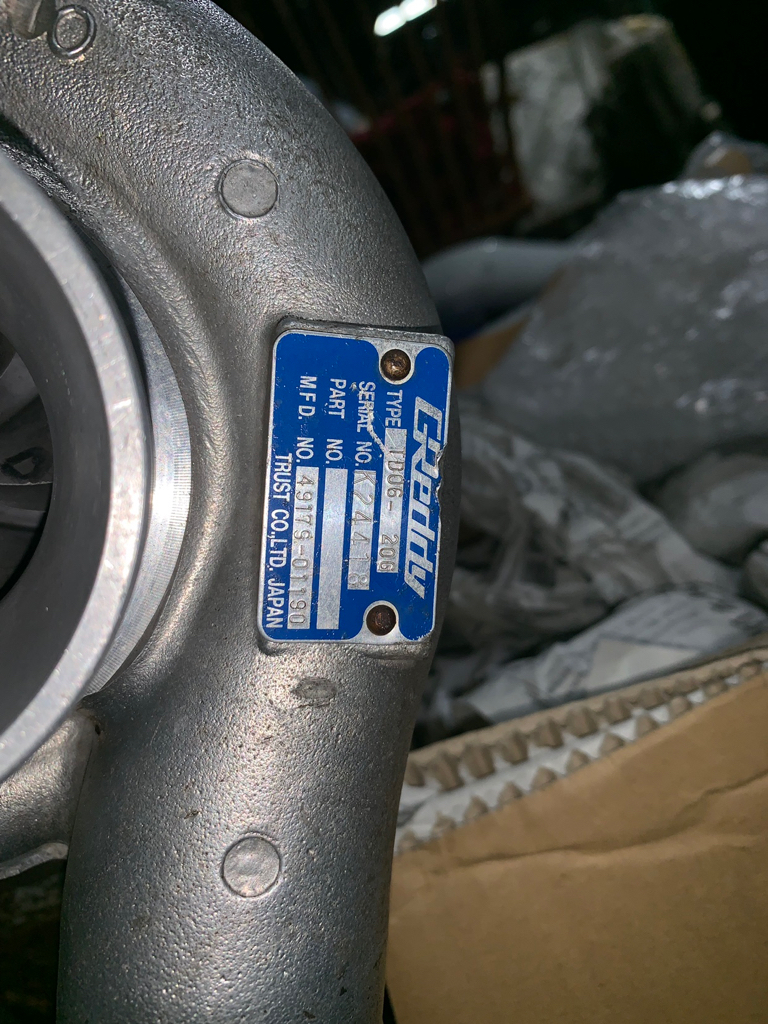 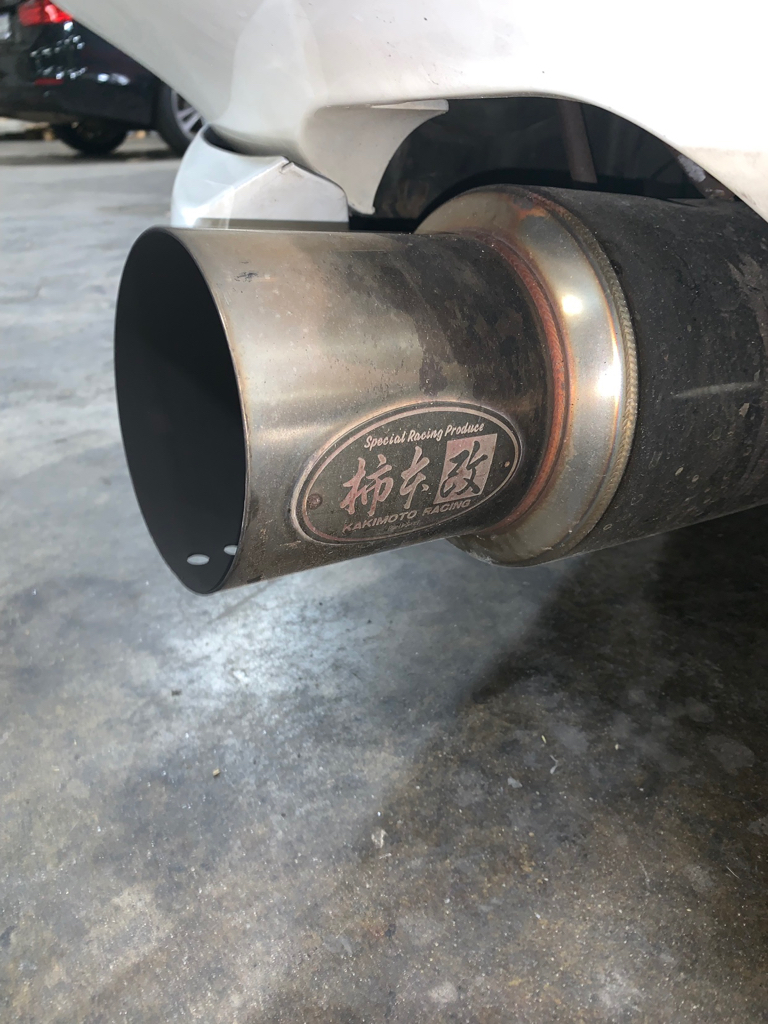 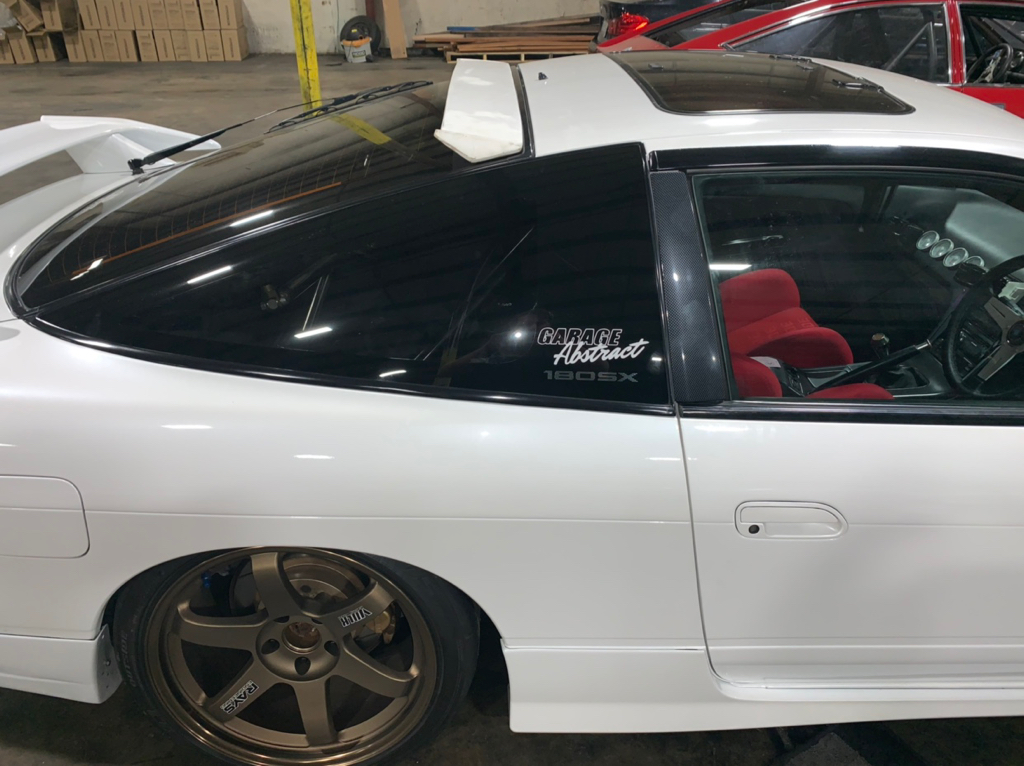 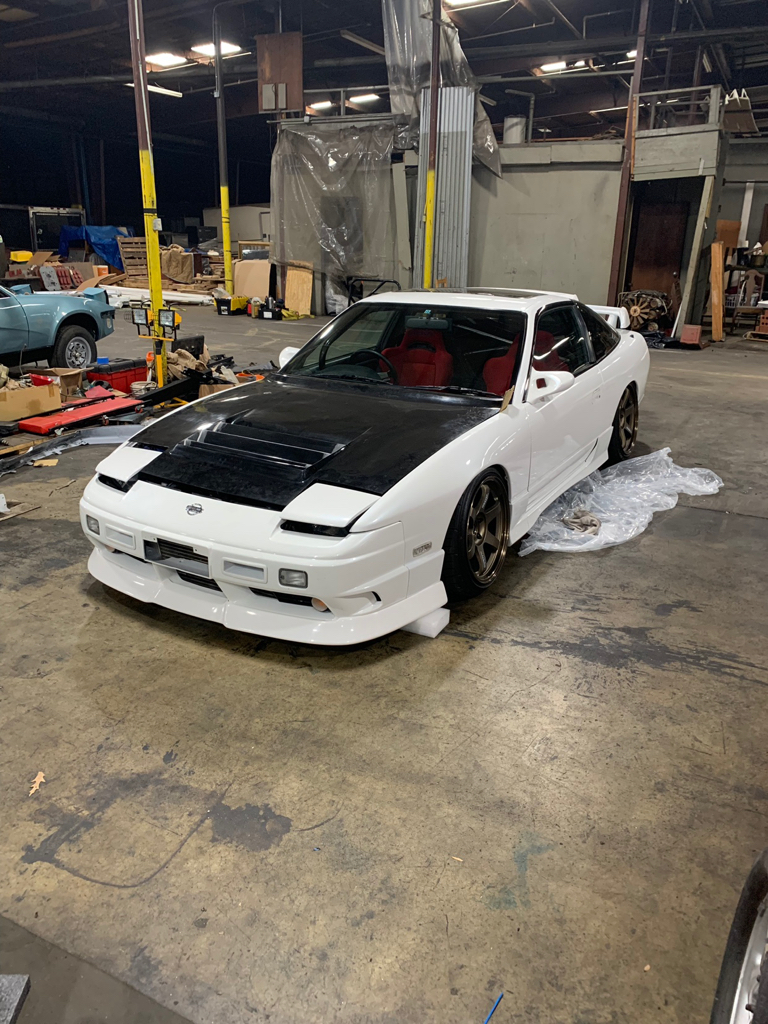 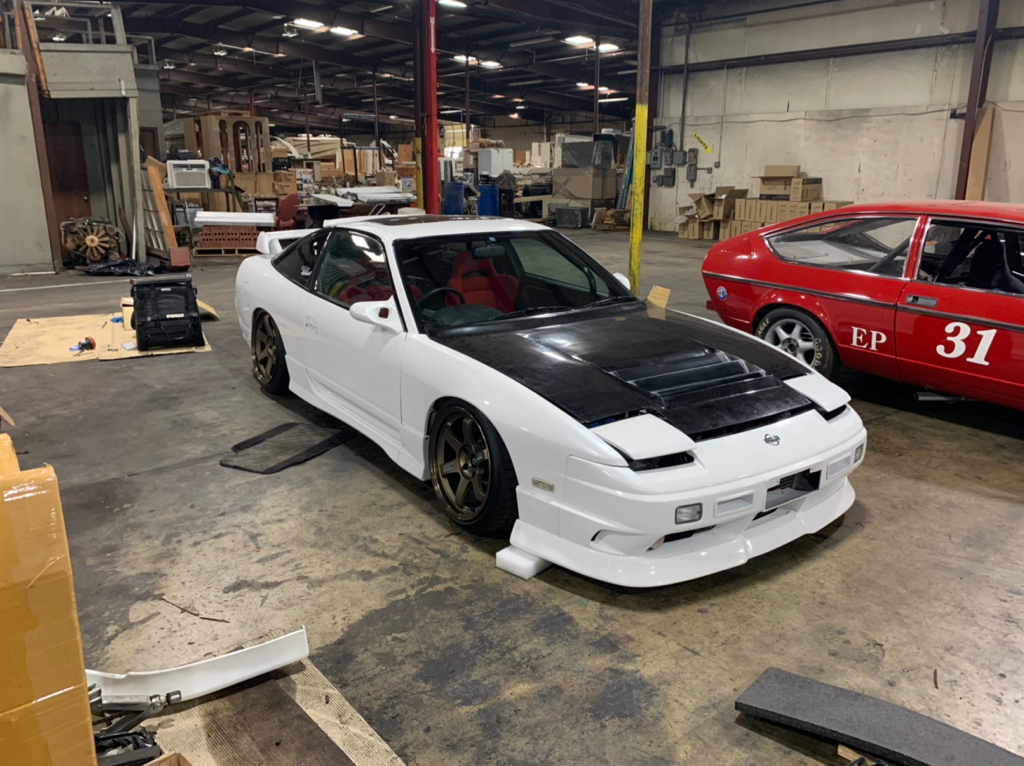 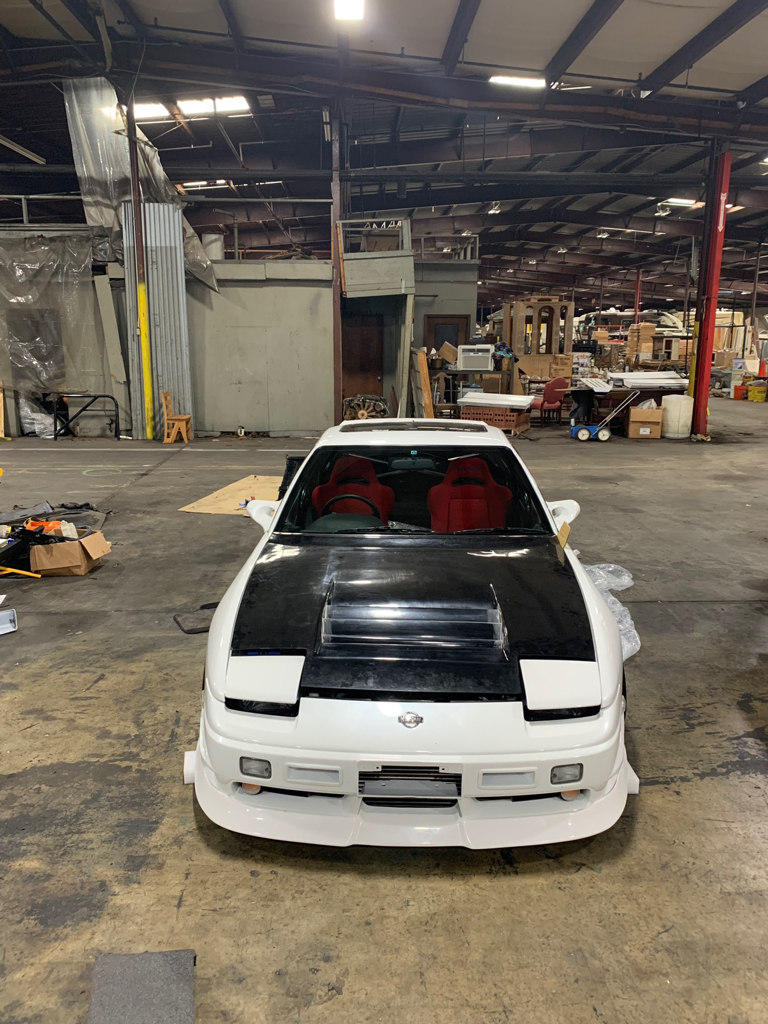
__________________
Garage Abstract IG: @teddylesshq Last edited by Teddyless; 04-21-2019 at 08:58 AM.. |
|
|

|
|
|
#43 |
|
Zilvia Junkie
 |
The car looks amazing as always & the cutouts for the cage came out fantastic. Ups to you for drilling in all these 30 y/o plastic pieces lol. Making me think about a cage now
 Sent from my iPhone using Tapatalk |
|
|

|
|
|
#44 |
|
Nissanaholic!
 |
Love how shitty KP hoods seem to fit. I have owned 3 of them and they all fit like ass!
Shit I have one now, brand new, fits terrible. At least it came with a sticker this time lol. Love the car and progress op! |
|
|

|
|
|
#45 |
|
Post Whore!
 Join Date: Apr 2007
Location: Left Hand Path
Posts: 2,652
Trader Rating: (22)
           Feedback Score: 22 reviews
|
Fantastic parts collection. It must feel so exhilarating drilling in to an un-cracked, perfect dash. Nice install work.
Your car has some cool company in that workshop place =)
__________________
... ... ... ... . |
|
|

|
|
|
#47 | ||||
|
Zilvia Member
 Join Date: Oct 2016
Location: South Carolina
Age: 23
Posts: 150
Trader Rating: (3)
          Feedback Score: 3 reviews
|
Quote:
Thank you! It was definitely one of the more stressful things I’ve done haha Quote:
Thanks man! Can’t wait to see yours with the gt4’s! Quote:
Man you’re not kidding. I searched forever for an original racing service max hood, but finally decided to throw in the towel and get a KP. It’s definitely going to need some work to look right haha Quote:
Thanks for the continuous support man! It really means a lot!
__________________
Garage Abstract IG: @teddylesshq |
||||
|
|

|
|
|
#49 |
|
Zilvia Member
 Join Date: Oct 2016
Location: South Carolina
Age: 23
Posts: 150
Trader Rating: (3)
          Feedback Score: 3 reviews
|
Okay, this isn’t a HUGE update like the last couple have been, but I want to start posting more frequently, even if that means not a lot of progress takes place.
Not too much has changed since the last post. I’ve mocked up the Hot Road front lip, and have been tinkering with the KP hood trying to get it to fit better. So far I’ve had to further notch all four bolt holes on both hood hinges in order to slide the hood forward about a quarter of an inch. I’ve also notched the hood latch in order to allow more adjustment height wise as well. It’s almost there, however I need to relocate my battery because the right front corner of the hood is sitting on my negative post and not sitting flush with the fender/headlight. I’ve also began ordering parts to repair the rear of my car. So far I’ve acquired a brand new OEM hatchback rear bumper cover, as well as a new OEM kouki lower taillight panel. I also need a new rear bumper support, but I figure I can dig one of those up locally. Then off to the body shop! 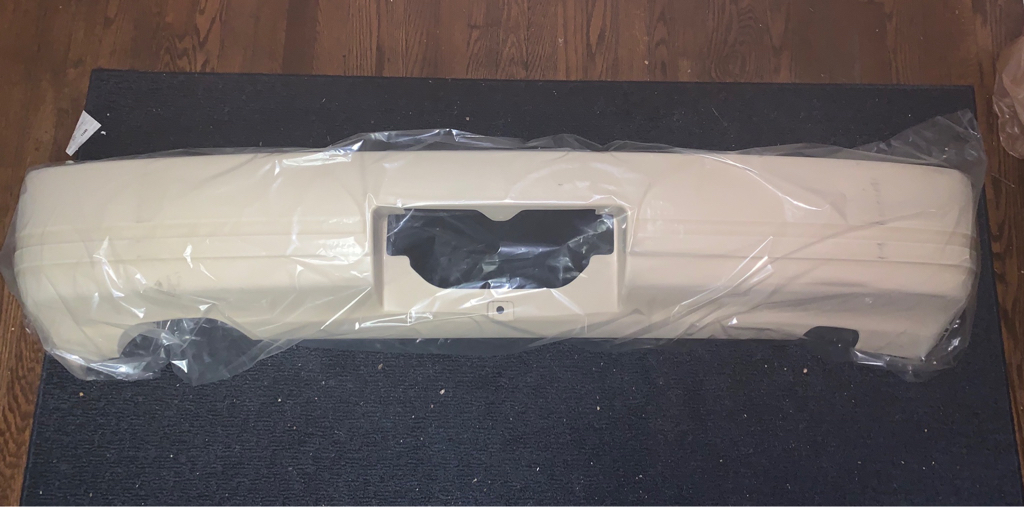 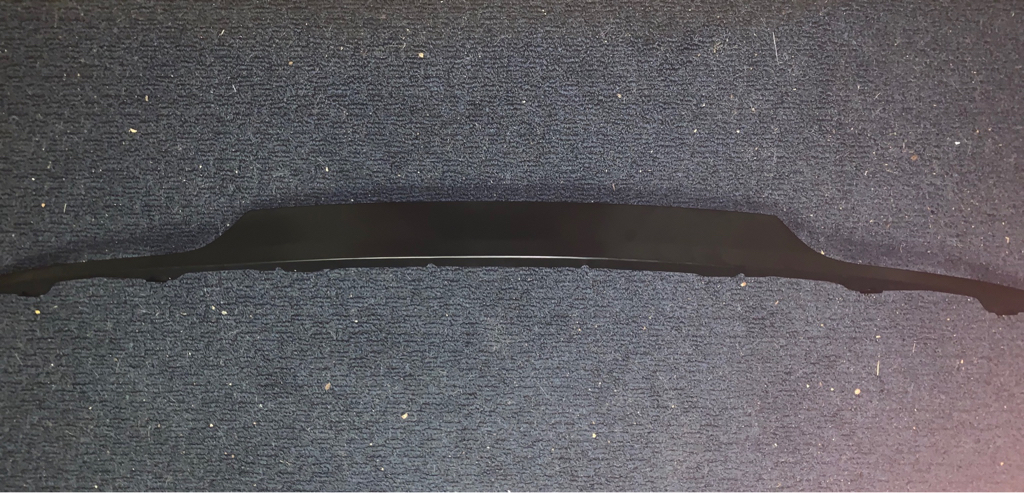 In the meantime, I’ve gotten a few more goodies here and there. Tomei 3 point strut brace and an old Zeta 1 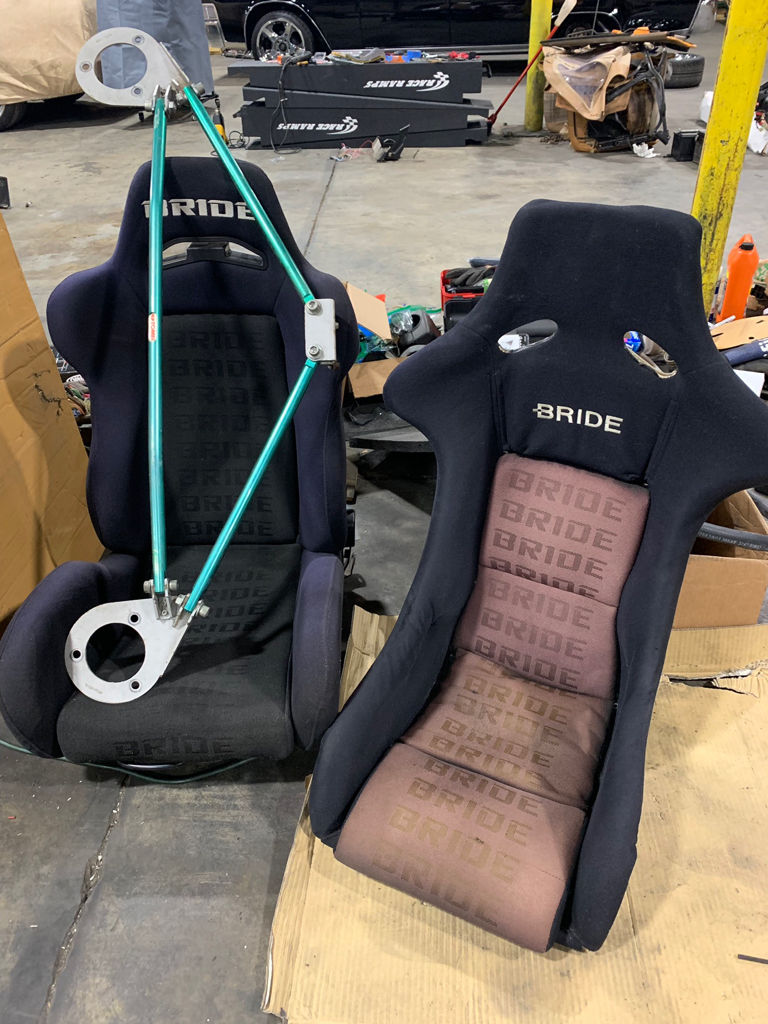 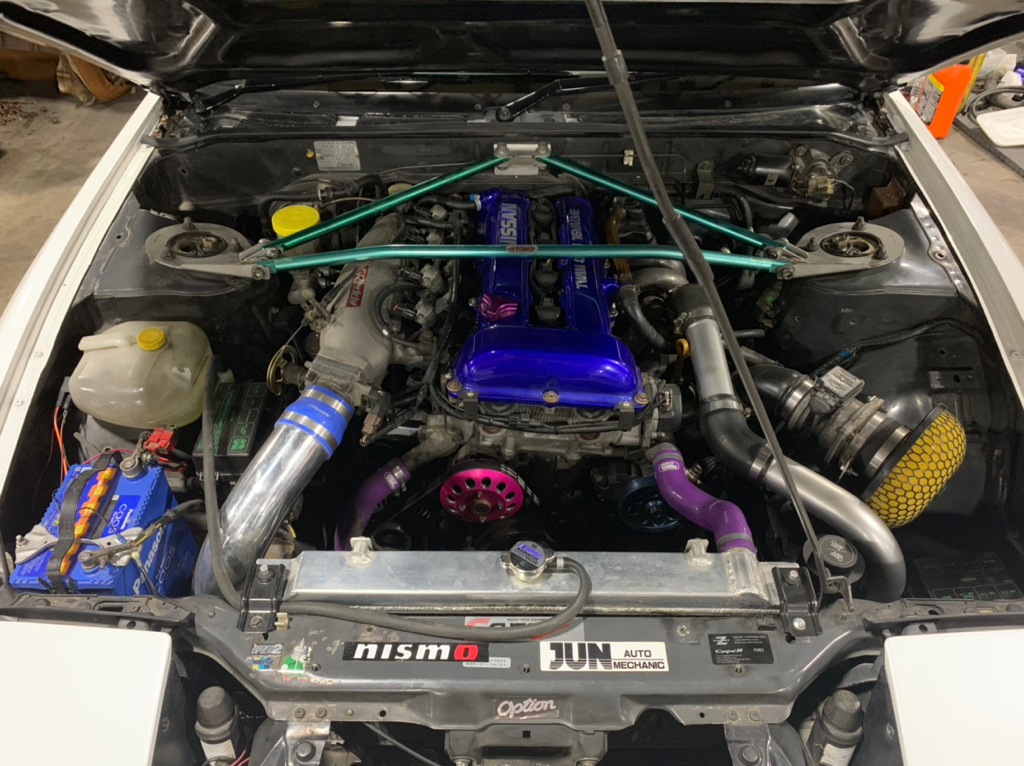 I’ve slowly been progressing with the red interior by peeling the fabric off a spare glove box. I need to get a staple gun to secure the bride fabric to the back side. 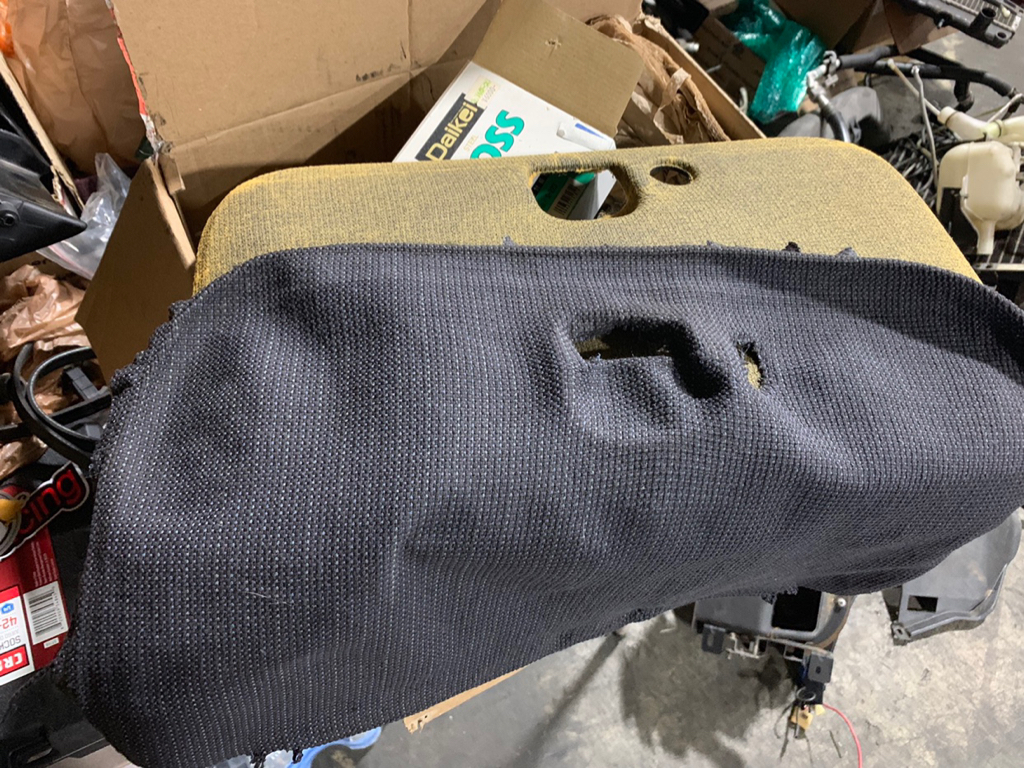 Still on the hunt for a dual/blast pipe style exhaust! Either trust or Works9! 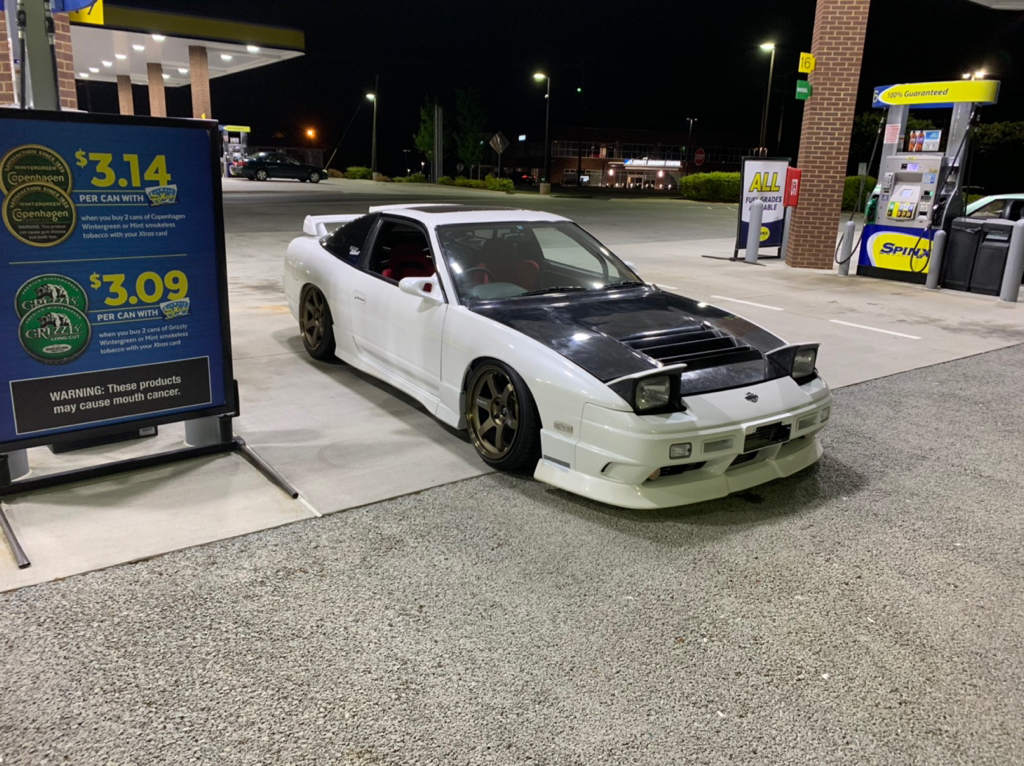 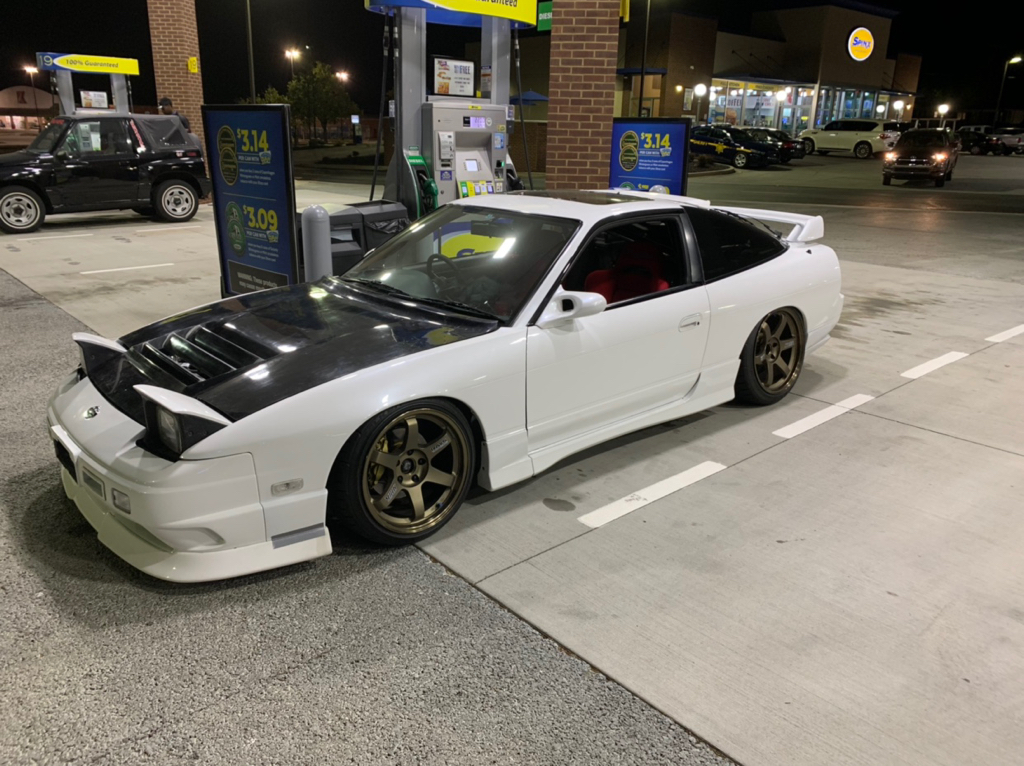 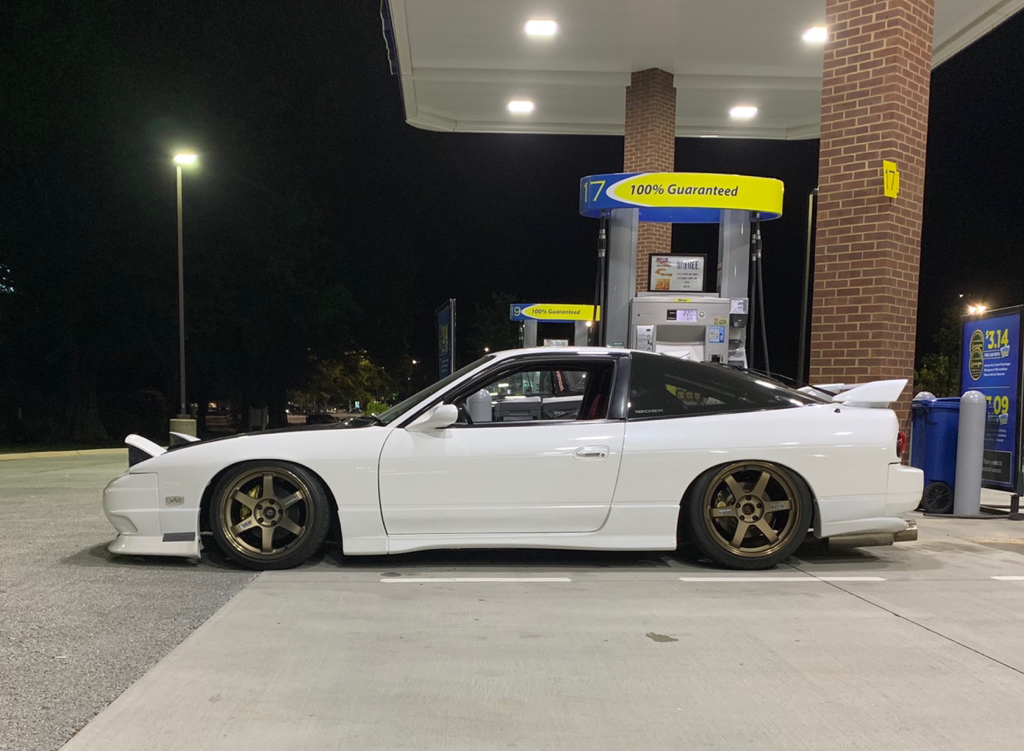 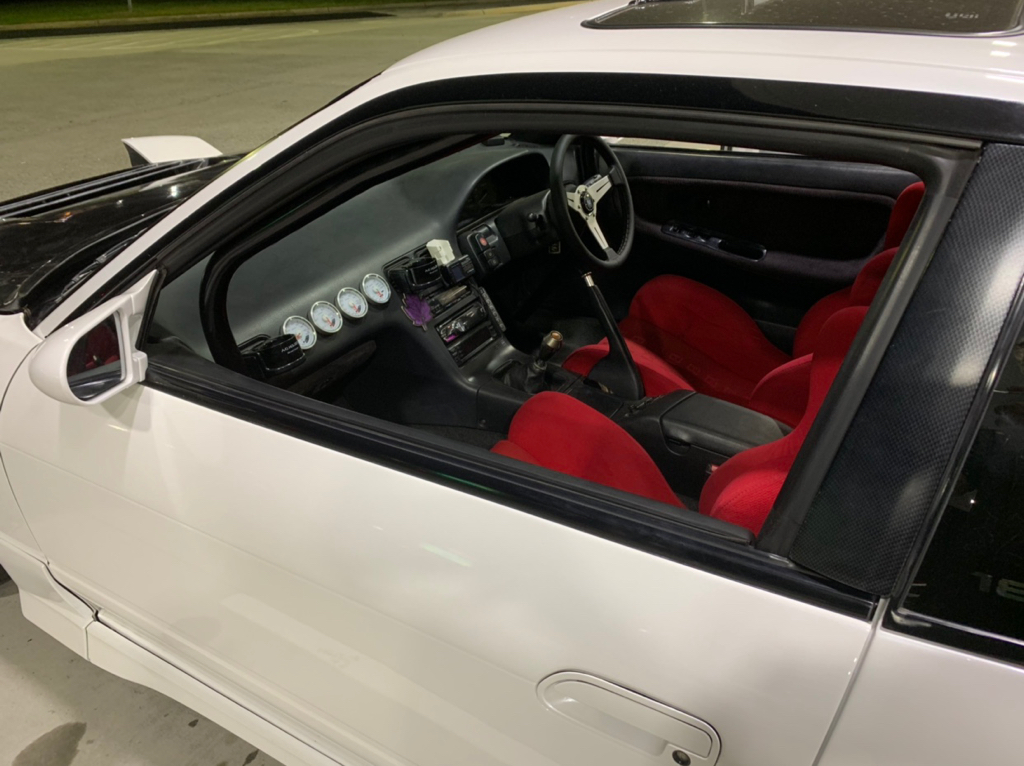 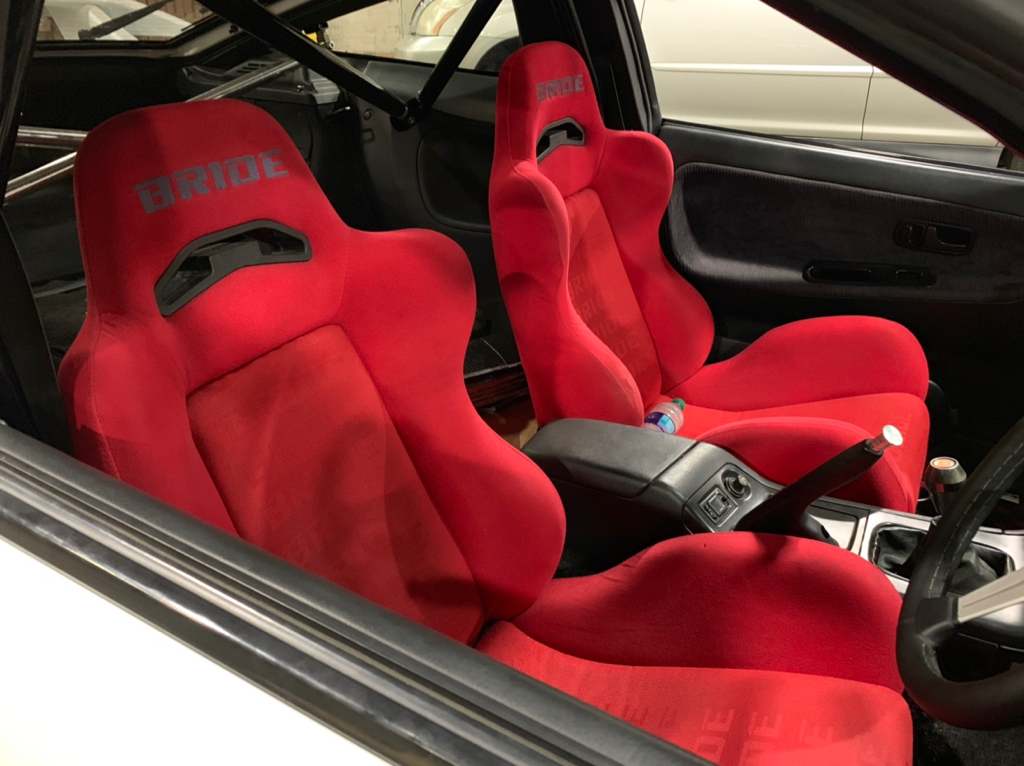 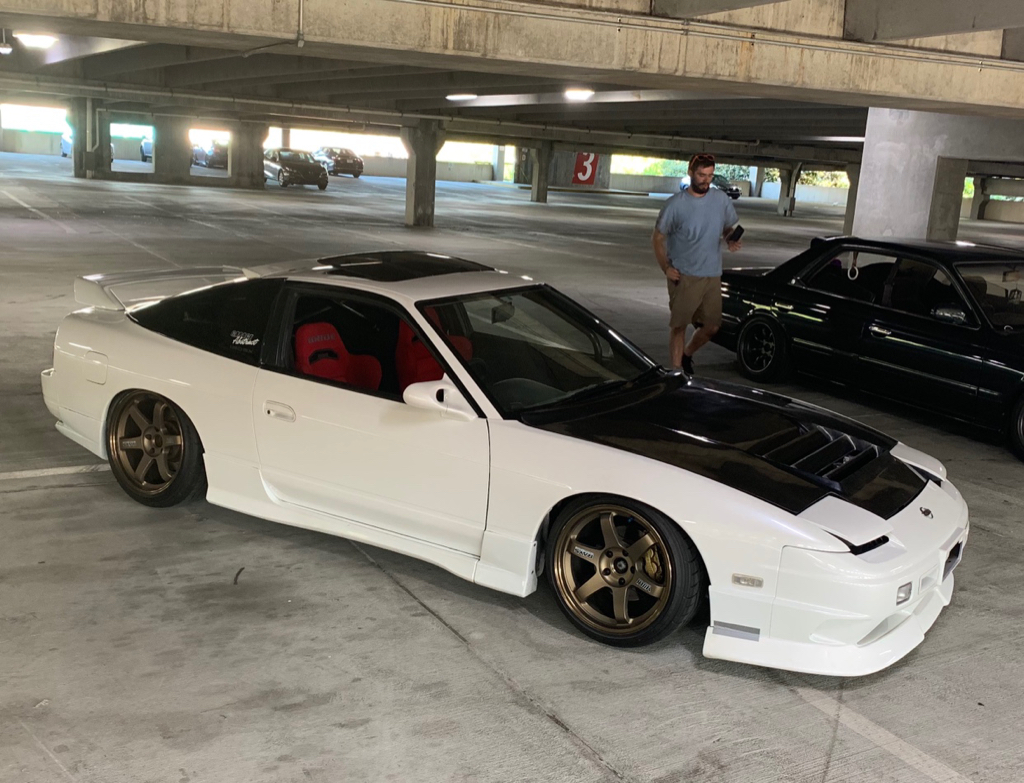
__________________
Garage Abstract IG: @teddylesshq |
|
|

|
|
|
#50 |
|
Zilvia Junkie
 Join Date: Oct 2013
Location: Savannah
Age: 36
Posts: 562
Trader Rating: (4)
           Feedback Score: 4 reviews
|
Car is looking good! Whats the little box by the glass ontop of the dash?
__________________
Need aftermarket parts? PM or DM me competitive pricing! [email protected] |
|
|

|
|
|
#51 | |
|
Zilvia Member
 Join Date: Oct 2016
Location: South Carolina
Age: 23
Posts: 150
Trader Rating: (3)
          Feedback Score: 3 reviews
|
Quote:
That’s a sensor for the little Japanese radar detector I have mounted below my center vent Sent from my iPhone using Tapatalk
__________________
Garage Abstract IG: @teddylesshq |
|
|
|

|
|
|
#52 |
|
Nissanaholic!
 |
Love this build, lots of 180sx aero KP bonnet builds going around lately!
|
|
|

|
|
|
#56 | |
|
Zilvia Member
 Join Date: Oct 2016
Location: South Carolina
Age: 23
Posts: 150
Trader Rating: (3)
          Feedback Score: 3 reviews
|
Quote:
WK0 Aspen White Pearl Glow Sent from my iPhone using Tapatalk
__________________
Garage Abstract IG: @teddylesshq |
|
|
|

|
|
|
#57 |
|
Zilvia Member
 Join Date: Oct 2016
Location: South Carolina
Age: 23
Posts: 150
Trader Rating: (3)
          Feedback Score: 3 reviews
|
Teddy's Southeast 180SX Build
SMALL UPDATE:
Continuing with the small weekly updates, I haven’t progressed too much on the 180. I decided to give the early 2000’s sticker stack up a go and designed some period correct stickers to throw on the car. Not sure how I feel about them tbh 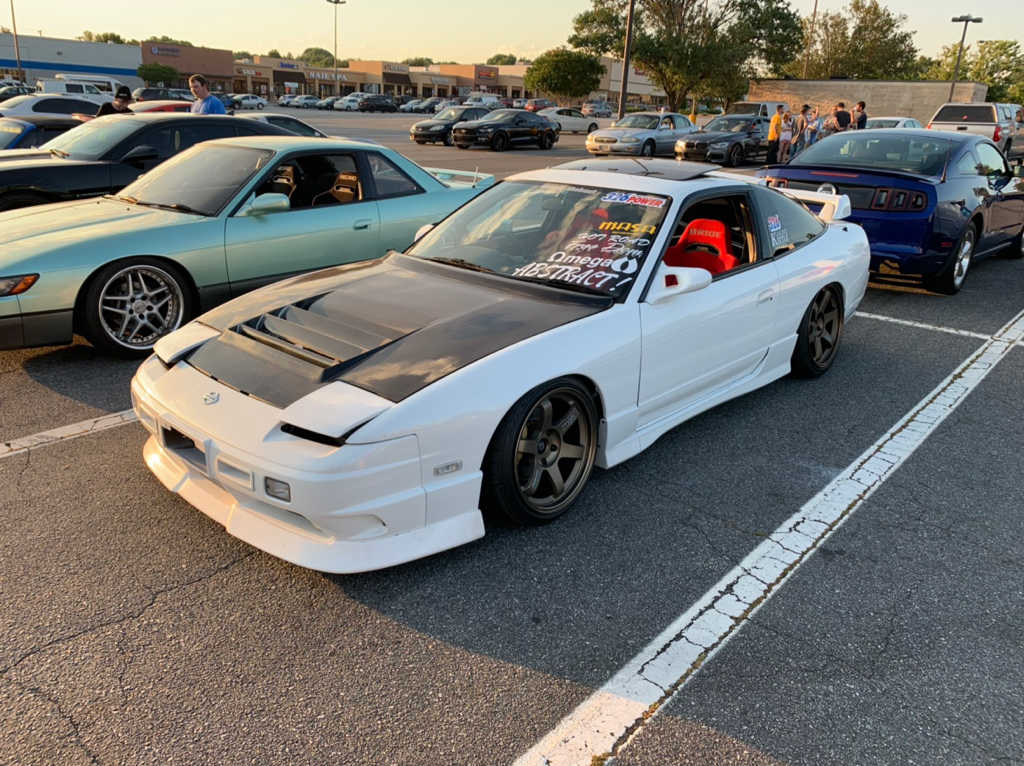 Other than that, I picked up some Honda hurricane CBR mirrors, but I’m not entirely sure I’ll put them on the car or not. I’ve ordered some base plates from yahoo japan, and am currently waiting for those to arrive before I can fully mock up the hurricanes. 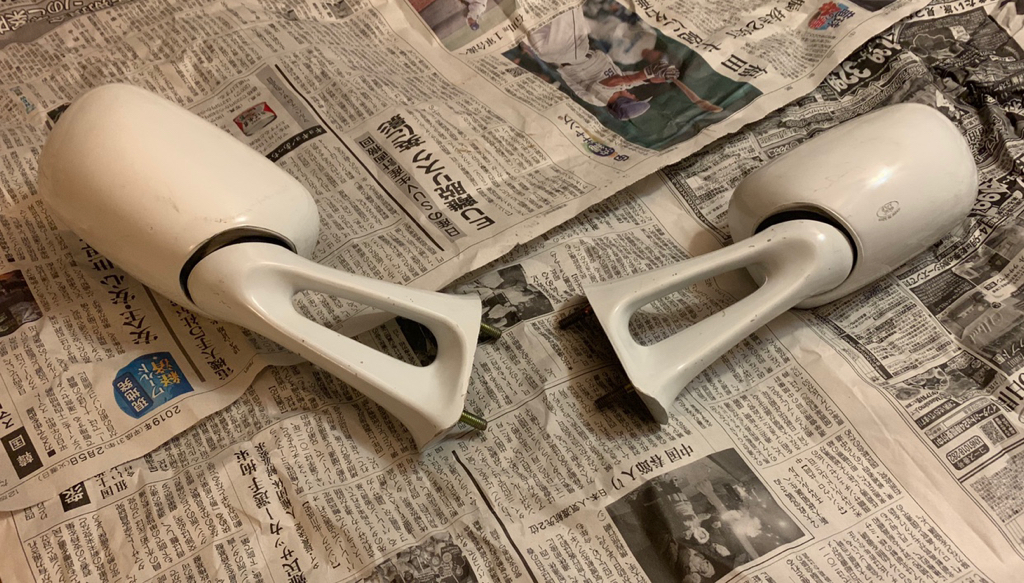 I’ll also get to finishing the red upholstery on the door cards and glove box one of these days, but the car is currently in the body shop having the rear end damage fixed, as well as the KP hood painted (yay). During this past week I picked up another 180SX that I plan on turning into more of a fun, drift oriented build (still early 2000’s street style of course). It’s looking a little rough right now, but I’ve been making steady progress so far. The car had a completely stripped interior aside from a crack-free dash and door cards. I swapped the dash out and put in a cracked dash in order to preserve the mint dash to eventually swap into the two tone S13 you can see in the background of some of the pictures. I also added a center console and an extra Damsel cluster I had. It needs carpet and more interior plastics, but I’m not all that worried about it at the moment. I’ve just been throwing spare parts I’ve had at it in order to keep costs lower for now. The interior has had the seams completely riveted and has been hand brushed silver, which is... interesting. I’ll be posting progress on the purple car in this thread as well from now on. In the future weeks I’ll be removing the current body kit, and adding aero and start stripping the body for paint ~ 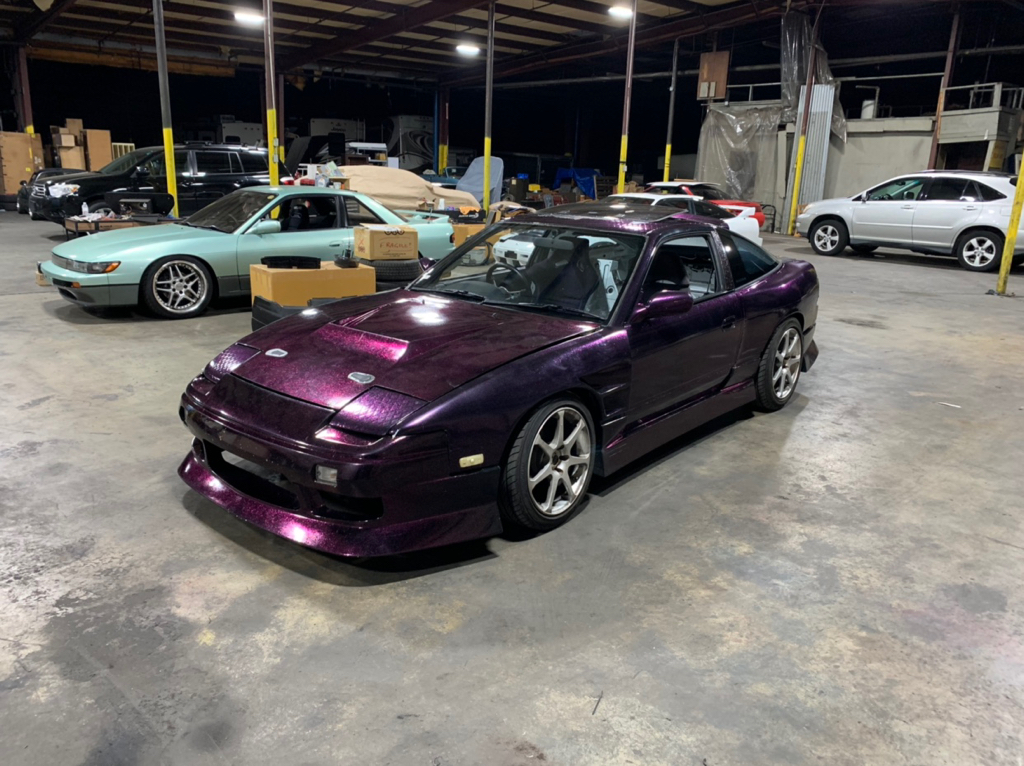 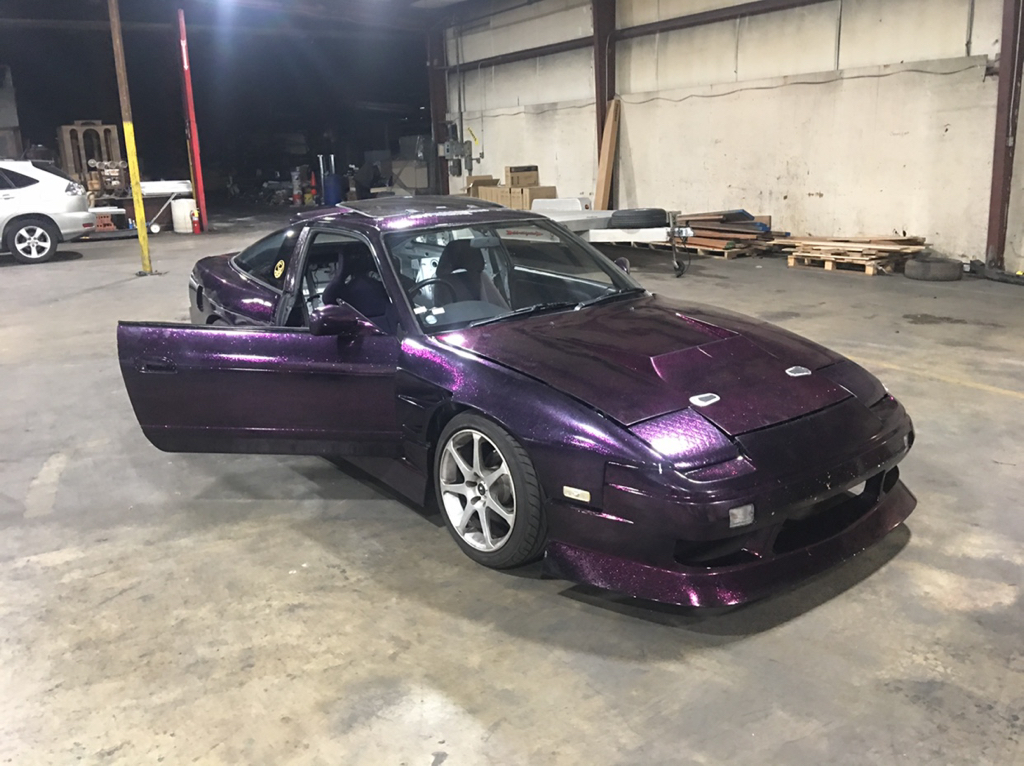 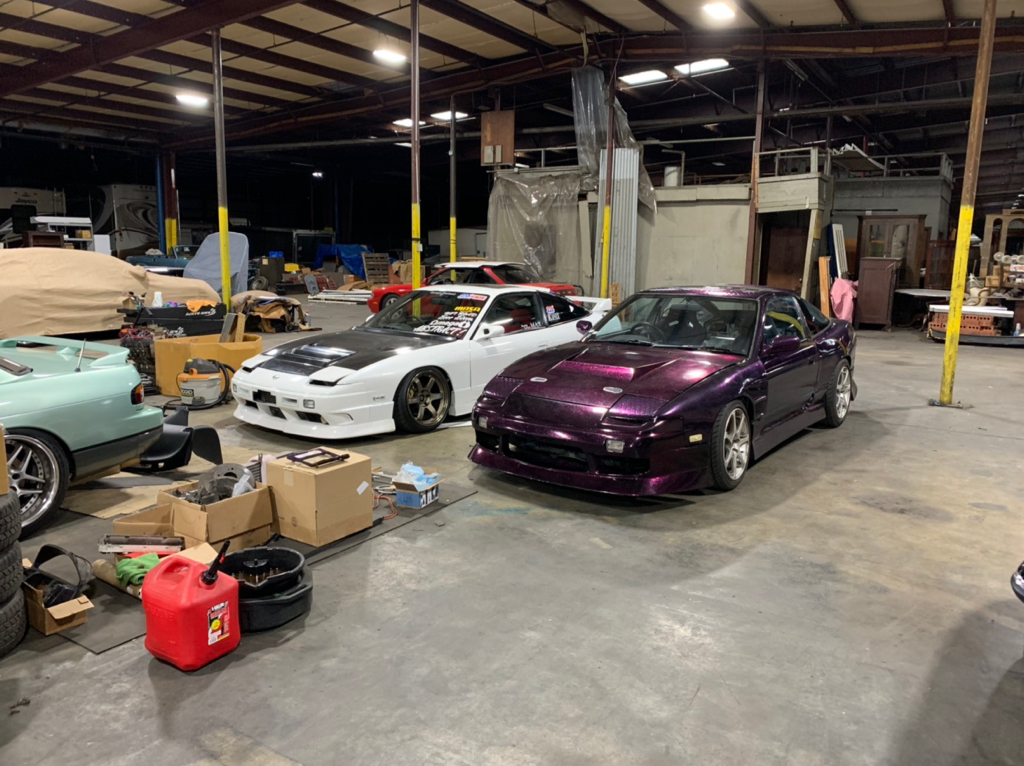 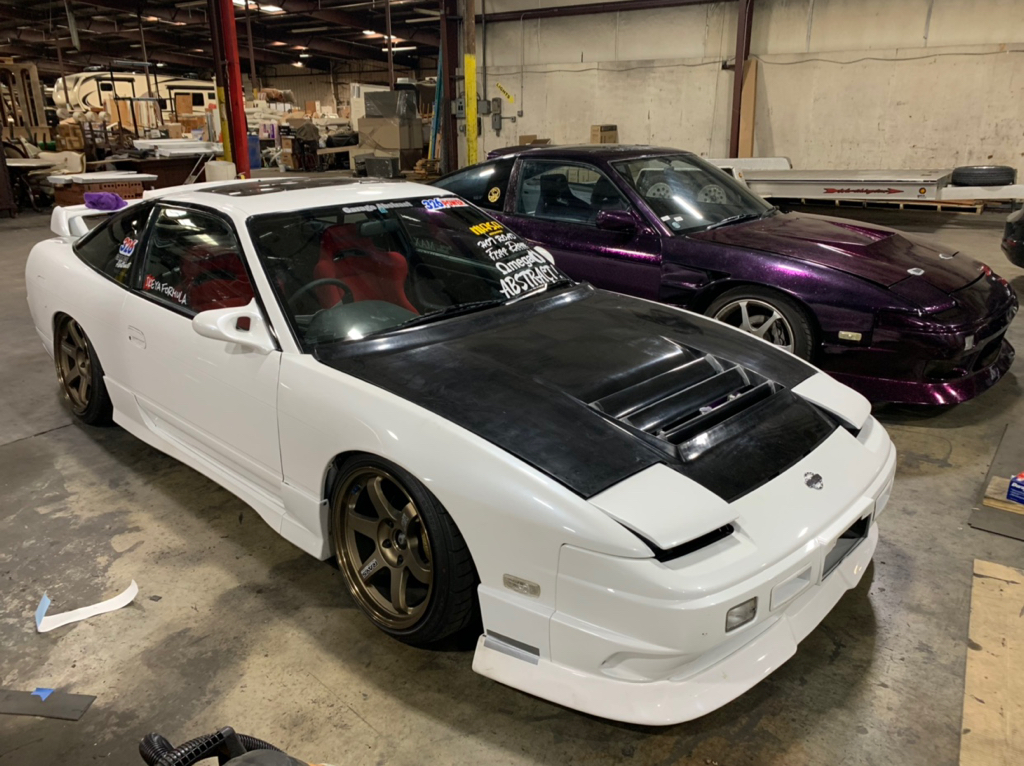 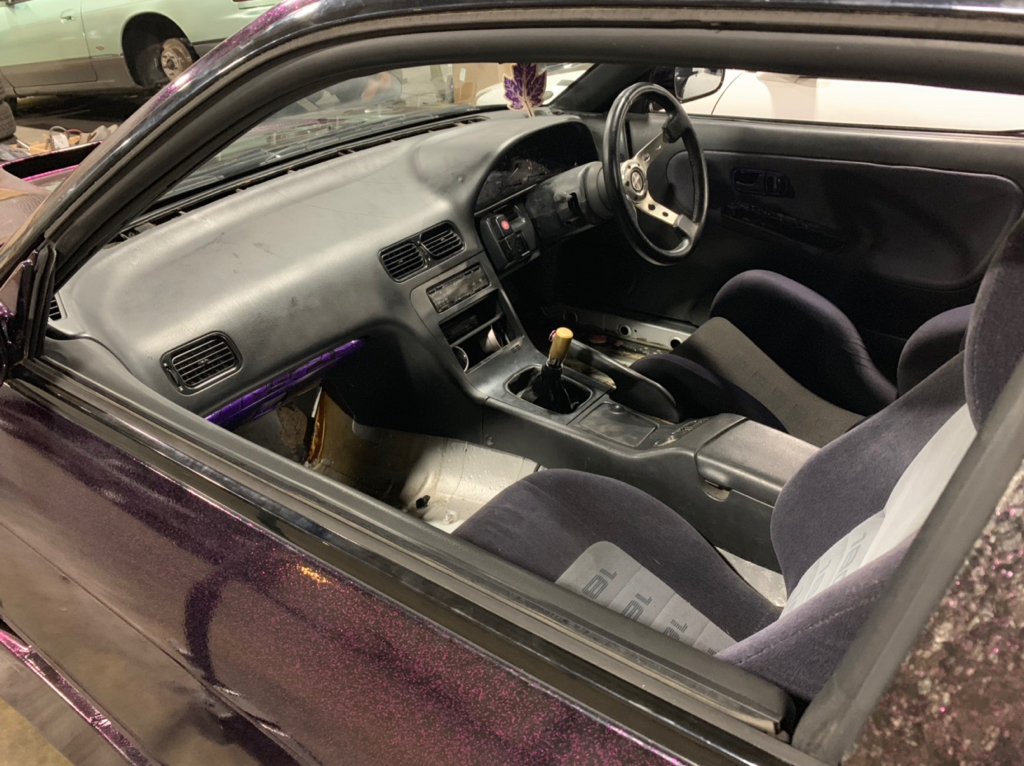
__________________
Garage Abstract IG: @teddylesshq |
|
|

|
|
|
#59 | |
|
Zilvia Member
 Join Date: Apr 2019
Location: Clearwater
Age: 31
Posts: 274
Trader Rating: (0)
          Feedback Score: 0 reviews
|
Quote:
 |
|
|
|

|
 |
| Bookmarks |
| Thread Tools | |
| Display Modes | |
|
|