
 |
|
|||||||
| Home | Rules & Guidelines | Register | Member Rides | FAQ | Members List | Social Groups | Calendar | Mark Forums Read |
| Builds (and builds only) Got a build thread? It goes here, build threads anywhere else on the forum will be locked and never moved. |
 |
|
|
Thread Tools | Display Modes |
|
|
|
|
#1 |
|
Nissanaholic!
 Join Date: Aug 2009
Location: Texas
Age: 29
Posts: 1,605
Trader Rating: (27)
 Feedback Score: 27 reviews
|
Background story:
I bought this car completely bone stock 3 years ago. Automatic, SE, non Hicas. Swapped it to 5-speed a month later, then swapped in an S13 redtop SR20 after a couple more months, then traded the SR20 for a 1JZ engine alone. Got the 1JZ running 8 months later and after one year of drifting with the engine overheating 24/7 and dozens of attempts to solve the overheating, I sold the 1JZ setup and parted out the car. I bought a 350z, drove it for 2 weeks and realized that the grass wasn't greener..... The 350Z just could not replace the s13 in my heart. So I did what any dedicated 240sx owner would do.... I traded the stock 350z for my old s13 which now had a stock KA in it. The value of the 2 cars were similar, and my old car is worth ALOT more to me than to anyone else, so the trade was not as bad of a deal as it sounds... My Z had transmission grinds and smoked a bit. Anyway my old s13 had been massacred a little bit by the temporary owner during the KA swap so now I had to go over the car and fix some major issues. I pulled the KA to do all of the work I needed to do to make it more reliable and ready for boost, because my plans are to boost it later using a simple S15 T28 setup on low boost. I pulled the KA and I have been waiting on parts for a few weeks and tonight I just assembled some of the engine. I went through and cleaned everything, sand-blasted some parts and painted things to make it all pretty.     The other guy murdered this s14 KA swap into the car and was using the s14 harness, ECU, MAF, intake, etc. everything The timing was WAY off, IAT sensor wires were cut, multiple vacuum leaks, oil leaks, power steering leak, transmission fluid leak, etc. No gauges worked because of the s14 engine harness. These aproblems are not something I was going to try and fix the hard way so I started looking for S13 parts so I could just remove all the s14 stuff and swap in stock S13 things everywhere and keep the long block and transmission. Luckily there was an s13 at the junkyard and it still had all those parts on it so I pulled it all and it was super expensive but I had the parts I needed. One problem, the engine harness was chewed through by rats. I was planning on relooming the harness anyway so this wasn't that big of an issue. Only a few wires were damaged and none were completely cut. Initial damage & condition  cutting out the damaged wires  this is such a dirty job  damaged area all repaired & pretty  full harness redone  |
|
|

|
| Sponsored Links |
|
|
#2 |
|
Nissanaholic!
 Join Date: Aug 2009
Location: Texas
Age: 29
Posts: 1,605
Trader Rating: (27)
 Feedback Score: 27 reviews
|
after my harness was all done I was ready to pull the KA and begin the real work
  pulled everything apart and de-greased the HELL out of my block. 3 cans of brake clean  degreasing parts     I bought a sand-blaster specically for this build so I could have some CLEAN parts to paint before assembly.    I am using an s14 upper intake with no butterflies, and I also drilled out the metal pipes for PCV into each intake runner and welded the holes up. I also cutoff some EGR brackets and smoothed the intake edges out where the sharp aluminum cuts you when you work on it.      taking this nasty head to the machine shop work to be done: hot-tank cleaning deck the head check for warping remove broken exhaust manifold stud check valves and grind if necessary replace valve stem seals inspect valve guides re-shim lifters polish cams  $560 later     welded on my oil drain bung with an extension pipe to make it easily accessible from the top, and carefully placed it between my engine mount & AC compressor  cutout my bumper support to make room for the intercooler & retain strength by welding in a piece of rectangular tubing and boxing in the sides.     painted my intake manifold, valve cover, & oil pan.     checked inside my junkyard S13 ECU and it looks fantastic!  painted my engine block with some VHT aluminum color, I love the way this looks, and it sticks really well.   cleaned the threads out and installed my ARP head studs along with a Fel-Pro head gasket with some copper spray.  installed the head and torqued it all down to 70 ft/lb which is ARP's spec in 3 steps so I went 30,50,70.   cams & timing chains next. I decided to do the 248 "hot cam" swap on this engine because I absolutely LOOOOVE the way it sounds with this setup. I have had it on 2 of my other 240s in the past. I set it to 3 teeth CCW on the chain.   oil pump & oil pan installed with a new O-ring and a new front main seal  welded up this EGR plug for my manifold at work one day  mudflaps came in the mail, courtesy of a fellow Zilvia member... + cash of course  had to repair some murdered chassis harness wiring from the s14 ka swap they did   welded up my stock diff at work  solid subframe bushings  garage rattlecan paint job I did for the car a year ago   |
|
|

|
|
|
#8 |
|
Zilvia.net Advertiser
 Join Date: Oct 2003
Location: Chicago, IL
Posts: 1,511
Trader Rating: (27)
           Feedback Score: 27 reviews
|
Keep it coming!
__________________
Performance Parts // Track Prep // Fabrication **Follow us on Instagram @TFWorks For all the latest TF★ news visit our blog!! 
|
|
|

|
|
|
#9 | |
|
Nissanaholic!
 Join Date: Aug 2009
Location: Texas
Age: 29
Posts: 1,605
Trader Rating: (27)
 Feedback Score: 27 reviews
|
Quote:
Thank you! I appreciate the interest. Will do, I wasn't sure if there were any people on here who would appreciate a simple and almost stock KA24DE build going into a car. It's definitely not anything crazy, but that also makes it interesting. |
|
|
|

|
|
|
#10 |
|
Nissanaholic!
 Join Date: Aug 2009
Location: Texas
Age: 29
Posts: 1,605
Trader Rating: (27)
 Feedback Score: 27 reviews
|
Update, I just worked on the KA all day.
Tapping my oil filter housing for 1/8" NPT and installing a plug for oil feed for the future turbo, and my oil pressure sensor line. This little plug twisted one of my allen wrenched like a candy cane before it broke loose, then it stripped when I used an impact wrench, so I drilled it out and then in finally broke loose using an easyout.  Tap for 1/8" NPT  Cleanout with a spin brush & brake cleaner  oil pressure sensor line & plug installed  all done, installed with a new OEM Nissan gasket & a tiny bit of RTV  almost completely done assembling the KA brand new AISIN water pump new front main seal new coolant hoses new coolant temp sensor   brand new white bunny clutch kit from competition clutches ARP flywheel bolts ARP pressure plate bolts    dust shield installed, transmission, 2 lower brackets, and all bolts tight & done  ISR engine & trans mounts the previous owner bought, I'm going to give them a shot.  |
|
|

|
|
|
#11 |
|
Zilvia Member
 Join Date: Feb 2008
Location: Austin, TX
Age: 33
Posts: 298
Trader Rating: (6)
 Feedback Score: 6 reviews
|
nice build, nice to see more atx 240 owner on here! I am working on my s13, if you know of any ka24 around town lmk.
__________________
9/25/17-'91 Z32 TT '15 WRX-dd |
|
|

|
|
|
#12 |
|
Nissanaholic!
 Join Date: Aug 2009
Location: Texas
Age: 29
Posts: 1,605
Trader Rating: (27)
 Feedback Score: 27 reviews
|
Engine went in the car that same night
    eBay headers comin through!  Also, I messaged the person who bought my old Feal Coilovers and got him to trade me the Feals back for these BC's plus cash.   All done and drivable, kinda... The car had a big idle problem that was very hard to figure out.  I made myself a boost leak tester at work with an old hole-saw to find the vacuum leak that appeared to be causing my issue.    I wanted to be sure my fuel pressure was good using my old aeromotive FPR with the stock fuel rail and I didnt want to wait for shipping so I made one out of a stock FPR with a steel -6AN fitting welded to it. I am a welder fabricator so this was easily accomplished at work with a Miller TIG welder and a foot pedal.   Finally set it on the ground after installing my old Feal Coilovers! The ride height is super high, I will lower it later, doesnt matter now.   Time for Texas safety inspection! Since my car is over 25 years old I do not have to pass an emission test. PASS  So after chasing this idle issue around for a month, I finally figured it out. Unfortunately one of the many things I tried to fix it was remove my 248 hot cam and install factory s13 cams, which didn't help. The issue was the IACV, and I know what you are thinking, DUH! But I had changed the IACV twice since it was running and there was never any difference, So what happened was I was lucky enough to have 2 bad IACVs and then I bought one from a Zilvia member which also turned out to be bad.... I installed a 4th one yesterday and now the car finally runs smooth and doesn't fluctuate. I had a friend hook up a consult scanner and we saw that there was no CEL and all voltages looked great, including IACV percentage, but my IACV was just stuck open so it was an internal vacuum leak that doesnt show on a vacuum/boost leak test. Last edited by drifter92; 03-18-2018 at 05:29 PM.. |
|
|

|
|
|
#14 |
|
Zilvia Member
 Join Date: Jul 2016
Location: Chicago suburbs
Posts: 173
Trader Rating: (0)
     Feedback Score: 0 reviews
|
Nice build. Good to see someone who's doing things the right way. You must be Chinowith right? I've seen you on YouTube and Reddit. I might have an s13 sensor, I'll check when I get home.
|
|
|

|
|
|
#16 |
|
Premium Member
 Join Date: Mar 2009
Location: Maricopa, AZ
Age: 30
Posts: 7,679
Trader Rating: (10)
           Feedback Score: 10 reviews
|
I swear me and a friend tried to hot cam swap two different KADE's in the past, the first time we tried 2 teeth CCW, the second time we tried 3 teeth CCW since it seemed that people had done it both ways. Both times it bent all the intake valves...
Nice build so far fixing that car back up  |
|
|

|
|
|
#17 | |
|
Nissanaholic!
 Join Date: Aug 2009
Location: Texas
Age: 29
Posts: 1,605
Trader Rating: (27)
 Feedback Score: 27 reviews
|
Quote:
|
|
|
|

|
|
|
#19 |
|
Nissanaholic!
 Join Date: Aug 2009
Location: Texas
Age: 29
Posts: 1,605
Trader Rating: (27)
 Feedback Score: 27 reviews
|
Thank you, I really have to have a clean engine, I can't stand when I go to work on something and my hands are covered in wet black oil residue the first time I reach for something.
|
|
|

|
|
|
#22 |
|
Zilvia Member
 Join Date: Jul 2016
Location: Chicago suburbs
Posts: 173
Trader Rating: (0)
     Feedback Score: 0 reviews
|
I found the s13 sensor, but it's missing the connector. Still has good wire length, just needs a new plug soldered on. Let me know if you are interested in it.
|
|
|

|
|
|
#24 |
|
Nissanaholic!
 Join Date: Aug 2009
Location: Texas
Age: 29
Posts: 1,605
Trader Rating: (27)
 Feedback Score: 27 reviews
|
Update: I took the car to Kevin Soucie in dallas for a roll cage. I now have my Sparco racing seat mounted after cutting some of the floorboard out and dropping it down and a 5 point harness. The interior is all installed around the cage, I have been daily driving the car and I have had absolutely zero issues in any way, except for it being 100 degrees every day with no AC. The humidity down here has been incredible!
|
|
|

|
|
|
#25 |
|
Zilvia Addict
 Join Date: Apr 2014
Location: Milwaukee
Age: 31
Posts: 810
Trader Rating: (11)
           Feedback Score: 11 reviews
|
I can appreciate the problem solving and fabbing that you have accomplished in this build, I do similar things everyday at work and on my own s13, nice job man!!
|
|
|

|
|
|
#27 |
|
Nissanaholic!
 Join Date: Aug 2009
Location: Texas
Age: 29
Posts: 1,605
Trader Rating: (27)
 Feedback Score: 27 reviews
|
Big update!
So I have been driving this car alot, no issues with anything so far. I recently drove in Lone Star Drift's Special Stage Australia event in Houston. I knew I wouldn't win, and I was not comfortable enough in this car at that track to compete so I didn't. The car did GREAT though. The track was tight and super technical requiring a handfull of e-brake drags and dozens of clutch kicks to connect the track on a good line with stock KA power. This was extremely fun! I had never driven on a real track where line mattered so this was a great change of pace for me. I was forced to learn e-brake entries and my white bunny clutch got the shit beat out of it for dozens of laps and I never had a single issue with anything on the car the whole weekend. Before this event, I was still having weird idle issues and after shorting out a wire to my ignition switch causing the car to sit with no battery for 2 weeks, all of a sudden my car would die every time I pressed the clutch while I was not stopped. When I stopped idle would come up to a low idle of 500rpm and shake the whole car. This was super frustrating and forced me to finally buy something every 240sx owner should have, a consult scanner that plugs into a laptop. I bought the EEEKit from Amazon and I'm using the free Conzult software that came with it to read my sensor outputs and timing, RPM, etc to fix these phantom issues I have been having and once I got the scanner, the solutions came fast. The consult scanner said my O2 sensor signal was 0.0v..... and my TPS was adjusted wrong. 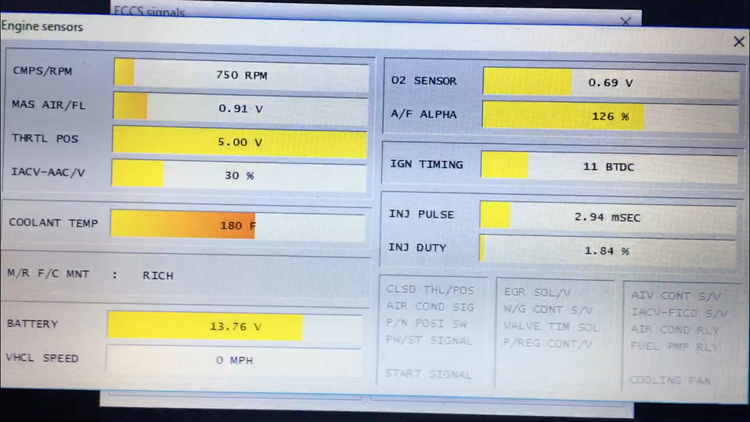 When I extended the O2 sensor wire on my engine harness that was chewed by rats, I peeled back the shielding, soldered a regular wire onto the existing wire for the O2 sensor and then laid the shielding over it and applied shrink-wrap to the area then plugged it into my new Bosch O2 sensor and everything seemed great. I got a hold of Martin @ RSEnthalpy and he gave me some golden information about that O2 sensor wire shield. The shielding wire weave is actually grounded in the ECU, so when that shielding touches the signal wire, you have a grounded signal. So I repaired that mistake and the O2 sensor started reading perfectly as FSM states. This repair caused my idle to change and the car started running ALOT better! Martin told me to adjust my TPS to 0.5v with the throttle closed, so I did that and then adjusted ignition timing and IACV until I was happy with all of the results and now the car runs like a champ all the time. It starts instantly and has never made a single sputter or done anything but run perfectly every single time I drive the shit out of it. |
|
|

|
|
|
#28 | |
|
Leaky Injector
Join Date: Apr 2012
Location: Wichita Falls Tx
Age: 28
Posts: 77
Trader Rating: (0)
 Feedback Score: 0 reviews
|
Quote:
|
|
|
|

|
|
|
#29 |
|
Nissanaholic!
 Join Date: Aug 2009
Location: Texas
Age: 29
Posts: 1,605
Trader Rating: (27)
 Feedback Score: 27 reviews
|
Floorboard modification for 6'4" tall dude comfort, with a cage, and a helmet.
I tried to get my seat comfortable without cutting the floorboard, but it just wasn't happening. Fuck it. I cut out the area where the OEM catalytic converter would live, then my seat could dump down flat on the floorboard and it felt crazy to sit that low. I cut some 3/16" steel plate to weld in place down there to replace the floorboard. 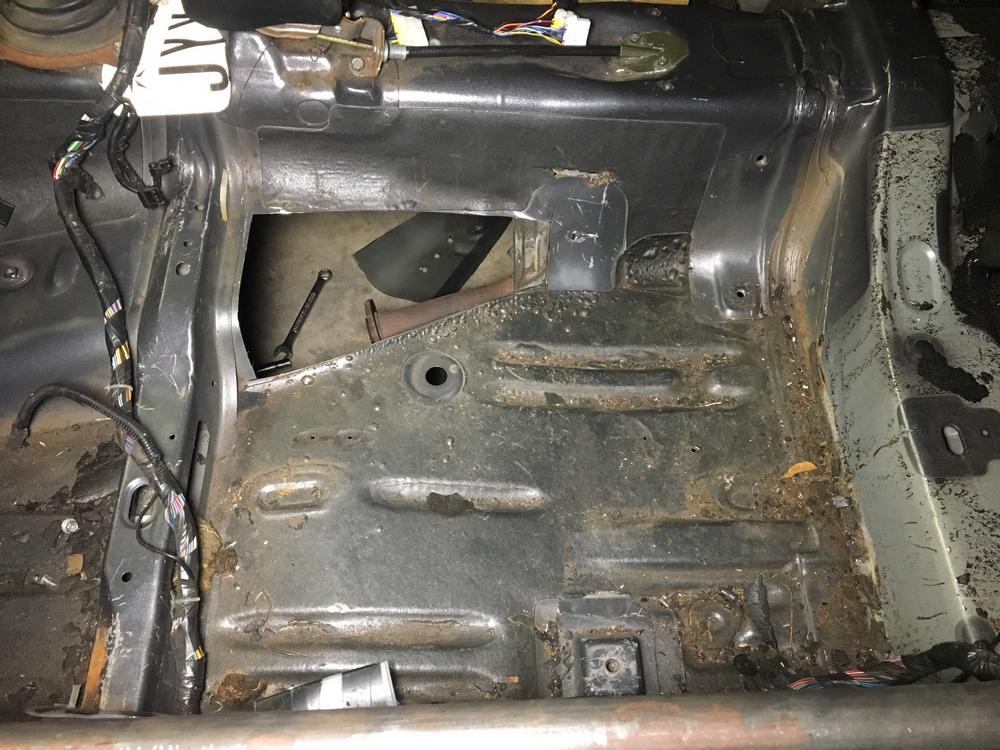 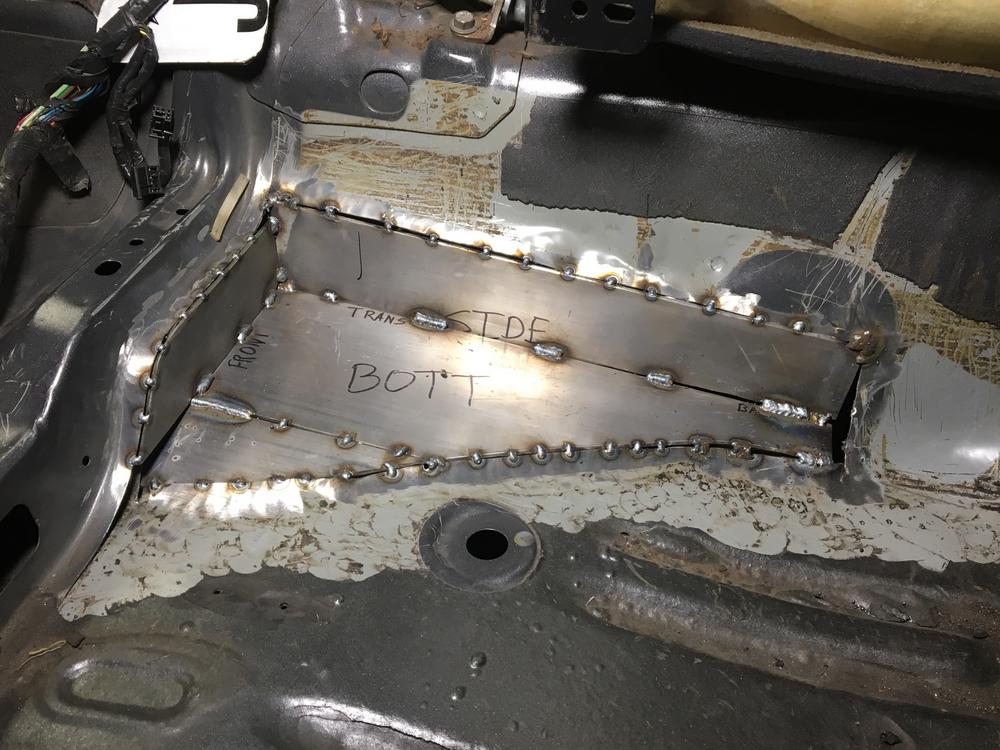 I used some 3M seam sealer to fill in the unwelded areas to make it waterproof then sprayed some paint on it to prevent rust. I also laid down some heat shielding mat under my carpet for obvious reasons. 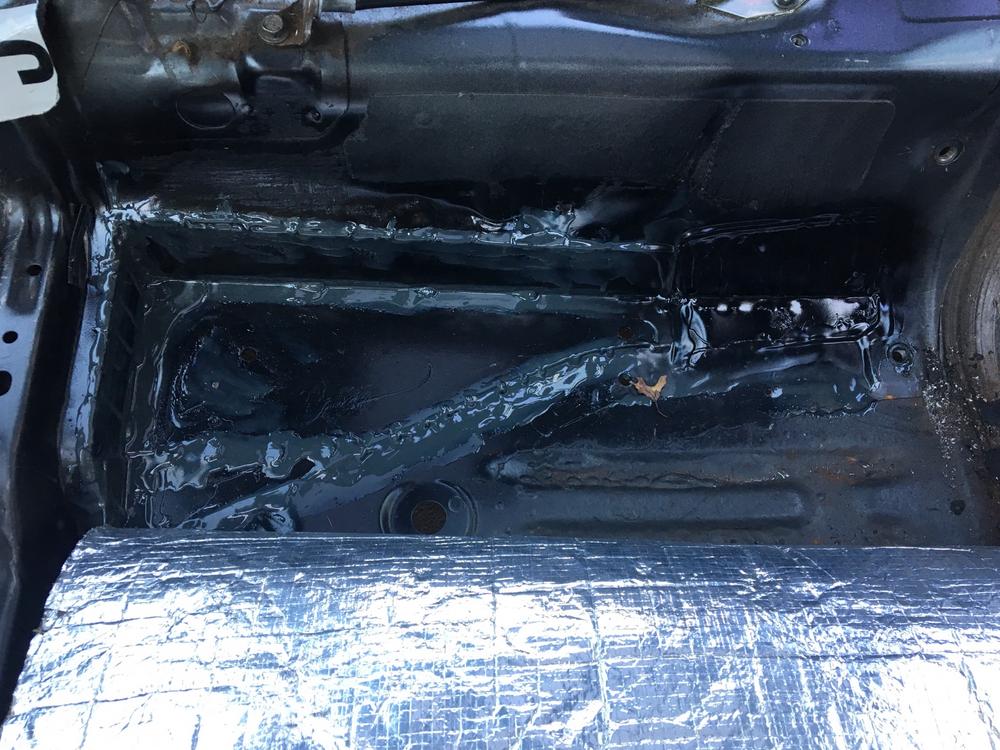 Since I cut out the area where the test pipe would live, that means my exhaust would not bolt up anymore without modification. So I got to work rebuilding the front pipe on my eBay 3" stainless exhaust and ended up with this. It turns towards the passenger side to clear my new floorboard, then turns back under the driveshaft to connect back to the flange near the diff just like a normal eBay exhaust. 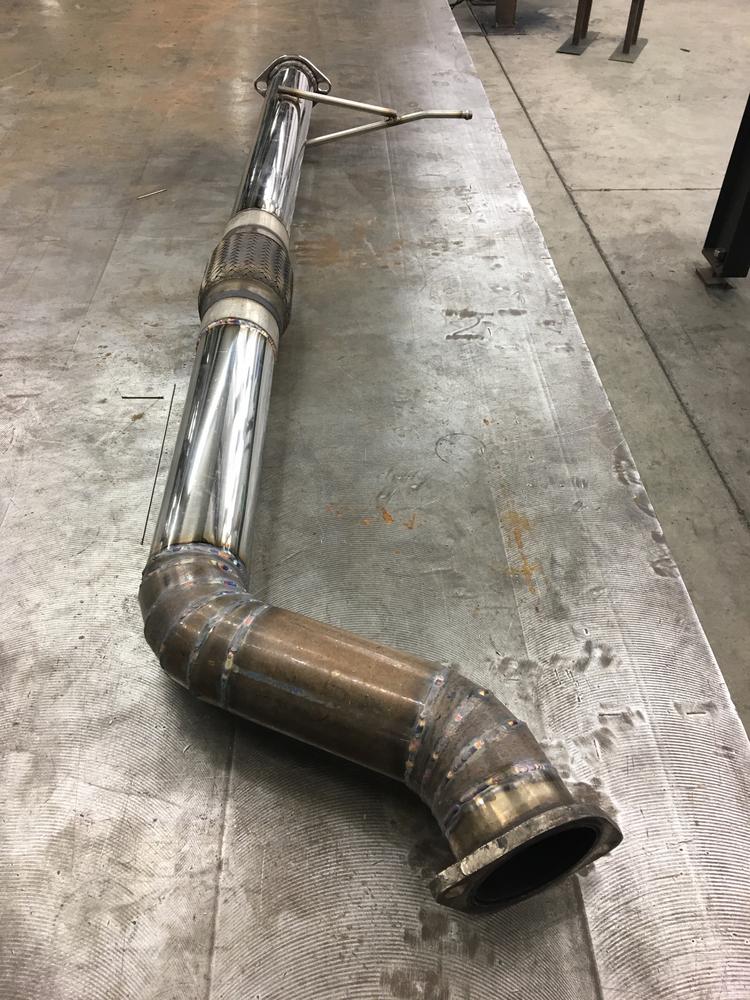 I haven't done a ton of this wall stainless welding but I am proud of this pretty set of rainbows. 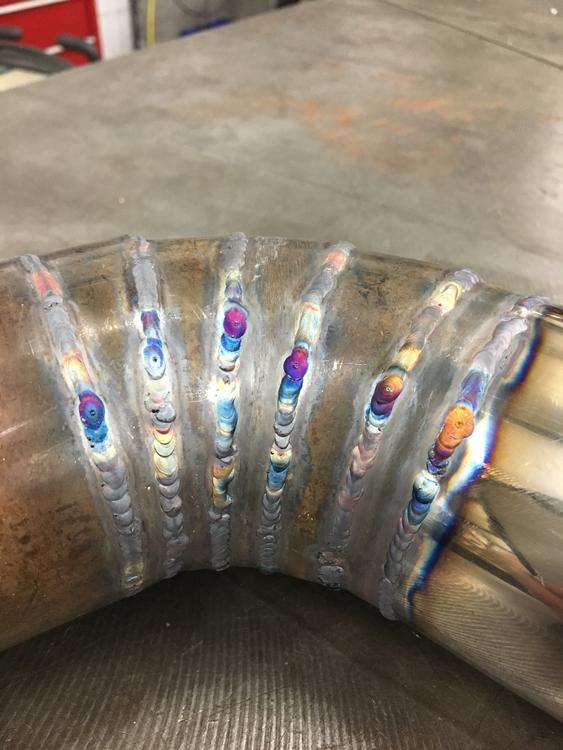 So the cage by Kevin Soucie @ Turn5 Fabrication is fantastic! After notching all of my interior plastics and things I painted the cage and installed everything. It looks great IMO, I am super happy with my car again. 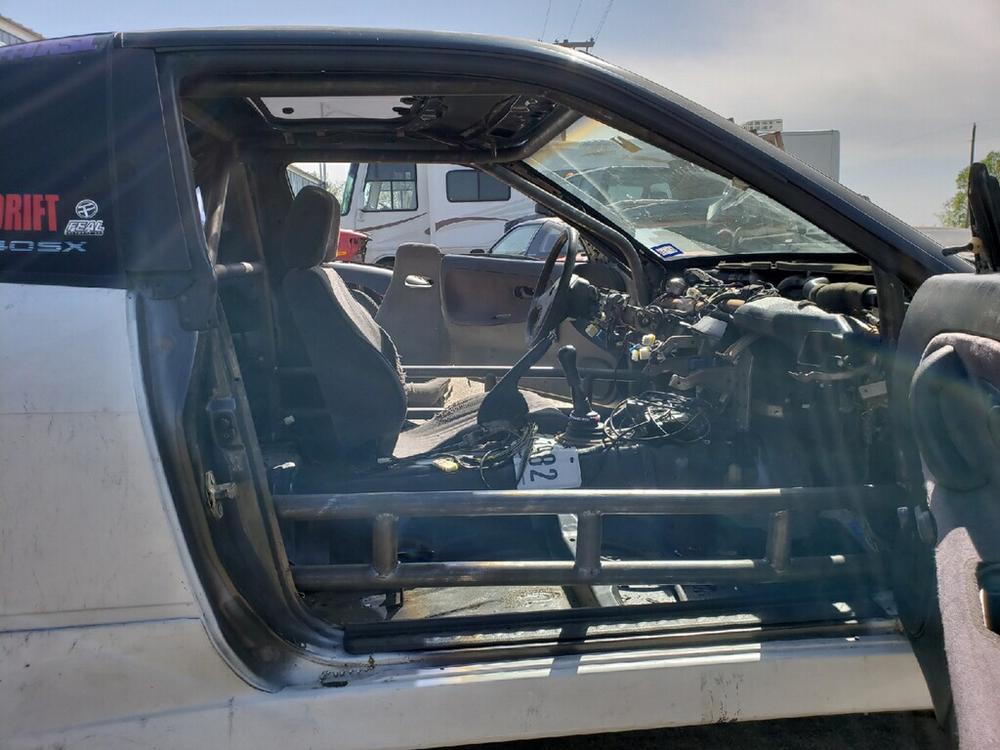 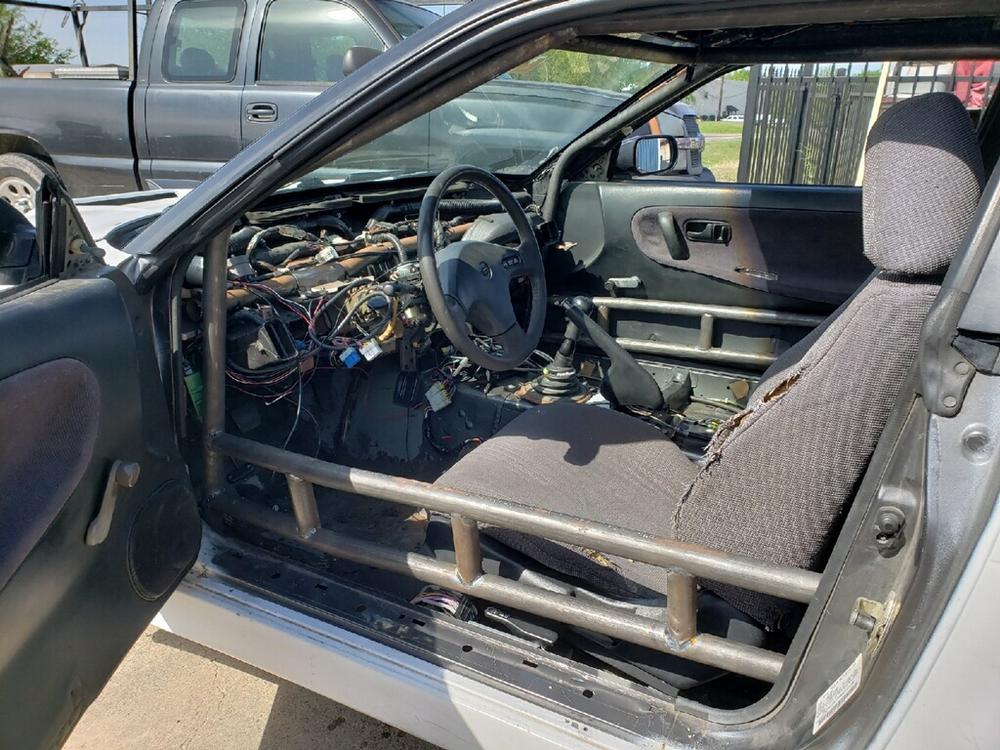 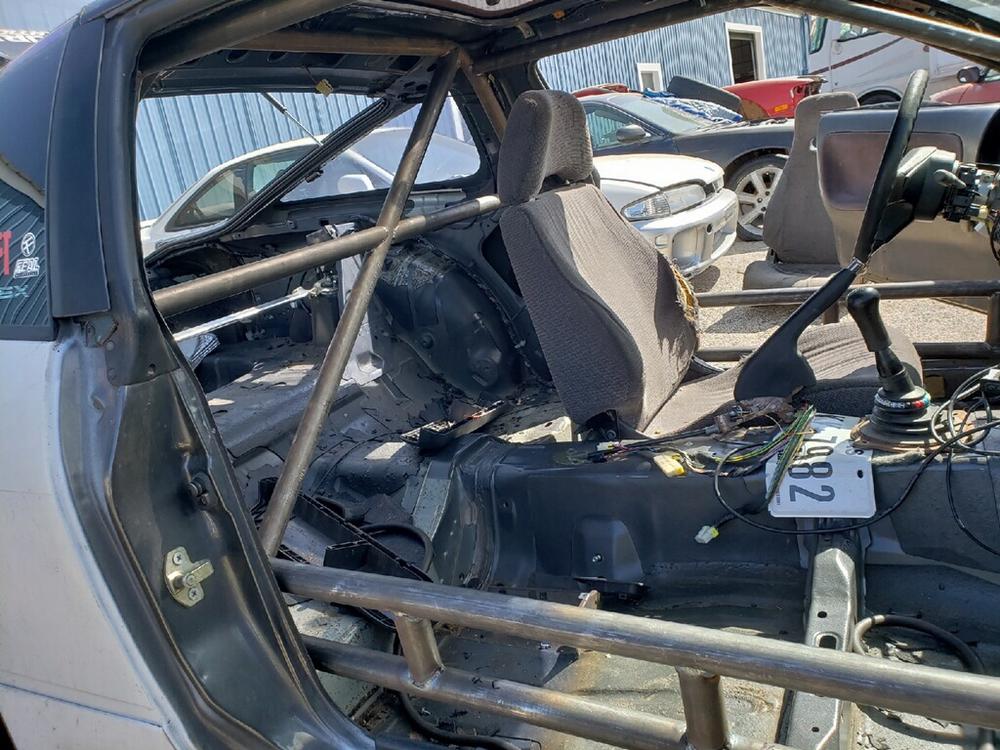 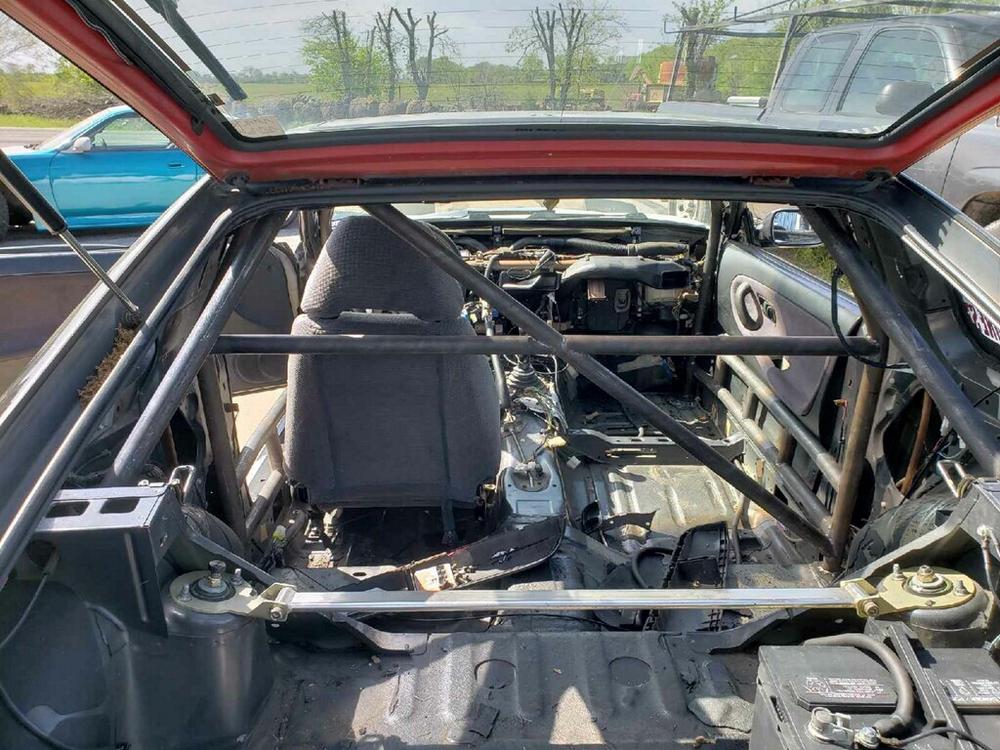 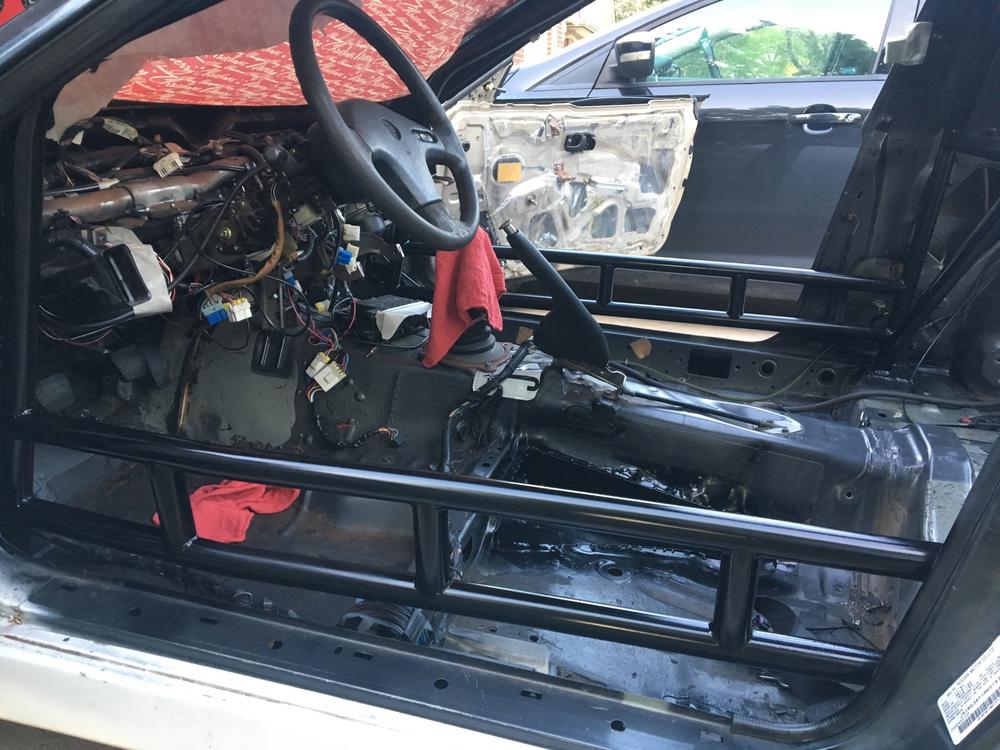 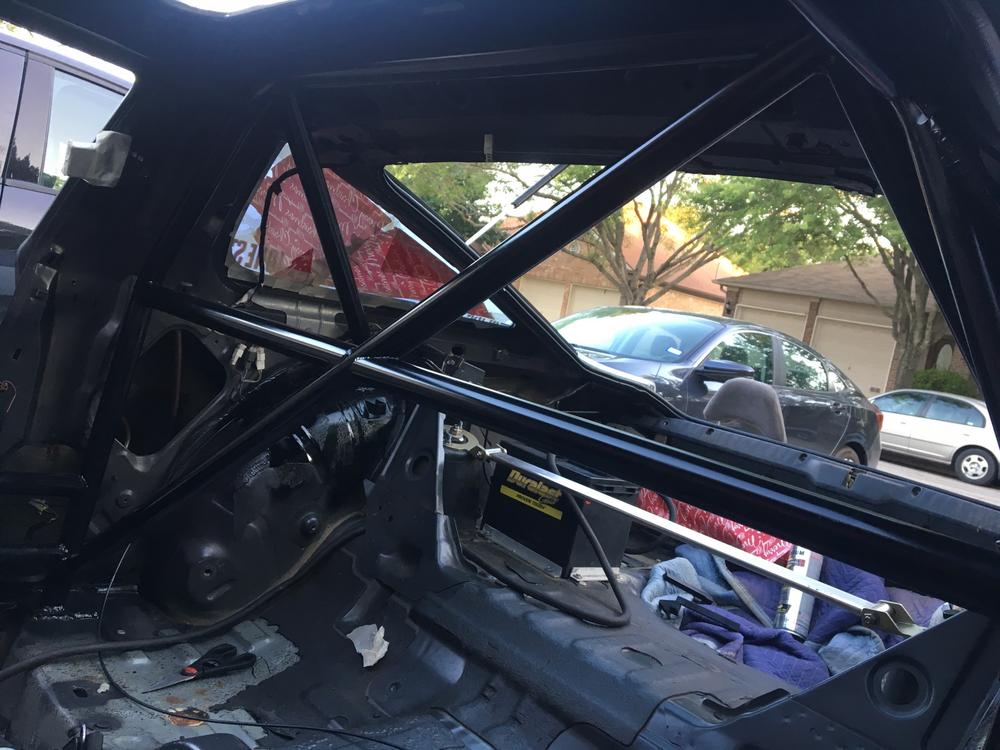 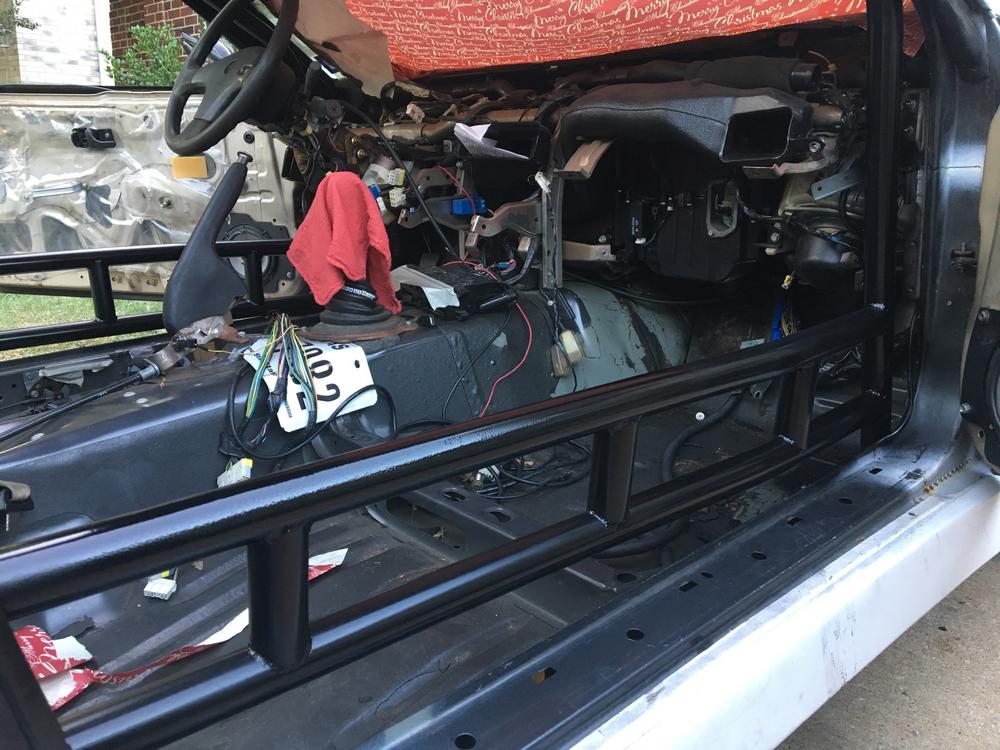 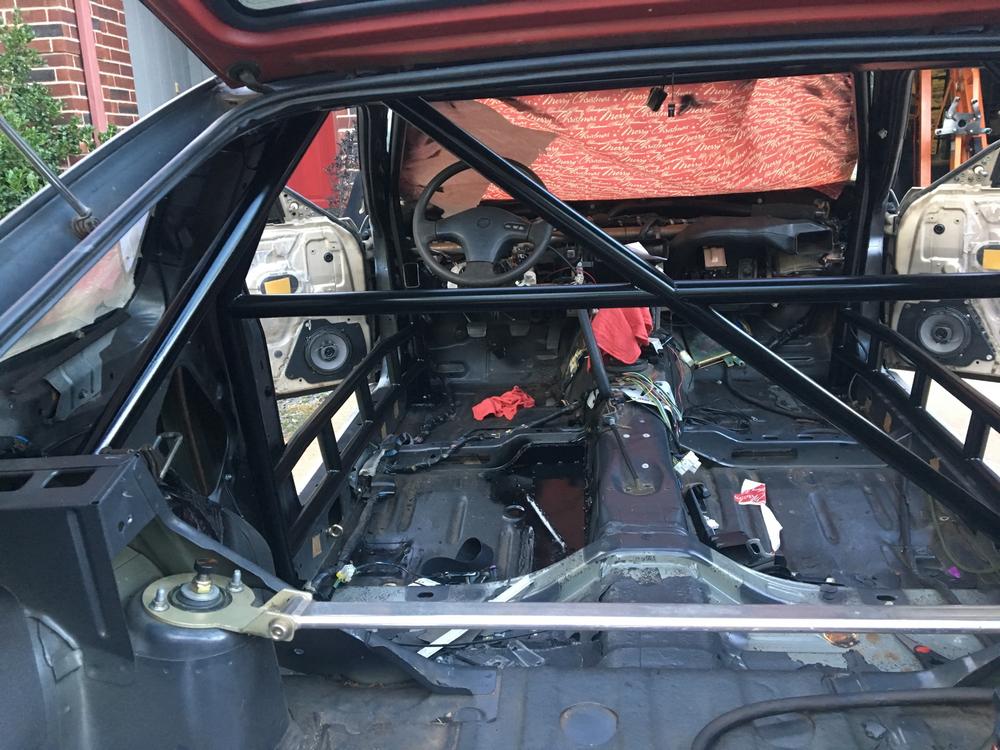 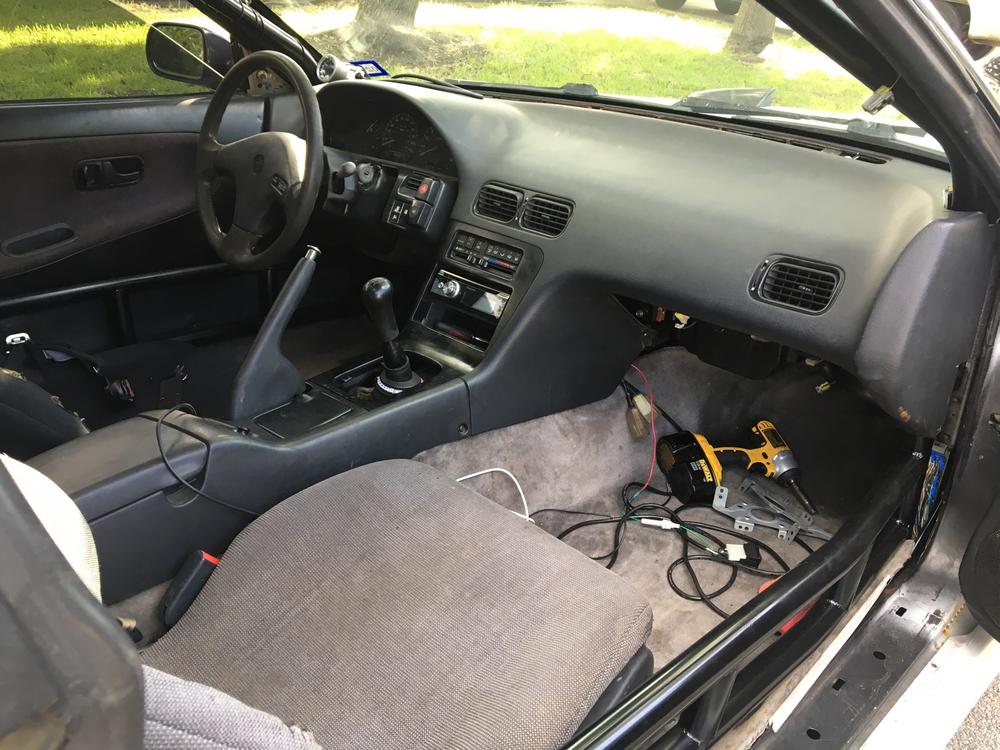 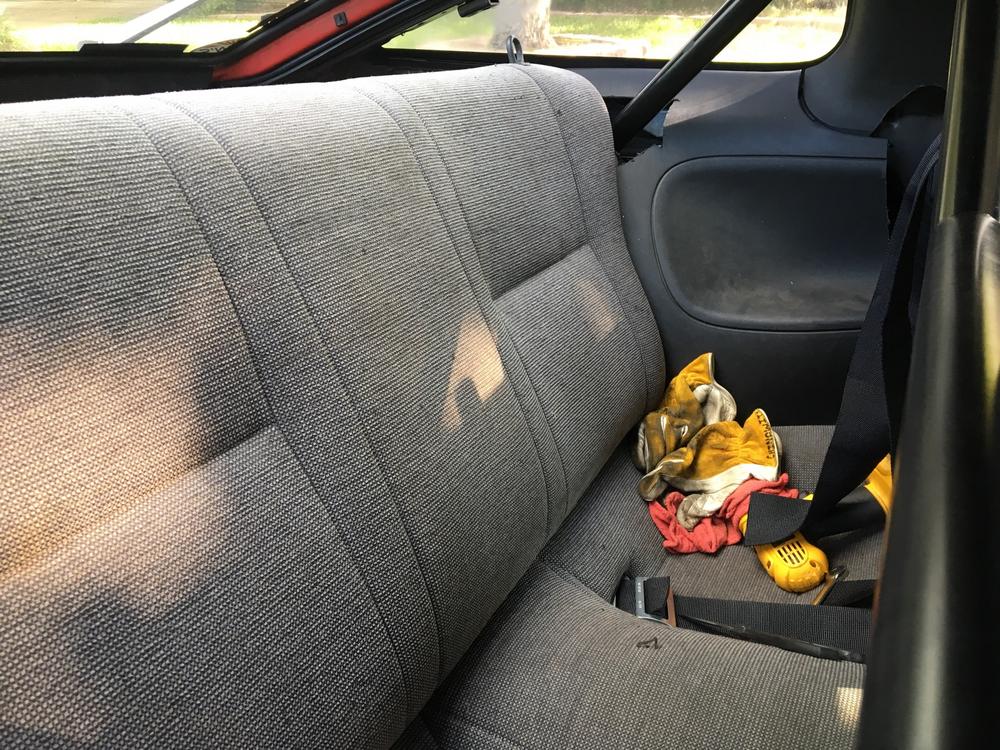 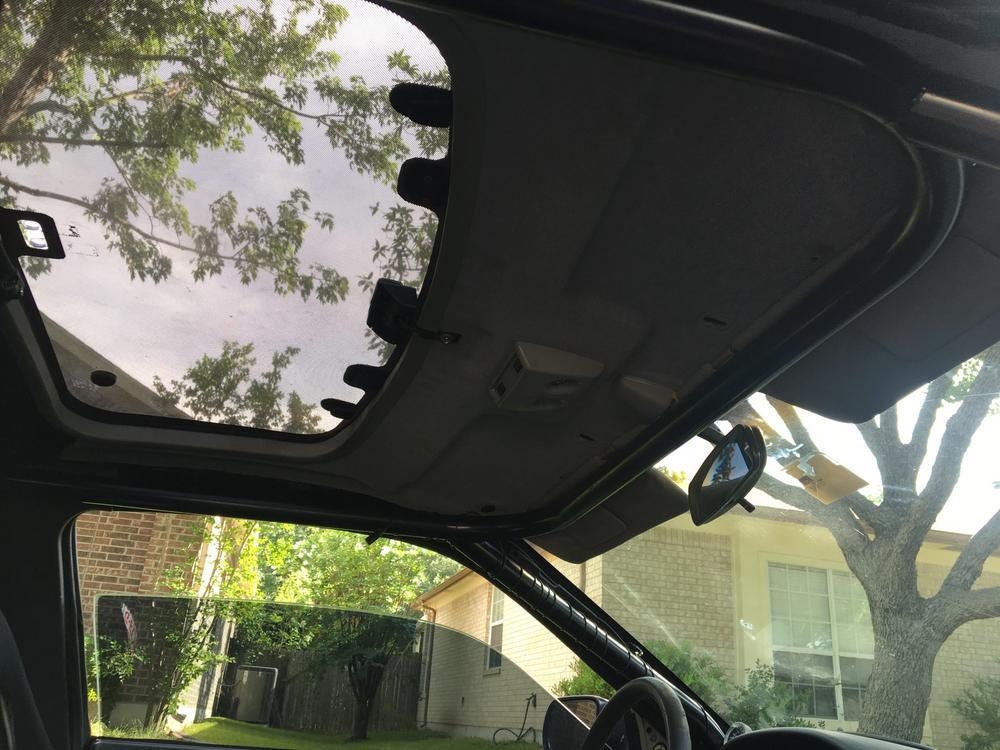 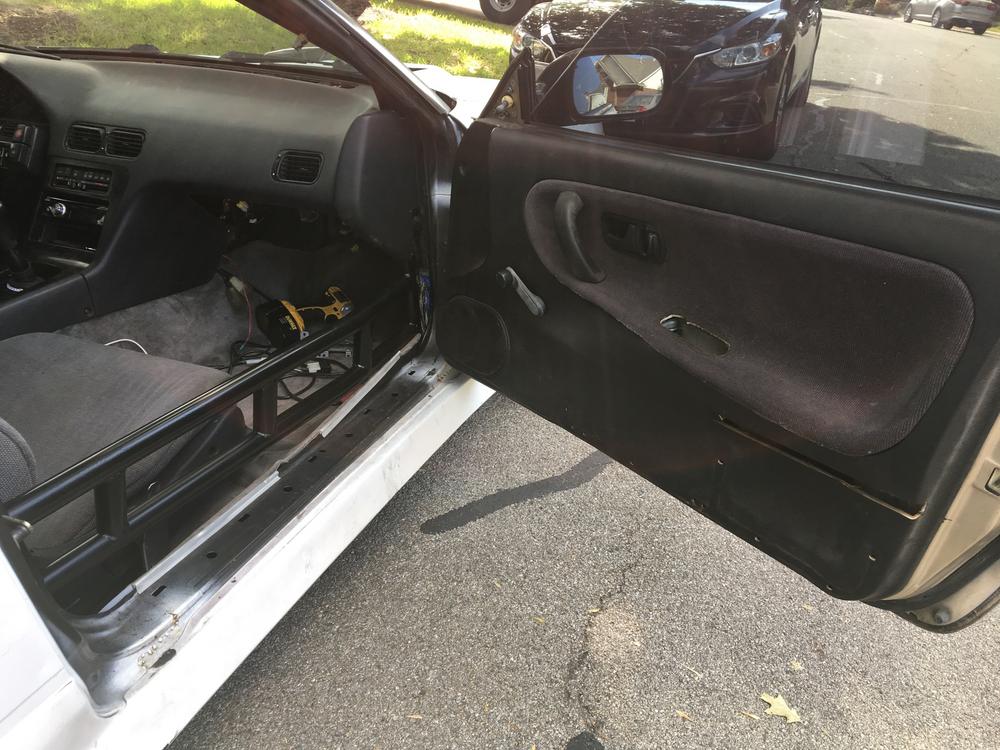 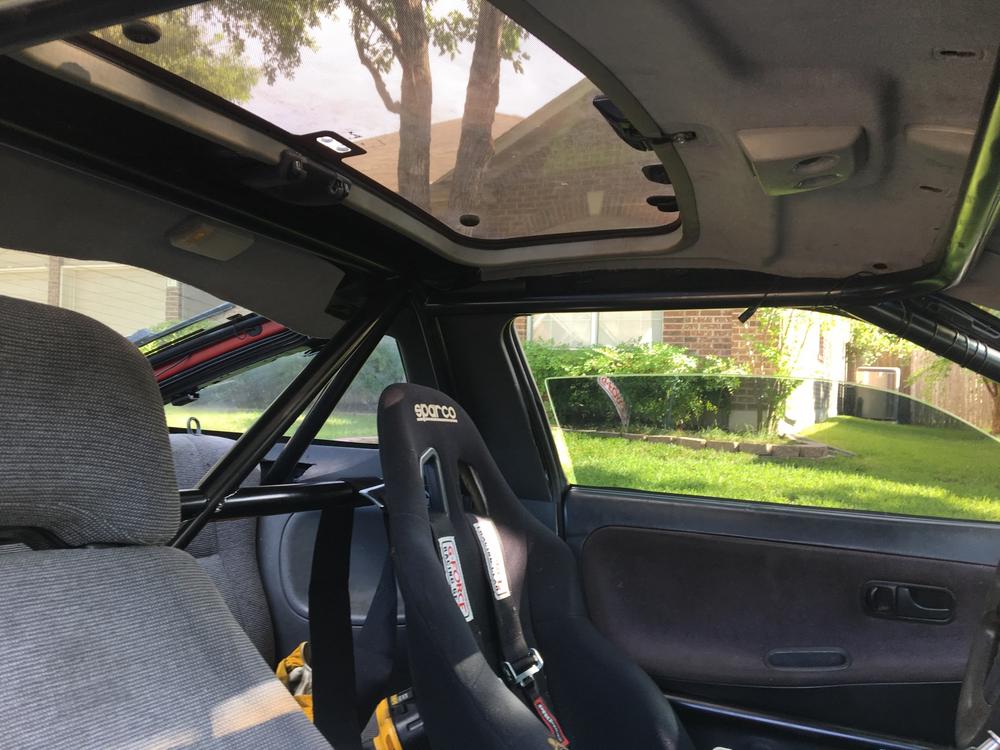 |
|
|

|
|
|
#30 |
|
Nissanaholic!
 Join Date: Aug 2009
Location: Texas
Age: 29
Posts: 1,605
Trader Rating: (27)
 Feedback Score: 27 reviews
|
 so now I needed to get my Sparco seat mounted I found these steel rails on craigslist and ended up cutting the front corners off to make it fit better over the OEM bar that runs across under the front seat. Now I am super comfortable, but way too far from the steering wheel..... So, I bought a works bell quick release, Momo steering wheel hub, and a new MOMO prototipio steering wheel, which brings the steering wheel much closer to me and also is a quick release which makes life amazing. 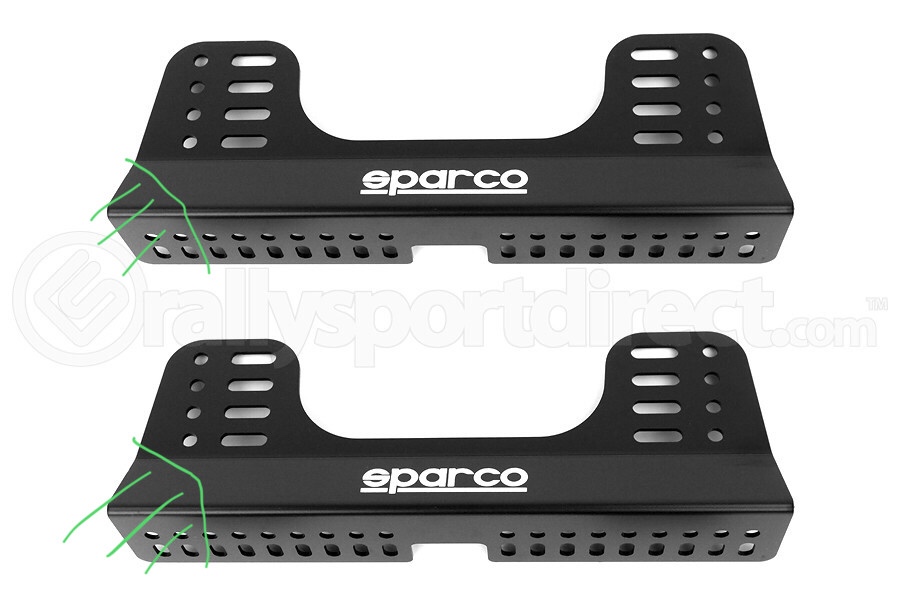   Problem: The MOMO horn button bracket will not fit in the WorksBell quick release. The ID is too small, for no reason at all. So I had my coworker mill the ID to a large enough size for my horn button bracket to fit correctly because I really want a working horn. https://i.imgur.com/DeG6s5y.mp4?1  comfort!    |
|
|

|
 |
| Bookmarks |
| Thread Tools | |
| Display Modes | |
|
|