
 |
|
|||||||
| Home | Rules & Guidelines | Register | Member Rides | FAQ | Members List | Social Groups | Calendar | Mark Forums Read |
| Builds (and builds only) Got a build thread? It goes here, build threads anywhere else on the forum will be locked and never moved. |
 |
|
|
Thread Tools | Display Modes |
|
|
#631 |
|
Zilvia.net Advertiser
 Join Date: Nov 2005
Location: Michigan
Age: 33
Posts: 5,431
Trader Rating: (16)
           Feedback Score: 16 reviews
|
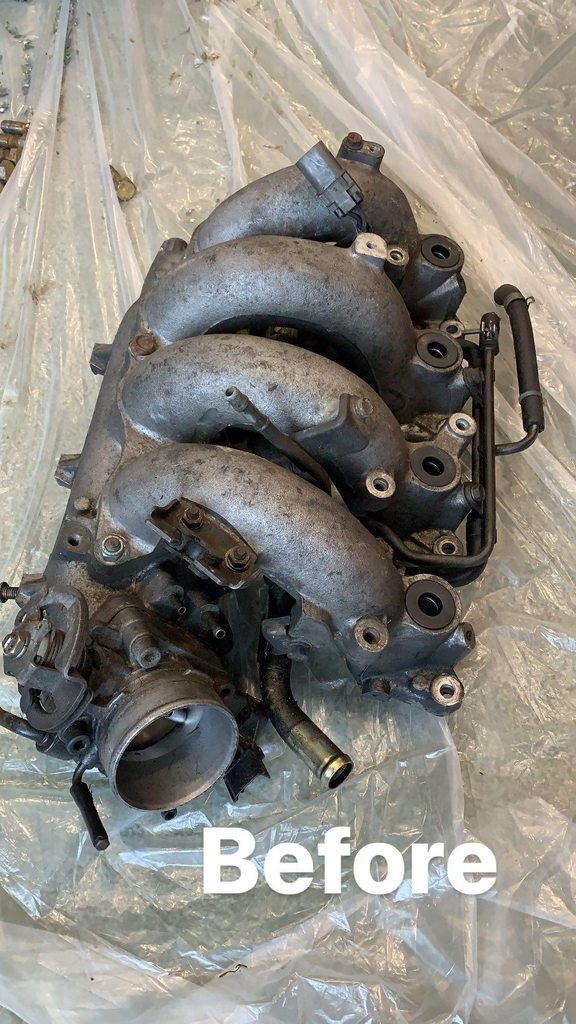 The pool of oil inside the manifold LOL. 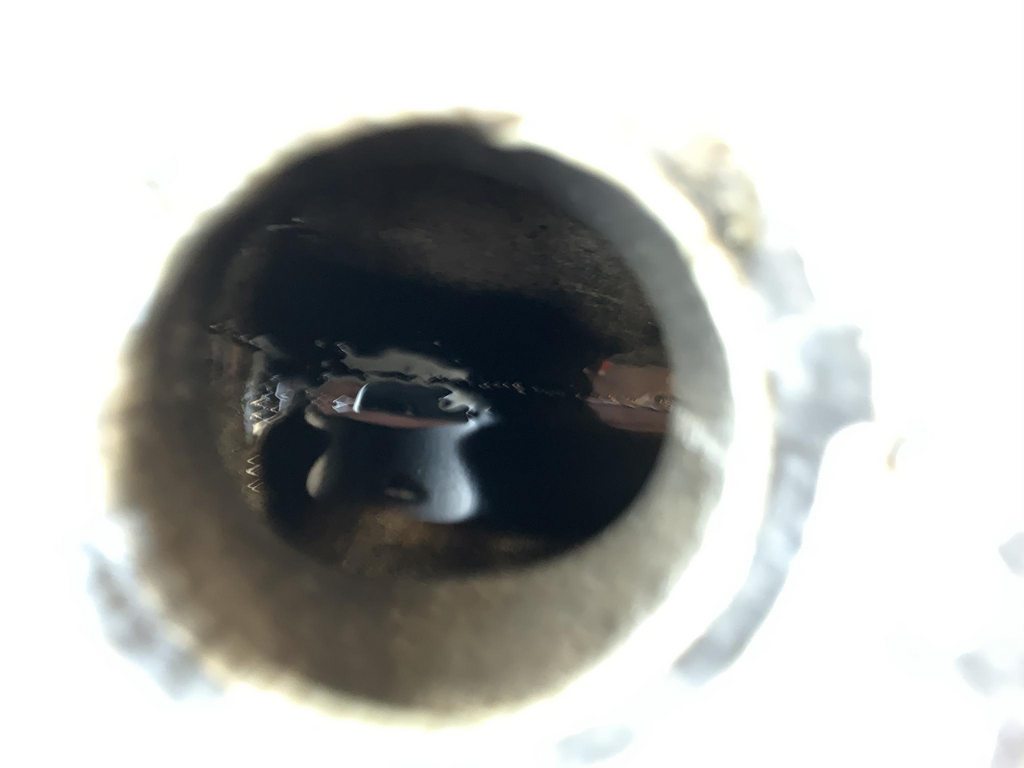 Gave it a quick beadblast and mocked up the radium rail. It needs a more powerful blaster to really get it down to powdercoat-able surface though. I'll do that later this week along with some other parts. 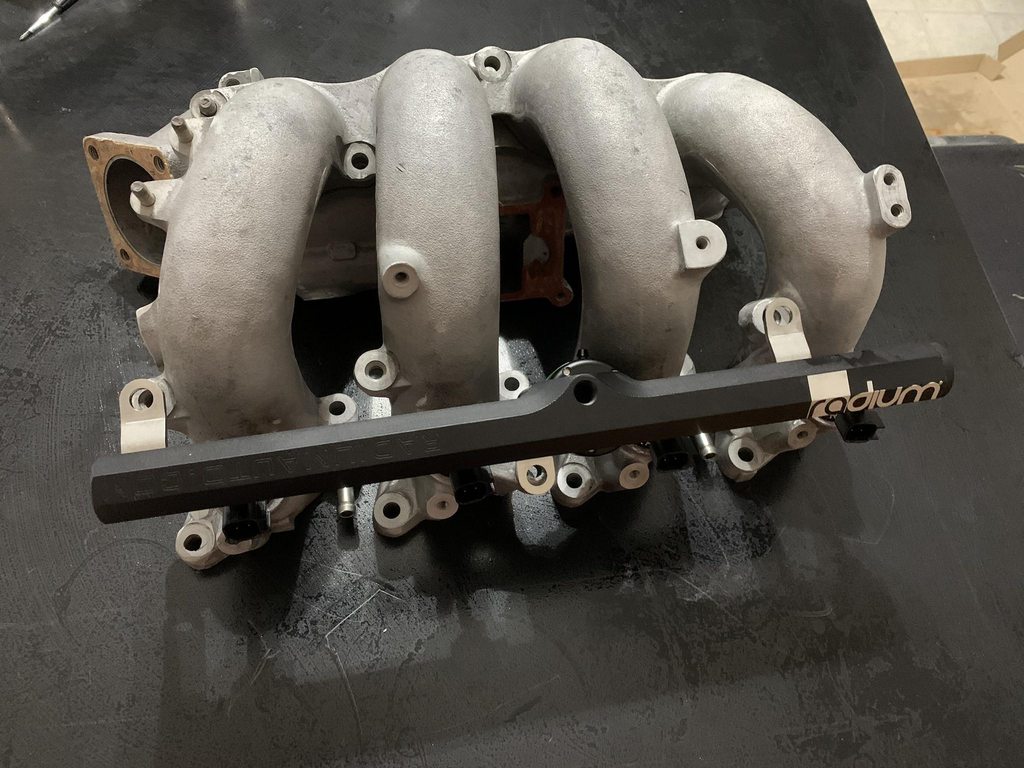 One step forward and two steps back. Redoing the subframe and saving up for some FLCA that actually fit and allow me to run the setup I want on the car. Going for a modernized Koguchi-inspired Chuki look. Just needs that oval cut and a Xenon lip... Thinking I'm going to go with R33 wheels... I need to roll and tatakidashi the rears just a touch. 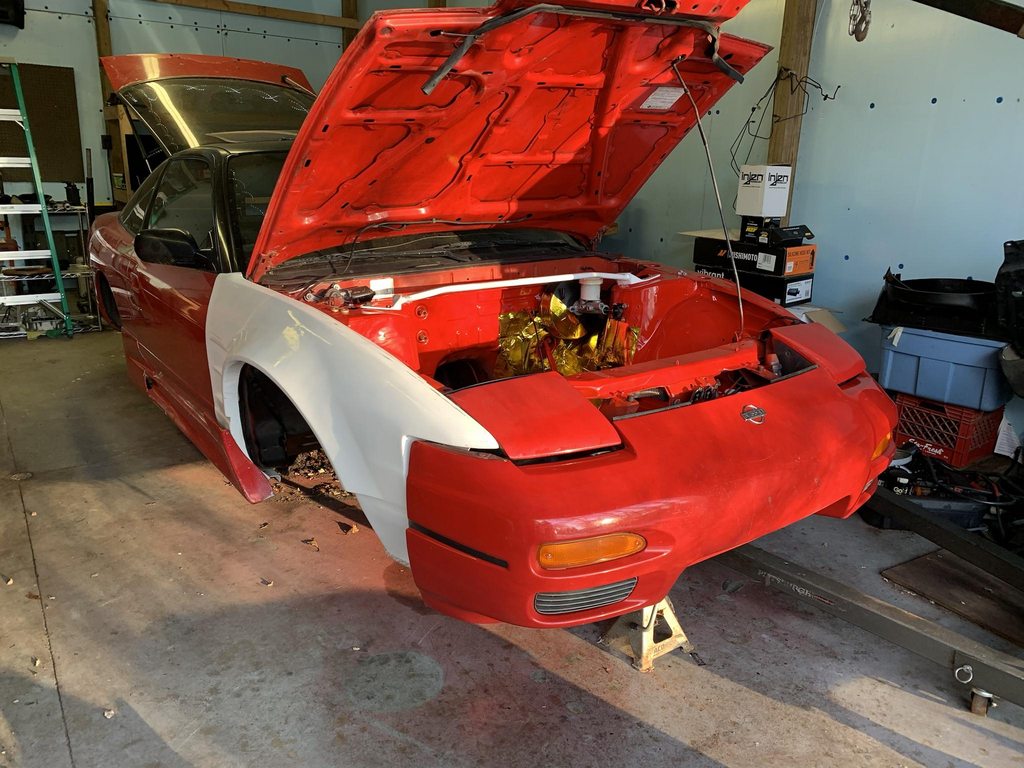
__________________
Build: http://zilvia.net/f/showthread.php?t=643065 Friends don't let friends buy knock-offs. |
|
|

|
| Sponsored Links |
|
|
#632 |
|
Zilvia.net Advertiser
 Join Date: Nov 2005
Location: Michigan
Age: 33
Posts: 5,431
Trader Rating: (16)
           Feedback Score: 16 reviews
|
After years and years of wanting one, I finally bought a MIG.
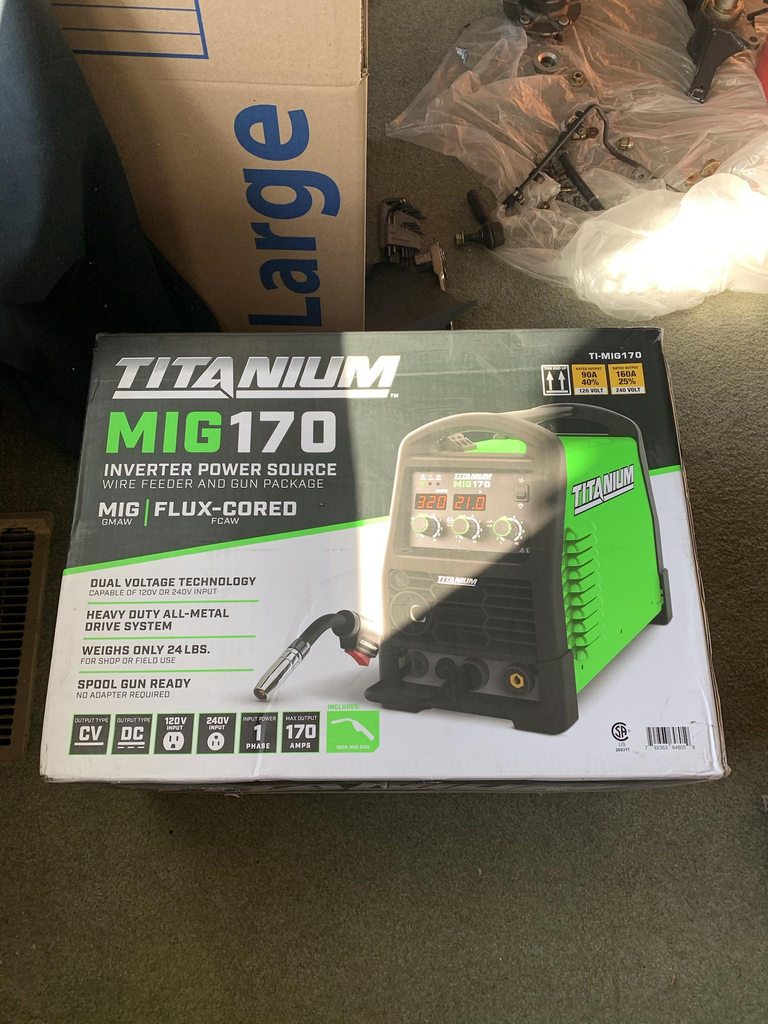 Just waiting on my helmet. 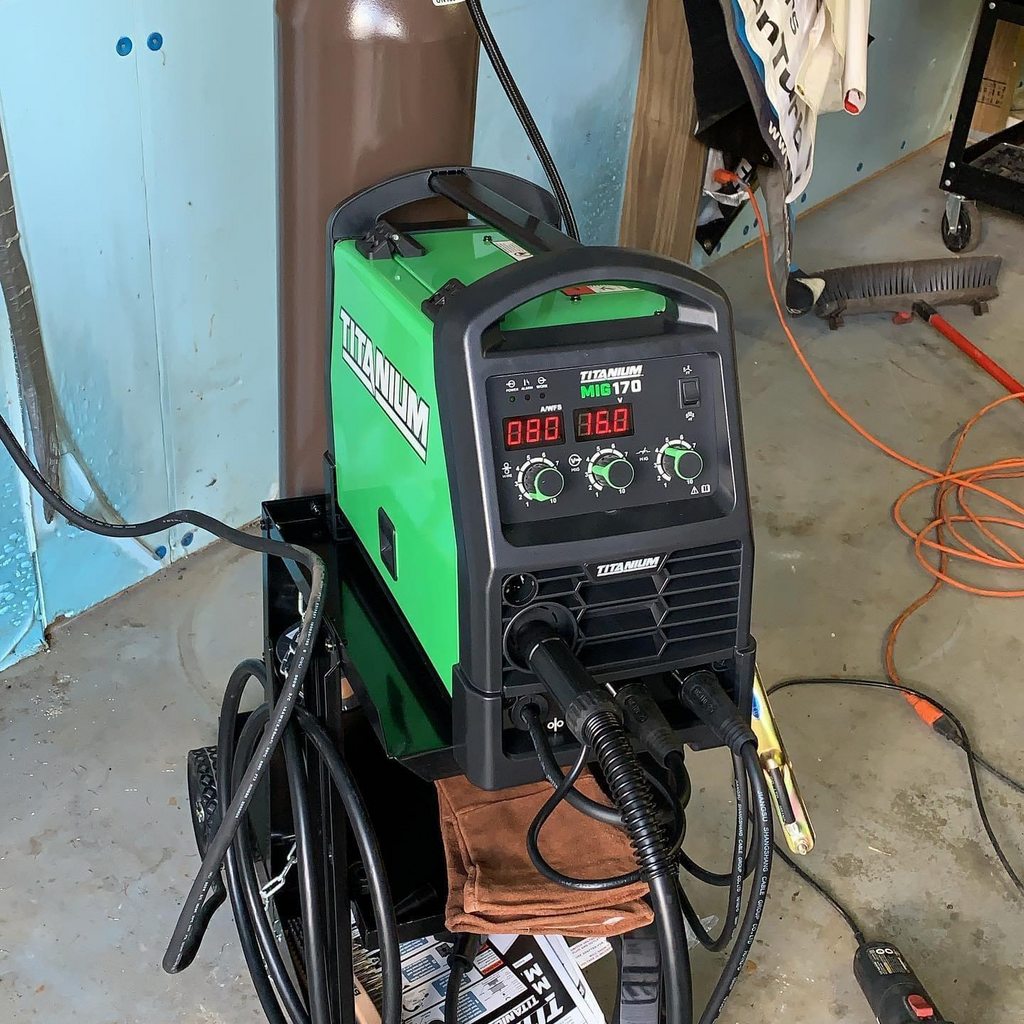 Re-inspiring me to work on this turd orange chassis since it needs all kinds of welding work: 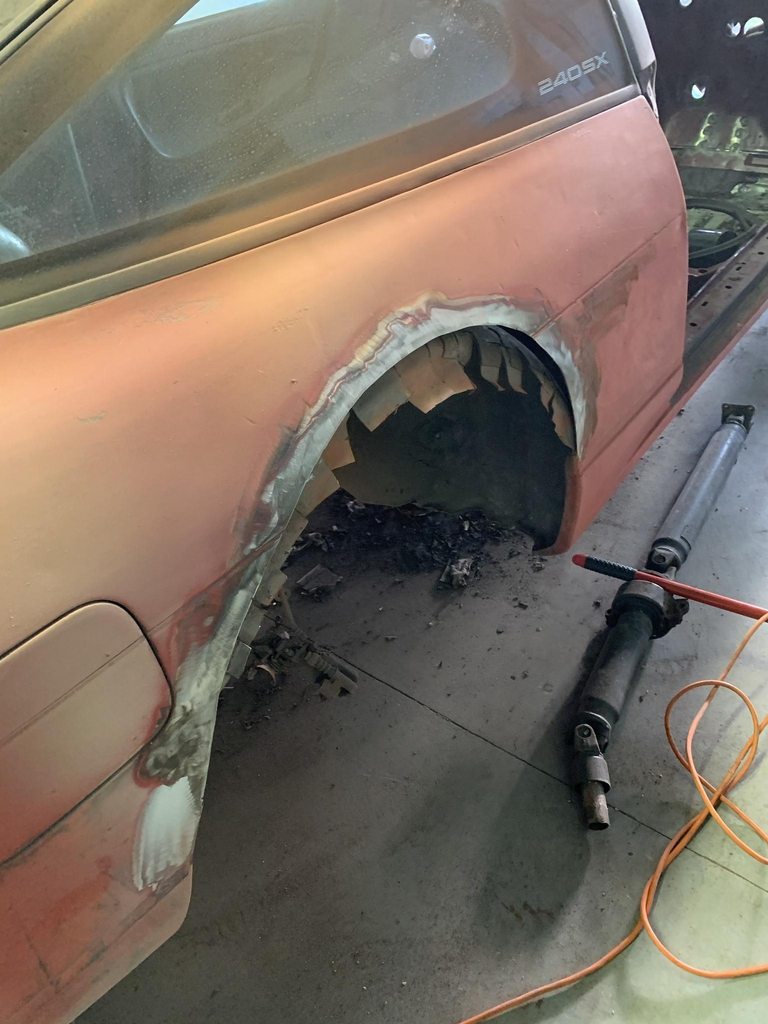 Oh look, bondo: 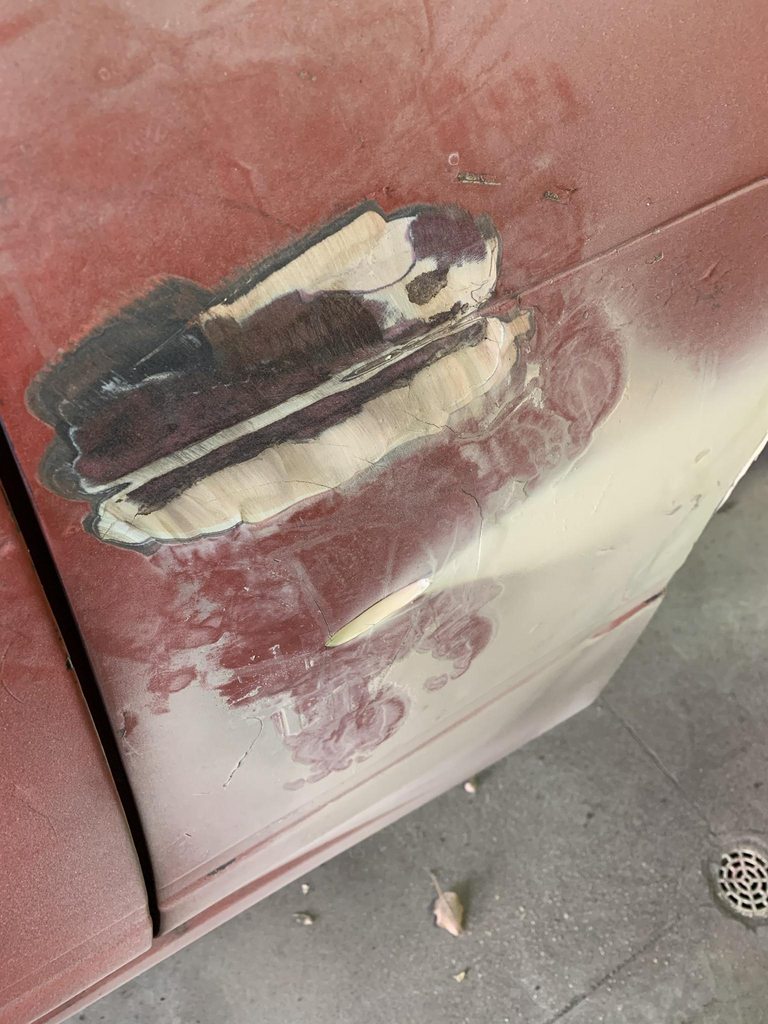 Lots of fucking bondo. 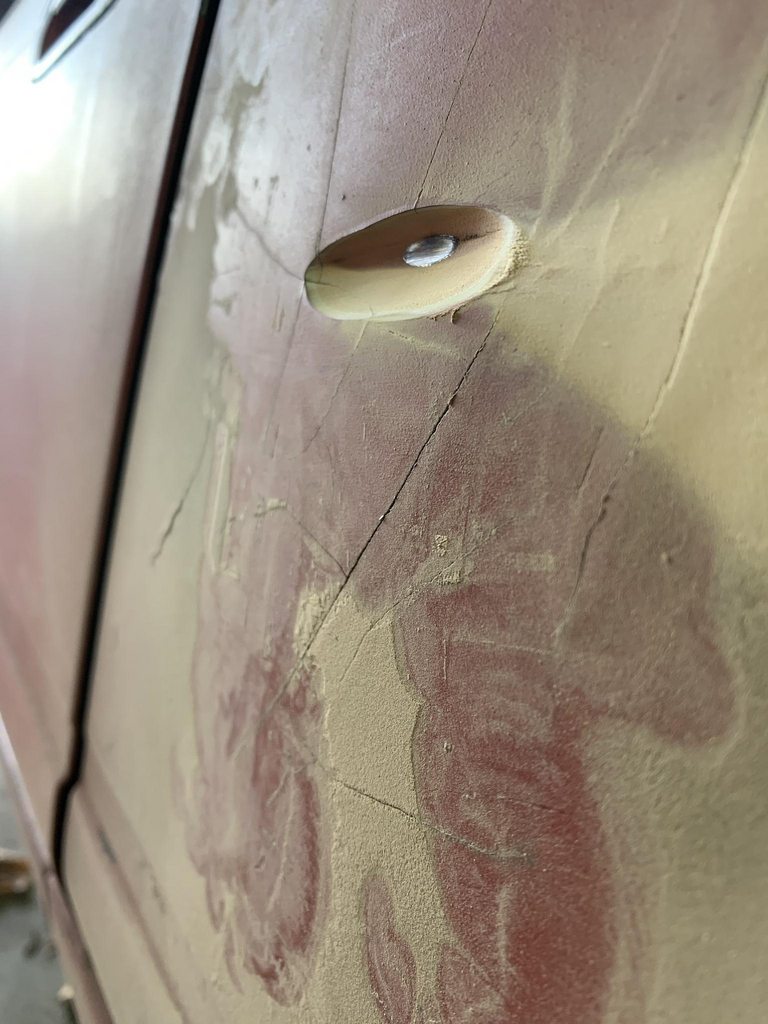 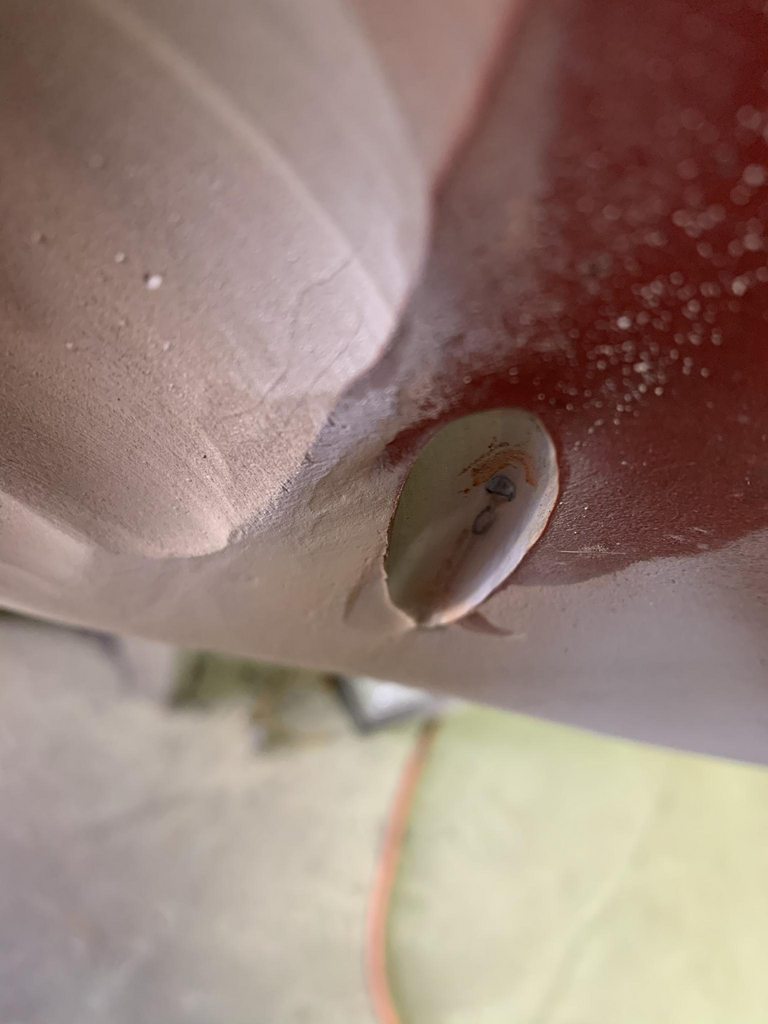 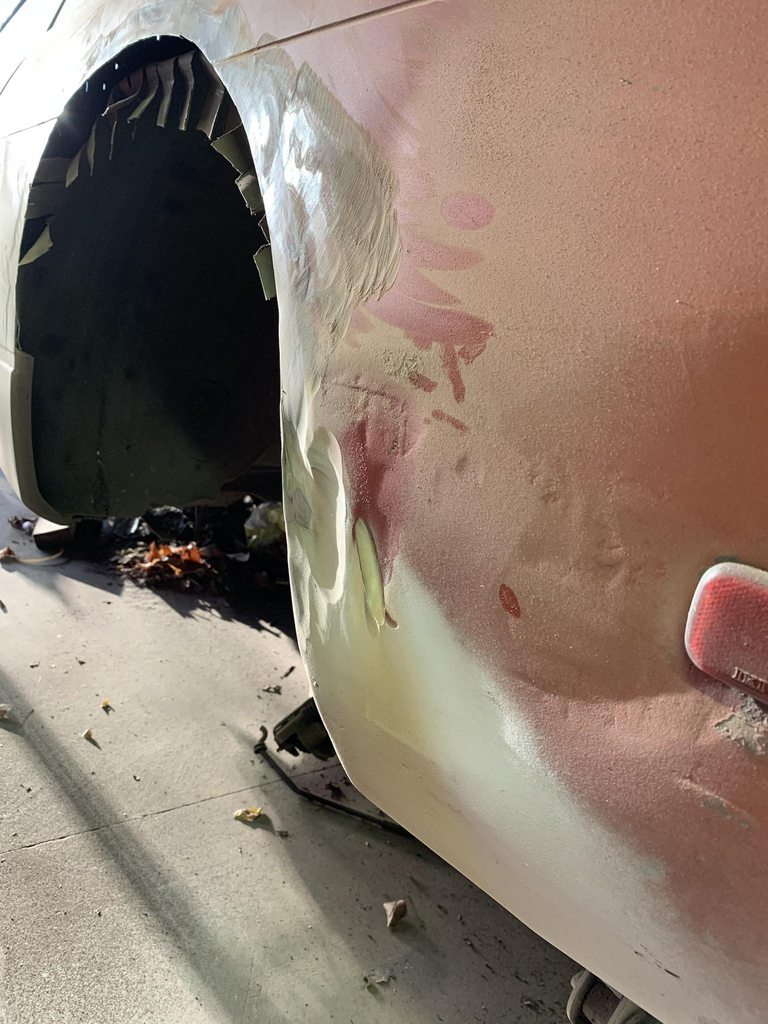 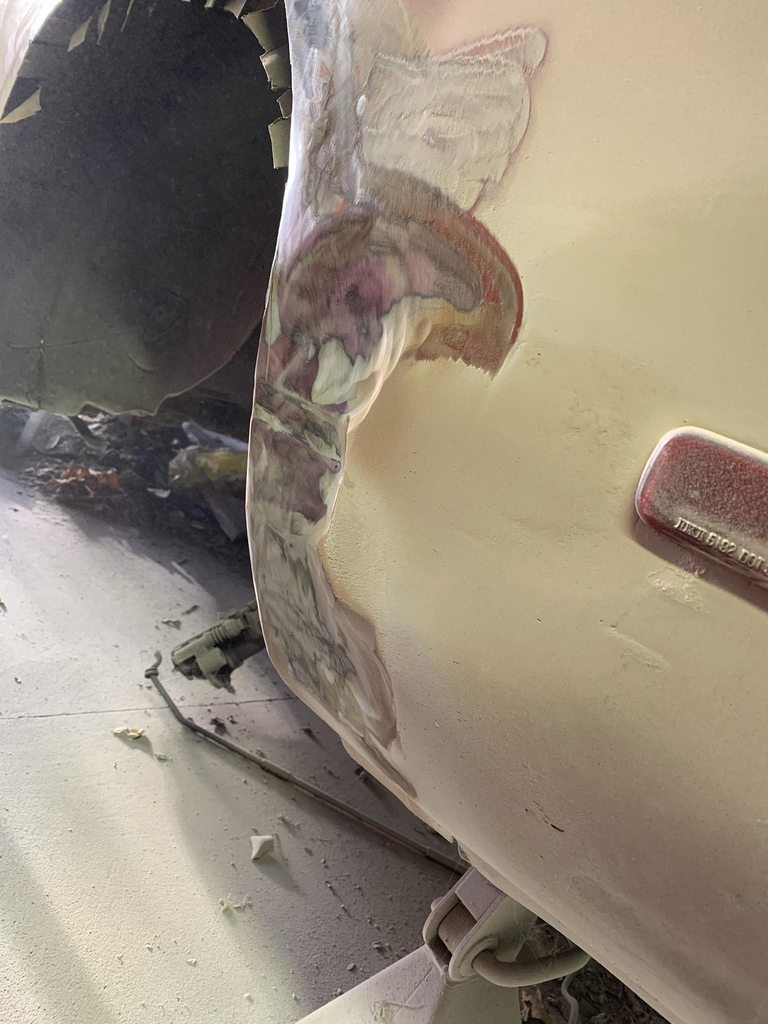 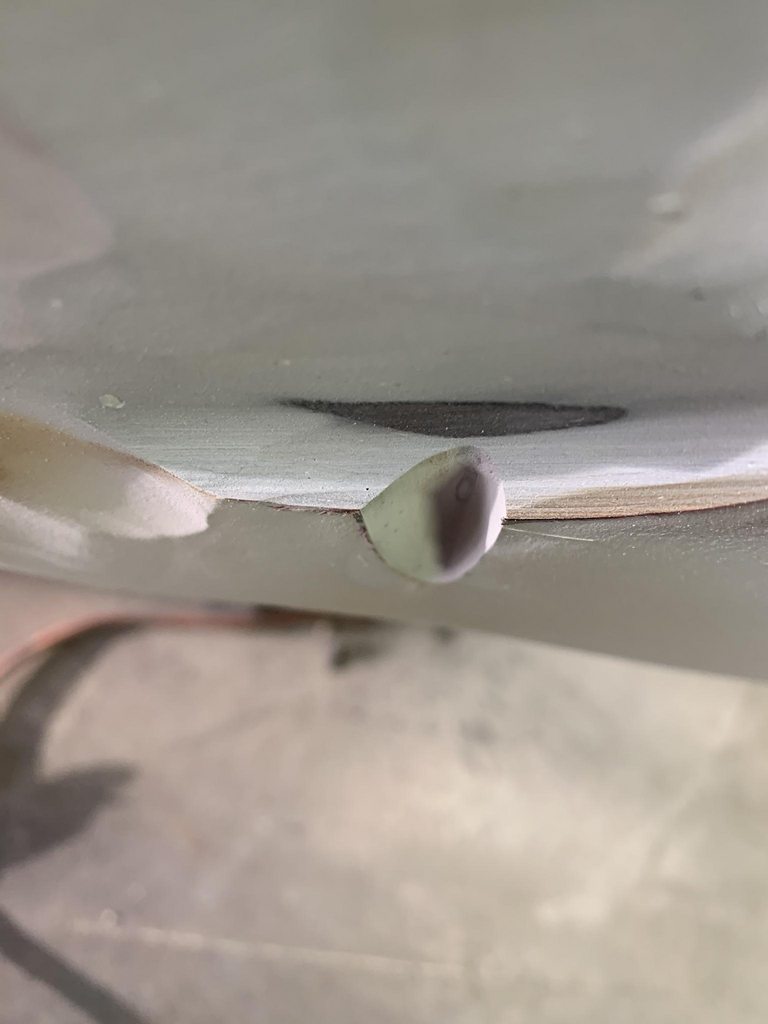 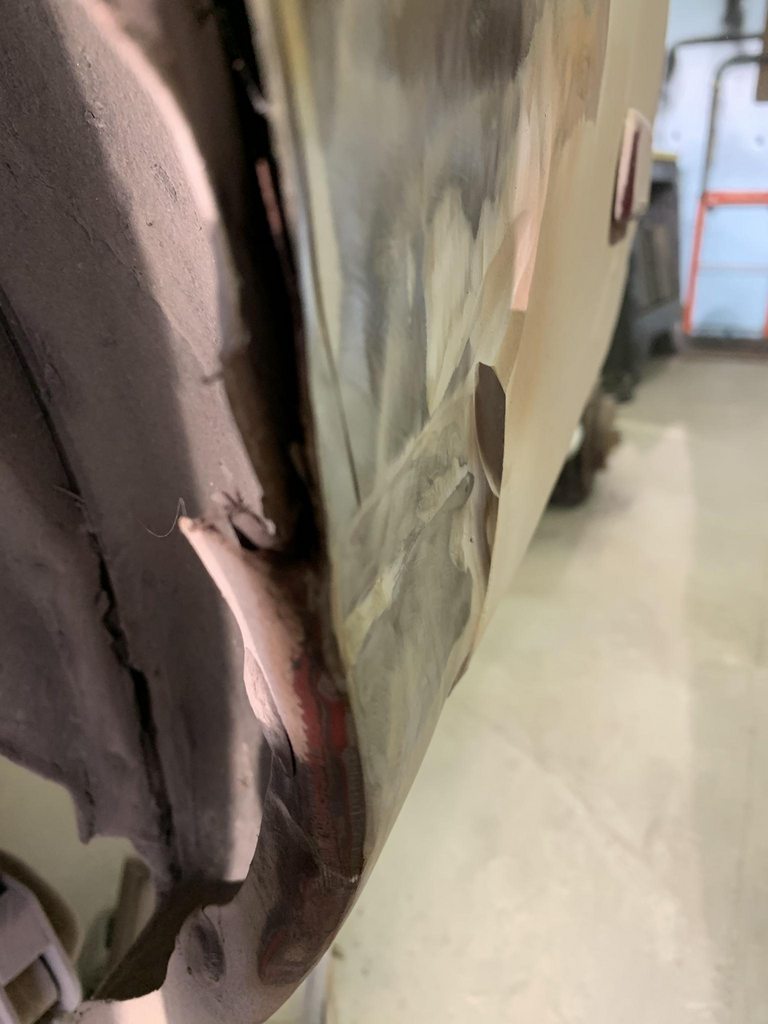 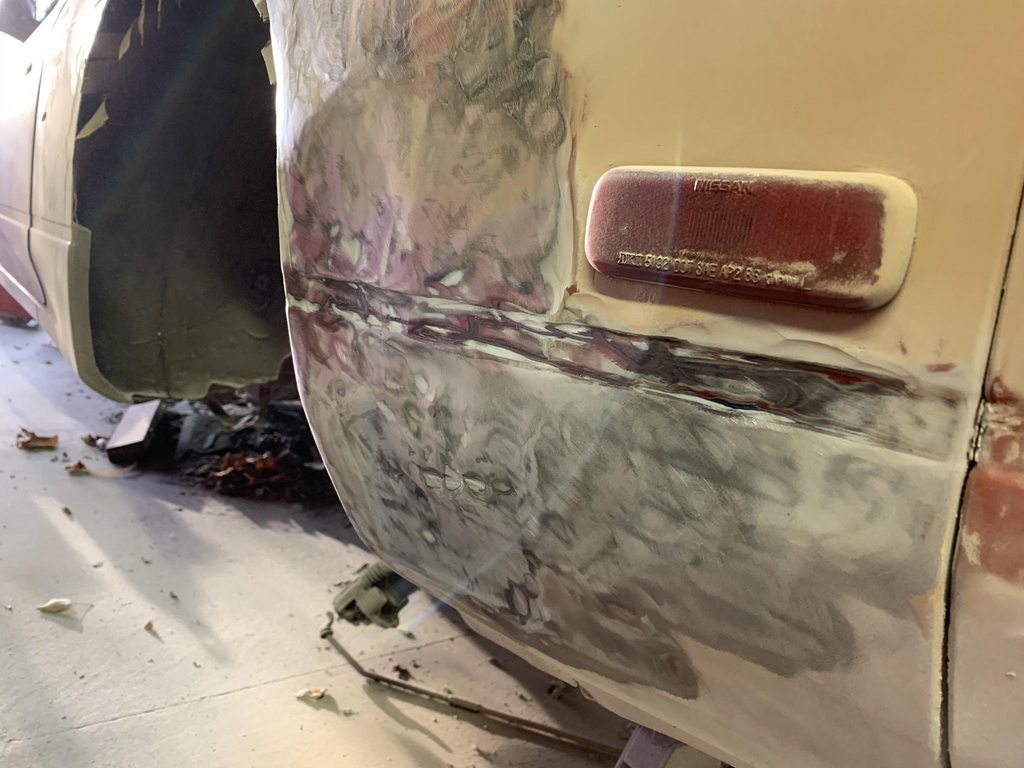 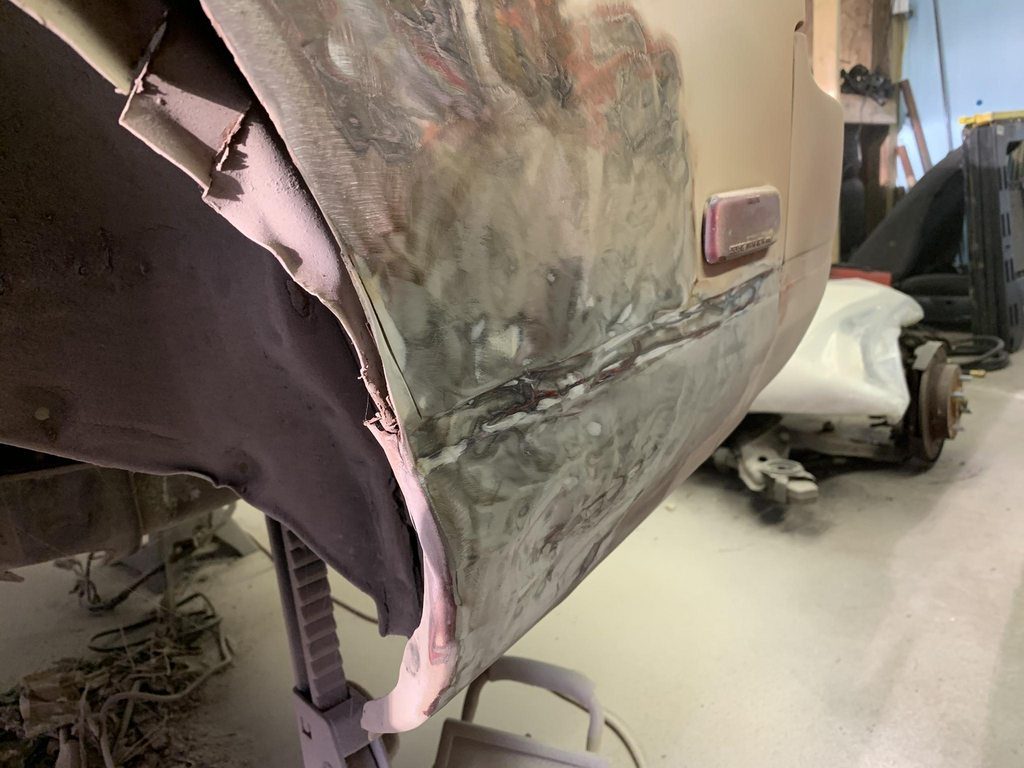 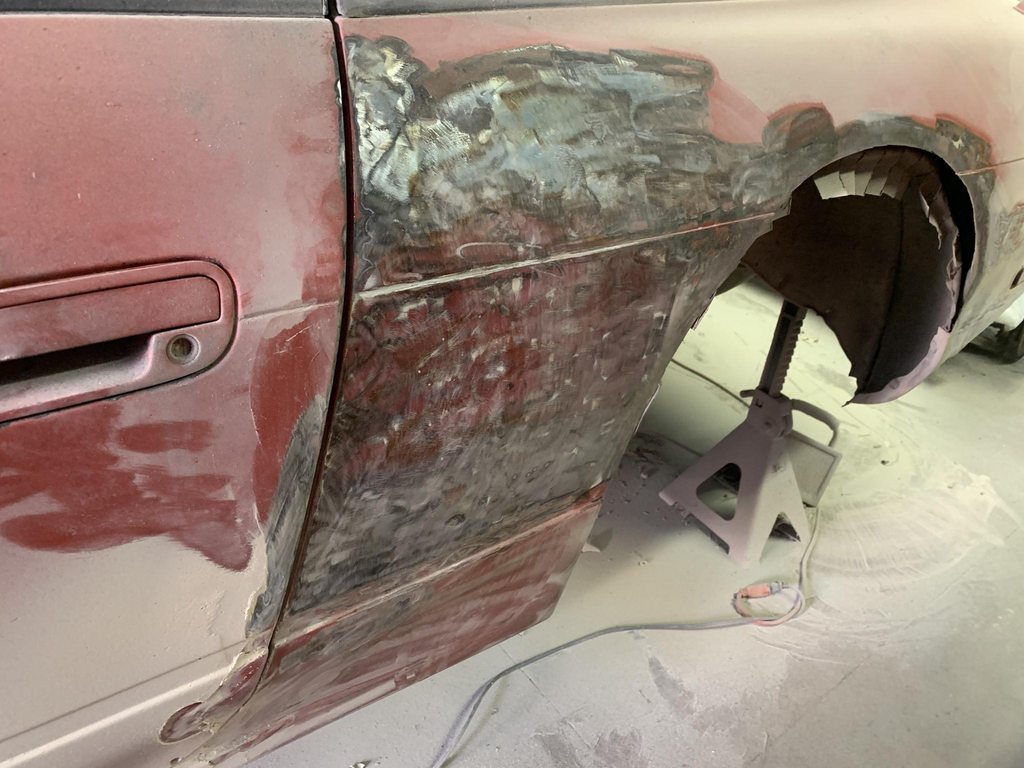 But wait, there's more! 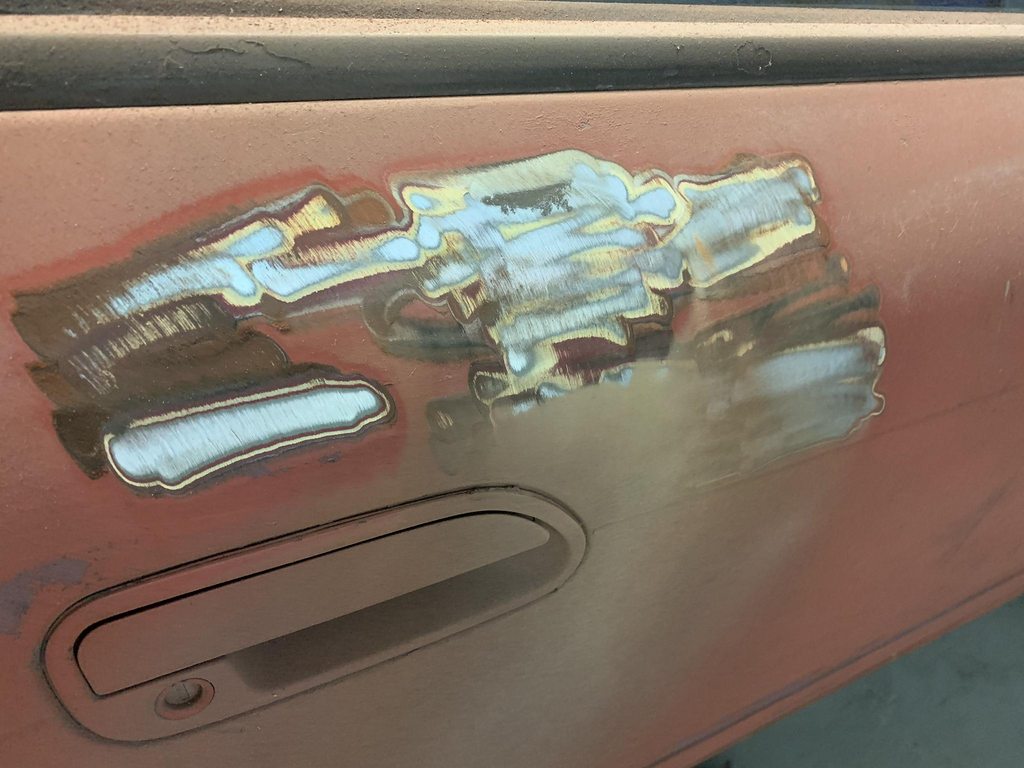 Apparently they decided to skim coat the entire top of the door? 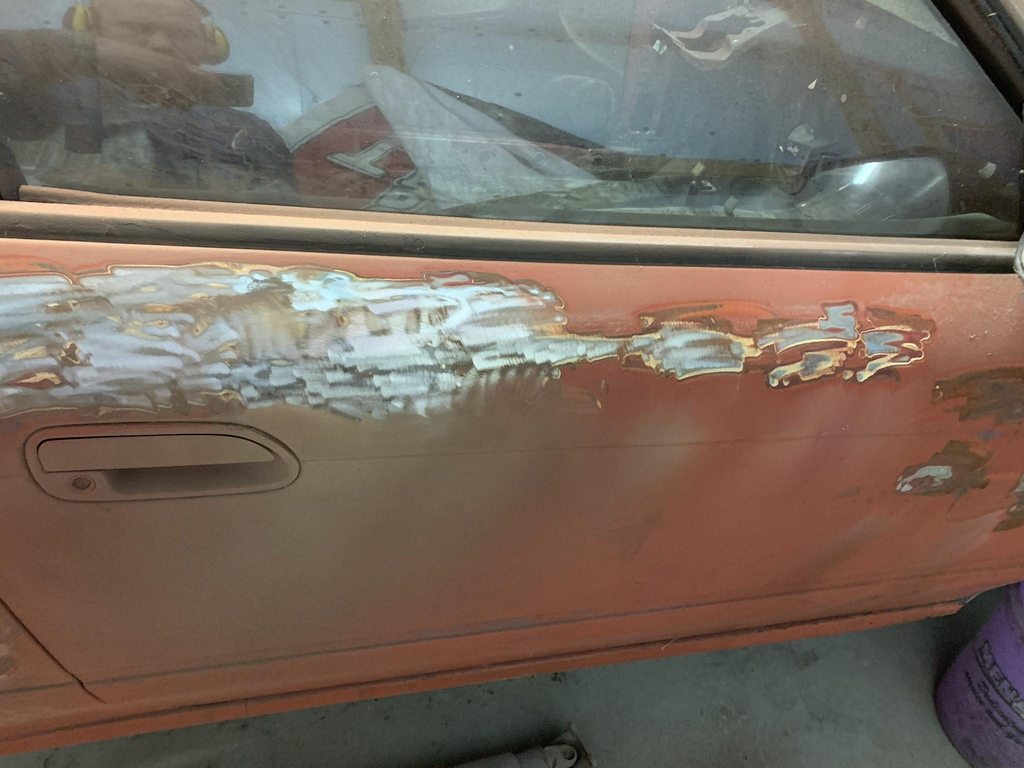 Anyway, I couldn't breathe after this so I decided to stop for the night. Lots and lots and lots of welding and fabwork pictures to come hah. Oh and I got my ex-nascar C&R oil filter housing in. A massive improvement on the shit-ass cross drilled cast Earl's one I was going to run. Gonna make a short video on this because I think it's important. 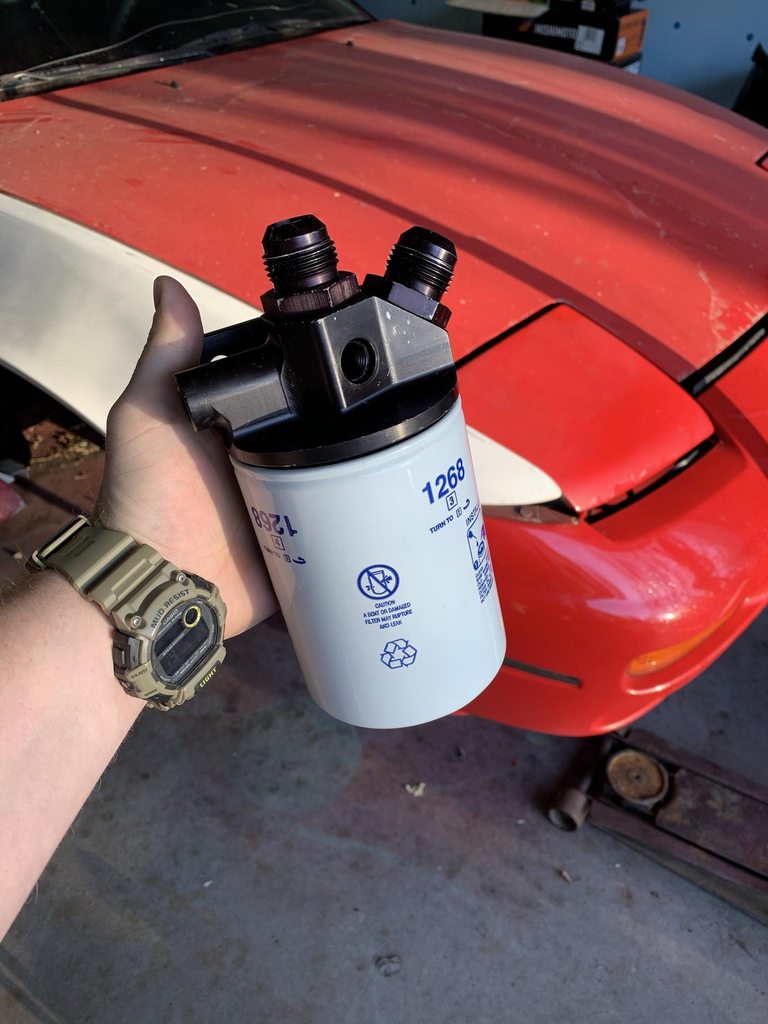
__________________
Build: http://zilvia.net/f/showthread.php?t=643065 Friends don't let friends buy knock-offs. |
|
|

|
|
|
#633 |
|
Zilvia Addict
 Join Date: Feb 2014
Location: Arizona ٩( ᐛ )و Subaru Parts Consultant
Age: 26
Posts: 813
Trader Rating: (3)
           Feedback Score: 3 reviews
|
Man, sucks to find body filler all over like that. Hopefully the door is okay under all of that filler. Any recent progress on getting the engine sorted?
__________________

|
|
|

|
|
|
#634 |
|
Zilvia Addict
 |
I am convinced that there are some bondo artists roaming the earth. I have seen some hectic body damage covered with filler, and end up looking like the original panel. Shit is crazy.
__________________
|
|
|

|
|
|
#635 |
|
Zilvia Member
 Join Date: Mar 2011
Location: Detroit
Age: 29
Posts: 159
Trader Rating: (4)
 Feedback Score: 4 reviews
|
I actually think it came that way from the factory. Every s13 I've cut into in the rear quarters has bondo there. I'm not sure if it was easier to get that molded bodyline into the car that way or what, but I'm certain it was like that from the factory. Strange.
__________________
93 coupe - AutoX/Fun summer daily/Eternal project 
|
|
|

|
|
|
#637 | ||||
|
Zilvia.net Advertiser
 Join Date: Nov 2005
Location: Michigan
Age: 33
Posts: 5,431
Trader Rating: (16)
           Feedback Score: 16 reviews
|
Quote:
Quote:
Quote:
Quote:
Did this whole process yesterday. Feels like I've done it way too many times, haha. No stupid aluminum bushings this time though, so that'll be nice. More on that tonight or tomorrow. 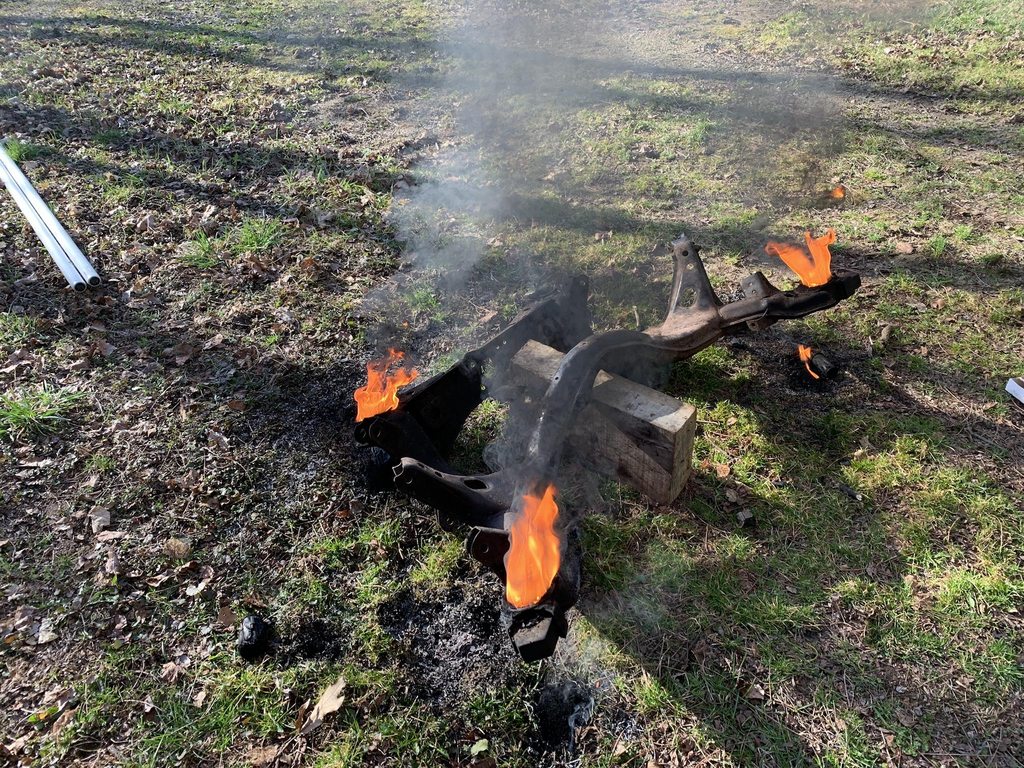
__________________
Build: http://zilvia.net/f/showthread.php?t=643065 Friends don't let friends buy knock-offs. |
||||
|
|

|
|
|
#639 |
|
Zilvia.net Advertiser
 Join Date: Nov 2005
Location: Michigan
Age: 33
Posts: 5,431
Trader Rating: (16)
           Feedback Score: 16 reviews
|
Galvanic action and the fact that you have to press them in.
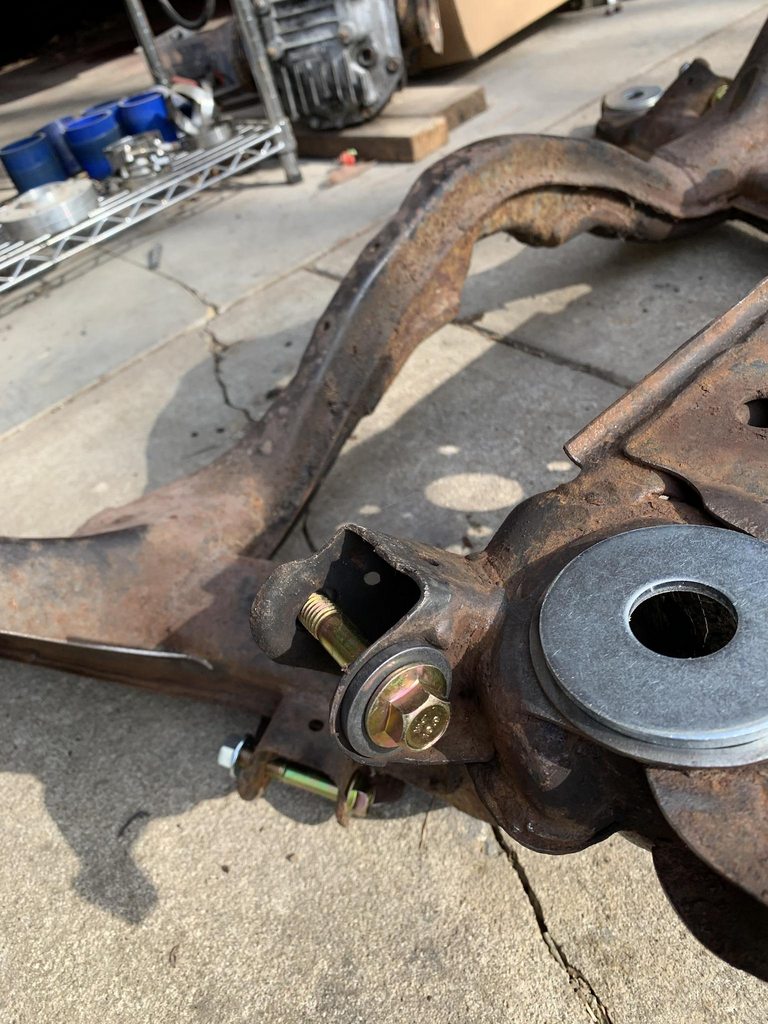 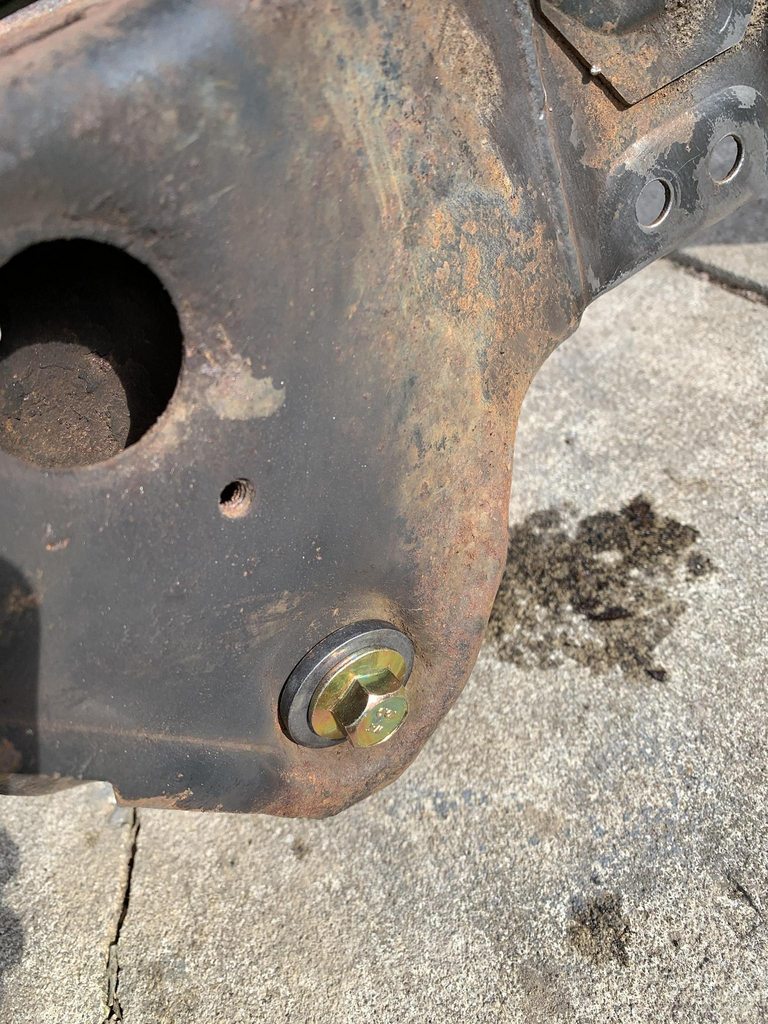 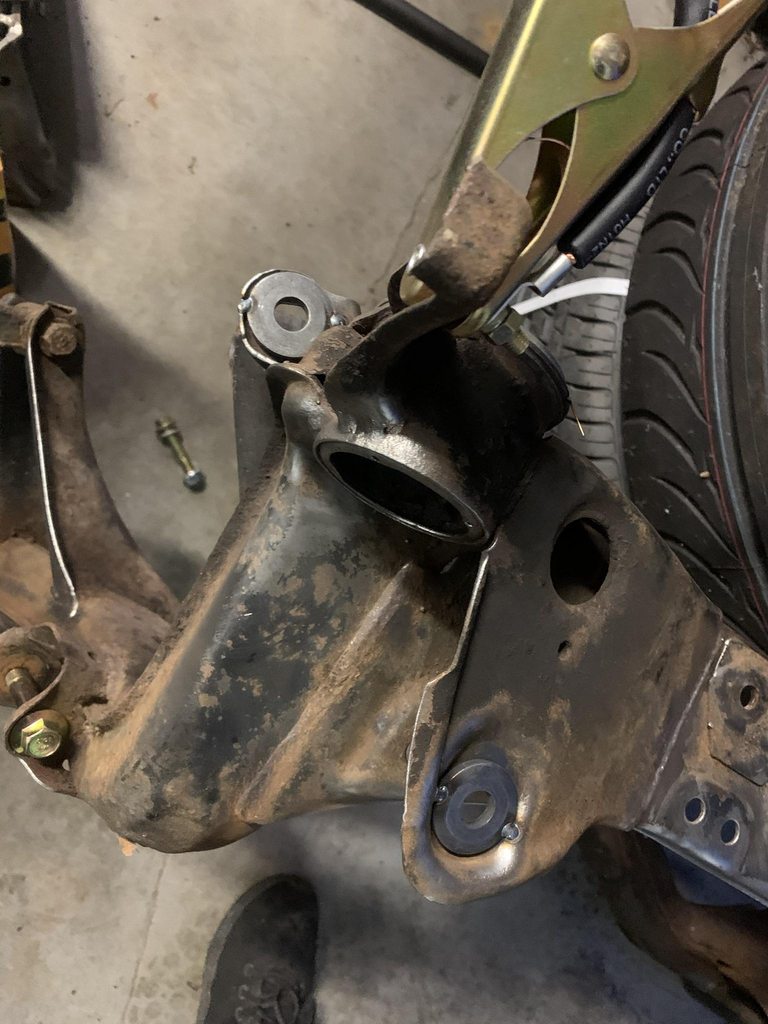 Welder go brrrrrrrrrrr... 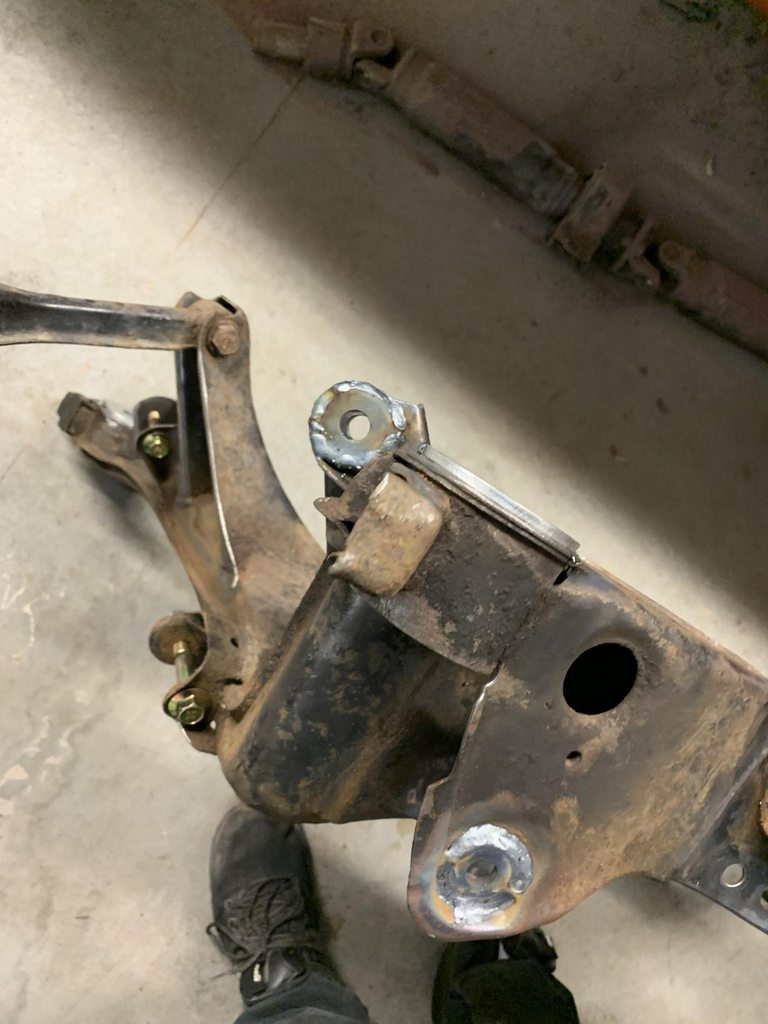 Why? Because why would I ever want to go back to eccentric bolts? Also, this, again, is no place for aluminum. There is another washer welded to the other side as well. I need to cut this down and weld this thing on, just need an extension cord for the welder. 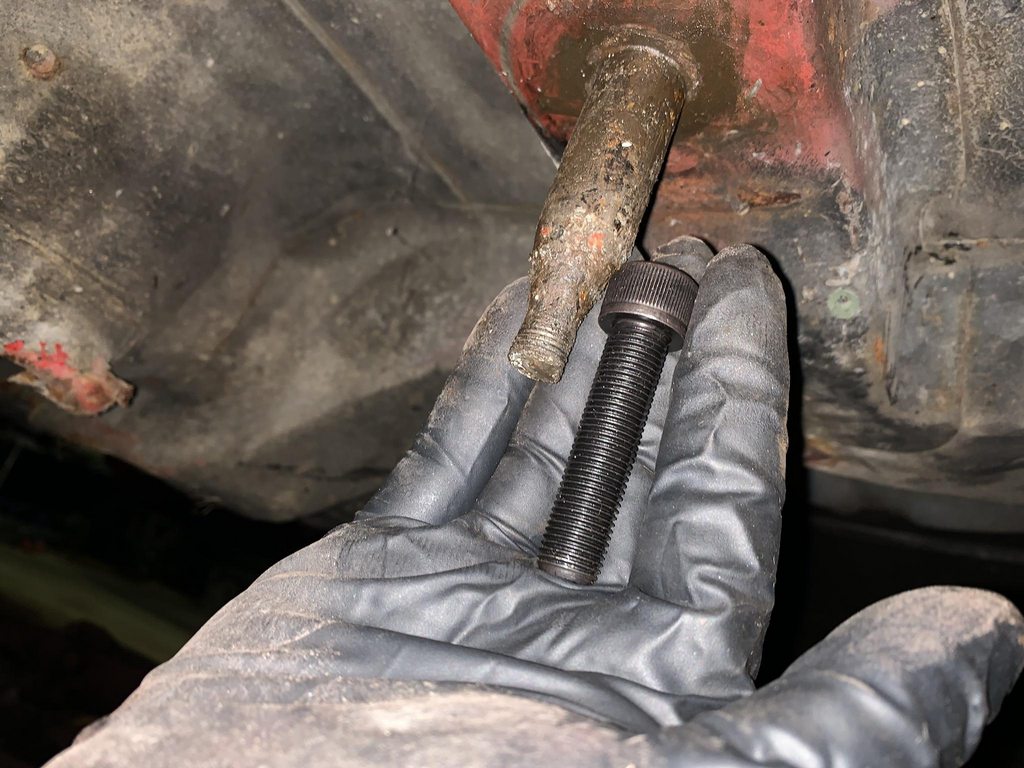 Soon to be solid steel "bushings". Had to do some figuring tonight on the best way to ensure good fitment, and now I have it. Just have to cut the tube to length and do a mockup before I glue these things in there. Then a few more reinforcements and the whole subframe is off to be stripped, e-coated, and powdercoated. Should be absolutely bulletproof after that. 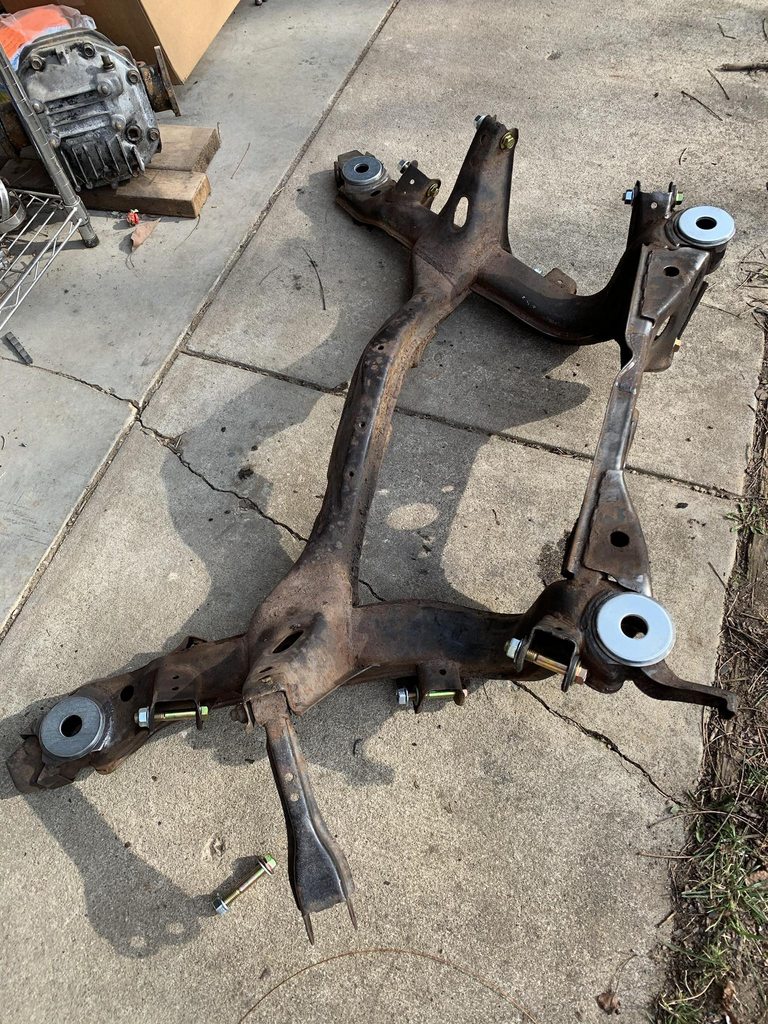
__________________
Build: http://zilvia.net/f/showthread.php?t=643065 Friends don't let friends buy knock-offs. |
|
|

|
|
|
#640 |
|
Zilvia.net Advertiser
 Join Date: Nov 2005
Location: Michigan
Age: 33
Posts: 5,431
Trader Rating: (16)
           Feedback Score: 16 reviews
|
So, I did several mock-ups and test-fits of this thing, then I tack welded the washers and tubes into place and test fit again before gluing it all together.
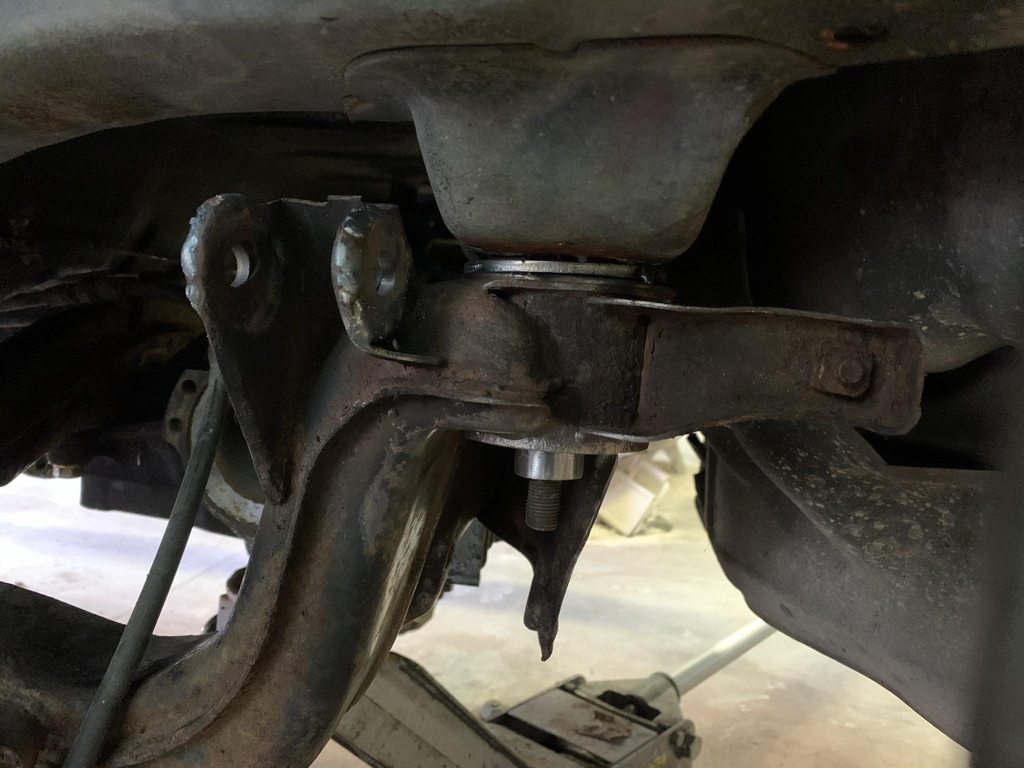 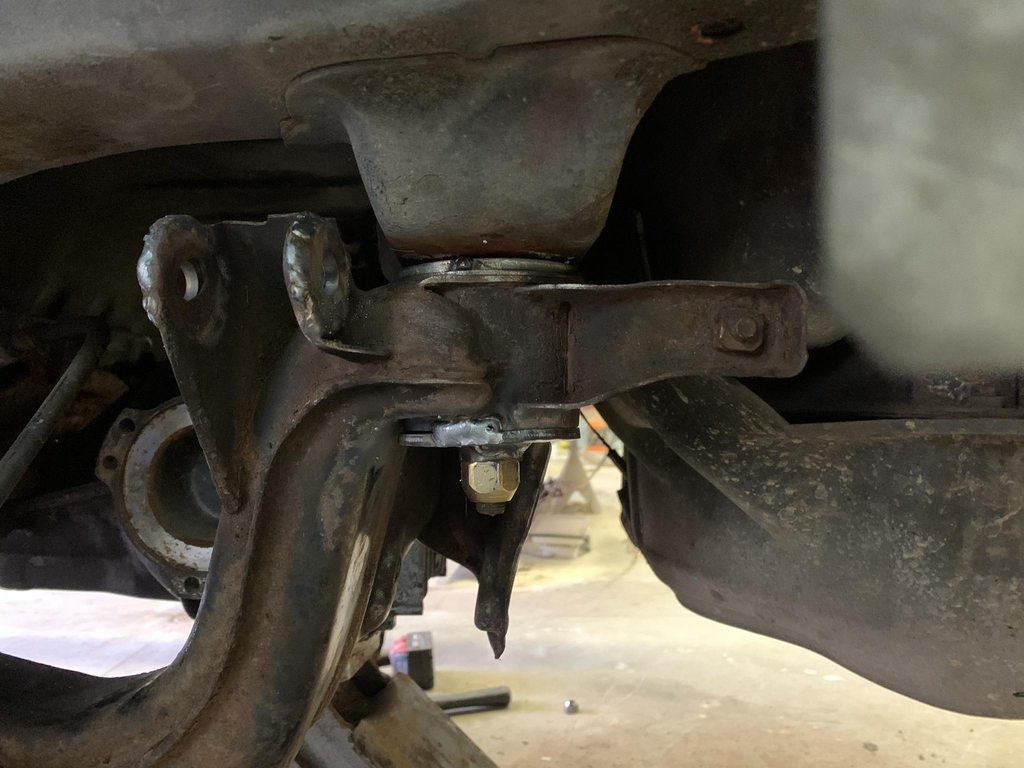 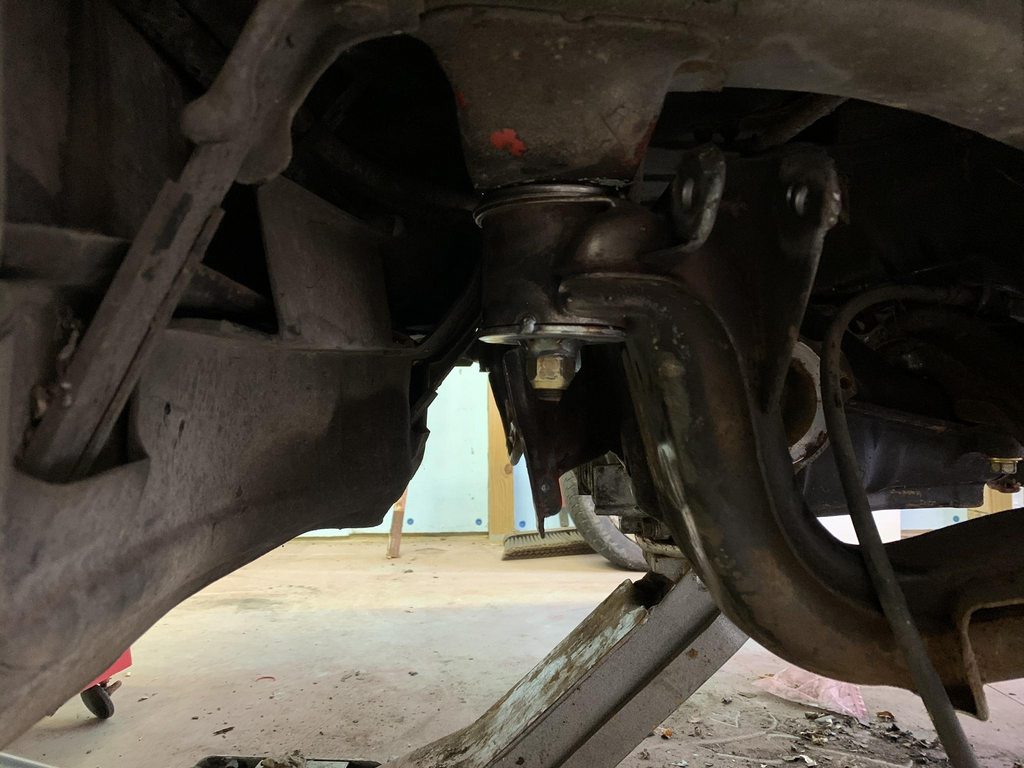 My welding isn't anything spectactular to behold, but some of that is due to the crusty-ness of the base metal. I didn't remove the bushing sleeves, so as you might guess, there was some rust between them and the subframe itself. I cleaned everything as best I could with a wire wheel on my angle grinder. 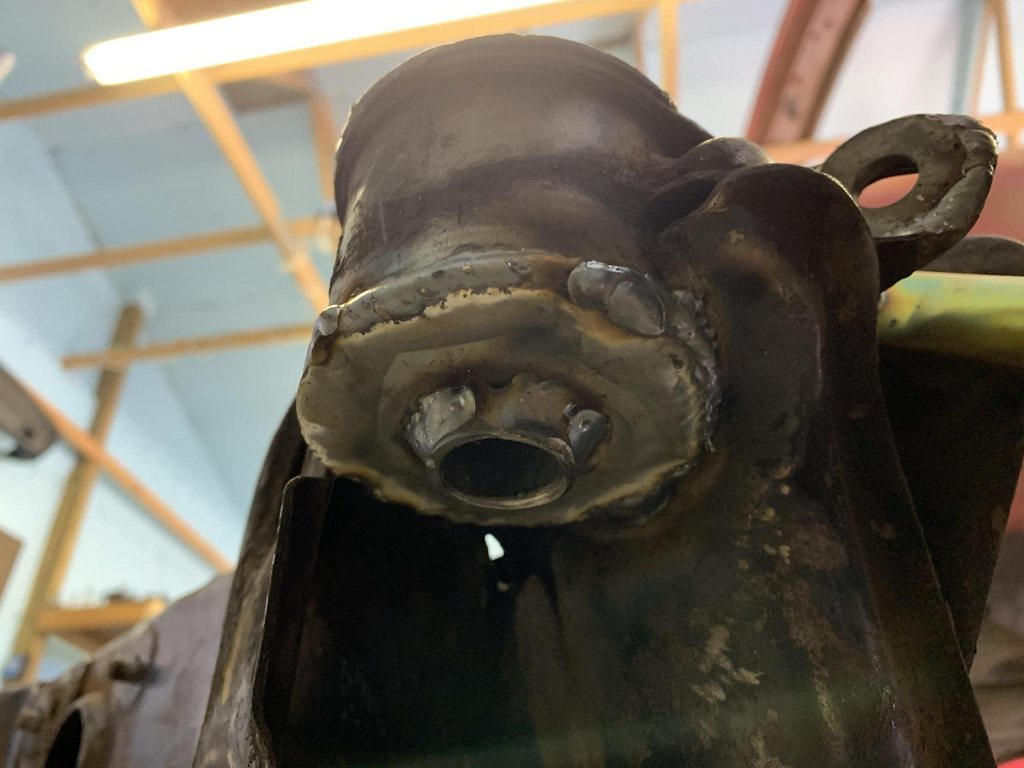 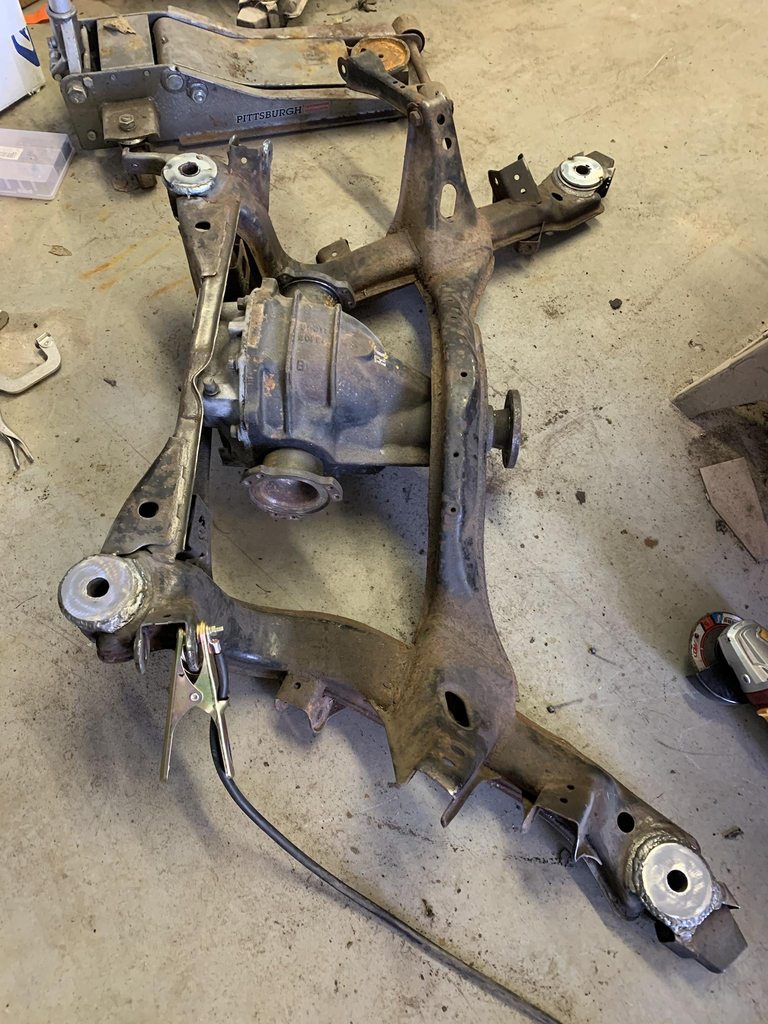 I tacked the tubes in from the underside, but I wanted it to be fully sealed, so I spot welded around the tops and sanded them flush with a flapwheel. 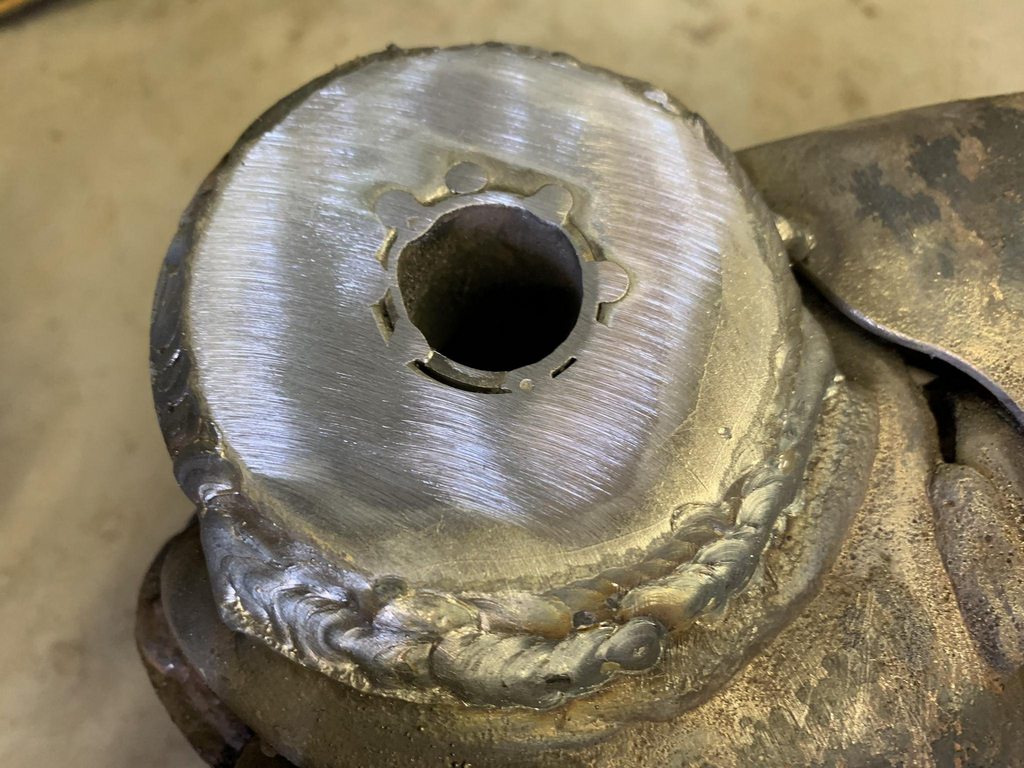 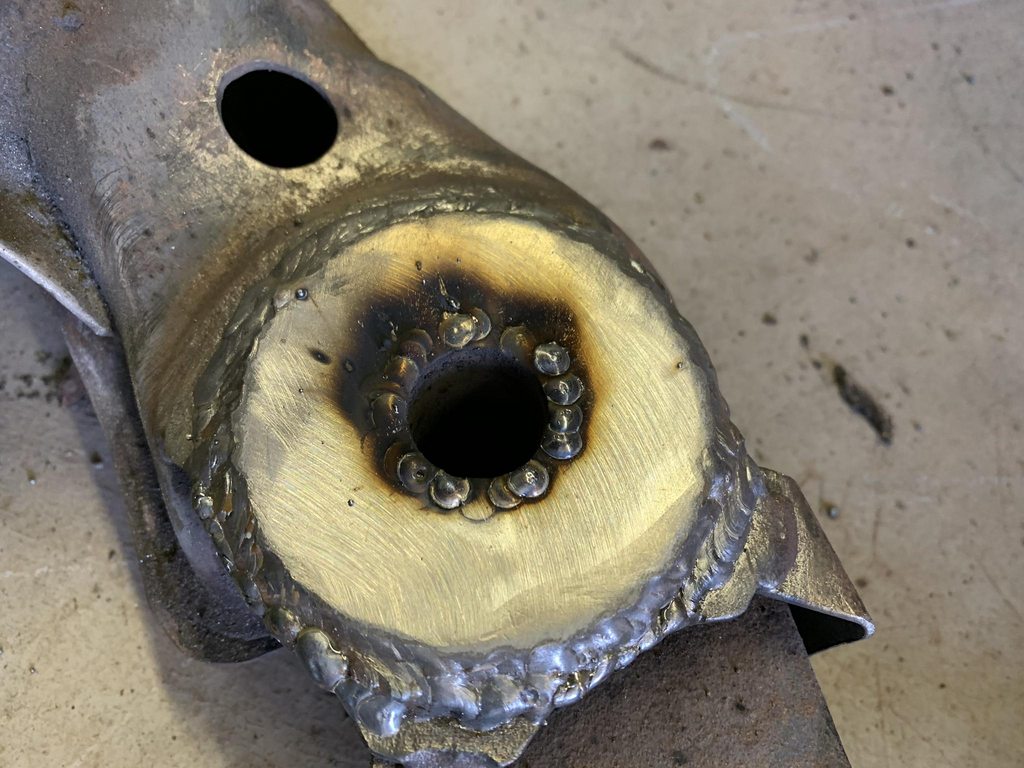 Got another set of the gktech subframe braces, along with their RLCA drop brackets. 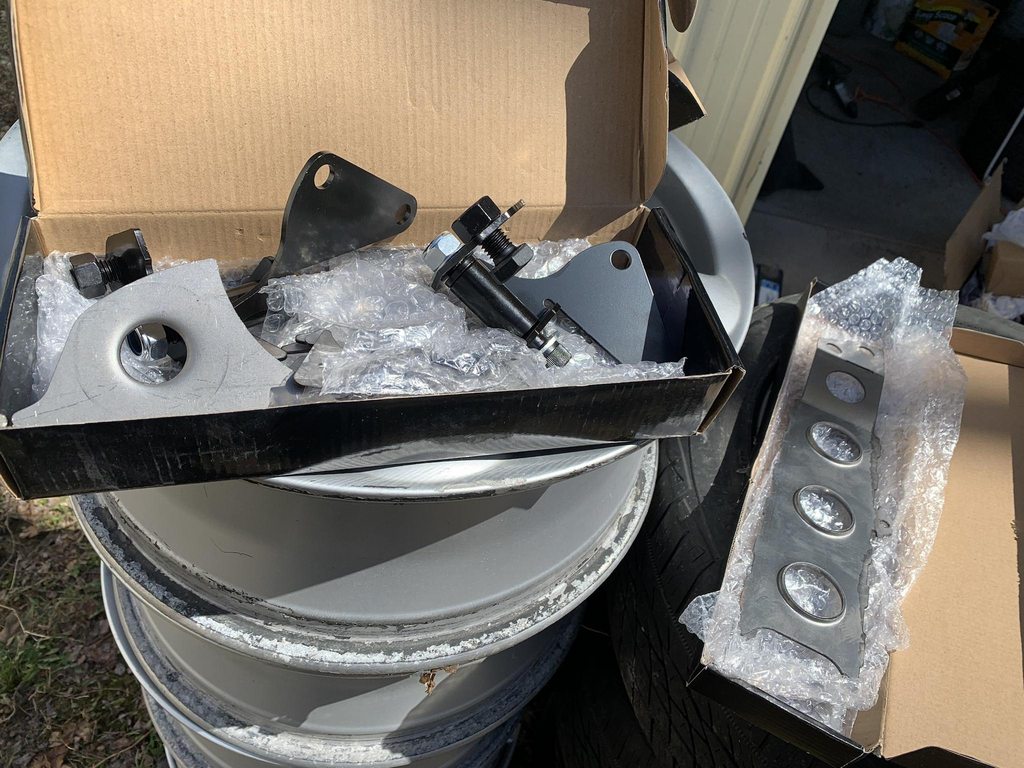 Tips when installing these: Grind down the factory welds so they can sit much more flush and symmetrical side to side. Factory S13 subframes are not that consistent, so you'll notice that each side fits quite different if you don't do this. 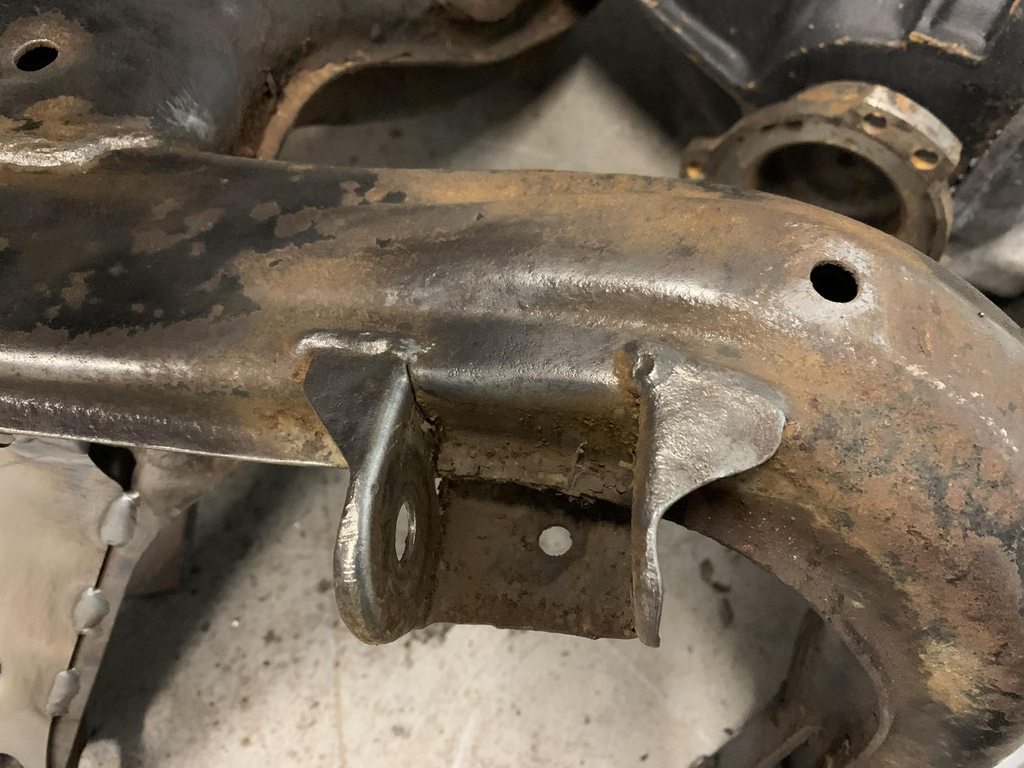 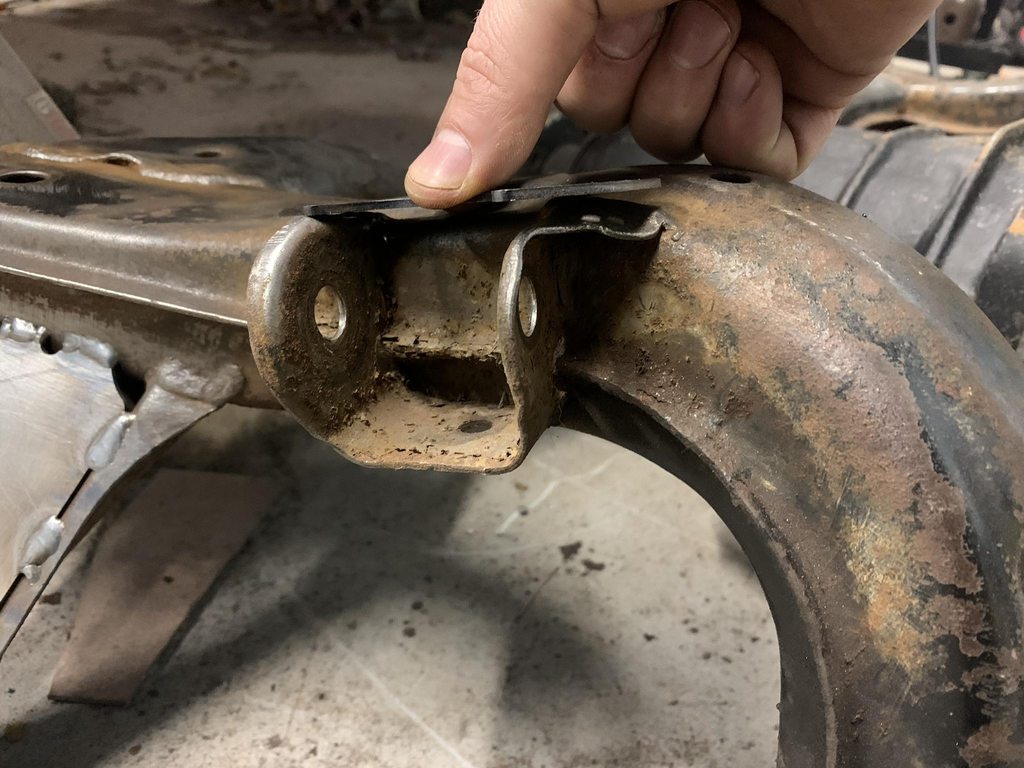 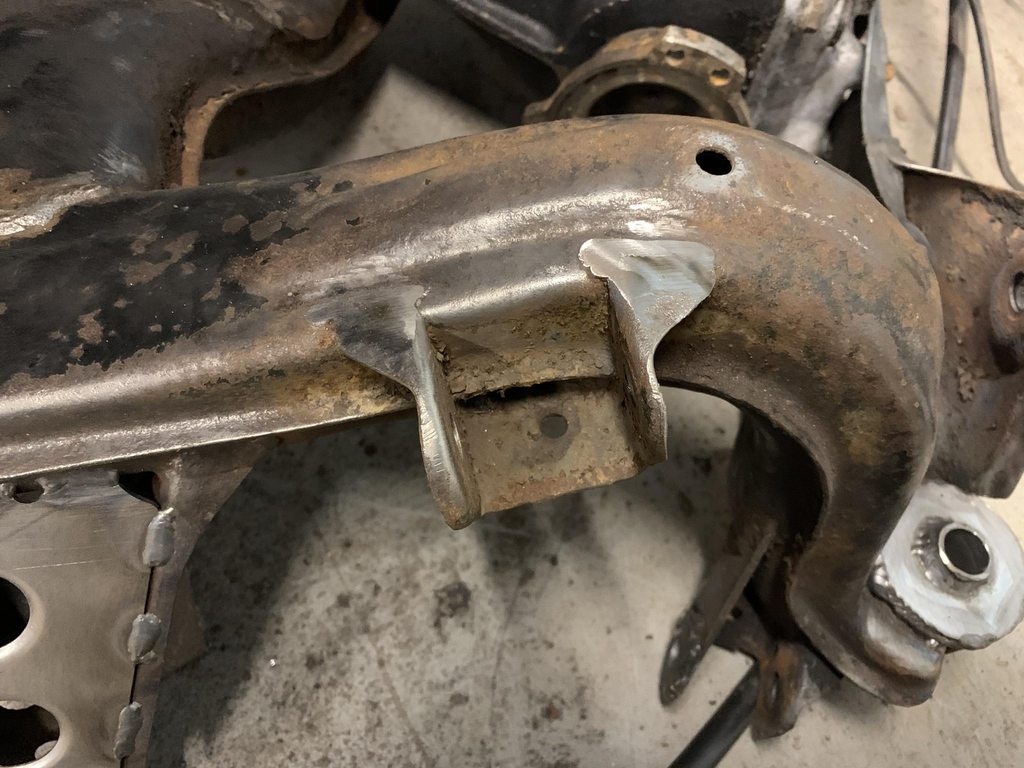 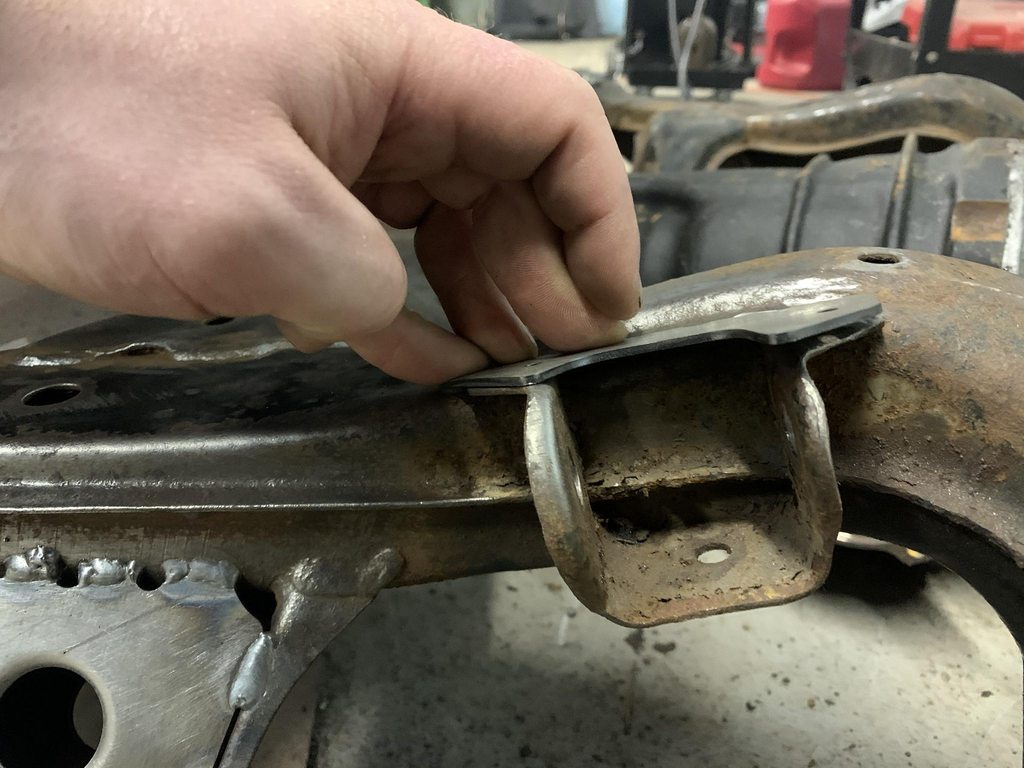 Also, when doing the toe arm mounts, you can actually trim a bit off the bottom after you've tacked the plate in, which is nice because that's the area the exhaust always hits. 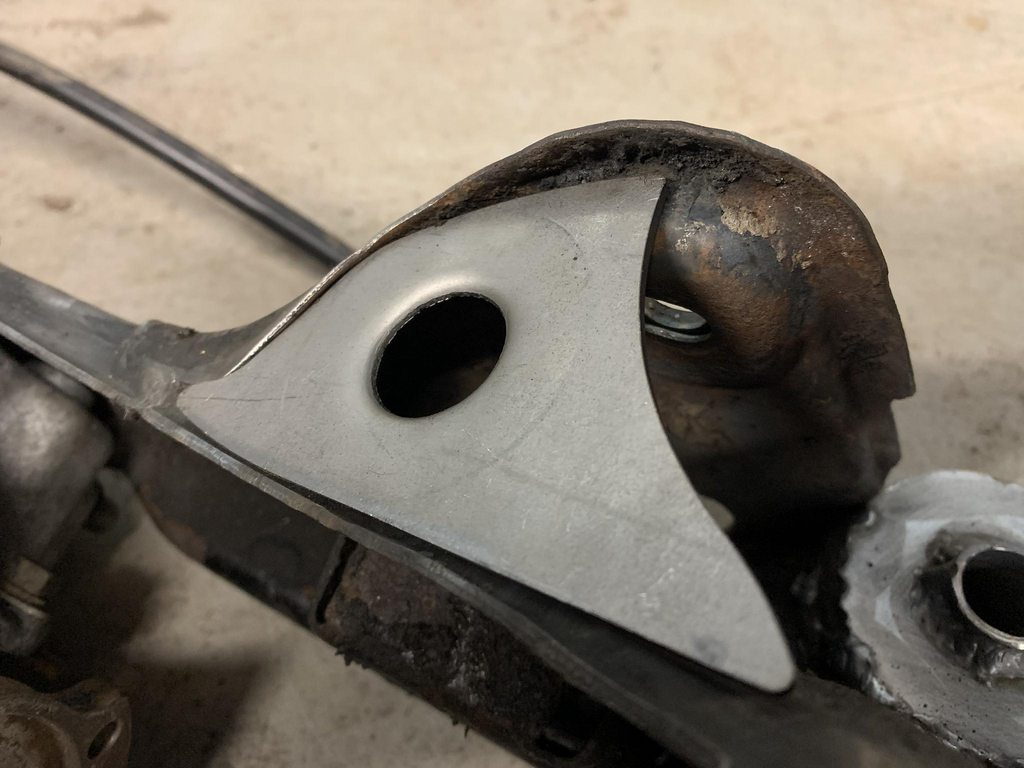 Okay so these RLCA brackets were interesting. I think it's partly because I have wisefab, and partly just the way this goes, but be prepared to do a lot of fitting and triple checking. Also don't be like me and weld the inside seems without checking clearance first, I had to do quite a bit of grinding to get the heim joint spacers to fit back in  . . 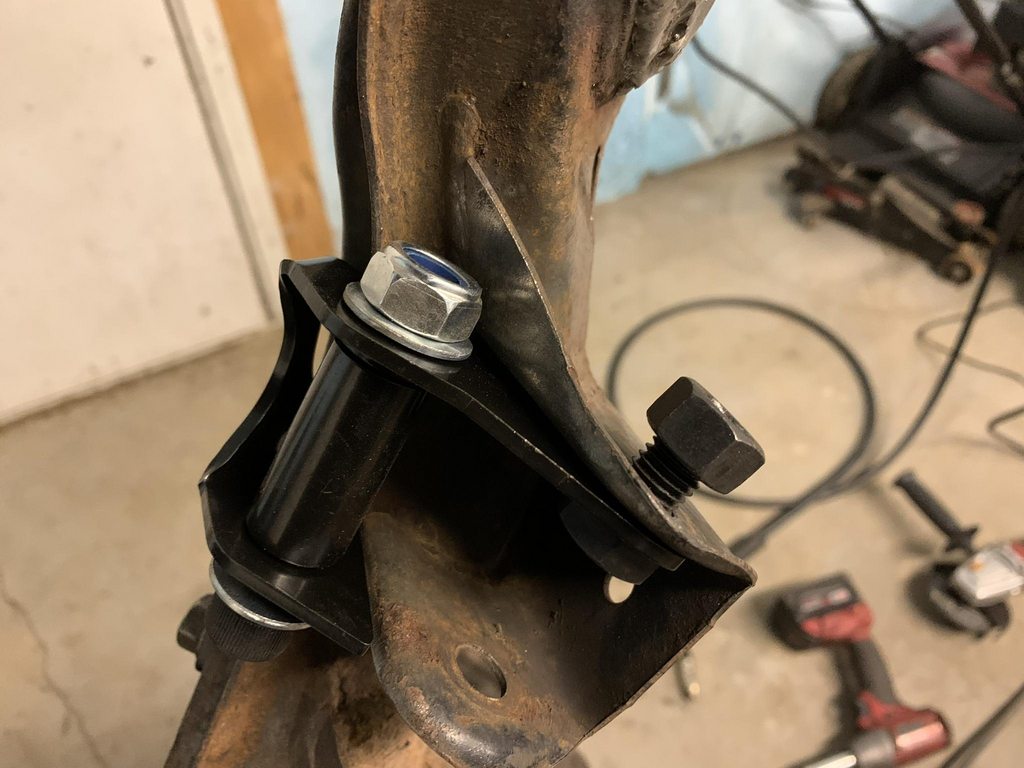 In order to get the rod end to not be maxed out, I twisted the bracket quite a bit. This helped a ton, and allowed me to not have to hammer the LCA or bolts into place, hah. I did also have to grind down the "seam" on the subframe pretty heavily to allow me to slide the bolt in easily. 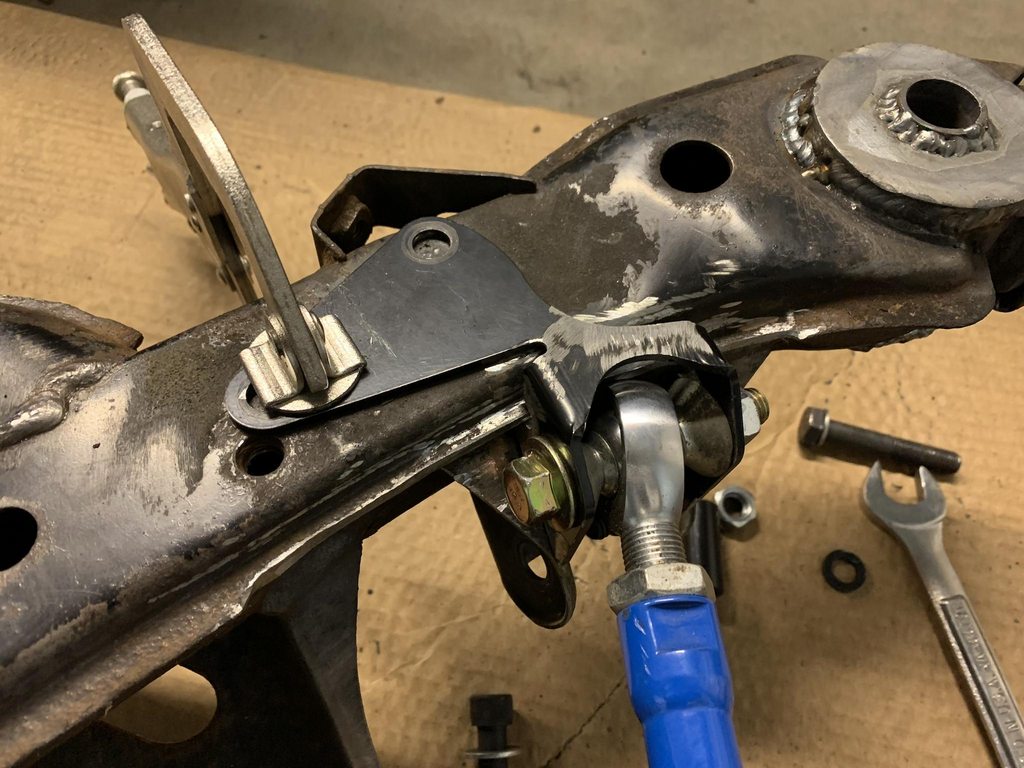 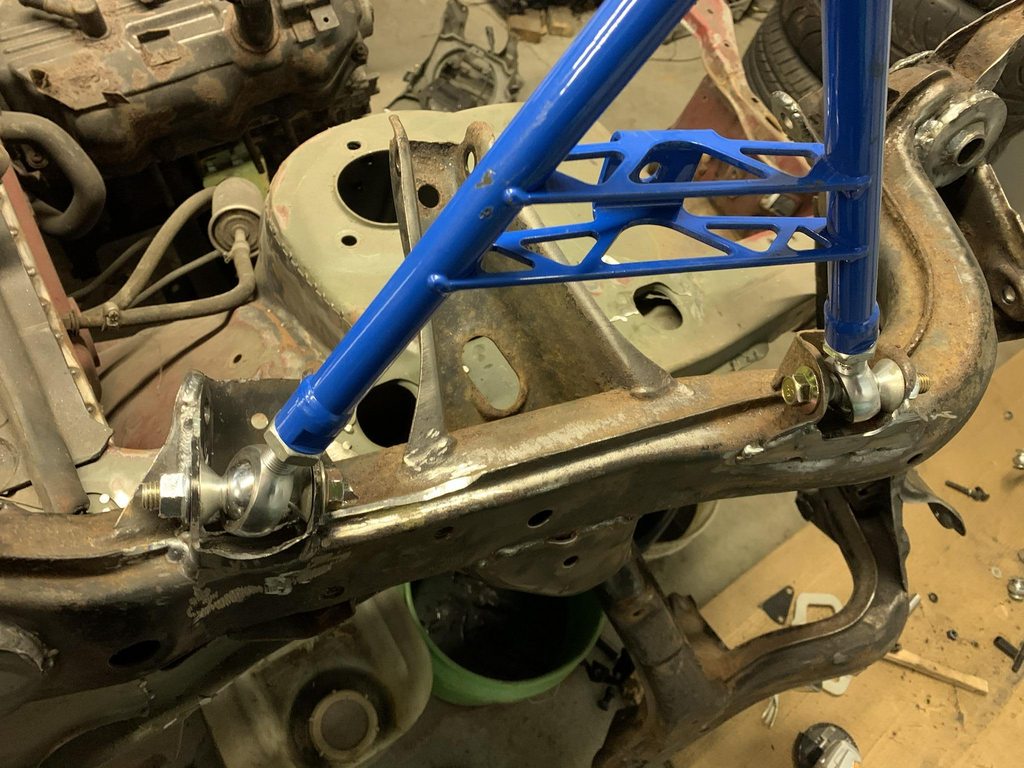 Click for articulation video: https://imgur.com/ICrxKoe All braced up with the exception of the camber arm mounts: 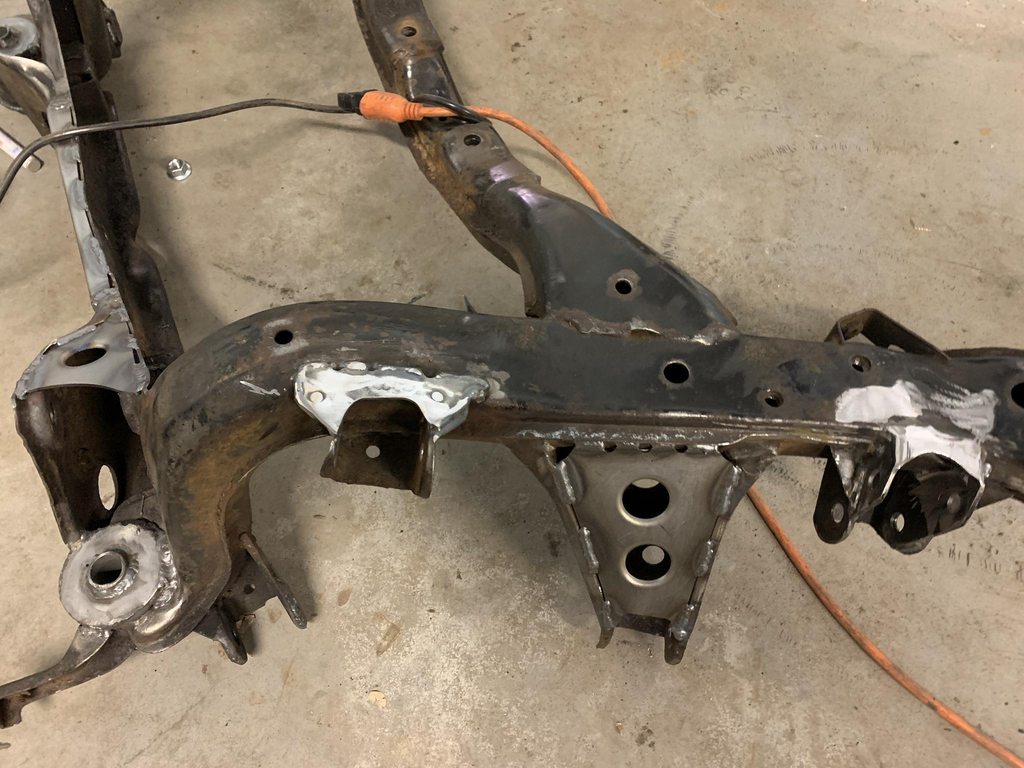 Oh yeah, glued this on too: 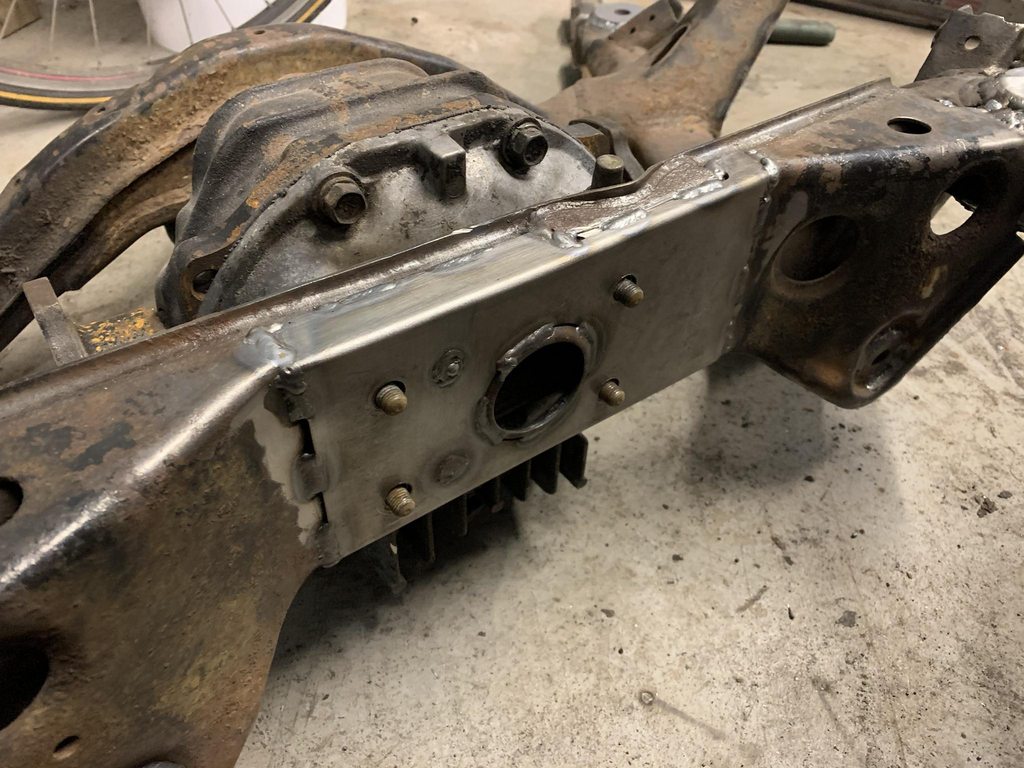 And test fit time. I like that this solution raises the subframe a bit, but also leaves room for the camber arm bolt without having to smash or cut that part of the frame behind it: 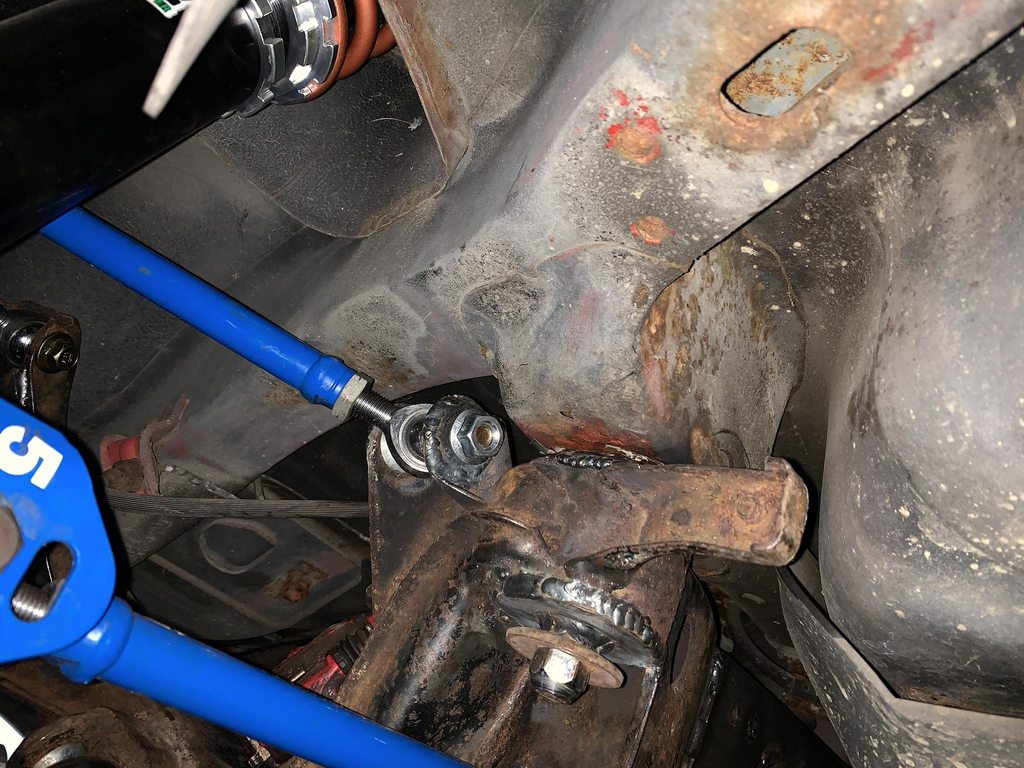 Wisefab with dropped front pickup: 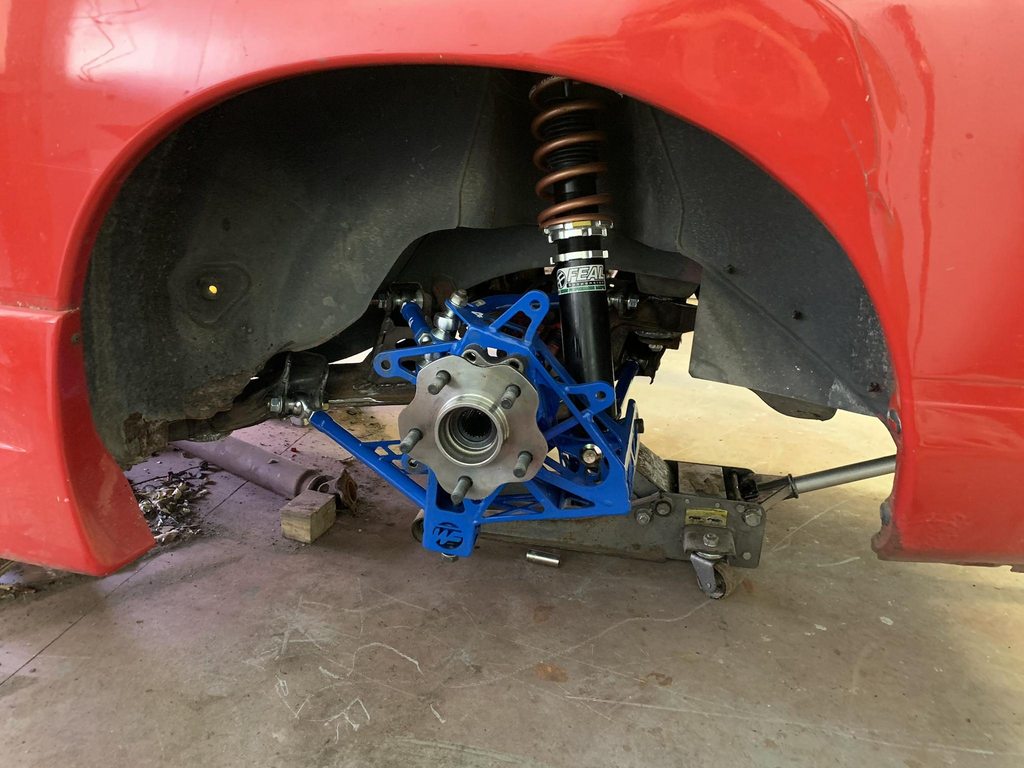 Fitment should be pretty nice, even with these second hand G35 wheels and maybe a few mm spacer. 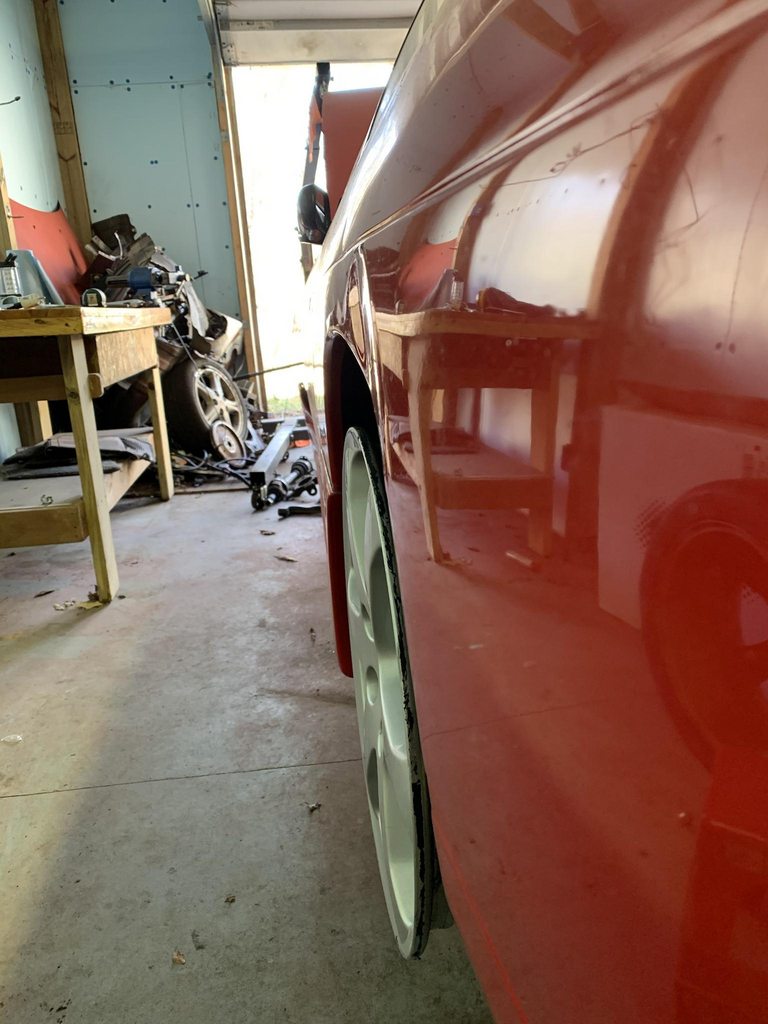 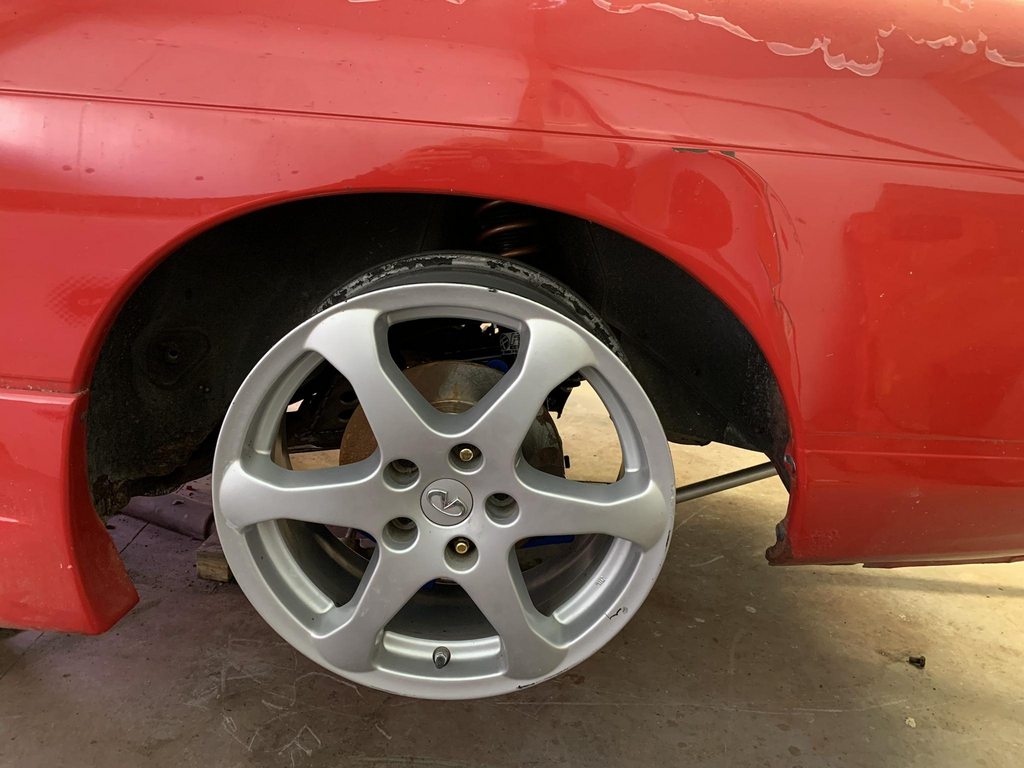 I then proceeded to roll that fender. That was about 15 hours worth of work over two days. I still need to weld the drop bracket on the other side and the camber bracket braces in, but then it will be done and ready for de-rusting. I'm really stoked on how it all came out. It's definitely a mild press-fit into the car now as the tube I used actually has a smaller ID than the factory bushing. I really think this car is going to be something else.
__________________
Build: http://zilvia.net/f/showthread.php?t=643065 Friends don't let friends buy knock-offs. |
|
|

|
|
|
#643 |
|
Post Whore!
 Join Date: Apr 2007
Location: Left Hand Path
Posts: 2,652
Trader Rating: (22)
           Feedback Score: 22 reviews
|
I think you will have the most powerful subframe in all of the land when it's all said and done.
Nice work! Shame on all that hidden bondo on the body though. You gotta hand it to the fella who did that work--helluva sculptor, huh. Haha
__________________
... ... ... ... . |
|
|

|
|
|
#644 | ||
|
Zilvia.net Advertiser
 Join Date: Nov 2005
Location: Michigan
Age: 33
Posts: 5,431
Trader Rating: (16)
           Feedback Score: 16 reviews
|
Quote:
Quote:
Yeah the bondo is on the orange car. It always looked pretty shitty, which is why the car went from gloss black to what was supposed to be flat red; to hide the shitty body work and paint.
__________________
Build: http://zilvia.net/f/showthread.php?t=643065 Friends don't let friends buy knock-offs. |
||
|
|

|
|
|
#645 |
|
Zilvia FREAK!
 |
That's remarkable bondo. Sometimes bondo removal projects really catch you off guard. I've found some totally unnecessary stuff that looks like someone wanted to have their insurance fix a car, and the bodyshop did the maximum possible without having the car totaled out - but since there was nothing wrong, they just used bondo to feather their bondo into the bondo, and kept going until they spent the whole bill on bondo.
Mine sure doesn't have it there, because I once sat on the ground and leaned - now I have a spot that pops there... (but most cars have factory filler, especially around the roof and quarter joints - I think the s13 mostly just has sealer, because of the way the roof/quarter window design lets the pieces come together without any slop) |
|
|

|
|
|
#646 |
|
Zilvia.net Advertiser
 Join Date: Nov 2005
Location: Michigan
Age: 33
Posts: 5,431
Trader Rating: (16)
           Feedback Score: 16 reviews
|
So I stumbled across a cheap running hatch, so now I have another one.
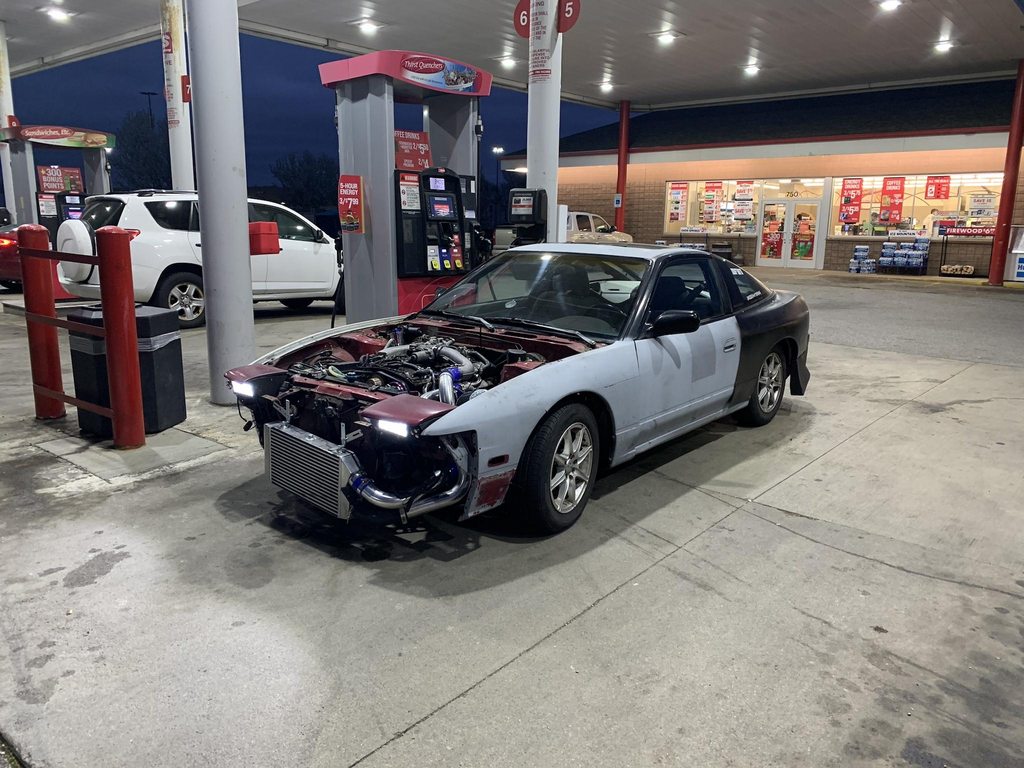 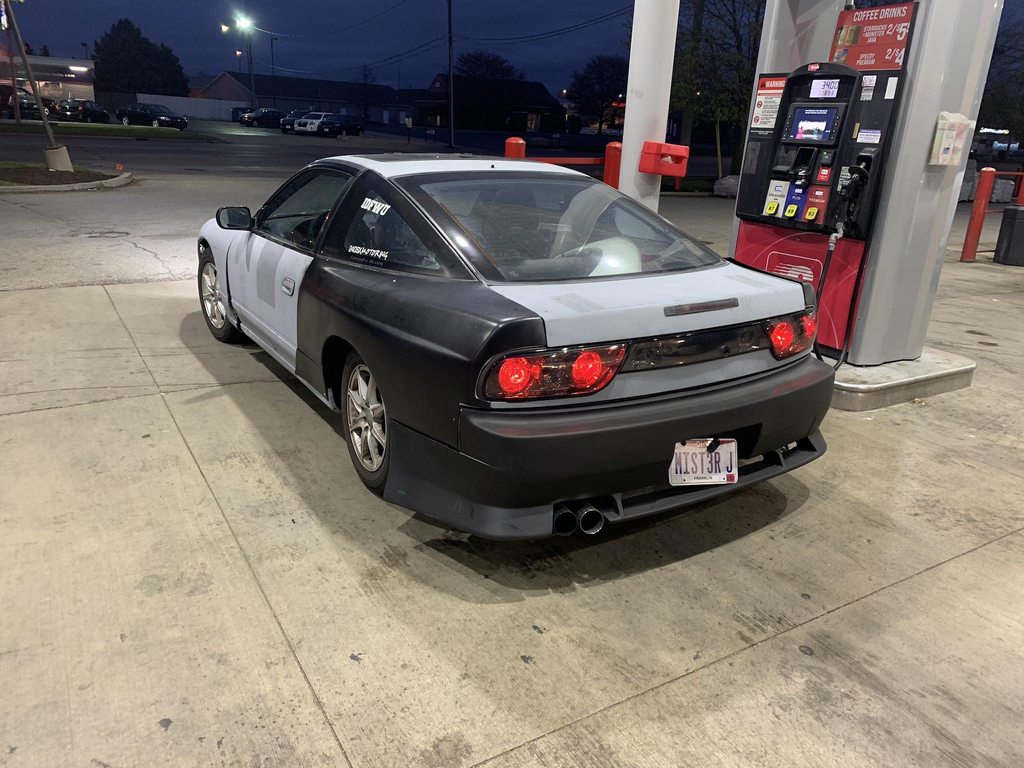 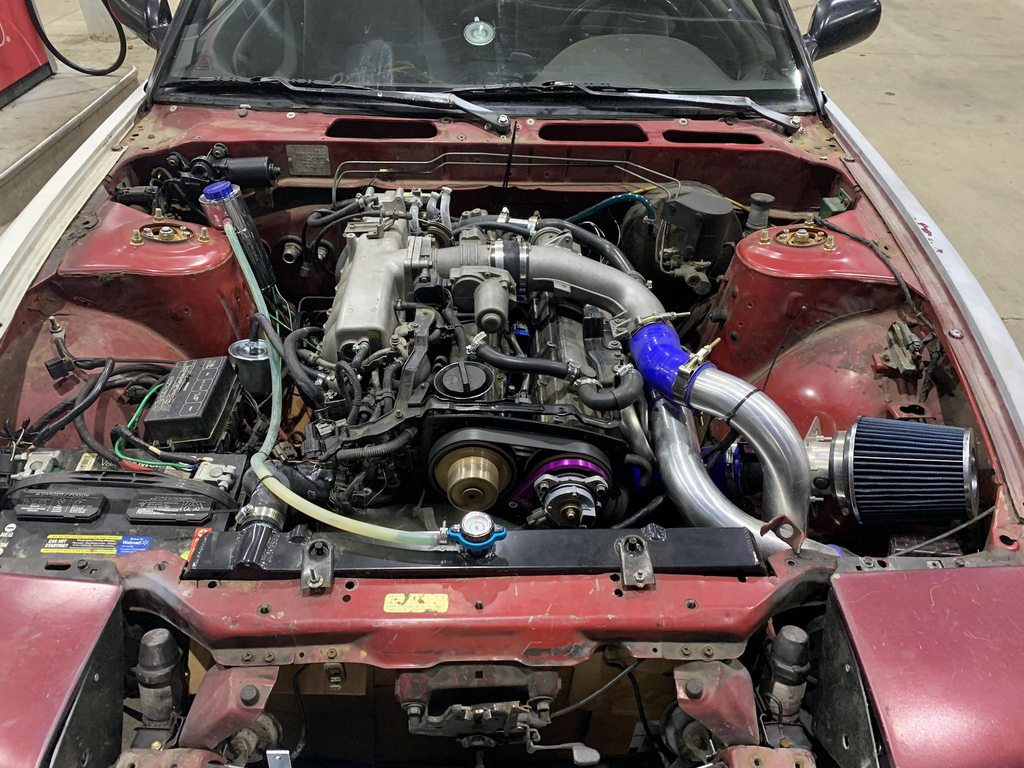 This car has a plethora of issues haha. First of all, a little about the car. It's an RB25 NEO with an RB20DET transmission  . It's very rusty, and the wiring work on this car is atrocious. The fuel pump and starter are routed to switched in the interior with home wiring and no fuse or relay in sight, haha. It's on Maxspeedingrod coilovers (ebay junk), plenty of bolts broken or the holes rusted out, and the RB definitely doesn't pull like it should (more on this later). I got it for $2k though, and #savetheschassis or whatever. Plan is to fix/rip this thing around while I put the SR car together. Have some fun cringing at these pics. . It's very rusty, and the wiring work on this car is atrocious. The fuel pump and starter are routed to switched in the interior with home wiring and no fuse or relay in sight, haha. It's on Maxspeedingrod coilovers (ebay junk), plenty of bolts broken or the holes rusted out, and the RB definitely doesn't pull like it should (more on this later). I got it for $2k though, and #savetheschassis or whatever. Plan is to fix/rip this thing around while I put the SR car together. Have some fun cringing at these pics.Oh yeah and the overs were just slapped on top of the quarters with like four rivets each.  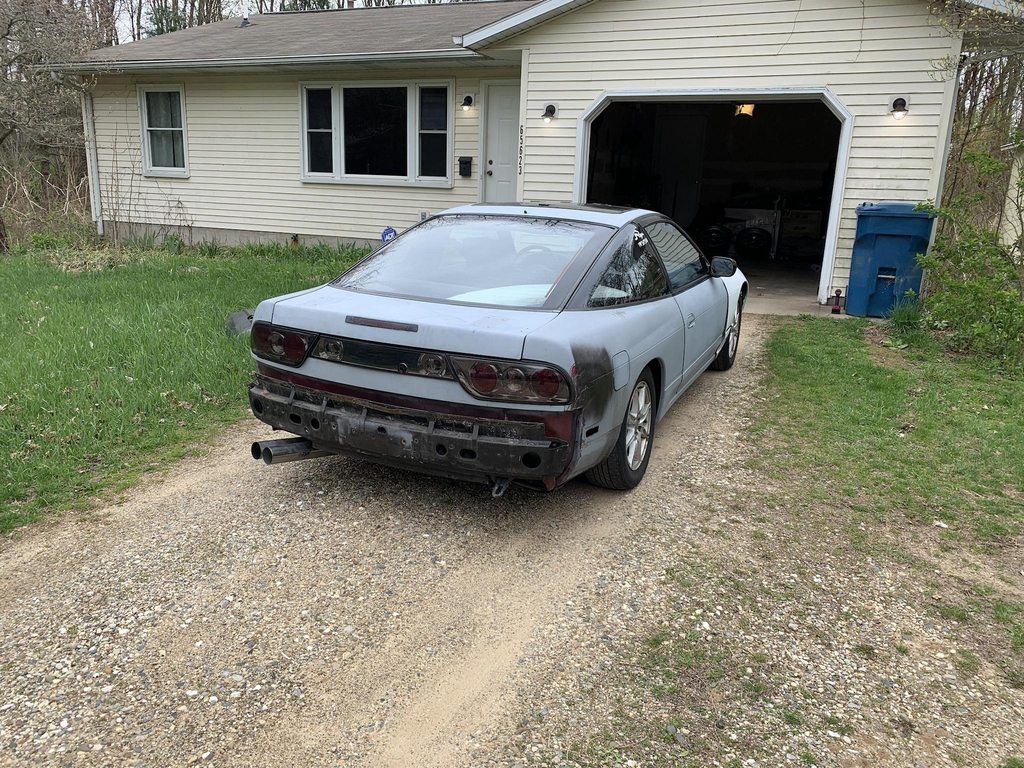 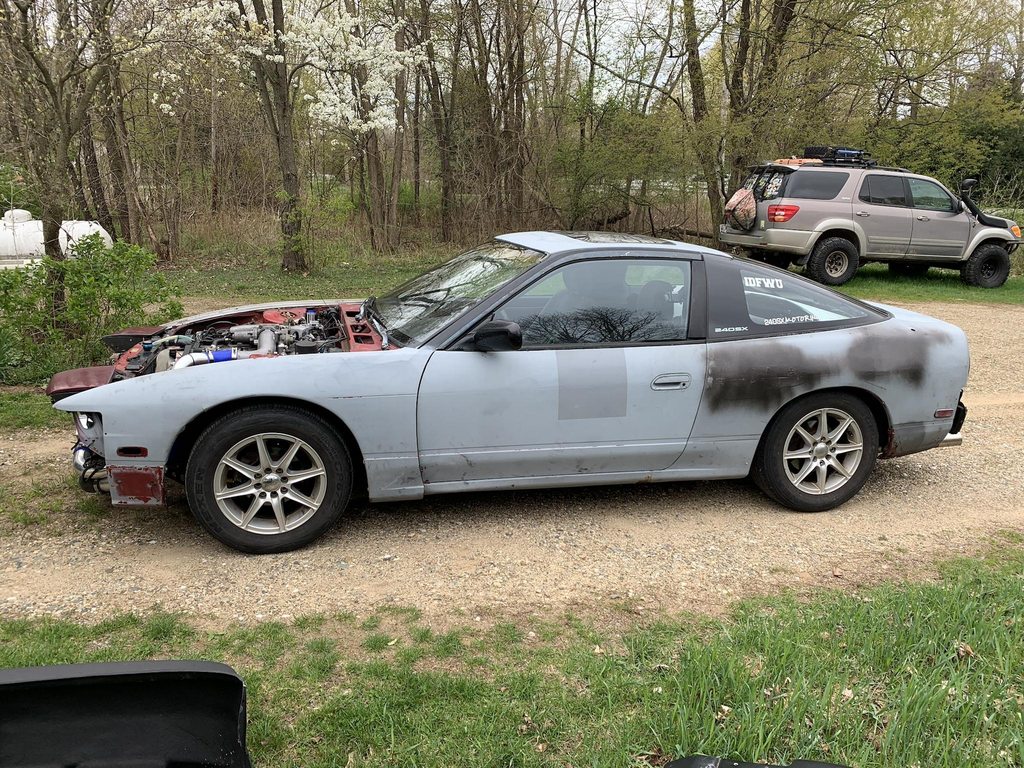 Re-arranged the intercooler piping. 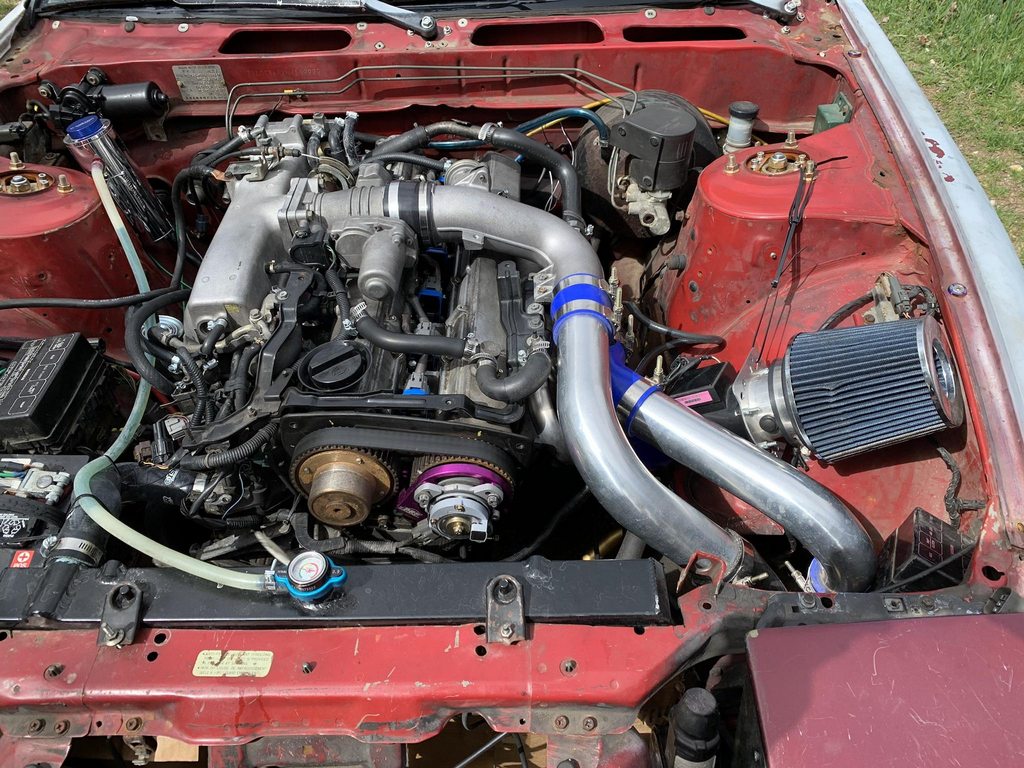 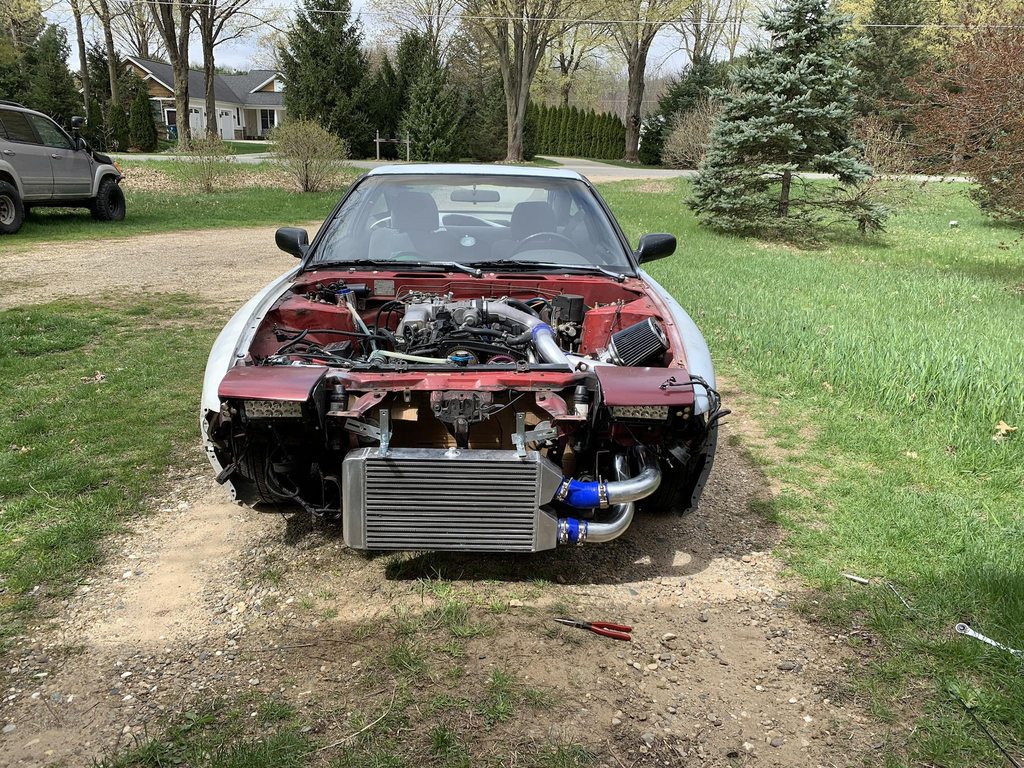 Wrong hardware and rust everywhere, haha. 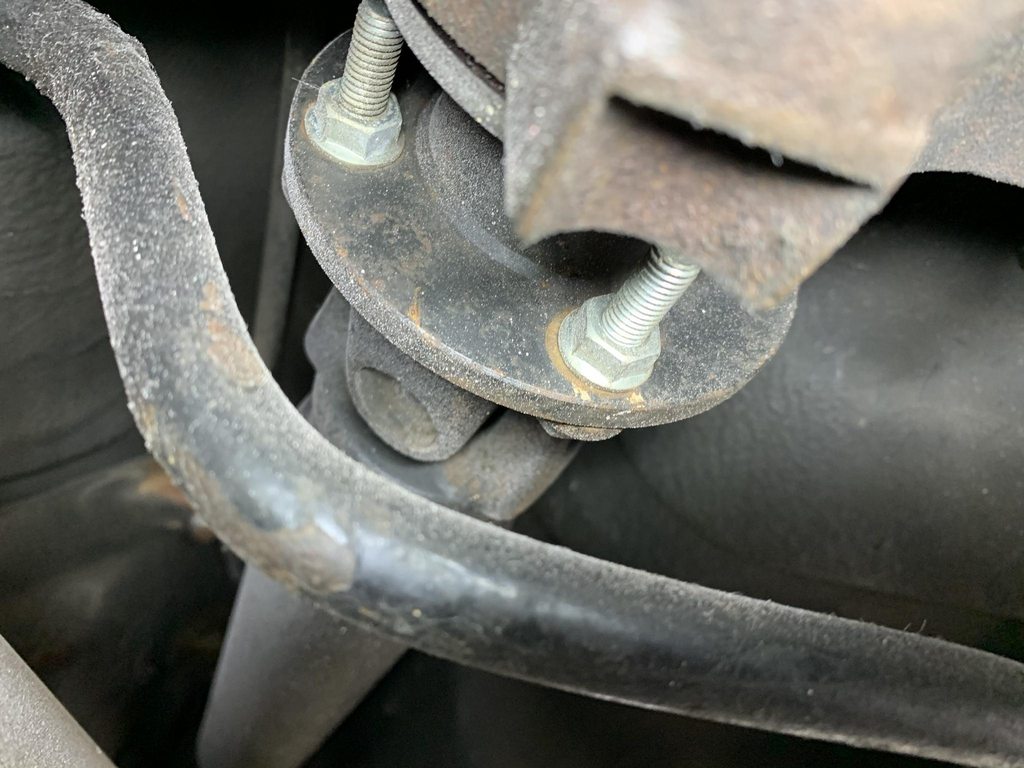 Broken gas tank strap bolt. 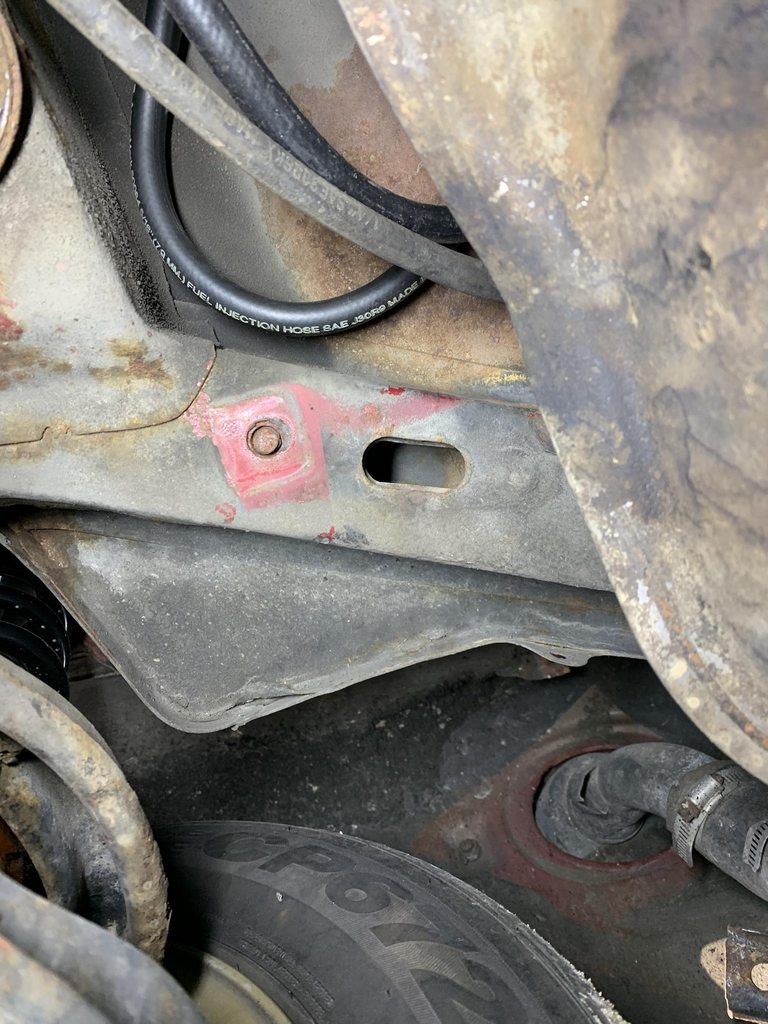 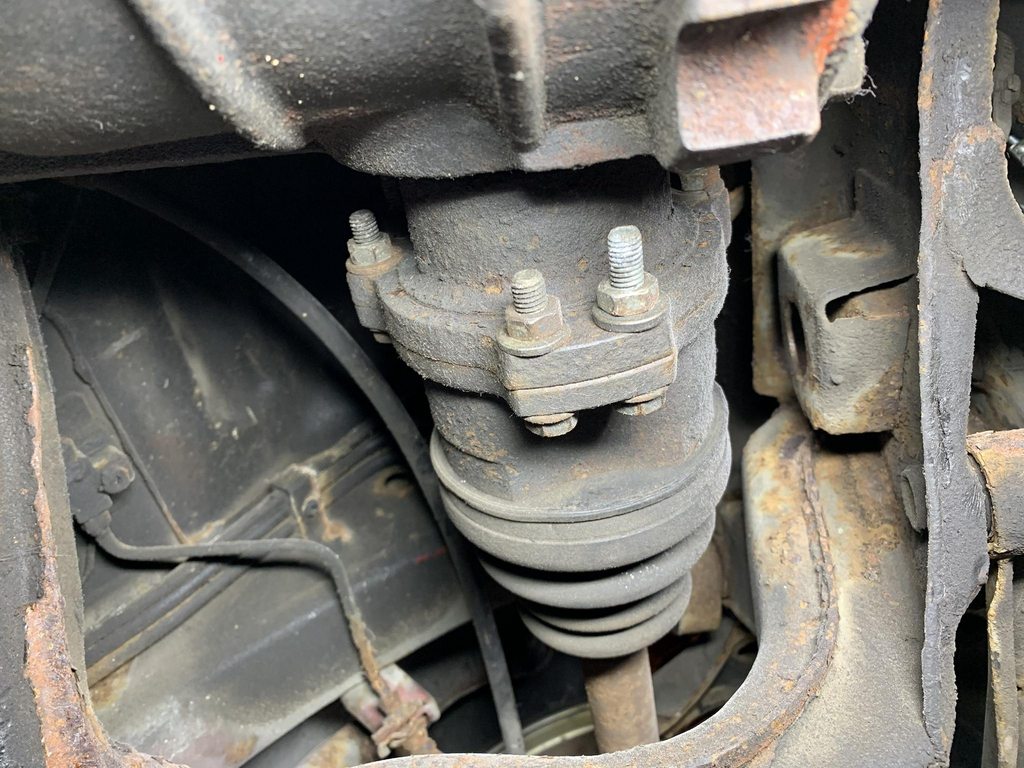 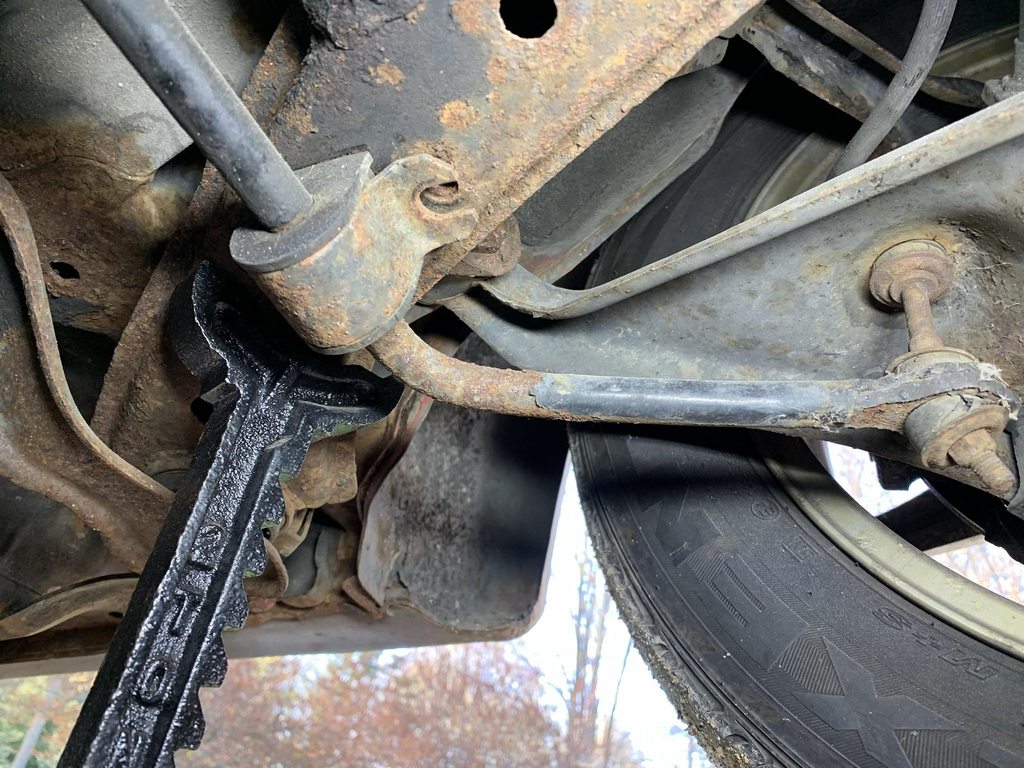 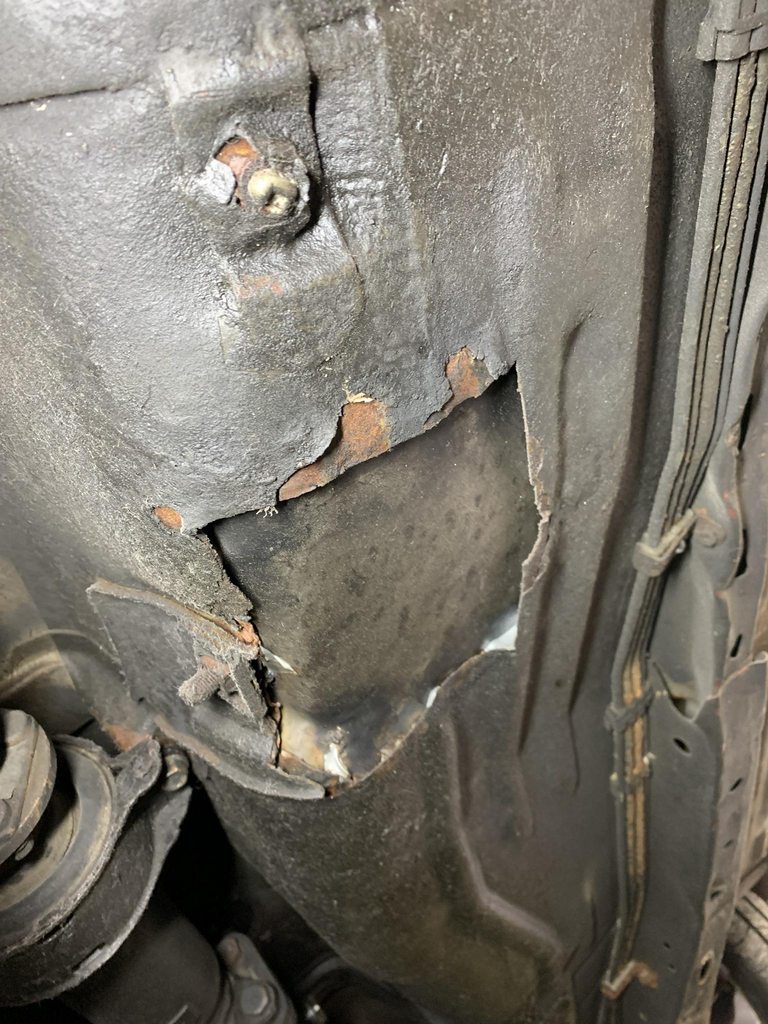 S14 diff and WOW are those OEM bolts *gasp* 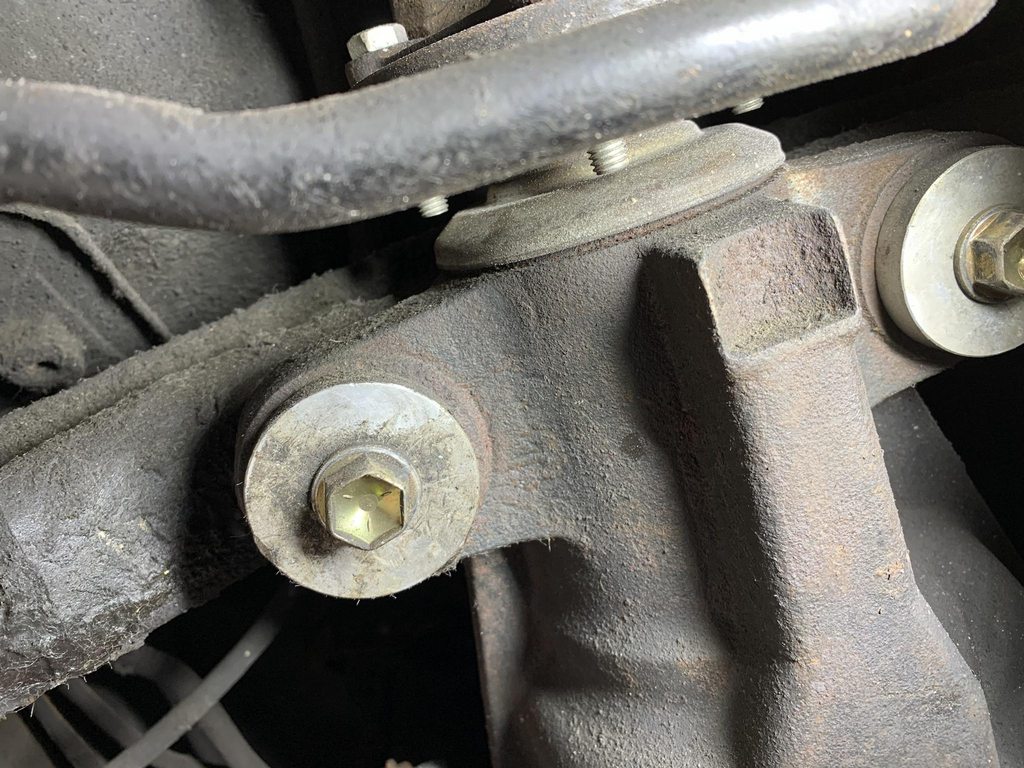 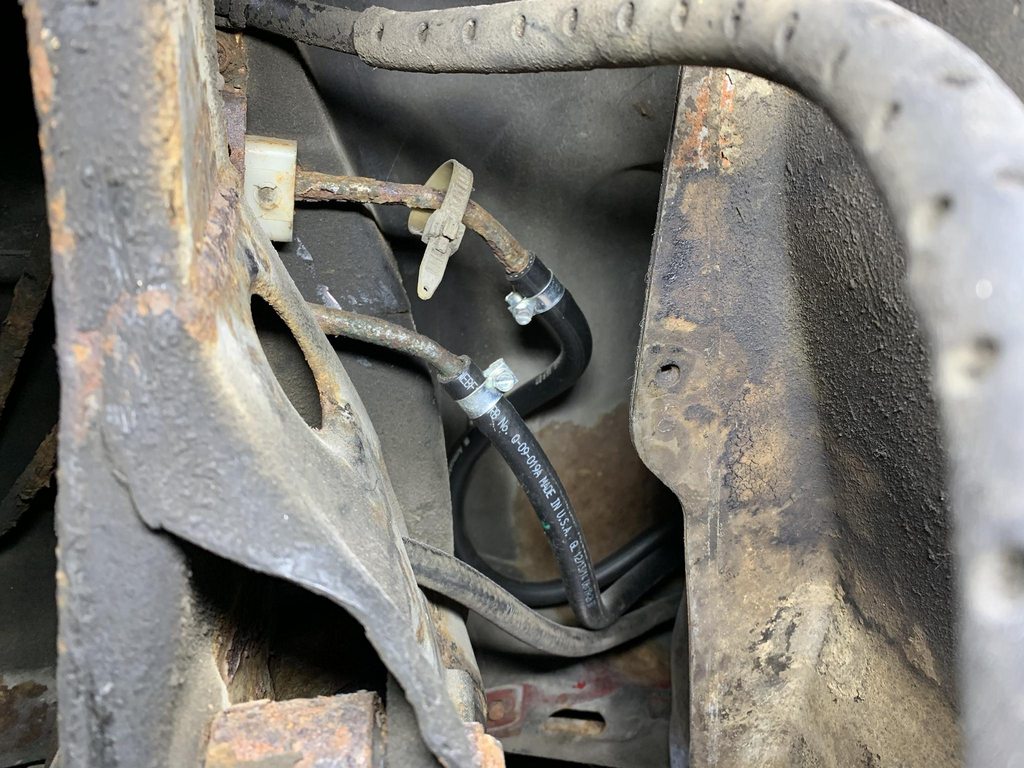 Un-shaved the bodyline and more bondo artists at it again. 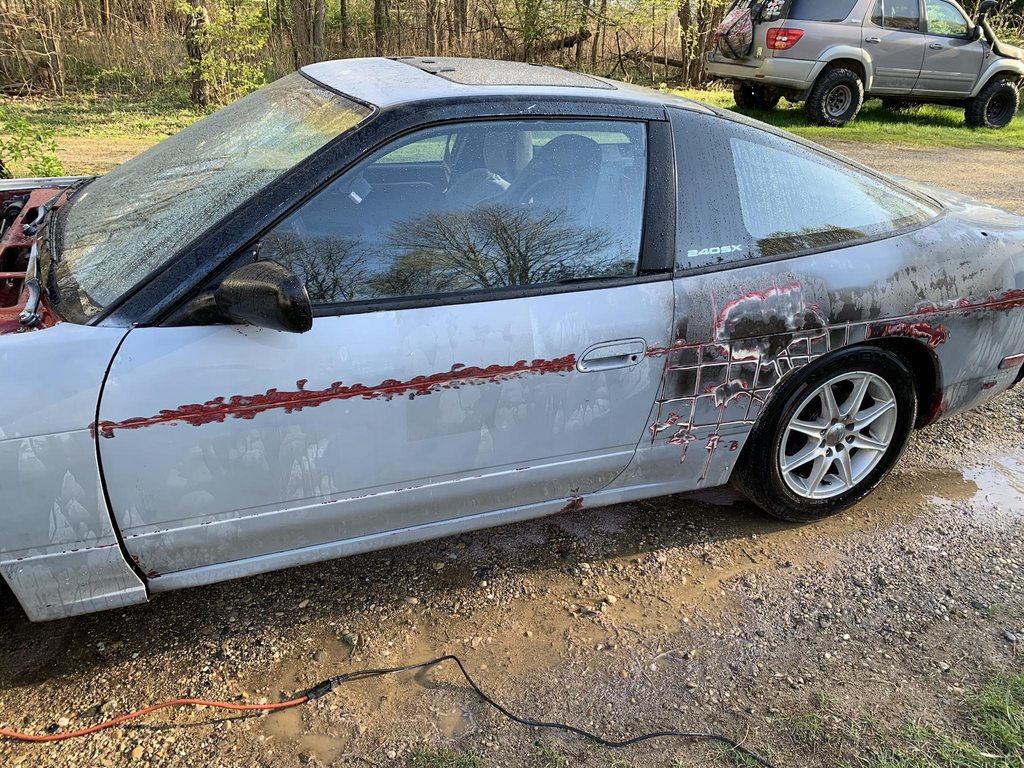 Car also had a ton of boost leaks, and I think the turbine is probably shattered (RB25's come with ceramic turbine wheels and nylon compressor wheels). The BOV leaked like a sieve, so I replaced it with a turbosmart unit a friend had laying around. The car wasn't warming up on the four hour drive home, so about halfway through I stuck a bunch of cardboard in front of the radiator, and then it actually came up to temp. I'm assuming it has no thermostat in it, so I bought a Z32 one to drop in. Changed the oil with some HPL 5w50, and it runs much better without all the massive holes and leaks in the plumbing, but I need to confirm the turbo condition and install the thermostat still to really get a good picture of what's needed to actually get this thing making the power it should. Current as of this post: 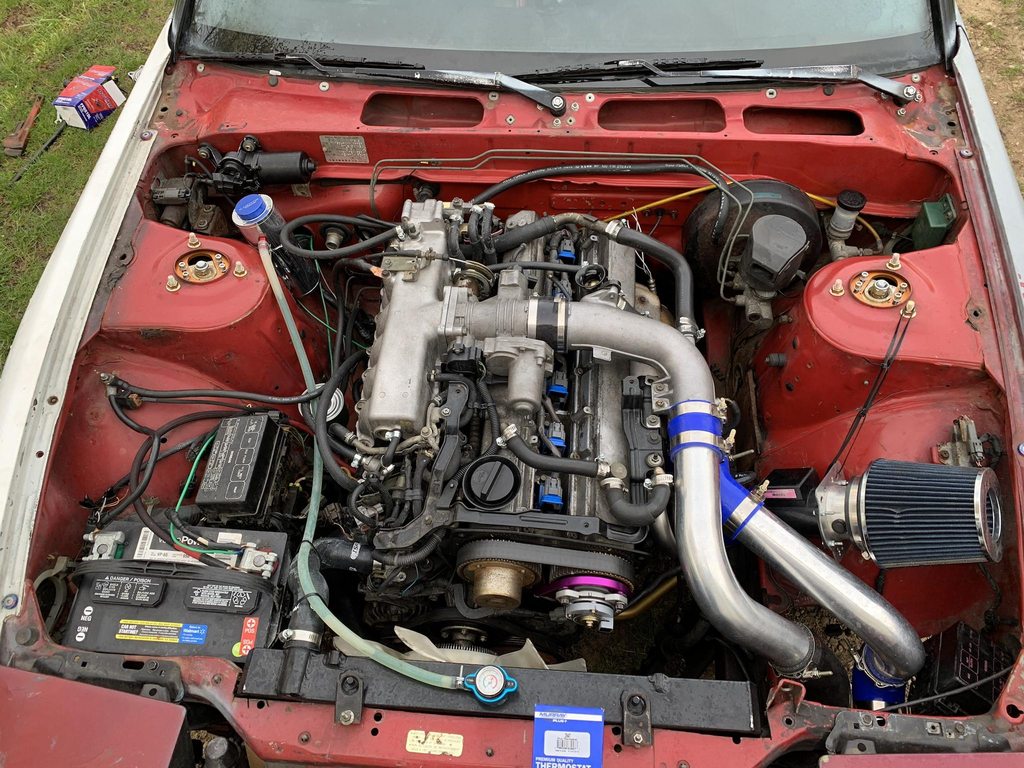
__________________
Build: http://zilvia.net/f/showthread.php?t=643065 Friends don't let friends buy knock-offs. |
|
|

|
|
|
#647 |
|
Zilvia.net Advertiser
 Join Date: Nov 2005
Location: Michigan
Age: 33
Posts: 5,431
Trader Rating: (16)
           Feedback Score: 16 reviews
|
Well, I knew this car was sketchy, but not quite this sketchy, haha. This thing is going to be a lot of work.
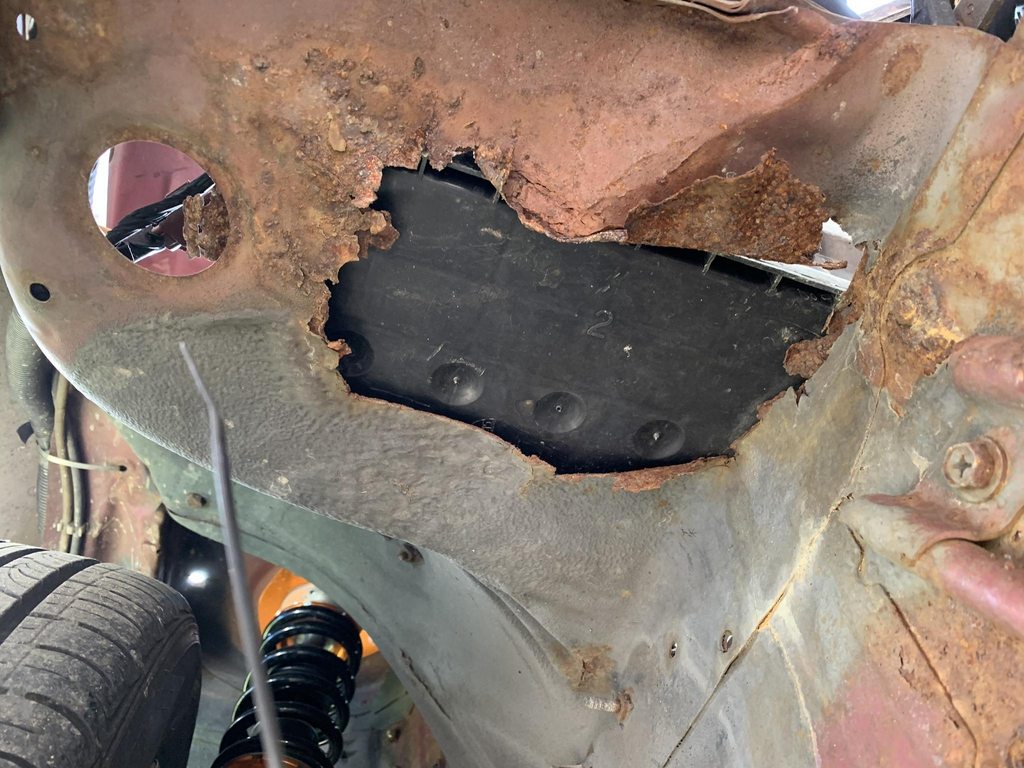 Every sway bar mount is on with one bolt, and the fronts are backwards... WTF? 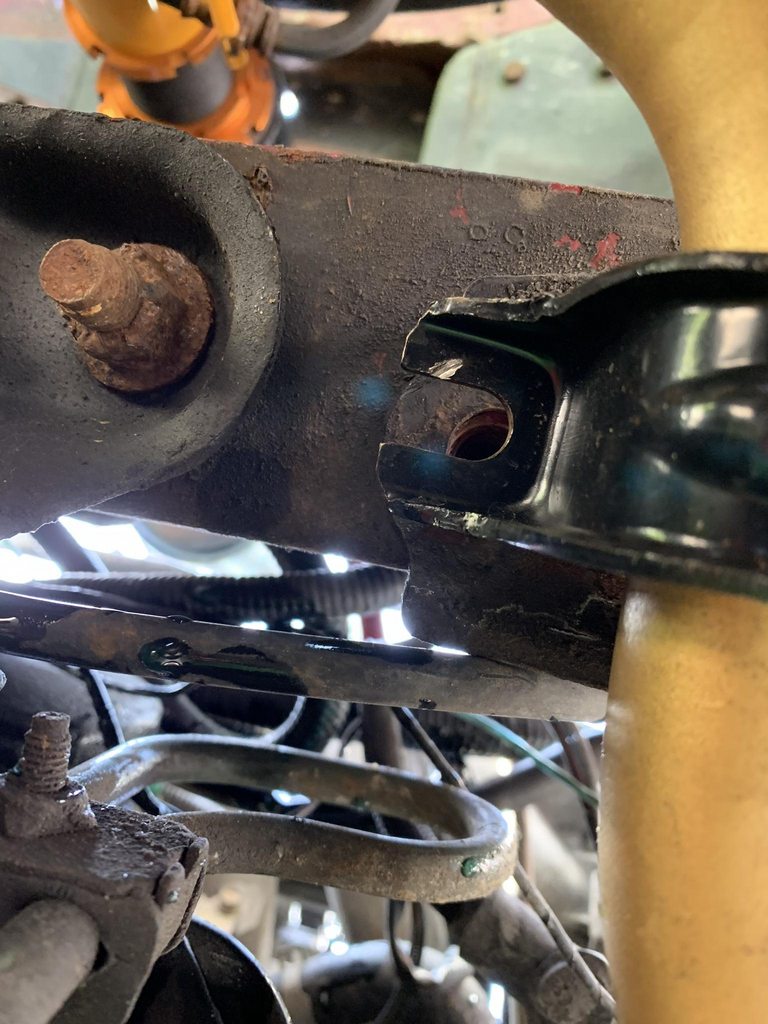 Missing nut and no gasket between the turbo and manifold. 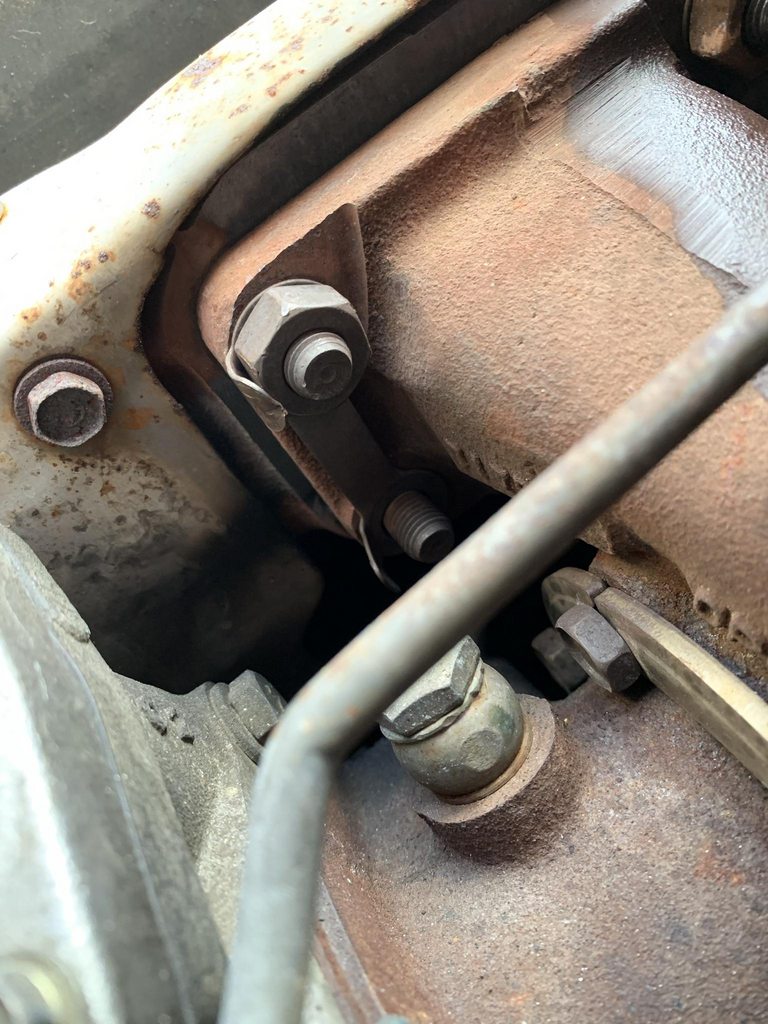 Every exhaust connection was loose on the turbo outlet. 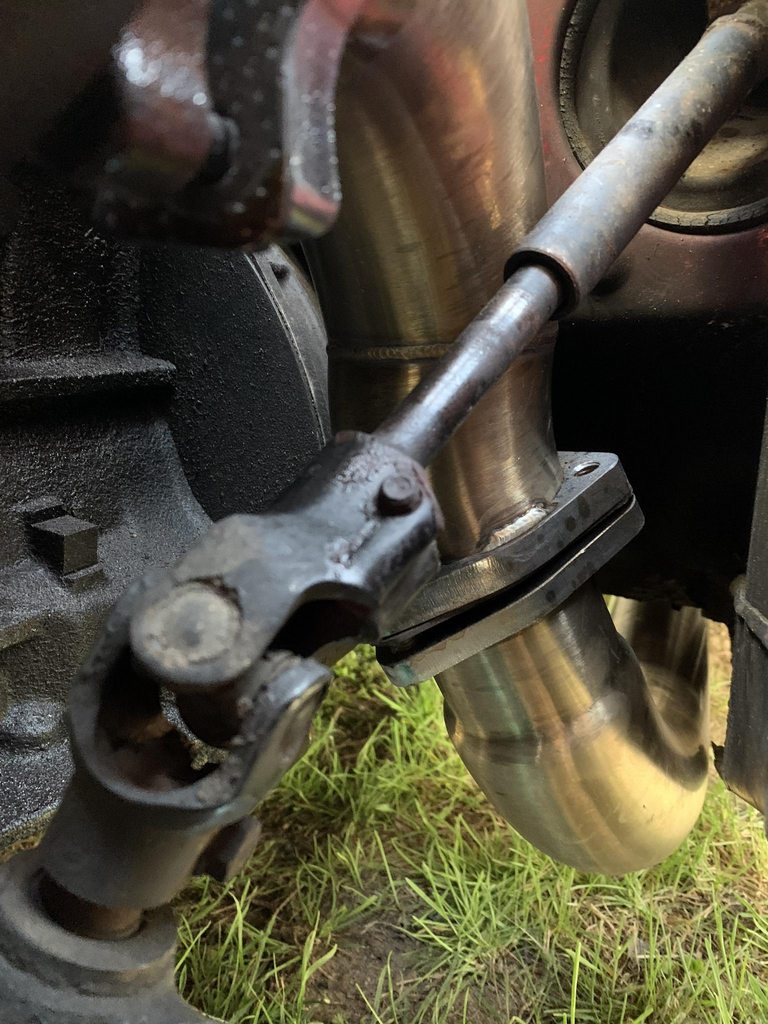 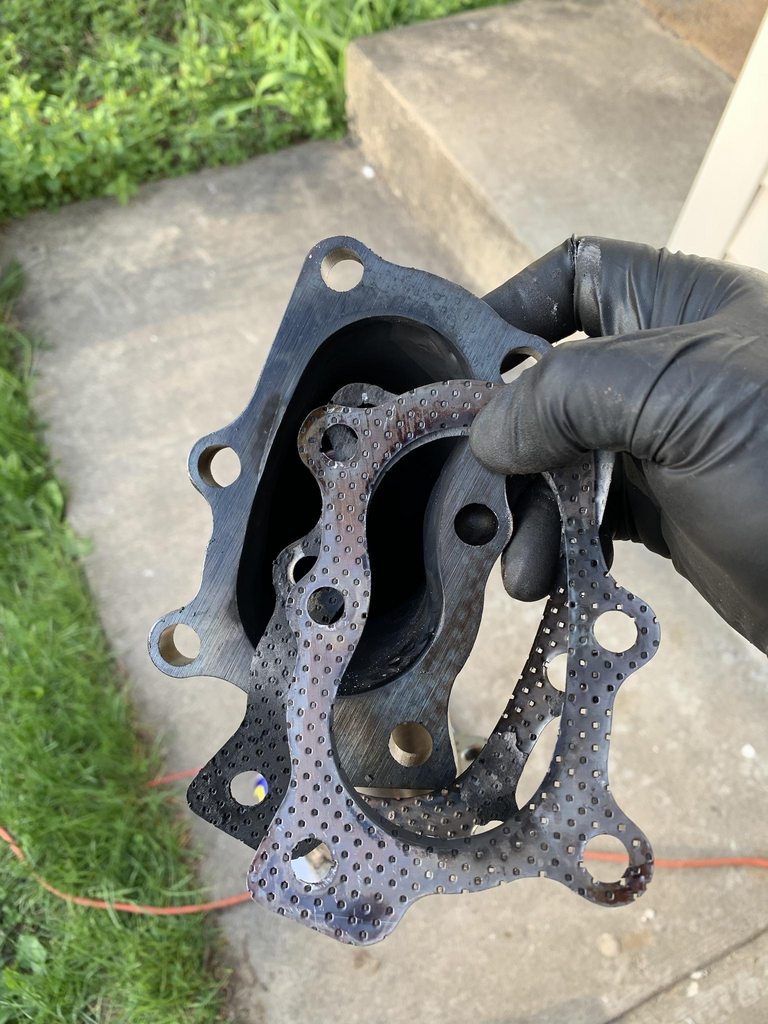 The hacked radiator support looks like it provides about 3% of the structure it once did. 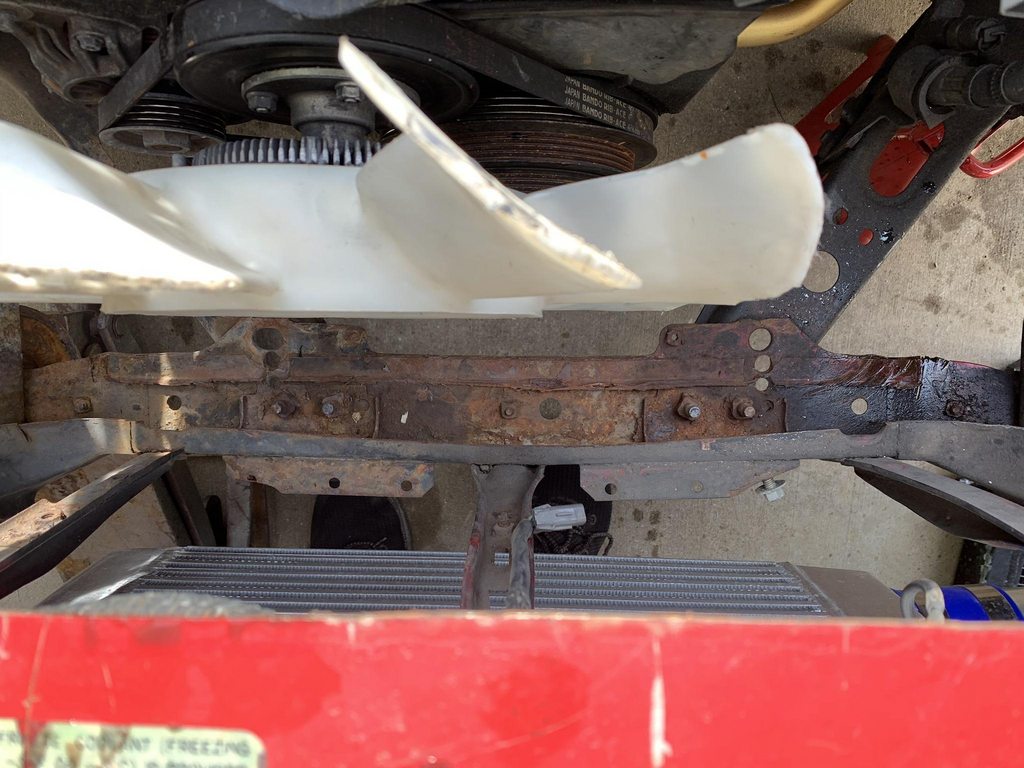 Boost leaks everywhere. There is no check valve in the brake booster line. Things like this everywhere: 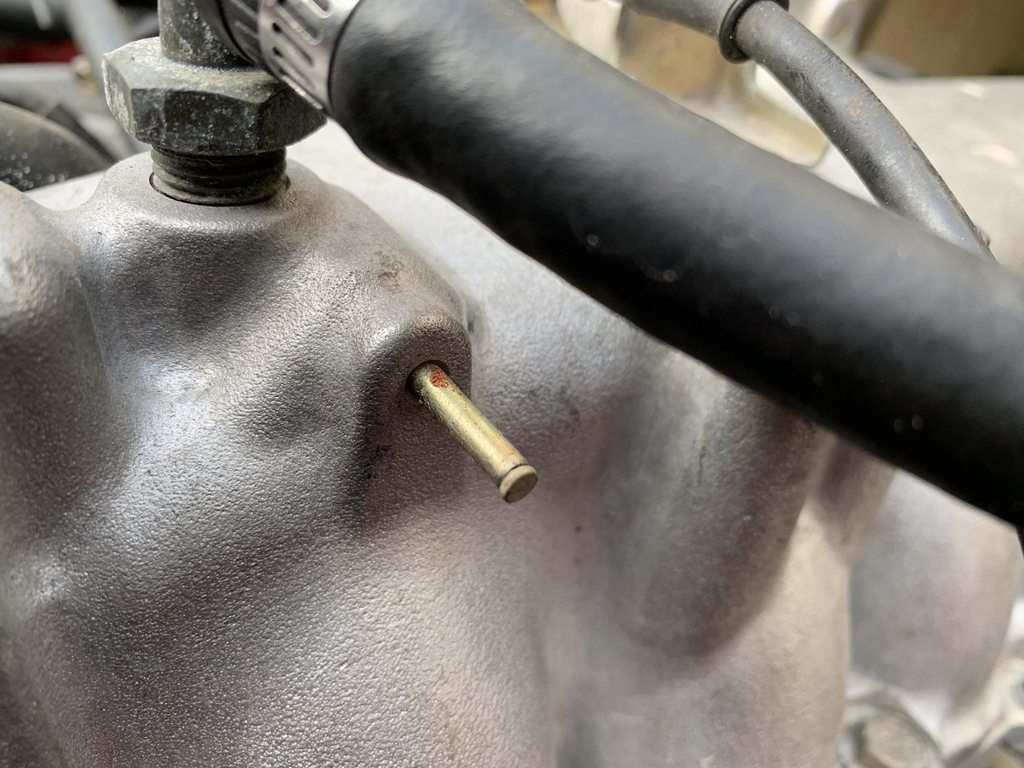 It had this Leakimoto 154* Thermostat, and it now makes sense why the car never warmed up. 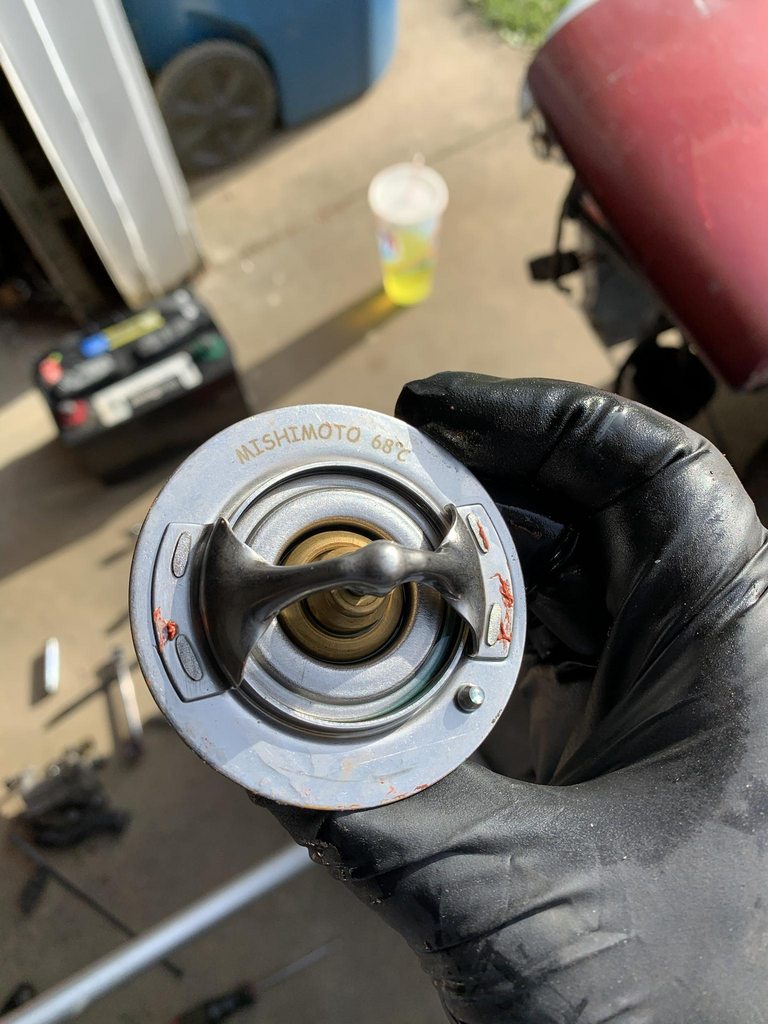 And holy sketchy wiring batman. 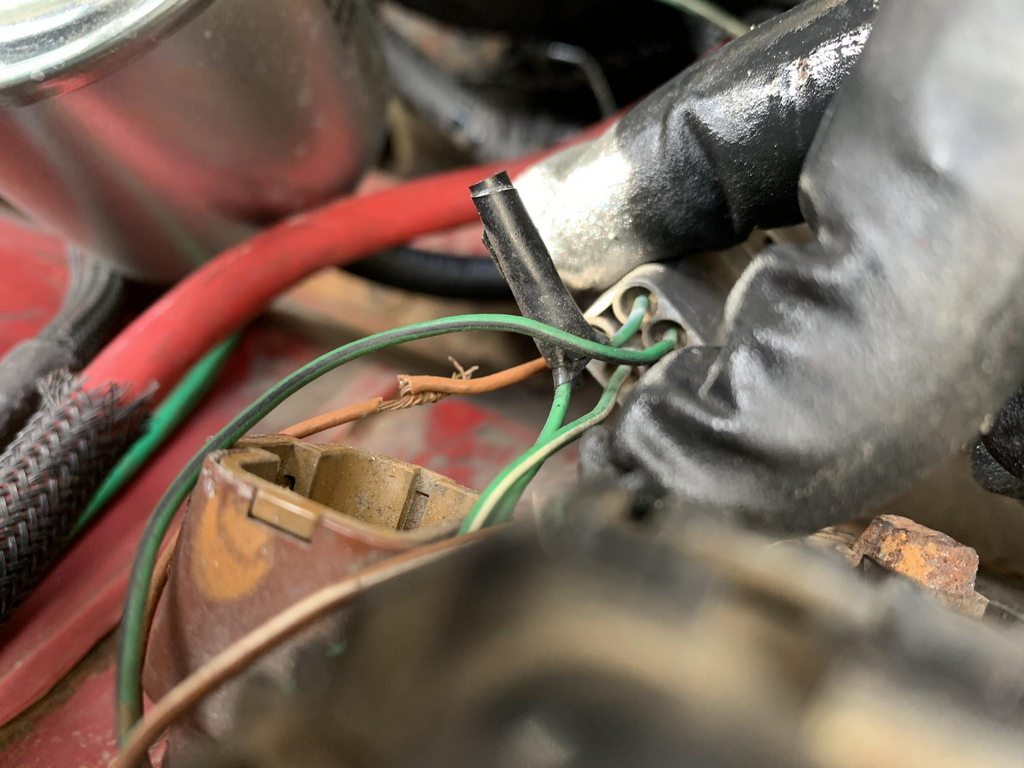 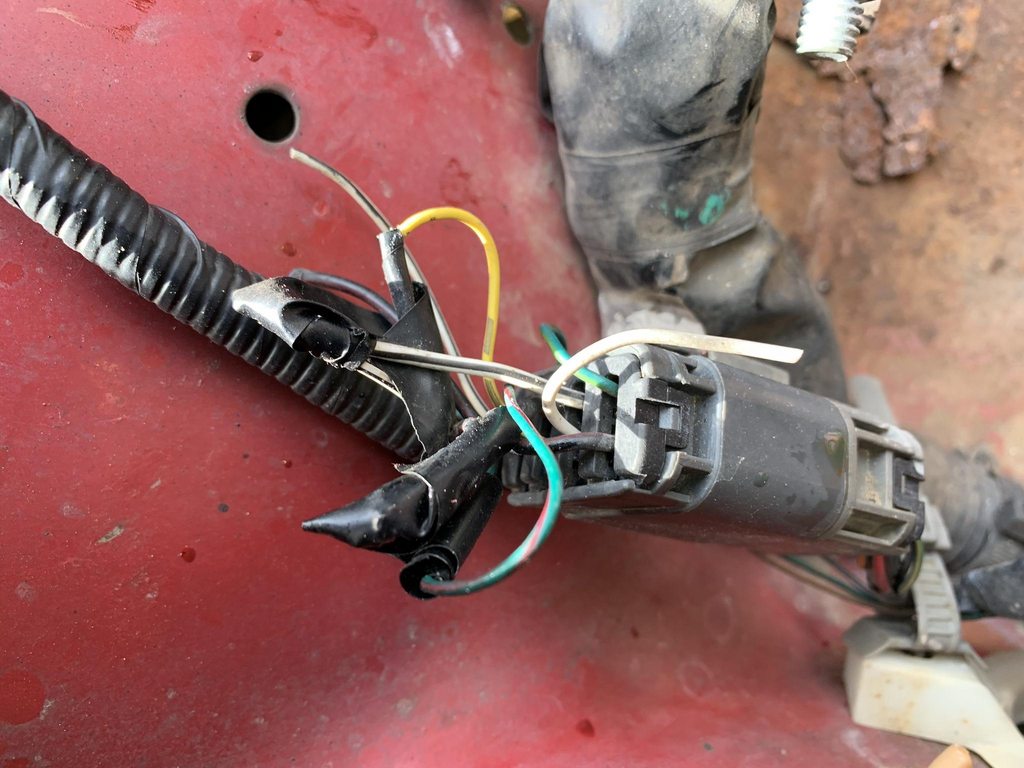 Mmmmm corrosion... 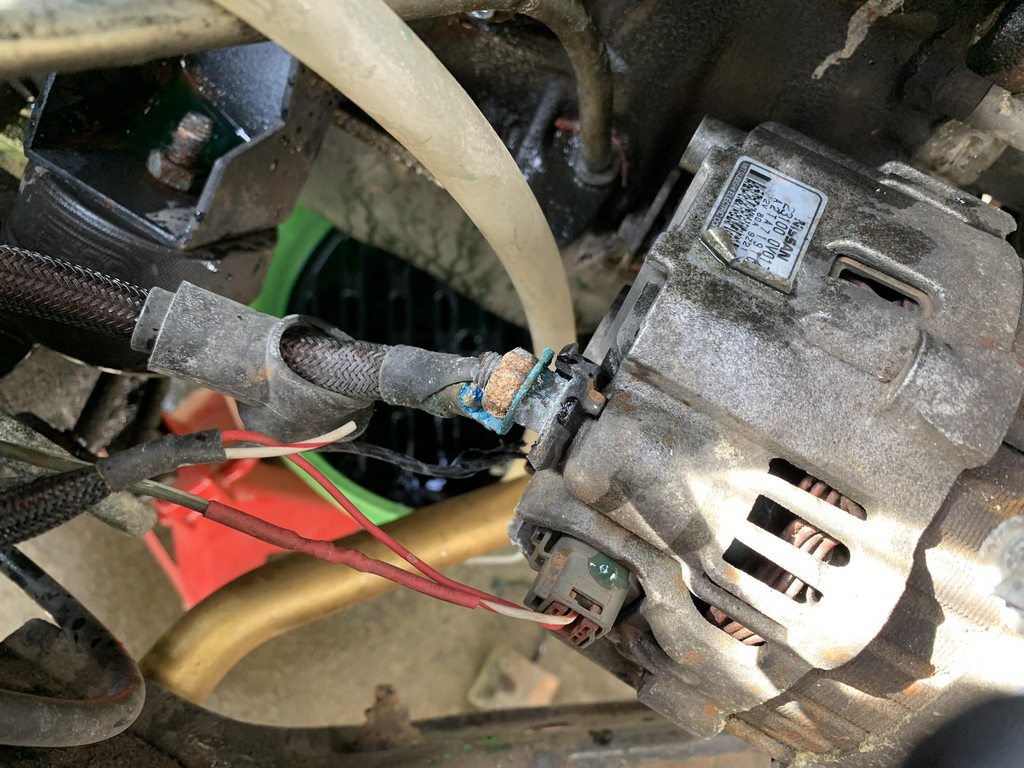 These pulled right out. 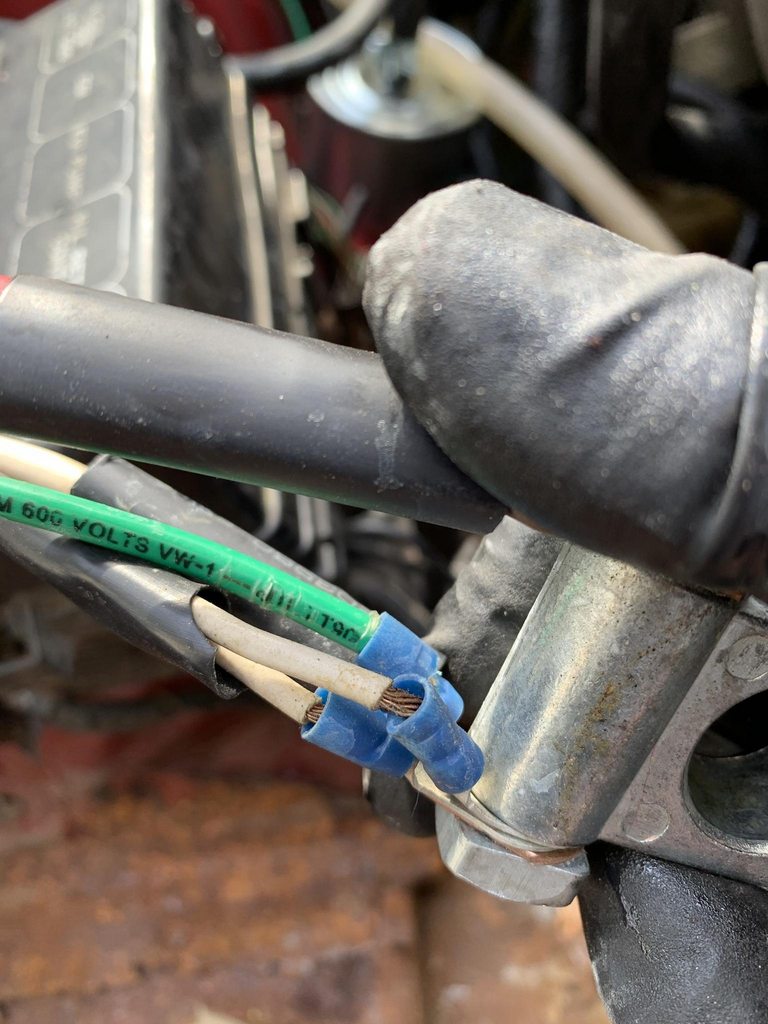 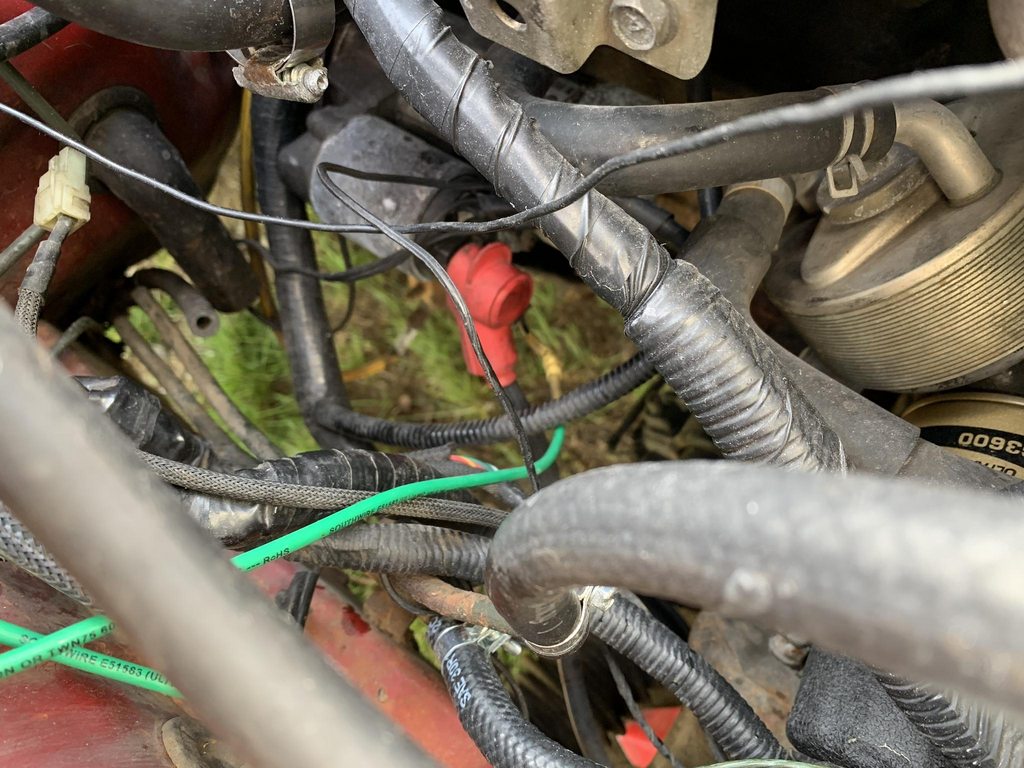 Seems good. 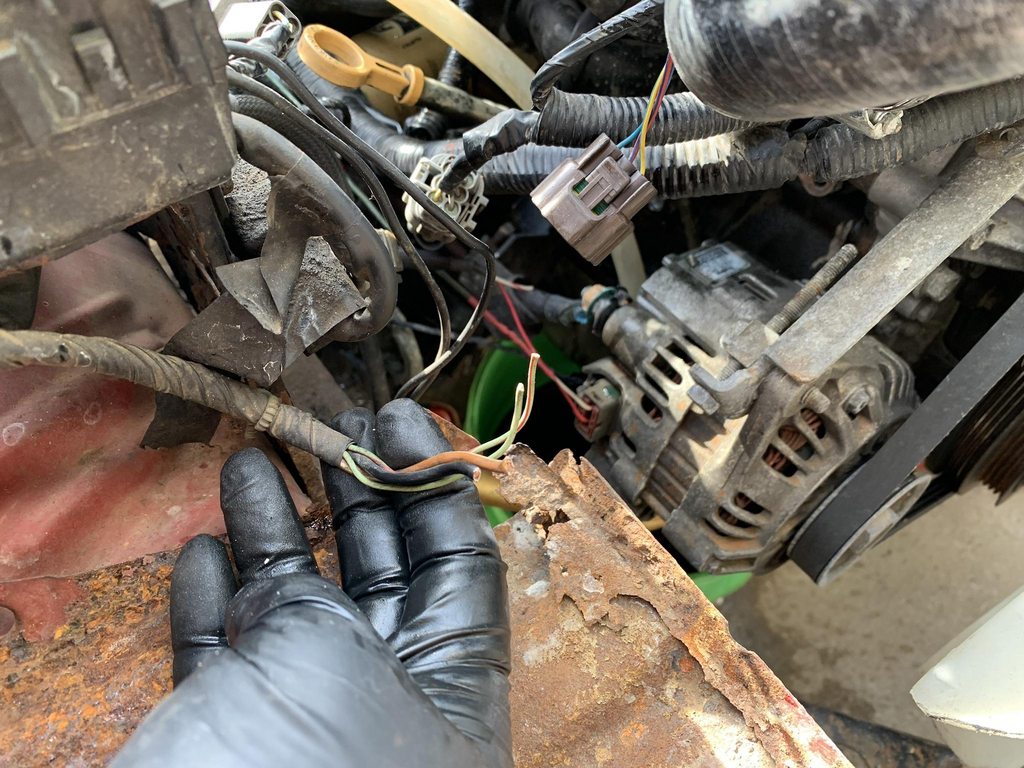 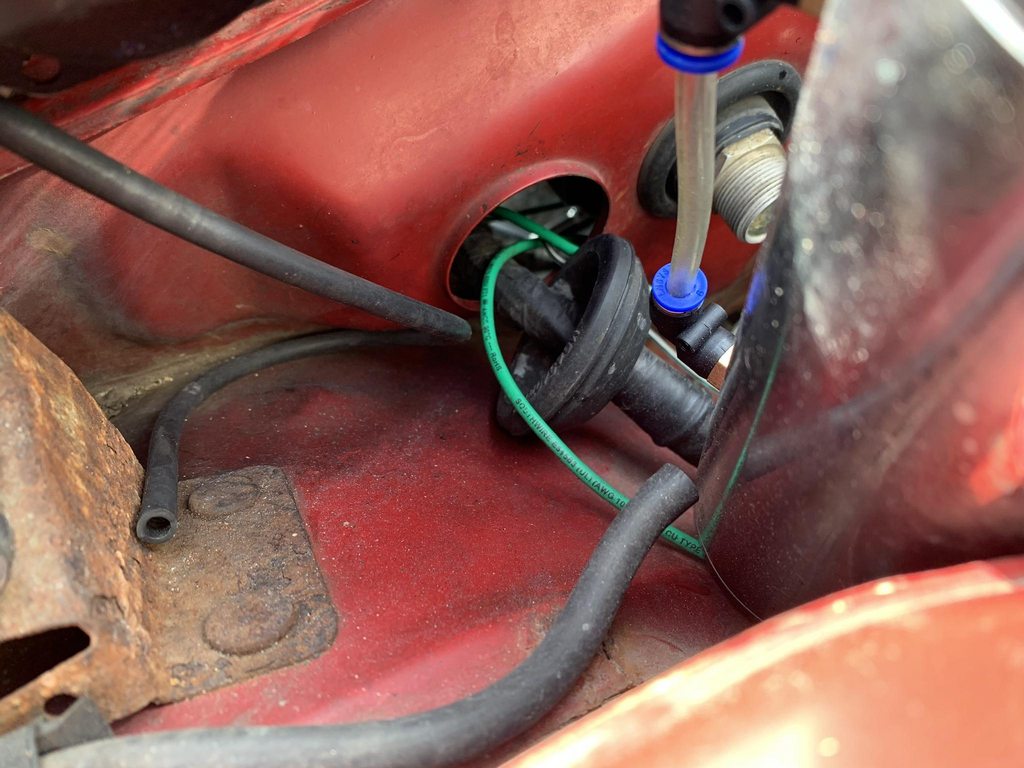 Aaaaand my favorite one, the ol' replace-a-fuse! 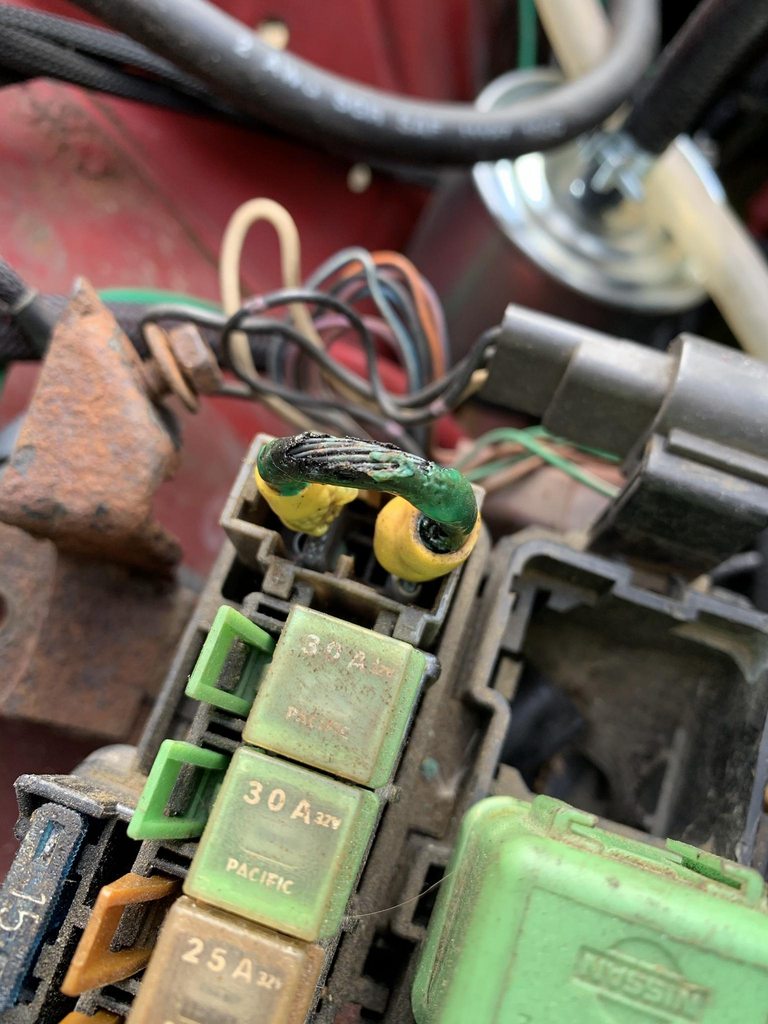
__________________
Build: http://zilvia.net/f/showthread.php?t=643065 Friends don't let friends buy knock-offs. |
|
|

|
|
|
#649 |
|
Zilvia.net Advertiser
 Join Date: Nov 2005
Location: Michigan
Age: 33
Posts: 5,431
Trader Rating: (16)
           Feedback Score: 16 reviews
|
Yeah pretty much! Weather has been shit here lately and the car is sitting outside, but I'm itching to get back into it.
__________________
Build: http://zilvia.net/f/showthread.php?t=643065 Friends don't let friends buy knock-offs. |
|
|

|
|
|
#651 |
|
Zilvia.net Advertiser
 Join Date: Nov 2005
Location: Michigan
Age: 33
Posts: 5,431
Trader Rating: (16)
           Feedback Score: 16 reviews
|
Right? Kinda surprised it didn't burst into flames.
Anyway, seeing as how this thing is going to require a lot of work, and I have a car that is essentially ready for an engine, I've decided to yank the RB, re-gasket it, and toss it in the red car while I finish all the fancy SR bits. Here's the nice rust hole under the battery. 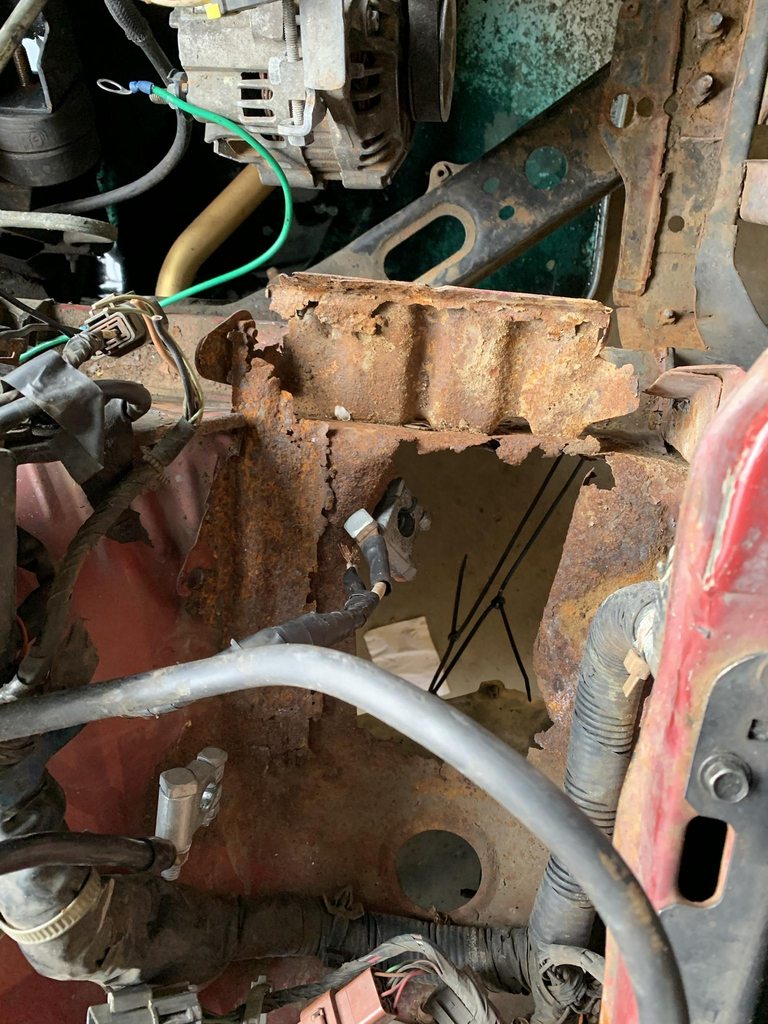 And the quality job they did with the intercooler piping hole. 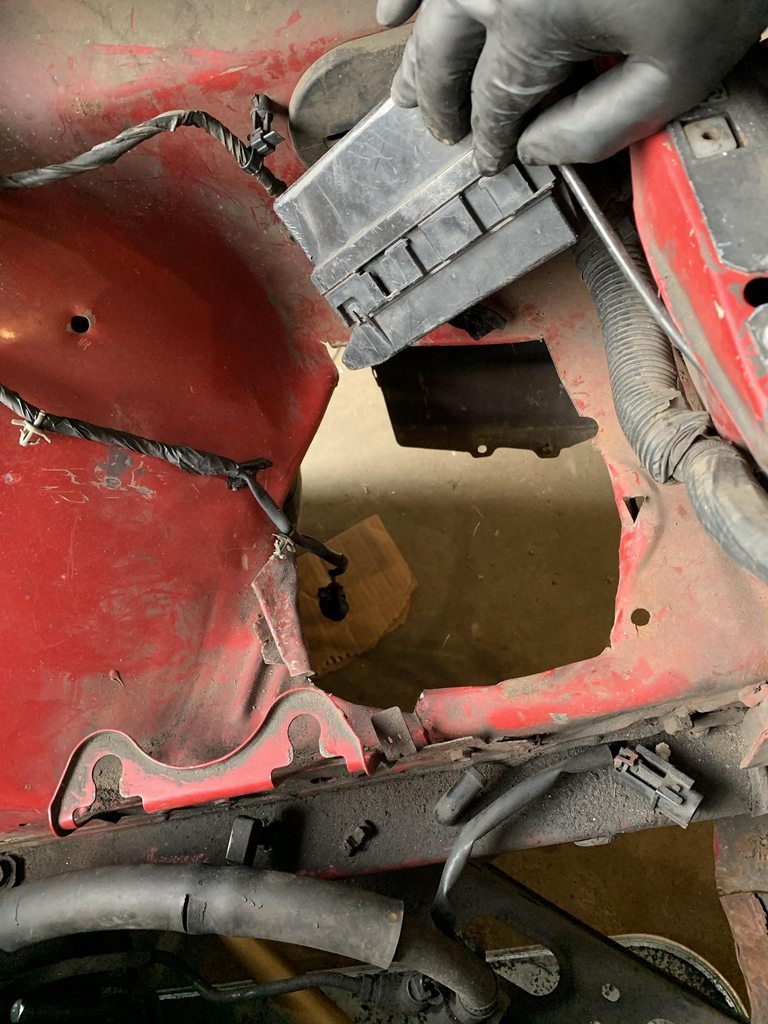 Pulling a few things apart to make the engine easier to pull by itself, I discovered there was no gasket between the intake manifold and IACV. Yet another leak... 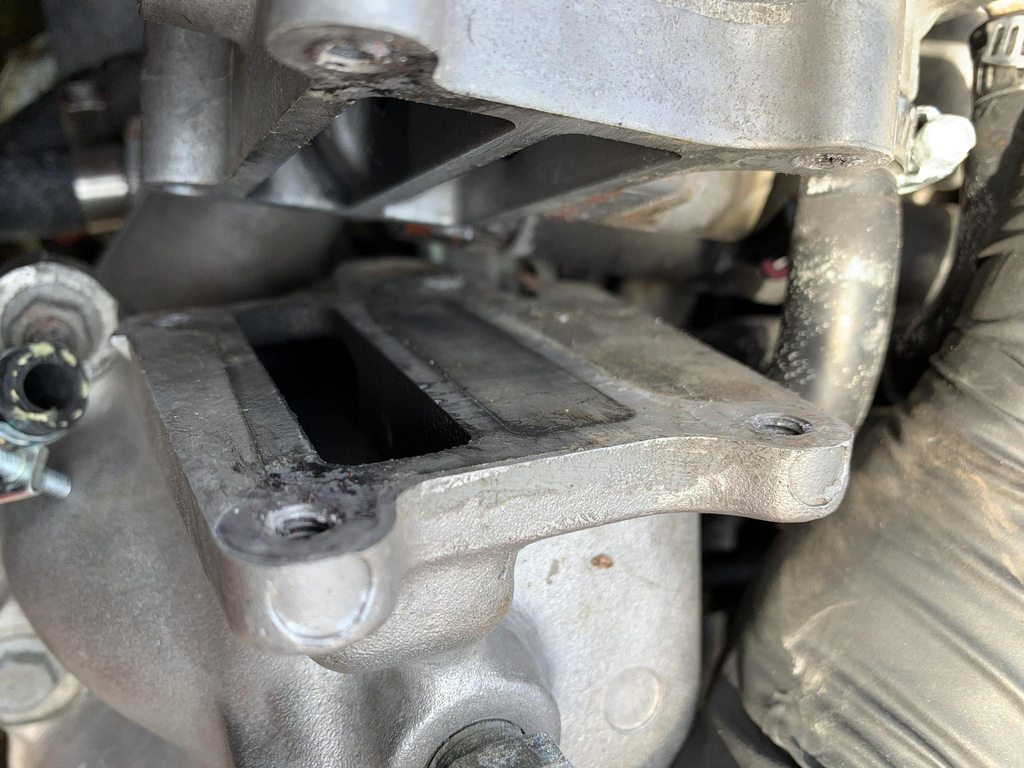 Here's what was left of the turbo gasket. The nuts were basically hand tight. 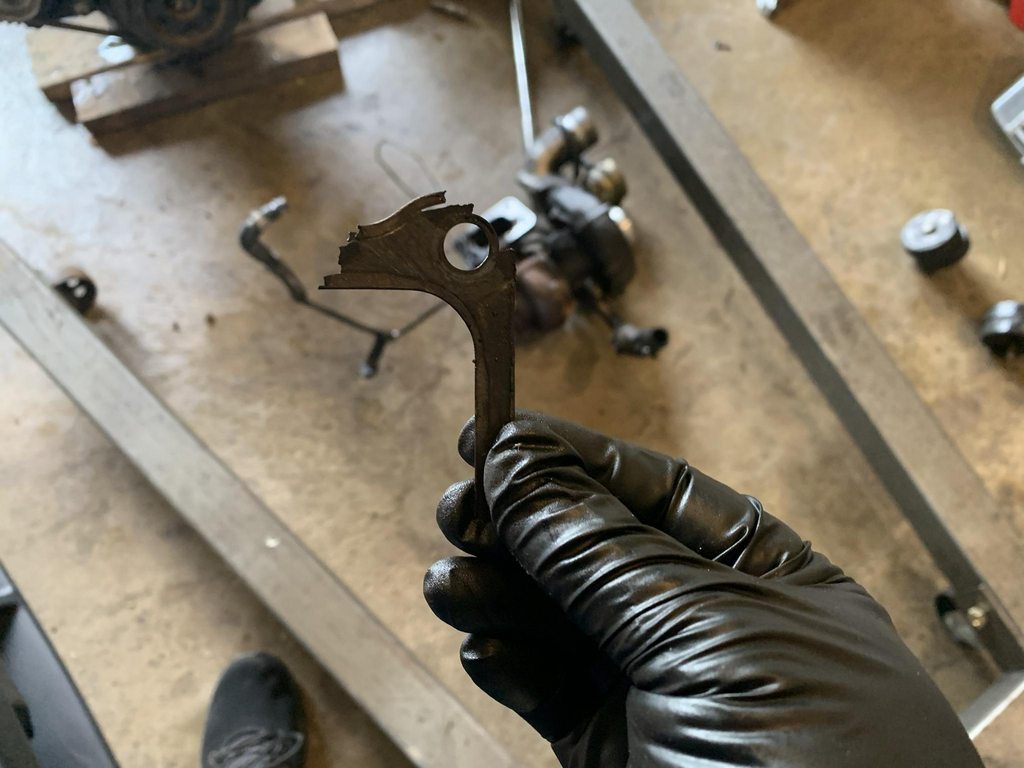 About ready. 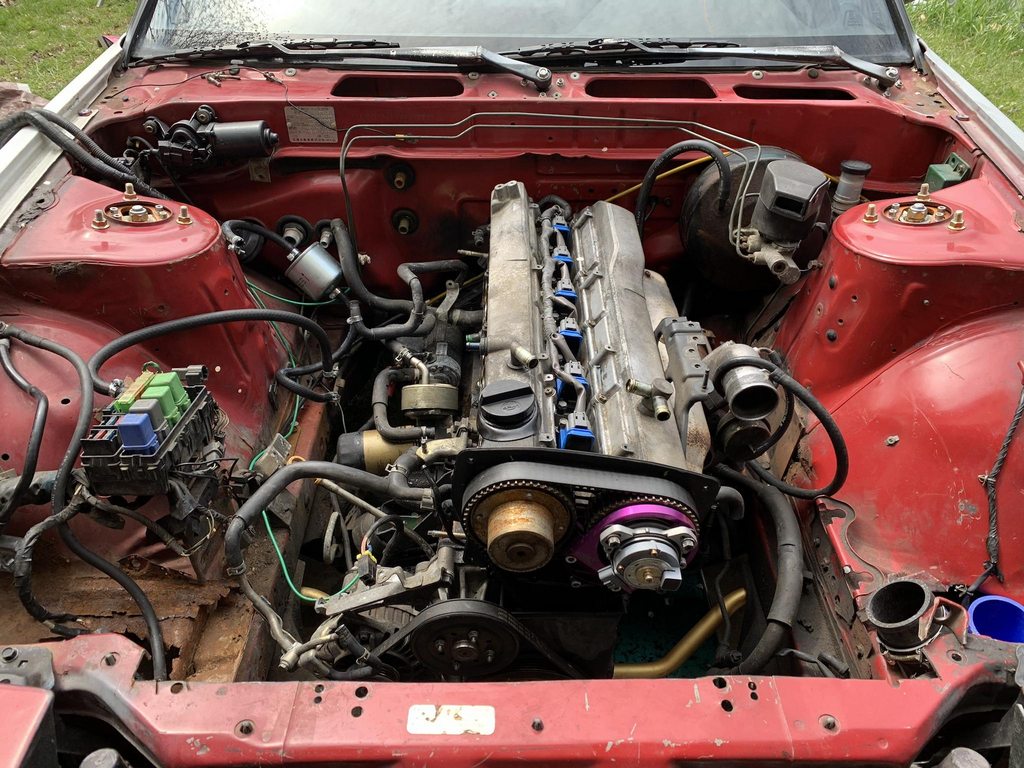 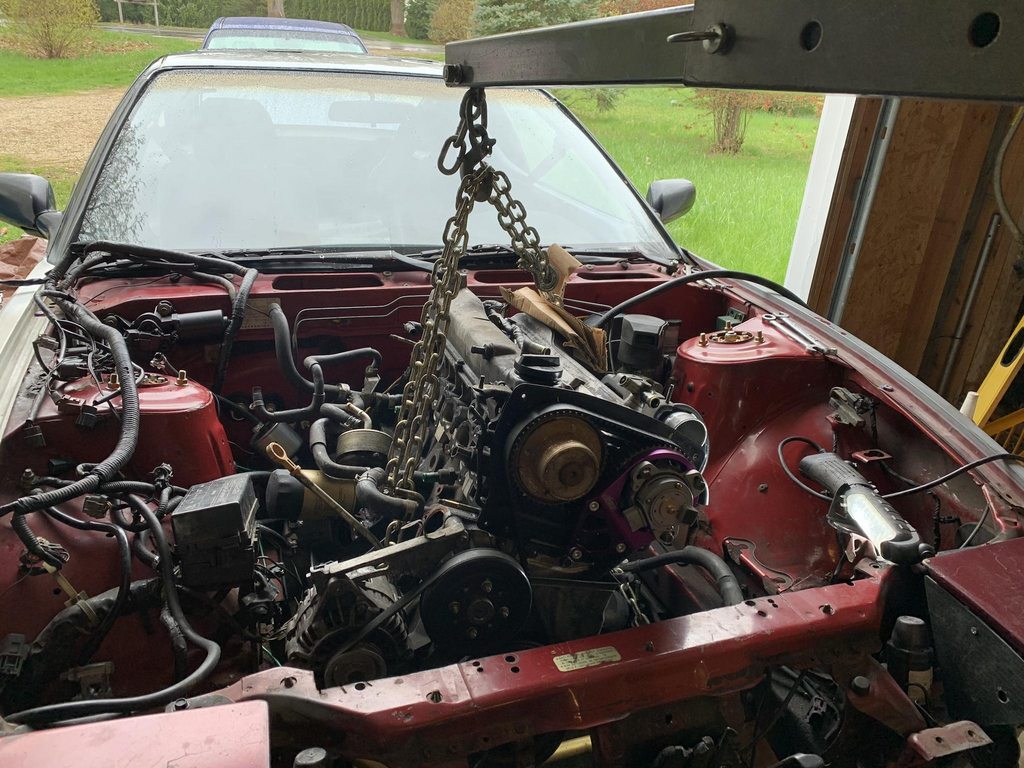 My garage is a mess (both of them). Also recently acquired a complete KA24DE for $150 that you can see in the totes lol. 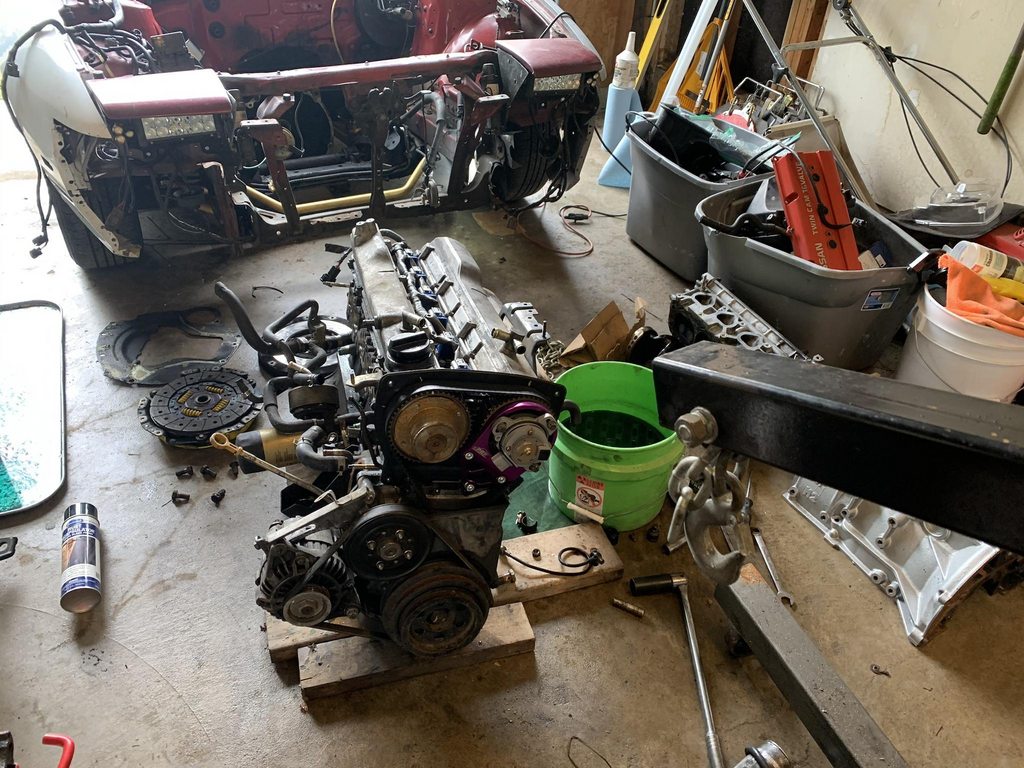 All ready for the new gaskets, which of course are two weeks out. 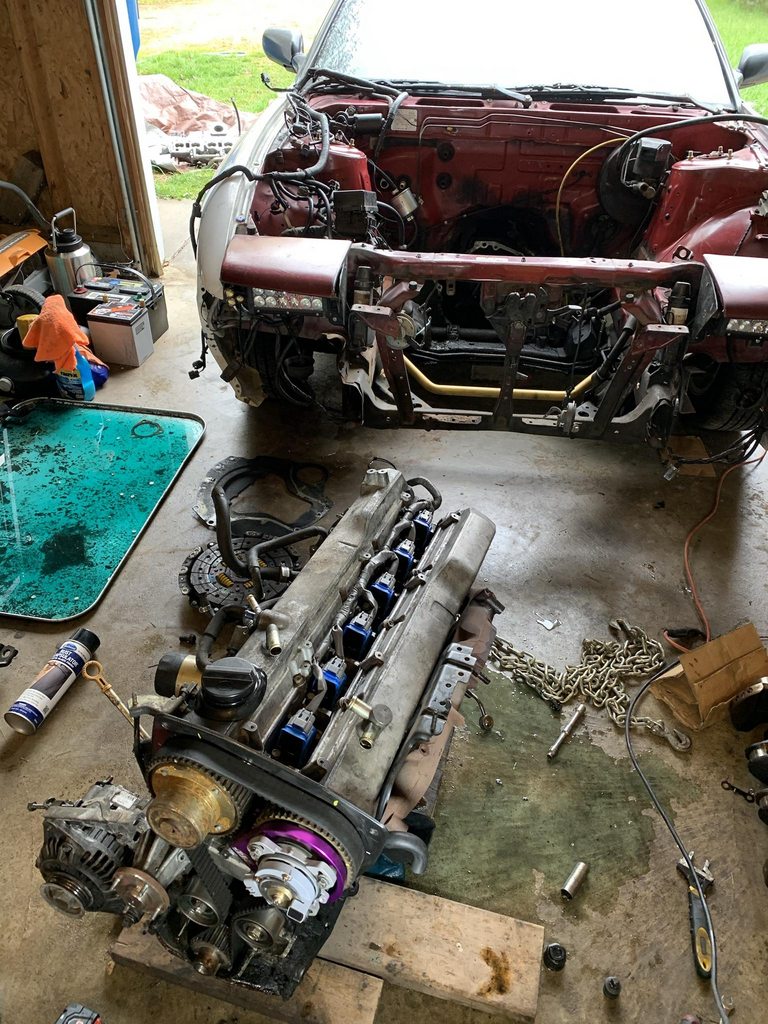 LOL at my life. Anyway, I got a second job at Lane Automotive/Motorstate Distributing, so that's keeping me extra busy, but I'll be working on everything some more this weekend. Should be able to get that subframe done and the rest of the red car all set besides pressing some S14 ball joints into the FLCA. I'm hoping to have the car ready and waiting for the June 5th & 6th MI Drift even at Michigan International Raceway. Very, very excited to get back to driving. 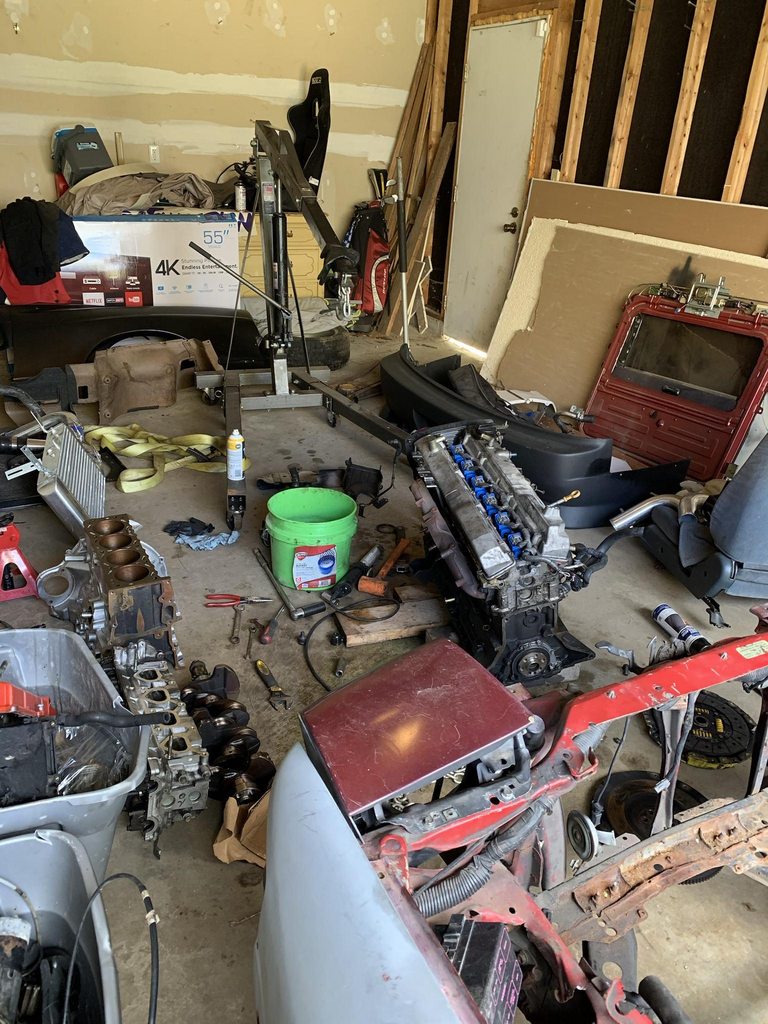
__________________
Build: http://zilvia.net/f/showthread.php?t=643065 Friends don't let friends buy knock-offs. |
|
|

|
|
|
#652 |
|
Zilvia.net Advertiser
 Join Date: Nov 2005
Location: Michigan
Age: 33
Posts: 5,431
Trader Rating: (16)
           Feedback Score: 16 reviews
|
More progress this weekend. Decided to figure out the mounting for the Treadstone intercooler. Thing is massive, but I trimmed off the horn mounts from the bumper mount uprights and reinforced them so they could handle the weight of the intercooler.
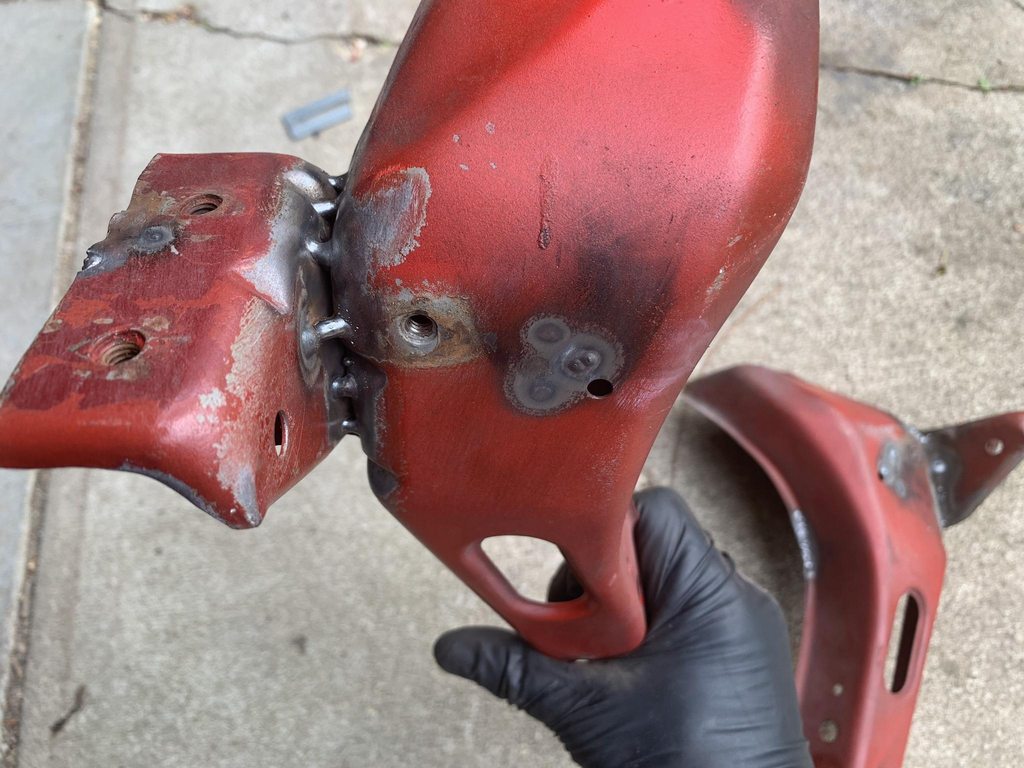 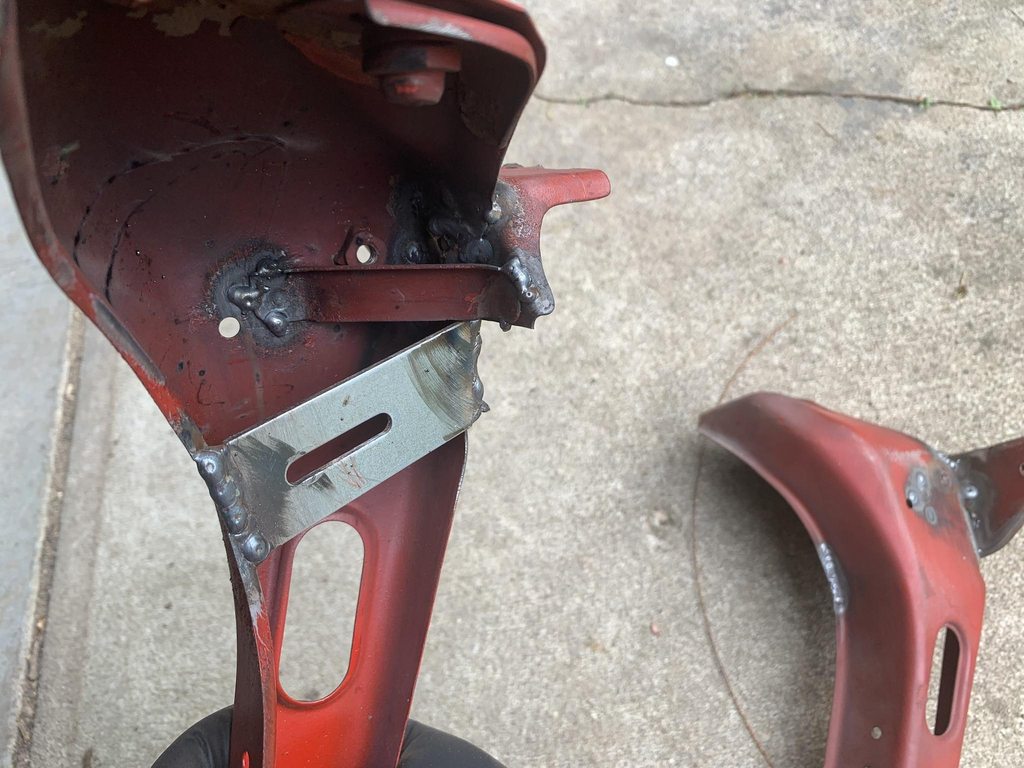 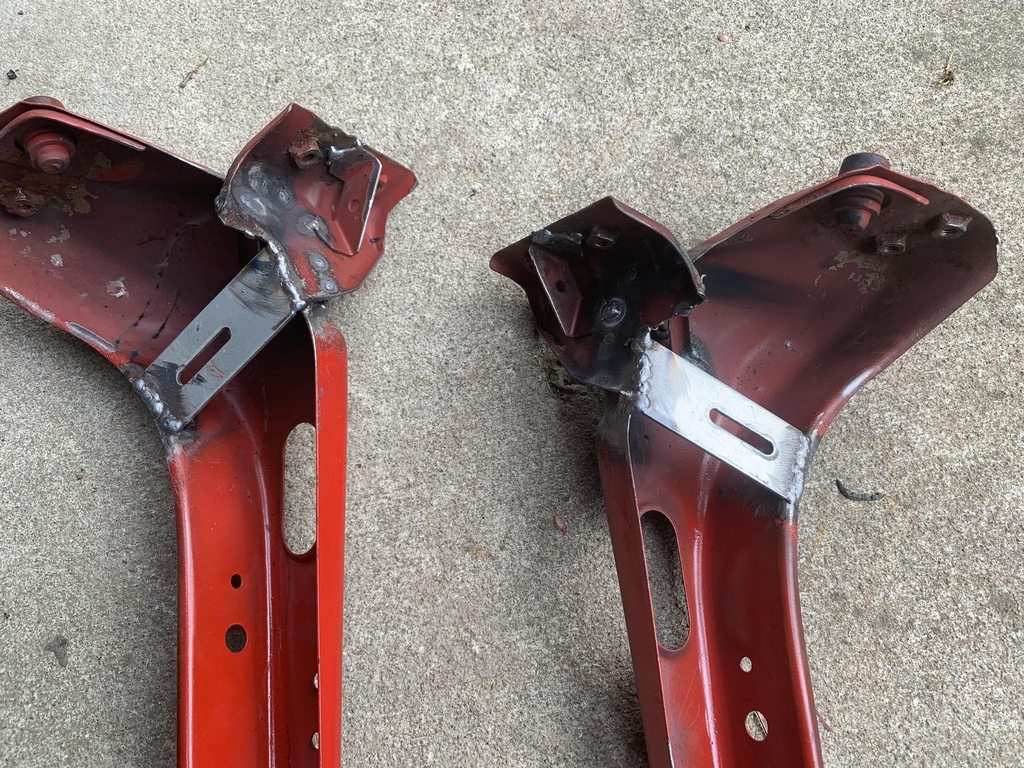 Not pretty, but they'll get bead blasted and repainted. Fits super snug, and reminds me of the old-school HKS intercooler kit in size and tilt. 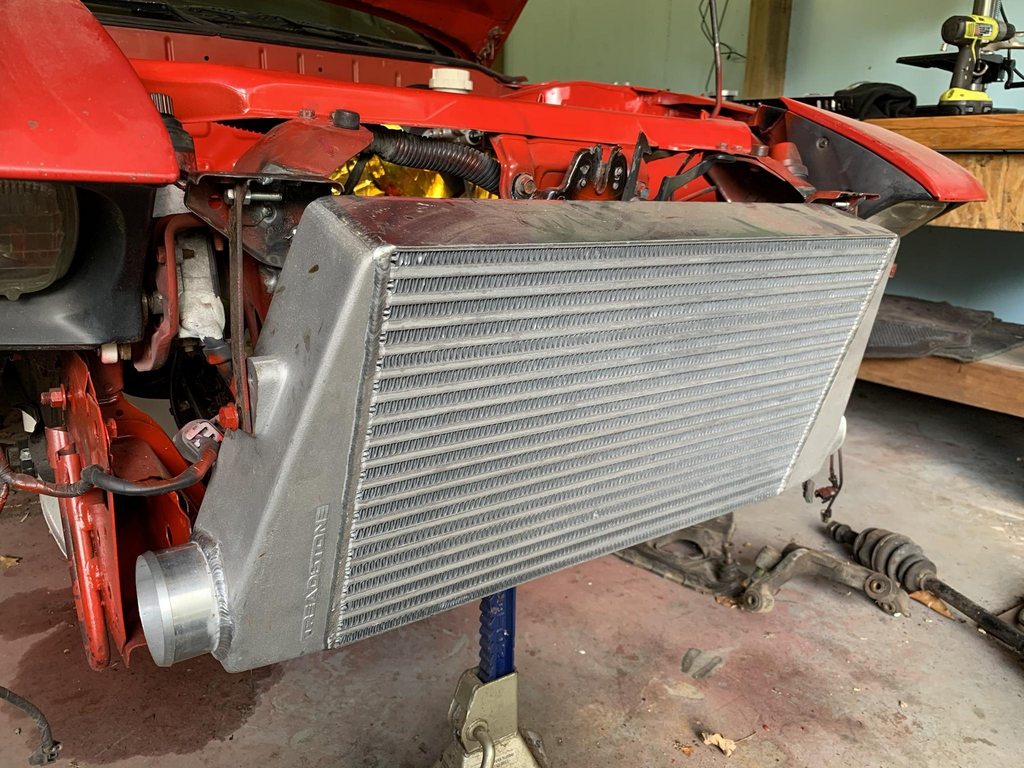  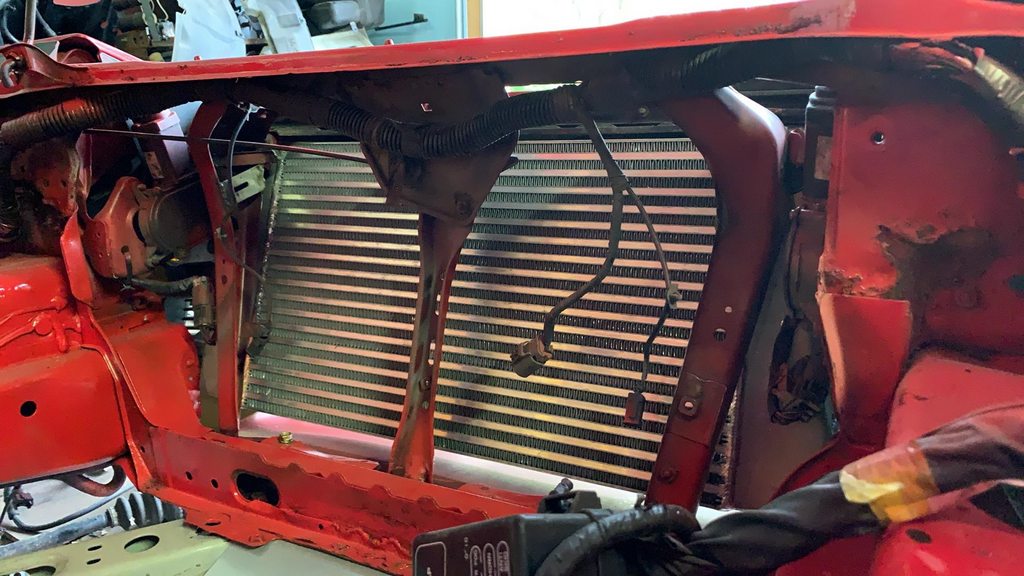 Slowly trimmed the bumper to fit. It mounts up to the lower mounts quite nicely, and surprisingly didn't need that much work. 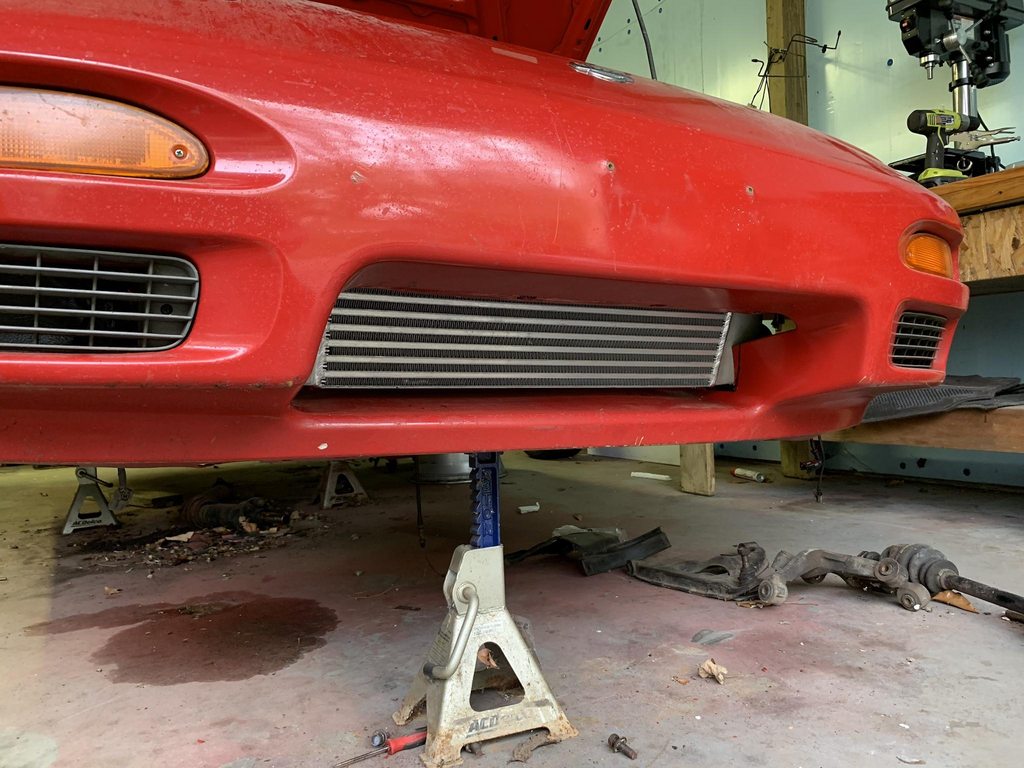 This is just mounted with two top bolts. 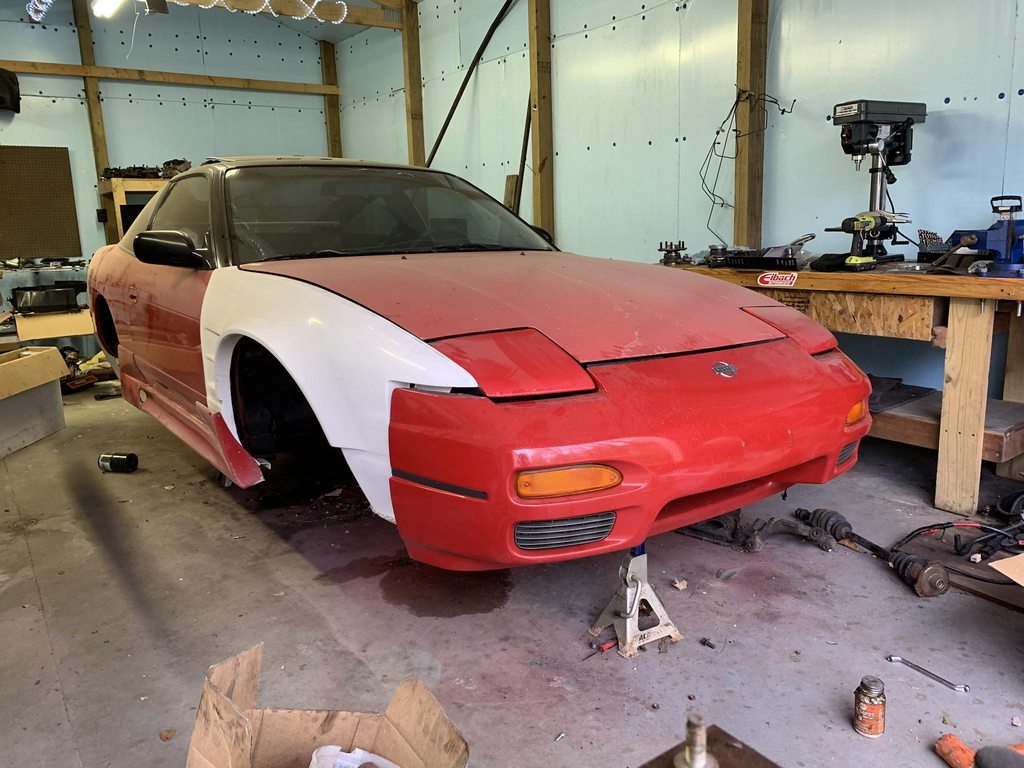
__________________
Build: http://zilvia.net/f/showthread.php?t=643065 Friends don't let friends buy knock-offs. |
|
|

|
|
|
#653 |
|
Zilvia.net Advertiser
 Join Date: Nov 2005
Location: Michigan
Age: 33
Posts: 5,431
Trader Rating: (16)
           Feedback Score: 16 reviews
|
It fits perfectly below the upper bumper support, and I should just be able to stick some foam in there to seal it against the bumper.
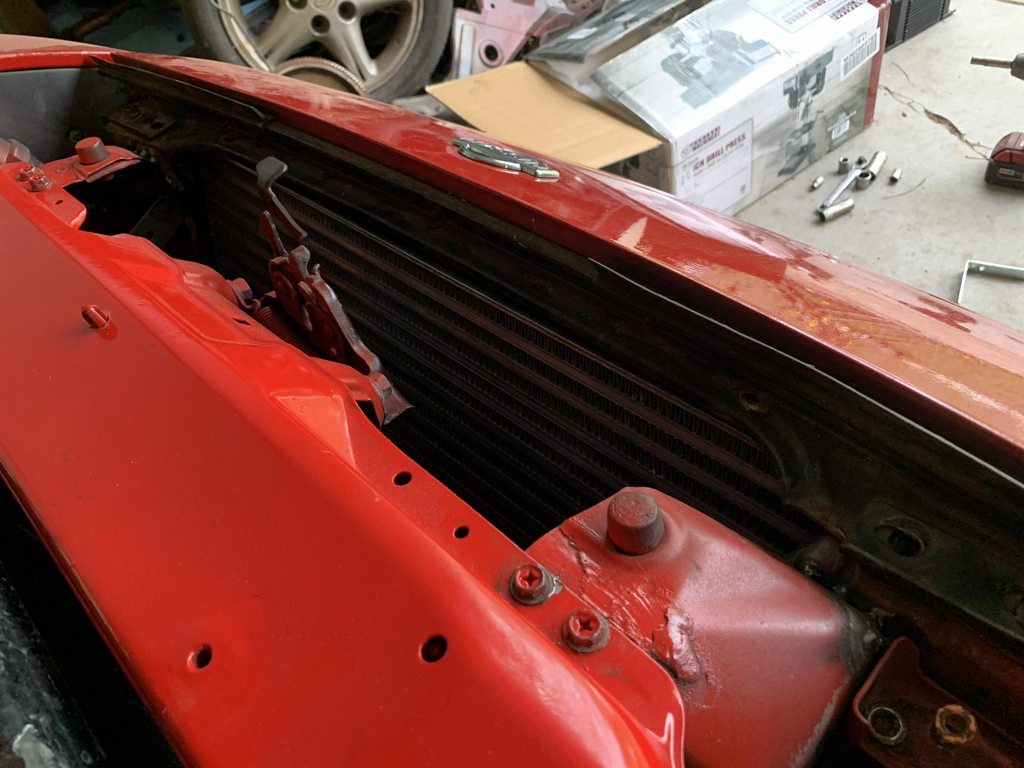 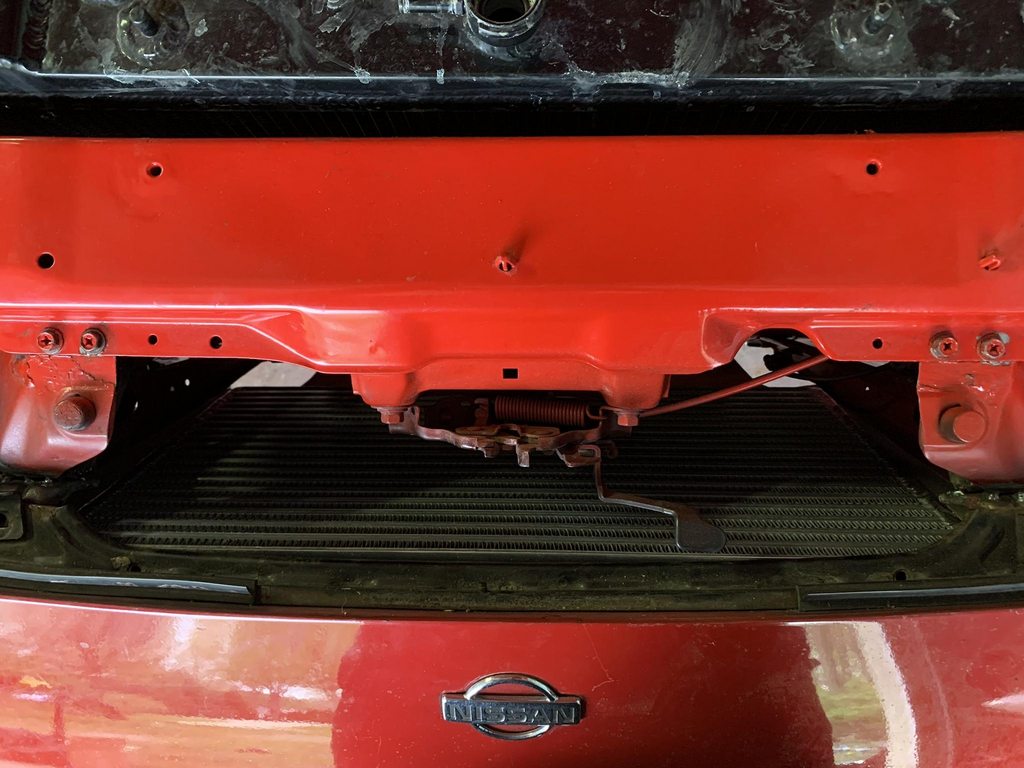 After that I welded the intercooler mounts onto the bumper mounts. Then I moved on to the engine mounts that came with the RB, and boy were these things pieces of shit. They were bent, installed with M8 hardware, and just generally of poor construction. I went about fixing them as best I could. First, I bent them back flat, and reinforced the section that the engine mount bolts to. 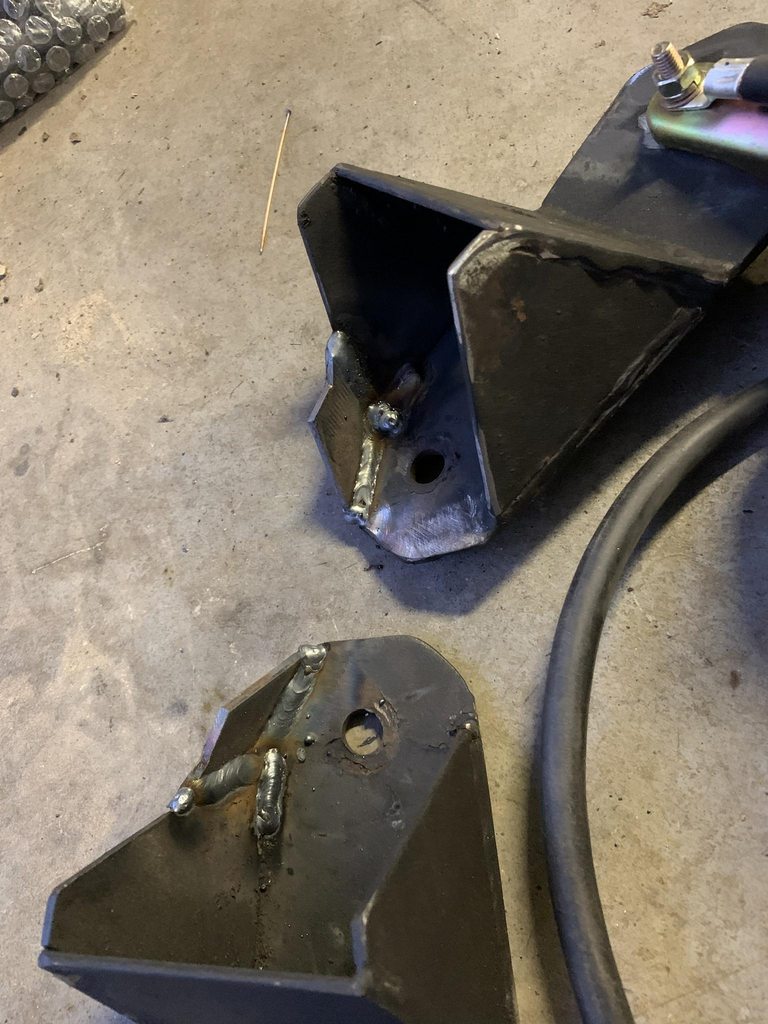 Then I welded some plate on the tops so as better to resist bending forces. 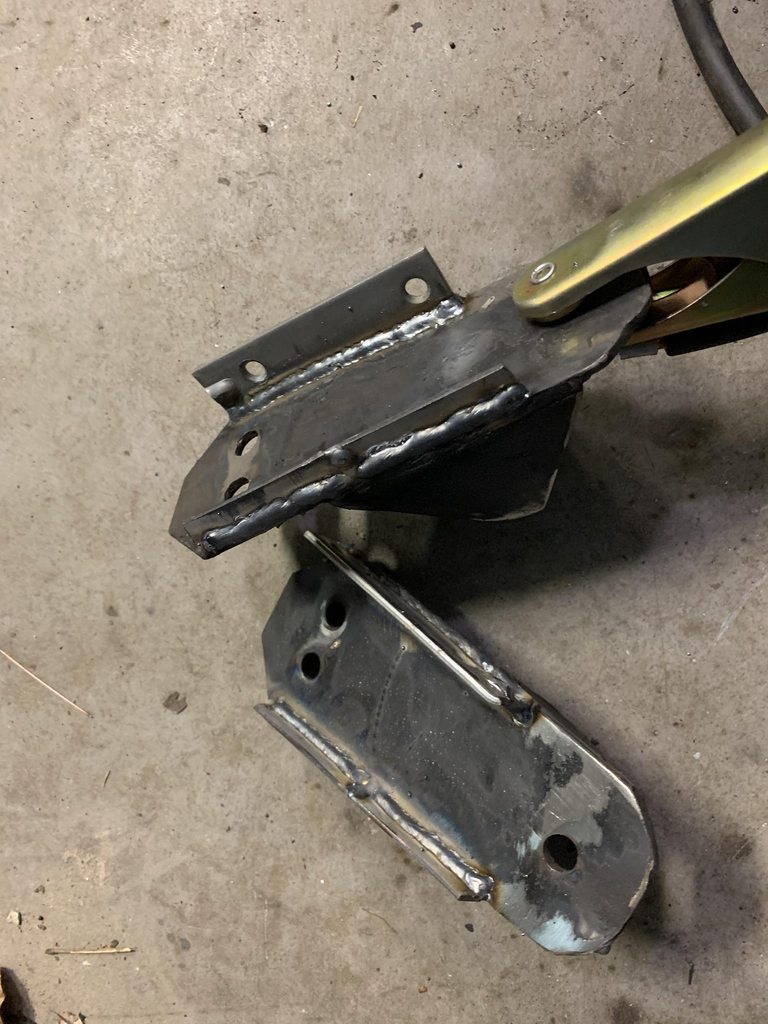 I'd like to use these Gktech mounts, but I think they might raise the engine too much. 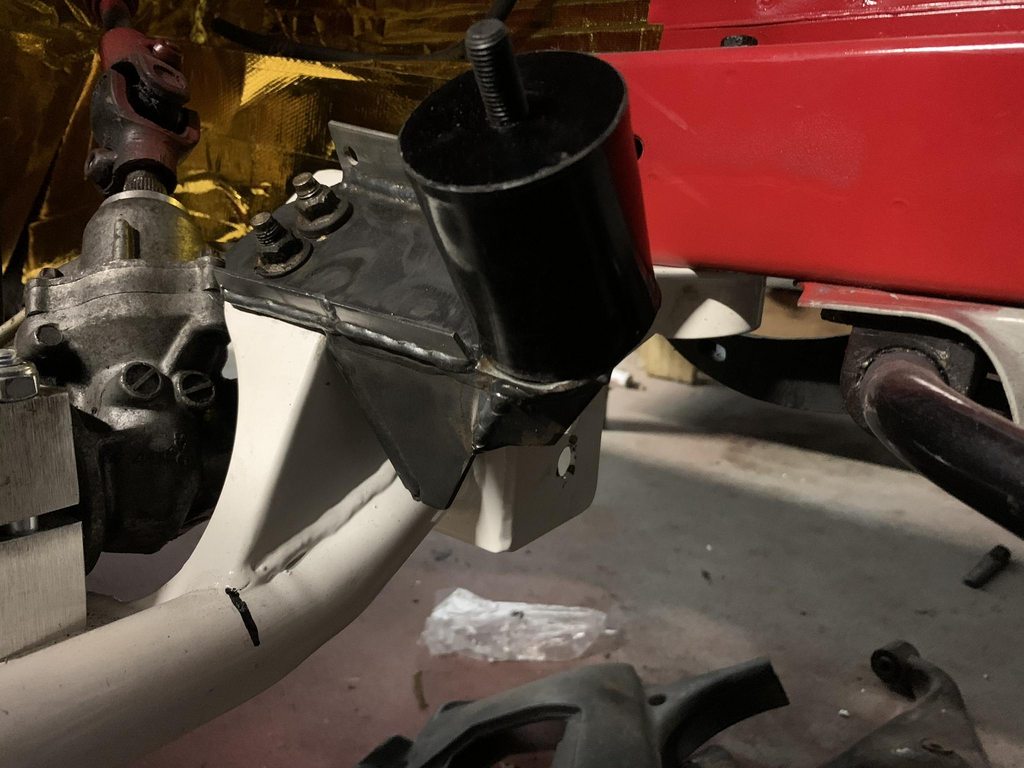 After mockup, I noticed they contacted the crossmember in a couple spots, so I chopped out those parts. This is after the trim: 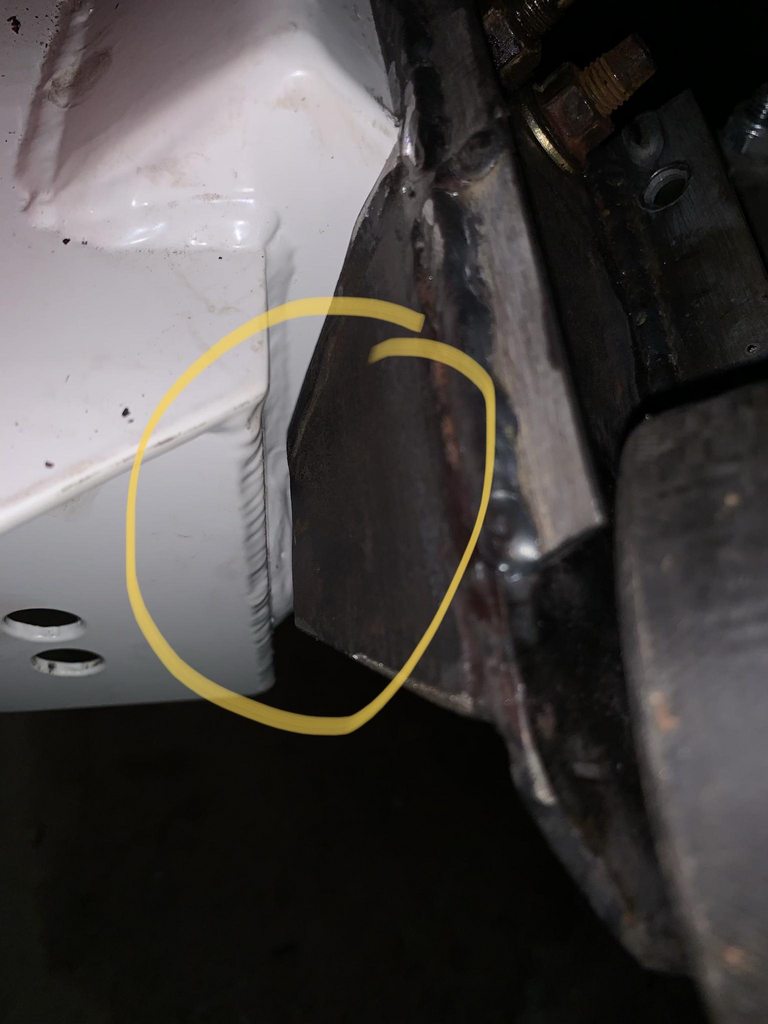 And boxed those sections in. 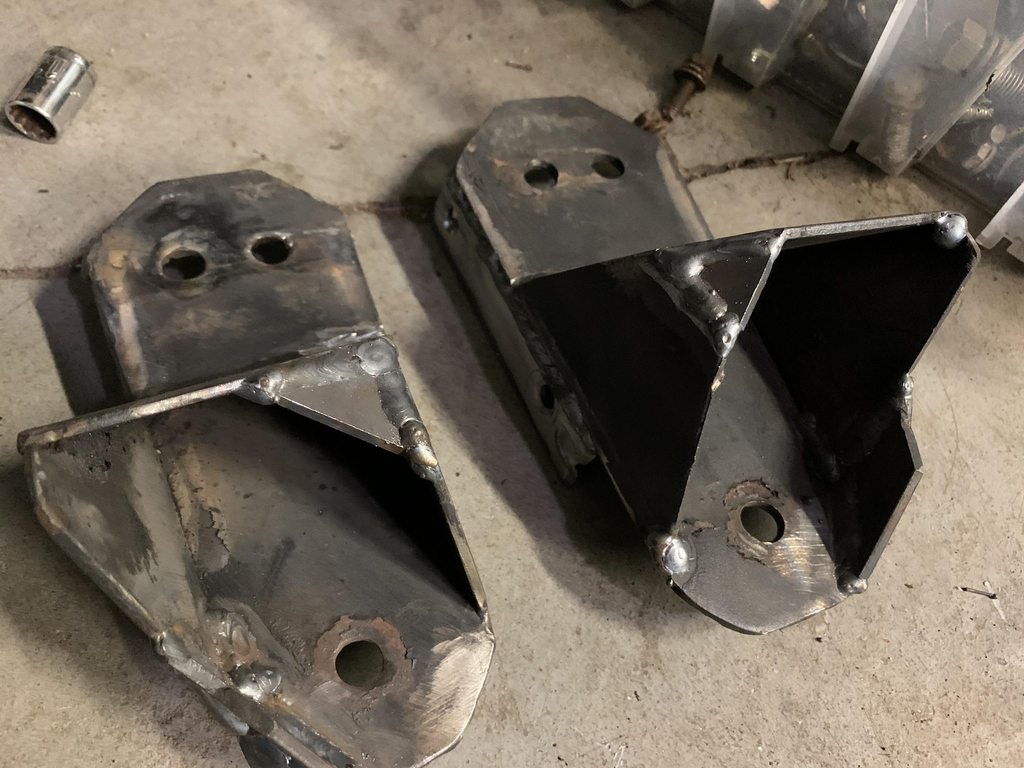 Hopefully they'll hold up now. 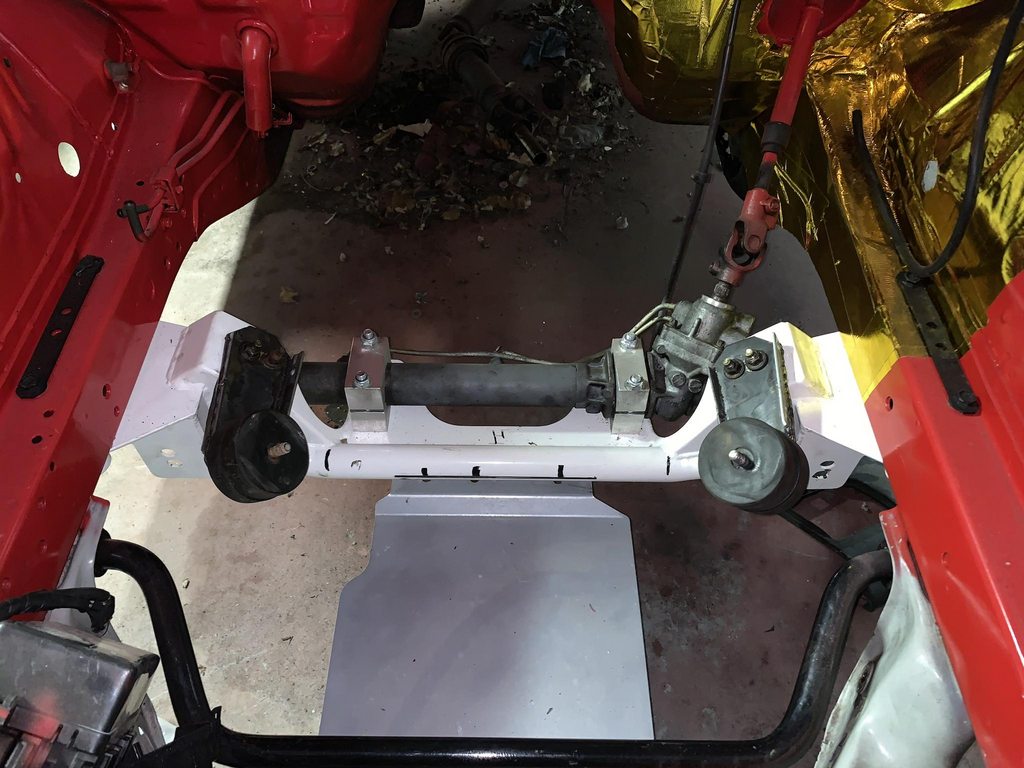 Also, I trimmed the inner fender and opened up the side vents. I think these look especially silly when people leave them half blocked. 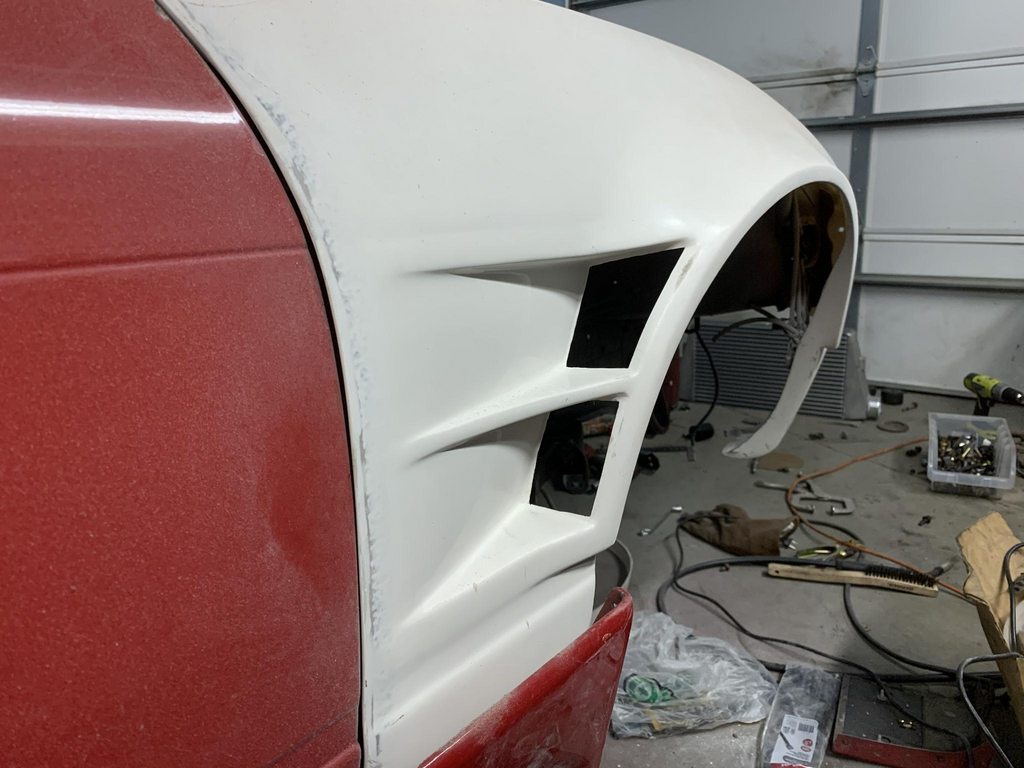 Plenty more work to do, and I'm still waiting on the gasket set and timing kit for the RB, so I'll keep doing chassis work until they show up.
__________________
Build: http://zilvia.net/f/showthread.php?t=643065 Friends don't let friends buy knock-offs. |
|
|

|
|
|
#654 |
|
Zilvia.net Advertiser
 Join Date: Nov 2005
Location: Michigan
Age: 33
Posts: 5,431
Trader Rating: (16)
           Feedback Score: 16 reviews
|
Decided to seam weld the front core support area today to hopefully stiffen it a little and prevent the lower rad support from tearing away from the frame rails like my other chassis.
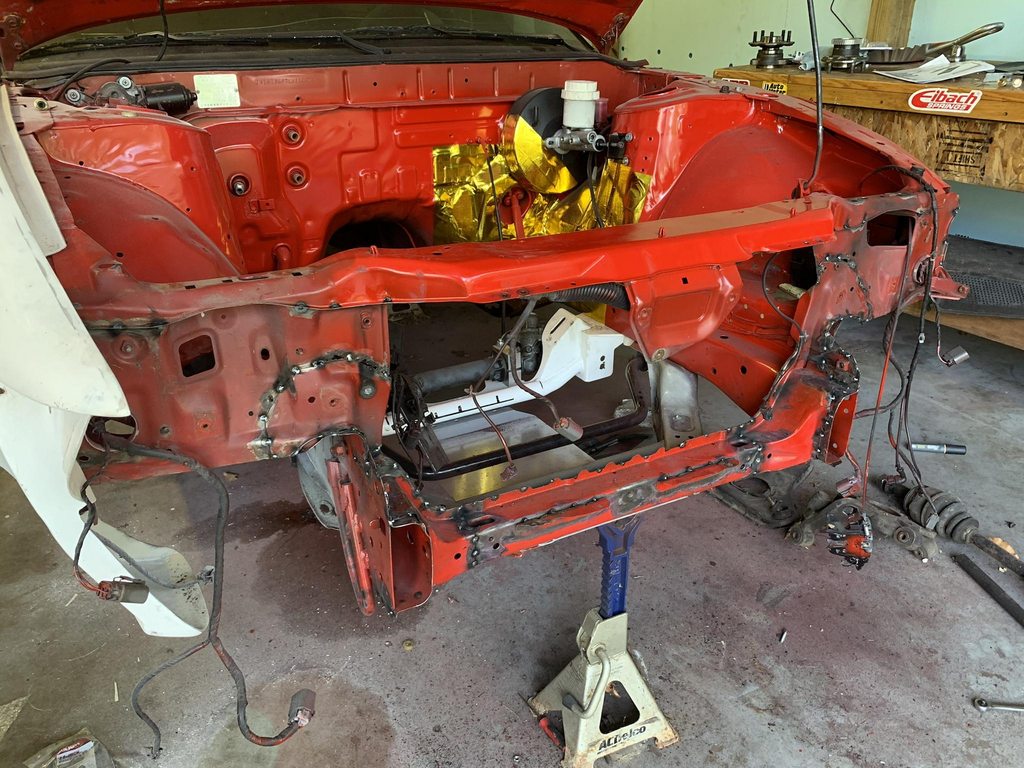
__________________
Build: http://zilvia.net/f/showthread.php?t=643065 Friends don't let friends buy knock-offs. |
|
|

|
|
|
#656 |
|
Zilvia Member
 Join Date: Feb 2017
Location: Lansing michigan
Posts: 154
Trader Rating: (1)
 Feedback Score: 1 reviews
|
Nice work man! I feel like we are gluttons for punishment owning these cars at times lol. I was just talking to my friends about that mis event should be sweet
|
|
|

|
|
|
#657 | ||
|
Zilvia.net Advertiser
 Join Date: Nov 2005
Location: Michigan
Age: 33
Posts: 5,431
Trader Rating: (16)
           Feedback Score: 16 reviews
|
Quote:
Quote:
Not a ton of progress last weekend, I had a bunch of other stuff to take care of. Painted the front end. 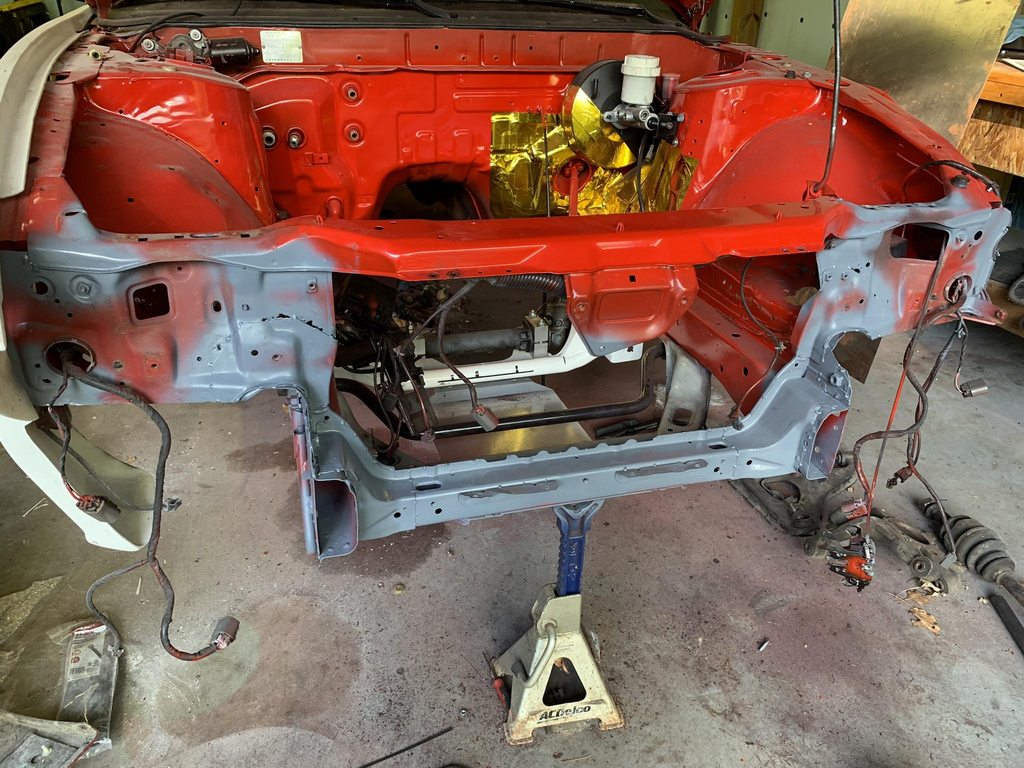 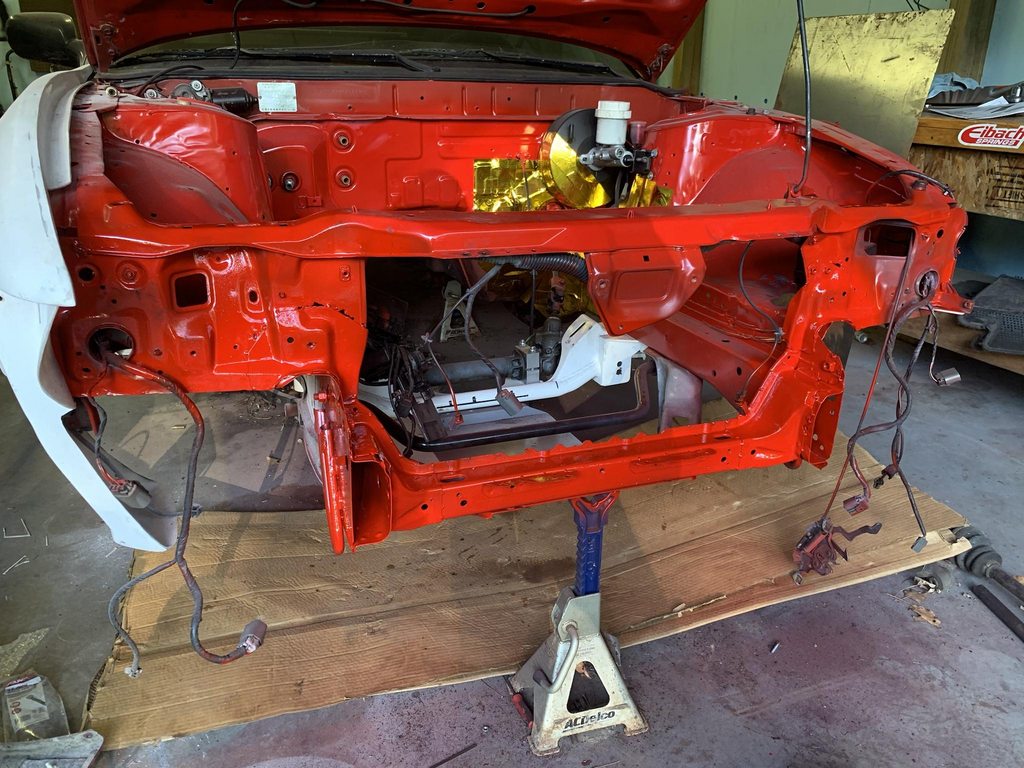 And all the fun that's going to happen this weekend, lots of AN goodness. 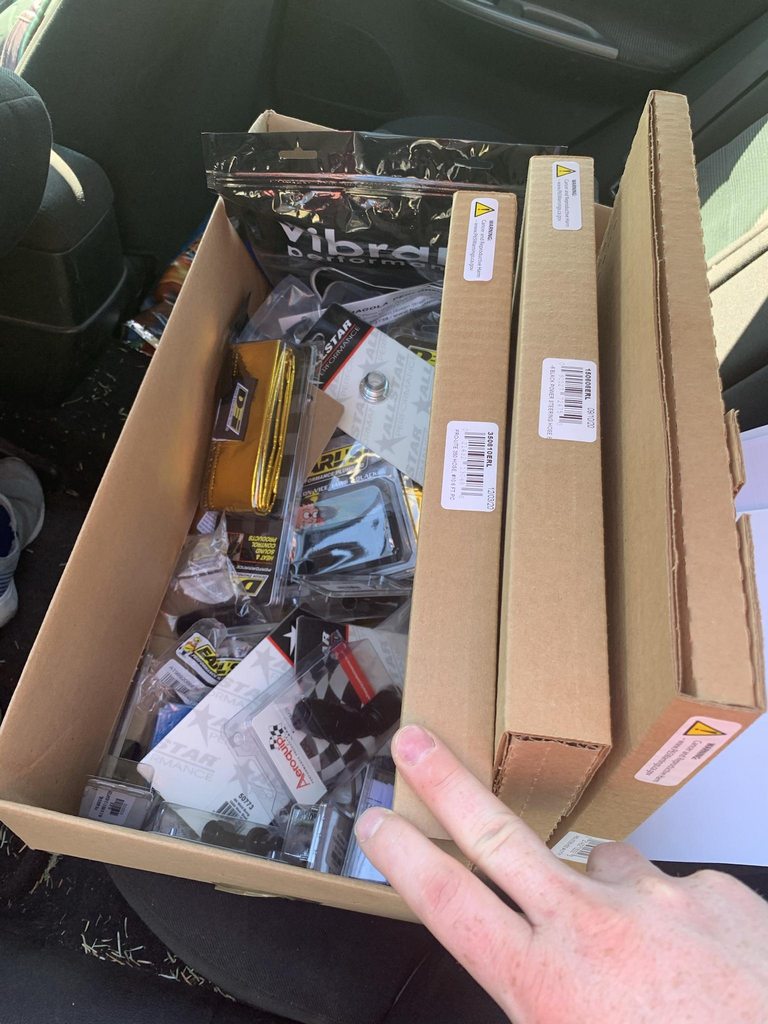
__________________
Build: http://zilvia.net/f/showthread.php?t=643065 Friends don't let friends buy knock-offs. |
||
|
|

|
|
|
#658 |
|
Post Whore!
 |
You aren?t going to want to go back to the SR...
__________________
My SR20VET |
|
|

|
|
|
#659 |
|
Zilvia.net Advertiser
 Join Date: Nov 2005
Location: Michigan
Age: 33
Posts: 5,431
Trader Rating: (16)
           Feedback Score: 16 reviews
|
Haha we'll see. The setup on the SR should be pretty gnarly.
Picture dump. I'm rushing things a little now because I want to drive it this season and I'll redo shit I don't like over the winter. Got a Taurus fan. 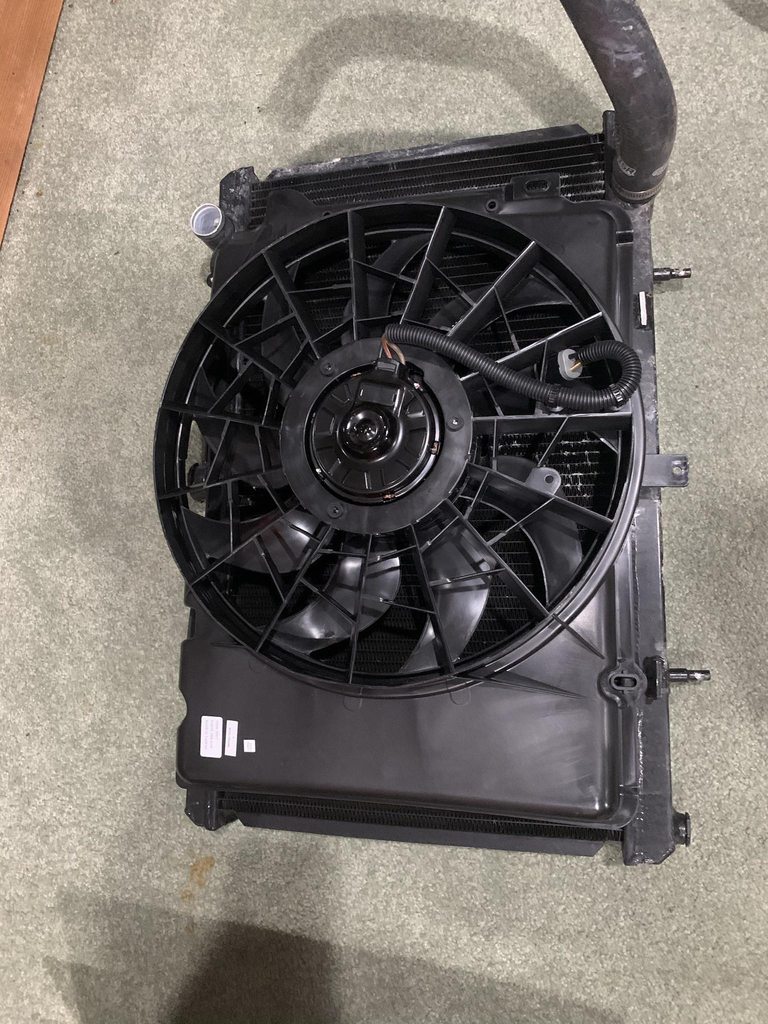 Got some extendee boys. Pro tip: drill your rear hubs to 14mm and you can use Subaru extended studs, which are the same thread pitch as Nissan so you don't have to change half your lug nuts. 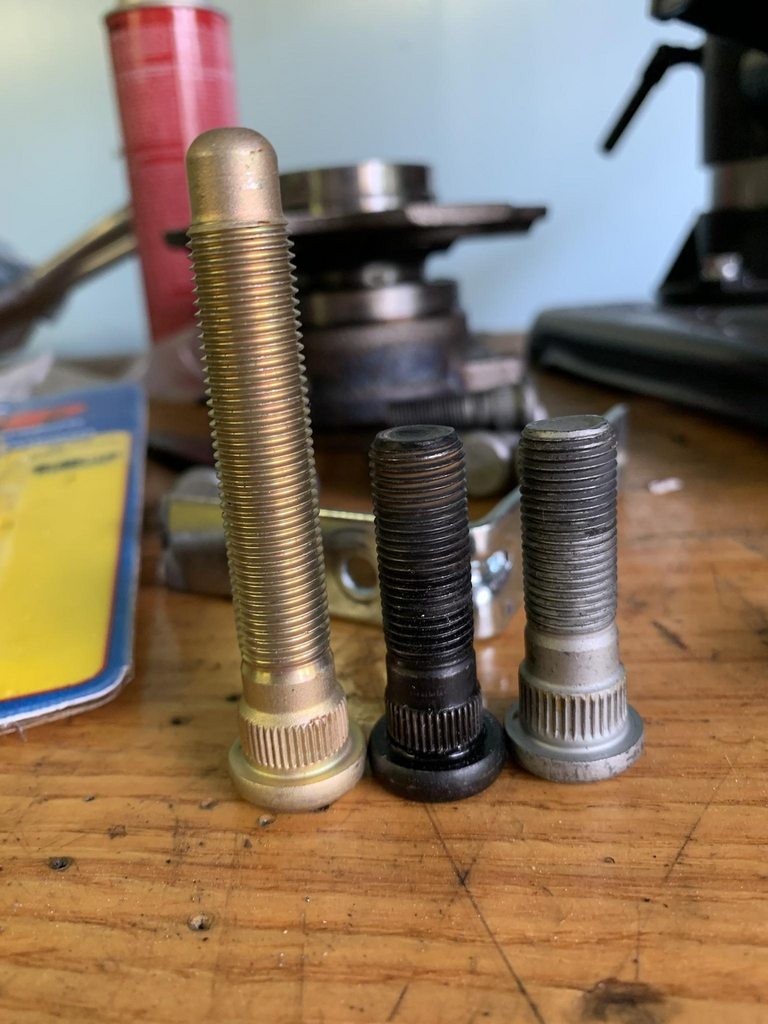 Improved the super high tech mounts the RB was running. 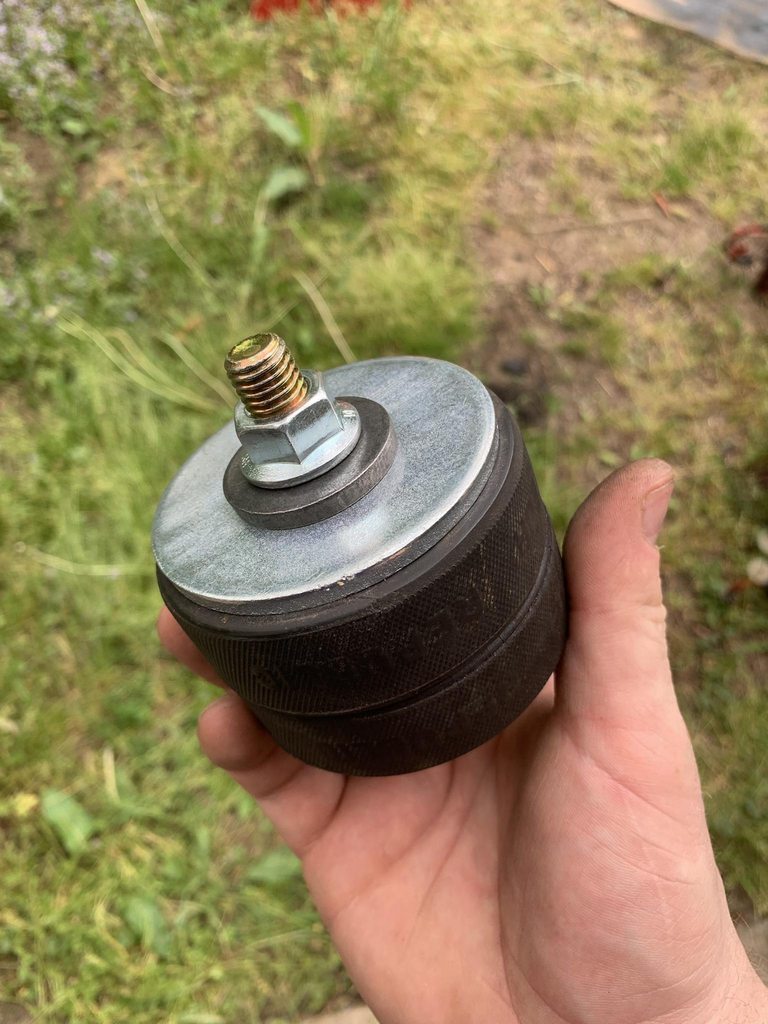 Painted the subframe. 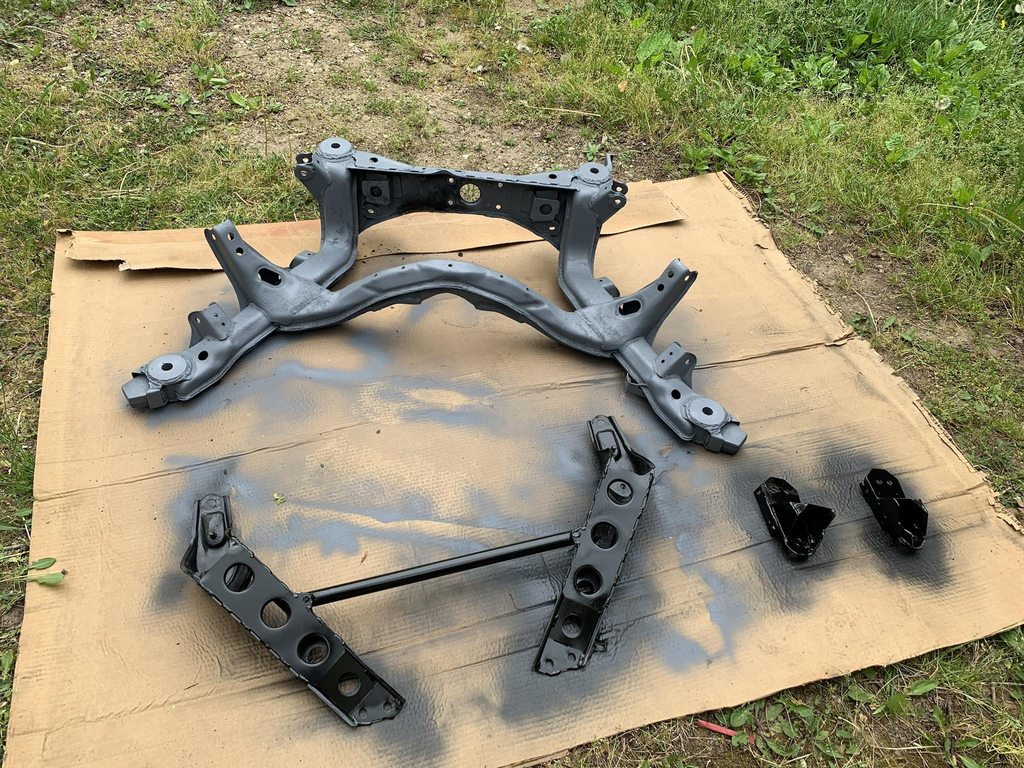 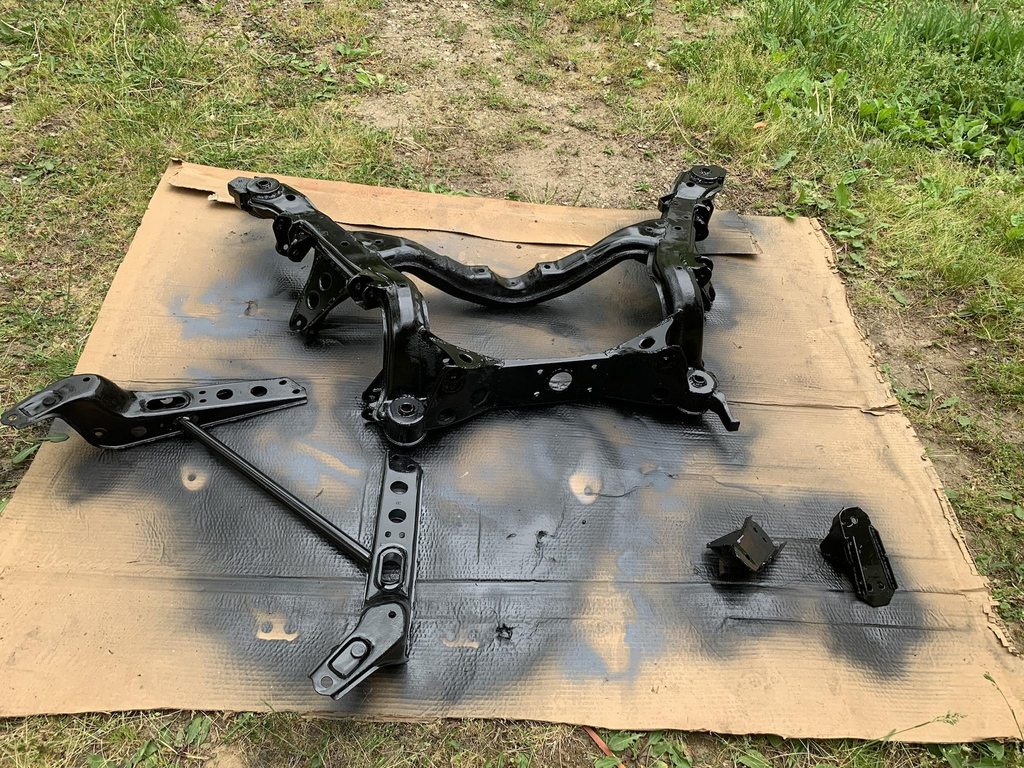 Got it back in with the Wisefab. Wisefab is still a PITA to install, although just a little less so with the new subframe. 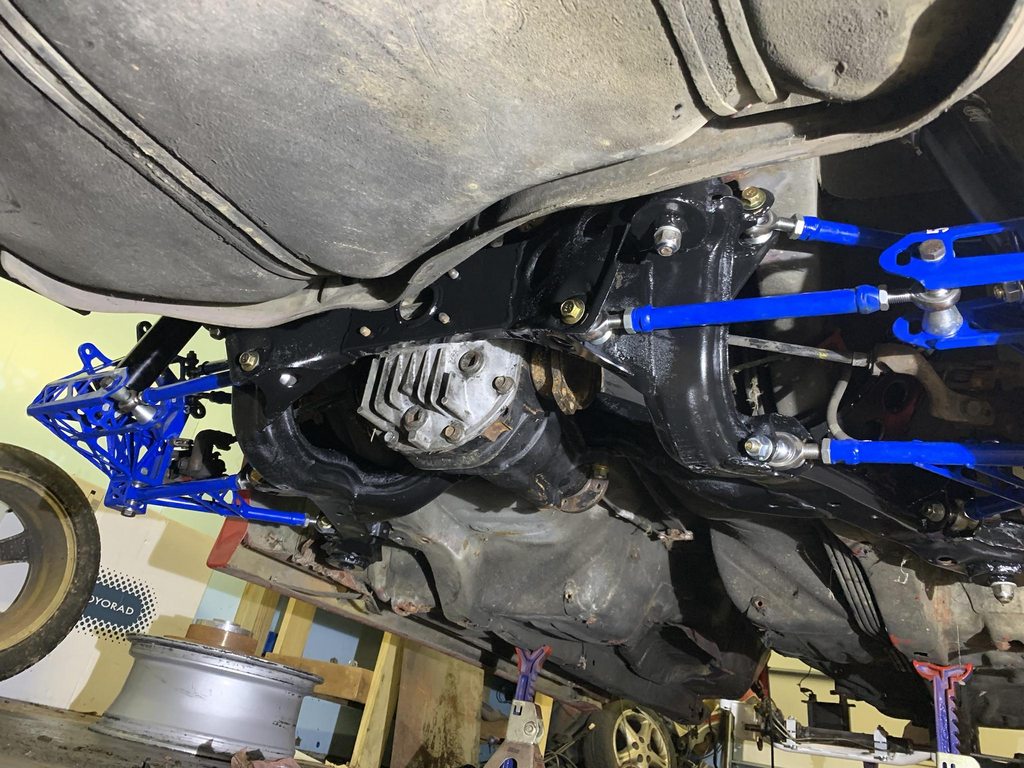 Oh yeah, took my old tension rod brace out (it needs re-doing and wasn't compatible with my bash plate) and did the gktech braces and welded my own bar in. 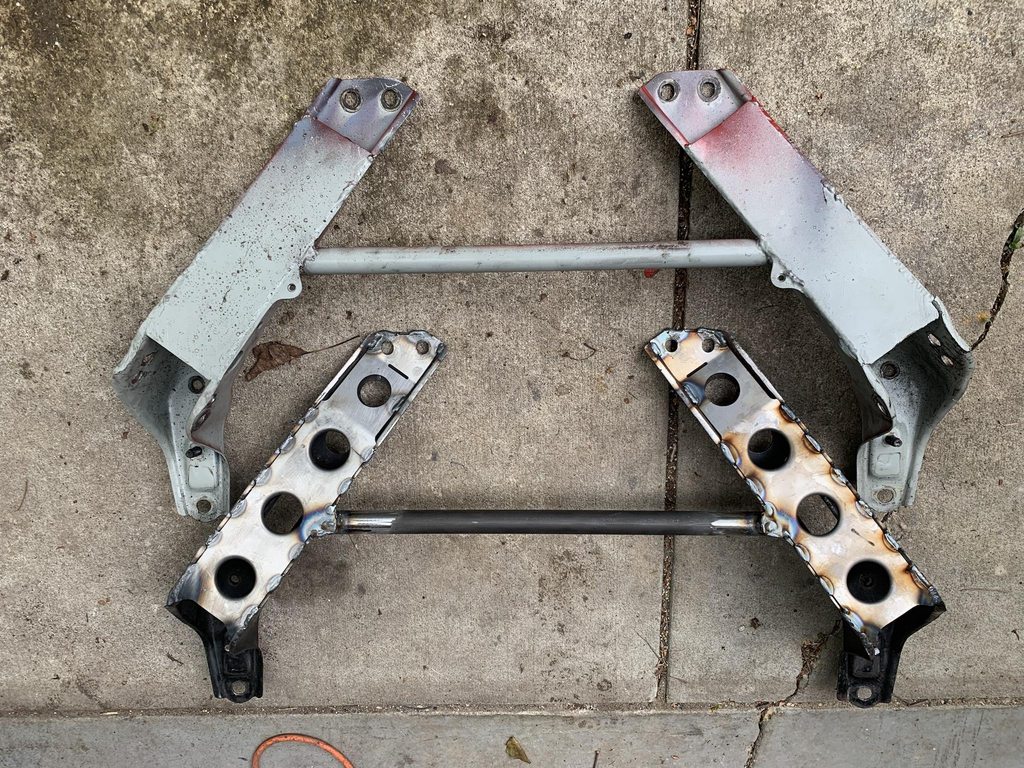 Pretty stoked on these extended studs. 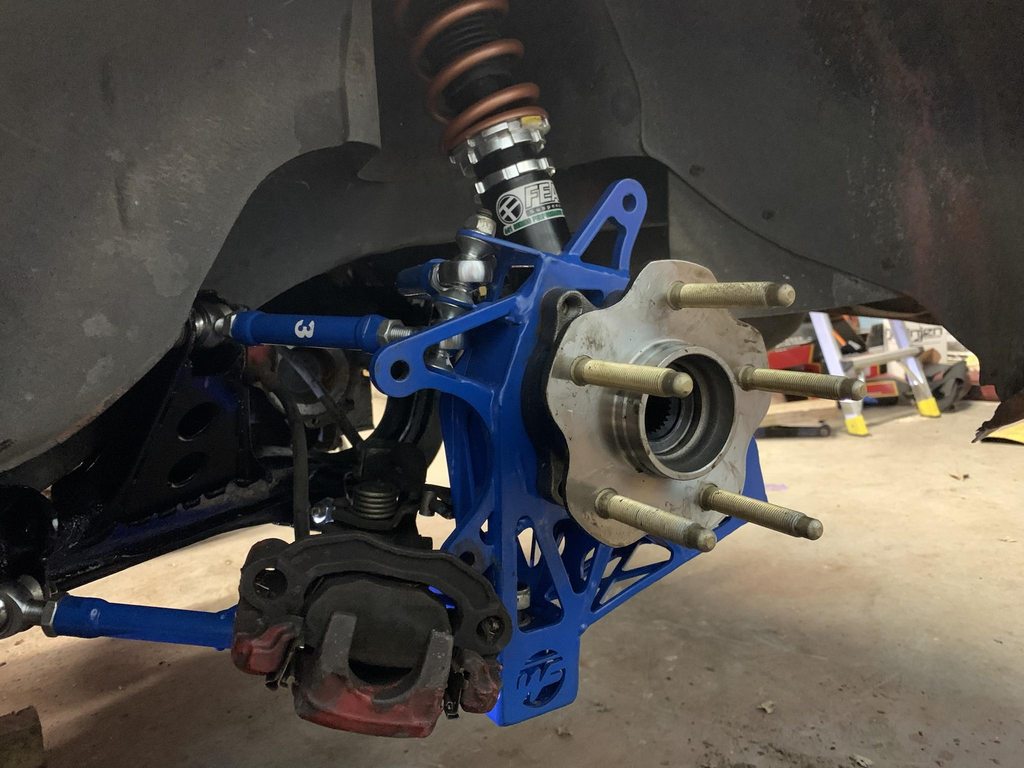 PLZ ignore the dust and shit. 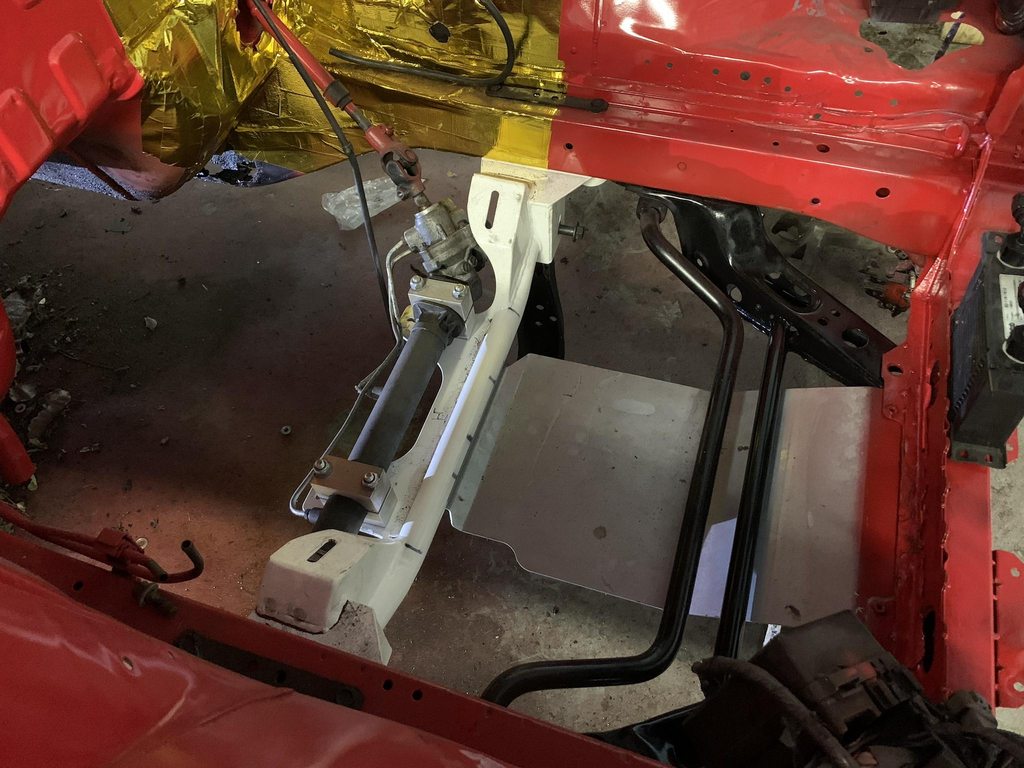 Hovercraft. For reference these are factory G35 17x7+? wheels. 15mm spacer up front for mock up, I will be running the 17x8 version of this wheel all around as soon as I pick them up from my friend. 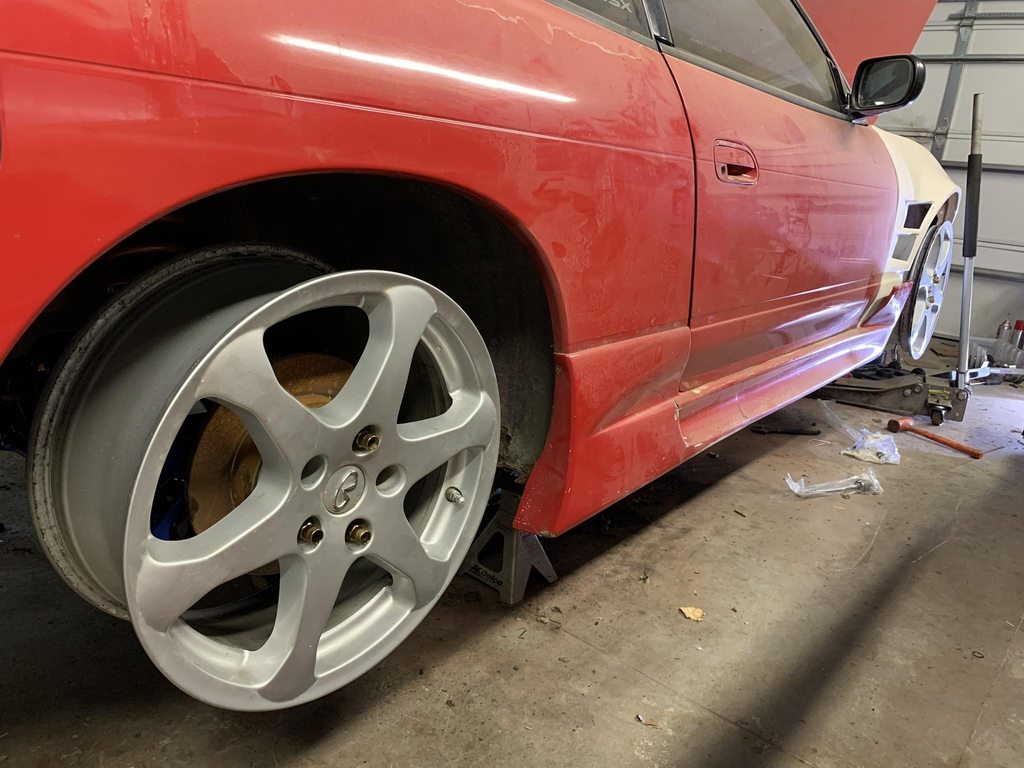 
__________________
Build: http://zilvia.net/f/showthread.php?t=643065 Friends don't let friends buy knock-offs. |
|
|

|
 |
| Bookmarks |
| Thread Tools | |
| Display Modes | |
|
|